tastytrendingredients

  • Home
  • Recipes
    • Appetizers
    • Breakfast
    • Dessert
    • Dinner
    • Drinks
    • Salads
    • Snacks
    • Soups
  • About me
  • Contact
menu icon
go to homepage
  • Home
  • Recipes
    • Appetizers
    • Breakfast
    • Dessert
    • Dinner
    • Drinks
    • Salads
    • Snacks
    • Soups
  • About me
  • Contact
search icon
Homepage link
  • Home
  • Recipes
    • Appetizers
    • Breakfast
    • Dessert
    • Dinner
    • Drinks
    • Salads
    • Snacks
    • Soups
  • About me
  • Contact
×

Pollo Loco: Irresistibly Creamy Mexican Chicken and Rice

December 2, 2025 by Grace Snow Leave a Comment

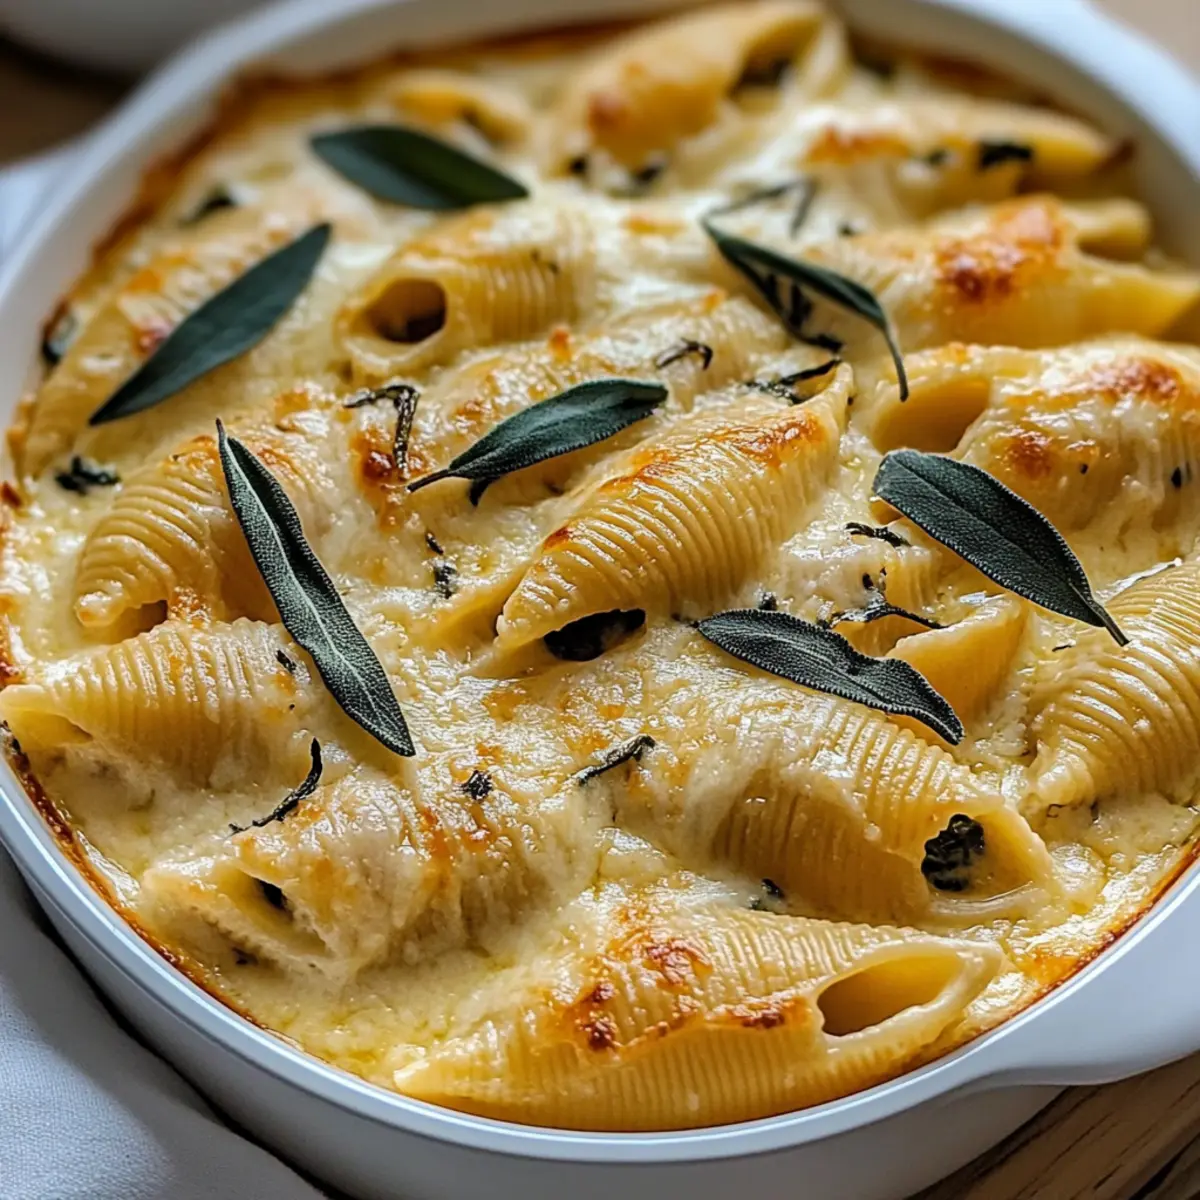
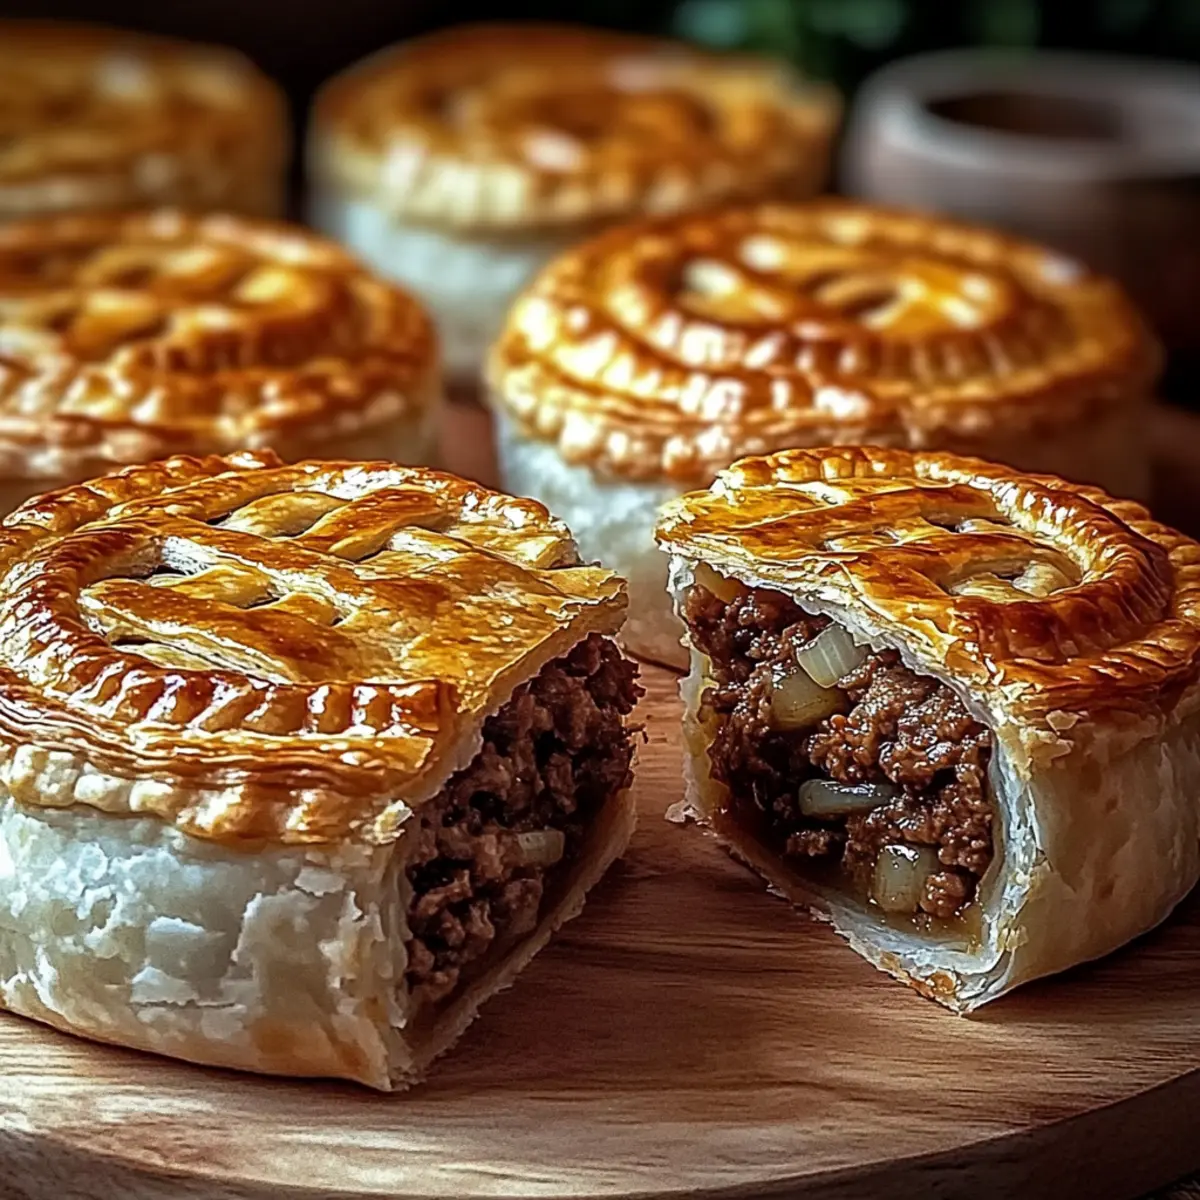
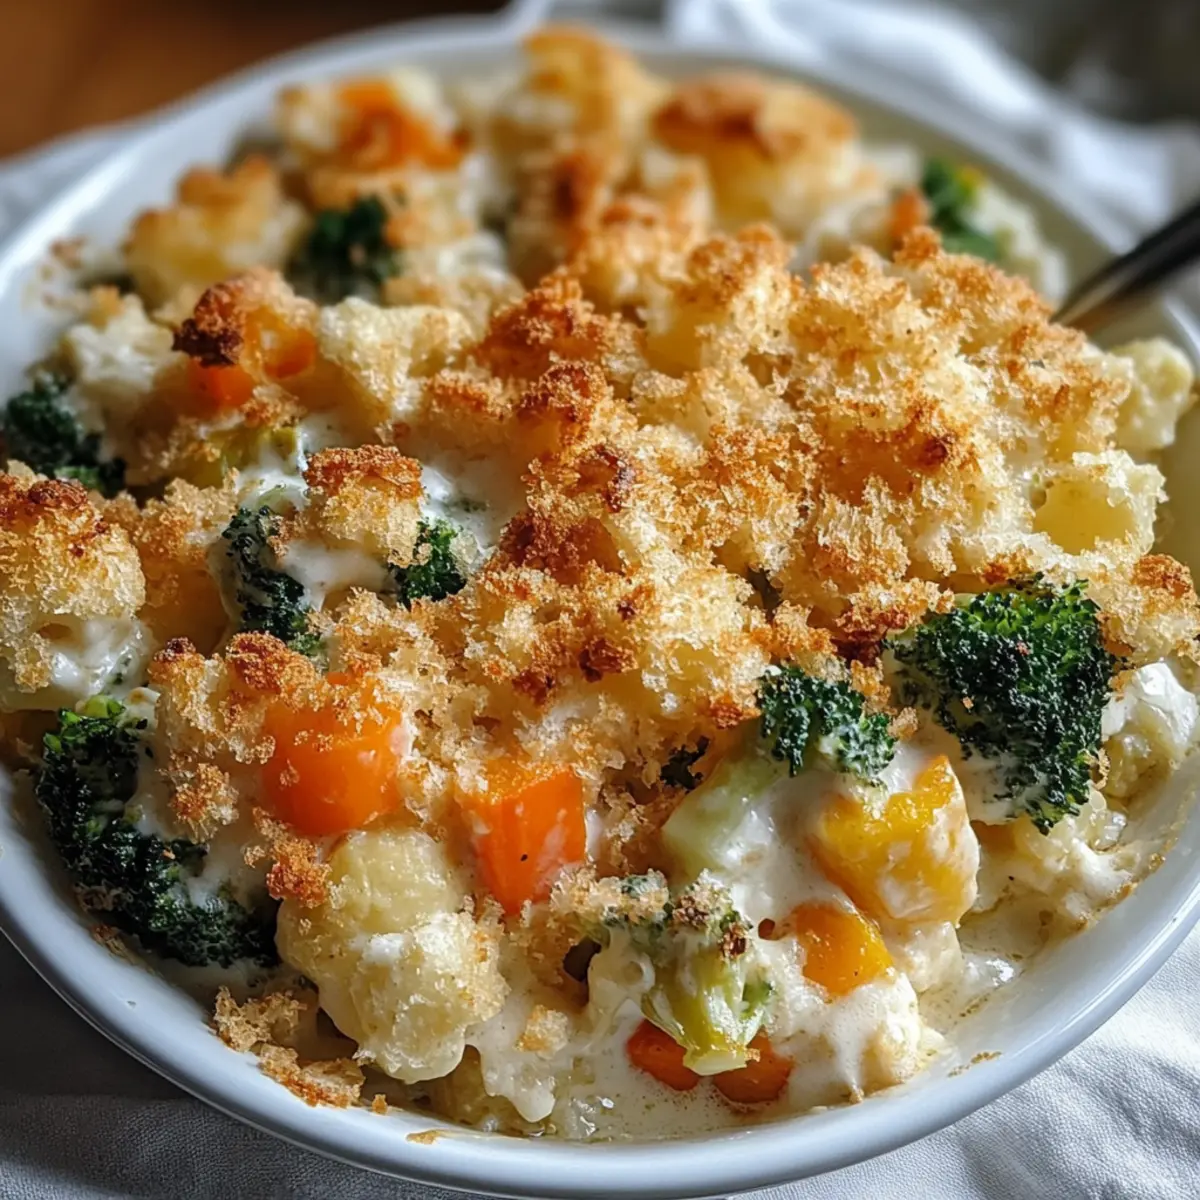
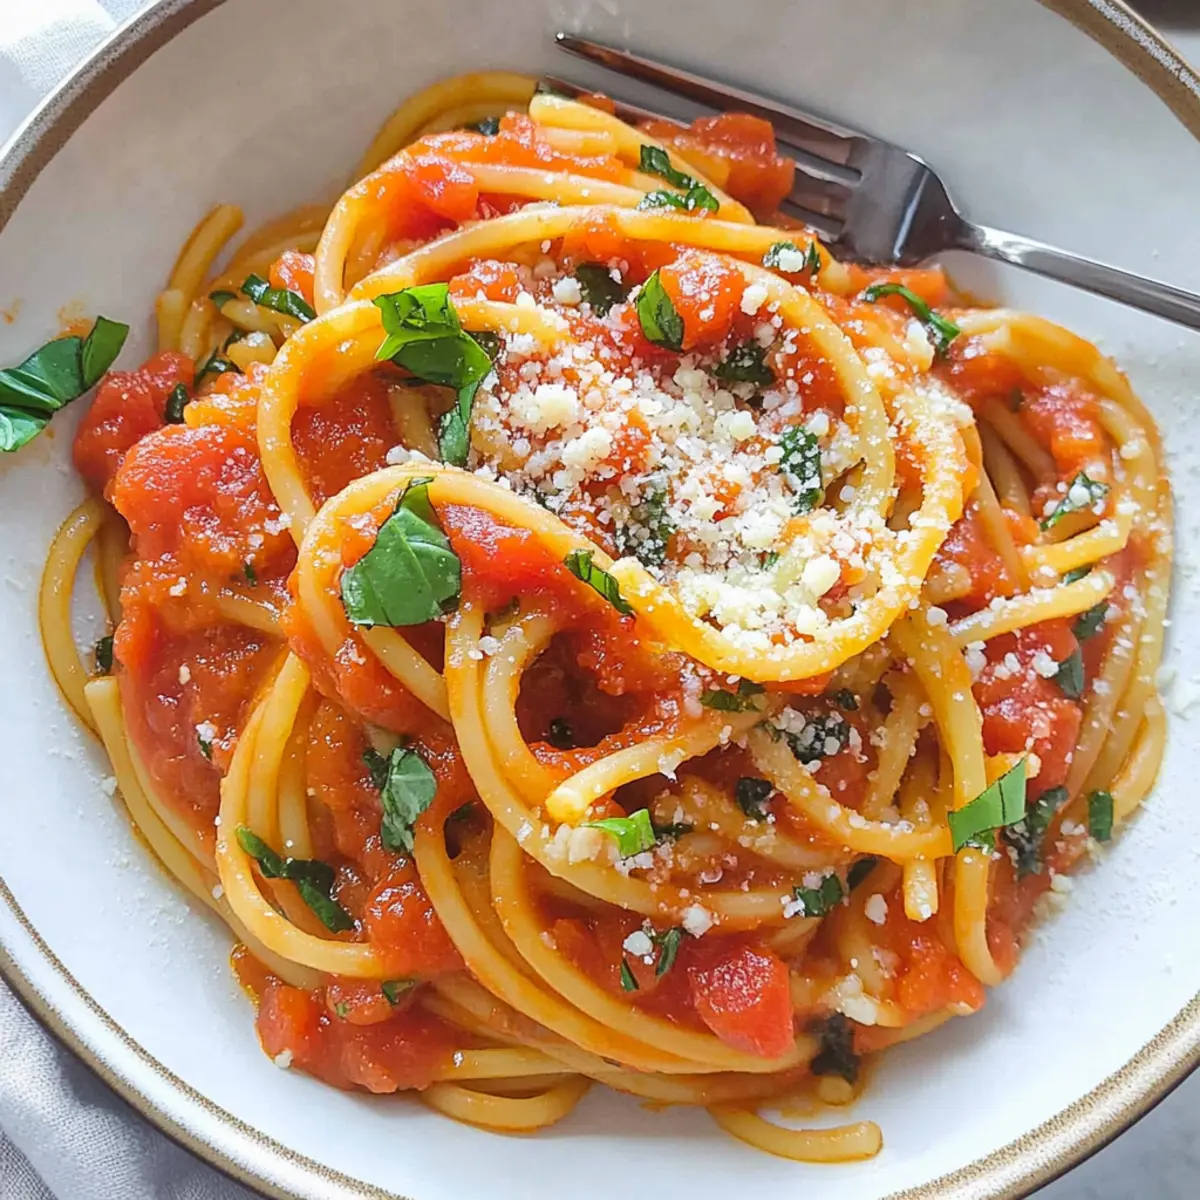
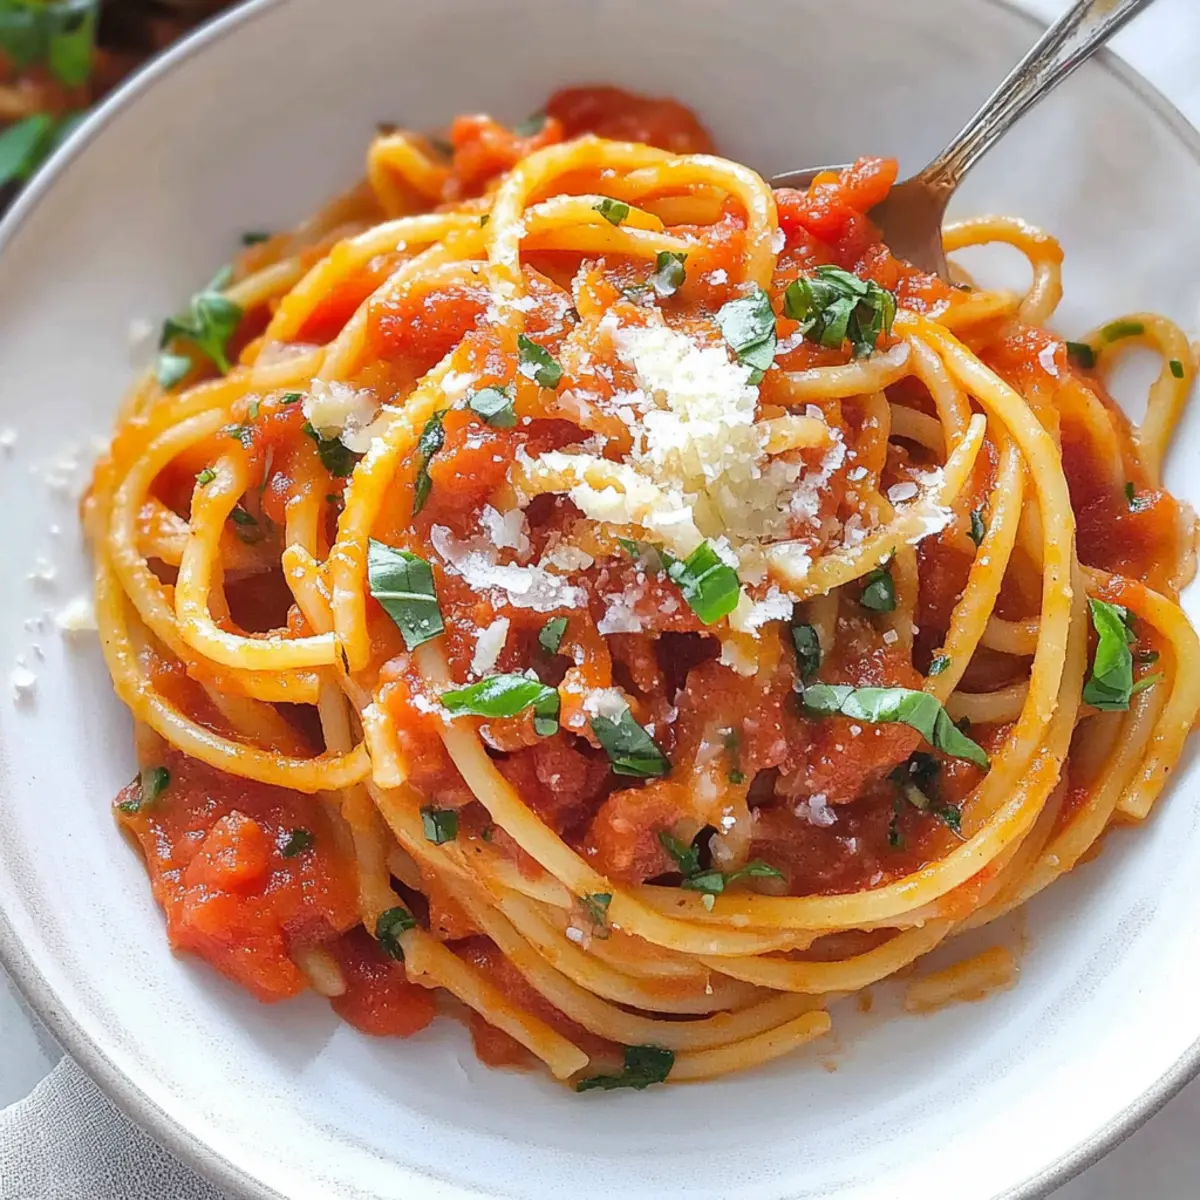
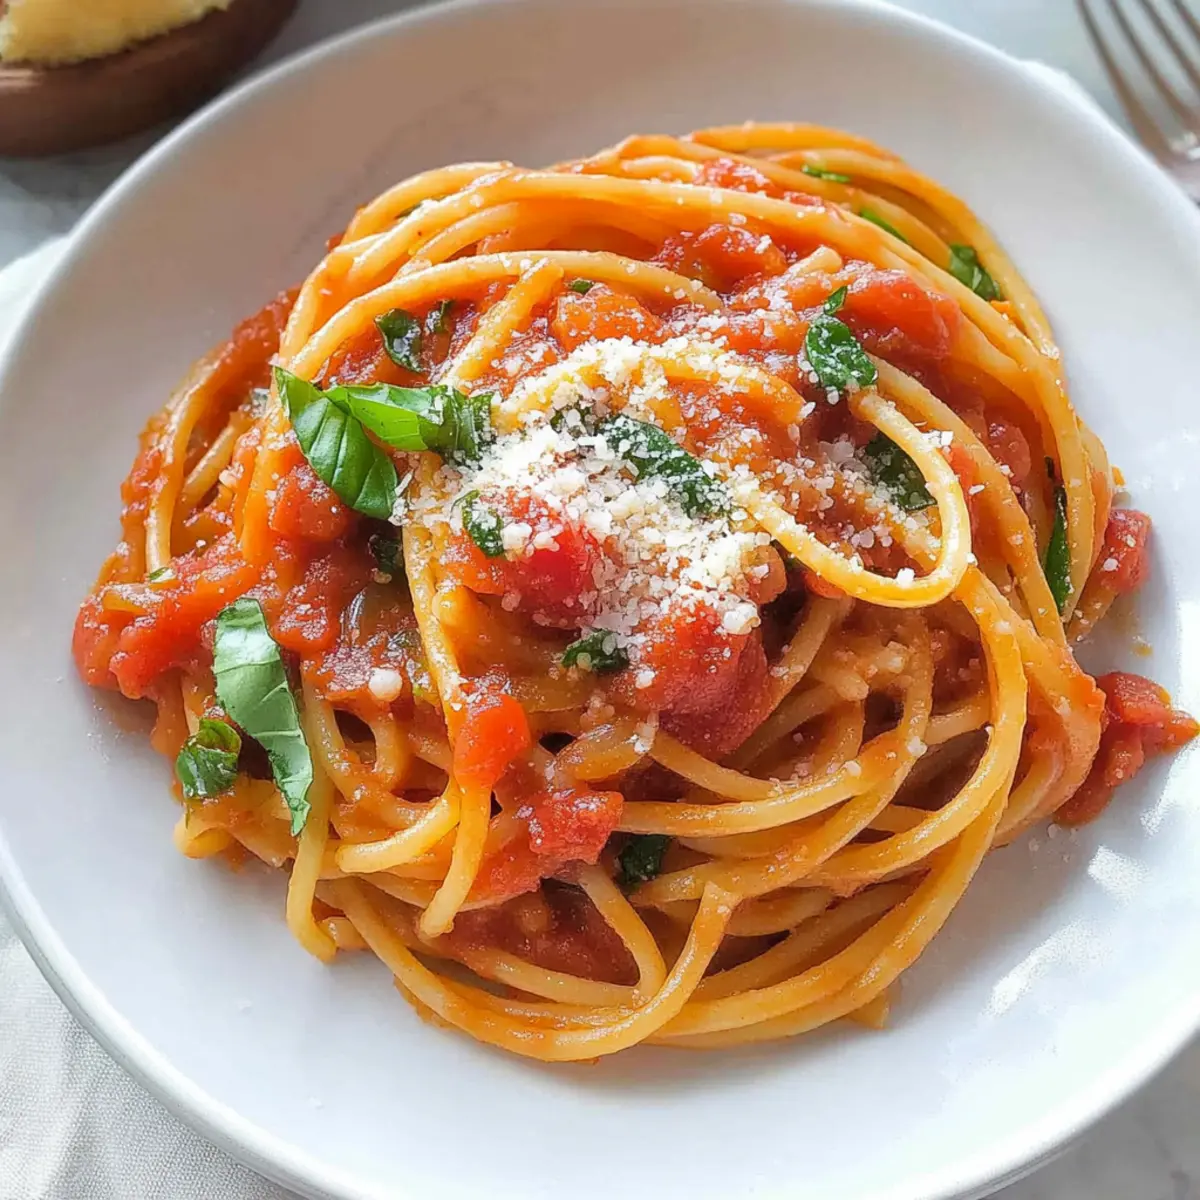
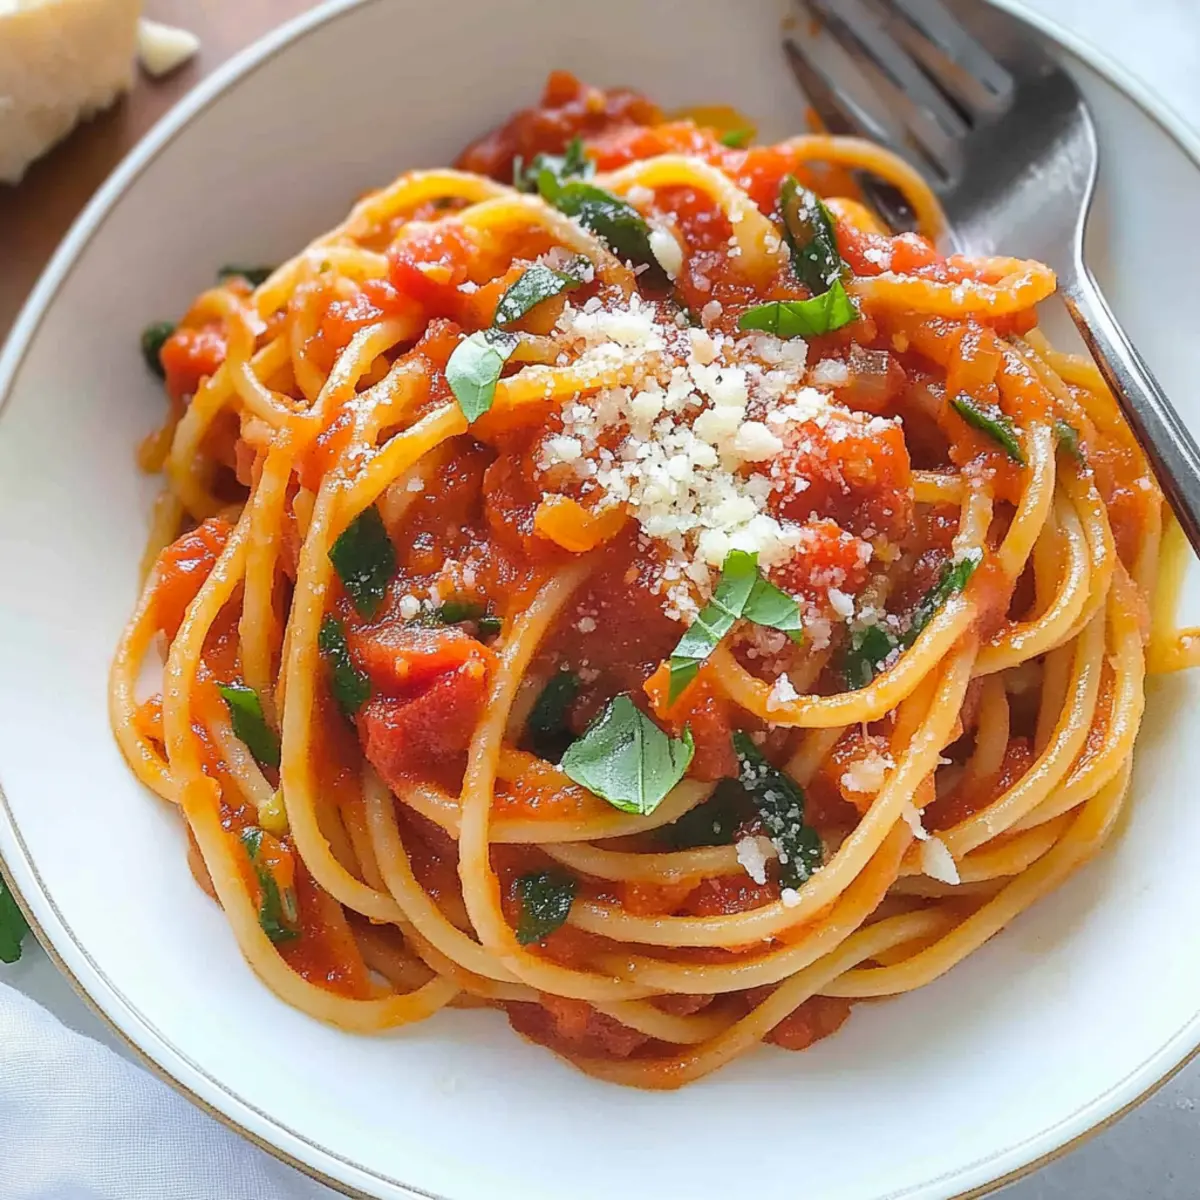
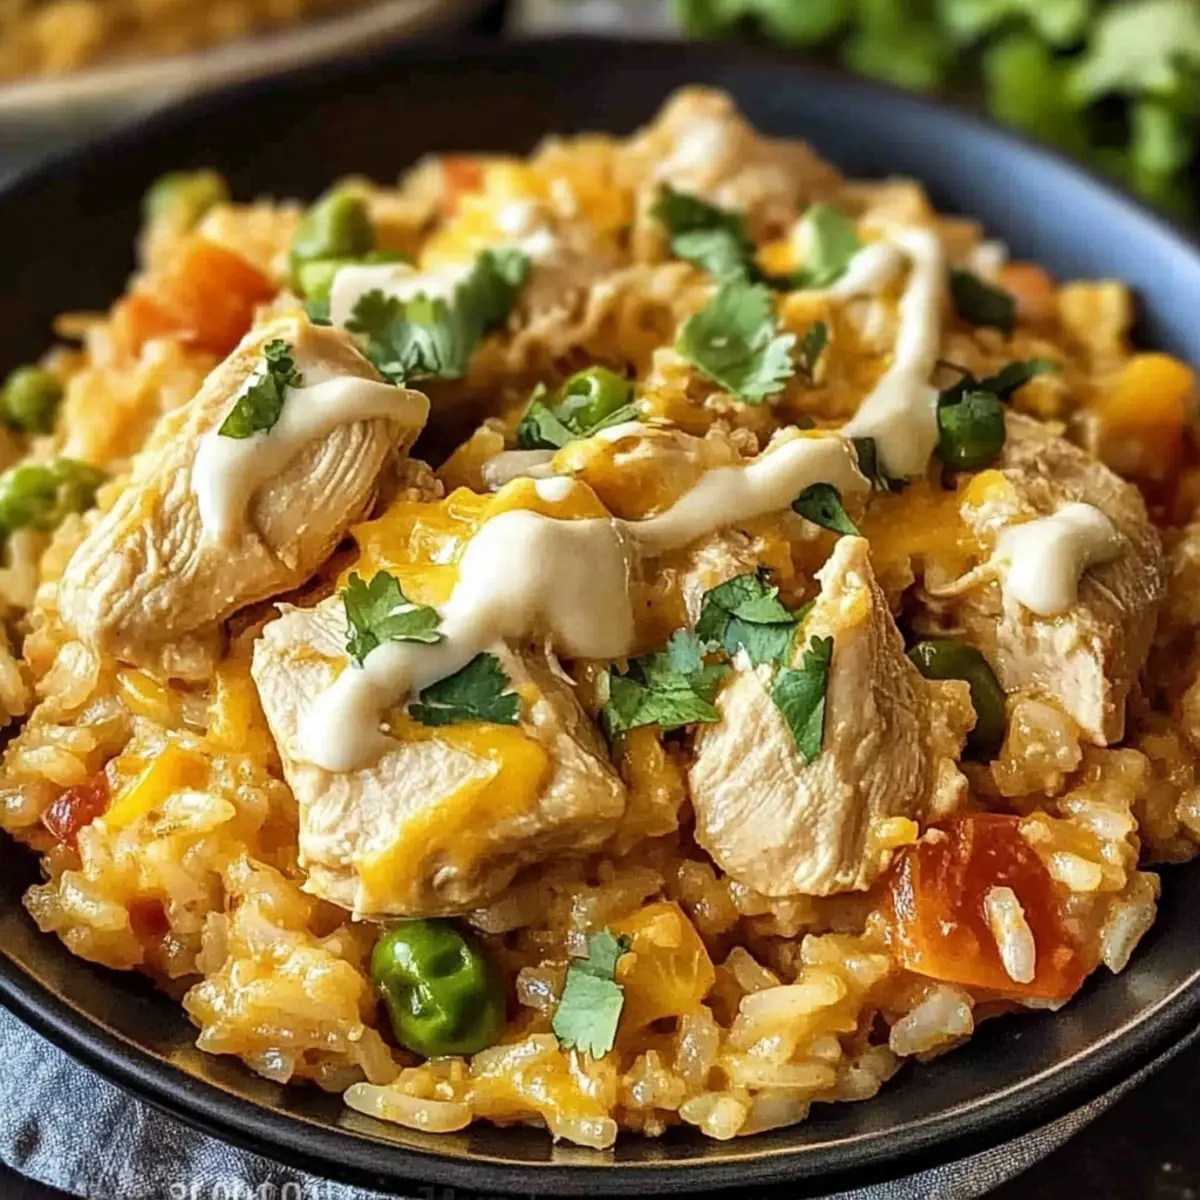
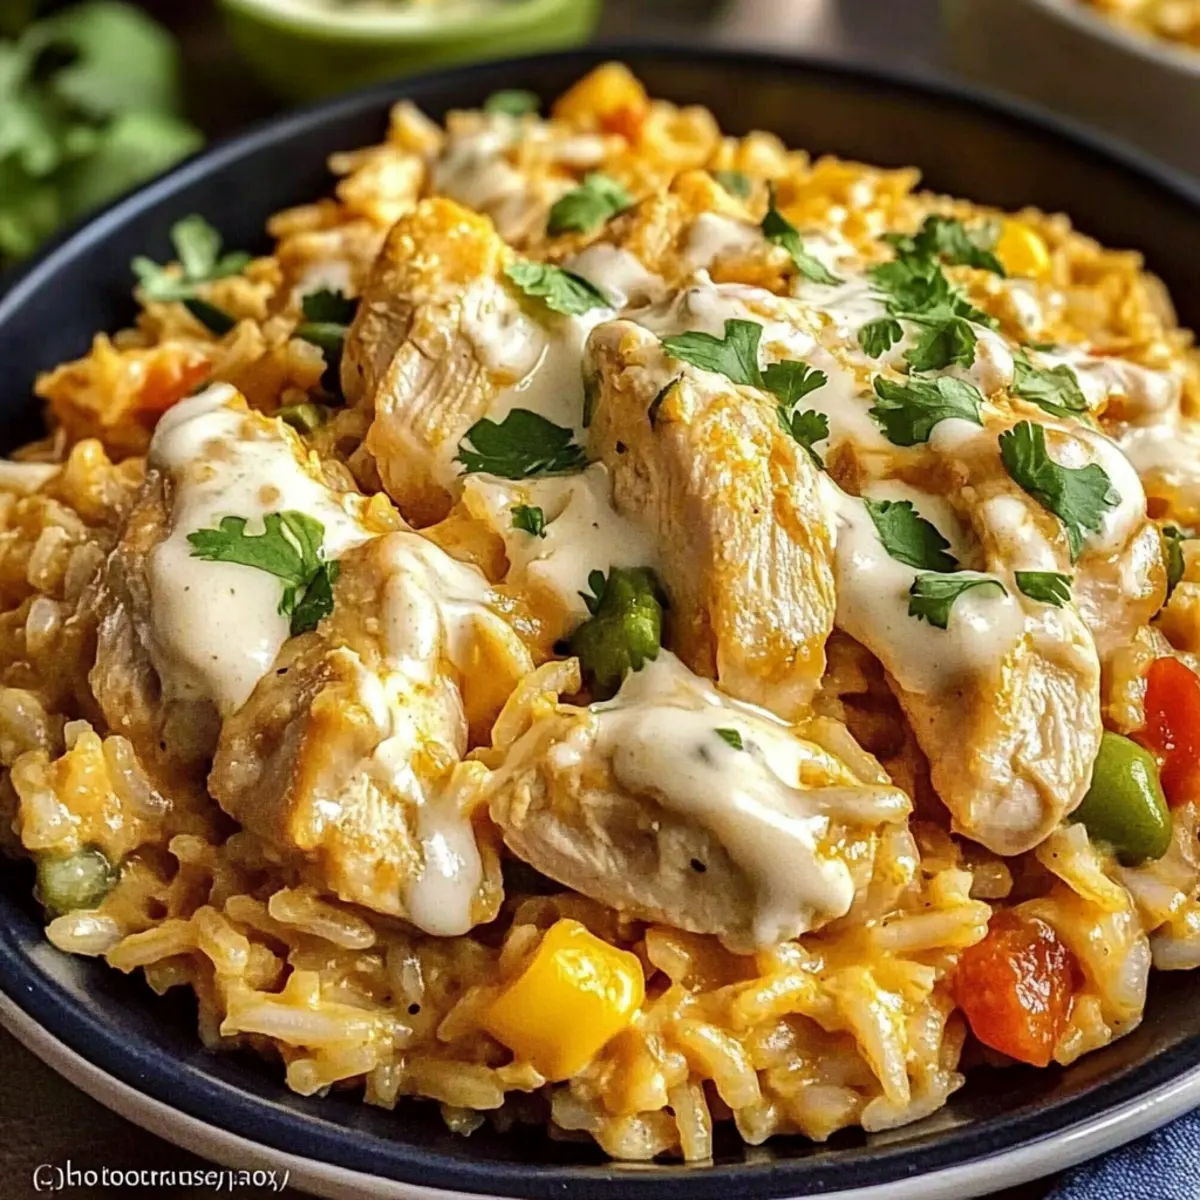
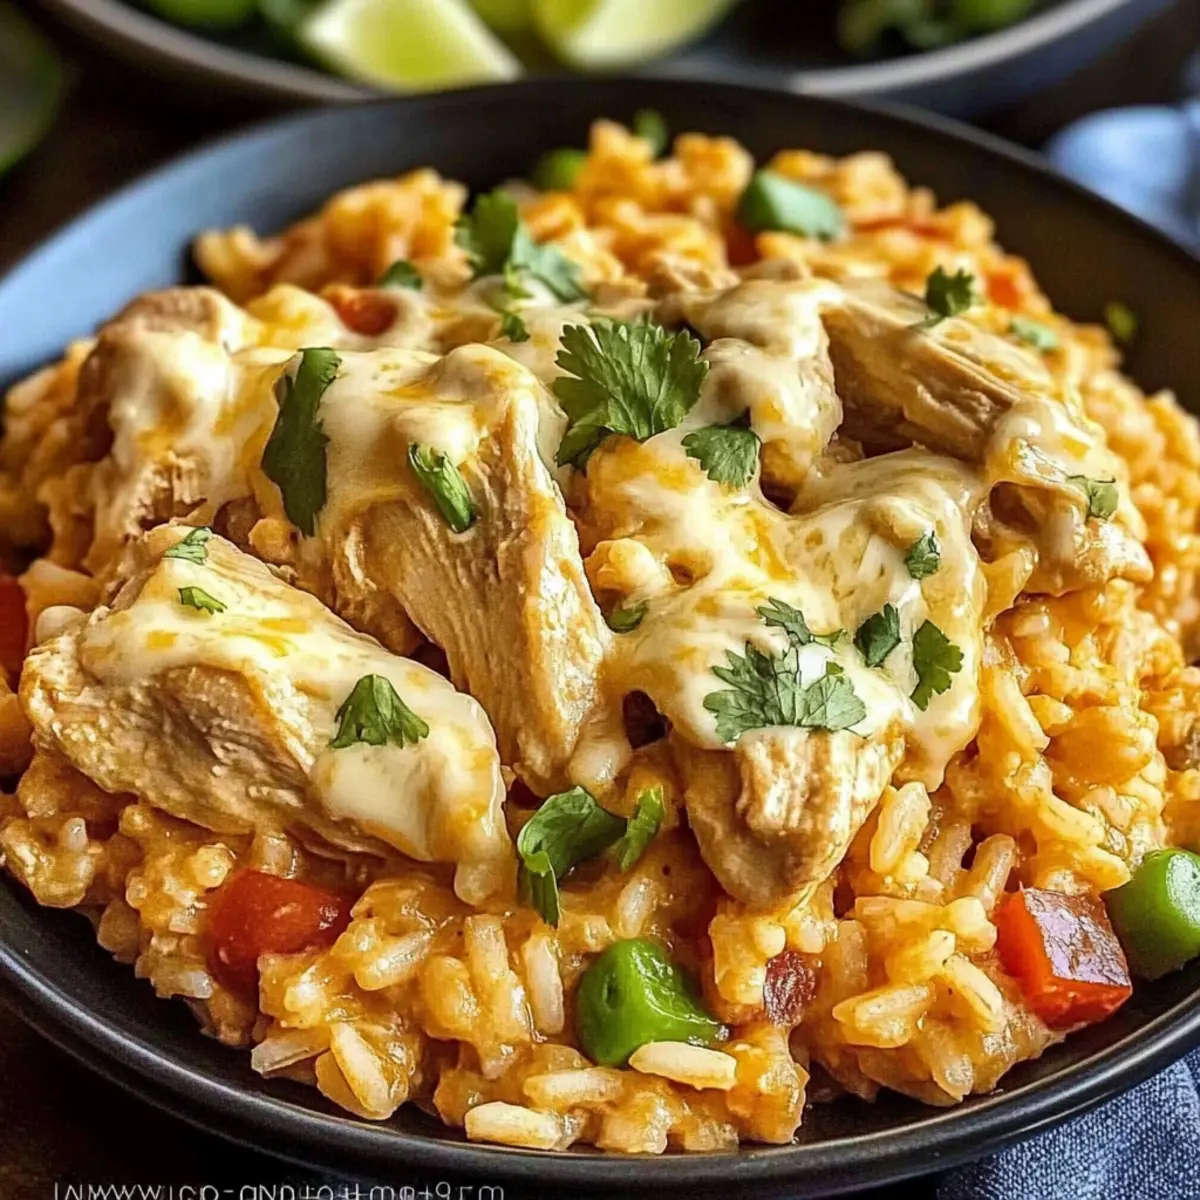
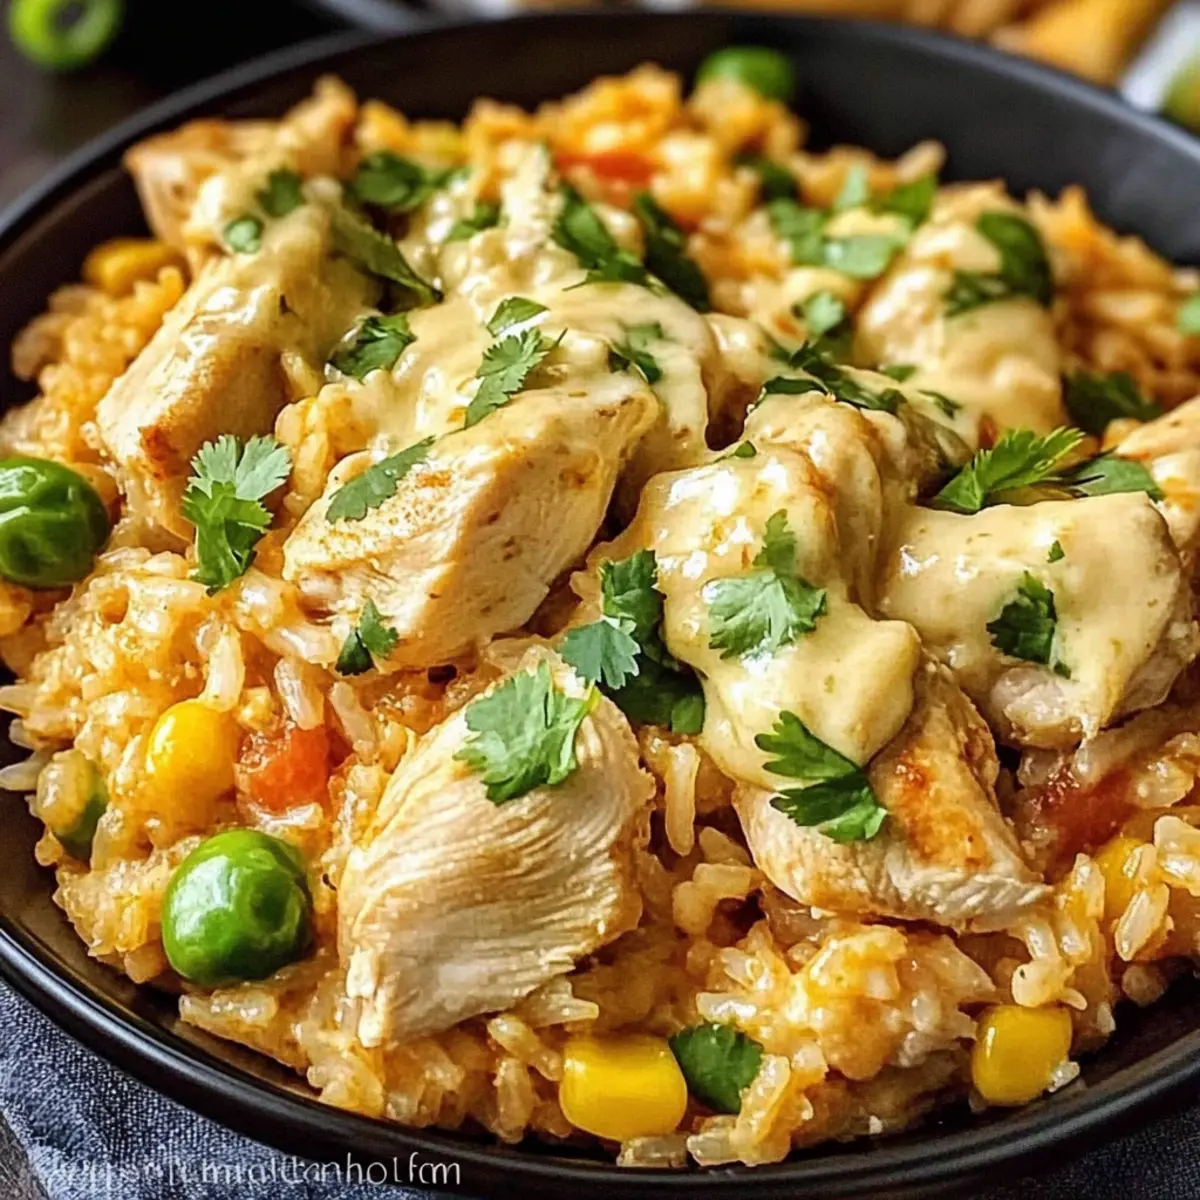
The kitchen was a whirlwind of aromas as I pulled the lid off the pot, revealing a vibrant medley of saffron-infused rice and tender chicken simmering in a savory embrace. This Pollo Loco - Mexican Chicken and Rice with Queso is my go-to for those busy weeknights when the family craves something hearty yet easy to whip up. With its comforting layers and creamy queso gracefully melting over each bite, it transforms simple pantry staples into an unforgettable feast. Not only is this recipe family-friendly, making it a crowd-pleaser for kids and adults alike, but it’s also a breeze to prep in advance—perfect for meal prepping! Ready to dig into a dish that combines warmth and flavor in every forkful? Let’s dive in!

Why Is Pollo Loco a Must-Try?

Comforting, rich flavors: Each bite of this Pollo Loco bursts with savory goodness, thanks to the creamy queso and tender, seasoned chicken.
Quick & Easy: With simple ingredients and less than 30 minutes of cook time, it's perfect for busy weeknights.
Meal Prep Friendly: Make it ahead and enjoy leftovers all week! Pair it with a fresh avocado and lime salad for a refreshing side.
Kid-Approved: Its familiar taste is sure to win over picky eaters, making family dinners stress-free.
Versatile: Adjust spice levels or swap ingredients for endless variations, like using rotisserie chicken or trying different types of cheese.

This recipe is ideal for those craving flavor without the fuss—just like our Fiesta Lime Chicken or Honey BBQ Chicken Rice. Dive into this delicious dish and share the love with your family!

Pollo Loco Ingredients

• Prepare for a flavor-packed journey with these essential ingredients!

For the Chicken

  • Chicken Breast – The main protein; opting for rotisserie chicken can save time!
  • Olive Oil – Used for sautéing, it ensures delicious flavor and moisture in the chicken.
  • Adobo Seasoning – Adds spice and depth; apply generously for the best flavor.

For the Rice

  • Saffron Yellow Rice – The colorful base of the dish; it infuses delightful flavor.
  • Tomato Bouillon Cube – Enhances umami, bringing out the rich taste in the rice.
  • Water – Essential for cooking the rice to perfection.

For the Creamy Topping

  • White Queso – Provides creaminess and richness; if needed, use cream cheese and Monterey Jack as a substitute.
  • Milk – Ensures a smooth and creamy consistency when mixed with the queso.

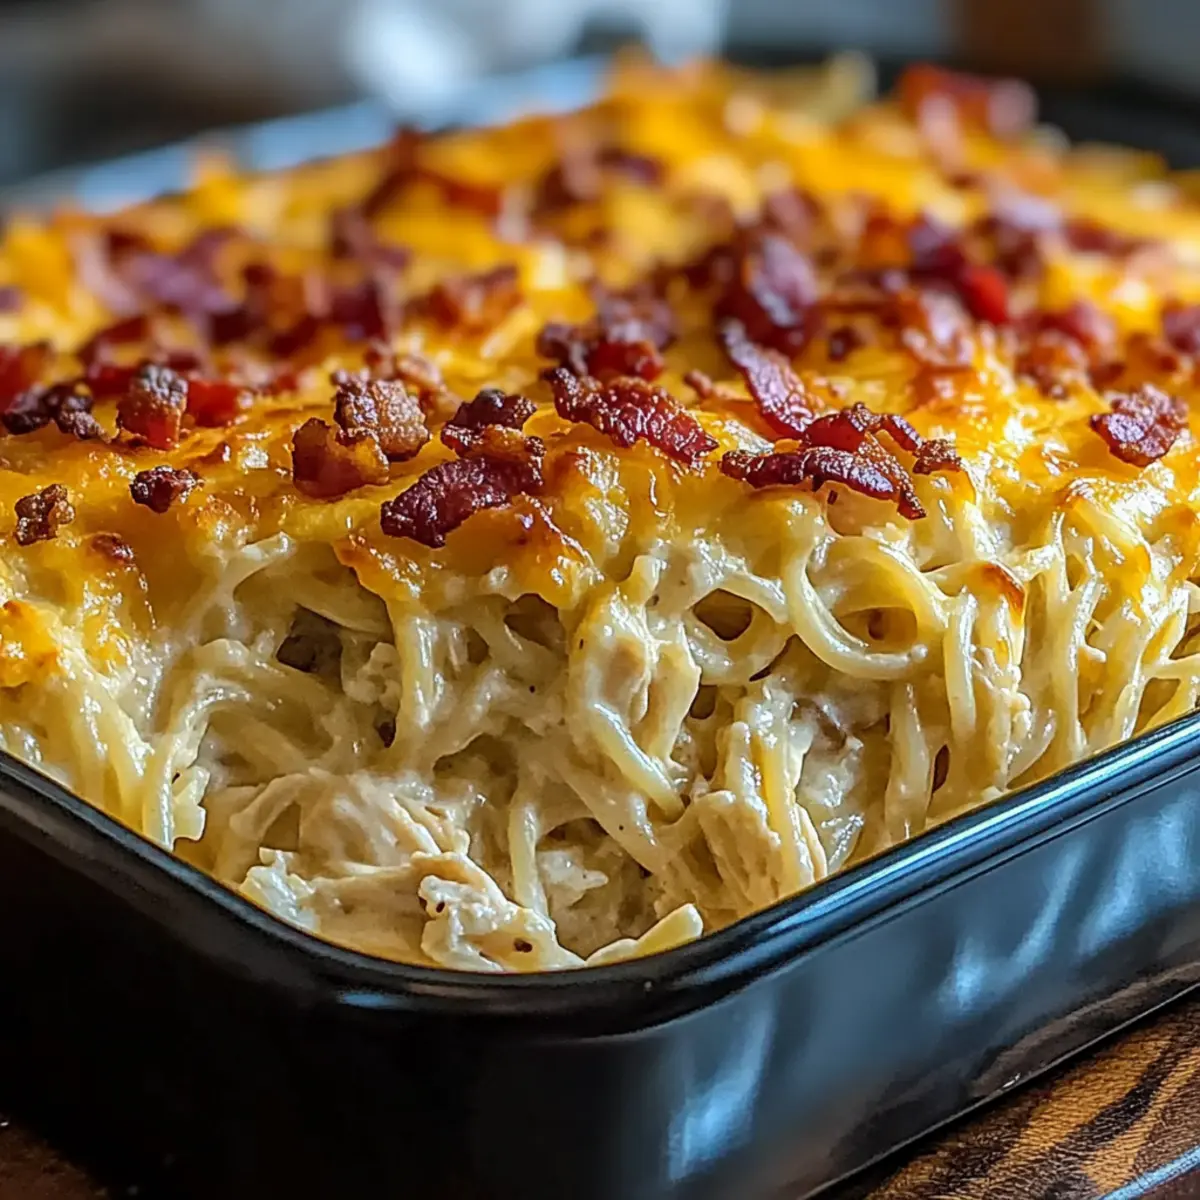
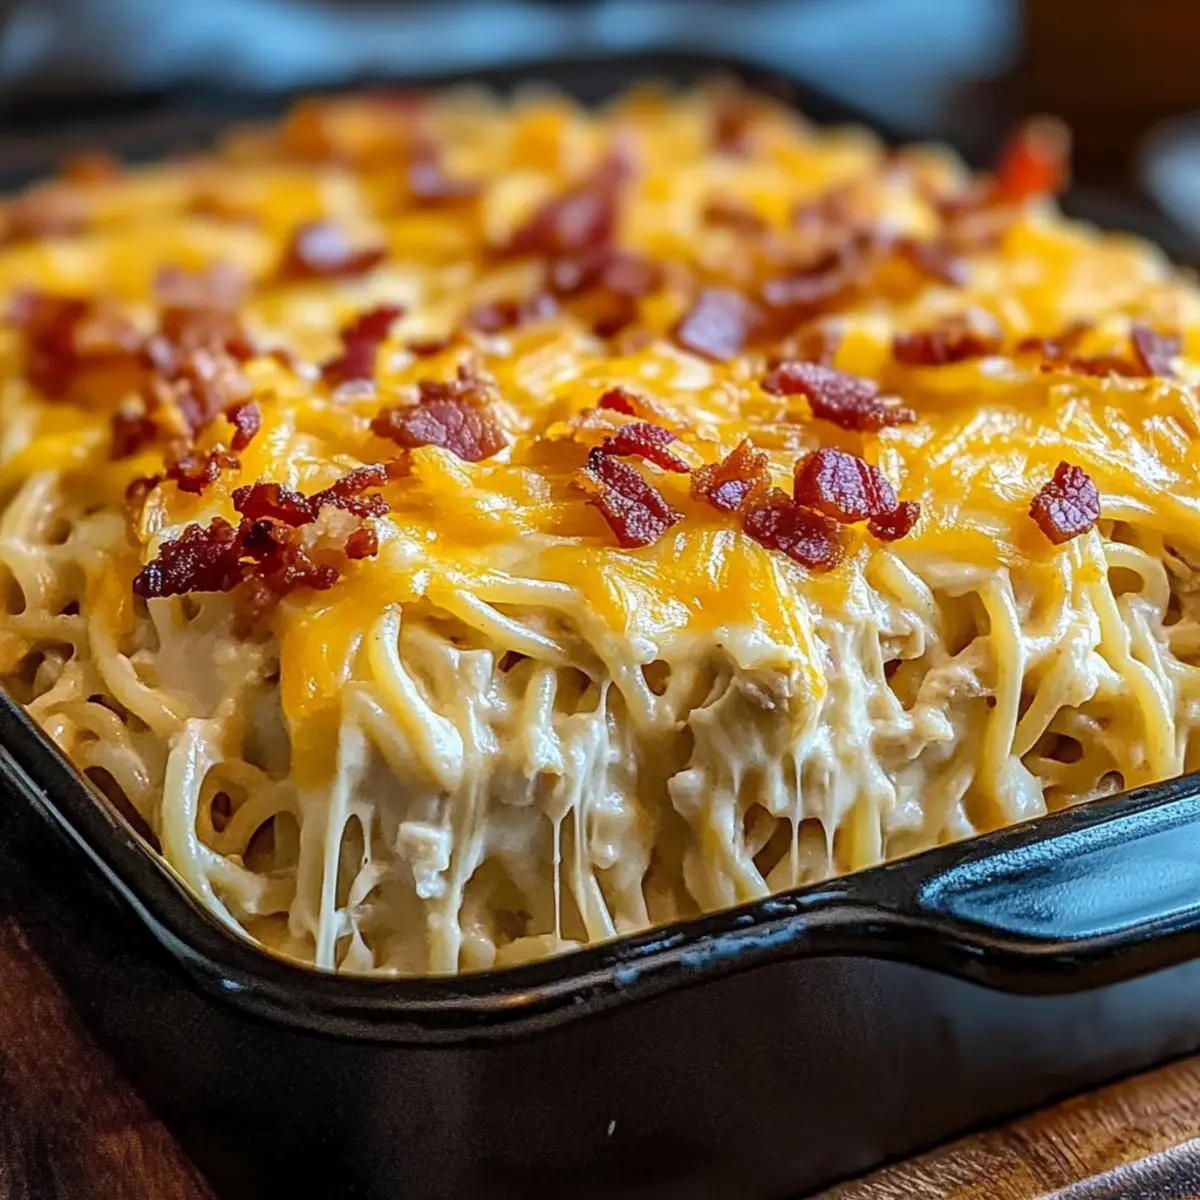
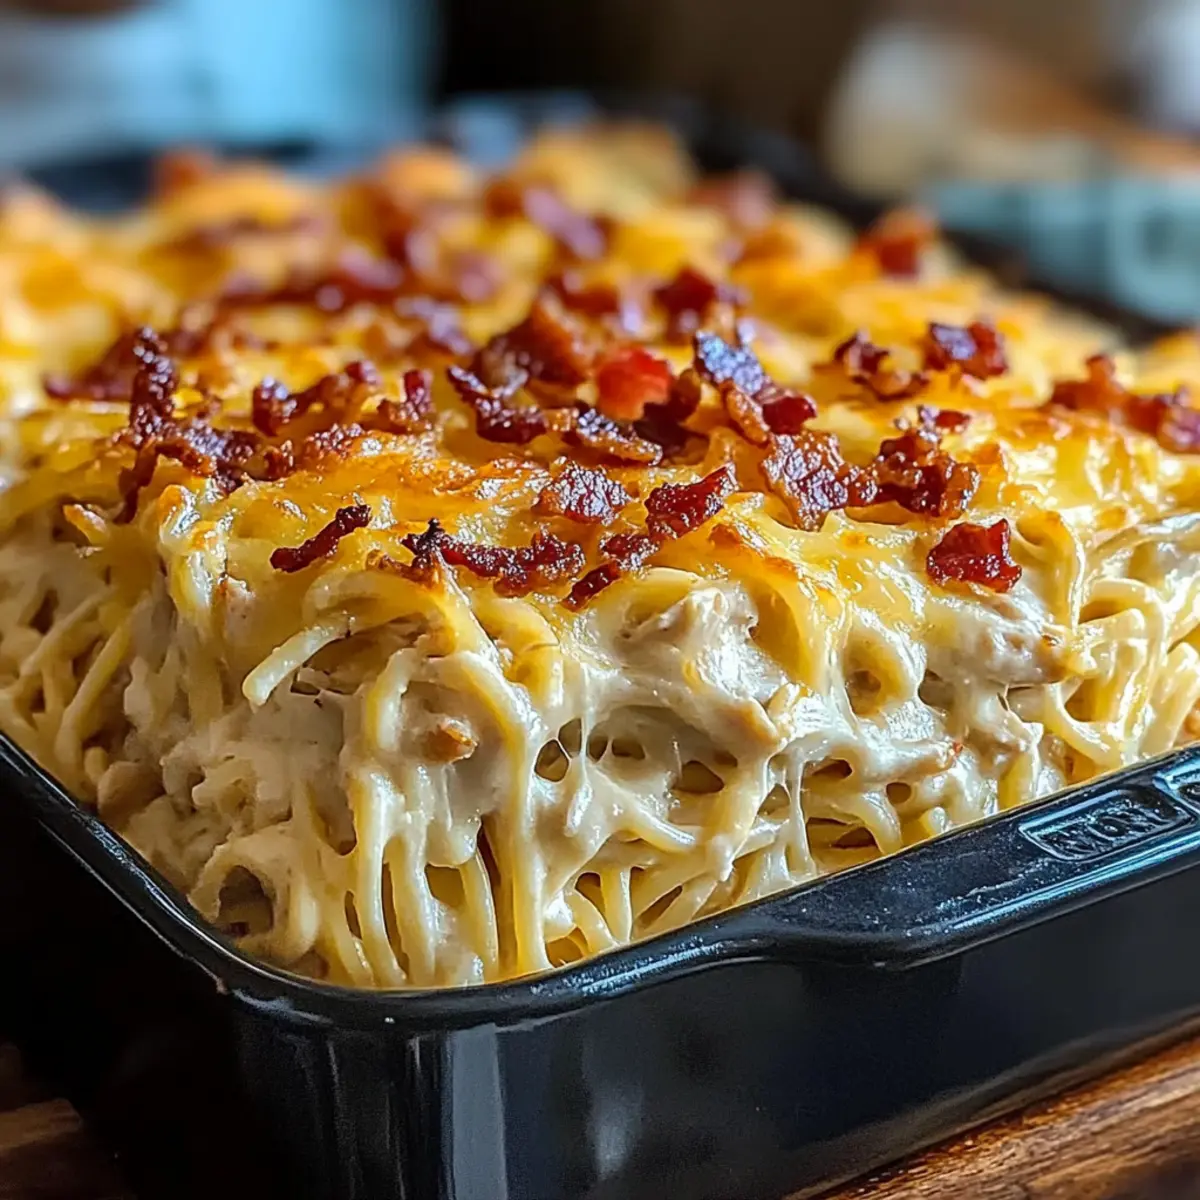
This Pollo Loco - Mexican Chicken and Rice with Queso is a delightful meal that transforms everyday cooking into a vibrant celebration!

Step‑by‑Step Instructions for Pollo Loco - Mexican Chicken and Rice with Queso

Step 1: Prepare the Chicken
Begin by patting the chicken breasts dry with paper towels. Generously season both sides with adobo seasoning, ensuring an even coating for full flavor. This step is crucial for making your Pollo Loco flavorful. Set the seasoned chicken aside while you heat the skillet.

Step 2: Sauté the Chicken
Heat a tablespoon of olive oil in a large skillet over medium heat. Once the oil shimmers, carefully place the seasoned chicken breasts into the skillet. Sauté each side for about 3 minutes, or until the chicken is nicely browned and no longer pink in the center. This caramelization adds great flavor to your Pollo Loco.

Step 3: Combine Ingredients
With the chicken cooked, add the saffron yellow rice to the skillet, followed by a cup of water and a crumbled tomato bouillon cube. Stir everything together, ensuring the rice is well-coated. Bring the mixture to a rolling boil, which will help infuse the rice with all the savory flavors from the chicken.

Step 4: Simmer the Rice
Once your mixture is boiling, reduce the heat to low and cover the skillet with a lid. Let it simmer for 20 to 25 minutes, checking occasionally. The rice should absorb the liquid and become fluffy, while the chicken continues cooking through. You’ll know it’s ready when the rice is tender and has a light, airy texture.

Step 5: Add Creamy Queso
After the rice has cooked, remove the skillet from heat. Stir in the white queso and a splash of milk, mixing until the queso melts and creates a creamy sauce that envelops the chicken and rice. This step is what makes your Pollo Loco irresistibly creamy and rich.

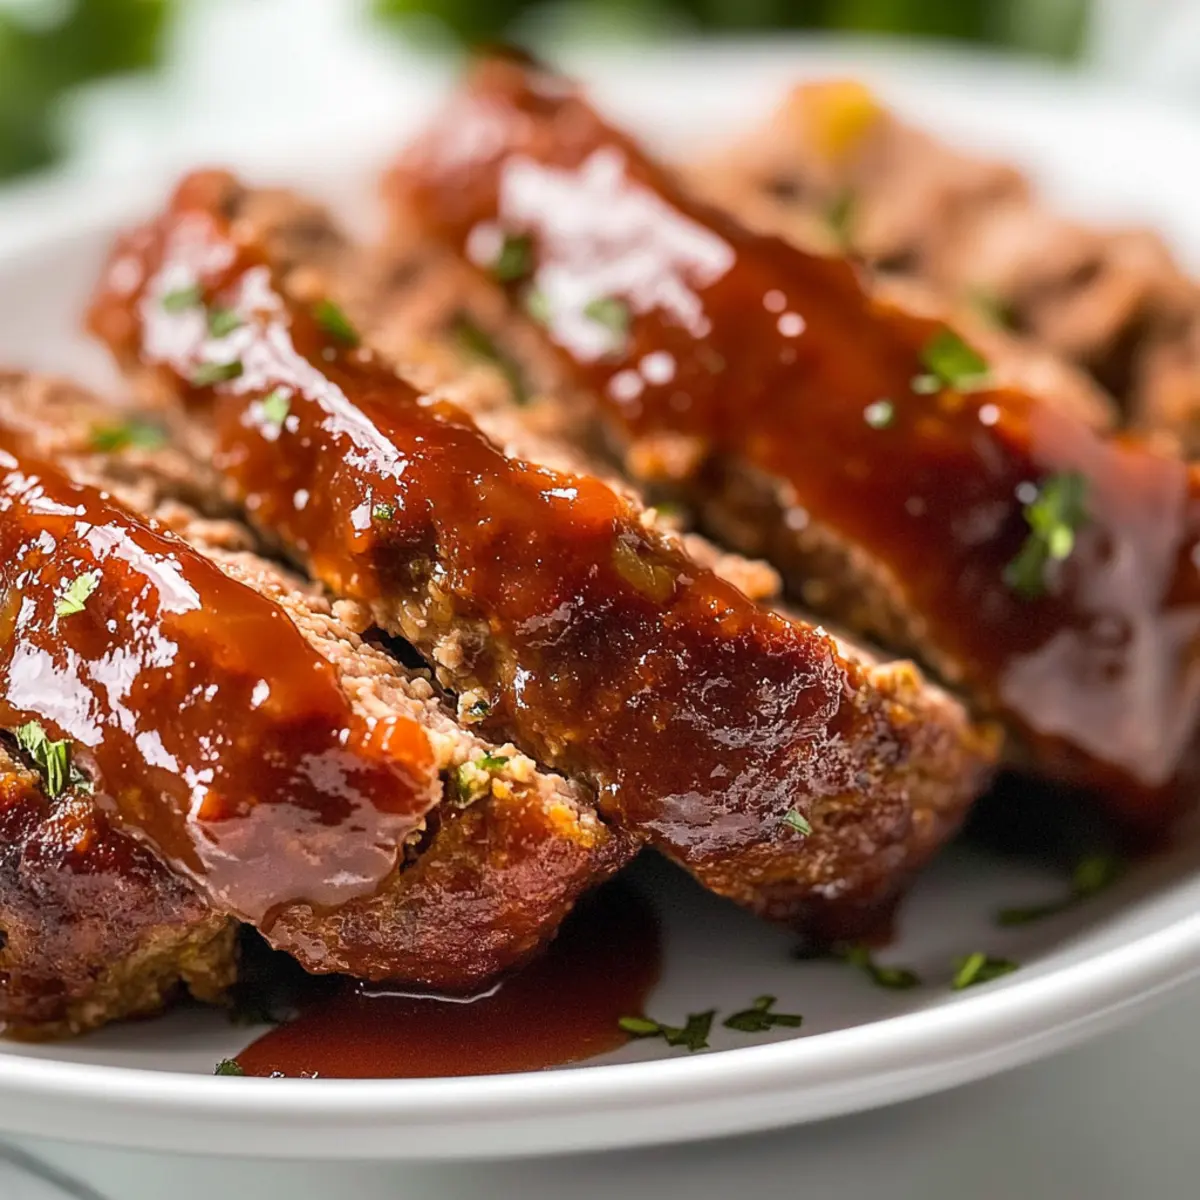
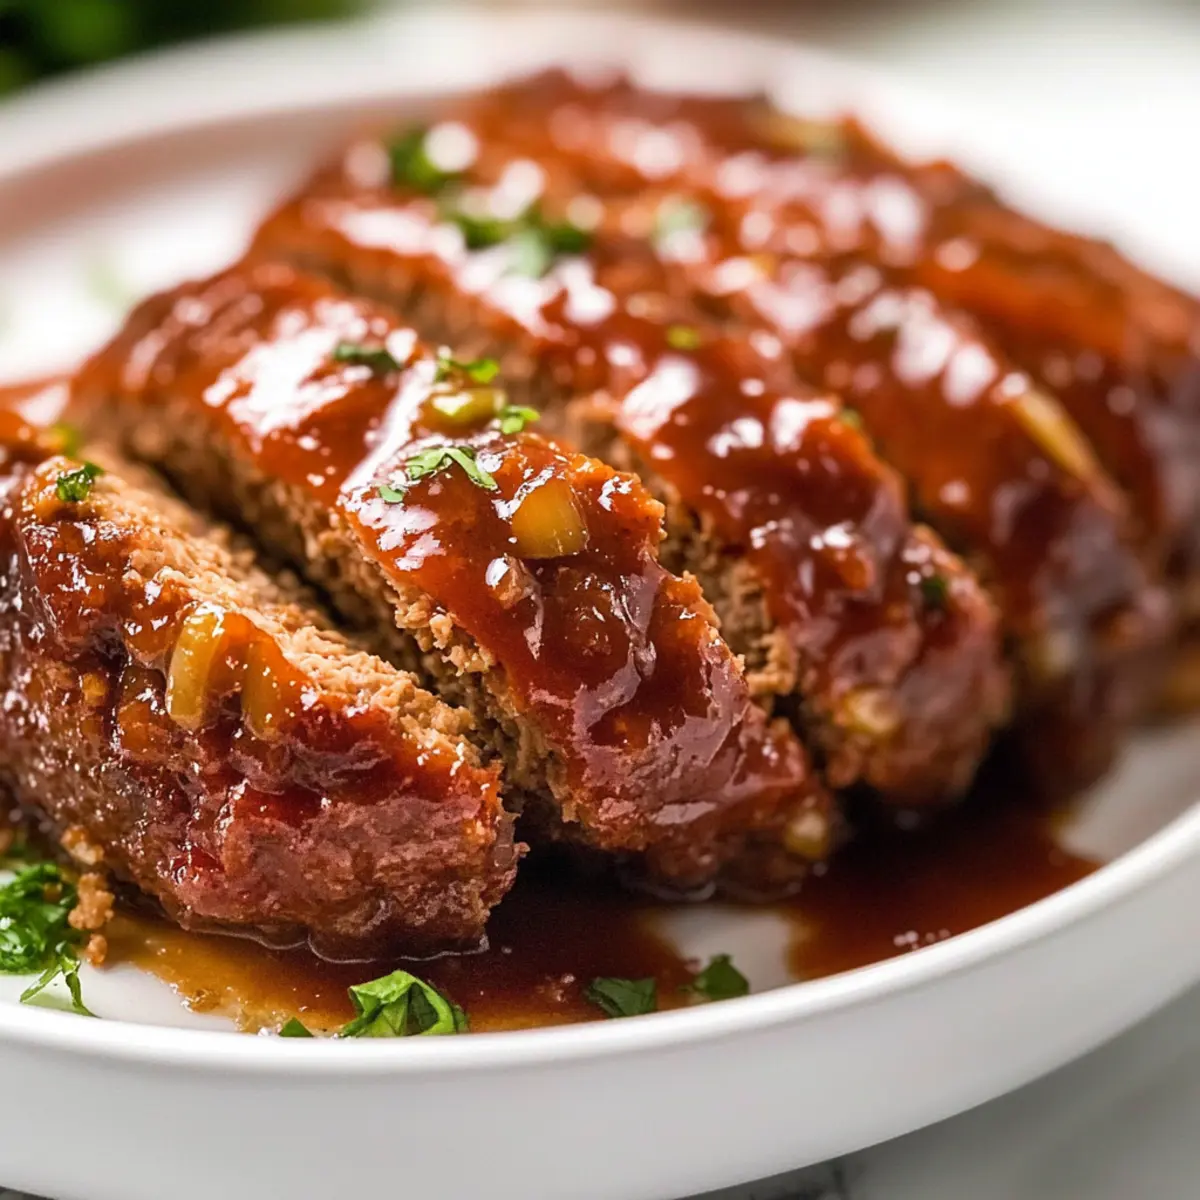
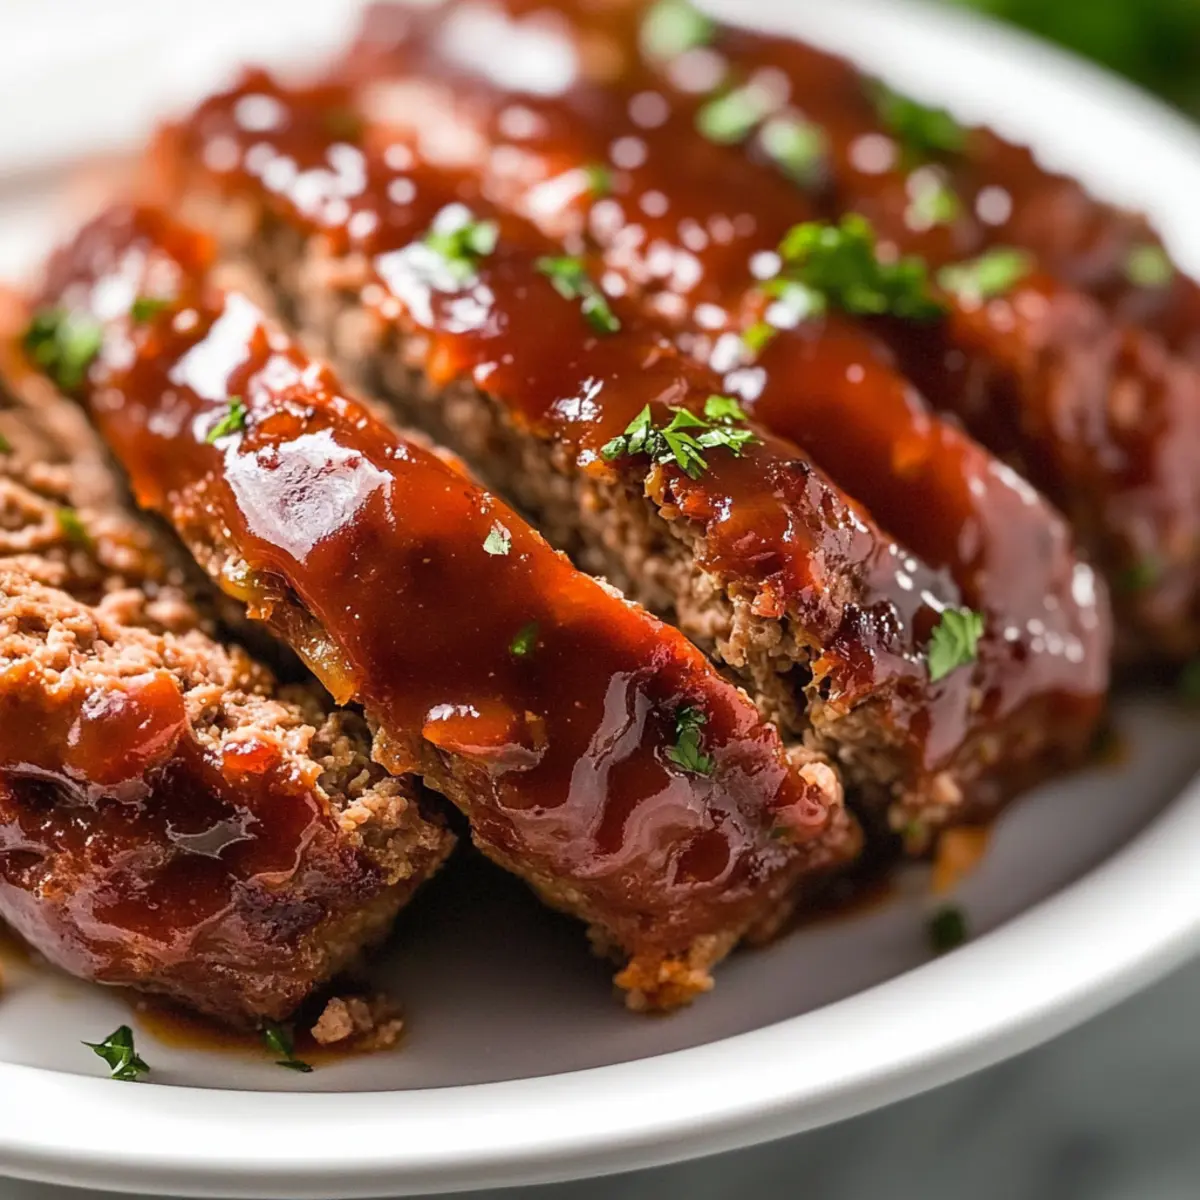
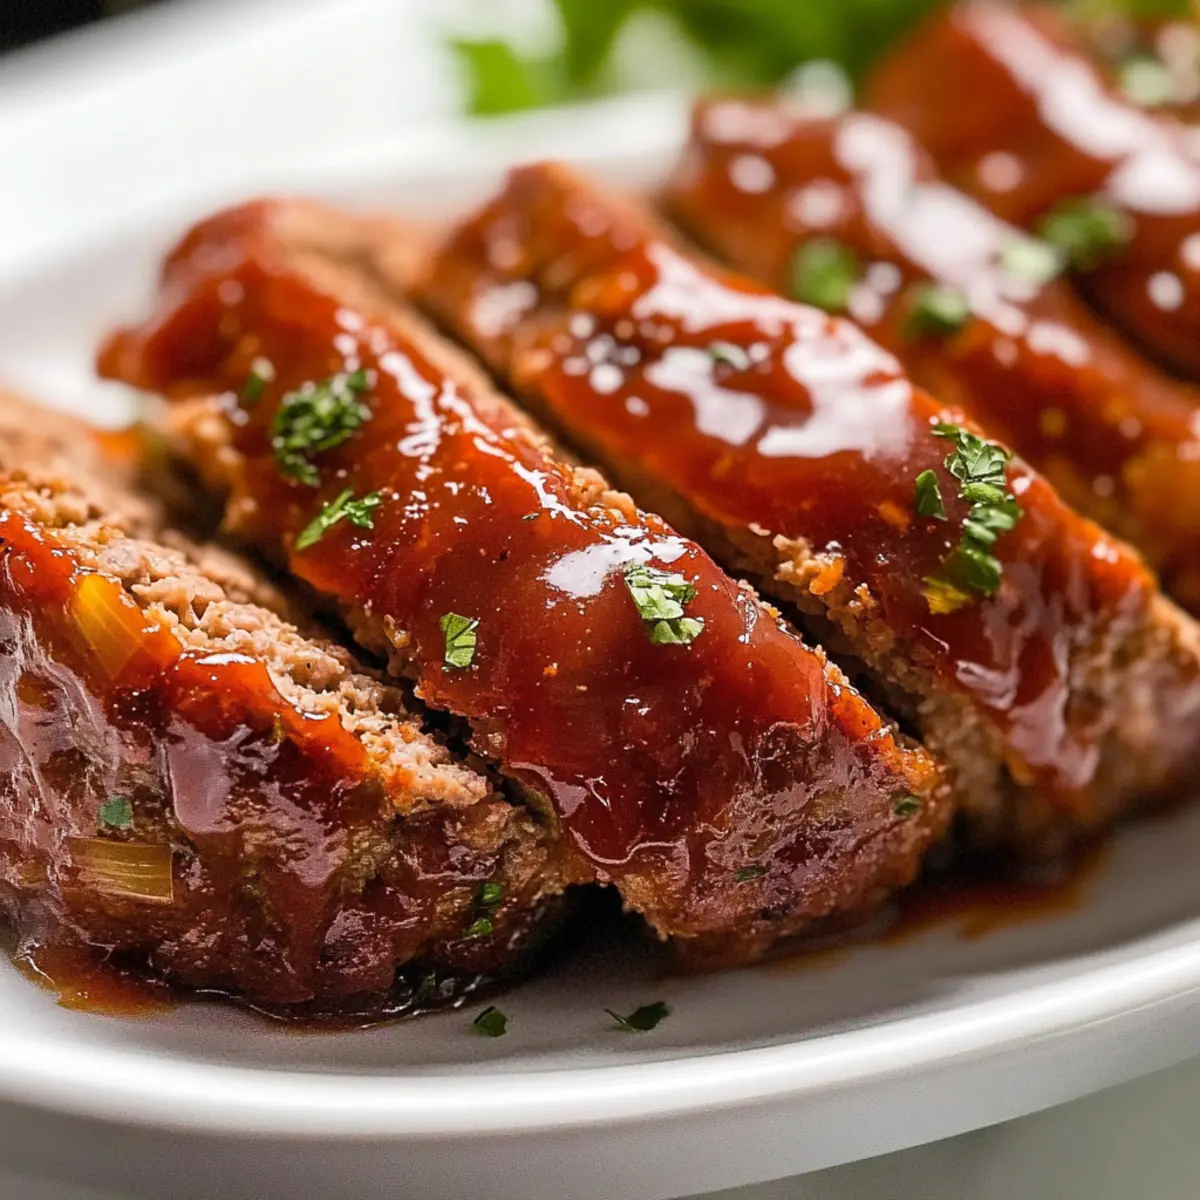
Step 6: Serve and Enjoy
Ladle generous portions of the Pollo Loco onto plates, ensuring each serving includes chicken and the flavorful rice. The creamy queso on top adds a lovely finish. For an added touch, consider garnishing with fresh cilantro, lime wedges, or a dollop of sour cream. Enjoy your comforting meal!

Make Ahead Options

Preparing Pollo Loco - Mexican Chicken and Rice with Queso in advance is a game changer for busy weeknights! You can season and cook the chicken up to 24 hours ahead, storing it in the refrigerator to allow the flavors to deepen. Additionally, you can prepare the saffron rice and combine it with the cooked chicken, refrigerating the mixture for up to 3 days. To maintain its quality, be sure to add a splash of water or broth when reheating to keep it moist. Just before serving, melt in the creamy queso and milk, mixing until smooth, and you’ll have a comforting feast ready in no time!

Pollo Loco Variations & Substitutions

Feel free to mix things up and create the Pollo Loco of your dreams with these delightful twists and swaps!

  • Dairy-Free: Use vegan cheese or coconut cream to replace the white queso, ensuring a creamy finish without dairy.
  • Spicy Kick: Add diced jalapeños during sautéing for an extra layer of heat that complements the chicken beautifully.
  • Brown Rice: Substitute white rice with brown rice for a nuttier flavor and added fiber. Just be mindful of the longer cooking time!
  • Vegetarian Delight: Swap the chicken for sautéed bell peppers and mushrooms, offering a colorful and hearty veggie alternative.
  • Flavorful Broth: Instead of water, use chicken or vegetable broth for cooking the rice to intensify flavors.
  • Citrus Zing: Add the juice of a lime or lemon during the final mixing stage for a refreshing burst of brightness that elevates the dish.
  • One-Pot Wonder: Combine all ingredients, including the chicken and rice, in a slow cooker for an effortless, hands-off cooking experience.
  • Smoky Notes: Incorporate smoked paprika into the adobo seasoning for a subtle smoky flavor that pairs perfectly with the other ingredients.

If you're in the mood for something different, you might also enjoy our One Pot Rice or a comforting bowl of Chicken Dumplings Cozy. So go ahead, unleash your creativity, and enjoy crafting your unique Pollo Loco experience!

Expert Tips for Pollo Loco

  • Flavor Development: Allow the Pollo Loco to sit for a bit after cooking. This helps the flavors meld together beautifully, making it taste even better next day.

  • Avoid Soggy Rice: Be careful not to overcook the rice; this can lead to a mushy texture. Keep an eye on the liquid level while it simmers.

  • Protein Variations: If you’re short on time, opt for shredded rotisserie chicken instead of raw to speed up preparation while still achieving delicious results.

  • Adjusting Spice Levels: Want a kick? Add diced jalapeños or a sprinkle of chipotle powder during cooking, but taste as you go to avoid overwhelming heat.

  • Creamy Consistency: If your queso isn’t melting smoothly, a little extra splash of milk can help achieve that luscious, creamy sauce you desire in this Pollo Loco dish.

How to Store and Freeze Pollo Loco

Fridge: Store leftovers in an airtight container and refrigerate for up to 3 days. Ensure the dish is completely cooled before sealing to maintain freshness.

Freezer: For longer storage, freeze Pollo Loco in a freezer-safe container for up to 3 months. Place parchment paper between layers if stacking to prevent sticking.

Reheating: Thaw in the fridge overnight, then reheat gently in a skillet over medium heat, adding a splash of broth or water to keep the creamy queso luscious and moist.

Make-Ahead: Prepare up to 2 days in advance. Combine all ingredients, refrigerate, and simply heat before serving for effortless meal prep.

What to Serve with Pollo Loco - Mexican Chicken and Rice with Queso

To create a delightful dining experience alongside this comforting Pollo Loco, consider these complementary dishes that elevate your meal.

  • Creamy Avocado Salad: The refreshing avocado salad adds a cool, creamy texture that balances the spicy and savory notes of the Pollo Loco, enhancing overall enjoyment.

  • Cilantro Lime Rice: Bright and zesty, this side dish echoes the flavors of saffron rice while adding a pop of freshness that pairs beautifully with the rich chicken and queso.

  • Roasted Corn on the Cob: Sweet and slightly charred, this classic Mexican side brings a satisfying crunch that contrasts nicely with the tenderness of the chicken.

  • Pico de Gallo: This fresh salsa loaded with tomatoes, onions, and cilantro provides a burst of flavor and acidity, cutting through the creaminess of the dish while adding a vibrant touch.

  • Chips and Guacamole: Crispy tortilla chips served with creamy guacamole make for a delightful snack or appetizer, inviting everyone to dig in and enjoy a bit of Mexican tradition before the main event.

  • Spicy Margaritas: A refreshing cocktail option to elevate your meal, the sweet and tangy notes of a spicy margarita perfectly complement the bold flavors in Pollo Loco, making it a fantastic pairing choice.

By combining these elements, you'll create a memorable meal that celebrates the rich flavors and textures of your Pollo Loco - Mexican Chicken and Rice with Queso, making any night feel like a special occasion.

Pollo Loco - Mexican Chicken and Rice with Queso Recipe FAQs

What is the best way to select chicken for Pollo Loco?
Absolutely! For the best flavor and texture, select chicken breasts that are firm and plump, with no dark spots or bruising. If you're short on time, using high-quality rotisserie chicken can save you the hassle and still deliver fantastic results.

How should I store leftover Pollo Loco?
Leftovers should be kept in an airtight container in the fridge where they can last for up to 3 days. Make sure the dish is completely cooled before sealing it to maintain freshness and flavor. Add a splash of water when reheating to keep it moist.

Can I freeze Pollo Loco for later?
Yes, you can! To freeze, let the Pollo Loco cool completely, then transfer it to a freezer-safe container, ensuring it's sealed tightly. It can be frozen for up to 3 months. For best results, I recommend labeling containers with the date for easy tracking.

What if my rice turns out mushy?
If your rice ends up mushy, it’s likely due to overcooking or too much liquid. Next time, keep an eye on the simmering process and check for doneness closer to the 20-minute mark. If it's not ready, give it a few extra minutes, but avoid letting it sit on the heat too long.

Can I make this dish egg-free or dairy-free?
Absolutely! To make Pollo Loco dairy-free, you can substitute the white queso with a vegan cheese alternative or a homemade cashew cream. Just blend soaked cashews with a bit of nutritional yeast and water until smooth for a creamy texture without any dairy.

What other ingredients can I add to enhance flavor?
Feel free to elevate your Pollo Loco with diced jalapeños for heat, fresh cilantro for herbiness, or a splash of lime juice for zesty brightness. The more the merrier! Don't hesitate to get creative with your additions based on what your family enjoys!

Pollo Loco - Mexican Chicken and Rice with Queso

Pollo Loco: Irresistibly Creamy Mexican Chicken and Rice

Pollo Loco - Mexican Chicken and Rice with Queso is a comforting and flavorful dish, perfect for busy weeknights.
Print Recipe Pin Recipe
Prep Time 10 minutes mins
Cook Time 25 minutes mins
Total Time 35 minutes mins
Servings: 4 servings
Course: Dinner
Cuisine: Mexican
Calories: 450
Ingredients Equipment Method Nutrition Notes

Ingredients
  

For the Chicken
  • 2 pieces Chicken Breast Can use rotisserie chicken for quicker prep.
  • 1 tablespoon Olive Oil Used for sautéing.
  • 2 tablespoons Adobo Seasoning Generously apply for best flavor.
For the Rice
  • 1 cup Saffron Yellow Rice Colorful base of the dish.
  • 1 cube Tomato Bouillon Enhances umami flavor.
  • 1 cup Water Essential for cooking the rice.
For the Creamy Topping
  • 1 cup White Queso Provides creaminess; can substitute if needed.
  • 1/2 cup Milk Ensures a smooth and creamy consistency.

Equipment

  • Skillet
  • measuring cups
  • Paper towels

Method
 

Step-by-Step Instructions
  1. Pat the chicken breasts dry with paper towels and season with adobo seasoning.
  2. Heat olive oil in a skillet over medium heat and sauté chicken for about 3 minutes each side until browned.
  3. Add saffron yellow rice, water, and crumbled tomato bouillon to the skillet, stirring well.
  4. Reduce heat to low, cover, and simmer for 20 to 25 minutes until rice is fluffy.
  5. Stir in white queso and milk off the heat until creamy.
  6. Serve with garnishes like cilantro and lime wedges, if desired.

Nutrition

Serving: 1servingCalories: 450kcalCarbohydrates: 40gProtein: 30gFat: 20gSaturated Fat: 7gPolyunsaturated Fat: 1gMonounsaturated Fat: 6gCholesterol: 70mgSodium: 900mgPotassium: 600mgFiber: 2gSugar: 2gVitamin A: 500IUVitamin C: 3mgCalcium: 250mgIron: 3mg

Notes

Allow flavors to meld by letting the dish sit after cooking. Store leftovers in the fridge for up to 3 days.

Tried this recipe?

Let us know how it was!

Pumpkin & Gouda Stuffed Shells: A Cozy Autumn Delight

December 2, 2025 by Grace Snow Leave a Comment

As the first whispers of autumn flutter in, I can't resist the allure of cozy comfort foods, especially when they come wrapped in cheesy goodness and seasonal delights. Enter my Pumpkin & Gouda Stuffed Shells – a dish that marries creamy gouda with the natural sweetness of pumpkin, all nestled within tender jumbo pasta shells. This recipe not only promises a quick prep time, but it’s also a great crowd-pleaser, perfect for family gatherings or a quiet night in. With a luxurious brown butter and sage Alfredo sauce drizzling over the top, each bite is like a warm embrace that will surely inspire nostalgia for chilly evenings spent around the dinner table. Are you ready to dive into this autumnal comfort food?

Why Are Pumpkin & Gouda Stuffed Shells Irresistible?

Comforting and Creamy: The combination of gouda and pumpkin creates a velvety filling that feels like a warm hug on a chilly evening.

Easy to Prepare: With simple steps and easy-to-find ingredients, you can create a spectacular dish in no time.

Versatile Options: Whether you want to add spinach for a nutrition boost or swap cheeses, this recipe allows for creative twists that cater to every taste.

Autumnal Flavors: Each bite celebrates the essence of fall, making it a perfect centerpiece for seasonal gatherings or cozy dinners at home.

Crowd Appeal: This dish not only pleases the palate but also impresses your guests, making it an excellent choice for entertaining.

As a delightful alternative to takeout, your Pumpkin & Gouda Stuffed Shells will become a family favorite, just like these Pumpkin Brownies Decadent or Herby Ricotta Stuffed dishes!

Pumpkin & Gouda Stuffed Shells Ingredients

For the Pasta
• Jumbo Pasta Shells – Provides a perfect vessel for the creamy filling; you can substitute with manicotti or medium shells if needed.

For the Filling
• Pumpkin Puree – Adds natural sweetness and creaminess; feel free to use canned or freshly roasted pumpkin for depth.
• Gouda Cheese – Contributes a rich, creamy flavor; it can be swapped for ricotta or mozzarella for a milder profile.
• Ricotta Cheese – Enhances the luxurious texture; if you're looking for a lighter alternative, cottage cheese works beautifully.
• Garlic Powder – Infuses a savory aroma; switch to fresh garlic if you prefer a bolder taste.
• Salt and Pepper – Essential seasoning to elevate the dish's flavors; adjust according to your taste preferences.

For the Alfredo Sauce
• Butter – Creates the base for the sauce; consider using clarified butter for extra richness and a nutty flavor.
• Heavy Cream – Delivers a rich and indulgent consistency to the sauce; whole milk can be a lighter substitute if desired.
• Fresh Sage Leaves – Adds a fragrant, earthy depth to the sauce; dried sage can work in a pinch, though the flavor will differ.
• Parmesan Cheese – Offers umami notes and rounds out the sauce; feel free to substitute pecorino for a sharper taste.

Enjoy crafting your delicious Pumpkin & Gouda Stuffed Shells, a dish that’s sure to delight all who are searching for comforting autumn flavors!

Step‑by‑Step Instructions for Pumpkin & Gouda Stuffed Shells

Step 1: Cook the Pasta
Begin by bringing a large pot of salted water to a rolling boil over high heat. Add the jumbo pasta shells and cook them for about 9-11 minutes until they are al dente, meaning they should have a slight bite to them. Once cooked, carefully drain the shells in a colander and set them aside, allowing them to cool slightly as you prepare the filling.

Step 2: Prepare the Filling
In a spacious mixing bowl, combine 1 cup of pumpkin puree, 1 cup of gouda cheese, 1 cup of ricotta cheese, 1 teaspoon of garlic powder, and salt and pepper to taste. Blend everything together until it forms a smooth and creamy mixture. The flavors should meld beautifully, creating a rich filling for your Pumpkin & Gouda Stuffed Shells.

Step 3: Stuff the Shells
With your filling ready, take each cooled jumbo shell and carefully scoop about 2 tablespoons of the pumpkin and gouda mixture into it, ensuring it's well packed but not overflowing. Place the filled shells seam-side up in a greased 9x13-inch baking dish. Arrange them closely packed to prevent them from drying out during baking.

Step 4: Make the Alfredo Sauce
In a medium saucepan, melt 4 tablespoons of butter over medium heat until it turns golden brown and starts to smell nutty, about 3-5 minutes. Carefully whisk in 1 cup of heavy cream and the finely chopped fresh sage leaves. Allow the sauce to simmer for about 5 minutes or until it thickens slightly and coats the back of a spoon beautifully.

Step 5: Assemble
Pour half of the brown butter and sage Alfredo sauce evenly over the stuffed shells in the baking dish. Sprinkle a generous layer of grated parmesan cheese over the top, allowing it to meld with the sauce, and then cover the dish with aluminum foil to trap in moisture for baking.

Step 6: Bake
Preheat your oven to 350°F (175°C) and bake the covered dish for 25 minutes. After 25 minutes, remove the foil and continue baking for an additional 10 minutes or until the shells are bubbly, golden, and the cheese is melted, creating a tantalizing topping for your Pumpkin & Gouda Stuffed Shells.

Step 7: Serve
Once your shells have baked to perfection, take them out of the oven and let them cool for a few minutes. Drizzle the remaining brown butter and sage Alfredo sauce generously over the top before serving. This final touch will elevate your dish and bring forth all those comforting autumn flavors!

Pumpkin & Gouda Stuffed Shells Variations

Feel free to let your creativity shine in the kitchen with these delightful variations that enhance your Pumpkin & Gouda Stuffed Shells!

  • Spinach & Kale: Add cooked spinach or kale to the filling for a pop of color and nutrition. This addition not only brightens the dish but also adds a lovely earthy note.

  • Sausage Boost: Incorporate cooked sausage or pancetta for a heartier dish. The savory protein brings an irresistible flavor that complements the sweetness of the pumpkin wonderfully.

  • Nutmeg Twist: Sprinkle a pinch of nutmeg into the filling for a warm, aromatic kick. This subtle spice elevates the dish with a cozy, festive touch perfect for autumn.

  • Cheese Swap: Try using a different cheese like ricotta or mozzarella for a milder flavor in the filling. Each cheese choice can provide a uniquely comforting taste experience.

  • Cayenne Heat: For a spicy twist, add a dash of cayenne pepper to the Alfredo sauce. This kick of heat will awaken your taste buds and create a perfect balance with the creamy sauce.

  • Pecorino Parmesan: Swap out Parmesan for pecorino cheese for a more robust flavor. This sharp cheese lends a delightful tang that complements the dish beautifully.

  • Roasted Pumpkin Puree: Use freshly roasted pumpkin puree instead of canned for a richer, more complex flavor. Roasting brings out the natural sweetness, enhancing the dish's overall warmth.

  • Herb Infusion: Mix in fresh herbs like thyme or rosemary into the sauce for an aromatic experience. These herbs infuse each bite with additional depth and a delightful fragrance.

For a homey culinary experience, serve your stuffed shells with a side of mixed greens or crusty bread, just like with these scrumptious Pumpkin Cinnamon Roll Muffins. Each variation invites you to explore, making every meal uniquely yours!

Make Ahead Options

These Pumpkin & Gouda Stuffed Shells are perfect for busy home cooks looking to save time! You can prepare the filling and stuff the shells up to 24 hours in advance—simply refrigerate them in a covered dish. Additionally, you can assemble the entire dish and store it in the fridge, but make sure to cover it tightly to maintain quality. When you're ready to eat, just pop it in a preheated oven at 350°F (175°C) for 35-40 minutes, allowing the shells to warm through and the cheese to melt beautifully. This makes for effortless meal planning, ensuring your delicious autumn feast is just a bake away!

Expert Tips for Pumpkin & Gouda Stuffed Shells

Watch the Cooking Time: Ensure the pasta shells are cooked al dente; overcooking leads to mushy shells that risk breaking while stuffing.

Use Fresh Ingredients: Fresh sage and roasted pumpkin can elevate the dish with richer flavors. Don’t hesitate to try these for a gourmet twist.

Pay Attention to Butter: While making the brown butter, keep a close eye to avoid burning. Dark brown butter has a nutty flavor, but too far can taste bitter.

Check Sauce Consistency: Aim for a thick yet pourable Alfredo. If too thin, let it simmer longer; if it's too thick, a splash of milk or cream can bring it back.

Layering Matters: Pour the Alfredo sauce evenly over the stuffed shells, ensuring each bite has that delicious flavor.

These tips will help you master the art of making perfect Pumpkin & Gouda Stuffed Shells!

How to Store and Freeze Pumpkin & Gouda Stuffed Shells

Fridge: Store leftovers in an airtight container for up to 3 days. Reheat in the oven at 350°F, adding a splash of cream to keep them moist.

Freezer: For longer storage, freeze the stuffed shells before baking. Wrap them tightly in plastic wrap and foil, lasting up to 3 months.

Reheating: Thaw overnight in the fridge before baking. Reheat at 350°F until warmed through, ensuring the sauce is bubbling and creamy.

Make-Ahead Tips: Assemble the Pumpkin & Gouda Stuffed Shells in advance and refrigerate for up to 24 hours before baking, making meal prep a breeze!

What to Serve with Pumpkin & Gouda Stuffed Shells

Creating the perfect meal doesn't just stop at the main dish; it's about complementing flavors that elevate the entire dining experience.

  • Garlic Bread: A warm, buttery loaf will soak up the rich Alfredo sauce perfectly, providing a delightful crunch that contrasts beautifully with the creamy filling.
  • Arugula Salad: Light and peppery, a fresh arugula salad dressed with lemon vinaigrette adds brightness and a touch of sophistication to your comforting dish.
  • Roasted Brussels Sprouts: Their crispy edges and earthy flavor enhance the sweet and savory notes of the stuffed shells, creating a balanced plate that celebrates autumn.
  • Butternut Squash Soup: A silky soup with a hint of spice curates a cozy atmosphere and sets the stage for the main event with its inherent fall flavors.
  • Sangiovese Wine: A medium-bodied red, like Sangiovese, complements the richness of the gouda and the sweet notes of pumpkin, making each sip a perfect match to every bite.
  • Pumpkin Spice Cheesecake: For a sweet ending, this creamy dessert echoes your main flavors while providing a festive touch that celebrates the season.

These delightful pairings will ensure your meal is not only memorable but also filled with the warmth and comfort we crave during the fall season!

Pumpkin & Gouda Stuffed Shells Recipe FAQs

What type of pumpkin should I use?
Absolutely! You can use either canned pumpkin puree or freshly roasted pumpkin. Canned pumpkin is super convenient, but roasting your pumpkin enhances the flavor. Simply cut a small pumpkin in half, remove the seeds, and roast it at 400°F (200°C) for about 45 minutes until tender. Scoop out the flesh, and you’re good to go!

How do I store leftovers?
Very simply! Leftover Pumpkin & Gouda Stuffed Shells can be stored in an airtight container in the refrigerator for up to 3 days. When you're ready to enjoy them again, just reheat in the oven at 350°F (175°C) for about 20 minutes, adding a splash of cream if they seem a bit dry.

Can I freeze the stuffed shells?
Yes! You can freeze the stuffed shells before baking. Wrap each shell tightly in plastic wrap and then in aluminum foil to prevent freezer burn. This way, they can be stored for up to 3 months. When you’re ready to cook, simply thaw them overnight in the fridge, and then bake as directed from the assembled state.

What if my Alfredo sauce is too thick?
No worries at all! If you find your Alfredo sauce is too thick, just whisk in a little bit of milk or cream over low heat until you reach your desired consistency. Aim for a sauce that’s thick enough to coat the back of a spoon, as it should be luxurious but still pourable.

Can I add other ingredients for dietary considerations?
Definitely! While the Pumpkin & Gouda Stuffed Shells are vegetarian, you can enhance them by adding cooked spinach or sautéed mushrooms for added nutrition. If you're looking for a protein boost, cooked sausage or pancetta works wonderfully. Just chop and incorporate them into the filling for a hearty twist!

Is it safe for pets?
It's best to keep these stuffed shells away from your pets. The ingredients, especially garlic and certain cheeses, can be harmful to dogs and cats. Instead, treat them with pet-friendly recipes for their meals, ensuring everyone in the family stays safe and healthy!

Enjoy every bite of your cozy creation!

Pumpkin & Gouda Stuffed Shells

Pumpkin & Gouda Stuffed Shells: A Cozy Autumn Delight

Enjoy the comforting flavors of Pumpkin & Gouda Stuffed Shells, a creamy and cheesy dish perfect for autumn gatherings.
Print Recipe Pin Recipe
Prep Time 30 minutes mins
Cook Time 35 minutes mins
Total Time 1 hour hr 5 minutes mins
Servings: 6 servings
Course: Dinner
Cuisine: Autumn, Italian
Calories: 450
Ingredients Equipment Method Nutrition Notes

Ingredients
  

For the Pasta
  • 12 pieces Jumbo Pasta Shells Can substitute with manicotti or medium shells.
For the Filling
  • 1 cup Pumpkin Puree Canned or freshly roasted pumpkin.
  • 1 cup Gouda Cheese Can be swapped for ricotta or mozzarella.
  • 1 cup Ricotta Cheese Cottage cheese can be a lighter alternative.
  • 1 teaspoon Garlic Powder Switch to fresh garlic for a bolder taste.
  • Salt and Pepper To taste.
For the Alfredo Sauce
  • 4 tablespoons Butter Consider using clarified butter for extra richness.
  • 1 cup Heavy Cream Whole milk can be a lighter substitute.
  • 8 pieces Fresh Sage Leaves Dried sage can work in a pinch.
  • 1/2 cup Parmesan Cheese Feel free to substitute pecorino for a sharper taste.

Equipment

  • Large pot
  • Mixing Bowl
  • Baking Dish
  • Medium saucepan

Method
 

Step-by-Step Instructions
  1. Cook the pasta in salted boiling water for 9-11 minutes until al dente. Drain and set aside.
  2. In a mixing bowl, combine pumpkin puree, gouda cheese, ricotta cheese, garlic powder, and salt and pepper. Blend until smooth.
  3. Stuff each pasta shell with about 2 tablespoons of the filling. Place in a greased baking dish, seam-side up.
  4. Melt butter in a saucepan over medium heat until golden brown. Whisk in heavy cream and sage, simmer for 5 minutes.
  5. Pour half of the Alfredo sauce over the stuffed shells. Top with parmesan cheese and cover with aluminum foil.
  6. Bake at 350°F for 25 minutes, remove foil, and bake for an additional 10 minutes until bubbly and golden.
  7. Let cool, then drizzle remaining Alfredo sauce over the top before serving.

Nutrition

Serving: 1servingCalories: 450kcalCarbohydrates: 35gProtein: 20gFat: 25gSaturated Fat: 15gCholesterol: 90mgSodium: 600mgPotassium: 450mgFiber: 3gSugar: 5gVitamin A: 7000IUVitamin C: 5mgCalcium: 300mgIron: 2mg

Notes

For optimal results, ensure to watch the cooking time and use fresh ingredients where possible.

Tried this recipe?

Let us know how it was!

Cranberry Brie Sourdough Pull Apart Bread to Wow Guests

December 2, 2025 by Grace Snow Leave a Comment

As I pulled the rich aroma of freshly baked bread from the oven, my heart danced with anticipation. This Cranberry Brie Sourdough Pull Apart Bread isn't just another appetizer; it’s a celebration of flavors that fills your kitchen with warmth and makes your gatherings unforgettable. With its easy preparation, you’ll impress your guests without slaving away in the kitchen. Each gooey pull reveals warm brie mingling with the tangy sweetness of cranberry, all encased in a crusty loaf that beckons to be shared. Perfect for holiday parties or cozy nights in, this vegetarian delight is bound to become your new go-to recipe. What’s your favorite twist on a classic, and are you ready to give this one a try?

Why is this recipe a showstopper?

Irresistible aroma: The moment this bread starts baking, your kitchen fills with a heavenly scent that draws everyone in.

Flavor explosion: Each bite combines creamy brie and tart cranberry, creating a sweet and savory harmony that delights the palate.

Easily customizable: Want to mix things up? You can easily swap brie for goat cheese or add caramelized onions to elevate the flavors.

Crowd-pleaser: Perfect for holiday gatherings or casual get-togethers, this appetizer will impress your guests without the fuss.

Quick and simple: With just a few easy steps, you're on your way to a dish that looks and tastes gourmet. If you enjoy homemade delights, consider pairing it with a side of Cheesy Garlic Bread for an extra treat.

Versatile option: This recipe is not just for gatherings; serve it as a cozy snack while enjoying a glass of wine.

Cranberry Brie Sourdough Pull Apart Bread Ingredients

For the Bread
• Sourdough Bread – Provides structure and a tangy flavor; substitute with any round crusty bread, like French or Italian, if sourdough is not available.

For the Cheese Filling
• Brie Cheese – Adds richness and melts beautifully; can be swapped for goat cheese, gouda, or sharp cheddar for different flavor profiles.
• Cranberry Sauce – Offers a sweet-tart contrast to the brie; alternatives include raspberry or fig jam for unique twists.

For the Flavor Base
• Butter – Essential for richness and flavor; use salted or unsalted based on preference.
• Garlic Powder – Enhances aroma and flavor; fresh garlic can be used as a substitute if preferred.
• Salt – Balances flavors; adjust according to taste.
• Pepper – Adds mild heat; can increase or decrease based on preference.

For the Garnish
• Fresh Parsley – For garnish and a pop of color; omit if unavailable.

This sumptuous Cranberry Brie Sourdough Pull Apart Bread reflects the love for homemade food and makes gatherings even more special!

Step‑by‑Step Instructions for Cranberry Brie Sourdough Pull Apart Bread

Step 1: Preheat the Oven
Begin by preheating your oven to 350°F (175°C). This temperature will ensure that your Cranberry Brie Sourdough Pull Apart Bread bakes evenly, resulting in a golden brown crust and a gooey interior. While the oven warms up, gather your ingredients and get your baking tray ready for the loaf.

Step 2: Prepare the Sourdough Loaf
Place the sourdough loaf on a cutting board and, using a serrated knife, carefully make deep cuts in a grid pattern without slicing all the way through the bottom. This allows the flavors to seep into the bread while maintaining its structure. You should make about 1-inch wide cuts, creating enough space to stuff with brie and cranberry sauce.

Step 3: Mix the Flavor Base
In a small bowl, melt some butter and stir in garlic powder, salt, and pepper to taste. This rich mixture will enhance the flavors of your Cranberry Brie Sourdough Pull Apart Bread. Make sure it’s well combined, as this butter will be drizzled into the cuts of the bread for added moisture and flavor.

Step 4: Drizzle the Butter Mixture
Gently drizzle the butter mixture into the cuts of the loaf, ensuring each crack is filled for maximum flavor infusion. Use a spoon if needed to help it reach the deeper sections. The buttery garlic aroma will start to fill your kitchen, giving you a hint of the deliciousness to come.

Step 5: Stuff the Bread
Now it’s time to stuff your bread! Take small pieces of brie cheese and cranberry sauce and carefully tuck them into each cut of the loaf. The brie should melt beautifully while the cranberry adds a tangy sweetness, creating a delightful contrast. Add a sprinkle of chopped parsley on top for a pop of color and freshness.

Step 6: Bake the Bread
Wrap the entire stuffed loaf in aluminum foil and place it on a baking tray before sliding it into the preheated oven. Bake for 15 minutes, allowing the bread to heat through and the brie to start melting. After 15 minutes, unwrap the foil and bake for an additional 10 minutes to achieve a crispy top and perfectly gooey center.

Step 7: Let Cool and Serve
Once the bread is golden brown and melty, remove it from the oven and let it cool for a few moments. This will allow the cheese to set slightly. Serve your Cranberry Brie Sourdough Pull Apart Bread warm, perfect for pulling apart and savoring each cheesy, sweet bite surrounded by a crunchy crust.

Make Ahead Options

These Cranberry Brie Sourdough Pull Apart Bread are perfect for busy home cooks looking to save time! You can prepare the entire loaf up to 24 hours in advance, just assemble the bread and wrap it tightly in aluminum foil. This keeps it fresh and prevents the bread from drying out. When you're ready to bake, simply remove it from the fridge, unwrap it, and pop it in the preheated oven at 350°F (175°C) for the same baking times. The bread will come out just as delicious, with gooey brie and sweet cranberry waiting to delight your guests. This make-ahead method ensures you'll have a show-stopping appetizer ready with minimal effort!

Cranberry Brie Sourdough Pull Apart Bread Variations

Feel free to take this delectable bread to new heights with a few fun twists and fillings!

  • Goat Cheese: Swap brie for goat cheese to introduce a tangy flavor that pairs wonderfully with cranberry.
  • Caramelized Onions: Add caramelized onions for a sweet and savory depth that elevates the overall taste experience.
  • Nutty Crunch: Incorporate chopped walnuts or pecans into the stuffing for a delightful crunch that contrasts with the melty cheese.
  • Spicy Kick: Mix in crushed red pepper flakes with the butter mixture to add a hint of spice that will tingle your taste buds.
  • Fruit Medley: Use fig jam or raspberry preserves instead of cranberry for a sweet twist that brings in different notes of flavor.
  • Herbed Delight: Experiment with fresh herbs like rosemary or thyme for an aromatic punch that complements the richness of the brie.
  • Smoky Flavor: Add a touch of smoked gouda to the cheese filling for a deep, smoky flavor that transforms each bite.
  • Vegetarian Twist: For a vegetarian-friendly option, combine different seasonal vegetables such as spinach or artichokes with your cheese to make this bread even heartier.

As you're creating these variations, you might enjoy pairing this bread with a comforting side like Cornbread Breakfast Casserole for those cozy nights in, or serve warm alongside some Cheesy Garlic Bread at your next gathering. The possibilities are endless, and it’s all about making it your own!

Expert Tips for Cranberry Brie Sourdough Pull Apart Bread

Prepare the Bread: Allow the sourdough loaf to sit out for about 15 minutes before cutting. This makes it easier to cut without squishing the bread.

Use Fresh Ingredients: Opt for fresh brie and homemade cranberry sauce when possible. They enhance the flavor of your Cranberry Brie Sourdough Pull Apart Bread.

Avoid Overstuffing: While you may be tempted to cram in as much filling as possible, overstuffing can cause the bread to break apart. Aim for balanced stuffing.

Watch Cooking Times: Every oven is different, so keep an eye on your bread towards the end of baking. You want a golden crust, but not overly browned.

Experiment Freely: Don’t hesitate to mix up the cheeses or add ingredients like caramelized onions or nuts based on personal taste. This make it your own signature dish!

Serve Warm: For maximum gooeyness, serve your bread warm. It’s at its best when straight out of the oven, enticing everyone to dig in!

What to Serve with Cranberry Brie Sourdough Pull Apart Bread

Nothing elevates a cozy gathering like the delightful aroma and taste of warm bread paired with exquisite sides.

  • Creamy Mashed Potatoes: Their smooth texture complements the chewy bread, creating a comforting balance of flavors. A dollop of gravy adds an extra layer of indulgence!

  • Garlic Herb Roasted Vegetables: The caramelization adds a savory depth, while the spices and herbs keep things fresh. These vibrant veggies provide a colorful contrast to your bread.

  • Honey-Glazed Carrots: Their natural sweetness pairs beautifully with the tart cranberry and rich brie. Plus, their crunch adds a lovely contrasting texture.

  • Spinach Salad: Light and refreshing, a simple spinach salad topped with a zesty vinaigrette cleanses the palate between bites of the cheesy bread. Consider adding some nuts for crunch.

  • Savory Cheese Plate: A variety of cheeses alongside nuts and fruits will enhance the experience. Think gouda or aged cheddar to create rich, flavorful layers.

  • Sparkling Wine: An effervescent bubbly complements the rich, creamy texture of the melted brie perfectly. It's the ideal accompaniment for any festive occasion.

  • Apple Crisp: For a sweet finish, this warm dessert with a crumbly topping echoes the sweet-tart elements of the pull-apart bread, delivering a satisfying ending to your meal.

Each of these delightful pairings bolsters the sweet and savory notes of the Cranberry Brie Sourdough Pull Apart Bread, transforming it into the star of your table.

How to Store and Freeze Cranberry Brie Sourdough Pull Apart Bread

Room Temperature: Store uneaten bread at room temperature in a paper bag or wrapped in a clean kitchen towel for up to 1 day. This helps maintain its crusty texture.

Fridge: If you have leftovers, place them in an airtight container in the fridge for up to 2 days. This will keep the flavors intact while preventing spoilage.

Freezer: Wrap the bread tightly in plastic wrap and then in aluminum foil to freeze for up to 2 months. When ready to enjoy, thaw overnight in the fridge and reheat.

Reheating: To restore the gooey texture of your Cranberry Brie Sourdough Pull Apart Bread, reheat in a 350°F (175°C) oven for about 10-15 minutes. Enjoy the melty delights once again!

Cranberry Brie Sourdough Pull Apart Bread Recipe FAQs

How do I select the best sourdough bread for this recipe?
Absolutely! Look for a round sourdough loaf that feels firm to the touch and has a crisp crust. The bread should have a pleasant, tangy aroma and a dense structure—this ensures it holds up when you make those deep cuts. If you notice dark spots all over, choose another loaf as it may be past its prime.

How should I store leftovers?
Very! If you have any leftover Cranberry Brie Sourdough Pull Apart Bread, place it in an airtight container and store it in the fridge for up to 2 days. This preserves its flavors while preventing spoilage. To enjoy its gooey goodness again, just reheat it in a 350°F (175°C) oven for about 10-15 minutes, and it'll taste fresh out of the oven!

Can I freeze the bread?
Absolutely! To freeze, wrap the fully baked bread tightly in plastic wrap, then wrap it again in aluminum foil. This protects it from freezer burn and keeps it fresh for up to 2 months. When you're ready to enjoy it, simply thaw it overnight in the fridge and reheat it in the oven for that delightful melty texture.

What should I do if my bread starts to break apart while stuffing?
Oh no! If your bread begins to crack while you’re stuffing it, just be gentle. Make smaller cuts or simply stuff fewer toppings into each slice to keep it intact. If you’re worried about it being too full, remember: it's about balance! You want enough filling to enjoy the flavors without compromising the bread's structure.

Is this recipe safe for pets or those with allergies?
Very! If you have pets, I recommend keeping this bread away from them, especially because of the dairy and potential garlic flavor, which can be harmful to some animals. For allergy considerations, it’s best to double-check with anyone who might have a sensitivity; you can always swap out ingredients to make it nut-free or dairy-free as necessary.

Can I prepare this dish ahead of time?
Absolutely! You can make the Cranberry Brie Sourdough Pull Apart Bread a few hours ahead of time. Just assemble it, wrap it tightly in foil, and refrigerate until you’re ready to bake. When it’s time to serve, pop it into the preheated oven for a delightful, freshly baked appetizer that will impress everyone.

Cranberry Brie Sourdough Pull Apart Bread

Cranberry Brie Sourdough Pull Apart Bread to Wow Guests

This Cranberry Brie Sourdough Pull Apart Bread is a delightful appetizer combining gooey brie and tangy cranberry, perfect for any gathering.
Print Recipe Pin Recipe
Prep Time 20 minutes mins
Cook Time 25 minutes mins
Total Time 45 minutes mins
Servings: 8 pieces
Course: Appetizers
Cuisine: American
Calories: 200
Ingredients Equipment Method Nutrition Notes

Ingredients
  

For the Bread
  • 1 loaf Sourdough Bread Substitute with any round crusty bread if sourdough is not available.
For the Cheese Filling
  • 8 ounces Brie Cheese Can be swapped for goat cheese or gouda.
  • 1 cup Cranberry Sauce Alternatives include raspberry or fig jam.
For the Flavor Base
  • 4 tablespoons Butter Use salted or unsalted based on preference.
  • 1 teaspoon Garlic Powder Fresh garlic can be used as a substitute.
  • 1 teaspoon Salt Adjust according to taste.
  • 1 teaspoon Pepper Increase or decrease based on preference.
For the Garnish
  • 2 tablespoons Fresh Parsley Omit if unavailable.

Equipment

  • Oven
  • Baking tray
  • Cutting Board
  • Serrated knife
  • small bowl
  • Aluminum Foil

Method
 

Step‑by‑Step Instructions
  1. Preheat your oven to 350°F (175°C).
  2. Place the sourdough loaf on a cutting board and make deep cuts in a grid pattern without slicing all the way through the bottom.
  3. In a small bowl, melt some butter and stir in garlic powder, salt, and pepper.
  4. Drizzle the butter mixture into the cuts of the loaf.
  5. Stuff the bread with small pieces of brie cheese and cranberry sauce.
  6. Wrap the stuffed loaf in aluminum foil and place it on a baking tray. Bake for 15 minutes, then unwrap and bake for an additional 10 minutes.
  7. Let it cool briefly, then serve warm.

Nutrition

Serving: 1pieceCalories: 200kcalCarbohydrates: 24gProtein: 6gFat: 10gSaturated Fat: 5gPolyunsaturated Fat: 0.5gMonounsaturated Fat: 3gCholesterol: 25mgSodium: 350mgPotassium: 150mgFiber: 1gSugar: 4gVitamin A: 500IUVitamin C: 2mgCalcium: 100mgIron: 0.5mg

Notes

This recipe is perfect for any gathering and can be customized with different cheeses or additional ingredients like caramelized onions.

Tried this recipe?

Let us know how it was!

Irresistible British Meat Pies: Cozy Comfort in Every Bite

December 2, 2025 by Grace Snow Leave a Comment

The aroma of freshly baked pastry fills the air, mingling with the savory scent of seasoned meat—it’s a symphony of comforting scents that draws you into the kitchen. Today, I'm excited to share my recipe for British Meat Pies, a classic dish that’s perfect for cozy nights or festive gatherings. These delightful pies offer not just mouthwatering flavors but also versatility, allowing you to play with fillings like ground beef, lamb, or chicken. And if you’re short on time, no worries! They come together easily to satisfy your homemade cravings. Whether you serve them with a side of tangy ketchup or rich gravy, they’re sure to please every palate. Curious to learn how to make these savory gems? Let’s dive into the recipe!

Why Are British Meat Pies So Irresistible?

Heartwarming Comfort: These British meat pies offer a delightful taste of nostalgia, transporting you back to cozy family dinners and festive gatherings.

Flaky Pastry: The golden crust is flaky and perfect, giving way to a savory filling that satisfies every time.

Endless Variations: You can easily switch up the fillings, using beef, lamb, or chicken. Don't hesitate to add veggies or alternate herbs for unique flavors!

Effortless Preparation: Even if you're short on time, these pies come together quickly, making them ideal for busy weeknights or spontaneous gatherings.

Crowd Pleaser: No one can resist a freshly baked pie, making them a surefire hit for parties or family meals. Serve with dipping sauces like ketchup or gravy for an added flair!

British Meat Pies Ingredients

For the Pastry
• Shortcrust Pastry – Creates a flaky outer crust; feel free to use store-bought for convenience.

For the Filling
• Lean Ground Beef – The primary protein choice, offering rich flavor; swap with ground chicken or lamb for a twist.
• Onion – Adds sweetness and depth; shallots can be substituted for a more delicate bite.
• Garlic – Enhances the savory filling; fresh minced garlic is best, but garlic powder works in a pinch.
• Beef Broth – Keeps the filling moist and flavorful; vegetable broth works well for a lighter version.
• Dried Thyme – Imparts an earthy aroma; fresh thyme can elevate the taste further.

For Egg Wash
• Egg – Provides a beautiful golden sheen on the crust; milk can substitute if you prefer a non-egg option.

With these ingredients, you'll create delicious British meat pies that offer comforting vibes and satisfy your homemade food cravings!

Step‑by‑Step Instructions for British Meat Pies

Step 1: Prepare the Pastry
Begin by rolling out the shortcrust pastry on a lightly floured surface until it’s about 1/4 inch thick. Use a round cutter to cut circles that will fit into your greased pie tins, ensuring you have enough pastry for the base and a lid. Aim for even thickness to promote even baking.

Step 2: Cook the Filling
In a skillet over medium heat, sauté chopped onions and minced garlic in a splash of oil until tender and fragrant, taking about 3-4 minutes. Next, add the lean ground beef, cooking until it browns completely, roughly 5-7 minutes. Pour in the beef broth and sprinkle the dried thyme, allowing the mixture to simmer until it thickens for about 10 minutes, stirring occasionally.

Step 3: Assemble the Pies
Take the circles of pastry and line each pie tin, gently pressing the dough into the edges. Spoon in the savory meat mixture, filling generously but leaving space at the top. Cover each pie with another pastry circle, then crimp the edges with a fork to seal them tightly, ensuring no filling escapes during baking.

Step 4: Egg Wash
Prepare an egg wash by beating an egg in a small bowl. Brush the tops of the assembled British meat pies with this wash, giving them a beautiful golden sheen when baked. This step is crucial for achieving that inviting color, so make sure to cover every edge.

Step 5: Bake
Preheat your oven to 400°F (200°C). Place the prepared meat pies on a parchment-lined baking sheet, ensuring they are spaced evenly apart. Bake the pies for 25-30 minutes, or until the crust is golden brown and crisp, keeping an eye on them in the last few minutes to prevent over-baking.

Step 6: Serve
Once baked, remove the pies from the oven and let them cool for a few minutes before serving. This rest allows the filling to set slightly, making them easier to handle. Pair your warm British meat pies with a side of ketchup or rich gravy for dipping, enhancing their comforting flavors.

Expert Tips for British Meat Pies

• Perfect Pastry Thickness: Ensure the pastry isn’t rolled too thin; a robust crust holds the filling better and prevents breakage.

• Cooling Filling: Let the meat mixture cool slightly before filling the pastry to avoid a soggy crust—nobody likes a floppy pie!

• Watch the Bake: Keep an eye on the baking time; ovens vary. Look for a deep golden color to ensure your British meat pies are perfectly done.

• Flavorful Herbs: Feel free to experiment with fresh herbs like rosemary or oregano for a twist on the traditional thyme—variety is key!

• Freezing for Later: These pies freeze wonderfully! Assemble them up to the baking point, then freeze for ready-to-bake meals anytime.

• Dipping Sauces Galore: Serve your pies with a variety of dips like tangy ketchup, rich gravy, or even a homemade mustard sauce—add an extra layer of flavor!

How to Store and Freeze British Meat Pies

Room Temperature: Enjoy your British meat pies fresh out of the oven for the best flavor, but they can be kept at room temperature for up to 2 hours.

Fridge: Store leftover pies in an airtight container in the refrigerator for up to 3 days. Reheat gently to maintain crispy pastry.

Freezer: For longer storage, freeze assembled but unbaked pies. Wrap them tightly in plastic wrap and foil; they can last in the freezer for up to 3 months.

Reheating: When ready to enjoy, bake from frozen at 400°F (200°C) for about 30-35 minutes, or until heated through and golden, ensuring they stay delightfully flaky!

Make Ahead Options

These British Meat Pies are a fantastic option for meal prep enthusiasts! You can make the flaky shortcrust pastry and assemble the pies up to 24 hours in advance; simply refrigerate them until you’re ready to bake. To maintain their quality, cover the assembled pies with plastic wrap to prevent drying out. The meat filling can also be prepared up to 3 days ahead—just let it cool completely before refrigerating. When you're ready to serve, preheat your oven, brush the tops with an egg wash, and bake straight from the fridge for a delightful homemade dinner in no time. Enjoy the convenience of make-ahead British Meat Pies that taste just as delicious as if they were freshly baked!

What to Serve with British Meat Pies

Nothing completes the heartwarming essence of homemade comfort food like delightful side dishes that enhance every savory bite.

  • Creamy Mashed Potatoes: These add a fluffy texture that contrasts beautifully with the flaky crust of the pies, soaking up any gravy for a flavorful experience.

  • Fresh Garden Salad: A light, zesty salad with crisp greens and a tangy vinaigrette brightens the meal, balancing the richness of the meat pies perfectly.

  • Roasted Vegetables: Seasoned root veggies deliver sweetness and earthy flavor, providing a hearty side that complements the savory filling nicely.

  • Hearty Gravy: Rich, homemade gravy elevates the experience, drenching your pie in savory goodness that mirrors traditional British comfort.

  • Apple Sauce: The sweetness of apple sauce offers a refreshing counterpoint to the savory richness of the meat pies, creating a delightful taste contrast.

  • Coleslaw: A crunchy, tangy coleslaw can provide a refreshing crunch, making it a delightful pairing that cuts through the richness of the pies.

  • Craft Beer or Cider: A cold pint of craft beer or a crisp apple cider pairs wonderfully, enhancing the flavors while providing a refreshing sip between bites.

  • Chocolate Biscuit Cake: For dessert, a slice of rich chocolate biscuit cake wraps up the meal perfectly, adding a sweet touch that echoes the warmth of your dinner table.

British Meat Pies: Delicious Variations Await

Get ready to elevate your British meat pies with scrumptious twists that cater to your taste and cravings!

  • Ground Chicken: Swap out beef for ground chicken, creating a lighter option that’s just as satisfying. The mild flavor pairs beautifully with the spices.

  • Lamb Substitute: For a richer flavor, use ground lamb instead of beef. Its distinct taste adds a delightful Mediterranean flair to your pies.

  • Vegetable Boost: Mix in finely chopped carrots and peas for added nutrition and a pop of color. They not only enhance the flavor, but also provide extra texture.

  • Herb Infusion: Try using fresh rosemary or oregano in place of dried thyme. Their aromatic profiles will bring a whole new dimension to your filling.

  • Spicy Kick: Add diced jalapeños or a pinch of red pepper flakes to introduce a gentle heat to the meat filling. This twist is perfect for those who enjoy a bit of spiciness!

  • Cheesy Surprise: Incorporate a handful of shredded cheese—like cheddar or mozzarella—into the filling for a gooey, melty indulgence. It creates a heavenly contrast with the flaky crust.

  • Gluten-Free Option: Use a gluten-free pastry mix to make these pies compatible with a gluten-free diet. You can still enjoy the same delightful flavors without any adjustments to the filling.

Feel free to mix and match these variations or create your own to suit your family’s preferences. And hey, if you're looking for ideas on sides, why not check out how to make a tangy dipping sauce or explore some other comforting homemade delights? Let your culinary imagination run wild!

British Meat Pies Recipe FAQs

How do I select the right ingredients for my British meat pies?
Absolutely! For the best flavor, choose lean ground beef that is fresh and well-marbled. Fresh vegetables should be bright and crisp—onions should be firm without dark spots, and garlic should be plump and not sprouting. Don't forget to check your herbs; fresh thyme can elevate the taste significantly compared to dried.

How long can I store leftover British meat pies?
Very! You can store your leftover British meat pies in an airtight container in the refrigerator for up to 3 days. Make sure to let them cool completely before storing to avoid excess moisture. This keeps the pastry crispy and the filling flavorful!

Can I freeze British meat pies, and how do I do it?
Absolutely! To freeze, assemble your pies but do not bake them. Wrap each pie tightly in plastic wrap and then in foil, ensuring no air is trapped inside. They can be frozen for up to 3 months. When you're ready to enjoy, bake from frozen at 400°F (200°C) for 30-35 minutes, or until heated through and golden. This way, you’ll have delicious homemade comfort food ready anytime!

What if my pastry breaks or doesn't hold the filling well?
No worries! If your pastry breaks, it might be too thin or not chilled enough. To fix it, simply patch it up with extra dough and make sure to seal it well. For better handling, chill your rolled-out pastry for about 15 minutes before cutting, and be mindful not to overwork the dough to keep it flaky.

Can my pets safely eat British meat pies?
Very! While the filling can be tempting for pets, it's best to avoid giving them any pie due to ingredients like garlic and onion that are harmful to dogs. If you want to share, prepare a special pet-friendly version by using plain, cooked meat without spices, which will be just as heartwarming for your furry friends without the risk!

How can I ensure my pies have that perfect golden finish?
To achieve that irresistible golden crust, apply a generous egg wash before baking. Whisk an egg and brush it evenly over the pastry tops. If you're avoiding eggs, using milk or a dairy-free alternative works well too. This step is crucial for giving your pies that appetizing, shiny surface that’s so inviting!

British Meat Pies

Irresistible British Meat Pies: Cozy Comfort in Every Bite

Discover how to make British Meat Pies, a delightful and comforting dish perfect for any occasion.
Print Recipe Pin Recipe
Prep Time 30 minutes mins
Cook Time 30 minutes mins
Cooling Time 5 minutes mins
Total Time 1 hour hr 5 minutes mins
Servings: 4 pies
Course: Dinner
Cuisine: British
Calories: 350
Ingredients Equipment Method Nutrition Notes

Ingredients
  

For the Pastry
  • 1 batch Shortcrust Pastry Feel free to use store-bought for convenience.
For the Filling
  • 1 lb Lean Ground Beef Swap with ground chicken or lamb for a twist.
  • 1 medium Onion Shallots can be substituted for a more delicate bite.
  • 2 cloves Garlic Fresh minced garlic is best.
  • 1 cup Beef Broth Vegetable broth works well for a lighter version.
  • 1 tsp Dried Thyme Fresh thyme can elevate the taste further.
For Egg Wash
  • 1 large Egg Milk can substitute if you prefer a non-egg option.

Equipment

  • Pie tins
  • Rolling Pin
  • Skillet
  • Baking Sheet
  • Mixing Bowl

Method
 

Step-by-Step Instructions for British Meat Pies
  1. Prepare the pastry by rolling out the shortcrust pastry on a lightly floured surface until it’s about 1/4 inch thick.
    British Meat Pies
  2. In a skillet over medium heat, sauté chopped onions and minced garlic in a splash of oil until tender and fragrant, taking about 3-4 minutes.
    British Meat Pies
  3. Add the lean ground beef, cooking until it browns completely, roughly 5-7 minutes. Pour in the beef broth and sprinkle the dried thyme, allowing the mixture to simmer until it thickens for about 10 minutes.
    British Meat Pies
  4. Take the circles of pastry and line each pie tin, gently pressing the dough into the edges. Spoon in the savory meat mixture, filling generously but leaving space at the top.
    British Meat Pies
  5. Cover each pie with another pastry circle, then crimp the edges with a fork to seal them tightly, ensuring no filling escapes during baking.
    British Meat Pies
  6. Prepare an egg wash by beating an egg in a small bowl. Brush the tops of the assembled British meat pies with this wash.
    British Meat Pies
  7. Preheat your oven to 400°F (200°C). Place the prepared meat pies on a parchment-lined baking sheet, ensuring they are spaced evenly apart. Bake for 25-30 minutes.
    British Meat Pies
  8. Once baked, remove the pies from the oven and let them cool for a few minutes before serving.
    British Meat Pies

Nutrition

Serving: 1pieCalories: 350kcalCarbohydrates: 40gProtein: 20gFat: 15gSaturated Fat: 5gPolyunsaturated Fat: 1gMonounsaturated Fat: 3gCholesterol: 65mgSodium: 600mgPotassium: 400mgFiber: 2gSugar: 2gVitamin A: 350IUVitamin C: 5mgCalcium: 30mgIron: 3mg

Notes

These pies freeze wonderfully! Assemble them up to the baking point, then freeze for ready-to-bake meals anytime.

Tried this recipe?

Let us know how it was!

Creamy Winter Vegetable Casserole for Cozy Nights In

December 2, 2025 by Grace Snow Leave a Comment

As I rummaged through my fridge, a medley of vibrant winter vegetables caught my eye, begging to be transformed into something heartwarming. This Creamy Winter Vegetable Casserole is my cozy answer to chilly evenings, seamlessly merging the season’s best veggies into a velvety mushroom cream that everyone will love. It’s not just a feast for the eyes but also a quick and comforting option for those busy weeknights, taking only 45 minutes to prepare. Plus, it’s versatile enough to accommodate gluten-free and vegan preferences, making it a perfect dish for family gatherings or a quiet night in. Curious how to whip up this simple yet satisfying casserole? Let’s dive into the details!

Why Is This Casserole a Must-Try?

Comforting and Hearty: Picture a cozy dish that brings warmth to your dining table with every bite!

Vibrant Ingredients: Packed with seasonal winter vegetables like carrots, parsnips, and Brussels sprouts, this casserole bursts with color and flavor.

Quick Preparation: Just 45 minutes from start to finish, this recipe is perfect for busy weeknights or unexpected guests.

Customizable Delight: Whether you’re gluten-free or vegan, you can easily adjust the ingredients to suit your dietary needs—just like in my Sweet Potato Casserole.

Crowd-Pleasing Appeal: Serve it at family gatherings or cozy dinners, and watch it disappear—everyone will be coming back for seconds!

Creamy Winter Vegetable Casserole Ingredients

• This dish harmonizes seasonal flavors with a comforting creamy texture.

For the Vegetables

  • Mixed Winter Vegetables – The heart of this casserole includes carrots, parsnips, cauliflower, broccoli, and Brussels sprouts for a colorful base.
  • Garlic Powder – Adds depth of flavor that complements the creaminess.
  • Salt and Freshly Ground Black Pepper – Essential for enhancing overall taste; adjust according to your preferences.

For the Creamy Mix

  • Low-Fat Cream of Mushroom Soup – Provides delicious creaminess and flavor; substitute with cream of celery for a different twist.
  • Milk – Elevates the creaminess—it can be replaced with whole or unsweetened plant-based milk for a dairy-free option.
  • Dried Thyme – Imparts a fragrant herbal aroma that brightens the dish.

For the Topping

  • Breadcrumbs – Crunchy topping that adds texture; opt for gluten-free breadcrumbs if required.
  • Melted Butter – Binds the topping while enhancing flavor.
  • Shredded Cheese – Cheddar or Gruyère adds richness and a delightful melt; use non-dairy cheese for a vegan option.

This Creamy Winter Vegetable Casserole brings not just comfort, but a delightful medley of flavors to your table!

Step‑by‑Step Instructions for Creamy Winter Vegetable Casserole

Step 1: Prepare Oven and Dish
Preheat your oven to 375°F (190°C) to ensure it's nice and hot for baking. As it warms up, lightly grease a medium baking dish with butter or oil to prevent sticking, creating a welcoming space for your creamy winter vegetable casserole.

Step 2: Prep Vegetables
While the oven heats, steam or blanch your mixed winter vegetables—carrots, parsnips, cauliflower, broccoli, and Brussels sprouts—for about 3-4 minutes. You want them to be just tender but still vibrant. Drain them well to remove excess moisture, which will help keep your casserole from becoming soggy.

Step 3: Combine Filling Ingredients
In a large mixing bowl, combine the prepared vegetables with the low-fat cream of mushroom soup, milk, shredded cheese, dried thyme, garlic powder, salt, and freshly ground black pepper. Stir well until everything is nicely blended and coated, creating a rich, creamy mixture that promises comfort with every bite.

Step 4: Fill Baking Dish
Transfer your flavorful vegetable mixture into the greased baking dish, ensuring it’s spread evenly. This will allow for even cooking, so the creamy winter vegetable casserole bakes beautifully and every mouthful is filled with that delicious, savory goodness.

Step 5: Add Topping
In a separate bowl, combine the breadcrumbs with melted butter, stirring well to ensure they’re thoroughly coated. Sprinkle this crunchy topping evenly over the casserole, adding a delightful texture that will contrast beautifully with the creaminess underneath as it bakes.

Step 6: Bake
Place the baking dish in the preheated oven and bake uncovered for 25-30 minutes. You're looking for the top to be golden brown and crispy, while the filling should be bubbly and inviting. This will create a stunning presentation for your creamy winter vegetable casserole.

Step 7: Rest and Serve
Once baked to perfection, remove the casserole from the oven and let it rest for about 5 minutes. This resting period allows the flavors to meld and makes it easier to serve, ensuring that each slice holds together beautifully as you dish up this comforting winter delight.

Make Ahead Options

These Creamy Winter Vegetable Casseroles are perfect for meal prep enthusiasts! You can chop and steam the mixed winter vegetables up to 24 hours in advance, storing them in an airtight container in the refrigerator to maintain their freshness. Additionally, you can mix the creamy filling ingredients (soup, milk, cheese, and seasonings) a day ahead and keep it refrigerated until you’re ready to assemble. When it’s time to enjoy, simply layer the vegetables and creamy mixture in the baking dish, top with breadcrumbs, and bake as directed. This way, you’ll have a comforting dish ready with minimal effort on busy weeknights!

Creamy Winter Vegetable Casserole Variations

Feel free to make this casserole your own, enhancing it with personal touches that will tickle your taste buds!

  • Gluten-Free: Substitute regular breadcrumbs with gluten-free breadcrumbs to enjoy the same texture without the gluten.

  • Dairy-Free: Use unsweetened almond milk and a non-dairy cream of mushroom soup for a vegan-friendly alternative. The flavors remain rich and satisfying!

  • Protein Boost: Stir in a cup of cooked quinoa or chickpeas for an extra protein punch. This not only adds heartiness but also transforms the dish into a more fulfilling meal.

  • Flavor Twist: Experiment with spices like smoked paprika or curry powder to bring a delightful zing to your casserole. Just a dash can elevate the whole dish!

  • Veggie Swap: Try different winter vegetables such as sweet potatoes or turnips. They offer unique textures and flavors, making each casserole experience memorable.

  • Herb Variations: Fresh herbs, like rosemary or parsley, can be added for a bright, fragrant touch. Toss them in with the vegetables before mixing for added depth.

  • Nutty Crust: Mix in some chopped nuts, like pecans or almonds, with the breadcrumbs. This adds a surprising crunch and an extra layer of flavor to your comforting casserole.

Feel inspired by your creations! Ultimately, this casserole is just the beginning—check out my other beloved dishes like Cornbread Breakfast Casserole or Spicy Miso Casserole for new ideas to bring joy to your kitchen. Enjoy the delicious journey!

How to Store and Freeze Creamy Winter Vegetable Casserole

Fridge: Store any leftovers in an airtight container for up to 4 days. Allow the casserole to cool completely before sealing to maintain its creamy texture.

Freezer: For longer storage, prepare the casserole unbaked, wrap it tightly in plastic wrap and foil, and freeze for up to 3 months. This way, you can enjoy this comforting dish anytime you want.

Reheating: To reheat, thaw in the refrigerator overnight if frozen. Bake at 350°F (175°C) for 20-30 minutes or until heated through, allowing the top to regain its crunch.

Make-Ahead Tips: You can assemble the casserole ahead of time and refrigerate it overnight before baking, making it a perfect option for busy weeknights or family gatherings.

What to Serve with Creamy Winter Vegetable Casserole

As you prepare to savor this delightful casserole, let’s create a feast that complements its rich, hearty flavors and comforting warmth.

  • Roasted Chicken: The tender juiciness of roasted chicken balances beautifully with the creamy richness of the casserole, making every bite a delightful experience.
  • Apple and Walnut Salad: A refreshing, crunchy salad with sweet apples and crunchy walnuts brightens the meal while adding a seasonal touch.
  • Herb-Infused Quinoa: Fluffy quinoa infused with fresh herbs not only enhances the meal's texture but also adds a nutritious boost beside the creamy casserole.
  • Garlic Breadsticks: Soft, buttery garlic breadsticks provide a satisfying contrast to the casserole's velvety texture, perfect for dipping into the creamy sauce.
  • Steamed Green Beans: Crisp-tender green beans add a fresh pop of color and flavor that cuts through the richness, creating a well-rounded plate.
  • Savory Pumpkin Soup: A warm bowl of pumpkin soup brings a cozy autumn vibe alongside the casserole, enhancing the comfort-food experience.
  • Peppered Cornbread: The slight sweetness and crumbly texture of peppered cornbread complements the creamy casserole while providing a hearty addition to your meal.
  • Crisp White Wine: A chilled glass of Sauvignon Blanc or Chardonnay offers a refreshing balance to the casserole’s richness and enhances the overall flavors.
  • Chocolate Chip Cookies: For dessert, serve classic chocolate chip cookies to finish off your comforting meal on a sweet note, evoking feelings of nostalgia and love.

Expert Tips for Creamy Winter Vegetable Casserole

  • Prep Vegetables Well: Ensure you steam or blanch the mixed winter vegetables until just tender. Overcooking can lead to a mushy casserole.

  • Moisture Control: Drain vegetables thoroughly after cooking to avoid excess moisture. A soggy casserole can ruin your comforting dish!

  • Cheese Substitutions: If using non-dairy cheese for a vegan option, choose one that melts well to maintain creamy texture in your creamy winter vegetable casserole.

  • Breadcrumb Options: For a gluten-free version, always check that your breadcrumbs are certified gluten-free. This ensures everyone can enjoy this delicious meal!

  • Serving Tips: Allow resting time after baking. It helps flavors meld and allows for cleaner slices, making for a more visually appealing presentation.

Creamy Winter Vegetable Casserole Recipe FAQs

How do I select ripe winter vegetables for the casserole?
Absolutely! Look for vibrant colors and firm textures when selecting winter vegetables like carrots and Brussels sprouts. Avoid any with dark spots or soft spots. For a mix of flavors and textures, choose a variety of sturdy vegetables like cauliflower and parsnips that are in season.

How do I store leftover Creamy Winter Vegetable Casserole?
You'll want to store any leftovers in an airtight container in the fridge. Make sure to let the casserole cool completely before sealing it. It will stay fresh for up to 4 days, allowing you to enjoy the flavors for a few days after your delicious meal.

Can I freeze the Creamy Winter Vegetable Casserole?
Yes, you can! To freeze, prepare the casserole unbaked and wrap it tightly in plastic wrap followed by foil. This method helps maintain the quality for up to 3 months. When you’re ready to enjoy it, simply thaw it overnight in the refrigerator and bake as instructed, adding extra time if needed.

What should I do if my casserole is too watery?
No worries! If your casserole turns out watery, it’s often because the vegetables released too much moisture. To fix this, drain the veggies well after steaming. Alternatively, you can also mix in a tablespoon or two of cornstarch with the filling ingredients for a thicker consistency.

Is this casserole safe for those with dairy allergies?
Certainly! To accommodate dairy allergies, simply substitute the low-fat cream of mushroom soup with a dairy-free alternative and use non-dairy milk and cheese. There are fantastic plant-based options available that melt beautifully, ensuring you don’t miss out on the creamy goodness of this winter casserole.

Creamy Winter Vegetable Casserole

Creamy Winter Vegetable Casserole for Cozy Nights In

This Creamy Winter Vegetable Casserole blends vibrant vegetables in a velvety mushroom cream, perfect for chilly evenings.
Print Recipe Pin Recipe
Prep Time 15 minutes mins
Cook Time 30 minutes mins
Resting Time 5 minutes mins
Total Time 45 minutes mins
Servings: 6 servings
Course: Dinner
Cuisine: American
Calories: 350
Ingredients Equipment Method Nutrition Notes

Ingredients
  

For the Vegetables
  • 2 cups Mixed Winter Vegetables (carrots, parsnips, cauliflower, broccoli, Brussels sprouts) Steamed or blanched
  • 1 teaspoon Garlic Powder
  • 1 teaspoon Salt Adjust to taste
  • 1 teaspoon Freshly Ground Black Pepper Adjust to taste
For the Creamy Mix
  • 1 can Low-Fat Cream of Mushroom Soup Can substitute with cream of celery
  • 1 cup Milk Can substitute with plant-based milk for dairy-free option
  • 1 teaspoon Dried Thyme
For the Topping
  • 1 cup Breadcrumbs Use gluten-free if required
  • 2 tablespoons Melted Butter
  • 1 cup Shredded Cheese (Cheddar or Gruyère) Can use non-dairy cheese for vegan option

Equipment

  • medium baking dish
  • large mixing bowl
  • Steamer or pot for blanching

Method
 

Preparation Steps
  1. Preheat your oven to 375°F (190°C) and grease a medium baking dish with butter or oil.
  2. Steam or blanch the mixed winter vegetables for about 3-4 minutes until just tender.
  3. In a large bowl, combine the prepped vegetables with cream of mushroom soup, milk, shredded cheese, thyme, garlic powder, salt, and pepper.
  4. Transfer the vegetable mixture into the greased baking dish, spreading it evenly.
  5. In a separate bowl, mix breadcrumbs with melted butter and sprinkle over the casserole.
  6. Bake in the preheated oven for 25-30 minutes until the topping is golden brown and filling is bubbly.
  7. Let the casserole rest for about 5 minutes before serving.

Nutrition

Serving: 1sliceCalories: 350kcalCarbohydrates: 45gProtein: 10gFat: 15gSaturated Fat: 7gPolyunsaturated Fat: 1gMonounsaturated Fat: 2gCholesterol: 30mgSodium: 800mgPotassium: 600mgFiber: 5gSugar: 4gVitamin A: 750IUVitamin C: 30mgCalcium: 200mgIron: 2mg

Notes

For best results, drain vegetables well to prevent sogginess; allow resting before serving for clean slices.

Tried this recipe?

Let us know how it was!

Candied Smoked Salmon Bites – A Sweet & Savory Delight

December 2, 2025 by Grace Snow Leave a Comment

As I stood by the smoker, a sweet, smoky aroma enveloped me—taking me back to summer cookouts filled with laughter and delicious bites. One of my absolute favorites? Candied Smoked Salmon Bites. With their rich, caramelized glaze of maple and honey, these little treasures bring a delightful twist to any gathering. What I love most about this recipe is that it’s not only gluten-free and packed with protein, but it’s also incredibly simple to whip up—perfect for both seasoned chefs and kitchen novices alike. Whether you serve them as a charming appetizer or a tasty topping on your favorite salad, these salmon bites are sure to impress. Curious about how to make them at home? Let’s dive in!

Why Are Candied Smoked Salmon Bites Irresistible?

Irresistible Flavor: Each bite bursts with sweet, smoky goodness that will transport your taste buds to a sunny summer gathering.
Easy Preparation: Don't worry if you’re not a master chef! This recipe is simple to follow, making it perfect for home cooks of all skill levels.
Versatile Serving Options: Whether enjoyed as a standalone appetizer or a unique topping on salads, they elevate any dish with flair.
Protein-Packed Delight: With their high-protein content, these bites are not just tasty; they're a wholesome choice for any meal.
Crowd-Pleaser: Bring them to your next get-together, and watch how they disappear! They’re a surefire hit, reminiscent of classic comfort food with a gourmet twist. Enjoy the flavors in these Candied Smoked Salmon Bites and impress your guests!

Candied Smoked Salmon Bites Ingredients

For the Salmon

  • Salmon (4-5 lbs) – This is the star ingredient providing rich flavor and texture; using a whole side yields the best results!
  • Kosher Salt (¼ cup) – Essential for curing the salmon, it intensifies the flavor and helps with preservation.

For the Sweet Glaze

  • Brown Sugar (1 cup) – This adds the necessary sweetness and helps create that irresistible caramelized exterior.
  • Maple Syrup (¾ cup) – Infuse your bites with a distinct maple flavor; always opt for 100% pure for the best taste.
  • Honey (¼ cup) – Provides extra sweetness and aids in the caramelization process during smoking.

Additional Notes

  • Keep these Candied Smoked Salmon Bites gluten-free by ensuring all ingredients used are certified gluten-free.

Step‑by‑Step Instructions for Candied Smoked Salmon Bites

Step 1: Prepare Salmon
Begin by slicing your fresh salmon into 1-inch cubes, yielding about 35 pieces from a whole side. Ensure each piece is uniform for even curing. Place the cubed salmon into a large bowl, allowing for enough space to mix in the marinade later.

Step 2: Marinate
In a mixing bowl, combine 1 cup of brown sugar, ¼ cup of kosher salt, ¾ cup of maple syrup, and ¼ cup of honey along with 2 cups of water. Stir until the mixture is well blended. Add the salmon cubes, ensuring they are fully submerged in the marinade. Cover the bowl with plastic wrap and refrigerate for at least 3 hours or overnight, allowing the flavors to meld.

Step 3: Preheat Smoker
When you're ready to smoke the salmon, preheat your smoker to 180°F (82°C). This low temperature will ensure the salmon remains moist while absorbing the wonderful smoky flavor. Prepare your grill grate by lining it with aluminum foil, which will help prevent sticking and make cleanup easier.

Step 4: Smoke the Salmon
After the smoker is preheated, place the marinated salmon cubes on the foil-lined grates, making sure they are spaced about 1 inch apart to allow for even cooking. Close the smoker lid and let the salmon smoke for 1 hour, during which delectable aromas will begin to fill the air.

Step 5: Make Glaze
While the salmon is smoking, pour the remaining marinade into a small saucepan and simmer over medium heat for about 10 minutes. This will reduce the liquid into a syrupy glaze, perfect for brushing on the salmon later. Keep an eye on the glaze as it thickens to avoid burning.

Step 6: Continue Smoking
After the initial hour, carefully flip each salmon cube and brush them generously with the glaze you just prepared. Close the smoker lid and continue to smoke for an additional 4-5 hours, brushing with the glaze every 45 minutes. The salmon is done when it becomes caramelized and reaches an internal temperature of at least 160°F (71°C).

Step 7: Serve
Once your Candied Smoked Salmon Bites are perfectly caramelized and smoky, remove them from the smoker and let them cool slightly. Serve them warm as a delicious snack, appetizer, or atop salads for a gourmet touch.

What to Serve with Candied Smoked Salmon Bites

Let your culinary creativity flow as we explore delightful pairings that will elevate your Candied Smoked Salmon Bites to the next level!

  • Creamy Mashed Potatoes: This classic comfort dish balances the smoky sweetness of the salmon with rich, velvety textures. The masher becomes your new best friend here, creating a warming accompaniment.

  • Mixed Green Salad: A fresh salad, drizzled with a light vinaigrette, offers a crisp contrast to the rich salmon. Add sliced cucumbers and ripe avocados for a burst of flavor and creaminess.

  • Crispy Baguette Slices: Toasted baguette slices provide the perfect vehicle for topping with salmon bites. The crunchiness plays beautifully against the tender fish, making each bite a delightful experience.

  • Beer Pairing: A light lager or a fruity wheat beer enhances the smoky essence of the salmon while cleansing the palate beautifully. This dynamic duo celebrates summer gatherings and casual nights in.

  • Honey-Glazed Carrots: Roasted carrots drizzled with honey create a sweet, earthy side that complements the salmon's flavor profile. Their tender sweetness resonates perfectly with each savory bite.

  • Spicy Mango Salsa: Add a zesty tropical twist! The heat from the salsa contrasts nicely with the sweet, smoky bites, creating a vibrant and exciting flavor profile that dances on your tongue.

  • Chilled White Wine: A crisp Sauvignon Blanc or a fruit-forward Pinot Grigio pairs beautifully with the rich salmon bites, enhancing the total flavor experience without overpowering it.

  • Chocolate Mousse: For dessert, a light chocolate mousse brings a creamy, decadent finish to your meal. Its airy sweetness harmonizes with the salmon, leaving your palate satisfied and delighted.

Storage Tips for Candied Smoked Salmon Bites

Fridge: Store leftover Candied Smoked Salmon Bites in an airtight container for up to 1 week. This keeps them fresh and ready for snacking!

Freezer: For longer storage, freeze the salmon bites in a single layer on a baking sheet before transferring them to a freezer-safe container. They can last up to 3 months.

Thawing: When you're ready to enjoy them, thaw in the fridge overnight. Reheat gently in the oven at a low temperature for best results.

Reheating: To retain the flavor and texture, reheat the salmon bites at 350°F (175°C) for about 10 minutes, ensuring they don’t dry out.

Variations & Substitutions for Candied Smoked Salmon Bites

Feel free to get creative and make these delicious bites your own with a few simple adjustments!

  • Vegan Version: Substitute the salmon with thin slices of smoked tofu for a plant-based twist that still delivers flavor.
  • Sticky Heat: Add a tablespoon of sriracha or your favorite hot sauce to the glaze for a spicy kick. The sweet and spicy combo will delight your taste buds!
  • Different Sweeteners: Use agave nectar instead of maple syrup for a lighter sweet option. This swap provides a unique flavor while keeping things vegan-friendly.
  • Herb Infusion: Incorporate fresh herbs like dill or thyme into the marinade for an aromatic touch that elevates the bites.
  • Wood Chip Variations: Experiment with different smoking wood chips, such as cherry or pecan, to discover new flavor dimensions. Each type offers a distinctive taste experience!
  • Crunchy Coating: For added texture, toss the salmon bites in crushed nuts or panko breadcrumbs before smoking. This gives an extra layer of crunch that's irresistible.
  • Serving Style: Try serving them over crispy lettuce leaves or alongside an avocado dip for a refreshing pairing! Elevate your appetizer game with this vibrant presentation.
  • Gluten-Free Alternatives: Ensure all ingredients, especially the soy sauce for dipping, are certified gluten-free, so everyone can enjoy these delightful bites at your next gathering.

These variations will keep your gatherings fresh and exciting! And if you want to try out other delightful dishes, check out these One Pot Salmon ideas for more inspiration!

Make Ahead Options

These Candied Smoked Salmon Bites are perfect for meal prep enthusiasts! You can marinate the salmon cubes up to 24 hours in advance, soaking them in the sweet maple-honey mixture for maximum flavor development. Simply follow the marination steps and refrigerate the covered bowl. Additionally, you can smoke the salmon up to 3 days ahead; let the bites cool completely, then store them in an airtight container in the refrigerator. When you’re ready to enjoy, gently reheat them in the oven for a few minutes to warm up and crisp up the glaze. This way, you’ll have delicious, smoky bites ready at a moment's notice without compromising quality!

Expert Tips for Candied Smoked Salmon Bites

• Freshness First: Always choose the freshest salmon you can find for the best flavor and texture. Stale fish can ruin your candied bites.

• Marinating Time: For optimum flavor, marinate the salmon cubes overnight. This allows the sugars and spices to fully penetrate the fish, enhancing the taste.

• Temperature Check: Use a meat thermometer to ensure your salmon reaches an internal temperature of 160°F. Consuming undercooked fish can be unsafe, so always verify!

• Glaze Monitoring: Keep an eye on the glaze while it simmers. If it thickens too quickly, lower the heat to prevent burning and ensure a perfect texture.

• Experiment with Wood: Don't hesitate to experiment with different wood chips while smoking! Each wood type offers a unique flavor profile to your Candied Smoked Salmon Bites.

Candied Smoked Salmon Bites Recipe FAQs

What should I look for when selecting salmon?
Absolutely! When choosing salmon, look for fresh, firm fillets that have a bright color and a clean, ocean-like smell. Avoid fish with dark spots or a dull appearance as these may indicate spoilage. For the best results in your Candied Smoked Salmon Bites, choose a whole side of salmon for optimal flavor and texture.

How should I store leftover Candied Smoked Salmon Bites?
Store your leftover Candied Smoked Salmon Bites in an airtight container in the refrigerator for up to 1 week. Make sure they are completely cooled before sealing to prevent condensation, which can create sogginess. Enjoy them straight from the fridge or gently reheat them for a delightful snack!

Can I freeze Candied Smoked Salmon Bites?
Yes, you can! To freeze your Candied Smoked Salmon Bites, lay them out in a single layer on a baking sheet and place them in the freezer for about 1 hour until they are firm. After that, transfer the bites into a freezer-safe container or a zip-top bag. They can last up to 3 months in the freezer. When you’re ready to enjoy them, thaw in the fridge overnight and reheat gently.

What happens if my salmon doesn’t reach the recommended temperature?
It’s very important to check the internal temperature of your salmon bites while smoking. You want them to reach a minimum of 160°F (71°C) for food safety. If they don’t, they could pose a health risk. Use a meat thermometer to check the temperature at the thickest part of the fish. If they're undercooked, you can put them back in the smoker until they reach the appropriate temperature.

Can I make Candied Smoked Salmon Bites if I have allergies?
If you have allergies, especially to fish or any of the ingredients in our glaze, it's best to reconsider this recipe. For those who are looking for alternatives, you can try using firm tofu or eggplant as substitutes. Always be cautious about cross-contamination and consult with a healthcare provider if you're uncertain. Enjoy safely!

Candied Smoked Salmon Bites

Candied Smoked Salmon Bites – A Sweet & Savory Delight

Candied Smoked Salmon Bites are a delicious, gluten-free appetizer bursting with sweet, smoky flavors.
Print Recipe Pin Recipe
Prep Time 3 hours hrs
Cook Time 5 hours hrs
Total Time 8 hours hrs
Servings: 35 bites
Course: Appetizers
Cuisine: American
Calories: 120
Ingredients Equipment Method Nutrition Notes

Ingredients
  

For the Salmon
  • 4-5 lbs Salmon Using a whole side yields the best results.
  • ¼ cup Kosher Salt Essential for curing the salmon.
For the Sweet Glaze
  • 1 cup Brown Sugar Adds sweetness and helps create a caramelized exterior.
  • ¾ cup Maple Syrup Opt for 100% pure for the best taste.
  • ¼ cup Honey Helps in the caramelization process.

Equipment

  • Smoker
  • Mixing Bowl
  • Saucepan
  • Aluminum Foil
  • Meat Thermometer

Method
 

Step-by-Step Instructions
  1. Prepare Salmon by slicing it into 1-inch cubes.
  2. Marinate the salmon cubes in a mixture of brown sugar, kosher salt, maple syrup, honey, and water for at least 3 hours.
  3. Preheat the smoker to 180°F.
  4. Smoke the salmon for 1 hour, making sure the cubes are spaced apart.
  5. Make the glaze by simmering the remaining marinade until it thickens.
  6. Continue smoking the salmon for an additional 4-5 hours, brushing with glaze every 45 minutes.
  7. Serve the Candied Smoked Salmon Bites warm.

Nutrition

Serving: 1biteCalories: 120kcalCarbohydrates: 10gProtein: 15gFat: 5gSaturated Fat: 1gPolyunsaturated Fat: 1gMonounsaturated Fat: 2gCholesterol: 40mgSodium: 300mgPotassium: 250mgSugar: 8gIron: 1mg

Notes

Ensure all ingredients are certified gluten-free.

Tried this recipe?

Let us know how it was!

Crock Pot Brown Sugar Pineapple Ham for Effortless Holiday Joy

December 2, 2025 by Grace Snow Leave a Comment

As the aroma of sweet, caramelized goodness wafts through your kitchen, my heart skips a beat—there's something undeniably magical about the Crock Pot Brown Sugar Pineapple Ham. This dish isn't just a meal; it's a centerpiece that transforms any gathering into a cherished memory. With easy preparation and minimal cleanup, it’s your ticket to a stress-free holiday feast that leaves you free to enjoy the company of friends and family. The perfect blend of brown sugar and tangy pineapple bathes the ham in a delectable glaze, creating a juicy delight that pleases every palate. Looking for a comforting holiday recipe that's sure to impress, yet easy enough for any home chef? Let’s dive into this enchanting dish that'll make you the star of your festive table! What sides will you serve alongside this showstopper?

Why is this ham recipe a must-try?

Ease of Preparation: With just a few ingredients and minimal effort, you can whip up a show-stopping dish without the fuss.

Flavor Explosion: The delightful combination of brown sugar and tangy pineapple creates a glaze that will keep your guests raving long after the meal.

Versatility: Serve it at holiday gatherings or as a comforting weeknight dinner; it fits every occasion beautifully.

Time-Saving: Let your Crock Pot do the heavy lifting! This recipe frees you up to enjoy time with family and friends.

Crowd-Pleaser: Impress everyone at the table with this juicy ham that pairs perfectly with sides like creamy mashed potatoes or garlic green beans.

Leftover Magic: Any leftovers can be transformed into delicious sandwiches or used in future meals, making this recipe a win-win. Check out ideas for comforting side dishes to serve with your ham, like Crock Pot Chicken or Pumpkin Brownies Decadent.

Crock Pot Brown Sugar Pineapple Ham Ingredients

For the Ham

  • Pre-cooked Spiral Cut Ham – Choose bone-in for more flavor or boneless for simplified serving.

For the Glaze

  • Brown Sugar (3.5 cups) – Creates a rich, caramelized coating; reduce if you prefer a less sweet profile.
  • Raw Natural Honey (½ cup) – Adds moisture and depth; maple syrup stands as a suitable alternative.

For the Pineapple

  • Pineapple Tidbits or Chunks (1 can, 20 oz, undrained) – Imparts sweetness and tang; fresh pineapple adds a delightful burst of flavor.

Get ready to create a remarkable Crock Pot Brown Sugar Pineapple Ham that dazzles the taste buds while making your holiday effortless and memorable!

Step‑by‑Step Instructions for Crock Pot Brown Sugar Pineapple Ham:

Step 1: Prepare the Crockpot
Begin by lining the bottom of your Crock Pot with 2 cups of brown sugar, forming a sweet base that will caramelize beautifully during cooking. This layer not only infuses the dish with flavor but also helps in creating a sticky glaze. Make sure to spread it evenly, as this will set the stage for your delicious Crock Pot Brown Sugar Pineapple Ham.

Step 2: Place the Ham
Carefully position the spiral-cut ham on top of the brown sugar layer in the Crock Pot, ensuring that it fits snugly. Gently pull apart the slices of the ham to allow the glaze to seep in between them. This step is crucial for the caramelized flavor to fully penetrate the meat as it cooks.

Step 3: Add Honey and Pineapple
Drizzle ½ cup of raw natural honey evenly over the ham. This will add richness and moisture to the dish. Next, pour the pineapple tidbits (with juice) around and on top of the ham. The tangy pineapple not only enhances the flavor but also keeps the ham juicy as it cooks slowly in the Crock Pot.

Step 4: Finalize with Brown Sugar
Sprinkle the remaining 3 cups of brown sugar generously over the top of the ham, making sure it’s evenly coated. This will create a beautiful, caramelized crust as the ham cooks. The sugar melts and combines with the ham juices and pineapple, intensifying the sweet and savory profile of your Crock Pot Brown Sugar Pineapple Ham.

Step 5: Cook the Ham
Cover the Crock Pot with the lid and set it to cook on low for approximately 3.5 to 4 hours. During this time, the ham will become fork-tender, and the glaze will bubble delightfully. It’s important to resist the urge to open the lid too frequently, as this releases heat and affects cooking time.

Step 6: Rest and Serve
Once the cooking time is complete, carefully remove the lid and let the ham rest for about 10-15 minutes before slicing. This resting period allows the juices to redistribute throughout the meat, ensuring each slice is juicy and packed with flavor. Serve the slices alongside the caramelized pineapple and drizzled glaze for a magnificent presentation.

Crock Pot Brown Sugar Pineapple Ham Variations

Feel free to make this delicious recipe your own with these fun and easy twists that will tantalize your taste buds!

  • Spice It Up: Add cayenne pepper or smoked paprika for a delightful kick that enhances the sweetness beautifully. A little heat goes a long way in balancing the flavors!

  • Fruit Fusion: Try adding orange slices or cherries for an exciting fruity twist that brightens the glaze. The citrus adds a refreshing zest that complements the sweetness of the ham perfectly.

  • Herbal Infusion: Incorporate fresh rosemary or thyme into the glaze for an aromatic touch. These herbs will elevate the flavor profile, making your dish even more enchanting.

  • Maple Magic: Swap honey with pure maple syrup for an earthy twist. Its unique flavor marries beautifully with the brown sugar and pineapple, making for a delicious variation.

  • Citrus Boost: Use pineapple juice instead of the syrup to intensify the tropical flavor. It enhances the glaze's sweetness while adding a refreshing tang that quenches the palate.

  • Nutty Crunch: Sprinkle crushed pecans or walnuts on top towards the end of cooking for a delightful crunch. This contrast in texture adds an exciting element to your festive feast.

  • Ginger Spice: Add freshly grated ginger or ground ginger to the glaze for a warm, spicy note. Its zingy essence balances the sweetness beautifully, tantalizing every bite.

Looking for more delightful recipes? You can also check out my Crockpot Butter Chicken for a scrumptious twist or indulge in some sweet treats like Pumpkin Brownies Decadent. Enjoy your cooking adventures!

Expert Tips for Crock Pot Brown Sugar Pineapple Ham

  • Choose Wisely: Select a ham that fits snugly in your crockpot to ensure even cooking and a perfect texture.

  • Score for Success: Lightly score the surface of the ham with shallow cuts; this helps the glaze absorb better, enhancing flavor.

  • Watch the Clock: Avoid overcooking by sticking to the low setting; 3.5 to 4 hours keeps the ham juicy and prevents dryness.

  • Don’t Rush Resting: Allow the ham to rest for 10-15 minutes post-cooking; this step redistributes juices for incredibly moist slices.

  • Personal Touch: Feel free to experiment with spices like nutmeg or cloves, but adjust mindfully to maintain balance in your glorious Crock Pot Brown Sugar Pineapple Ham.

What to Serve with Crock Pot Brown Sugar Pineapple Ham

As the sweet aroma of your ham fills the air, it's time to consider the perfect accompaniments to elevate your holiday table.

  • Creamy Mashed Potatoes: This classic side provides a velvety texture that complements the savory-sweet ham, soaking up the luscious glaze beautifully. Everyone will love how the rich potatoes balance the dish.

  • Garlic Green Beans: Bright, crisp green beans tossed in garlic add a refreshing crunch to your plate, offering a pop of color and nutrition to contrast with the dense, tender ham.

  • Sweet Potato Casserole: Topped with mini marshmallows, the sweetness of this casserole harmonizes perfectly with the flavors of the ham, enhancing the festive spirit of your meal.

  • Fresh Spinach Salad: A light salad with a tangy vinaigrette brings a refreshing element to the table, cutting through the richness of the ham and making every bite feel balanced.

  • Dinner Rolls: Warm, fluffy dinner rolls are perfect for sopping up leftover glaze, making them an irresistible addition. Their soft texture invites the savory flavors of the meal, making gatherings even more special.

  • Sparkling Apple Cider: Elevate the dining experience with this bubbly drink that echoes the sweetness of the ham while providing a festive touch to your celebration.

  • Pineapple Upside-Down Cake: For dessert, capture the ham's essence with this sweet treat. Its caramelized pineapple echoes the flavors of your main dish while offering a delightful contrast in texture.

How to Store and Freeze Crock Pot Brown Sugar Pineapple Ham

  • Room Temperature: Avoid leaving ham out for more than 2 hours to prevent spoilage. Keep it refrigerated promptly after serving.

  • Fridge: Store leftovers in an airtight container for up to 3-4 days. Ensure the ham is completely cooled before sealing to maintain freshness.

  • Freezer: Wrap tightly in plastic wrap and then aluminum foil or a freezer-safe bag. Your Crock Pot Brown Sugar Pineapple Ham can be frozen for up to 6 months.

  • Reheating: Thaw in the fridge overnight before reheating. Warm in the oven at 325°F until heated through, about 20-30 minutes, for the best texture.

Make Ahead Options

These Crock Pot Brown Sugar Pineapple Ham preparations are perfect for busy families looking to save time during the hectic holiday season! You can assemble the ham and glaze up to 24 hours in advance by placing the pre-cooked spiral-cut ham in the Crock Pot with the brown sugar and honey, topped with pineapple. Simply cover and refrigerate it until you're ready to cook. This strategy not only enhances flavors but also helps you effortlessly serve a delicious dish with minimal last-minute effort. When it’s time to eat, simply cook on low for 3.5 to 4 hours—it will come out just as delicious and tender!

Crock Pot Brown Sugar Pineapple Ham Recipe FAQs

What type of ham is best for this recipe?
Absolutely! For the best results, opt for a pre-cooked spiral cut ham. Bone-in options often provide deeper flavor, while boneless hams allow for easy slicing.

How should I store leftovers from the Crock Pot Brown Sugar Pineapple Ham?
Store any leftover ham in an airtight container in the refrigerator for 3-4 days. Ensure it's cooled to room temperature before sealing to maintain its moisture and flavor.

Can I freeze the ham, and if so, how?
Yes, you can freeze your Crock Pot Brown Sugar Pineapple Ham! Wrap the leftover portions tightly in plastic wrap, then in aluminum foil or place them in a sturdy freezer bag. This way, it can be kept frozen for up to 6 months. When you're ready to enjoy it again, simply thaw in the fridge overnight and reheat in a preheated oven at 325°F until warmed thoroughly, which usually takes about 20-30 minutes.

What if the ham turns out dry after cooking?
If your ham ends up dry, don't worry; it can happen! Try slicing it and layering it in a baking dish with some of the leftover glaze or pineapple juice, covering it with foil, and warming it in the oven at a low temperature. This moisture infusion can help revive its juiciness.

Can I use fresh pineapple instead of canned?
Absolutely! Fresh pineapple is a delightful alternative that adds a burst of flavor. Just make sure to cut it into chunks and mix it with its juice when adding it to the ham, as the moisture is essential for keeping the ham tender and delicious.

Is this recipe safe for pets?
No, it's best to keep this ham away from pets; the honey and high salt content can be harmful to them. It's always better to stick to pet-safe treats when it comes to snacking for your furry friends!

Crock Pot Brown Sugar Pineapple Ham:

Crock Pot Brown Sugar Pineapple Ham for Effortless Holiday Joy

Crock Pot Brown Sugar Pineapple Ham offers a delightful blend of sweet and tangy flavors for an unforgettable holiday meal.
Print Recipe Pin Recipe
Prep Time 15 minutes mins
Cook Time 3 hours hrs 30 minutes mins
Resting Time 15 minutes mins
Total Time 4 hours hrs
Servings: 8 slices
Course: Dinner
Cuisine: American
Calories: 320
Ingredients Equipment Method Nutrition Notes

Ingredients
  

For the Ham
  • 1 each Pre-cooked Spiral Cut Ham Choose bone-in for more flavor or boneless for simplified serving.
For the Glaze
  • 3.5 cups Brown Sugar Creates a rich, caramelized coating; reduce if you prefer a less sweet profile.
  • 0.5 cups Raw Natural Honey Adds moisture and depth; maple syrup stands as a suitable alternative.
For the Pineapple
  • 1 can (20 oz) Pineapple Tidbits or Chunks Imparts sweetness and tang; fresh pineapple adds a delightful burst of flavor.

Equipment

  • Crock-pot

Method
 

Step-by-Step Instructions for Crock Pot Brown Sugar Pineapple Ham
  1. Prepare the Crockpot by lining the bottom with 2 cups of brown sugar.
  2. Place the spiral-cut ham on top of the brown sugar layer, ensuring it fits snugly.
  3. Add honey evenly over the ham, then pour the pineapple tidbits around and on top.
  4. Sprinkle the remaining 3 cups of brown sugar generously over the top of the ham.
  5. Cover and cook on low for approximately 3.5 to 4 hours.
  6. Once cooked, let the ham rest for about 10-15 minutes before slicing.

Nutrition

Serving: 1slicesCalories: 320kcalCarbohydrates: 40gProtein: 22gFat: 10gSaturated Fat: 3gMonounsaturated Fat: 6gCholesterol: 70mgSodium: 1500mgPotassium: 450mgFiber: 1gSugar: 35gVitamin C: 4mgCalcium: 1mgIron: 4mg

Notes

Select a ham that fits snugly in your crockpot to ensure even cooking. Score the ham surface for better glaze absorption. Avoid overcooking by adhering to the time guidelines. Allowing the ham to rest before slicing ensures juicy pieces.

Tried this recipe?

Let us know how it was!

Classic Meatloaf Recipe: Juicy, Flavorful & Simply Irresistible

December 2, 2025 by Grace Snow Leave a Comment

You know that moment when the aroma of baking meatloaf fills your kitchen, instantly transporting you back to cherished family dinners? It's a guaranteed mood booster! Today, I'm thrilled to share my Classic Meatloaf Recipe—a dish that not only serves up nostalgia but also embraces the flavors and textures we adore while keeping health in mind. With a delightful blend of secret seasonings and the option for keto-friendly swaps, this meatloaf promises a sumptuous, crowd-pleasing centerpiece for any dinner table. Plus, it's remarkably quick to prepare, making it perfect for those evenings when you crave comfort without the hassle. Are you ready to elevate your meatloaf game and impress your family with a fresh twist on this beloved classic? Let’s dive in!

Why is this meatloaf a must-try?

Nostalgic Comfort: This Classic Meatloaf Recipe brings back those comforting family dinners with its rich flavors and tender texture.
Quick and Easy: Prep time is minimal, leaving you with more moments to enjoy with family or friends while it bakes.
Health-Conscious Choices: Adapt the recipe effortlessly, swapping in healthier or keto-friendly ingredients without sacrificing taste.
Versatile Variations: Explore different takes, from personal mini meatloaves to tasty vegetarian substitutes, ensuring something for everyone.
Family Favorite: It’s sure to be a hit at the dinner table, perfect for busy weeknights or cozy weekend gatherings, just like those delightful Mini Tropical Pavlovas for dessert!

Classic Meatloaf Recipe Ingredients

Here’s everything you need to create a mouthwatering classic meatloaf that will warm your heart and satisfy your cravings!

For the Meat Mixture

  • Ground Beef – Ideal for flavor and moisture; aim for 80-85% lean for the best balance.
  • Onion – Finely chopped to provide flavor and moisture throughout the loaf.
  • Eggs – Acts as a binder to hold the meatloaf together, ensuring a perfect slice every time.
  • Milk – Keeps the meatloaf moist; substitute with heavy cream for an even richer taste.
  • Breadcrumbs – Binds the ingredients; use Panko for a lighter texture or almond flour for a keto-friendly option.
  • Garlic – Minced to infuse the meatloaf with robust flavor and depth.
  • Ketchup – Adds sweetness and tang; consider low-sugar varieties for a healthier twist.
  • Fresh Parsley – Adds a hint of freshness; can be swapped out for other herbs as desired.
  • Worcestershire Sauce – Elevates the dish with rich, savory notes; soy sauce may be used as a substitute.
  • Salt & Pepper – Essential for bringing all the flavors together; adjust to match your taste.
  • Italian Seasoning – Offers a blend of spices that enhances the overall flavor profile.

For the Glaze

  • Ketchup – Use the same as in the meat mixture to maintain consistency in flavor.
  • Brown Sugar – Provides extra sweetness; consider sugar-free alternatives for a healthier glaze.
  • White Vinegar – Balances sweetness and adds a touch of tangy brightness.
  • Garlic Powder – An optional addition for extra depth in the glaze's flavor profile.
  • Onion Powder – Complements the garlic powder and adds richness to the glaze.

Dive into making this classic meatloaf recipe—your family will thank you for a meal that’s as delicious as it is nostalgic!

Step‑by‑Step Instructions for Classic Meatloaf Recipe

Step 1: Preheat the Oven
Begin by preheating your oven to 350°F (175°C). While it heats up, grab your loaf pan and lightly grease it or line it with parchment paper for easy cleanup. This preparation ensures that your Classic Meatloaf will bake evenly and slide out effortlessly once it’s done cooking.

Step 2: Mix the Meatloaf Ingredients
In a large mixing bowl, combine the ground beef, finely chopped onion, eggs, milk, and breadcrumbs. Add the minced garlic, ketchup, fresh parsley, Worcestershire sauce, salt, pepper, and Italian seasoning. Gently mix everything together with your hands or a spatula until just combined, ensuring not to overmix, as this helps keep your meatloaf tender.

Step 3: Form the Meatloaf
Once combined, transfer the meat mixture onto a clean, flat surface and shape it into a loaf. Carefully place your formed meatloaf into the prepared loaf pan or on a lined baking sheet. Make sure it’s evenly shaped, as this will help it cook uniformly and achieve that delightful, comforting texture in your Classic Meatloaf Recipe.

Step 4: Prepare the Glaze
In a separate bowl, mix together the glaze ingredients: ketchup, brown sugar (or sugar-free substitute), white vinegar, garlic powder, and onion powder. This delicious mixture not only complements the meatloaf but also creates a glossy, flavorful topping. Brush half of the glaze over the meatloaf, ensuring a nice even coating to enhance flavor as it bakes.

Step 5: Bake the Meatloaf
Slide the meatloaf into your preheated oven and bake for about 45 minutes. After this time, check for doneness with a meat thermometer, aiming for an internal temperature of 160°F (71°C). Once reached, carefully apply the remaining glaze to the top of the meatloaf for extra flavor and shine before putting it back in the oven for an additional 15–30 minutes.

Step 6: Rest and Slice
Once your meatloaf has cooked completely, remove it from the oven and let it rest for 10–15 minutes. This resting period allows the juices to redistribute throughout the meatloaf, ensuring every slice is as moist and flavorful as possible. Now, grab your sharp knife and slice into your Classic Meatloaf to reveal its delicious, tender interior!

Expert Tips for the Classic Meatloaf Recipe

  • Check the Temp: Use a meat thermometer to confirm the internal temperature reaches 160°F. This ensures your classic meatloaf is both safe and perfectly moist.
  • Avoid Overmixing: Gently mix the ingredients until just combined. Overmixing can lead to a dense, tough loaf that lacks the tender texture we love.
  • Chill the Mixture: Let the meat mixture rest in the fridge for 30 minutes before baking. This helps it hold together better while cooking and enhances flavor.
  • Glaze for Flavor: Apply half the glaze before baking and the other half during the last 15–30 minutes. This layering adds a delicious, tangy richness to your classic meatloaf.
  • Rest Before Slicing: Allow your meatloaf to rest for 10-15 minutes after baking. This step is essential for retaining moisture and making it easier to slice.
  • Wrap for Freshness: Store leftovers in the fridge wrapped tightly. This will keep your classic meatloaf moist and flavorful for up to three days!

Make Ahead Options

These Classic Meatloaf Recipe preparations are perfect for busy home cooks looking to save time without sacrificing flavor! You can mix the meatloaf ingredients and form the loaf up to 24 hours in advance. Simply cover the shaped loaf tightly with plastic wrap and refrigerate until you're ready to bake. For added convenience, you can also prepare the glaze and store it separately in the refrigerator for up to 3 days. When you're ready to cook, just preheat your oven and brush the glaze over the meatloaf—then bake as directed. This way, you can enjoy a hearty, delicious dinner with minimal effort, just as comforting and flavorful as if it was made from scratch on the spot!

How to Store and Freeze Classic Meatloaf

Fridge: Store leftover classic meatloaf in an airtight container for up to 3 days to maintain its moisture and flavor.

Freezer: For longer storage, wrap the meatloaf tightly in plastic wrap and then aluminum foil. It can be frozen for up to 3 months.

Reheating: To reheat, thaw overnight in the fridge and then bake in a preheated oven at 350°F (175°C) for about 20 minutes, or until heated through.

Slicing: For easier serving, slice the meatloaf before freezing. This allows you to reheat individual portions as needed!

What to Serve with Classic Meatloaf?

Transform your comforting meatloaf into a delightful dining experience with these perfect pairings that will elevate your meal.

  • Creamy Mashed Potatoes: These buttery, fluffy delights soak up the savory gravy, making each bite a nostalgic treat.

  • Garlic Green Beans: Their bright crunch and garlicky flavor add a fresh contrast, enhancing the heartiness of the meatloaf. Taking a bite of meatloaf followed by a crisp green bean is pure joy!

  • Roasted Vegetables: A medley of seasonal veggies brings sweetness and depth, complementing the rich flavors of the loaf beautifully. The slight caramelization adds a delightful touch to your plate.

  • Coleslaw: This zesty, crunchy side not only cuts through the meatloaf's richness but also adds refreshing brightness. Imagine that crispness balancing the hearty meat and creating a wonderful texture experience.

  • Honey-Glazed Carrots: Sweet and tender, these carrots add a playful sweetness that contrasts perfectly with the savory profile of meatloaf. They playfully invite you to take another scrumptious forkful.

  • Fresh Garden Salad: A light mix of greens with a tangy vinaigrette refreshes the palate and uplifts the meal's overall appeal. The vibrant colors and textures of the salad make every bite exciting.

  • Homemade Applesauce: A warm, sweet side dish provides a lovely contrast to the savory meatloaf, evoking memories of hearty family dinners. Each spoonful of applesauce enhances the flavors, leaving comfort on your plate.

  • Classic Red Wine: A smooth glass of Cabernet Sauvignon brings a rich, fruity layer to your meal, enriching the meatloaf's flavors. The wine's tannins harmonize beautifully with the dish, creating a balanced dining experience.

  • Chocolate Lava Cake: End on a sweet note with a gooey dessert that feels indulgent yet comforting, making your classic meatloaf dinner truly unforgettable. The rich chocolate will sweetly linger on your palate.

Classic Meatloaf Recipe Variations

Get ready to put your own spin on this classic dish and delight your taste buds with these exciting adaptations!

  • Turkey Blend: Substitute half of the ground beef with ground turkey for a leaner meatloaf that’s still juicy and flavorful. It’s a wonderful twist that will leave you feeling satisfied yet lighter.

  • Vegetarian Option: For a meatless version, use lentils or chickpeas blended with spices and breadcrumbs. This hearty variation packs a protein punch while keeping all the comfort of traditional meatloaf.

  • Keto-Friendly: Swap breadcrumbs for almond flour or crushed pork rinds to enjoy a guilt-free, low-carb option that maintains the same deliciously rich flavor you love.

  • Spicy Kick: Add diced jalapeños or a splash of hot sauce to the meat mixture for a zesty surprise that brings a lively punch to the classic flavor.

  • Herb Infusion: Mix in fresh herbs like thyme or rosemary for an elevated aromatics profile. The herbal notes will give your meatloaf a delightful freshness that pairs beautifully with the savory ingredients.

  • Mini Meatloaves: For quicker cooking and fun portioning, shape your mixture into individual mini meatloaves. These charming bites not only reduce cooking time but are also perfect for kids and gatherings!

  • Glazed Variations: Experiment with barbecue sauce in place of ketchup for the glaze or add a layer of spicy chili sauce for a smoky, tangy kick. Your meatloaf can shine with these enticing flavors.

  • Savory Stuffing: Consider stuffing your meatloaf with sautéed vegetables or cheese like mozzarella or cheddar. This secret surprise in every slice can make each bite extraordinary!

As you explore these ideas, you'll discover that adapting your Classic Meatloaf Recipe not only enhances its flavors but also resonates with your family's tastes. Dive into creativity and don’t forget to check out delicious sides like Quinoa Tabbouleh for a colorful presentation!

Classic Meatloaf Recipe FAQs

How do I choose the right ground beef for meatloaf?
Absolutely! For the best flavor and moisture, aim for ground beef that is 80-85% lean. This blend offers the right fat balance while ensuring your meatloaf remains juicy and does not dry out during cooking. Look for bright red color and avoid any meat with dark spots, as those may indicate age or spoilage.

How can I store leftover classic meatloaf?
Very simply! Store your classic meatloaf in an airtight container in the fridge. It will stay fresh for up to 3 days. To reheat, simply place slices in a preheated oven at 350°F (175°C) for about 20 minutes or until heated through.

Can I freeze classic meatloaf, and if so, how?
You bet! To freeze, wrap the meatloaf tightly in plastic wrap, then in aluminum foil to protect it from freezer burn. It can be stored for up to 3 months. For reheating, thaw it overnight in the fridge, then bake at 350°F (175°C) for approximately 20-30 minutes until warmed throughout. Slice before freezing for easy portioning!

What if my meatloaf turned out dense?
For a tender meatloaf, avoid overmixing the ingredients. When combining, mix just until everything is blended—too much mixing can lead to a dense loaf. Additionally, consider chilling the mixture in the fridge for about 30 minutes before baking; this helps it maintain its shape and improves flavor.

Are there any dietary considerations for this meatloaf?
Yes! This classic meatloaf recipe can be easily adjusted to meet certain dietary needs. You can substitute breadcrumbs with almond flour to make it keto-friendly. Always check for allergies, especially if you're using store-bought sauces like Worcestershire or ketchup, which can contain gluten or other allergens.

Can I modify the recipe to make mini meatloaves?
Absolutely! Mini meatloaves are a fantastic idea! Simply shape the meat mixture into smaller loaves and adjust the baking time to about 25-30 minutes. This creates fun, individual servings that are perfect for meal prep or family dinners!

Classic Meatloaf Recipe

Classic Meatloaf Recipe: Juicy, Flavorful & Simply Irresistible

A Classic Meatloaf Recipe that brings nostalgia and delightful flavors to your dinner table.
Print Recipe Pin Recipe
Prep Time 15 minutes mins
Cook Time 1 hour hr
Resting Time 15 minutes mins
Total Time 1 hour hr 15 minutes mins
Servings: 6 slices
Course: Dinner
Cuisine: American
Calories: 250
Ingredients Equipment Method Nutrition Notes

Ingredients
  

For the Meat Mixture
  • 1 lb Ground Beef 80-85% lean for best flavor and moisture.
  • 1 medium Onion Finely chopped.
  • 2 Eggs Acts as a binder.
  • 1/2 cup Milk Can substitute with heavy cream.
  • 1 cup Breadcrumbs Panko preferred for lighter texture.
  • 2 cloves Garlic Minced.
  • 1/2 cup Ketchup Consider low-sugar varieties.
  • 1/4 cup Fresh Parsley Can swap for other herbs.
  • 1 tbsp Worcestershire Sauce Soy sauce can be used as substitute.
  • 1 tsp Salt Adjust to taste.
  • 1/2 tsp Pepper Adjust to taste.
  • 1 tbsp Italian Seasoning Enhances overall flavor.
For the Glaze
  • 1/4 cup Ketchup Same as used in meat mixture.
  • 2 tbsp Brown Sugar Optional sugar-free alternatives.
  • 1 tbsp White Vinegar Balances sweetness.
  • 1 tsp Garlic Powder Optional.
  • 1 tsp Onion Powder Optional.

Equipment

  • Loaf pan
  • Mixing Bowl
  • Meat Thermometer
  • Spatula

Method
 

Step-by-Step Instructions
  1. Preheat your oven to 350°F (175°C). Prepare a loaf pan by greasing or lining it with parchment paper.
  2. In a large mixing bowl, combine ground beef, onion, eggs, milk, and breadcrumbs. Add garlic, ketchup, parsley, Worcestershire sauce, salt, pepper, and Italian seasoning. Mix gently.
  3. Transfer the meat mixture to a clean surface and shape into a loaf. Place in the prepared loaf pan.
  4. In a separate bowl, mix together the glaze ingredients. Brush half of the glaze over the meatloaf.
  5. Bake the meatloaf in the preheated oven for about 45 minutes. Check for doneness with a thermometer, aiming for 160°F.
  6. Rest the meatloaf for 10-15 minutes before slicing.

Nutrition

Serving: 1sliceCalories: 250kcalCarbohydrates: 12gProtein: 20gFat: 15gSaturated Fat: 6gPolyunsaturated Fat: 1gMonounsaturated Fat: 8gCholesterol: 80mgSodium: 600mgPotassium: 300mgFiber: 1gSugar: 2gVitamin A: 200IUVitamin C: 1mgCalcium: 30mgIron: 2mg

Notes

Store leftovers in an airtight container for up to 3 days in the fridge. For longer storage, wrap tightly in plastic wrap and aluminum foil for up to 3 months in the freezer.

Tried this recipe?

Let us know how it was!

Delightful Pasta Napoletana Ready in 30 Minutes or Less

December 2, 2025 by Grace Snow Leave a Comment

As I stood in my kitchen, catching the scent of onions caramelizing and garlic sizzling, I realized I had just unlocked a weeknight miracle—Pasta Napoletana. This dish, with its vibrant tomatoes and fragrant basil, comes together in under 30 minutes, transforming simple ingredients into a comforting meal that's perfect for any day of the week. Not only is this Pasta Napoletana quick and easy to whip up, but it’s also kind on your budget, making it an ideal choice for those busy nights when you crave homemade goodness without breaking the bank. Whether you’re cooking for family or simply treating yourself, this delightful recipe embraces the heartwarming essence of Italian cuisine. Are you ready to dive into this flavorful journey? Let’s make pasta magic together!

Why Is Pasta Napoletana Amazing?

Simplicity is key: With just a handful of ingredients, this dish comes together effortlessly in under 30 minutes, perfect for busy weeknights. Rich flavors come alive from the harmonious blend of sweet caramelized onions, juicy tomatoes, and fragrant garlic. Versatility allows you to customize your Pasta Napoletana with fresh vegetables or proteins like olives and Italian sausage to suit your taste. Budget-friendly without sacrificing flavor, making it a go-to choice for anyone looking to eat well without spending much. Plus, it’s a crowd-pleaser that will impress both family and friends alike, reminiscent of home-cooked Italian meals. If you’re eager for more quick dishes, try Skillet Pasta Sun or explore a delightful twist with Seafood Pasta Savory.

Pasta Napoletana Ingredients

• Get ready for a deliciously simple meal!

For the Pasta

  • Pasta – 8 oz (220 grams) spaghetti or bucatini; the essential base for this Pasta Napoletana.
  • Fine Salt – ½ tsp, plus more to taste; enhances flavor, adjust based on your palate.

For the Sauce

  • Olive Oil – 1 Tbsp (plus more for drizzling); adds richness to the sauce—opt for extra virgin for a more robust flavor.
  • Onion – 1 medium-sized, finely chopped; lends sweetness to the sauce; any onion type will do, but a large onion provides extra richness.
  • Garlic – 2–3 cloves, minced; adds aromatic depth; feel free to increase for a more garlicky punch.
  • Canned Tomatoes – 1 can (14 oz/400 grams) whole, diced, or cherry tomatoes; forms the flavorful sauce base—fresh tomatoes work well, too!
  • Black Pepper – ⅛ tsp; gives a subtle kick—add to taste to customize your spice level.

For the Finish

  • Basil – 1 handful, chopped or torn; infuses fresh herbal notes; fresh parsley is a lovely substitute if needed.
  • Parmesan Cheese – 3 Tbsp grated, for serving; adds a savory finishing touch, omit for a vegan version.

With these ingredients in hand, you're just moments away from enjoying a warm plate of Pasta Napoletana, bringing cherished Italian flavors to your home kitchen!

Step‑by‑Step Instructions for Pasta Napoletana

Step 1: Boil the Pasta
Fill a large pot with water, add a generous pinch of salt, and bring it to a rolling boil over high heat. Once boiling, add 8 oz of spaghetti or bucatini and cook according to package instructions until al dente, about 8-10 minutes. Reserve ½ cup of pasta cooking water, then drain the rest in a colander, shaking off any excess water.

Step 2: Sauté the Onions
In a large skillet, heat 1 tablespoon of olive oil over medium heat. Add the finely chopped onion and sauté for about 5-6 minutes until it becomes soft and translucent. Stir occasionally to ensure it browns evenly. The aroma should fill your kitchen, signaling that your sauce base is coming together beautifully.

Step 3: Add the Garlic
Add the minced garlic to the pan with the sautéed onions, stirring gently for an additional 2 minutes. As the garlic cooks, it will release its fragrant aroma, enhancing the base of your Pasta Napoletana. Keep an eye on it to prevent burning, as burnt garlic can impart a bitter taste.

Step 4: Prepare the Tomato Sauce
Pour in the can of tomatoes, along with ½ teaspoon of fine salt and ⅛ teaspoon black pepper, stirring well to combine. Allow the mixture to simmer over medium heat for about 15 minutes, occasionally stirring. The sauce will thicken slightly, developing a vibrant color and rich flavor as it reduces.

Step 5: Combine and Adjust
Once the sauce is thickened and fragrant, taste it and adjust the seasoning if necessary. Add the drained pasta to the skillet along with a handful of chopped basil and toss everything together, ensuring each pasta strand is coated with the sauce. If it appears too dry, introduce some of the reserved pasta cooking water for the perfect consistency.

Step 6: Serve the Pasta Napoletana
Divide the Pasta Napoletana among plates and top with 3 tablespoons of grated Parmesan cheese. Add extra basil and a drizzle of olive oil for a final touch of flavor. Enjoy this quick and easy meal warm, celebrating the homemade goodness that is just a step away from your kitchen!

Pasta Napoletana Variations & Substitutions

Feel free to make this delightful dish your own with these customizable ideas!

  • Dairy-Free: Omit Parmesan cheese and replace it with nutritional yeast or a dairy-free cheese alternative for a vegan twist.

  • Fresh Tomatoes: Use 2 cups of diced fresh tomatoes instead of canned for a vibrant, garden-fresh flavor.

  • Veggie Boost: Add 1 cup of diced zucchini or bell peppers when sautéing the onions for extra nutrition and color. It adds a wonderful crunch!

  • Protein-Packed: Toss in 1 cup of cooked Italian sausage or grilled chicken for a hearty addition that transforms this dish into a fulfilling main course.

  • Spice It Up: Add a pinch of red pepper flakes or a diced jalapeño while sautéing to turn up the heat and give your Pasta Napoletana an exciting kick.

  • Herb Variations: Swap out the basil for fresh parsley or oregano to explore different flavor profiles and find your favorite herb combination.

If you’re curious about more pasta creations, consider trying Cauliflower Pasta Ready or the tantalizing Tuscan White Bean Pasta for delightful variations.

Storage Tips for Pasta Napoletana

  • Fridge: Store leftovers in an airtight container for up to 2 days. While the basil may darken, it will retain flavor, ensuring you still enjoy a delightful taste.
  • Freezer: You can freeze Pasta Napoletana for up to 2 months. Portion it into freezer-safe containers, allowing space for expansion.
  • Reheating: When ready to enjoy, thaw in the fridge overnight, then reheat gently on the stovetop with a splash of water and a drizzle of olive oil for a silky texture.
  • Room Temperature: Avoid leaving the Pasta Napoletana out for more than 2 hours to maintain its freshness and flavor, keeping it safe to eat.

Make Ahead Options

These Pasta Napoletana are perfect for busy cooks looking to save time during hectic weeknights! You can prepare the sauce (onions, garlic, and tomatoes) up to 3 days in advance; simply cool it completely, store it in an airtight container, and refrigerate. The pasta can also be cooked ahead and stored for up to 24 hours—just keep it in an airtight container with a drizzle of olive oil to prevent sticking. When it’s time to serve, reheat the sauce in a pan, add the freshly cooked pasta, and toss with chopped basil. This way, you'll enjoy the same delicious flavors with minimal effort and less stress in your evening routine!

Expert Tips for Pasta Napoletana

  • Ingredient Quality: Use the best-quality canned tomatoes you can find. They really elevate the flavor of your Pasta Napoletana and provide a rich, vibrant sauce.

  • Sautéing Onions: Avoid rushing the onion sautéing step! Allow them to caramelize slowly for about 5-6 minutes to bring out natural sweetness, enhancing your sauce.

  • Adjusting Seasoning: Always taste before serving! Adjust the salt and pepper in your Pasta Napoletana before adding the pasta in to personalize the flavor to your liking.

  • Pasta Water Magic: Don't forget to reserve some pasta cooking water! It’s the secret ingredient for creating a velvety sauce that perfectly coats your noodles.

  • Storing Leftovers: Store any leftovers in an airtight container for up to 2 days. Reheat in a pan with a splash of olive oil to bring back that wonderful flavor!

What to Serve with Quick and Easy Pasta Napoletana

Nothing completes a hearty meal quite like the perfect side dishes that complement fresh pasta flavors.

  • Garlicky Breadsticks: The warm, buttery goodness pairs wonderfully, enhancing the aromatic garlic in the Pasta Napoletana for a delightful experience.

  • Simple Arugula Salad: A bright, peppery salad with lemon vinaigrette balances the rich flavors, providing a fresh contrast that invigorates each bite.

  • Roasted Vegetables: A mix of seasonal veggies adds a touch of sweetness and texture, creating a vibrant plate that bursts with flavor and color.

  • Caprese Salad: Juicy tomatoes, fresh mozzarella, and basil echo the pasta's ingredients and provide a delightful lightness while celebrating Italian flair.

  • Creamy Polenta: This comforting side offers a rich, creamy texture, perfectly complementing the vibrant sauce, making each meal feel like a warm embrace.

  • Zesty Lemon Sorbet: A refreshing dessert with a bright citrus kick cleanses the palate, leaving a lingering satisfaction after your pasta indulgence.

  • Chardonnay or Pinot Grigio: These light wines pair beautifully, enhancing the dish's flavors without overwhelming them, ideal for sipping alongside your meal.

With these delicious sides and pairings, your Pasta Napoletana transforms into a multi-layered culinary event that warms both heart and home!

Pasta Napoletana Recipe FAQs

What type of pasta should I use for Pasta Napoletana?
You can use 8 oz (220 grams) of spaghetti or bucatini as the traditional bases for this dish. However, feel free to swap in your favorite short pasta like penne or fusilli if you're looking for a different texture!

How should I store leftover Pasta Napoletana?
Store any leftovers in an airtight container in the refrigerator for up to 2 days. While the fresh basil may darken, it will retain its flavor—so don’t worry about that! Just make sure to reheat gently, adding a splash of water and a drizzle of olive oil for moisture.

Can I freeze Pasta Napoletana, and if so, how?
Absolutely! You can freeze it for up to 2 months. To do this, simply let the pasta cool, then portion it into freezer-safe containers, allowing space for expansion. When you’re ready to enjoy it again, just thaw it overnight in the fridge and reheat with a splash of water and olive oil.

How can I customize my Pasta Napoletana?
Very! You can add fresh vegetables like zucchini or bell peppers, or even proteins like cooked Italian sausage or tuna for a heartier meal. Try incorporating olives or capers after sautéing the onions for added flavor!

What should I look for when selecting canned tomatoes?
The quality of your canned tomatoes is crucial for a delicious Pasta Napoletana. Look for whole or diced tomatoes packed in juice or puree—these will typically yield a richer sauce. Choose brands with natural ingredients and avoid those with excessive preservatives for the best flavor.

What can I do if my sauce is too watery?
If you find your sauce is too thin, let it simmer on medium heat for a few extra minutes until it thickens to your liking. You can also add a small amount of the reserved pasta cooking water gradually, which helps to emulsify and create a silky texture.

Pasta Napoletana

Delightful Pasta Napoletana Ready in 30 Minutes or Less

Pasta Napoletana is a quick and flavorful Italian dish that combines vibrant tomatoes and fragrant basil, ready in under 30 minutes.
Print Recipe Pin Recipe
Prep Time 10 minutes mins
Cook Time 20 minutes mins
Total Time 30 minutes mins
Servings: 4 servings
Course: Dinner
Cuisine: Italian
Calories: 400
Ingredients Equipment Method Nutrition Notes

Ingredients
  

For the Pasta
  • 8 oz spaghetti or bucatini the essential base for this Pasta Napoletana
  • ½ tsp fine salt enhances flavor, adjust based on your palate
For the Sauce
  • 1 Tbsp olive oil adds richness to the sauce; opt for extra virgin for a more robust flavor
  • 1 medium-sized onion, finely chopped lends sweetness to the sauce; any onion type will do
  • 2–3 cloves garlic, minced adds aromatic depth; feel free to increase for a more garlicky punch
  • 1 can (14 oz) whole, diced, or cherry tomatoes forms the flavorful sauce base; fresh tomatoes work well too
  • ⅛ tsp black pepper gives a subtle kick; add to taste
For the Finish
  • 1 handful basil, chopped or torn infuses fresh herbal notes; fresh parsley is a lovely substitute
  • 3 Tbsp Parmesan cheese, grated adds a savory finishing touch, omit for a vegan version

Equipment

  • Large pot
  • Colander
  • Large skillet
  • Wooden spoon

Method
 

Step-by-Step Instructions for Pasta Napoletana
  1. Fill a large pot with water, add a generous pinch of salt, and bring it to a rolling boil over high heat. Once boiling, add 8 oz of spaghetti or bucatini and cook according to package instructions until al dente, about 8-10 minutes. Reserve ½ cup of pasta cooking water, then drain the rest in a colander, shaking off any excess water.
  2. In a large skillet, heat 1 tablespoon of olive oil over medium heat. Add the finely chopped onion and sauté for about 5-6 minutes until it becomes soft and translucent. Stir occasionally to ensure it browns evenly.
  3. Add the minced garlic to the pan with the sautéed onions, stirring gently for an additional 2 minutes. Keep an eye on it to prevent burning.
  4. Pour in the can of tomatoes, along with ½ teaspoon of fine salt and ⅛ teaspoon black pepper, stirring well to combine. Allow the mixture to simmer over medium heat for about 15 minutes.
  5. Once the sauce is thickened and fragrant, taste it and adjust the seasoning if necessary. Add the drained pasta to the skillet along with a handful of chopped basil and toss everything together.
  6. Divide the Pasta Napoletana among plates and top with 3 tablespoons of grated Parmesan cheese. Enjoy warm!

Nutrition

Serving: 1servingCalories: 400kcalCarbohydrates: 60gProtein: 12gFat: 14gSaturated Fat: 3gPolyunsaturated Fat: 1gMonounsaturated Fat: 10gCholesterol: 5mgSodium: 400mgPotassium: 600mgFiber: 4gSugar: 5gVitamin A: 15IUVitamin C: 25mgCalcium: 10mgIron: 10mg

Notes

Use fresh ingredients for the best flavor, and adjust seasoning to suit your taste.

Tried this recipe?

Let us know how it was!

Creamy Southern Spaghetti Bake: A Cozy Family Favorite

December 2, 2025 by Grace Snow Leave a Comment

Stepping into my kitchen feels like opening a treasure chest filled with comforting scents and cherished memories. One dish that always brings a smile to my family’s faces is the Creamy Southern Spaghetti Bake. This comforting casserole, with its layers of tender shredded chicken and a luscious cream cheese ranch sauce, creates a warm embrace for the taste buds. Not only is it incredibly easy to whip up, making it an ideal choice for busy weeknights, but it’s also a crowd-pleaser that shines at any potluck or family gathering. Intrigued? Let’s dive into how to make this delightful dish that’s sure to become a staple in your recipe book!

Why is this casserole a must-try?

Simplicity is key: With straightforward steps and minimal prep, this Creamy Southern Spaghetti Bake is perfect for any home cook, regardless of skill level.

Rich, Comforting Flavor: The harmonious blend of creamy sauces, tender chicken, and crispy bacon creates a dish that wraps you in cozy goodness.

Versatile: Easily adapt this recipe by swapping out ingredients; try using Cheesy Zucchini Bake for a veggie twist or substitute turkey for a delightful variation.

Crowd-Pleasing: Ideal for gatherings, it feeds a crowd and keeps everyone coming back for seconds!

Make-Ahead Friendly: Prepare it in advance and pop it in the oven when you're ready to serve – a true time-saver!

Once you try this comforting casserole, it’s sure to become a go-to dish for family dinners or potlucks.

Creamy Southern Spaghetti Bake Ingredients

For the Pasta
• Spaghetti – The base of the dish; offers structure. Substitution: Penne, rotini, or linguine can be used, just cook until al dente.

For the Filling
• Cooked Shredded Chicken – Provides protein and heartiness. Substitution/Prep Note: Rotisserie chicken is a great shortcut.
• Cream Cheese (8 oz) – Adds creamy texture and richness. Make sure it is softened for easy mixing.
• Cream of Chicken Soup (10.5 oz) – Acts as a creamy binder.
• Sour Cream (1 cup) – Adds tanginess and contributes to the creamy texture.
• Ranch Seasoning Mix (1 oz packet) – Provides flavor depth and Southern twist.
• Garlic Powder (1 tsp) – Enhances overall flavor.
• Black Pepper (½ tsp) – Adds a hint of spice.

For Toppings
• Shredded Cheddar Cheese (2 cups, divided) – Provides cheesy flavor; melts beautifully and forms a crust on top.
• Grated Parmesan Cheese (½ cup) – Adds a salty, nutty flavor.
• Bacon (6 slices, cooked and crumbled) – Adds a crunchy topping and smoky flavor.
• Chopped Parsley (optional, 2 tbsp) – For garnish and added freshness.

This luscious Creamy Southern Spaghetti Bake comes together beautifully, transforming even the simplest ingredients into a delightful meal. Enjoy every cheesy, creamy, and comforting bite!

Step‑by‑Step Instructions for Creamy Southern Spaghetti Bake

Step 1: Preheat the Oven
Begin by preheating your oven to 350°F (175°C). While the oven warms up, grease a 9x13-inch baking dish with cooking spray or butter to prevent sticking. This essential preparation will create a lovely golden crust on your Creamy Southern Spaghetti Bake when it's done.

Step 2: Cook the Spaghetti
In a large pot, bring salted water to a boil and cook the spaghetti until just al dente, about 7-8 minutes. Stir occasionally to prevent sticking. Once cooked, drain the spaghetti in a colander, and set it aside without rinsing, as the starch will help the sauce cling better.

Step 3: Prepare the Creamy Filling
In a large mixing bowl, combine the softened cream cheese, cream of chicken soup, sour cream, ranch seasoning mix, garlic powder, and black pepper. Use a hand mixer or a wooden spoon to mix until the ingredients are smooth and fully blended. This creamy mixture is the heart of your Creamy Southern Spaghetti Bake.

Step 4: Mix in Chicken and Cheese
Gently fold in the cooked shredded chicken, 1½ cups of shredded cheddar cheese, and the drained spaghetti into the creamy mixture. Stir until every strand of spaghetti is well coated with the flavorful filling. This creates a luscious, hearty base for your casserole that’s sure to delight.

Step 5: Assemble the Casserole
Pour the creamy spaghetti mixture into the prepared baking dish, spreading it out evenly with a spatula. Top it generously with the remaining shredded cheddar cheese and crumbled bacon to create a deliciously cheesy and crispy topping. This step is crucial for that mouthwatering finish.

Step 6: Bake to Perfection
Cover the baking dish with aluminum foil and place it in the preheated oven. Bake for 25 minutes, then carefully remove the foil and continue baking for an additional 10-15 minutes. Keep an eye out for a golden, bubbly top that signals your Creamy Southern Spaghetti Bake is ready.

Step 7: Let it Rest
Once out of the oven, let the casserole sit for 5-10 minutes. This resting time will make it easier to slice and serve, ensuring those creamy layers hold together beautifully. It’s the final touch before garnishing and diving into this comforting meal.

Step 8: Garnish and Serve
For a fresh finish, sprinkle the baked casserole with chopped parsley, if desired. Serve your Creamy Southern Spaghetti Bake warm, and watch as it becomes the centerpiece of joy and laughter at your family table or potluck gathering!

Storage Tips for Creamy Southern Spaghetti Bake

Fridge: Store leftover Creamy Southern Spaghetti Bake in an airtight container for up to 3-4 days. This keeps it fresh and ready for quick meals!

Freezer: For longer storage, freeze the baked casserole by wrapping it tightly in plastic wrap and then foil. It can stay good for up to 2 months.

Reheating: When ready to enjoy, thaw overnight in the fridge and reheat in the oven at 350°F (175°C) until heated through, about 25-30 minutes.

Make-Ahead: Assemble the spaghetti bake in advance and refrigerate for up to 24 hours before baking. This makes it a convenient option for busy days!

Creamy Southern Spaghetti Bake Variations

Feel free to let your creativity shine with these delightful twists to your Creamy Southern Spaghetti Bake!

  • Vegetarian: Swap the chicken with sautéed mushrooms, zucchini, or spinach for a hearty veggie option. Each bite bursts with fresh flavors!

  • Spicy Kick: Add diced jalapeños or a dash of cayenne pepper to the sauce for a fiery surprise. This twist awakens the taste buds and brings excitement to every mouthful.

  • Cheddar Lovers: Amp up the cheesy goodness by mixing different cheese varieties such as gouda, mozzarella, or pepper jack. It creates an irresistible melty texture, perfect for cheese enthusiasts.

  • Creamy White Sauce: Instead of cream of chicken soup, use a homemade white sauce for a rich and decadent flavor. It’s a bit more work but elevates your casserole to gourmet levels.

  • Bacon-Free: For a lighter version, try using turkey bacon or omit altogether, adding crushed nuts on top for crunch instead. You'll still enjoy a satisfying bite without the extra fat.

  • Pasta Alternatives: Feeling adventurous? Try a different base like whole wheat pasta or even zucchini noodles for a low-carb take. This swaps the texture while keeping all that creamy goodness.

  • Herb Infusion: Incorporate fresh herbs like rosemary or thyme into the cream mixture for aromatic notes. Herbs can transform the ordinary into extraordinary with their fragrant touch.

  • Savory Add-Ons: Toss in some caramelized onions or roasted red peppers to bring layers of flavor. These additions create a symphony of tastes that will charm your guests.

For more delicious ideas, consider trying out a comforting dish like Cheesy Zucchini Bake or whip up some tasty Matcha Baked Doughnuts for a sweet treat!

Make Ahead Options

These Creamy Southern Spaghetti Bake options are a lifesaver for busy home cooks! You can assemble the entire casserole up to 24 hours in advance by following the usual steps, then cover it tightly with foil and refrigerate to maintain freshness. To keep the flavors vibrant, make sure to allow the dish to sit at room temperature for about 30 minutes before baking. When ready to serve, preheat your oven to 350°F (175°C) and bake as directed, simply adding a few extra minutes if it’s been chilled. You'll enjoy the same delicious goodness, saving you time on hectic weeknights while still impressing your family and friends!

Expert Tips for Creamy Southern Spaghetti Bake

• Choose the Right Pasta: Opt for spaghetti or alternatives like penne or rotini; just ensure they are cooked al dente to hold up in the casserole.

• Soften Cream Cheese: Always soften your cream cheese before mixing; this avoids lumps and ensures a smooth, creamy filling in your spaghetti bake.

• Flavor Boost: Add a pinch of red pepper flakes to the filling for a delightful kick. For a Southern twist, consider using a spicy ranch dressing instead of the seasoning mix.

• Avoid Overbaking: Keep an eye on the casserole during the last minutes of baking; you want a golden crust without drying out the creamy layers of your Southern spaghetti bake.

• Meal Prep: Feel free to make this casserole ahead of time; assemble everything, cover, and refrigerate for up to 24 hours before baking—perfect for busy weeknights!

What to Serve with Creamy Southern Spaghetti Bake?

Elevate your family dinner with these delightful pairings that enhance the comforting nature of this casserole.

  • Garlic Bread: The crunchy, buttery slices perfectly complement the creamy texture, allowing every bite to burst with flavor.

  • Crisp Green Salad: A refreshing mix of greens with a light vinaigrette cuts through the richness of the bake, adding a vibrant contrast.

  • Roasted Vegetables: Seasoned and caramelized veggies provide a delightful earthy note, balancing the creaminess with their natural sweetness.

  • Buttery Corn on the Cob: Sweet and juicy corn on the cob is the ideal summer side, bringing a touch of nostalgia and bright flavor moments to the table.

  • Creamy Coleslaw: A tangy coleslaw adds crunchy texture and a zesty note that pairs wonderfully with the decadent spaghetti bake.

  • Sweet Tea or Lemonade: Sipping on these refreshing drinks adds a delightful Southern charm, making your meal feel extra special.

Creating a full meal is simple with these delicious sides, ensuring everyone leaves the table satisfied and happy.

Creamy Southern Spaghetti Bake Recipe FAQs

What type of pasta should I use for this recipe?
Absolutely! While spaghetti is the classic choice for the Creamy Southern Spaghetti Bake, you can also substitute with penne, rotini, or linguine. Just make sure to cook the pasta until al dente for the best texture in the casserole.

How should I store leftovers?
Leftover Creamy Southern Spaghetti Bake can be stored in an airtight container in the refrigerator for up to 3-4 days. This way, you'll have quick and easy meals ready to reheat when needed!

Can I freeze this casserole?
Yes! Freezing this dish is super simple. First, allow the casserole to cool completely, then wrap it tightly in plastic wrap followed by aluminum foil to prevent freezer burn. It will keep well for up to 2 months. To thaw, just place it in the refrigerator overnight, then reheat in the oven at 350°F (175°C) for about 25-30 minutes until warmed through.

What can I do if my cream cheese is lumpy?
To avoid lumps in your filling, always allow your cream cheese to soften at room temperature before mixing. If you find it still lumpy, you can use a hand mixer or a whisk to blend it smoothly. Mixing in smaller batches can also help achieve a creamier texture.

Are there any dietary considerations for this recipe?
Absolutely! If you have dietary restrictions, feel free to swap out ingredients to cater to your needs. For a gluten-free version, use gluten-free pasta and ensure the cream of chicken soup is gluten-free as well. You could also substitute the chicken with sautéed veggies for a vegetarian option. Just be mindful about any allergies to ingredients like cream cheese or ranch seasoning!

Creamy Southern Spaghetti Bake

Creamy Southern Spaghetti Bake: A Cozy Family Favorite

Creamy Southern Spaghetti Bake is an easy, comforting casserole with layers of chicken and cream cheese ranch sauce, perfect for busy weeknights and gatherings.
Print Recipe Pin Recipe
Prep Time 15 minutes mins
Cook Time 40 minutes mins
Resting Time 10 minutes mins
Total Time 1 hour hr 5 minutes mins
Servings: 8 slices
Course: Dinner
Cuisine: Southern
Calories: 450
Ingredients Equipment Method Nutrition Notes

Ingredients
  

For the Pasta
  • 8 oz Spaghetti Substitution: Penne, rotini, or linguine can be used, just cook until al dente.
For the Filling
  • 2 cups Cooked Shredded Chicken Rotisserie chicken is a great shortcut.
  • 8 oz Cream Cheese Make sure it is softened for easy mixing.
  • 10.5 oz Cream of Chicken Soup
  • 1 cup Sour Cream
  • 1 oz Ranch Seasoning Mix
  • 1 tsp Garlic Powder
  • 0.5 tsp Black Pepper
For Toppings
  • 2 cups Shredded Cheddar Cheese Divided; melts beautifully and forms a crust on top.
  • 0.5 cup Grated Parmesan Cheese
  • 6 slices Bacon Cooked and crumbled.
  • 2 tbsp Chopped Parsley Optional, for garnish.

Equipment

  • Large pot
  • Mixing Bowl
  • Baking Dish
  • Spatula

Method
 

Preparation
  1. Preheat your oven to 350°F (175°C) and grease a 9x13-inch baking dish.
  2. In a large pot, boil salted water and cook the spaghetti until al dente, about 7-8 minutes. Drain and set aside.
  3. In a large mixing bowl, combine cream cheese, cream of chicken soup, sour cream, ranch seasoning mix, garlic powder, and black pepper. Mix until smooth.
  4. Fold in the cooked chicken, 1½ cups cheddar cheese, and spaghetti until well coated.
  5. Pour the mixture into the baking dish, spread evenly, and top with remaining cheddar cheese and crumbled bacon.
  6. Cover with aluminum foil and bake for 25 minutes. Remove foil and bake for an additional 10-15 minutes until golden and bubbly.
  7. Let the casserole rest for 5-10 minutes before serving. Garnish with chopped parsley if desired.

Nutrition

Serving: 1sliceCalories: 450kcalCarbohydrates: 40gProtein: 28gFat: 24gSaturated Fat: 12gCholesterol: 95mgSodium: 800mgPotassium: 450mgFiber: 2gSugar: 3gVitamin A: 500IUVitamin C: 2mgCalcium: 250mgIron: 2mg

Notes

This dish transforms simple ingredients into a comforting meal that will delight your family and guests.

Tried this recipe?

Let us know how it was!
  • « Previous Page
  • 1
  • …
  • 151
  • 152
  • 153
  • 154
  • 155
  • …
  • 242
  • Next Page »

Welcome!

Hi, I’m Grace, a Sydney-based home cook with a passion for bold flavors and trending ingredients. Whether you’re a busy beginner or a seasoned foodie, you’ll find dishes here that are fresh, fun, and full of flavor.

More about me

Popular Recipes

  • Ground Beef Stroganoff
    Creamy Ground Beef Stroganoff in Just 30 Minutes
  • Ground Beef Stroganoff
    Creamy Ground Beef Stroganoff in Just 30 Minutes
  • Taco Joes
    Taco Joes: Savory Sandwiches with a Zesty Kick
  • Stovetop Creamy Ground Beef Pasta
    Stovetop Creamy Ground Beef Pasta: Dinner in 30 Minutes!

Footer

↑ back to top

About

  • Privacy Policy
  • Disclaimer
  • Terms & Conditions

Newsletter

  • Sign Up! for emails and updates

Contact

  • About me
  • Contact me

Copyright © 2025 TastyTrendIngredients