tastytrendingredients

  • Home
  • Recipes
    • Appetizers
    • Breakfast
    • Dessert
    • Dinner
    • Drinks
    • Salads
    • Snacks
    • Soups
  • About me
  • Contact me
menu icon
go to homepage
  • Home
  • Recipes
    • Appetizers
    • Breakfast
    • Dessert
    • Dinner
    • Drinks
    • Salads
    • Snacks
    • Soups
  • About me
  • Contact me
search icon
Homepage link
  • Home
  • Recipes
    • Appetizers
    • Breakfast
    • Dessert
    • Dinner
    • Drinks
    • Salads
    • Snacks
    • Soups
  • About me
  • Contact me
×

Crockpot Spinach Artichoke Dip with Frozen Spinach Made Easy

October 24, 2025 by Grace Snow Leave a Comment

As I stirred my slow cooker one evening, the delightful aroma of savory garlic and melting cheese wafted through my kitchen, instantly lifting my spirits. This Easy Crockpot Spinach Artichoke Dip with Frozen Spinach is not just another appetizer; it’s a warm hug for your taste buds, perfect for gatherings or cozy nights in. With the beauty of a “dump-and-go” recipe, you can whip it up in no time and let it work its magic while you mingle with your guests. Plus, this hearty dip is vegetarian-friendly, making it an ideal crowd-pleaser that everyone will adore. Are you ready to dive into the creamy goodness that will elevate your snack game?

Why is this dip a game-changer?

Simplicity at Its Best: With just a few ingredients and a "dump-and-go" method, whipping up this dip is effortless.

Crowd-Pleasing Flavor: The combination of creamy cheeses, tangy artichokes, and savory garlic creates an irresistible taste that will have your guests coming back for more.

Versatile Snack Option: Perfect for parties or a cozy movie night, this dip pairs wonderfully with tortilla chips, fresh veggies, or even pita bread.

Time-Saving Convenience: Using frozen spinach cuts prep time, and your slow cooker essentially does the work for you, freeing you up to socialize or enjoy your evening.

Gourmet Touch: Impress your friends with a rich, creamy dip that tastes like it came straight from a restaurant, but is made right in your kitchen! For more appetizers, consider trying my Spinach Pie Deliciously or Crispy Parmesan Artichoke Hearts.

Crockpot Spinach Artichoke Dip with Frozen Spinach Ingredients

For the Dip

  • Onion – provides a foundational flavor; substitute with shallots for a milder taste.
  • Garlic – adds aromatic depth; fresh garlic is recommended, but jarred can be used in a pinch.
  • Frozen Spinach – acts as the primary base; do not thaw before use to maintain texture.
  • Artichoke Hearts – introduces a tender texture and unique taste; canned is typically used, while fresh can be labor-intensive.
  • Sour Cream – adds tanginess and creaminess; Greek yogurt can be used as a lighter alternative.
  • Mayonnaise – contributes richness; substitute with more Greek yogurt if desired.
  • Parmesan Cheese – offers a salty, nutty flavor; freshly grated melts better than pre-packaged.
  • Mozzarella Cheese – adds gooeyness; feel free to mix with other cheeses like cheddar for variation.
  • Cream Cheese – provides creaminess; does not need to be softened beforehand due to the slow-cooking process.

This delightful concoction of ingredients melds together in your slow cooker to create the ultimate Crockpot Spinach Artichoke Dip with Frozen Spinach—a warm and inviting dip perfect for any gathering!

Step‑by‑Step Instructions for Crockpot Spinach Artichoke Dip with Frozen Spinach

Step 1: Gather the Ingredients
Begin by assembling all your ingredients for the Crockpot Spinach Artichoke Dip with Frozen Spinach. You’ll need onion, garlic, frozen spinach (do not thaw), artichoke hearts, sour cream, mayonnaise, Parmesan cheese, mozzarella cheese, and cream cheese. Ensure everything is ready to save time during the mixing process.

Step 2: Mix the Base Ingredients
In your crockpot, combine the chopped onion and minced garlic along with the frozen spinach and artichoke hearts. Next, add in the sour cream, mayonnaise, grated Parmesan, and shredded mozzarella. Stir gently until everything is well mixed, creating a deliciously creamy base for your dip that’s packed with flavor.

Step 3: Add the Cream Cheese
Now it's time to incorporate the cream cheese into your mix. Place the cream cheese on top of the mixture without stirring it in just yet. This allows the cream cheese to melt beautifully as it cooks, enriching the overall texture and flavor of the dip.

Step 4: Cook on High
Cover the crockpot and set it to cook on High for 1.5 hours. Keep an eye on it during this time—the dip should start to bubble gently, signaling that the cheeses are melting and blending nicely together.

Step 5: Stir and Continue Cooking
Once the initial cooking time is complete, use a spatula to gently stir the dip, incorporating the melted cream cheese into the mixture. Return the lid and continue cooking for another 15-30 minutes until it’s hot, bubbling, and the flavors meld together, creating a luscious texture.

Step 6: Serve with Your Favorite Dippers
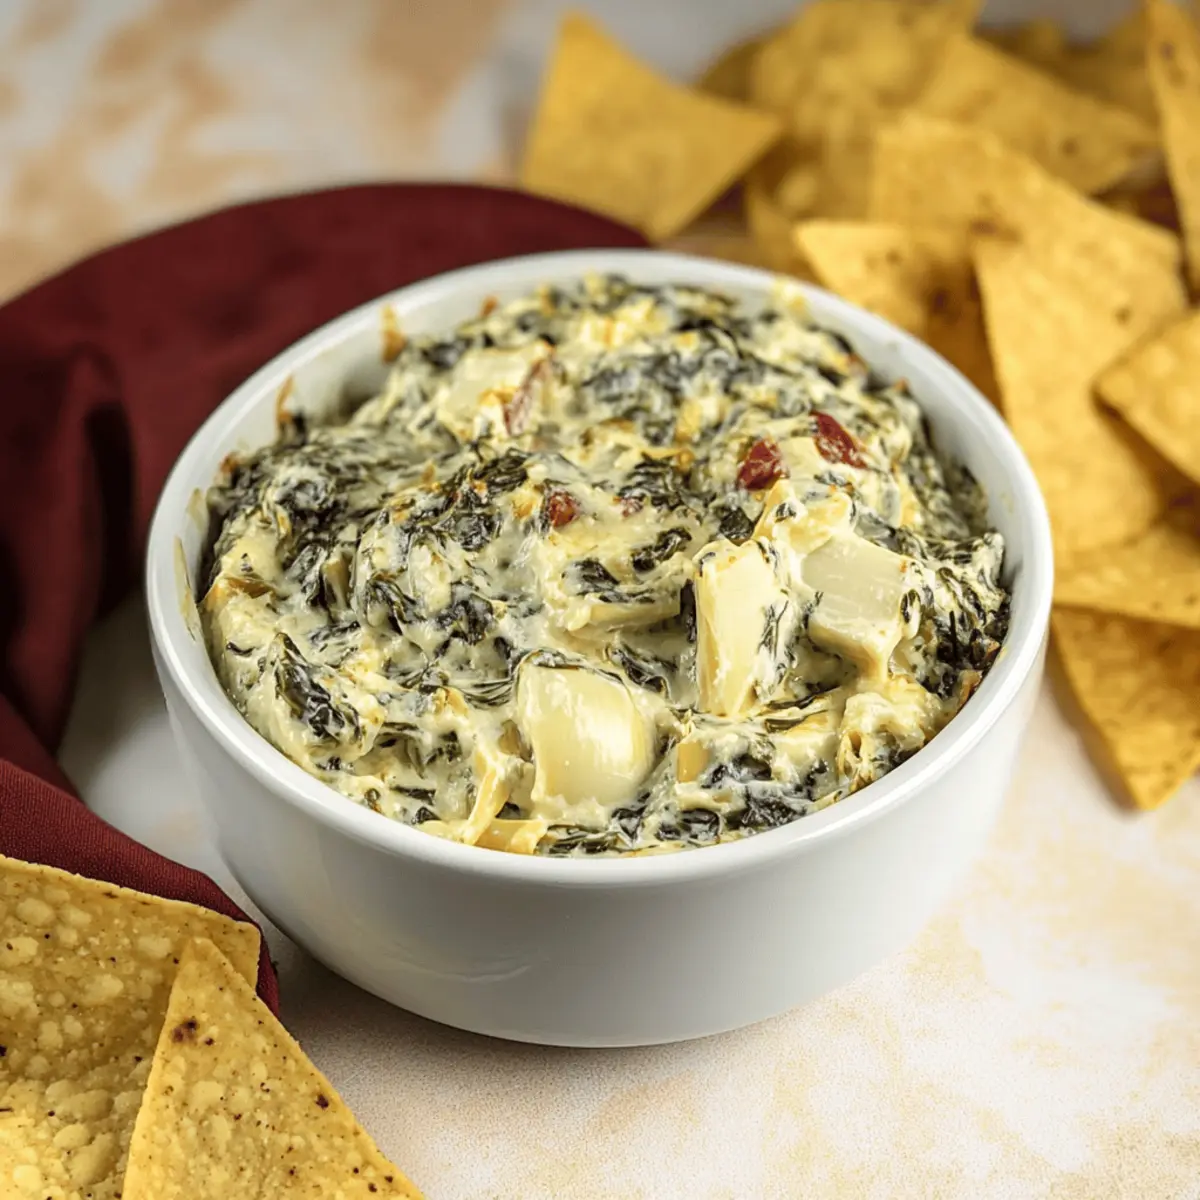
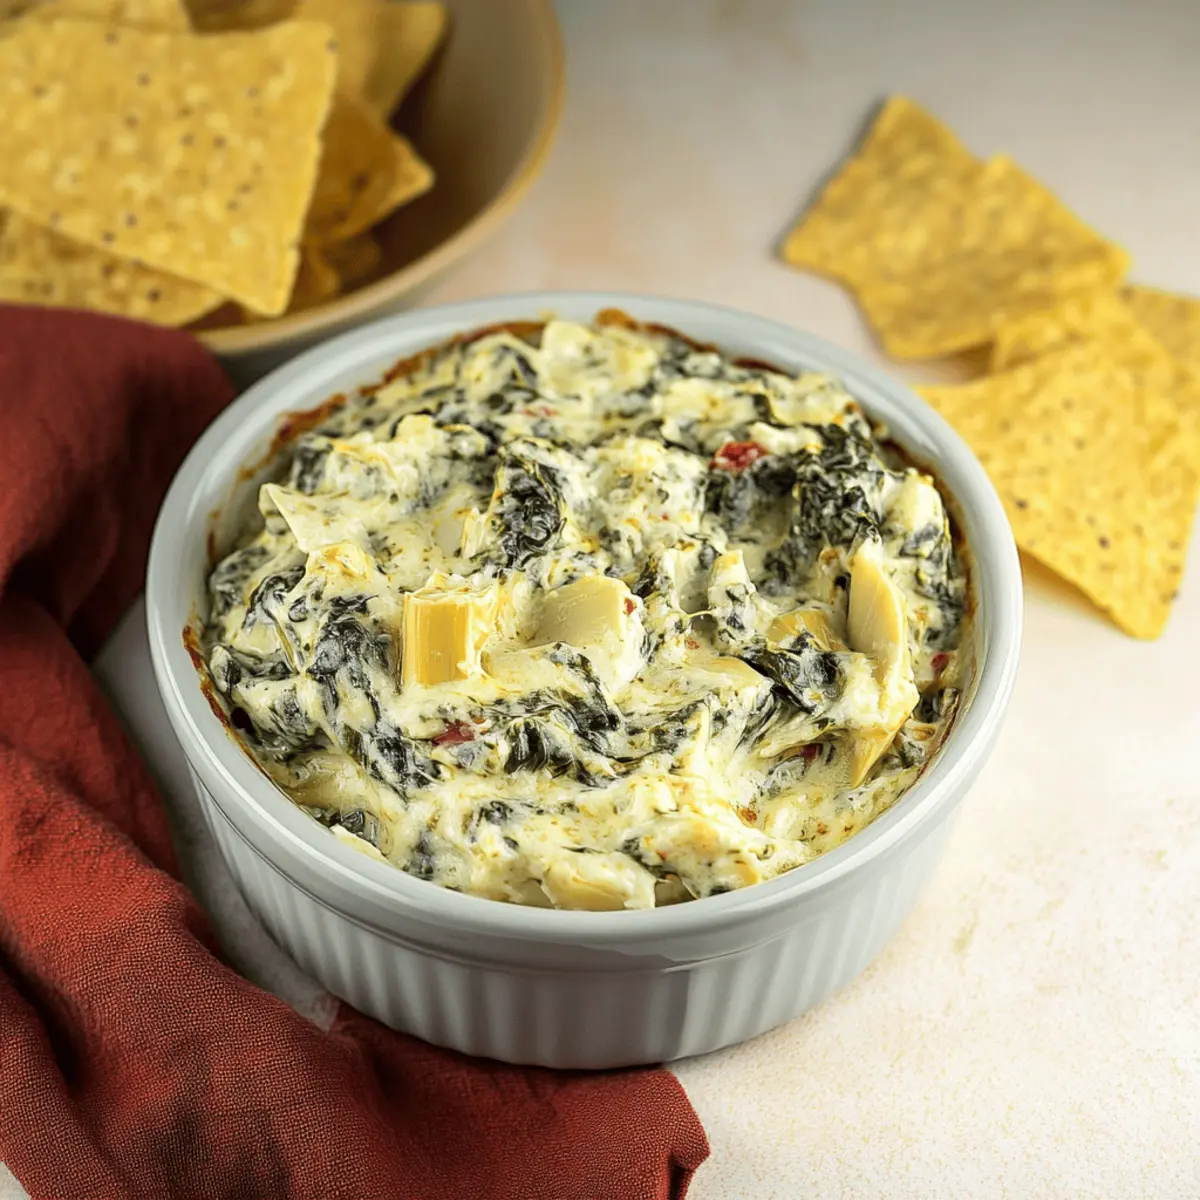
Once the Crockpot Spinach Artichoke Dip with Frozen Spinach is bubbling and ready, carefully spoon it into a serving bowl. Pair with crunchy tortilla chips, fresh veggies, or pita bread for a delightful snack. The visual appeal and aroma will make it hard for anyone to resist!

Expert Tips for the Best Dip

Perfect Cheese Melting: Ensure your cream cheese is spread evenly on top without mixing it in initially. This allows for even melting and a creamy texture in your Crockpot Spinach Artichoke Dip with Frozen Spinach.

Avoid Watery Consistency: If your dip seems too runny, take off the lid during the last 15-30 minutes to allow excess moisture to evaporate.

Texture Check: Stir the dip periodically to monitor its texture. If it becomes too loose, add more cream cheese or mozzarella to thicken it up.

Flavor Enhancement: For added depth, sauté the onion and garlic before adding them to the dip. This simple step can elevate the overall flavor profile.

Thrifty Leftovers: Use any remaining dip as a delicious filling for stuffed chicken breasts or mix it into pasta for a quick meal the next day!

Make Ahead Options

These Crockpot Spinach Artichoke Dip with Frozen Spinach is perfect for meal prep enthusiasts! You can chop the onion, mince the garlic, and mix the spinach, artichoke hearts, sour cream, and cheeses up to 24 hours in advance, storing the mixture in an airtight container in the refrigerator to maintain freshness. Just be sure to add the cream cheese on top before cooking—that step helps keep its creamy texture. When you’re ready to serve, place the prepped mixture in the crockpot, cook on High for 1.5 hours, stir well, and let it bubble for an additional 15-30 minutes for that luxurious finish. This way, you save precious time and still enjoy a deliciously creamy dip that will wow your guests!

What to Serve with Easy Crockpot Spinach Artichoke Dip with Frozen Spinach

Serving up a delightful dip is just the beginning; it's all about creating a full meal experience that leaves your guests asking for more.

  • Tortilla Chips: These crunchy delights provide the perfect contrast to the creamy dip, ensuring every scoop is satisfying.

  • Fresh Veggie Sticks: Crisp carrots and celery sticks add a refreshing crunch, balancing the rich flavors of the dip while keeping it light and healthy.

  • Pita Bread: Soft, warm pita is not only a delightful vessel for your dip but also enhances the flavor with its slightly chewy texture.

  • Cheese Platter: Offering assorted cheeses alongside your dip creates an inviting charcuterie experience. Add some savory crackers for variety!

  • Stuffed Mini Peppers: These bite-sized treats are perfect for a pop of color and an extra layer of flavor while being easily dippable.

  • Savory Bruschetta: Toasted bread topped with tomatoes and basil pairs wonderfully with the creamy spinach artichoke dip, bringing a touch of freshness to your spread.

  • Sparkling Wine: A chilled sparkling wine elevates your gathering, matching beautifully with the comforting flavors of the dip.

  • Chocolate-Covered Strawberries: To end on a sweet note, these elegant treats provide a decadent contrast to the savory dip, making for a delightful finish.

Storage Tips for Crockpot Spinach Artichoke Dip with Frozen Spinach

Fridge: Store leftover Crockpot Spinach Artichoke Dip in an airtight container for up to 4 days. Ensure it’s cooled completely before sealing to retain freshness.

Freezer: For longer storage, freeze the dip in a freezer-safe container or resealable bag, where it can last for up to 3 months. Thaw in the fridge overnight before reheating.

Reheating: Gently reheat the dip on the stovetop over medium-low heat, stirring often. Add a splash of milk or more cheese to restore creaminess if needed.

Room Temperature: If serving at a party, keep the dip warm in the crockpot for a maximum of 2 hours. After that, it should be refrigerated to ensure food safety.

Crockpot Spinach Artichoke Dip Variations

Feel free to make this dip your own with these scrumptious twists that will tantalize your taste buds!

  • Sautéed Aromatics: Sautéing garlic and onions before adding them enhances the dip's depth of flavor. It’s a simple step that makes a big difference.

  • Spice It Up: For a bit of heat, toss in some red pepper flakes or add roasted red peppers. They’ll contribute a delightful smokiness and eye-catching color.

  • Vegan Upgrade: Opt for a vegan version by swapping dairy products for cashew cream or plant-based cheeses. Making it vegan doesn’t mean sacrificing flavor!

  • Herbed Goodness: Stir in fresh herbs like dill or basil for a burst of freshness. These herbs will elevate the dip from ordinary to extraordinary.

  • Creamy Spinach Boost: Add more spinach by mixing in wilted fresh spinach towards the end of cooking for added texture and vibrant color. It’ll make your dip extra lush.

  • Cheese Variety: Mix different cheeses, such as cheddar or gouda, with mozzarella for a unique flavor profile. Each cheese brings its own flair to the dish!

  • Crunchy Topping: For an exciting texture contrast, top the dip with crispy panko breadcrumbs mixed with Parmesan before serving. Just a sprinkle will do the trick!

  • BBQ Twist: Try adding a dash of BBQ sauce for a tangy, smoky flavor that pairs beautifully with the creaminess of the cheese. Your guests won’t believe their taste buds!

With these variations, you can customize your Crockpot Spinach Artichoke Dip with Frozen Spinach to suit any occasion. For more delightful recipes, check out my Chickpea Spinach Curry or whip up some wholesome Sweet Potatoes Black. Enjoy your culinary adventure!

Crockpot Spinach Artichoke Dip with Frozen Spinach Recipe FAQs

How do I select the best frozen spinach for this dip?
Absolutely! When choosing frozen spinach, look for bags that are vibrant green and free of dark spots. Ensure the packaging is intact and avoid any brands that contain added sauces or seasonings, as you want to control the flavor of your dip.

How should I store leftovers, and how long will they last?
Very! You can store leftover Crockpot Spinach Artichoke Dip in an airtight container for up to 4 days in the refrigerator. Make sure the dip is completely cooled before sealing the container to keep it fresh and delicious!

Can I freeze the dip, and how?
Absolutely! To freeze your Crockpot Spinach Artichoke Dip, allow it to cool completely, and then transfer it to a freezer-safe container or resealable freezer bag. It can last for up to 3 months. When you’re ready to enjoy it again, simply thaw it in the refrigerator overnight. Reheat on the stovetop over medium-low heat, stirring frequently and adding a splash of milk if needed.

What should I do if my dip turns out watery?
If your dip gets too watery, there’s an easy fix! Simply uncover the crockpot and cook it for an additional 15-30 minutes, stirring occasionally. This helps the excess moisture evaporate. If it still seems loose, consider adding more melted cream cheese or mozzarella to thicken it up.

Is this dip suitable for vegetarians, and what about common allergens?
Very! This Crockpot Spinach Artichoke Dip is vegetarian-friendly, making it an excellent option for gatherings. If you're concerned about common allergens, note that it contains dairy products. For those with dairy allergies, substitute the cream cheese and other dairy ingredients with plant-based versions to make a delicious vegan dip alternative.

Crockpot Spinach Artichoke Dip with Frozen Spinach

Crockpot Spinach Artichoke Dip with Frozen Spinach Made Easy

This Crockpot Spinach Artichoke Dip with Frozen Spinach is the perfect vegetarian-friendly appetizer that combines savory flavors for any gathering.
Print Recipe Pin Recipe
Prep Time 10 minutes mins
Cook Time 1 hour hr 30 minutes mins
Total Time 1 hour hr 40 minutes mins
Servings: 8 servings
Course: Appetizers
Cuisine: American
Calories: 250
Ingredients Equipment Method Nutrition Notes

Ingredients
  

For the Dip
  • 1 medium Onion provides a foundational flavor; substitute with shallots for a milder taste.
  • 2 cloves Garlic adds aromatic depth; fresh garlic is recommended, but jarred can be used in a pinch.
  • 16 oz Frozen Spinach acts as the primary base; do not thaw before use to maintain texture.
  • 14 oz Artichoke Hearts introduces a tender texture and unique taste; canned is typically used.
  • 1 cup Sour Cream adds tanginess and creaminess; Greek yogurt can be used as a lighter alternative.
  • 1/2 cup Mayonnaise contributes richness; substitute with more Greek yogurt if desired.
  • 1 cup Parmesan Cheese offers a salty, nutty flavor; freshly grated melts better than pre-packaged.
  • 1 cup Mozzarella Cheese adds gooeyness; feel free to mix with other cheeses like cheddar for variation.
  • 8 oz Cream Cheese provides creaminess; does not need to be softened beforehand.

Equipment

  • Crockpot

Method
 

Step-by-Step Instructions
  1. Gather all your ingredients for the dip.
  2. In your crockpot, combine the chopped onion, minced garlic, frozen spinach, and artichoke hearts.
  3. Add in the sour cream, mayonnaise, grated Parmesan, and shredded mozzarella. Stir gently until well mixed.
  4. Place the cream cheese on top without stirring it in.
  5. Cover and cook on High for 1.5 hours.
  6. Stir the dip, incorporating the melted cream cheese, and continue cooking for another 15-30 minutes.
  7. Spoon into a serving bowl and pair with tortilla chips, fresh veggies, or pita bread.

Nutrition

Serving: 1cupCalories: 250kcalCarbohydrates: 8gProtein: 10gFat: 20gSaturated Fat: 10gPolyunsaturated Fat: 1gMonounsaturated Fat: 8gCholesterol: 50mgSodium: 400mgPotassium: 300mgFiber: 3gSugar: 2gVitamin A: 2000IUVitamin C: 15mgCalcium: 250mgIron: 2mg

Notes

Store leftovers in an airtight container for up to 4 days. For longer storage, freeze for up to 3 months.

Tried this recipe?

Let us know how it was!

Savory Turkey and Stuffing Meatballs with Gravy to Savor

October 23, 2025 by Grace Snow Leave a Comment

In the midst of a hectic week, there's nothing quite like the comforting aroma of home-cooked food wafting through the kitchen. Enter my Turkey and Stuffing Meatballs with Gravy, a dish that delivers all the festive flavors of Thanksgiving in under an hour. These savory meatballs, crafted from juicy ground turkey and delectable stuffing mix, make for an easy weeknight dinner that will please everyone at the table. Not only are they a breeze to whip up, but the addition of a rich, velvety gravy elevates them into true comfort food territory. Whether served over fluffy mashed potatoes or nestled into a warm bowl of egg noodles, this recipe invites you to savor a little taste of celebration every day. Are you ready to add this delightful twist on a classic to your weekly menu?

What makes these meatballs special?

Hearty Comfort: These Turkey and Stuffing Meatballs with Gravy bring the warmth of a Thanksgiving feast to your plate any night of the week.

Quick & Easy: With minimal prep and just under an hour to cook, you can whip up a satisfying meal that crowds will rave about.

Savory Goodness: The combination of tender turkey and flavorful stuffing creates a dish that's both delightful and nostalgic.

Versatile Serving Options: Enjoy these meatballs over mashed potatoes, egg noodles, or even as a delightful appetizer with cranberry sauce!

Elevate your dinner routine and indulge in this comforting dish that’s sure to satisfy, just like my Sweet Potatoes Black or Fried Shrimp Cabbage.

Turkey and Stuffing Meatballs Ingredients

• Discover the delightful components of these Turkey and Stuffing Meatballs with Gravy.

For the Meatballs

  • Ground Turkey – The main protein that provides a light and tender texture; substituting with ground chicken will yield softer meatballs.
  • Large Eggs – Essential for binding the mixture together and adding moisture; opt for three if using medium eggs for a better hold.
  • Granulated Garlic – Adds savory depth; feel free to replace it with fresh garlic for a more intense flavor.
  • Salt – Enhances the overall flavors; adjust based on your broth's saltiness for the perfect balance.
  • Black Pepper – Adds a hint of spice; freshly ground will elevate the dish with a bolder flavor.
  • Onion – Finely grated or minced, it infuses moisture and flavor; shallots can be used for a sweeter twist.
  • Boxed Stuffing Mix – Provides seasoning and texture; choose turkey or chicken flavor for a savory kick.
  • Butter – Adds richness and assists in browning; olive oil can be a healthier alternative.
  • Olive Oil – Enhances flavor during cooking; you may substitute it with vegetable oil as needed.
  • Low Sodium Chicken Broth – Keeps the meatballs moist and is crucial for the gravy; vegetable broth can lighten the dish.
  • Dried Thyme – Adds an herby note to both meatballs and gravy; fresh thyme can be substituted for a vibrant flavor.

For the Gravy

  • Flour – Used to make the roux for thickening gravy; cornstarch or a gluten-free blend can be used as an alternative.

Get ready to bring the wonderful flavors of Thanksgiving into your kitchen with these simple yet satisfying Turkey and Stuffing Meatballs with Gravy!

Step‑by‑Step Instructions for Turkey and Stuffing Meatballs With Gravy

Step 1: Preheat the Oven
Begin by preheating your oven to 350°F (175°C). In a large mixing bowl, crumble the ground turkey and add in the large eggs, granulated garlic, salt, black pepper, and finely grated onion. Stir in the boxed stuffing mix until everything is well-combined, creating a flavorful base for your Turkey and Stuffing Meatballs.

Step 2: Form Meatballs
Using a standard ice cream scoop, portion out the mixture and shape it into uniform meatballs, about 1 to 1.5 inches in diameter. This ensures even cooking and a consistent texture in your Turkey and Stuffing Meatballs. Place the meatballs on a baking sheet lined with parchment paper while you prepare to cook them.

Step 3: Sear the Meatballs
Heat a large skillet over medium-high heat and add a combination of butter and olive oil. Once the butter has melted and the oil is hot, add the meatballs in batches, searing them for about 1 to 2 minutes on each side until they achieve a beautiful golden brown crust. This step adds flavor and color to your dish.

Step 4: Bake the Meatballs
Return all the browned meatballs to the skillet and carefully pour in the low sodium chicken broth along with the dried thyme. Cover the skillet and transfer it to the preheated oven, baking for approximately 20 minutes, or until the meatballs reach an internal temperature of 165°F (74°C). The broth will keep the meatballs juicy.

Step 5: Prepare the Gravy
While the meatballs are baking, you can make the gravy. In a separate saucepan, melt some butter over medium heat, then whisk in the flour to create a roux. Gradually add in some of the cooking liquid from the skillet to avoid lumps, stirring until the gravy thickens to your desired consistency. This is what makes your Turkey and Stuffing Meatballs truly comforting.

Step 6: Serve and Enjoy
Once the meatballs are cooked, remove them from the oven and transfer to a serving dish. Drizzle the luscious gravy over the top, and for an optional touch, strain the gravy for a smoother finish. Serve these delightful Turkey and Stuffing Meatballs with gravy over mashed potatoes or egg noodles for a cozy meal that captures the essence of a Thanksgiving feast.

What to Serve with Turkey and Stuffing Meatballs with Gravy

Breathe in the cozy aromas of home cooking as you create a delightful meal that comforts the soul and pleases everyone at the table.

  • Creamy Mashed Potatoes: The whisper of butter and cream creates a luscious bed for the savory meatballs and gravy.

  • Garlic Bread: Crunchy and warm, this bread option offers a perfect contrast to the tender meatballs and is a hit for dipping in the rich gravy.

  • Sautéed Green Beans: Fresh and vibrant green beans add a crisp texture, balancing the softness of the meatballs. A hint of garlic ensures they’re bursting with flavor.

  • Roasted Brussels Sprouts: Caramelized to perfection, their slightly bitter flavor pairs beautifully with the sweet richness of the meatballs' stuffing mix.

  • Cranberry Sauce: This tangy sweet condiment brings a pop of brightness that contrasts beautifully with the savory notes, evoking a true Thanksgiving spirit.

  • Cauliflower Rice: For a lighter option, this grain-free substitute absorbs the gravy and offers a delightful texture, keeping your plate healthy yet satisfying.

  • Apple Cider: A chilled glass of apple cider refreshes the palate between bites, while its sweet and tart essence complements the hearty meal.

  • Pumpkin Cheesecake: End your meal on a sweet note with this creamy dessert, echoing the flavors of fall and holiday gatherings, leaving everyone smiling.

Expert Tips for Turkey and Stuffing Meatballs

  • Proper Mixing: Ensure you mix the turkey and stuffing thoroughly but don’t overwork the meat. This will keep your Turkey and Stuffing Meatballs tender rather than tough.

  • Uniform Size: Use an ice cream scoop for consistent meatball size. This way, they cook evenly, enhancing the overall texture and flavor.

  • Avoid Soggy Meatballs: Don’t skip the searing step! Browning the meatballs adds flavor and helps keep them firm while baking in the broth.

  • Check Temperature: Use an instant-read thermometer to ensure the meatballs reach an internal temperature of 165°F. This prevents overcooking and drying them out.

  • Flavor Boost: For an extra depth of flavor, add any juices released while the meatballs rest into the gravy. This little trick can elevate your Turkey and Stuffing Meatballs With Gravy to another level!

Turkey and Stuffing Meatballs Variations

Feel free to get creative and customize these meatballs to suit your taste preferences and dietary needs!

  • Ground Chicken: Substitute ground turkey with ground chicken for a slightly different texture and flavor profile.
  • Herbaceous Twist: Use fresh herbs instead of dried thyme for a bright, vibrant flavor that will enhance every bite.
  • Spicy Kick: Add crushed red pepper flakes to the meat mixture for a delicious heat that beautifully balances the savory notes.
  • Vegetable Boost: Mix in finely chopped spinach or zucchini to amp up the nutrition and add moisture to the meatballs.
  • Gluten-Free Option: Swap boxed stuffing mix with gluten-free bread crumbs or crushed gluten-free crackers for a gluten-free dish.
  • Mini Meatball Bites: Create smaller meatballs for a perfect appetizer or game day snack; serve with a side of cranberry sauce for dipping.
  • Savory Gravy Twist: Use mushroom broth instead of chicken broth for a deep, umami flavor in your gravy.
  • Savory & Sweet: Incorporate dried cranberries or apples into the meatball mixture for a delightful contrast to the savory ingredients.

These variations guarantee a delicious meal every time! Try them with my Roasted Bratwurst Peppers for another comforting dish or serve them alongside some flavorful Skillet Pasta Sun for a complete feast!

Make Ahead Options

These Turkey and Stuffing Meatballs with Gravy are a fantastic option for busy weeknights and meal prep enthusiasts! You can mix the meatball ingredients and shape them into meatballs up to 24 hours in advance; just cover them tightly and refrigerate until you're ready to cook. Additionally, the gravy can be prepared ahead of time and stored in the fridge for up to 3 days. To maintain quality, allow the meatballs and gravy to cool before refrigerating, and reheat gently on the stove with a splash of broth before serving. Simply bake the meatballs and serve with the warmed gravy for a comforting meal that feels like a special occasion, all while saving you precious time!

How to Store and Freeze Turkey and Stuffing Meatballs

Fridge: Store leftover Turkey and Stuffing Meatballs in an airtight container for up to 5 days. This will keep them fresh and flavorful for quick weeknight meals.

Freezer: For longer storage, freeze the meatballs after cooking, placing them in a single layer on a baking sheet until solid. Then transfer to a freezer-safe bag for up to 3 months.

Reheating: To reheat, gently warm the meatballs in a saucepan with a bit of chicken broth to prevent drying out. Heat until warmed through, enjoying that savory flavor again!

Storage Tip: If stored in gravy, you may need to add extra broth during reheating to maintain a silky consistency for your Turkey and Stuffing Meatballs.

Turkey and Stuffing Meatballs with Gravy Recipe FAQs

What kind of ground turkey is best to use?
Absolutely! For the juiciest meatballs, choose 93% lean ground turkey. This balance of fat keeps the meatballs tender and flavorful. If you'd like a leaner option, ground chicken also works beautifully and makes for softer meatballs.

How do I store leftover Turkey and Stuffing Meatballs?
I recommend storing leftover meatballs in an airtight container in the refrigerator for up to 5 days. Make sure they are completely cooled before sealing to maintain freshness. For longer storage, you can freeze them for up to 3 months.

Can I freeze these meatballs? How?
Yes! Freeze the Turkey and Stuffing Meatballs after cooking. First, allow them to cool completely. Then, place them in a single layer on a baking sheet lined with parchment paper, ensuring they don’t touch. Freeze until solid, about 1-2 hours, and then shift them to a freezer-safe bag, removing as much air as possible to prevent freezer burn. They’ll be delicious for months!

What should I do if my gravy is too thick?
If your gravy becomes too thick, it’s very easy to fix! Gradually whisk in additional chicken broth or water, a tablespoon at a time, while heating on medium-low. Keep stirring until you reach your desired consistency. A silky gravy is what we’re after, so don’t hesitate to tweak it!

Are these meatballs suitable for gluten-free diets?
Certainly! To adapt this recipe for gluten-free dietary needs, simply use a gluten-free stuffing mix and substitute the flour in the gravy with cornstarch or a gluten-free flour blend. This way, you can still enjoy those heartwarming flavors without any added gluten!

Can I make these meatballs in advance?
Very much so! To meal prep, you can prepare the meatballs a day ahead and refrigerate them in the raw form. Shape and store them in an airtight container, and when you're ready to cook, just sear and bake them as instructed. This saves time on busy weeknights!

Turkey and Stuffing Meatballs With Gravy

Savory Turkey and Stuffing Meatballs with Gravy to Savor

Delight in Turkey and Stuffing Meatballs with Gravy, a comforting dish that delivers Thanksgiving flavors in under an hour.
Print Recipe Pin Recipe
Prep Time 15 minutes mins
Cook Time 25 minutes mins
Total Time 40 minutes mins
Servings: 4 meatballs
Course: Dinner
Cuisine: American
Calories: 320
Ingredients Equipment Method Nutrition Notes

Ingredients
  

For the Meatballs
  • 1 lb Ground Turkey
  • 2 large Large Eggs
  • 1 tsp Granulated Garlic
  • 1 tsp Salt
  • 1 tsp Black Pepper
  • 1 medium Onion finely grated
  • 1 box Boxed Stuffing Mix turkey or chicken flavor
  • 2 tbsp Butter
  • 2 tbsp Olive Oil
  • 1 cup Low Sodium Chicken Broth
  • 1 tsp Dried Thyme
For the Gravy
  • 2 tbsp Flour

Equipment

  • Mixing Bowl
  • Baking Sheet
  • Skillet
  • Saucepan
  • Ice cream scoop

Method
 

Step-by-Step Instructions
  1. Preheat the oven to 350°F (175°C). In a large mixing bowl, crumble the ground turkey and add in the large eggs, granulated garlic, salt, black pepper, and finely grated onion. Stir in the boxed stuffing mix until well-combined.
  2. Using a standard ice cream scoop, portion out the mixture and shape it into uniform meatballs, about 1 to 1.5 inches in diameter. Place the meatballs on a baking sheet lined with parchment paper.
  3. Heat a large skillet over medium-high heat and add a combination of butter and olive oil. Once melted, add the meatballs in batches, searing them for about 1 to 2 minutes on each side until golden brown.
  4. Return all browned meatballs to the skillet and pour in the low sodium chicken broth along with the dried thyme. Cover and transfer to the oven, baking for approximately 20 minutes, or until the internal temperature reaches 165°F.
  5. While the meatballs bake, make the gravy by melting some butter in a saucepan, whisking in the flour to create a roux. Gradually add some of the cooking liquid, stirring until thickened.
  6. Remove the meatballs and transfer to a serving dish. Drizzle the gravy over the top and serve over mashed potatoes or egg noodles.

Nutrition

Serving: 2meatballsCalories: 320kcalCarbohydrates: 15gProtein: 25gFat: 18gSaturated Fat: 6gPolyunsaturated Fat: 2gMonounsaturated Fat: 8gCholesterol: 120mgSodium: 720mgPotassium: 450mgFiber: 1gSugar: 1gCalcium: 2mgIron: 8mg

Notes

For best results, ensure even cooking and don't skip the searing step to enhance flavor.

Tried this recipe?

Let us know how it was!

Crispy Leftover Mashed Potatoes and Stuffing Pancakes

October 23, 2025 by Grace Snow Leave a Comment

As I rummaged through my fridge the day after Thanksgiving, I stumbled upon a treasure trove of leftover stuffing and mashed potatoes. It was almost too good to toss aside! That’s when inspiration struck: why not whip up some delicious Leftover Stuffing Pancakes? These delightful pancakes marry the rich flavors of your feast into a crispy exterior and a tender interior that both comforts and excites the taste buds. Not only do they help clear out those leftovers, but they also turn ordinary ingredients into a crowd-pleasing dish that’s perfect for any meal. Ready to transform those remnants into something magical? Let’s dive into this creative cooking adventure together!

Why Use Leftover Thanksgiving Stuffing?

Convenience at Its Best: With just a few ingredients from your fridge, you can transform leftovers into something extraordinary.

Crispy Texture: These pancakes offer a delightful crunch on the outside that perfectly contrasts the soft, savory inside.

Flavor Explosion: Combining leftover stuffing with mashed potatoes creates a unique taste that resonates with all the warmth of Thanksgiving.

Creative Cooking: It's a fun and inventive way to repurpose leftovers, keeping meals exciting and preventing waste.

Versatile Dish: Serve them for breakfast, lunch, or dinner, and watch them disappear from your table! Consider pairing with poached eggs or a drizzle of gravy for an irresistible meal.

Leftover Mashed Potatoes and Stuffing Pancakes Ingredients

For the Pancake Mixture

  • Leftover Stuffing – This delightful base offers robust flavor and moisture; any variety works wonders!
  • Mashed Potatoes – Use this creamy goodness for binding and a comforting texture; leftovers are perfect here.
  • Eggs – These act as a binder helping the pancakes hold shape while adding protein.
  • Flour – All-purpose flour enhances the texture; feel free to swap for gluten-free options if needed.

For Seasoning

  • Salt – Essential for enhancing all the flavors; feel free to adjust based on your taste.
  • Pepper – A pinch adds just the right amount of heat; fresh ground is always a bonus!
  • Garlic Powder – For an extra layer of savory flavor; it works beautifully with your leftovers.

Ready to create these cozy, crispy Leftover Mashed Potatoes and Stuffing Pancakes? Let’s get started!

Step‑by‑Step Instructions for Leftover Mashed Potatoes and Stuffing Pancakes

Step 1: Combine Ingredients
In a large bowl, add your leftover stuffing and mashed potatoes. Use a fork to gently mix them until well combined, ensuring the textures merge without over-mixing, which can result in tougher pancakes. You want a cohesive mixture that maintains some of the stuffing's delightful chunks—this should take about 2 minutes.

Step 2: Add Eggs
Crack two eggs into the mixture and mix thoroughly until the eggs are fully incorporated. This step will help bind the ingredients together, adding moisture and richness. Aim for a uniform, slightly wet dough that holds its shape; this should take about 1–2 minutes.

Step 3: Incorporate Flour
Gradually sprinkle in ½ cup of all-purpose flour (or gluten-free alternative) while stirring until the batter reaches a thick pancake-like consistency. Depending on the moisture in your leftovers, you may need more or less flour, but it should hold together without being overly stiff. This process should take another 1–2 minutes.

Step 4: Season the Mixture
Add salt, pepper, and garlic powder to taste, stirring until evenly distributed throughout the pancake batter. This is your opportunity to adjust the flavor to your preference, enhancing the savory notes of the leftover stuffing. Aim for a well-seasoned mixture that brightens the overall flavor profile; this should only take about a minute.

Step 5: Heat the Skillet
Place a non-stick skillet over medium heat and add a small amount of oil or butter to coat the surface. Allow it to heat for approximately 2-3 minutes until a drop of water skitters across the surface. This preheating is crucial for achieving a crispy exterior on your Leftover Mashed Potatoes and Stuffing Pancakes.

Step 6: Form Pancakes
Scoop a generous portion of the pancake batter onto the hot skillet, gently flattening it to about ½ inch thick. Cook for 3–4 minutes until the edges begin to look firm and the bottom turns golden brown. Check occasionally to ensure they don’t burn while maintaining that beautiful crispiness.

Step 7: Flip and Finish Cooking
Carefully flip the pancake using a spatula, cooking for an additional 3–4 minutes on the other side until it’s golden brown and firm. Keep an eye out for a lightly browned bottom to signify they are perfectly cooked through. Remove from the skillet and repeat the process until all the batter is used.

Step 8: Serve Warm
Serve your delicious Leftover Mashed Potatoes and Stuffing Pancakes immediately while warm. They are perfect enjoyed as is or paired with sauces like gravy or cranberry for a delightful twist on the classic flavors of Thanksgiving. Let the cozy comfort of these pancakes embrace your next meal!

How to Store and Freeze Leftover Stuffing Pancakes

  • Fridge: Store leftover pancakes in an airtight container for up to 3 days. Place parchment paper between layers if stacking to prevent sticking.

  • Freezer: For longer storage, freeze pancakes in a single layer on a baking sheet before transferring them to a sealed freezer bag. They'll stay fresh for up to 2 months.

  • Reheating: Reheat in a skillet over medium heat for 2–3 minutes per side or in the microwave for 30 seconds to 1 minute. Enjoy them warm for that delightful crisp!

  • Helpful Tip: These creative leftover stuffing pancakes are a great way to minimize food waste while keeping meal times interesting!

Expert Tips for Leftover Mashed Potatoes and Stuffing Pancakes

  • Mix Mindfully: Avoid overmixing the batter to retain a light and fluffy texture. A few gentle folds are all you need to combine the ingredients.

  • Heat Matters: Preheat your skillet thoroughly before adding the batter. This ensures the pancakes develop that desired crispy exterior without burning.

  • Adjust for Texture: The mixture should be thick yet pourable. If it's too runny, add a little more flour, but remember, too much can make your pancakes dense.

  • Flavor Boost: Consider folding in shredded cheese or finely chopped herbs to elevate the flavors of your leftover mashed potatoes and stuffing pancakes.

  • Cooking in Batches: Cook pancakes in small batches, leaving space between them in the skillet to ensure even cooking and crispiness on all sides.

Leftover Mashed Potatoes and Stuffing Pancakes Variations

Feel free to explore these fun twists and make the recipe uniquely yours!

  • Gluten-Free: Substitute all-purpose flour with a 1:1 gluten-free flour blend for a safe, delicious option.

  • Cheesy Goodness: Mix in shredded cheddar or crumbled feta to create a rich and creamy flavor that melts beautifully.

  • Veggie Boost: Add finely chopped greens, like spinach or kale, for an extra nutritional punch and vibrant color.

  • Herb Infusion: Incorporate fresh herbs such as thyme or rosemary to complement the stuffing and elevate the savory experience.

  • Spicy Kick: Fold in chopped jalapeños or a dash of hot sauce to bring some heat to your pancakes—a fun surprise!

  • Savory Sweetness: Top with a dollop of cranberry sauce for a refreshing contrast that highlights the Thanksgiving flavors beautifully.

  • Starchy Protein: Consider adding cooked, crumbled sausage or diced cooked turkey for added heartiness and protein in every bite.

  • Sweet Twist: Drizzle maple syrup or honey on top as a deliciously unexpected sweet counterpoint to the savory pancakes.

Each variation offers a delightful new experience, making leftovers shine in a way that comforts and excites. Enjoy your culinary journey!

What to Serve with Leftover Stuffing Pancakes

Transform your leftover stuffing pancakes into a complete meal that delights your senses and warms your heart.

  • Poached Eggs: Topping your pancakes with perfectly poached eggs adds a silky richness that elevates each bite to new heights. The runny yolk mixes beautifully with the flavorful pancakes, creating a delightful harmony.

  • Cranberry Sauce: A spoonful of tart cranberry sauce provides a refreshing contrast to the savory pancakes. Its sweetness balances the richness, making every mouthful a joyful experience.

  • Sautéed Greens: Pair with lightly sautéed spinach or kale for a nutritious twist. The greens add a welcome freshness and a pop of color to your plate, enhancing both flavor and texture.

  • Maple Syrup: Drizzling real maple syrup over these pancakes introduces a touch of sweetness that feels indulgent. It’s a wonderful nod to breakfast classics that perfectly complements the savory elements.

  • Gravy: For an even heartier option, serve your pancakes with homemade turkey gravy. This comforting addition ties back to Thanksgiving flavors and makes every bite feel like a warm hug.

  • Fresh Fruit Salad: A side of mixed seasonal fruits adds a refreshing sweetness and a vibrant contrast. The juicy elements lighten the meal and bring a delightful crunch to the mix.

  • Apple Cider: For a drink, consider warm apple cider. Its spiced sweetness perfectly matches the flavors of the pancakes, making it a cozy beverage to savor alongside your meal.

  • Yogurt with Honey: Serve a dollop of Greek yogurt drizzled with honey for a creamy side. The tangy yogurt balances the flavors while adding a cooling effect.

Make Ahead Options

These Leftover Mashed Potatoes and Stuffing Pancakes are perfect for busy home cooks looking to save time during meal prep! You can mix the pancake batter up to 24 hours in advance and store it in an airtight container in the refrigerator. To maintain quality, give the batter a gentle stir before cooking, as the ingredients may settle. If you prefer, you can also cook the pancakes ahead of time and refrigerate them for up to 3 days. When ready to enjoy, simply reheat in a skillet over medium heat for a few minutes on each side until heated through. This way, you can savor the comforting flavors of Thanksgiving with minimal effort!

Leftover Mashed Potatoes and Stuffing Pancakes Recipe FAQs

What type of leftover stuffing works best for pancakes?
Absolutely! You can use any variety of leftover stuffing—from traditional bread stuffing to cornbread or even wild rice blends. The richness and flavors will infuse the pancakes, providing a unique taste experience. Just ensure it’s not too dry; if it is, consider adding a splash of chicken or vegetable broth to moisten it up!

How long can I store leftover pancakes in the fridge?
After making these delightful Leftover Mashed Potatoes and Stuffing Pancakes, you can store them in an airtight container in the refrigerator for up to 3 days. They’re perfect for reheating as a quick meal or snack; just pop them in a skillet or microwave!

Can I freeze my leftover pancakes?
Yes! To freeze, lay the pancakes in a single layer on a baking sheet until they’re frozen solid (about 1-2 hours). Once frozen, transfer them to a sealed freezer bag, where they can be stored for up to 2 months. It’s a fantastic way to minimize waste and enjoy a cozy meal later on!

What should I do if my pancake batter is too thick?
If your batter is too thick, don’t worry! Simply add a little more mashed potatoes or a splash of milk to loosen it up. Mix gently until it's the right consistency—thick but pourable. This will help create those lovely, fluffy pancakes that everyone loves!

Are these pancakes suitable for kids or people with food allergies?
Absolutely! However, be cautious if someone has specific allergies, especially to gluten in the flour or eggs. You can substitute gluten-free flour to make them safe for gluten sensitivity, and use an egg replacement like flaxseed meal mixed with water if eggs are a concern. They’re a fantastic way to get kids excited about eating leftovers!

Leftover Mashed Potatoes and Stuffing Pancakes

Crispy Leftover Mashed Potatoes and Stuffing Pancakes

Transform your Thanksgiving leftovers into delicious Leftover Mashed Potatoes and Stuffing Pancakes that are crispy on the outside and tender inside.
Print Recipe Pin Recipe
Prep Time 10 minutes mins
Cook Time 20 minutes mins
Total Time 30 minutes mins
Servings: 4 pancakes
Course: Breakfast
Cuisine: American
Calories: 250
Ingredients Equipment Method Nutrition Notes

Ingredients
  

For the Pancake Mixture
  • 2 cups leftover stuffing any variety works wonders
  • 2 cups mashed potatoes leftovers are perfect here
  • 2 large eggs helps pancakes hold shape
  • ½ cup all-purpose flour or gluten-free alternative
For Seasoning
  • 1 tsp salt adjust to taste
  • ½ tsp pepper fresh ground is a bonus
  • 1 tsp garlic powder for extra flavor

Equipment

  • large bowl
  • Fork
  • non-stick skillet
  • Spatula

Method
 

Step-by-Step Instructions
  1. In a large bowl, add your leftover stuffing and mashed potatoes. Use a fork to mix until well combined, ensuring the textures merge without over-mixing, about 2 minutes.
  2. Crack two eggs into the mixture and mix thoroughly until well incorporated, about 1–2 minutes.
  3. Gradually sprinkle in ½ cup of all-purpose flour while stirring until the batter reaches a thick pancake-like consistency, about 1–2 minutes.
  4. Add salt, pepper, and garlic powder to taste, stirring until evenly distributed, about 1 minute.
  5. Place a non-stick skillet over medium heat and add oil or butter. Heat for 2-3 minutes until ready.
  6. Scoop a portion of the pancake batter onto the hot skillet and flatten to ½ inch thick. Cook for 3–4 minutes until edges firm and bottom is golden brown.
  7. Carefully flip the pancake and cook for an additional 3–4 minutes until golden brown and firm. Repeat until all batter is used.
  8. Serve pancakes warm as is or with sauces like gravy or cranberry.

Nutrition

Serving: 1pancakeCalories: 250kcalCarbohydrates: 30gProtein: 6gFat: 10gSaturated Fat: 3gPolyunsaturated Fat: 1gMonounsaturated Fat: 3gCholesterol: 100mgSodium: 400mgPotassium: 300mgFiber: 2gSugar: 1gVitamin A: 200IUVitamin C: 3mgCalcium: 30mgIron: 1mg

Notes

Avoid overmixing for fluffy pancakes. Preheat skillet for crispy texture. Adjust flour for desired consistency. Cook in batches for even results.

Tried this recipe?

Let us know how it was!

Crispy Leftover Mashed Potatoes and Stuffing Pancakes

October 23, 2025 by Grace Snow Leave a Comment

As I rummaged through my fridge the day after Thanksgiving, I stumbled upon a treasure trove of leftover stuffing and mashed potatoes. It was almost too good to toss aside! That’s when inspiration struck: why not whip up some delicious Leftover Stuffing Pancakes? These delightful pancakes marry the rich flavors of your feast into a crispy exterior and a tender interior that both comforts and excites the taste buds. Not only do they help clear out those leftovers, but they also turn ordinary ingredients into a crowd-pleasing dish that’s perfect for any meal. Ready to transform those remnants into something magical? Let’s dive into this creative cooking adventure together!

Why Are These Pancakes So Irresistible?

Comforting and Creative: Who knew leftovers could be transformed into such a savory delight? These pancakes bring your Thanksgiving favorites together in a whole new way!
Crispy Yet Tender: Each bite features a crispy outer layer, unveiling a fluffy and moist inside that bursts with flavor.
Versatile Enjoyment: Not only are they fantastic for breakfast, but they also shine as a side dish for lunch or dinner, making them perfect anytime.
Quick and Easy: With minimal prep time, these pancakes fit seamlessly into your busy schedule. Plus, if you love using up leftovers, check out my Smoky Sweet Potatoes for even more delicious ideas!
Crowd-Pleasing Flavors: With the familiar tastes of stuffing and mashed potatoes, everyone at the table will find something to love. Bring smiles and comfort, one pancake at a time!

Leftover Mashed Potatoes and Stuffing Pancakes

• If you're looking to whip up something delicious from your leftovers, you're in the right place!

For the Pancake Mixture

  • Leftover Stuffing – Use any kind you have for flavor and moisture; it's the star of the show!
  • Mashed Potatoes – They add creaminess and act as a binder; leftovers work perfectly here.
  • Eggs – Provides structure and ensures your pancakes hold together nicely.
  • Flour – Essential for texture; all-purpose flour is great, but gluten-free flour is a viable substitute.

For Seasoning

  • Salt – Enhances flavors; adjust to your preference for the right balance.
  • Pepper – Gives a subtle kick; feel free to add more or less based on your taste.
  • Garlic Powder – Boosts savory notes, making these pancakes irresistible.

Get ready to savor these delightful Leftover Mashed Potatoes and Stuffing Pancakes that your family will love!

Step‑by‑Step Instructions for Leftover Mashed Potatoes and Stuffing Pancakes

Step 1: Mix the Base
In a large mixing bowl, combine 2 cups of your leftover stuffing with 1 cup of mashed potatoes. Use a fork to break up any lumps in the mashed potatoes and mix until the stuffing and potatoes are evenly blended. The mixture should be cohesive yet thick enough to hold its shape. This base will provide the heartiness of your Leftover Mashed Potatoes and Stuffing Pancakes.

Step 2: Add the Bindings
Crack 2 eggs into the mixture and stir well until fully incorporated. The eggs will act as a binder, ensuring that your pancakes hold together while cooking. Mix until you achieve a uniform texture. You might notice a slight change in color and consistency, which indicates that your mixture is ready for the next step.

Step 3: Incorporate the Flour
Gradually add ½ cup of all-purpose flour to the mixture, stirring gently until the batter reaches a thick yet pourable consistency. This step is crucial for achieving the right texture of your Leftover Mashed Potatoes and Stuffing Pancakes. If the batter feels too wet, add a little more flour, but be careful not to overmix, as this can make the pancakes tough.

Step 4: Season to Taste
Sprinkle in salt, pepper, and 1 teaspoon of garlic powder to enhance the flavor profile of your pancakes. Stir again to ensure the seasonings are evenly distributed throughout the batter. Taste a small amount if desired, and adjust the seasoning according to your preferences for a perfectly seasoned pancake batch.

Step 5: Heat the Skillet
Preheat a non-stick skillet over medium heat and add a tablespoon of oil to prevent sticking. Allow the oil to heat up until it shimmers lightly; this usually takes about 2 minutes. The right temperature is essential for achieving a crispy outer layer while ensuring the inside remains fluffy and tender, typical of your Leftover Mashed Potatoes and Stuffing Pancakes.

Step 6: Cook the Pancakes
Pour about ¼ cup of batter onto the hot skillet for each pancake, ensuring there's enough space between them. Cook for 3-4 minutes or until the edges start to look firm and small bubbles form on the surface. When the bottom is golden brown, carefully flip the pancake with a spatula, and cook for another 3-4 minutes until both sides are nicely browned.

Step 7: Serve Warm
Once cooked, transfer the pancakes to a plate and keep them warm while you repeat with the remaining batter. Aim to serve your Leftover Mashed Potatoes and Stuffing Pancakes immediately for the best texture. Consider serving them with a drizzle of cranberry sauce or gravy for an extra festive touch or perhaps a dollop of sour cream to enhance the flavors further.

What to Serve with Leftover Stuffing Pancakes?

Elevate your delightful pancakes into a full meal with these perfect pairings that add even more flavor and comfort.

  • Poached Eggs: The runny yolk adds a rich creaminess that complements the savory pancakes beautifully.
  • Cranberry Sauce: This adds a tangy-sweet burst, perfectly contrasting the hearty flavors of the stuffing pancakes.
  • Sautéed Greens: Fresh sautéed spinach or kale brings a light, vibrant element, balancing the dish while adding nutritional value.
  • Gravy: A generous drizzle of your favorite turkey or mushroom gravy enriches the pancakes even further, making them irresistible.
  • Applesauce: This fruity accompaniment enhances the savory profile with its sweet and tart notes, making each bite exciting.
  • Roasted Vegetables: A medley of seasonal roasted veggies adds texture and color, turning your meal into a comforting feast.
  • Cheesy Cauliflower Mash: This adds a creamy, cheesy contrast to your pancakes, marrying beautifully with their savory notes.
  • Hot Sauce: For those who love a kick, a few dashes of your favorite hot sauce can elevate the whole experience.
  • Iced Tea: A refreshing glass pairs wonderfully with the comforting meal, cutting through the richness of the pancakes.

How to Store and Freeze Leftover Mashed Potatoes and Stuffing Pancakes

Fridge: Store leftover pancakes in an airtight container for up to 3 days. They maintain their flavor and texture well when properly sealed.

Freezer: For longer storage, freeze pancakes in a single layer on a baking sheet, then transfer to a freezer-safe container. They can be stored for up to 2 months.

Reheating: Reheat pancakes in a skillet over medium heat for a few minutes on each side until warm and crispy. You can also use the microwave, but this may result in a softer texture.

Enjoy Anytime: These savory pancakes can be enjoyed at breakfast, lunch, or as a tasty snack, making them excellent for quick meal options!

Leftover Mashed Potatoes and Stuffing Pancakes Variations

Invite your creativity into the kitchen and discover how you can customize these delicious pancakes into something uniquely yours!

  • Herbed Stuffing: Swap in seasoned herb stuffing for an aromatic twist that elevates each bite.
  • Cheesy Delight: Fold in shredded cheese like cheddar or mozzarella for a gooey, savory pancake experience. Melting cheese adds a delightful richness that pairs beautifully with leftover flavors.
  • Veggie Boost: Add chopped vegetables such as spinach, bell peppers, or onions for added nutrition and texture. Not only do these colorful additions make your pancakes more vibrant, but they also provide extra crunch and freshness.
  • Gluten-Free Option: Use a 1:1 gluten-free flour blend instead of all-purpose flour to accommodate gluten sensitivities. You can still enjoy fluffy pancakes without sacrificing taste!
  • Sweet and Savory: Drizzle with maple syrup or top with cranberry sauce for a delicious contrast of flavors. The sweetness balances the savory stuffing beautifully, making every bite memorable.
  • Spicy Kick: Toss in some chopped jalapeños or a dash of cayenne pepper for those who enjoy a bit of heat. The spiciness blends perfectly with the savory elements of the pancakes!
  • Crispy Edges: For an extra crunchy texture, coat the pancakes in breadcrumbs or crushed crackers before frying. This will give them a satisfyingly crispy crust that contrasts wonderfully with the tender inside.
  • Comforting Pairings: Serve them alongside poached eggs or creamy gravy for a breakfast that feels like a warm hug. Pairing these pancakes with rich toppings can create a hearty meal perfect for any time of day!

Curious for more creative ideas? Don't miss out on exploring Coconutty Beans Greens or delight in my twist on Ricotta Protein Pancakes for more leftover magic!

Expert Tips for Leftover Mashed Potatoes and Stuffing Pancakes

  • Don't Overmix: Mixing too much can lead to tough pancakes. Stir gently just until combined for the best texture.
  • Temperature Matters: Ensure your skillet is adequately heated before adding the batter to achieve that perfect, crispy outer layer.
  • Customize Flavors: Consider adding herbs or cheese to the batter for an extra flavor kick, making your pancakes even more delightful!
  • Use Leftovers Wisely: Incorporate different stuffing varieties for diverse flavors, making each batch a unique creation.
  • Store Thoughtfully: Keep leftover pancakes in an airtight container and reheat in a skillet to restore their crispy goodness before serving.

Make Ahead Options

These Leftover Mashed Potatoes and Stuffing Pancakes are fantastic for meal prep enthusiasts! You can prepare the pancake batter by mixing the leftover stuffing, mashed potatoes, eggs, and flour up to 24 hours in advance—just refrigerate it in an airtight container until you're ready to cook. This not only saves you time on busy mornings but also allows the flavors to meld beautifully. When you're set to enjoy this easy dish, simply heat up your skillet and proceed to cook the pancakes as instructed. For best quality, avoid overmixing and store uncooked batter in the fridge to ensure your pancakes remain just as delicious as the moment they were made!

Leftover Mashed Potatoes and Stuffing Pancakes Recipe FAQs

How do I choose the best stuffing for pancakes?
Absolutely! You can use any variety of leftover stuffing, from classic herb to cornbread. Just ensure it’s moist; dryer stuffing may need a bit of added liquid like broth to help bind the pancakes. If you have some left over from your Thanksgiving feast, that’s even better!

How should I store leftover pancakes?
Store leftover pancakes in an airtight container in the refrigerator for up to 3 days. Make sure they are completely cooled before sealing to prevent condensation. For an easy grab-and-go meal, these pancakes can also be reheated in a skillet, restoring their lovely crispiness.

Can I freeze leftover stuffing pancakes?
Very! To freeze your pancakes, lay them in a single layer on a baking sheet and pop them in the freezer until firm. Then, transfer the frozen pancakes to a freezer-safe container or zip-top bag. They can last in the freezer for up to 2 months. This makes for a quick and satisfying meal option whenever you crave them!

What should I do if my pancake batter is too thick?
If your batter is too thick, don't worry! Simply add a splash of milk or chicken broth to loosen it up. Mix gently until you achieve a favorite, thick yet pourable consistency. Just be cautious not to overmix; a light hand will help keep your pancakes fluffy!

Can I make this recipe vegan or gluten-free?
Of course! For a vegan version, substitute eggs with a flaxseed mixture (1 tablespoon of ground flaxseed mixed with 2.5 tablespoons of water, let it sit for 5 minutes) and use plant-based mashed potatoes. For gluten-free pancakes, replace the all-purpose flour with your favorite gluten-free blend; just be sure to check that your stuffing is also gluten-free. Enjoy experimenting with these dietary adjustments!

How can I enhance the flavor of my pancakes?
To add some extra flavor kick, consider mixing in herbs like thyme or sage directly into your batter. You can also top your pancakes with a dollop of sour cream, a sprinkle of cheese, or even a drizzle of gravy or cranberry sauce for a festive touch. The more the merrier when it comes to toppings!

Leftover Mashed Potatoes and Stuffing Pancakes

Leftover Mashed Potatoes and Stuffing Pancakes You’ll Love

Transform your leftovers into crispy pancakes with these Leftover Mashed Potatoes and Stuffing Pancakes, perfect for any meal of the day!
Print Recipe Pin Recipe
Prep Time 10 minutes mins
Cook Time 15 minutes mins
Total Time 25 minutes mins
Servings: 4 pancakes
Course: Breakfast
Cuisine: American
Calories: 150
Ingredients Equipment Method Nutrition Notes

Ingredients
  

For the Pancake Mixture
  • 2 cups leftover stuffing Use any kind for flavor and moisture
  • 1 cup mashed potatoes Leftovers work perfectly
  • 2 eggs Provides structure
  • ½ cup all-purpose flour Or gluten-free flour as a substitute
For Seasoning
  • to taste salt Enhances flavors
  • to taste pepper Gives a subtle kick
  • 1 teaspoon garlic powder Boosts savory notes

Equipment

  • Mixing Bowl
  • Skillet
  • Spatula

Method
 

Step-by-Step Instructions for Leftover Mashed Potatoes and Stuffing Pancakes
  1. In a large mixing bowl, combine 2 cups of your leftover stuffing with 1 cup of mashed potatoes. Use a fork to break up any lumps in the mashed potatoes and mix until the stuffing and potatoes are evenly blended.
  2. Crack 2 eggs into the mixture and stir well until fully incorporated.
  3. Gradually add ½ cup of all-purpose flour to the mixture, stirring gently until the batter reaches a thick yet pourable consistency.
  4. Sprinkle in salt, pepper, and 1 teaspoon of garlic powder to enhance the flavor profile of your pancakes.
  5. Preheat a non-stick skillet over medium heat and add a tablespoon of oil to prevent sticking.
  6. Pour about ¼ cup of batter onto the hot skillet for each pancake. Cook for 3-4 minutes or until the edges start to look firm.
  7. Flip the pancake and cook for another 3-4 minutes until both sides are nicely browned.
  8. Once cooked, transfer the pancakes to a plate and serve warm.

Nutrition

Serving: 1pancakeCalories: 150kcalCarbohydrates: 20gProtein: 5gFat: 6gSaturated Fat: 1gPolyunsaturated Fat: 1gMonounsaturated Fat: 1gCholesterol: 60mgSodium: 250mgPotassium: 200mgFiber: 2gSugar: 1gVitamin A: 2IUVitamin C: 4mgCalcium: 2mgIron: 6mg

Notes

Consider serving with cranberry sauce, gravy, or sour cream for added flavor.

Tried this recipe?

Let us know how it was!

Comforting Turkey Lentil Soup for Cozy Nights In

October 23, 2025 by Grace Snow Leave a Comment

As the scent of simmering garlic and onions wafts through my kitchen, a wave of comfort washes over me. This isn’t just any soup; it's my cherished Turkey Lentil Soup with Fire-Roasted Tomatoes, a satisfying dish that turns leftover turkey into a cozy, hearty meal perfect for post-holiday evenings. Not only is this recipe a fantastic way to minimize food waste, but it also packs a nutritious punch with lentils and Yukon Gold potatoes that make every spoonful feel like a warm hug. With its balanced flavors and aromatic goodness, it's bound to become a staple in your home. Are you ready to embrace the heartwarming magic of this delicious soup? Let’s dive in!

Why is Turkey Lentil Soup So Comforting?

**Hearty, fulfilling **: This Turkey Lentil Soup is a delightful medley that transforms leftover turkey into a dish that's as satisfying as a warm hug on a chilly evening. Nutritious goodness: Packed with protein-rich lentils and comforting Yukon Gold potatoes, it's a wholesome option for health-conscious eaters. Easy to customize: Feel free to add your favorite veggies or spices, making it adaptable for every taste preference. Meal prep friendly: Perfect for leftovers, this soup can be stored or frozen for busy nights. Experience cozy dining with less food waste by whipping up this comforting classic; it's sure to make your family feel right at home!

Turkey Lentil Soup Ingredients

• Discover everything you need for this delightful Turkey Lentil Soup!

For the Soup Base

  • Olive Oil – Adds richness and facilitates cooking; feel free to use any neutral cooking oil.
  • Yellow Onion – Provides a savory base flavor; for a milder taste, consider substituting with shallots.
  • Garlic – Enhances flavor with its aromatic notes; using fresh garlic will yield the best results.
  • Fire-roasted Rotel Tomatoes – Contributes heat and acidity; you can swap with regular diced tomatoes and incorporate chili powder for a kick.
  • Green Lentils – Offers protein and texture; substitute with brown lentils, just adjust the cooking time accordingly.
  • Leftover Turkey – The heartiness of the soup comes from this main protein source; ground turkey can also be used as an alternative.
  • Chicken Broth – The flavorful base; opt for homemade or low-sodium broth for a lighter dish.
  • Bay Leaf – Infuses aromatic depth into the soup; don’t forget to remove it before serving!
  • Yukon Gold Potatoes – Adds comforting creaminess; sweet potatoes can be a delicious alternative for a subtly sweet flavor.
  • Salt and Black Pepper – Essential for seasoning to taste for that perfect flavor balance.

With these ingredients, you'll create a comforting Turkey Lentil Soup that's ideal for cozy nights in!

Step‑by‑Step Instructions for Turkey Lentil Soup

Step 1: Sauté the Aromatics
In a large Dutch oven, heat 2 tablespoons of olive oil over medium heat until shimmering, about 2 minutes. Once hot, add 1 chopped yellow onion and sauté for 5 minutes, stirring occasionally, until the onion is translucent. Then, stir in 3 minced garlic cloves and cook for another 1 minute, until fragrant, ensuring the garlic doesn't brown.

Step 2: Add the Main Ingredients
Now, pour in one 10-ounce can of fire-roasted tomatoes along with 1 cup of rinsed green lentils, 2 cups of shredded leftover turkey, and 6 cups of chicken broth. Toss in 1 bay leaf and stir everything together. Bring the mixture to a gentle simmer over medium-high heat, which should take about 5 minutes, creating a warm, inviting aroma.

Step 3: Simmer the Soup
Reduce the heat to low, partially cover the Dutch oven with the lid, and let the Turkey Lentil Soup simmer for approximately 50 minutes. Stir occasionally to prevent sticking, watching for the lentils to become tender and the soup to thicken slightly, creating a cozy and hearty texture that embraces the turkey.

Step 4: Incorporate Potatoes
After simmering, stir in 2 diced Yukon Gold potatoes, ensuring they're evenly distributed in the mix. Cover and allow the soup to simmer for an additional 10 minutes or until the potatoes are fork-tender, adding bulk and creaminess to the Turkey Lentil Soup, perfectly melding the flavors.

Step 5: Final Touches
Once the potatoes are cooked, discard the bay leaf from the soup. Taste and season your Turkey Lentil Soup with salt and black pepper to your preference, enhancing the flavors. For added warmth, feel free to mix in some chopped fresh parsley or a dash of hot sauce before serving warm with your choice of crusty bread or garlic naan.

Turkey Lentil Soup Variations & Substitutions

Feel free to play around with this recipe and make it your own!

  • Protein Swap: Replace leftover turkey with shredded chicken or beef for a different twist. This way, you'll maintain the heartiness while exploring new flavors.
  • Veggie Boost: Add chopped carrots, celery, or leafy greens like kale or spinach for an extra dose of nutrition and vibrant color in your soup. Each addition enhances taste and visual appeal, making it even more delightful.
  • Spice It Up: Mix in cumin, smoked paprika, or even a dash of cayenne pepper to give your Turkey Lentil Soup a flavor boost. These spices add warmth and depth, transforming the entire dish into an aromatic experience.
  • Dairy-Free Option: Use coconut milk instead of chicken broth for a dairy-free twist. This will impart a creamy texture, balancing the heat from the spices perfectly.
  • Potato Variation: Swap Yukon Gold potatoes for sweet potatoes for a touch of natural sweetness and a delightful twist in flavor. You'll still enjoy that cozy comfort, but with a sweeter note.
  • Lentil Change: If green lentils aren’t available, use red lentils; they cook faster and create a smoother texture in your soup. This could bring a new fun twist while maintaining the soup's essence.
  • Herb Infusion: Add fresh herbs like thyme, rosemary, or parsley for a delightful aroma and flavor lift in your Turkey Lentil Soup. Fresh herbs can really elevate the entire dish.
  • Creamy Finish: Blend a portion of the soup and stir it back in for a creamier consistency. This method adds richness that complements the chunky textures beautifully.

If you’re in the mood for more healthy soup ideas, you might also enjoy making Zuppa Toscana Soup or a cozy Lemon Chicken Soup. Happy cooking!

Expert Tips for Turkey Lentil Soup

  • Use Fresh Garlic: Opt for fresh garlic over pre-minced to elevate the flavor profile of your Turkey Lentil Soup with its vibrant aroma.

  • Watch the Salt: If you use leftover turkey drippings, be cautious of added salt. Taste the soup as it simmers to adjust seasoning to your preference.

  • Customize Texture: For a creamier soup, mash some of the Yukon Gold potatoes before serving. Alternatively, blend a portion of the soup for a smooth consistency.

  • Add Spice Gradually: If you want to kick up the heat, add jalapeños or hot sauce in small increments to control the spice levels in your Turkey Lentil Soup.

  • Storage Savvy: Keep leftovers in an airtight container and enjoy the soup within 5 days or freeze it for up to 6 months for future convenience.

  • Pressure Cook Option: For busy days, use a pressure cooker for a quicker Turkey Lentil Soup—cook on High Pressure for 15 minutes and let natural release happen!

Storage Tips for Turkey Lentil Soup

Fridge: Store your Turkey Lentil Soup in an airtight container for up to 5 days. This ensures freshness while preserving the hearty flavors and textures.

Freezer: Freezing is an excellent option for this soup! Portion it into freezer-safe containers and it will keep well for 3-6 months.

Reheating: When you're ready to enjoy your leftovers, simply reheat on the stovetop over medium heat, stirring occasionally. You may need to add a splash of broth to revive the creamy texture.

Wrapping: If freezing, wrap containers tightly with plastic wrap or aluminum foil to prevent freezer burn while keeping your Turkey Lentil Soup delicious!

What to Serve with Hearty Turkey Lentil Soup?

Serving up comforting dishes alongside your soup can elevate your meal to new heights. Imagine the delightful aromas mingling as you gather around the table!

  • Garlic Naan: Soft and warm, this naan is perfect for scooping up that hearty turkey lentil soup. Its buttery flavor adds a lovely contrast to the soup's spicy notes.

  • Crusty Bread: A slice of freshly baked artisan bread brings an irresistible crunch, making each bite a special occasion. Dip it into your bowl, allowing the flavors to meld beautifully.

  • Simple Green Salad: Fresh, crisp greens tossed in a light vinaigrette offer a refreshing balance to the rich soup, enhancing the overall dining experience.

Indulging in these pairings creates a delicious symphony of flavors and textures. You'll find the warmth of the soup complemented beautifully by these side options, making dinner both satisfying and memorable.

  • Cheese & Herb Scones: These savory scones provide a flaky, cheesy bite that pairs wonderfully with the soup, adding richness and comfort to the meal.

  • Roasted Vegetables: Seasonal roasted veggies bring a caramelized sweetness to the table, grounding the dish and enhancing its wholesome goodness.

  • Sparkling Apple Cider: A bubbly beverage, like sparkling apple cider, offers a sweet-tart refreshment that perfectly contrasts the savory notes of the hearty turkey lentil soup.

Let these delightful accompaniments turn a simple meal into a comforting feast that warms the heart and nourishes the soul!

Make Ahead Options

These Turkey Lentil Soup preparations are perfect for busy weeknights! You can chop the onions and garlic and refrigerate them up to 3 days in advance, saving you time during the cooking process. Additionally, you can cook the entire soup and let it cool before storing it in an airtight container in the refrigerator for up to 5 days. To maintain the flavors and texture, avoid adding the potatoes until you're ready to serve; simply stir them in during the last 10 minutes of cooking. When you’re ready to enjoy this hearty soup, reheat it gently on the stove or in the microwave until hot, giving you a comforting meal with minimal effort!

Turkey Lentil Soup Recipe FAQs

What type of lentils should I use for the soup?
For this Turkey Lentil Soup, green lentils are recommended due to their firm texture and nutritional benefits. You can substitute with brown lentils, but keep in mind they may require a slightly shorter cooking time—about 30-40 minutes instead of 50.

How should I store my leftover Turkey Lentil Soup?
Store your Turkey Lentil Soup in an airtight container in the refrigerator for up to 5 days. This keeps the flavors freshest. Just make sure to let it cool before sealing up any leftovers!

Can I freeze Turkey Lentil Soup?
Absolutely! Portion the soup into freezer-safe containers, leaving some space at the top for expansion. It can be stored in the freezer for 3-6 months. When you’re ready to enjoy it, simply thaw in the refrigerator overnight and then reheat on the stove over medium heat, stirring occasionally to maintain the creamy texture.

What can I do if my soup is too thick after cooking?
No problem! If your Turkey Lentil Soup thickens more than you'd like, just add a bit more chicken broth or water, stirring until you reach your desired consistency. For a creamier texture, you can also blend a small portion of the soup and then return it to the pot.

Is this soup suitable for my dietary restrictions?
This Turkey Lentil Soup is a good option for many diets, but please be cautious if you have specific allergies or sensitivities. If you're concerned about gluten, ensure your broth is gluten-free. For a vegetarian version, omit the turkey and use vegetable broth instead while increasing the ingredients like lentils or adding beans for protein.

Turkey Lentil Soup

Comforting Turkey Lentil Soup for Cozy Nights In

This Turkey Lentil Soup is a comforting dish made with leftover turkey that's perfect for cozy nights and minimizes food waste.
Print Recipe Pin Recipe
Prep Time 10 minutes mins
Cook Time 1 hour hr 5 minutes mins
Total Time 1 hour hr 15 minutes mins
Servings: 6 servings
Course: Soups
Cuisine: American
Calories: 300
Ingredients Equipment Method Nutrition Notes

Ingredients
  

Soup Base
  • 2 tablespoons Olive Oil Feel free to use any neutral cooking oil.
  • 1 medium Yellow Onion Chopped; for milder taste, consider substituting with shallots.
  • 3 cloves Garlic Minced; using fresh garlic will yield the best results.
  • 1 10-ounce can Fire-roasted Rotel Tomatoes Can swap with regular diced tomatoes and incorporate chili powder for a kick.
  • 1 cup Green Lentils Offers protein and texture; substitute with brown lentils, just adjust cooking time accordingly.
  • 2 cups Shredded Leftover Turkey Ground turkey can also be used as an alternative.
  • 6 cups Chicken Broth Opt for homemade or low-sodium broth for a lighter dish.
  • 1 leaf Bay Leaf Infuses aromatic depth; remove before serving!
  • 2 medium Yukon Gold Potatoes Diced; adds comforting creaminess.
  • to taste Salt Essential for seasoning.
  • to taste Black Pepper Essential for seasoning.

Equipment

  • Dutch oven

Method
 

Step-by-Step Instructions
  1. In a large Dutch oven, heat 2 tablespoons of olive oil over medium heat until shimmering, about 2 minutes. Once hot, add 1 chopped yellow onion and sauté for 5 minutes, stirring occasionally, until the onion is translucent. Then, stir in 3 minced garlic cloves and cook for another 1 minute, until fragrant.
  2. Now, pour in one 10-ounce can of fire-roasted tomatoes along with 1 cup of rinsed green lentils, 2 cups of shredded leftover turkey, and 6 cups of chicken broth. Toss in 1 bay leaf and stir everything together. Bring the mixture to a gentle simmer over medium-high heat, which should take about 5 minutes.
  3. Reduce the heat to low, partially cover the Dutch oven with the lid, and let the Turkey Lentil Soup simmer for approximately 50 minutes. Stir occasionally to prevent sticking.
  4. After simmering, stir in 2 diced Yukon Gold potatoes, ensuring they're evenly distributed. Cover and allow the soup to simmer for an additional 10 minutes or until the potatoes are fork-tender.
  5. Once the potatoes are cooked, discard the bay leaf. Taste and season your Turkey Lentil Soup with salt and black pepper to your preference.

Nutrition

Serving: 1bowlCalories: 300kcalCarbohydrates: 40gProtein: 25gFat: 10gSaturated Fat: 1.5gPolyunsaturated Fat: 0.5gMonounsaturated Fat: 7gCholesterol: 75mgSodium: 600mgPotassium: 800mgFiber: 15gSugar: 5gVitamin A: 15IUVitamin C: 20mgCalcium: 50mgIron: 4mg

Notes

For a creamier soup, mash some of the Yukon Gold potatoes before serving or blend a portion of the soup for a smooth consistency.

Tried this recipe?

Let us know how it was!

Savory Slow Cooker Ground Turkey Vegetable Soup You’ll Love

October 23, 2025 by Grace Snow Leave a Comment

As I stood by my slow cooker, the comforting aroma of sautéed garlic and fresh vegetables wafted through the air, instantly making my kitchen feel like a warm hug. What’s better than crafting a healthy, hearty meal with little effort? This Slow Cooker Ground Turkey Vegetable Soup is the answer! Packed with protein and colorful veggies, it’s not just a wholesome dish; it's a flavorful antidote for those long, busy days. Plus, it’s a freezer-friendly gem, meaning you can enjoy a bowl whenever the craving hits. Trust me, this soup will redefine your weeknight dinners. Are you ready to dive into the world of comforting soup perfection?

Why Is This Soup a Must-Try?

Nourishing and satisfying, this Slow Cooker Ground Turkey Vegetable Soup is a fantastic way to indulge in a wholesome meal that doesn't skimp on flavor. Simple preparation means you can set it and forget it—perfect for busy evenings. Flavor-packed with fresh veggies and lean turkey, it's a delicious alternative to fast food. Versatile too! Substitute ingredients based on what you have on hand, or try adding beans for an extra protein boost. Perfectly hearty, it warms you from the inside out, making it your go-to comfort food. Don’t forget to serve it with a side salad for a complete meal!

Slow Cooker Ground Turkey Vegetable Soup Ingredients

Unlock the secrets to this comforting bowl of goodness!

For the Base
• Olive Oil – Adds richness and helps sauté turkey; feel free to swap with avocado oil for a slightly nuttier taste.
• Ground Turkey – The star protein source for this dish; you can also use chicken or lean beef if you prefer.
• Garlic Cloves, minced – Infuses aromatic flavor; if you’re out of fresh, garlic powder will work just fine.
• Onion, diced – Provides essential sweetness and depth; a yellow or white onion brings the best flavor.
• Celery Sticks, diced – Adds a delightful crunch and layer to the soup; leeks can be a great softer alternative.
• Carrots, diced – Contributes natural sweetness and vibrant color; baby carrots save you some prep time!
• White Potatoes, peeled and chopped into small cubes – Rounds out this hearty soup; sweet potatoes are a lovely alternative if you want a different flavor.
• Diced Tomatoes, drained – Adds acidity and moisture; use fresh tomatoes in season for an extra pop of freshness.
• Chicken Broth – The flavorful base that ties it all together; substitute with vegetable broth for a vegetarian option.

For Seasoning
• Salt – Enhances all the delicious flavors; adjust it to your taste!
• Pepper – Offers a peppery kick; go for freshly cracked for the best results.
• Garlic Powder – An additional flavor enhancer; consider omitting if you’re using fresh garlic.
• Dried Oregano – Brings in an herbal note; if you’re out, Italian seasoning can work as a great substitute.
• Ground Thyme – Provides an earthy flavor note; fresh thyme is fantastic if you have it on hand.

For the Finishing Touch
• Spinach, fresh or frozen – Boosts nutrition while adding green color; substitute with kale or Swiss chard for a different twist.
• Fresh Parsley – An optional garnish that brings freshness to your soup; switch it out for any fresh herb you love!

This Slow Cooker Ground Turkey Vegetable Soup is not just a meal; it’s a delightful culinary experience waiting to unfold in your kitchen!

Step‑by‑Step Instructions for Slow Cooker Ground Turkey Vegetable Soup

Step 1: Sauté the Ground Turkey
Begin by heating 2 tablespoons of olive oil in a large skillet over medium-high heat. Add 1 pound of ground turkey and cook it, breaking it apart with a spatula, for about 5-10 minutes. Stir it occasionally until the turkey is no longer pink and shows a nice golden brown color. This will enhance the flavor of your Slow Cooker Ground Turkey Vegetable Soup.

Step 2: Transfer to Slow Cooker
Once the turkey is fully cooked, carefully transfer it into your slow cooker using a slotted spoon. Make sure to scrape up any flavorful bits from the skillet. Add all remaining ingredients, including diced onions, celery, carrots, potatoes, diced tomatoes, chicken broth, and your chosen spices. Stir everything thoroughly to ensure the flavors blend beautifully in your Slow Cooker Ground Turkey Vegetable Soup.

Step 3: Set to Cook
Cover your slow cooker with its lid and set it to low heat to allow the soup to simmer gently. Let it cook for 8-10 hours, allowing the vegetables to soften and the flavors to meld into a comforting, hearty bowl of soup. You may occasionally check on it, but resist the temptation to lift the lid too often to maintain even cooking.

Step 4: Add Spinach and Seasoning
About 30 minutes before serving, lift the lid and stir in 2 cups of fresh or frozen spinach to add a vibrant touch and nutrition to your soup. Taste the Slow Cooker Ground Turkey Vegetable Soup at this point and adjust the seasonings, adding salt and pepper as needed to enhance the overall flavor profile.

Step 5: Serve and Garnish
Once cooked, ladle the soup into bowls and garnish with chopped fresh parsley for an extra pop of freshness. This comforting Slow Cooker Ground Turkey Vegetable Soup is now ready to be enjoyed! Serve it warm, perhaps with some crusty bread or a green salad on the side, creating a beatifully satisfying meal.

What to Serve with Hearty Slow Cooker Ground Turkey Vegetable Soup

As the rich aroma of this comforting soup fills your home, consider these delightful pairings that elevate your dining experience.

  • Crusty Bread: Perfect for dipping, its crispy exterior and soft interior soak up the flavorful broth beautifully.

  • Leafy Green Salad: A refreshing mix of greens with a tangy vinaigrette adds brightness and crunch, balancing the soup's heartiness.

  • Garlic Breadsticks: Cheesy and buttery, they make a wonderful complement while providing that comforting, savory flavor we all love.

  • Creamy Mashed Potatoes: Velvety and smooth, they offer an indulgent touch that pairs wonderfully with the soup's texture.

  • Cheesy Cauliflower Gratin: Rich, creamy, and simply delightful, this dish adds a touch of decadence without overpowering the soup.

  • Steamed Broccoli: Lightly seasoned and crisp-tender, it enhances the meal with a burst of nutrients and color.

  • Chardonnay or Sauvignon Blanc: Both wines beautifully complement the soup’s flavors; Chardonnay brings creaminess, while Sauvignon Blanc adds zesty freshness.

  • Warm Apple Crisp: End your meal with something sweet; the warm, spiced apples combined with a crunchy topping create a delightful dessert that rounds out the evening.

Slow Cooker Ground Turkey Vegetable Soup Variations

Feel free to explore these delightful twists, adding your personal touch to this already comforting soup!

  • Dairy-Free: Substitute any milk-based ingredients with coconut milk or leave them out altogether to keep it creamy yet dairy-free.
    Embrace the richness of coconut milk, which brings a subtle sweetness that pairs beautifully with veggies.

  • Extra Protein: Add a can of drained beans, like kidney or white beans, for an extra protein and fiber boost.
    This addition makes the soup heartier while enhancing its nutritional profile, perfect for a filling meal.

  • Spicy Kick: Spice things up with a pinch of chili flakes or a dash of your favorite hot sauce.
    A little heat can awaken your senses, making each spoonful a burst of flavors that warms the soul.

  • Seasonal Veggies: Use whatever fresh vegetables you have on hand, like zucchini or bell peppers, to keep it vibrant and tailored to the season.
    Every season brings its bounty, so don’t hesitate to get creative and mix in seasonal delights.

  • Herb-Infused: Swap out the parsley for fresh basil or cilantro for a new herbal dimension.
    These fresh herbs lend a unique flavor profile, providing a refreshing contrast to the hearty broth.

  • Sweet Potato Option: Replace white potatoes with sweet potatoes for a deliciously sweet and healthy twist.
    Sweet potatoes not only add a different flavor but also pack a nutritional punch, ensuring every bite is wholesome.

  • Umami Boost: Stir in a tablespoon of soy sauce or miso paste for an umami punch.
    This savory addition deepens the flavor, making your soup even more satisfying and cozy.

Don’t hesitate to experiment, and for more hearty soup ideas, check out Zuppa Toscana Soup or try out a comforting bowl of Lemon Chicken Soup. Happy cooking!

Tips for the Best Slow Cooker Ground Turkey Vegetable Soup

• Cook Turkey Fully: Ensure your ground turkey is cooked thoroughly to an internal temperature of 165°F before adding it to the slow cooker for safety.

• Use Homemade Broth: For a deeper, more delicious flavor, consider using homemade chicken or vegetable broth instead of store-bought.

• Don't Overcook Vegetables: Keep an eye on the cooking time; overcooking can lead to mushy vegetables. Aim for 8-10 hours on low heat.

• Season to Taste: Adjust the salt and pepper according to your palate! Tasting the soup before serving ensures it's just right.

• Mix Up the Veggies: Feel free to substitute or add different vegetables based on what’s in season or what you have in your fridge. This keeps your Slow Cooker Ground Turkey Vegetable Soup exciting!

Make Ahead Options

This Slow Cooker Ground Turkey Vegetable Soup is perfect for busy home cooks looking to save time! You can chop and prepare all your vegetables (like carrots, celery, and potatoes) up to 24 hours in advance. Simply store them in an airtight container in the refrigerator to maintain their freshness and prevent browning. To make the soup even quicker on the day you plan to serve it, sauté the turkey, then transfer it with the prepped veggies and remaining ingredients into your slow cooker. When you're ready to enjoy your soup, cook it on low for 8-10 hours for that hearty, comforting flavor with minimal effort. Trust me, this proactive approach makes weeknight dinners a breeze while ensuring your Slow Cooker Ground Turkey Vegetable Soup is just as delicious!

Storage Tips for Slow Cooker Ground Turkey Vegetable Soup

Fridge: Store leftover soup in an airtight container in the fridge for up to 5 days, allowing the flavors to deepen as it sits.

Freezer: Portion the soup into freezer-safe containers and freeze for up to 3 months. When ready to enjoy, simply thaw overnight in the fridge.

Reheating: Gently reheat on the stove over low heat until warmed through, or use the microwave in 1-minute intervals, stirring in between, to maintain the texture of the vegetables.

Proper Cooling: Allow the soup to cool completely before transferring to storage containers to avoid condensation and maintain freshness.

Slow Cooker Ground Turkey Vegetable Soup Recipe FAQs

How do I choose the right ground turkey for the soup?
Absolutely! Look for ground turkey that is at least 93% lean for a healthier option. Check for a bright pink color without any dark spots or unpleasant odors, which can indicate spoilage. Fresh ground turkey typically has a slightly coarse texture, making it perfect for your Slow Cooker Ground Turkey Vegetable Soup.

What’s the best way to store leftovers?
After enjoying your soup, store the leftovers in an airtight container in the fridge for up to 5 days. This method keeps the flavors vibrant and allows for easy reheating. If you want to keep it longer, portion the soup into freezer-safe containers—this will allow you to savor it later for up to 3 months!

Can I freeze this soup? How?
Yes, you can definitely freeze your Slow Cooker Ground Turkey Vegetable Soup! Here's how: let the soup cool completely, then ladle it into freezer-safe containers. Leave about an inch of space at the top as the soup will expand when frozen. Label your containers with the date before placing them in the freezer. When you're ready to enjoy, simply thaw the soup in the fridge overnight and reheat it on the stove or in the microwave until warmed through.

What should I do if my vegetables become mushy?
If your vegetables turn out mushy, it could be due to letting the soup cook too long. To prevent this next time, try to stick to the recommended 8-10 hours on low heat. You might also add sturdier vegetables, such as green beans or bell peppers, later in the cooking process—maybe halfway through—to retain more crunch and texture in your Slow Cooker Ground Turkey Vegetable Soup.

Is this soup suitable for someone with allergies?
Very! This recipe can easily be adapted for allergy considerations. Use gluten-free broth if you're sensitive to gluten, and for a dairy-free option, just make sure not to add any dairy toppings. Always check labels for pre-packaged ingredients, and feel free to swap out any vegetables based on your specific dietary needs. Enjoy it worry-free with some simple adjustments!

Slow Cooker Ground Turkey Vegetable Soup

Savory Slow Cooker Ground Turkey Vegetable Soup You’ll Love

A healthy, hearty Slow Cooker Ground Turkey Vegetable Soup loaded with protein and colorful veggies.
Print Recipe Pin Recipe
Prep Time 15 minutes mins
Cook Time 10 hours hrs
Total Time 10 hours hrs 15 minutes mins
Servings: 6 cups
Course: Soups
Cuisine: American
Calories: 250
Ingredients Equipment Method Nutrition Notes

Ingredients
  

For the Base
  • 2 tablespoons Olive Oil Feel free to swap with avocado oil.
  • 1 pound Ground Turkey Or use chicken or lean beef.
  • 3 cloves Garlic, minced Garlic powder can be used if fresh is out.
  • 1 medium Onion, diced A yellow or white onion is best.
  • 2 stalks Celery, diced Leeks can be an alternative.
  • 2 medium Carrots, diced Baby carrots save prep time!
  • 2 medium White Potatoes, peeled and chopped Sweet potatoes are a good alternative.
  • 1 can Diced Tomatoes, drained Fresh tomatoes can be used when in season.
  • 4 cups Chicken Broth Substitute with vegetable broth for a vegetarian option.
For Seasoning
  • 1 teaspoon Salt Adjust to taste.
  • 1/2 teaspoon Pepper Freshly cracked is best.
  • 1 teaspoon Garlic Powder Omit if using fresh garlic.
  • 1 teaspoon Dried Oregano Italian seasoning can substitute.
  • 1 teaspoon Ground Thyme Use fresh thyme if available.
For the Finishing Touch
  • 2 cups Spinach, fresh or frozen Substitute with kale or Swiss chard.
  • 1/4 cup Fresh Parsley Optional garnish.

Equipment

  • Slow Cooker
  • Skillet

Method
 

Step-by-Step Instructions
  1. Sauté the Ground Turkey: Heat olive oil in a skillet over medium-high heat. Add ground turkey and cook for 5-10 minutes until golden brown.
  2. Transfer to Slow Cooker: Move cooked turkey to slow cooker with a slotted spoon. Add onions, celery, carrots, potatoes, tomatoes, broth, and spices. Stir well.
  3. Set to Cook: Cover and set slow cooker to low for 8-10 hours.
  4. Add Spinach and Seasoning: Stir in spinach 30 minutes before serving. Adjust salt and pepper to taste.
  5. Serve and Garnish: Ladle into bowls and garnish with parsley before serving warm, preferably with bread or salad.

Nutrition

Serving: 1cupCalories: 250kcalCarbohydrates: 30gProtein: 20gFat: 8gSaturated Fat: 2gPolyunsaturated Fat: 1gMonounsaturated Fat: 5gCholesterol: 75mgSodium: 500mgPotassium: 800mgFiber: 6gSugar: 4gVitamin A: 3000IUVitamin C: 15mgCalcium: 60mgIron: 3mg

Notes

Cook turkey to an internal temperature of 165°F before adding to slow cooker. Use homemade broth for better flavor. Monitor cooking time to avoid mushy vegetables.

Tried this recipe?

Let us know how it was!

Zesty Turkey Taco Soup: A Cozy Family Favorite

October 23, 2025 by Grace Snow Leave a Comment

As I stirred the bubbling pot, a warm wave of spicy aroma enveloped my kitchen, instantly transporting me back to cozy nights spent sharing meals with loved ones. This Healthy Homemade Turkey Taco Soup is my go-to comfort food, combining zesty ground turkey, black beans, and sweet corn into a hearty, soul-soothing bowl. It's the perfect quick dinner option, ready in no time and bursting with nutrition, ideal for nights when you crave a wholesome meal without the hassle. Not only is it gluten-free, but it also offers delightful flexibility—you can easily swap proteins or beans, tailoring it to your family’s tastes. So, what toppings will you add to make this soup your own?

Why Is This Turkey Taco Soup Special?

Hearty, Wholesome Ingredients: Each bowl is loaded with nutritious ingredients like black beans and corn, providing both fiber and fullness.
Quick and Easy: Ready in just about 30 minutes, making it perfect for busy weeknight dinners.
Customizable: Easily adapt it by swapping ground turkey with chicken or beef, and choose your favorite beans for a personal touch.
Crowd-Pleasing Flavor: The zesty combination of spices and fresh toppings will wow everyone, whether it's a cozy family night or a gathering with friends. Try pairing it with some crispy tortilla chips or serve it alongside a warm bowl of Asparagus Soup Healthy for a delicious feast!

Turkey Taco Soup Ingredients

Dive into the vibrant flavors of Turkey Taco Soup with these simple, wholesome ingredients!

For the Soup

  • Garlic – Fresh garlic enhances flavor and adds depth.
  • Onion – Any color onion can be used for a hint of sweetness.
  • Bell Pepper – Substitute any color for a slightly different flavor profile.
  • Olive Oil – Can replace with vegetable or canola oil for cooking.
  • Ground Turkey – The star protein; substitute with ground chicken or beef for variety.
  • Cumin – Adds warmth; homemade taco seasoning works as an alternative.
  • Smoked Paprika – Provides flavor and color; chili powder can be used for smokiness.
  • Goya Adobo Seasoning – A savory balance; use salt and pepper if unavailable.
  • Italian Seasoning – Optional seasoning that adds depth; can be swapped with oregano or basil.
  • Kosher Salt & Black Pepper – Season to taste based on preference.
  • Black Beans – Packed with fiber and protein; pinto or kidney beans can be used instead.
  • Frozen Corn – Adds sweetness and texture; fresh or canned corn works too.
  • Low-Sodium Chicken Broth – The base liquid; switch to vegetable broth for a vegetarian option.
  • Crushed Tomatoes – Forms the base flavor; swap with fresh or diced tomatoes if desired.
  • Tomato Paste – Thickening agent; extra crushed tomatoes can also be used.
  • Sugar – Balances acidity; can omit if unnecessary.

For the Toppings (Optional)

  • Avocados – Creamy addition that enhances texture.
  • Queso Fresco – Adds a savory, creamy touch.
  • Cilantro – Fresh and aromatic; sprinkle for brightness.
  • Limes – A burst of acidity; perfect for squeezing on top.
  • Corn Tortillas – Great for scooping and add a fun crunch.
  • Tortilla Chips – An excellent crunchy garnish for extra delight!

Feel free to mix and match these ingredients to create your own twist on this comforting Turkey Taco Soup!

Step‑by‑Step Instructions for Turkey Taco Soup

Step 1: Sauté Aromatics
In a large pot, heat 2 tablespoons of olive oil over medium heat until it shimmers. Add 3 minced garlic cloves, one chopped onion, and one diced bell pepper. Sauté for 5-6 minutes or until the onions are translucent and the peppers are tender, infusing your kitchen with delectable aromas that signal it's time for the Turkey Taco Soup to come together.

Step 2: Brown the Turkey
Introduce 1 pound of ground turkey to the pot, breaking it up with a spoon as it cooks. Sprinkle in 1 teaspoon each of cumin and smoked paprika, along with Goya Adobo seasoning and Italian seasoning to taste. Continue to cook for 7-8 minutes, stirring occasionally, until the turkey is browned and no longer pink, ensuring a savory base for your soup.

Step 3: Add Beans and Liquid
Next, add in two cans of rinsed black beans, 1 cup of frozen corn, 4 cups of low-sodium chicken broth, one can of crushed tomatoes, and 2 tablespoons of tomato paste. Stir well to combine all the ingredients, making sure the rich flavors meld together before the soup simmers, giving you a nourishing and hearty Turkey Taco Soup base.

Step 4: Simmer the Soup
Bring the mixture to a rolling boil over high heat, then reduce it to a gentle simmer. Cover the pot and let it cook for about 20 minutes, allowing the flavors to deepen and the ingredients to soften while the delightful aroma fills your home, making everyone eager for the Turkey Taco Soup.

Step 5: Final Adjustments
After simmering, stir in a teaspoon of sugar to balance any acidity from the tomatoes, and taste your soup, adjusting seasonings with salt and pepper as desired. If the soup feels too thick, you can add a splash more broth. These final touches will ensure your Turkey Taco Soup is perfectly seasoned.

Step 6: Serve
Ladle the Turkey Taco Soup into bowls, and let everyone choose their favorite toppings! Consider adding fresh avocados, crumbled queso fresco, a sprinkle of cilantro, and a squeeze of lime for a burst of freshness. Enjoy this inviting, cozy meal, perfect for sharing with family and friends.

Turkey Taco Soup: Customization Ideas

Dive into the delightful world of flavors by customizing this Turkey Taco Soup to suit your unique tastes and dietary needs!

  • Gluten-Free: Ensure all ingredients, especially broth and seasonings, are gluten-free. You’ll savor every spoonful without worry.
  • Dairy-Free: Omit cheese and swap sour cream with avocado slices or a dollop of dairy-free yogurt for a creamy touch.
  • Spice It Up: Add diced jalapeños or a sprinkle of cayenne pepper for an extra kick of heat that will warm your insides and excite your taste buds!
  • Vegetarian Delight: Substitute ground turkey with lentils or diced mushrooms, creating a hearty and satisfying option without meat.
  • Bean Variety: Feel free to change black beans to chickpeas or white beans. Each choice brings its own delightful twist, full of texture and flavor.
  • Broth Swap: For a vegetarian version, use vegetable broth instead of chicken broth, retaining that comforting base with a different essence.
  • Savory Boost: Incorporate a splash of lime juice or a hint of chipotle peppers for an exciting smoky flavor that will transport your taste experience.
  • Fresh Toppings: Get creative with toppings! Consider crispy tortilla strips, pickled red onions, or even a sprinkle of pumpkin seeds for a crunchy surprise on top of your soup.

This adaptable soup can delight everyone at the table, just like enjoying a warm bowl of Zuppa Toscana Soup or perhaps a cozy Santa Soup for another comforting yet hearty option!

What to Serve with Healthy Homemade Turkey Taco Soup

Transform your cozy dinner into a delightful spread with these perfect pairings that enhance every flavor!

  • Crispy Tortilla Chips:
    These crunchy bites add a satisfying texture contrast while being ideal for dipping. They soak up the delicious soup flavors beautifully.

  • Avocado Slices:
    Creamy and rich, fresh avocado elevates the soup's flavor. Its buttery texture creates a lovely balance to the zesty spices, making every bite heavenly.

  • Spanish Rice:
    Serve over fluffy Spanish rice for a heartier meal. The rice absorbs extra broth, enhancing the dish with a comforting, filling element.

  • Cornbread Muffins:
    Sweet and moist, cornbread muffins offer a delightful sweetness that complements the savory elements of the soup. They're perfect for mopping up every last drop!

  • Chopped Salad:
    A refreshing salad with crisp greens, cherry tomatoes, and a light vinaigrette adds a bright contrast. The crunchy elements balance the warmth of the soup while keeping things light.

  • Lime Wedges:
    Squeeze fresh lime juice over the soup just before serving. This tiny addition brightens the flavors and adds an enticing zesty kick to your meal.

  • Queso Fresco:
    Sprinkling crumbled queso fresco on top not only adds a deliciously creamy texture but also contributes a savory richness that perfectly rounds out the soup.

  • Cilantro Garnish:
    Fresh cilantro sprinkled on top enhances the visual appeal and adds an aromatic touch. Its vibrant flavor lifts the entire dish while tying together the spices beautifully.

How to Store and Freeze Turkey Taco Soup

Fridge: Store leftover Turkey Taco Soup in an airtight container in the fridge for up to 3-5 days. Reheat gently on the stovetop or in the microwave until warmed through.

Freezer: The soup can be frozen for up to 3 months. Allow it to cool completely before transferring it to freezer-safe containers, leaving some space for expansion.

Thawing: To enjoy, thaw the frozen soup overnight in the fridge. Reheat on the stovetop, adding a little broth or water if needed to reach your desired consistency.

Serving Tips: When reheating, give the soup a good stir and check the seasoning before serving, adjusting as necessary for the best flavor.

Expert Tips for Turkey Taco Soup

  • Choose Lean Meat: Use 90% lean ground turkey to keep your soup wholesome and avoid greasiness. This helps maintain a balanced texture.
  • Adjust Consistency: If your soup is too thick, stir in a bit more chicken broth. For a heartier soup, add more tomato paste as needed.
  • Season Wisely: Be cautious with salt, since both broth and canned tomatoes can be high in sodium. Taste as you go to ensure the perfect seasoning.
  • Tasty Variations: Feel free to swap proteins or beans based on your family's preferences. Try ground chicken or pinto beans for delightful twists.
  • Perfect Toppings: Elevate your Turkey Taco Soup with fresh garnishes like avocado and cilantro for added flavor and texture. Enjoy experimenting!

Make Ahead Options

These Turkey Taco Soup preparations are perfect for busy home cooks looking to save time! You can dice the onions, peppers, and garlic up to 24 hours in advance and store them in an airtight container in the refrigerator to maintain their freshness. Additionally, you can brown the ground turkey and mix in the spices ahead of time; this can be stored in the fridge for up to 3 days. When you're ready to enjoy your Turkey Taco Soup, simply add in the prepped veggies along with the broth, beans, and tomatoes, then simmer for about 20 minutes. This method ensures that your soup will be just as delicious while dramatically cutting down on your cooking time.

Turkey Taco Soup Recipe FAQs

What type of beans should I use for Turkey Taco Soup?
Absolutely! While black beans are a classic choice, you can easily substitute with pinto or kidney beans based on your family's taste preferences. Each variety brings a different texture and flavor, so feel free to experiment and find your favorite!

How long can I store Turkey Taco Soup in the fridge?
You can refrigerate Turkey Taco Soup in an airtight container for up to 3-5 days. Just ensure that it’s cooled completely before sealing it to maintain freshness. When ready to enjoy, simply reheat on the stovetop or in the microwave until warmed through.

Can I freeze Turkey Taco Soup? How do I do it?
Yes, you can freeze Turkey Taco Soup for up to 3 months! Allow the soup to cool completely and then transfer it to freezer-safe containers or resealable bags, leaving some space at the top for expansion during freezing. To thaw, place it in the fridge overnight and reheat over low heat, adding a splash of broth if the soup thickens too much.

What should I do if my soup is too salty?
If your Turkey Taco Soup turns out too salty, fear not! You can add a peeled, raw potato to the pot while it simmers; it will absorb excess salt. Let it cook for about 10-15 minutes, then remove the potato before serving. Alternatively, you might dilute the soup with a bit more broth or water to balance the flavor.

Can my pet eat Turkey Taco Soup?
While some ingredients, like ground turkey and beans, are safe for pets in small quantities, be cautious. Seasonings like garlic and onion are harmful to dogs and cats. It's best to keep the soup for human consumption only and opt for simple boiled turkey or vegetables if you want to share with your furry friends.

Turkey Taco Soup

Zesty Turkey Taco Soup: A Cozy Family Favorite

This Turkey Taco Soup is a healthy, comforting dish bursting with flavor, perfect for family dinners.
Print Recipe Pin Recipe
Prep Time 10 minutes mins
Cook Time 30 minutes mins
Total Time 40 minutes mins
Servings: 6 servings
Course: Soups
Cuisine: Mexican
Calories: 300
Ingredients Equipment Method Nutrition Notes

Ingredients
  

For the Soup
  • 2 tablespoons Olive Oil Can replace with vegetable or canola oil
  • 3 cloves Garlic Minced
  • 1 Onion Any color, chopped
  • 1 Bell Pepper Diced, any color
  • 1 pound Ground Turkey Can substitute with ground chicken or beef
  • 1 teaspoon Cumin Adds warmth
  • 1 teaspoon Smoked Paprika For flavor and color
  • 1 tablespoon Goya Adobo Seasoning A savory balance
  • 1 teaspoon Italian Seasoning Optional
  • 1 teaspoon Kosher Salt Adjust to taste
  • 1 teaspoon Black Pepper Adjust to taste
  • 2 cans Black Beans Rinsed, packed with fiber
  • 1 cup Frozen Corn Adds sweetness
  • 4 cups Low-Sodium Chicken Broth Can use vegetable broth for vegetarian option
  • 1 can Crushed Tomatoes Forms the base flavor
  • 2 tablespoons Tomato Paste Thickening agent
  • 1 teaspoon Sugar Balances acidity (optional)
For the Toppings (Optional)
  • 1 Avocados Creamy addition
  • 1/2 cup Queso Fresco Adds savory touch
  • 1/4 cup Cilantro Fresh and aromatic
  • 2 Limes For squeezing on top
  • 1 pack Corn Tortillas Great for scooping
  • 1 bag Tortilla Chips Crunchy garnish

Equipment

  • Large pot

Method
 

Cooking Instructions
  1. Heat olive oil over medium heat in a large pot. Add minced garlic, chopped onion, and diced bell pepper. Sauté for 5-6 minutes until fragrant.
  2. Introduce ground turkey, breaking it up as it cooks. Add cumin, smoked paprika, Goya Adobo, and Italian seasoning. Cook for 7-8 minutes until browned.
  3. Add rinsed black beans, frozen corn, chicken broth, crushed tomatoes, and tomato paste. Stir to combine ingredients well.
  4. Bring to a boil, then reduce heat and let simmer for about 20 minutes. Cover and let flavors meld.
  5. Stir in sugar to balance acidity, adjust seasonings with salt and pepper as needed, and add more broth if the soup is too thick.
  6. Serve in bowls with optional toppings like avocado, queso fresco, cilantro, and lime. Enjoy!

Nutrition

Serving: 1bowlCalories: 300kcalCarbohydrates: 30gProtein: 25gFat: 10gSaturated Fat: 2gPolyunsaturated Fat: 2gMonounsaturated Fat: 5gCholesterol: 70mgSodium: 400mgPotassium: 800mgFiber: 10gSugar: 3gVitamin A: 15IUVitamin C: 20mgCalcium: 5mgIron: 15mg

Notes

This Turkey Taco Soup can be easily customized with different proteins and beans to suit family preferences.

Tried this recipe?

Let us know how it was!

Cozy Up with Creamy Turkey Pot Pie Soup Bliss

October 23, 2025 by Grace Snow Leave a Comment

Cozy evenings call for a bowl of something heartwarming, and this Creamy Turkey Pot Pie Soup delivers just that! Bursting with tender shredded turkey and colorful vegetables, it's the perfect fix for those chilly days when you're craving comfort food. Whether you're using up leftover turkey from the holidays or poaching fresh breasts, this easy recipe transforms simple ingredients into a creamy delight that warms both the belly and the soul. What’s more, it comes together in no time, making it a brilliant choice for busy weeknights. Are you ready to indulge in a bowl of nostalgic goodness while adding a touch of homemade warmth to your dinner table? Let's get cooking!

Why is Turkey Pot Pie Soup a Must-Try?

Comforting and cozy, this Turkey Pot Pie Soup is the ultimate remedy for chilly days. Quick and easy to make, it promises a delicious meal without the fuss—perfect for busy weeknights. Versatile enough to utilize leftover turkey or fresh chicken, it adapts to whatever you have on hand. Rich in flavor, the creamy texture and vibrant veggies elevate this classic comfort food. Pair it with crusty bread or flaky puff pastry for an unforgettable experience—just like the classic Santa Soup Savory but with a hearty twist!

Turkey Pot Pie Soup Ingredients

• Perfect for cozy meals!

For the Soup Base

  • Flour – Thickens the soup base; cornstarch works as a gluten-free option.
  • Unsalted Butter – Adds richness and flavor; swap it for margarine if needed.
  • Yellow Onion – Provides aromatic sweetness; shallots can be a good substitute.
  • Minced Garlic – Enhances overall flavor; fresh garlic is preferable to garlic powder.
  • Kosher Salt – Enhances flavors; sea salt makes a suitable alternative.
  • Pepper – Adds seasoning; freshly cracked black pepper offers the best flavor.
  • Italian Seasoning – Imparts herbal notes; mix dried basil and oregano as a substitute.
  • White Wine Vinegar – Adds acidity and depth to the flavor; lemon juice or apple cider vinegar can work in a pinch.

For the Heartiness

  • Yukon Potatoes – Provides body and texture; waxy potatoes or sweet potatoes can also be used.
  • Chicken Broth (low sodium) – Serves as the soup base; vegetable broth works for a lighter option.

For the Protein and Veggies

  • Shredded Cooked Turkey – The main protein; shredded cooked chicken is a fine substitute.
  • Frozen Vegetable Mix – Adds color and nutrients; you can use fresh veggies like carrots and peas instead.

For Creaminess

  • Heavy Cream – Provides that creamy goodness; half-and-half or a non-dairy alternative can be used, although it may change the richness.

Embrace each ingredient in this Turkey Pot Pie Soup to turn ordinary meals into a comforting bowl of delight!

Step‑by‑Step Instructions for Turkey Pot Pie Soup

Step 1: Prepare the Slurry
In a small bowl, whisk together flour and enough cold water or broth to create a smooth slurry. Make sure there are no lumps for a seamless texture in your Turkey Pot Pie Soup. Set this aside as you move on to the next steps, because you'll need it to thicken the soup later.

Step 2: Sauté Aromatics
In a large pot, melt 4 tablespoons of unsalted butter over medium heat until bubbly, then add diced yellow onion and minced garlic. Sauté for about 5 minutes, stirring occasionally, until the onion is soft and translucent, releasing a sweet aroma that will enhance the flavor of your soup.

Step 3: Season the Base
Sprinkle in kosher salt, pepper, and Italian seasoning, stirring well to combine the spices into the fragrant onion and garlic mixture. Allow the spices to bloom for about a minute, then deglaze the pot with a splash of white wine vinegar. This will lift any flavorful bits stuck to the bottom, enriching your Turkey Pot Pie Soup.

Step 4: Incorporate Potatoes and Broth
Stir in diced Yukon potatoes, followed by low-sodium chicken broth and the prepared flour slurry. Mix everything together, bringing the soup to a gentle boil over medium-high heat. Watch as it thickens and transforms; this usually takes about 5-7 minutes to achieve that perfect simmering state.

Step 5: Simmer and Cook
Reduce the heat to low and let your soup simmer for 30 minutes. This slow cooking allows the potatoes to become fork-tender while melding all the delightful flavors of your Turkey Pot Pie Soup together. Stir occasionally and enjoy the comforting aroma wafting through your kitchen.

Step 6: Add Turkey and Vegetables
Once the potatoes are soft, stir in the shredded cooked turkey and your frozen vegetable mix. Let the soup simmer for an additional 5 minutes, ensuring everything is nicely heated through. The colors will brighten up beautifully, making it even more inviting!

Step 7: Finish with Cream
Finally, pour in the heavy cream to provide that luscious, creamy finish to your Turkey Pot Pie Soup. Stir gently, allowing everything to come together in harmony for another couple of minutes. The soup is now ready to serve; watch as it transforms every bowl into a cozy haven on cold days.

Turkey Pot Pie Soup Variations

Feel free to get creative and personalize your Turkey Pot Pie Soup with these delightful twists that enhance flavor and texture!

  • Dairy-Free: Substitute heavy cream with coconut cream for a rich, non-dairy option that adds a hint of sweetness.
  • Veggie Boost: Incorporate fresh carrots and peas in place of frozen veggies to brighten the soup with more vibrant colors and textures.
  • Spicy Kick: Add a pinch of red pepper flakes or a splash of hot sauce for a warm kick that takes your comfort food to the next level.
  • Herb-Infused: Swap out Italian seasoning for fresh herbs like thyme or rosemary for an aromatic transformation that elevates the taste profile.
  • Sweet Potato Twist: Replace Yukon potatoes with sweet potatoes for a naturally sweet and nutritious alternative; they perfectly complement the savory flavors.
  • Wine Flavor: For a touch of sophistication, add a splash of dry white wine or sherry while sautéing the onions for a depth of flavor reminiscent of classic cooking.
  • Protein Variety: If turkey isn't available, shredded rotisserie chicken or even chickpeas work beautifully to maintain the heartiness of the soup.
  • Pasta Addition: Toss in some small pasta, like ditalini, to make it a more filling meal; just cook the pasta separately and stir it in before serving.

With so many delicious options to explore, your Turkey Pot Pie Soup adventure is just beginning! If you're looking for other cozy dishes, consider trying a warm bowl of Crock Pot Chicken or a hearty Tamale Pie. Enjoy the culinary journey!

Expert Tips for Turkey Pot Pie Soup

  • Simmer Gently: Make sure to maintain a gentle simmer, as a rolling boil can lead to a less creamy texture in your Turkey Pot Pie Soup.

  • Mixing Flours: If gluten-free, use cornstarch instead of flour for your slurry, but remember to mix it with cold liquid to avoid clumping.

  • Fresh is Best: Opt for fresh vegetables over frozen when possible. They enhance both the flavor and nutrition of your Turkey Pot Pie Soup.

  • Taste for Seasoning: Always taste your soup before serving. You may need to adjust salt and pepper levels to complement the turkey and veggies.

  • Storage Tip: If storing, let the soup cool completely before refrigerating for up to 3-4 days. Reheat gently to avoid separation of creaminess.

  • Creamy Variations: For a lower-calorie option, substitute heavy cream with half-and-half, but keep in mind this will slightly alter the richness of your Turkey Pot Pie Soup.

How to Store and Freeze Turkey Pot Pie Soup

Fridge: Store your Turkey Pot Pie Soup in an airtight container for up to 3-4 days. Make sure the soup has cooled completely before sealing to maintain its creamy texture.

Freezer: If you'd like to enjoy it later, freeze the soup in freezer-safe containers for up to 3 months. Leave some space at the top, as the soup will expand when frozen.

Reheating: When you're ready to dig in, thaw the soup in the refrigerator overnight. Reheat gently on the stove, stirring well to prevent separating the creamy goodness.

Portioning: Consider freezing in individual portions for easy meals later. This way, you can pull out a single serving whenever you're craving comfort food without any fuss!

Make Ahead Options

These Creamy Turkey Pot Pie Soup preparations are perfect for busy weeknights! You can chop the vegetables and even cook the turkey up to 3 days in advance, storing them in an airtight container in the refrigerator to maintain freshness. Additionally, prepare the flour slurry and refrigerate it for up to 24 hours to save time later. When you’re ready to enjoy your delicious soup, simply sauté the aromatics, add in the chicken broth, and integrate your prepped ingredients. Finally, stir in the heavy cream for that velvety finish, ensuring your Turkey Pot Pie Soup is just as delightful as the day it was made!

What to Serve with Creamy Turkey Pot Pie Soup

Cozy up your dinner table with delightful sides that beautifully complement your warm, comforting soup!

  • Flaky Puff Pastry: Perfect for dipping, this buttery pastry mimics the classic pot pie top and adds a luxurious touch.

  • Crusty Bread: Ideal for sopping up every creamy bite, its hearty texture enhances the overall experience, making every spoonful feel special.

  • Fresh Garden Salad: A light and refreshing salad brings a crunchy contrast to the soup. Use seasonal greens and a zesty vinaigrette for brightness.

  • Roasted Root Vegetables: Caramelized carrots and sweet potatoes add sweetness and warmth, balancing out the creamy richness of the soup beautifully.

  • Savory Biscuits: These can be a delightful companion, offering a soft texture that can almost replicate the cozy comfort of the soup itself.

  • Crisp Apple Cider: Complement the flavors with this refreshing drink; its tartness pairs exceptionally well with the soup, cleansing the palate.

  • Homemade Cookies: For a sweet ending, enjoy classic chocolate chip or oatmeal cookies. Their warmth and comforting flavors echo that cozy vibe of your Soup.

With these pairings, every bite of your Creamy Turkey Pot Pie Soup becomes an inviting culinary experience!

Turkey Pot Pie Soup Recipe FAQs

How do I choose the right turkey for my Turkey Pot Pie Soup?
Absolutely! If you have leftover turkey from a holiday feast, it’s perfect for this recipe—just shred it and stir it in. If not, go for poached boneless, skinless turkey breasts, which can be cooked and shredded specifically for this soup. Look for turkey that is pale pink and firm to the touch, avoiding any that has dark spots or a strong odor.

What’s the best way to store leftover Turkey Pot Pie Soup?
Very! Store your Turkey Pot Pie Soup in an airtight container in the refrigerator for up to 3-4 days. Make sure the soup has completely cooled before sealing it to preserve its creamy texture. If you want to freeze it, let it cool first, then place in freezer-safe containers for up to 3 months. Just don’t forget to leave a bit of space at the top for expansion!

Can I freeze Turkey Pot Pie Soup? How do I do it?
Of course! To freeze your Turkey Pot Pie Soup, begin by allowing it to cool completely. Next, pour it into freezer-safe containers, leaving about an inch of space at the top to allow for expansion. Seal tightly and label it with the date. When you’re ready to eat, thaw it in the refrigerator overnight, then reheat gently on the stove, stirring well to mix the creamy goodness back together.

What can I do if my soup turns out too thick?
No worries! If your Turkey Pot Pie Soup is thicker than you’d like, simply add a bit of low-sodium chicken broth, milk, or even water to reach your desired consistency. You’ll want to stir it well while reheating to integrate the new liquid completely. Remember, the more the merrier when it comes to flavor adjustments!

Can I make this Turkey Pot Pie Soup gluten-free?
Absolutely! To make your Turkey Pot Pie Soup gluten-free, substitute all-purpose flour with cornstarch or a gluten-free flour blend. When making a slurry, whisk equal parts cornstarch with cold broth until smooth, and then incorporate it into the soup as you would the flour slurry. Enjoy your comforting bowl without any worries about gluten!

Turkey Pot Pie Soup

Cozy Up with Creamy Turkey Pot Pie Soup Bliss

This delicious Creamy Turkey Pot Pie Soup is a heartwarming dish bursting with tender turkey and colorful vegetables, perfect for chilly days.
Print Recipe Pin Recipe
Prep Time 15 minutes mins
Cook Time 45 minutes mins
Total Time 1 hour hr
Servings: 4 bowls
Course: Soups
Cuisine: American
Calories: 450
Ingredients Equipment Method Nutrition Notes

Ingredients
  

For the Soup Base
  • 1 cup Flour Cornstarch for gluten-free
  • 4 tablespoons Unsalted Butter Can be replaced with margarine
  • 1 medium Yellow Onion Shallots can be substituted
  • 2 cloves Minced Garlic Use fresh garlic for best flavor
  • 1 teaspoon Kosher Salt Sea salt works as an alternative
  • 1 teaspoon Pepper Freshly cracked black recommended
  • 1 teaspoon Italian Seasoning Mix dried basil and oregano as a substitute
  • 2 tablespoons White Wine Vinegar Lemon juice or apple cider vinegar can work
For the Heartiness
  • 2 medium Yukon Potatoes Waxy potatoes or sweet potatoes can also be used
  • 4 cups Chicken Broth (low sodium) Vegetable broth works for a lighter option
For the Protein and Veggies
  • 2 cups Shredded Cooked Turkey Shredded cooked chicken is a substitute
  • 2 cups Frozen Vegetable Mix Fresh veggies like carrots and peas may be used
For Creaminess
  • 1 cup Heavy Cream Half-and-half or a non-dairy alternative may be used

Equipment

  • Large pot
  • Whisk
  • small bowl

Method
 

Step‑by‑Step Instructions
  1. Prepare the Slurry: In a small bowl, whisk together flour and enough cold water or broth to create a smooth slurry. Set aside.
  2. Sauté Aromatics: In a large pot, melt unsalted butter, then add diced onion and minced garlic. Sauté until soft and translucent.
  3. Season the Base: Sprinkle in salt, pepper, and Italian seasoning. Deglaze the pot with white wine vinegar.
  4. Incorporate Potatoes and Broth: Stir in diced Yukon potatoes and low-sodium chicken broth with the flour slurry. Bring to a gentle boil.
  5. Simmer and Cook: Reduce heat, let the soup simmer for 30 minutes until potatoes are fork-tender.
  6. Add Turkey and Vegetables: Stir in shredded turkey and frozen vegetable mix, simmer for an additional 5 minutes.
  7. Finish with Cream: Pour in heavy cream, stir gently, and let everything come together in harmony.

Nutrition

Serving: 1bowlCalories: 450kcalCarbohydrates: 35gProtein: 25gFat: 25gSaturated Fat: 15gPolyunsaturated Fat: 2gMonounsaturated Fat: 8gCholesterol: 90mgSodium: 700mgPotassium: 800mgFiber: 4gSugar: 3gVitamin A: 15IUVitamin C: 20mgCalcium: 10mgIron: 10mg

Notes

For best results, maintain a gentle simmer and always taste for seasoning before serving.

Tried this recipe?

Let us know how it was!

Creamy Turkey Soup with Spinach for Cozy Comfort Nights

October 23, 2025 by Grace Snow Leave a Comment

As I stirred the pot, a rich aroma filled my kitchen, wrapping me in a warm hug of nostalgia. This Creamy Turkey Soup with Spinach is more than just a recipe; it’s a delightful way to turn your holiday leftovers into a hearty, comforting meal that’s bursting with good-for-you ingredients. Perfect for cozy gatherings or a simple weeknight dinner, this dish not only helps you make the most of leftover turkey but also packs in the nutrients with fresh spinach and savory vegetables. With its quick prep time and satisfying flavors, it’s sure to become a go-to in your culinary repertoire. Are you ready to rediscover the magic of your leftovers?

Why is this soup a weeknight winner?

Hearty Comfort: This creamy turkey soup is the perfect solution for those chilly evenings when you crave a satisfying meal without the fuss.

Quick Prep: With simple ingredients and a straightforward cooking process, you can whip it up in no time—great for busy nights!

Nutritional Boost: The fresh spinach isn't just colorful; it adds essential vitamins and minerals, making this dish not only tasty but wholesome too.

Versatile Ingredients: Customize your soup with extra veggies or spices, transforming it into your unique culinary creation each time.

Crowd-Pleasing Flavor: Whether serving a family meal or comforting a friend, this soup is sure to satisfy everyone's taste buds, just like my Lemon Chicken Soup or Zuppa Toscana Soup.

Turkey Soup with Spinach Ingredients

• Discover the key components for a hearty bowl!

  • For the Soup Base

  • Carrots – Adds natural sweetness and color; consider parsnips for a unique twist.

  • Celery – Provides a crunchy texture and aromatic essence; can be omitted if you're in a pinch.

  • Onion – Enhances overall flavor depth; shallots work well for a milder alternative.

  • Garlic – Offers fragrant richness; fresh is ideal, but garlic powder suffices in a hurry.

  • Turkey – The heart of the dish, offering protein and flavor; use any leftover turkey, whether roasted or grilled.

  • Broth (chicken or turkey) – Acts as the warming base; vegetable broth is a fantastic vegetarian option.

  • For the Creamy Finish

  • Cream (heavy or light) – Contributes to that luscious, creamy texture; swap with coconut milk for a dairy-free delight.

  • Spinach – Adds vibrancy and essential nutrients; kale can be a splendid substitute.

  • For Seasoning

  • Seasonings (salt, pepper, thyme) – Essential for flavor enhancement; fresh herbs can elevate the taste even further.

Embrace the comforting harmony of flavors in this Turkey Soup with Spinach as you prepare to savor each warm bowl!

Step‑by‑Step Instructions for Creamy Turkey Soup with Spinach

Step 1: Sauté Vegetables
In a large pot, heat 2 tablespoons of olive oil over medium heat. Add chopped carrots, diced celery, and onion, stirring occasionally until they soften—approximately 5-7 minutes. Toss in minced garlic and sauté for an additional minute, allowing the aroma to fill your kitchen, creating a flavorful base for your creamy turkey soup with spinach.

Step 2: Add Turkey and Broth
Once your vegetables are tender, stir in the leftover turkey, breaking it into bite-sized pieces. Pour in 4 cups of chicken or turkey broth, stirring well to combine. Increase the heat until the mixture reaches a gentle simmer, allowing the flavors to meld together—let it simmer for about 10 minutes for a rich and hearty soup.

Step 3: Incorporate Spinach
Add in a generous handful of fresh spinach to your simmering soup. Cook for another 3-4 minutes, stirring gently until the spinach wilts beautifully and turns vibrant green. This step not only enhances the visual appeal of your creamy turkey soup with spinach but also boosts the nutritional value, making each bowl a hearty delight.

Step 4: Creamy Finish
Reduce the heat to low and stir in 1 cup of heavy cream, mixing thoroughly until it achieves a rich and creamy texture. Season with salt, pepper, and dried thyme to taste. Allow the soup to heat through for another 2-3 minutes, ensuring that all flavors are well combined, and the soup is warmed to your liking.

Step 5: Serve Hot
Ladle the hot, creamy turkey soup with spinach into bowls and garnish with freshly cracked pepper or a sprinkle of thyme if desired. Serve with crusty bread on the side for a complete meal that warms your heart and satisfies your soul, perfect for sharing with family and friends on a cozy evening.

Expert Tips

  • Uniform Chopping: Ensure vegetables are chopped uniformly for even cooking; this prevents some from becoming mushy while others remain crunchy.

  • Cream Adjust: Start with less cream and adjust based on your desired richness; it’s easier to add than remove, especially in your creamy turkey soup with spinach.

  • Thicker Texture: For a thicker soup, blend a portion before mixing it back in; this gives a delightful creaminess without compromising on heartiness.

  • Seasoning Wisely: Taste and season as you go; adjusting the salt, pepper, and thyme after adding cream is vital, as these flavors can change.

  • Proper Storage: Allow the soup to cool before refrigerating in an airtight container; it can last for up to 4 days and is perfect for busy weeknights!

Turkey Soup with Spinach Variations

Feel free to make this creamy turkey soup your own with these fun and flavorful twists!

  • Dairy-Free: Substitute coconut milk for cream to create a deliciously creamy, lactose-free version that’s just as comforting.

  • Spicy Kick: Add red pepper flakes or chopped jalapeños for an added layer of heat that will warm you from the inside out. A little spice can elevate the entire bowl!

  • Hearty Grains: Toss in some cooked quinoa or orzo to give this soup a heartier texture. The grains absorb the flavors beautifully, making each bite satisfying.

  • Vegetable Boost: Incorporate leftover veggies like peas or diced bell peppers for extra color and nutrition. It’s a great way to clean out the fridge while enhancing the soup!

  • Herb-Infused: Fresh herbs like dill or parsley can replace the thyme for a different flavor profile; they add a lovely freshness that brightens the dish.

  • Smoky Flavor: Introduce diced smoked turkey or bacon during the sauté step to create a delightful smoky undertone that harmonizes beautifully with the soup.

  • Crème Fraîche Swirl: For an indulgent finish, swirl in some crème fraîche just before serving. Its tangy richness pairs perfectly with the soup's flavors.

  • Vegan Version: Use vegetable broth and skip the cream, replacing it with a cashew cream for a plant-based take that still feels luxurious. Try this on those nights when you're craving something lighter!

These variations invite creativity and allow you to personalize your creamy turkey soup with spinach, making it an ever-evolving favorite. Don't forget, if you're in the mood for something different, you might enjoy a comforting bowl of Asparagus Soup Healthy or even my savory Santa Fe Soup!

Make Ahead Options

These Creamy Turkey Soup with Spinach preparations are a fantastic way to save time on busy nights! You can chop the vegetables (carrots, celery, onion, and garlic) up to 24 hours in advance and store them in an airtight container in the refrigerator to maintain their freshness. Additionally, you can also shred leftover turkey and refrigerate it in a separate container for up to 3 days. When you’re ready to enjoy this comforting dish, simply sauté the prepped vegetables, add the turkey and broth, and follow the cooking steps. This way, you'll have a delicious homemade soup that's just as satisfying with minimal effort, perfect for delightful weeknight dinners!

What to Serve with Creamy Turkey Soup with Spinach

Enhance your comforting soup experience with delightful pairings that bring out its rich, savory flavors.

  • Crusty Bread: A warm, crispy baguette is perfect for dipping and soaking up all that creamy goodness.
  • Garlic Bread: Its buttery, garlicky taste complements the soup’s richness while adding an extra crunch.
  • Spinach Salad: A light spinach salad with a tangy vinaigrette refreshes your palate and balances the creaminess.
  • Roasted Vegetables: Seasoned carrots, zucchini, or bell peppers bring added depth and texture while boosting your veggie intake.
  • Rice: Fluffy white or wild rice can be a hearty addition, turning your soup into a complete meal that's both filling and satisfying.
  • Cheesy Biscuits: Warm, cheesy biscuits add a delightful, gooey texture and extra flavor with each bite, making it a perfect match.
  • Apple Crisp: For dessert, a warm apple crisp brings a sweet finish, echoing comfort and warmth, just like the heart of your soup.
  • Herbal Tea: A soothing chamomile or mint tea offers a gentle after-dinner drink that’s both refreshing and calming.
  • Wine Pairing: A light Chardonnay or Pinot Grigio can enhance your soup experience, offering a crisp balance to the creaminess of the dish.
  • Sparkling Water: Infused with lemon or mint, this bubbly drink adds a refreshing element to your meal, cleansing the palate beautifully.

Storage Tips for Turkey Soup with Spinach

Fridge: Place your leftover creamy turkey soup in an airtight container and refrigerate for up to 4 days. Always allow it to cool before sealing to maintain freshness.

Freezer: For longer storage, your turkey soup can be frozen for up to 3 months. Use freezer-safe containers and leave some space at the top for expansion.

Reheating: When you're ready to enjoy your soup again, reheat it gently on the stove over low heat, stirring occasionally to maintain that creamy texture.

Thawing: If frozen, transfer the soup to the fridge to thaw overnight before reheating, or use the microwave in short intervals, stirring in between for even warming.

Creamy Turkey Soup with Spinach Recipe FAQs

What is the best way to select ripe ingredients for this soup?
Absolutely! For the best flavor, choose vibrant carrots that are firm and smooth, avoiding any that are limp or have dark spots. Spinach should be fresh with bright green leaves, steering clear of any that look wilted or slimy. If you're selecting garlic, look for bulbs that are tight and heavy, without any sprouts. Fresh herbs should also be fragrant, with no signs of browning.

How should I store leftover creamy turkey soup?
Very! Place your leftover creamy turkey soup in an airtight container and refrigerate it for up to 4 days. It's important to let it cool to room temperature before sealing to preserve its optimal flavor and texture. When ready to enjoy, reheat gently on the stove over low heat until warmed through, stirring occasionally.

Can I freeze creamy turkey soup with spinach?
Yes! To freeze your turkey soup, make sure it’s cooled completely, then transfer it into freezer-safe containers or resealable bags. Leave some space at the top in the container for the soup to expand as it freezes. Your soup can be stored in the freezer for up to 3 months. When ready to eat, transfer the soup to the fridge 24 hours beforehand to thaw. Reheat gently on the stove to enjoy!

What if my soup is too thick?
Don’t worry! If you find your soup is thicker than you’d like, you can easily adjust it. Simply add a splash of broth or water to the pot while reheating, stirring to combine until it reaches your desired consistency. Remember, you can always thin it out, but it's tricky to thicken a soup that's too thin. Also, adding fresh ingredients like more spinach can enhance flavor while adjusting the texture!

Are there any dietary considerations for this soup?
Great question! This creamy turkey soup can accommodate various dietary needs. If you're concerned about allergies, it's important to note that the recipe contains dairy. You can substitute heavy cream with coconut milk or a non-dairy cream alternative to make it dairy-free. Additionally, always ensure that your broth is gluten-free if serving to someone with gluten sensitivities. If you have pets, keep the soup away from them, especially if garlic and onions are involved as they are toxic to dogs and cats.

Can I use fresh turkey instead of leftovers?
Absolutely! If you don't have leftover turkey, you can use freshly cooked turkey. Just poach or roast your turkey breast, then shred or chop it into bite-sized pieces when ready to add to the soup. This way, you can enjoy the same delicious flavors with freshly cooked turkey!

Turkey Soup with Spinach

Creamy Turkey Soup with Spinach for Cozy Comfort Nights

This Turkey Soup with Spinach transforms holiday leftovers into a hearty meal, perfect for cozy gatherings.
Print Recipe Pin Recipe
Prep Time 15 minutes mins
Cook Time 20 minutes mins
Total Time 35 minutes mins
Servings: 6 bowls
Course: Soups
Cuisine: American
Calories: 350
Ingredients Equipment Method Nutrition Notes

Ingredients
  

For the Soup Base
  • 2 tablespoons Olive Oil
  • 2 cups Carrots, chopped Can substitute with parsnips.
  • 1 cup Celery, diced Can be omitted.
  • 1 medium Onion, chopped Shallots can be used.
  • 3 cloves Garlic, minced Fresh is ideal.
  • 4 cups Turkey, leftover Any type.
  • 4 cups Broth (chicken or turkey) Vegetable broth is a substitute.
For the Creamy Finish
  • 1 cup Heavy Cream Can use coconut milk for dairy-free.
  • 2 cups Spinach, fresh Kale can substitute.
For Seasoning
  • to taste Salt
  • to taste Pepper
  • 1 teaspoon Dried Thyme

Equipment

  • Large pot

Method
 

Step-by-Step Instructions
  1. In a large pot, heat olive oil over medium heat. Add carrots, celery, and onion; sauté for 5-7 minutes until softened. Add garlic and sauté for another minute.
  2. Stir in leftover turkey, breaking into bite-sized pieces. Pour in broth and bring to a gentle simmer for 10 minutes.
  3. Add spinach and cook for 3-4 minutes until wilted.
  4. Reduce heat; stir in heavy cream. Season with salt, pepper, and thyme; heat through for 2-3 minutes.
  5. Ladle soup into bowls, garnish with pepper or thyme, and serve with crusty bread.

Nutrition

Serving: 1bowlCalories: 350kcalCarbohydrates: 25gProtein: 20gFat: 18gSaturated Fat: 10gPolyunsaturated Fat: 0.5gMonounsaturated Fat: 10gCholesterol: 100mgSodium: 800mgPotassium: 600mgFiber: 3gSugar: 3gVitamin A: 5000IUVitamin C: 20mgCalcium: 80mgIron: 2mg

Notes

For a thicker soup, blend a portion before mixing back. Adjust cream to your desired richness.

Tried this recipe?

Let us know how it was!

Leftover Turkey and Wild Rice Soup That Warms the Soul

October 23, 2025 by Grace Snow Leave a Comment

As leaves begin to change and a cozy chill fills the air, it’s time to embrace the warmth of homemade comfort food. Enter my Healthy Leftover Turkey and Wild Rice Soup, a delightful dish that magically transforms those post-holiday turkey remnants into something truly special. With its creamy texture and a hearty mix of vegetables, this soup becomes a nourishing family favorite and a simple solution for busy weeknight dinners. Plus, it’s packed with nutrients, making it a nourishing option you can feel good about. So, why settle for takeout when you can stir up a pot of comforting goodness right at home? Curious to see how this recipe can become your new go-to for leftover turkey?

Why Choose Leftover Turkey Soup?

Comforting, there’s nothing quite like a warm bowl of soup on chilly nights. Easy to make, this recipe transforms holiday leftovers into a satisfying dish with minimal fuss. Nutritious and hearty, packed with vegetables and lean turkey, it’s perfect for a healthy meal. Versatile, feel free to swap in other grains or veggies for a personal touch. Lastly, crowd-pleasing, your family will love this creamy soup, which is far better than any fast food alternative. Enjoy with a side of cornbread for a complete meal!

Leftover Turkey and Wild Rice Soup Ingredients

For the Soup
• Onion – Adds foundational flavor and sweetness.
• Celery – Contributes crunch and aromatic notes.
• Garlic – Provides a depth of flavor; can be minced for even distribution.
• Carrots – Adds sweetness and color; chop into small pieces for even cooking.
• Avocado oil – For sautéing; can be substituted with olive oil.
• Poultry seasoning – Enhances earthy taste; store-bought or homemade blends work.
• Wild rice blend – Acts as the grain base, providing texture; can swap for brown rice if preferred.
• Chicken or turkey broth – Provides rich flavor; homemade broth can enhance taste.
• Water – Used to adjust the soup’s consistency; can increase or decrease according to preference.
• Turkey – Use any leftover cooked turkey, shredded for easy incorporation.
• Butter or vegan butter – For the roux base; can use ghee or a dairy-free spread.
• Whole wheat pastry or gluten-free flour – Thickens the soup; gluten-free alternatives can be utilized.
• Milk – Adds creaminess; can be almond milk or any preferred milk.
• Chopped parsley – For garnish, adds freshness and color.

This Leftover Turkey and Wild Rice Soup is a delightful way to savor the goodness of your holiday feast!

Step‑by‑Step Instructions for Leftover Turkey And Wild Rice Soup

Step 1: Prep the Vegetables
Begin by preparing your vegetables for the Leftover Turkey And Wild Rice Soup. Chop one onion, mince three cloves of garlic, and use a food processor to thinly slice two stalks of celery and two carrots. Aim for uniform pieces to ensure even cooking and vibrant flavor throughout the soup.

Step 2: Sauté Aromatics
In a large stockpot, heat two tablespoons of avocado oil over medium-high heat. Once the oil shimmers, add the chopped onion and minced garlic, sautéing for about 5 minutes until the onion becomes translucent and fragrant. This step lays a flavorful foundation for your comforting soup.

Step 3: Add Celery and Carrots
Stir in the sliced celery and sauté for 2 minutes, allowing it to soften. Then, add the chopped carrots and cook for an additional 2 minutes. The vibrant colors and fresh aromas will signal that you're on the right track to crafting a nourishing Leftover Turkey And Wild Rice Soup.

Step 4: Combine Broth and Rice
Pour in a quart of chicken or turkey broth along with one cup of water and a tablespoon of poultry seasoning. Add in one cup of wild rice blend. Bring the mixture to a boil over high heat, then cover the pot and reduce to a simmer. Let it cook for around 45 minutes, until the rice is tender and has absorbed the delicious flavors.

Step 5: Incorporate Turkey
After 45 minutes of simmering, carefully lift the lid and stir in 2 cups of shredded leftover turkey. This warm addition will bring the soup together with comforting heartiness. Allow the soup to simmer for an additional 5 minutes, letting the turkey heat through and meld with the other ingredients.

Step 6: Make and Add Roux
In a separate saucepan, melt 2 tablespoons of butter over medium heat. Whisk in 2 tablespoons of flour, stirring for about 1 minute until it forms a paste. Gradually whisk in 1 cup of milk until smooth. This roux will thicken your Leftover Turkey And Wild Rice Soup, adding a creamy texture that everyone will love.

Step 7: Garnish and Serve
Finally, stir the roux mixture into the soup, adjusting thickness by adding more water or broth if desired. Taste for seasoning and adjust as necessary. Serve hot, garnished with freshly chopped parsley for a pop of color and flavor. Your Leftover Turkey And Wild Rice Soup is now ready to be enjoyed!

Expert Tips for Leftover Turkey Soup

  • Chop Evenly: Ensuring that the vegetables are cut uniformly will help them cook at the same rate, creating a balanced texture in your Leftover Turkey And Wild Rice Soup.

  • Adjust for Thickness: If you prefer a thicker soup, let it simmer longer. For a thinner consistency, add extra broth or water slowly while stirring.

  • Roux Mastery: When making the roux, whisk continuously while gradually adding milk to avoid lumps and achieve a smooth, creamy texture in the soup.

  • Broth Choice: Use homemade chicken or turkey broth if possible, as it enhances the overall flavor of your Leftover Turkey And Wild Rice Soup significantly.

  • Additional Veggies: Feel free to mix in other vegetables like green beans or peas, which will not only boost nutrition but also enhance the vibrant color and flavor profile of the soup.

Make Ahead Options

Preparing this Healthy Leftover Turkey and Wild Rice Soup in advance is a fantastic way to save time during busy weeknights! You can chop your vegetables (onion, celery, carrots, and garlic) up to 24 hours ahead and store them in an airtight container in the refrigerator. Additionally, you can mix the wild rice blend and seasonings ahead of time, keeping them in a tightly sealed container. When you're ready to cook, simply sauté the aromatics, add the broth, rice, and cooked turkey, and follow the remaining steps. This strategy not only maintains the soup's quality and freshness but also ensures your family enjoys a hearty meal with minimal effort! Just remember, for a delightful creaminess, add the roux just before serving.

What to Serve With Healthy Leftover Turkey and Wild Rice Soup

As you warm up with a bowl of this delightful soup, consider complementing it with these delicious pairings that turn your meal into a cozy feast.

  • Cornbread Muffins: The slightly sweet, buttery texture of cornbread enhances the soup's creamy richness and makes every bite a joy.

  • Crusty Artisan Bread: Perfect for dipping, crusty bread provides a comforting crunch that pairs wonderfully with the soup's smooth consistency. It’s a great way to soak up every last drop of flavor.

  • Green Salad: A fresh garden salad with tangy vinaigrette adds brightness and balances the soup's creamy texture. Crisp lettuce and colorful veggies provide a refreshing contrast.

  • Roasted Vegetables: Seasoned roasted carrots and Brussels sprouts bring a hearty, caramelized flavor that deepens the meal's comfort factor. Plus, they add extra nutrients to your serving!

  • Homemade Garlic Bread: Deliciously cheesy and buttery, garlic bread offers a savory crunch that plays beautifully against the rich flavors of your soup.

  • Apple Crisp: For a sweet finish, this warm dessert brings a delightful contrast of flavors, with a satisfying crunch that pairs neatly with your creamy soup.

  • Herbal Iced Tea: A refreshing glass of iced tea infused with mint or lemon enhances the overall experience, cleansing the palate with every sip.

  • Chardonnay: A crisp, chilled glass of Chardonnay accentuates the flavors of the soup, making for a lovely, light pairing that feels luxurious.

Embrace the warmth and comfort of a complete meal by diving into these tasty adding-on ideas!

How to Store and Freeze Leftover Turkey and Wild Rice Soup

Fridge: Store your Leftover Turkey and Wild Rice Soup in an airtight container for up to 4 days. Allow it to cool before sealing to maintain best freshness.

Freezer: For longer storage, freeze the soup in airtight containers for up to 3 months. Ensure it’s fully cooled prior to freezing to prevent ice crystals from forming.

Reheating: Reheat the soup on the stovetop over low heat, stirring occasionally, until warmed through. Add a splash of broth or water if it’s too thick after thawing.

Thawing: When ready to enjoy, thaw in the fridge overnight for safe reheating or use the microwave's defrost setting for convenience.

Leftover Turkey And Wild Rice Soup Variations

Feel free to personalize your delicious soup with these creative swaps and ideas that will tantalize your taste buds.

  • Grain Swap: Replace wild rice with brown rice or quinoa for a different texture that still holds all the heartiness. Quinoa adds a nutty flavor and is packed with protein!

  • Veggie Boost: Add vibrant green beans or sweet peas to up the nutritional value and give your soup a pop of color. The sweetness of peas pairs wonderfully with the savory turkey.

  • Spice it Up: For heat, toss in some crushed red pepper flakes or diced jalapeños. This will elevate your soup to a cozy warmth that's perfect for those chilly nights.

  • Dairy-Free Delight: Use almond milk or coconut milk instead of dairy for a creamy finish while keeping it vegan. This swap maintains the soup's richness without the lactose.

  • Herb Infusion: Fresh herbs like thyme, rosemary, or even a bit of dill will bring an aromatic depth to your soup. Just a sprinkle adds a delightful freshness that makes every spoonful exquisite.

  • Creamy Variation: Blend a handful of spinach or kale into your roux right before adding it to the soup. It not only thickens the soup but also adds a healthy green twist that tastes just divine.

  • Add Beans: Stir in a can of white beans for added fiber and protein. They meld beautifully with the other ingredients and give a nice creamy texture as they break down slightly in the cooking process.

  • Zuppa Toscana Influence: Inspired by classic flavors, you can mimic the essence of different soups! Add some Italian sausage and kale for a twist reminiscent of a Zuppa Toscana, combining familiar tastes in an enticing way.

Each of these variations can turn your Leftover Turkey And Wild Rice Soup into a unique meal reimagined. So don’t hesitate to explore these delicious options! Looking for something even heartier? Consider pairing it with a side of cornbread or read up on this tasty Corn Furikake Fried Rice for a delightful complement!

Leftover Turkey and Wild Rice Soup Recipe FAQs

How do I choose the right turkey for this soup?
Absolutely! When using leftover turkey, ensure it is properly cooked and stored within 3 to 4 days after cooking. Look for any signs of spoilage like an off smell or slimy texture. For the best flavor, using turkey that has been roasted with herbs and spices will elevate your soup to new heights!

What’s the best way to store this soup?
For sure! Store your Leftover Turkey and Wild Rice Soup in an airtight container in the fridge for up to 4 days. Be sure to let it cool completely before sealing to keep it fresh and delicious. For optimal taste, consume it sooner rather than later.

Can I freeze the soup?
You can! For longer storage, freeze the Leftover Turkey and Wild Rice Soup in airtight containers for up to 3 months. Make sure to let it cool before freezing. To maintain flavor and texture, label the containers with the date and type of soup so you can easily identify it later!

What if my soup turned out too thick after reheating?
Very common! If you find your soup too thick after thawing, simply add a splash of broth or water while reheating on low heat. Stir well to combine, ensuring a creamy consistency. You can also adjust the liquid while cooking if you prefer a thinner soup from the start.

Are there any dietary considerations I should keep in mind?
Absolutely! If you're serving this soup to guests with dietary restrictions, you can easily modify ingredients. For a gluten-free version, swap whole wheat pastry flour with a gluten-free alternative. To make it dairy-free, substitute the milk with almond, oat, or coconut milk. Always check for allergies before serving!

Leftover Turkey And Wild Rice Soup

Leftover Turkey and Wild Rice Soup That Warms the Soul

Transform your holiday turkey remnants into a comforting Leftover Turkey And Wild Rice Soup. A nutritious and hearty meal for busy weeknights.
Print Recipe Pin Recipe
Prep Time 15 minutes mins
Cook Time 1 hour hr
Total Time 1 hour hr 15 minutes mins
Servings: 6 servings
Course: Soups
Cuisine: American
Calories: 350
Ingredients Equipment Method Nutrition Notes

Ingredients
  

For the Soup
  • 1 medium Onion Adds foundational flavor and sweetness.
  • 2 stalks Celery Contributes crunch and aromatic notes.
  • 3 cloves Garlic Provides a depth of flavor; can be minced for even distribution.
  • 2 medium Carrots Adds sweetness and color; chop into small pieces for even cooking.
  • 2 tablespoons Avocado oil For sautéing; can be substituted with olive oil.
  • 1 tablespoon Poultry seasoning Enhances earthy taste; store-bought or homemade blends work.
  • 1 cup Wild rice blend Acts as the grain base, providing texture.
  • 1 quart Chicken or turkey broth Provides rich flavor; homemade broth can enhance taste.
  • 1 cup Water Used to adjust the soup’s consistency.
  • 2 cups Cooked turkey Use any leftover cooked turkey, shredded for easy incorporation.
  • 2 tablespoons Butter or vegan butter For the roux base; can use ghee or a dairy-free spread.
  • 2 tablespoons Flour Whole wheat pastry or gluten-free flour can be used.
  • 1 cup Milk Adds creaminess; can be almond milk or any preferred milk.
  • 1 tablespoon Chopped parsley For garnish, adds freshness and color.

Equipment

  • Large Stockpot
  • Saucepan
  • Food Processor

Method
 

Step-by-Step Instructions
  1. Chop one onion, mince three cloves of garlic, and use a food processor to thinly slice two stalks of celery and two carrots.
  2. In a large stockpot, heat two tablespoons of avocado oil over medium-high heat. Add the chopped onion and minced garlic, sautéing for about 5 minutes until the onion becomes translucent.
  3. Stir in the sliced celery and sauté for 2 minutes. Add the chopped carrots and cook for an additional 2 minutes.
  4. Pour in a quart of chicken or turkey broth along with one cup of water and a tablespoon of poultry seasoning. Add in one cup of wild rice blend. Bring to a boil, then cover and reduce to a simmer. Cook for around 45 minutes.
  5. Stir in 2 cups of shredded leftover turkey. Simmer for an additional 5 minutes.
  6. In a separate saucepan, melt 2 tablespoons of butter over medium heat. Whisk in 2 tablespoons of flour, stirring until it forms a paste. Gradually whisk in 1 cup of milk until smooth.
  7. Stir the roux mixture into the soup, adjusting thickness by adding more water or broth if desired. Serve hot, garnished with freshly chopped parsley.

Nutrition

Serving: 1cupCalories: 350kcalCarbohydrates: 40gProtein: 25gFat: 10gSaturated Fat: 3gPolyunsaturated Fat: 2gMonounsaturated Fat: 3gCholesterol: 70mgSodium: 600mgPotassium: 800mgFiber: 5gSugar: 2gVitamin A: 2500IUVitamin C: 15mgCalcium: 100mgIron: 2mg

Notes

Chop vegetables evenly to ensure even cooking. Adjust thickness by simmering longer or adding broth/water. Use homemade broth for better flavor. Add other veggies if desired.

Tried this recipe?

Let us know how it was!
  • « Previous Page
  • 1
  • …
  • 117
  • 118
  • 119
  • 120
  • 121
  • …
  • 180
  • Next Page »

Welcome!

Hi, I’m Grace, a Sydney-based home cook with a passion for bold flavors and trending ingredients. Whether you’re a busy beginner or a seasoned foodie, you’ll find dishes here that are fresh, fun, and full of flavor.

More about me

Popular Recipes

  • Butter Pecan Cookies
    Irresistibly Soft Butter Pecan Cookies for Cozy Moments
  • Decadent Turtle Bars
    Decadent Turtle Bars: Indulge in Sweet Gooey Perfection
  • Salted Caramel Butter Bars
    Decadent Salted Caramel Butter Bars You Can't Resist
  • Easy Italian Pasta Salad
    Easy Italian Pasta Salad: A Summer Delight to Share

Footer

↑ back to top

About

  • Privacy Policy
  • Disclaimer
  • Terms & Conditions

Newsletter

  • Sign Up! for emails and updates

Contact

  • About me
  • Contact me

Copyright © 2025 TastyTrendIngredients