tastytrendingredients

  • Home
  • Recipes
    • Appetizers
    • Breakfast
    • Dessert
    • Dinner
    • Drinks
    • Salads
    • Snacks
    • Soups
  • About me
  • Contact me
menu icon
go to homepage
  • Home
  • Recipes
    • Appetizers
    • Breakfast
    • Dessert
    • Dinner
    • Drinks
    • Salads
    • Snacks
    • Soups
  • About me
  • Contact me
search icon
Homepage link
  • Home
  • Recipes
    • Appetizers
    • Breakfast
    • Dessert
    • Dinner
    • Drinks
    • Salads
    • Snacks
    • Soups
  • About me
  • Contact me
×

Savory Japanese Clear Soup That Warms the Soul

September 20, 2025 by Grace Snow Leave a Comment

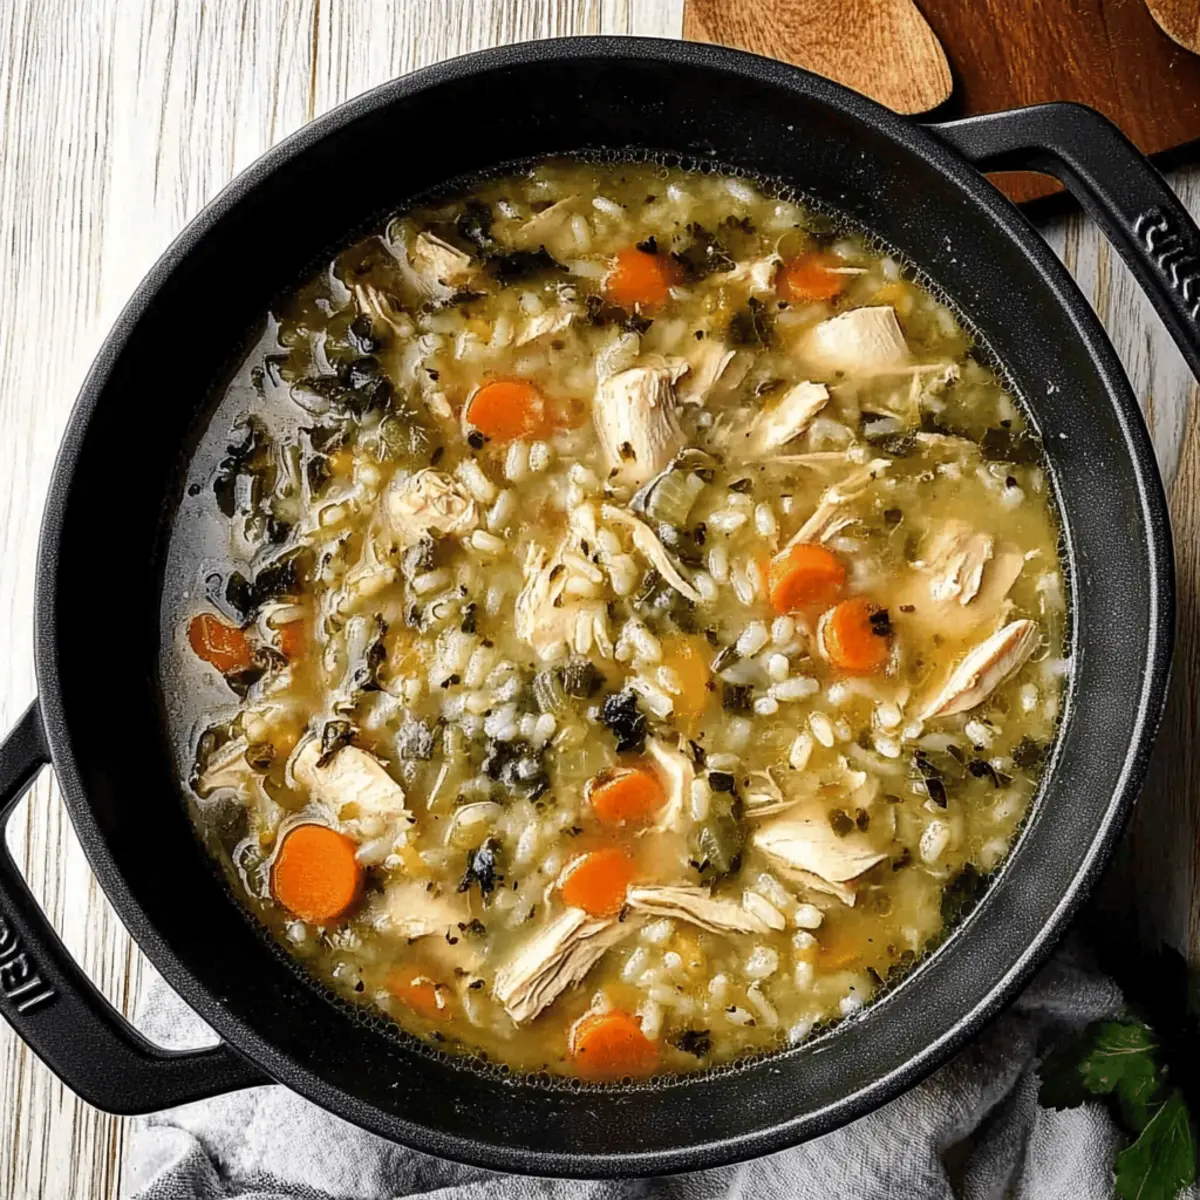
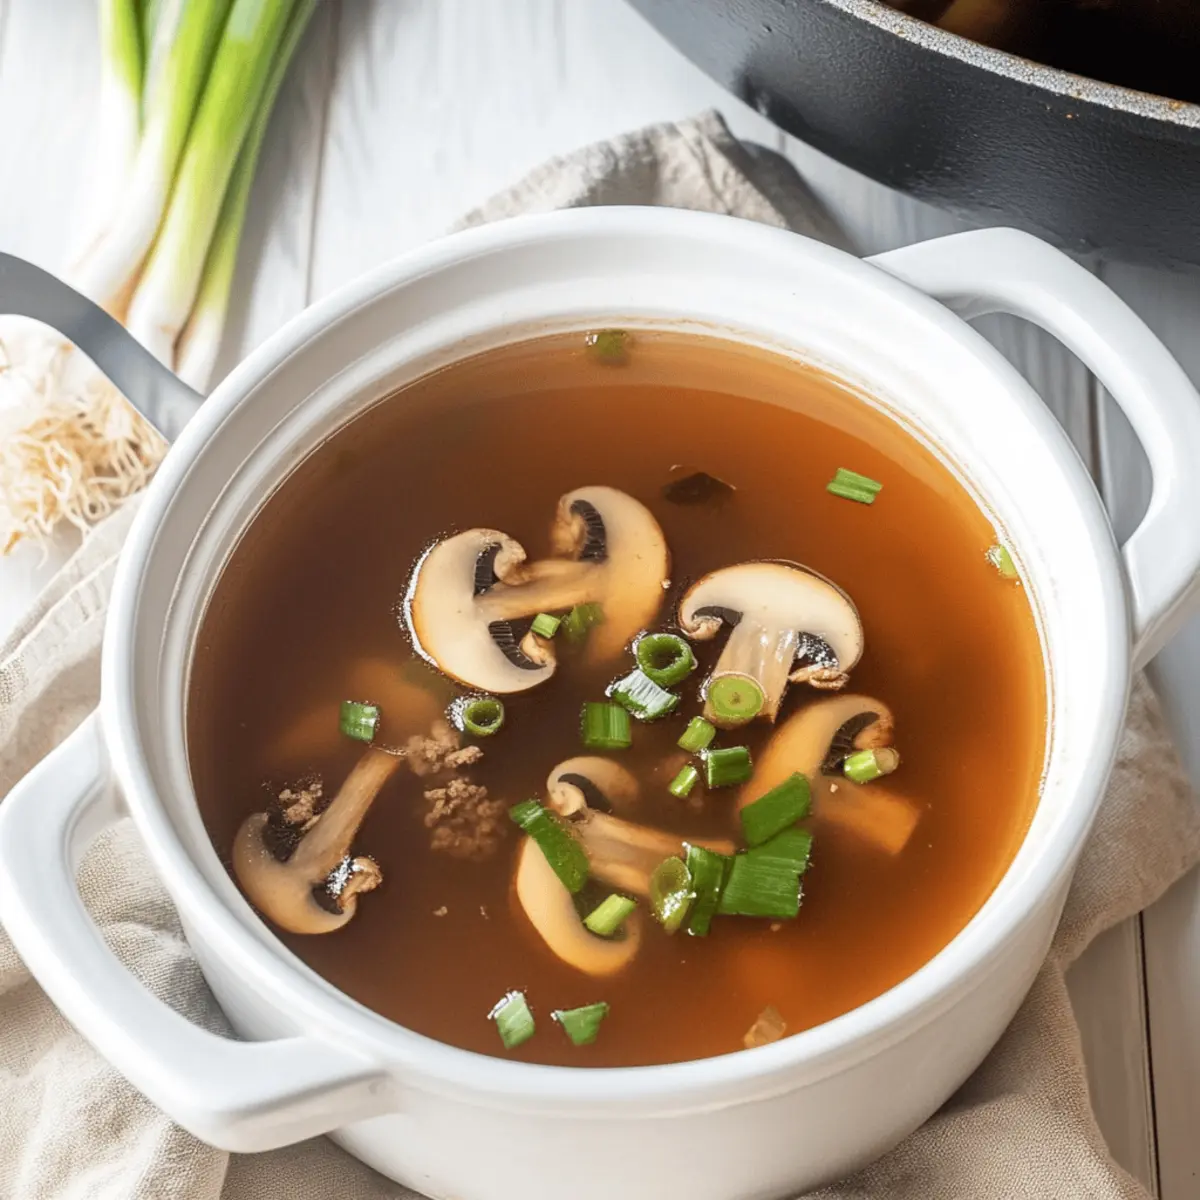
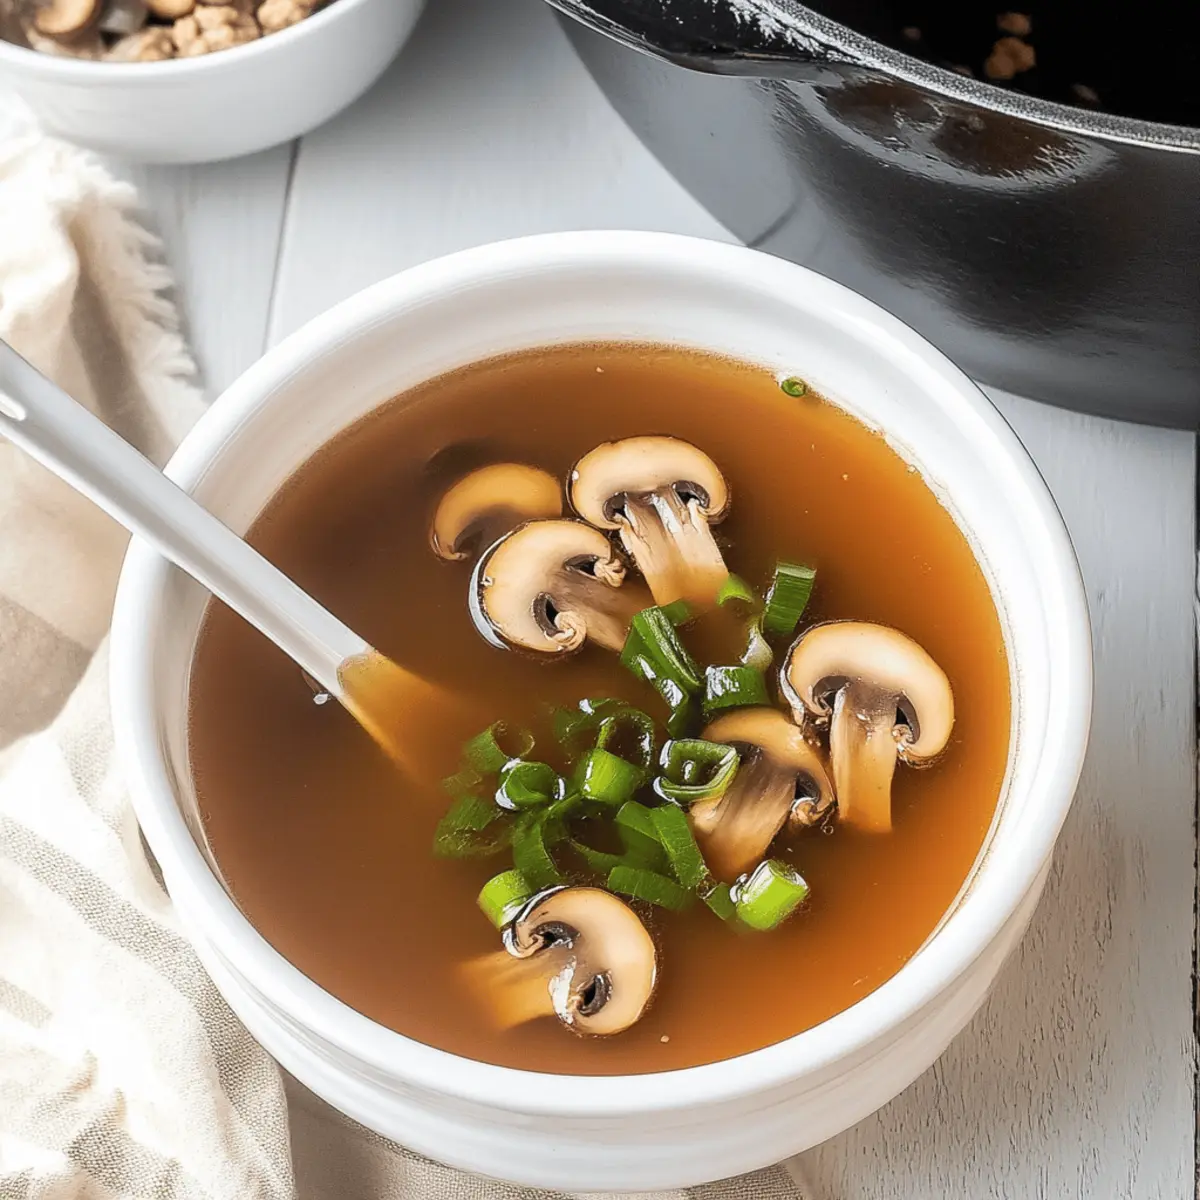
As the aroma of simmering broth wafts through my kitchen, I’m instantly transported back to the cozy ambience of my favorite Hibachi restaurant. This Japanese Clear Soup, or Hibachi Soup, is a comforting starter that brings that warm culinary experience right to your home. Crafted from a delicate blend of chicken and beef broths, it’s light yet bursting with subtle flavors from aromatic vegetables and herbs. What I adore about this recipe is not just its soothing qualities, but also the fact that it’s remarkably healthy and low-calorie—perfect for those moments when you want something nourishing without the guilt. Ready to elevate your meal game with this scrumptious and easily prepared dish? Let’s dive into the heart of Japanese cuisine together!

Why is Japanese Clear Soup so loved?

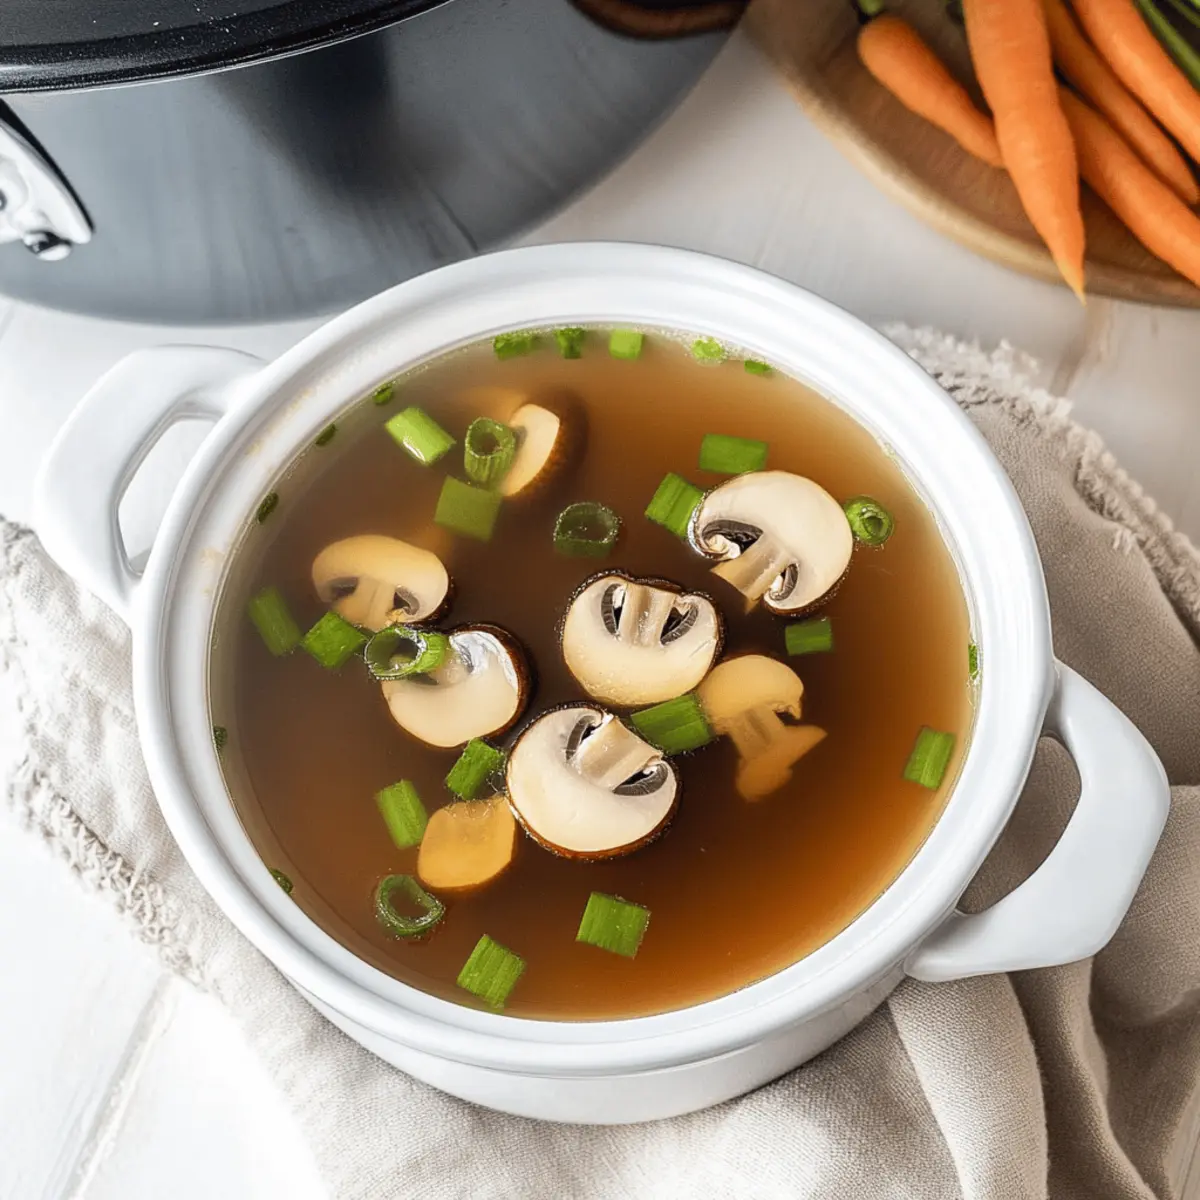
Simplicity meets flavor in every spoonful, making this dish a breeze to prepare. Healthy and low-calorie, it fits perfectly into any balanced meal plan without sacrificing taste. Versatile enough to customize with your favorite vegetables or proteins, it encourages creativity in the kitchen. Plus, its aesthetic appeal will impress your guests, making it a fantastic appetizer for gatherings. Whether paired with grilled favorites from your next dinner or enjoyed solo, this soup is sure to warm your heart and palate, reminiscent of cozy restaurant nights.

Japanese Clear Soup Ingredients

• Dive into the flavors of homemade comfort!

For the Broth

  • Chicken Stock – Ideal for a light yet flavorful base; use homemade or low-sodium options.
  • Beef Stock – Adds depth and richness; can substitute with vegetable broth for a vegetarian alternative.
  • Water – Balances the flavors in your broth, ensuring it stays light and refreshing.

For the Vegetables

  • Onion – Enhances sweetness and aroma; slice thinly for even cooking.
  • Carrots – Add color and slight sweetness; cut into matchsticks for a lovely presentation.
  • Scallions – Offer freshness; chop the greens for garnish and use the whites in the broth.
  • Mushrooms – Adds umami richness; shiitake or button mushrooms work beautifully.

For Seasoning

  • Soy Sauce – Introduces a salty depth; use low-sodium varieties to control saltiness.
  • Salt – Season to taste; adjust based on broth’s salt content.
  • Ground White Pepper – Provides a mild heat; perfect for a delicate soup.
  • Fresh Ginger – Infuses warmth and zest; grate for maximum flavor.

For Garnish

  • Cilantro – Offers a fresh, herbaceous touch; sprinkle on top just before serving.
  • Lemon Wedges – Add a bright zest; squeeze some for a citrusy lift to your soup.

With this light and savory Japanese Clear Soup, you’re not just making a dish; you’re inviting warmth and nostalgia to the table. Whether it's a weekday meal or a special occasion, this recipe will surely impress and satisfy your cravings!

Step‑by‑Step Instructions for Delicious Tomato Enoki Mushroom Soup with Ground Beef

Step 1: Sauté Aromatics
Heat a medium pot over medium heat and add a splash of oil, allowing it to shimmer. Once hot, incorporate minced ginger and smashed garlic, sautéing for about 2 minutes until fragrant and slightly golden. This infuses your base with warmth and sets the stage for the rich flavors to follow.

Step 2: Brown the Beef
Add 1 pound of lean ground beef to the pot, breaking it apart as it cooks. Stir it frequently for about 5 minutes or until the meat turns brown and no longer pink. Increase the heat slightly to achieve a nice sizzle, which adds depth to your Delicious Tomato Enoki Mushroom Soup.

Step 3: Caramelize Tomato Paste
Once the beef is cooked, stir in a generous amount of tomato paste, allowing it to cook for an additional 2 minutes. This step helps caramelize the paste, enhancing the overall flavor of the soup. You'll know it's ready when the paste darkens slightly and releases a rich aroma.

Step 4: Add Stock and Seasoning
Pour in 4 cups of low-sodium chicken stock, followed by a sprinkle of sugar, salt to taste, ground white pepper, and a splash of white vinegar. Mix well, stirring in fresh enoki mushrooms and the whites of scallions. Bring the soup to a gentle simmer, letting those beautiful flavors meld together.

Step 5: Simmer to Perfection
Allow the soup to simmer for at least 15 minutes. You'll see the enoki mushrooms soften, taking on the delicious flavors of the broth. Keep an eye on it, making sure it maintains a gentle simmer, which is essential for achieving that comforting texture in your Japanese Clear Soup.

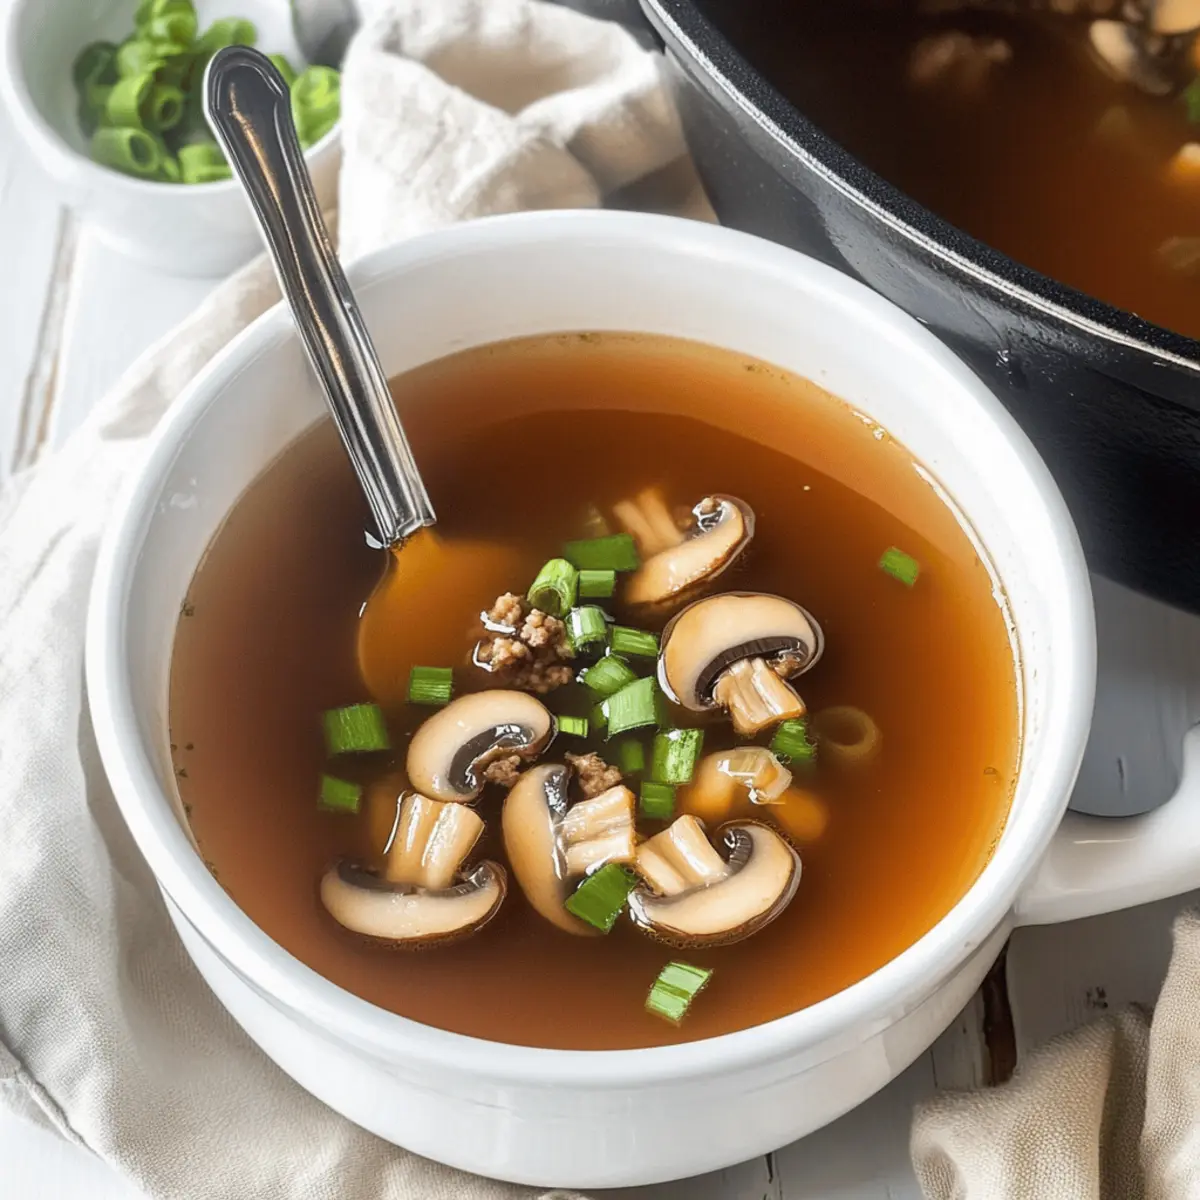
Step 6: Garnish and Serve
Once ready, ladle the steaming soup into bowls, garnishing with the reserved greens of the scallions. This final touch adds a fresh pop of color and flavor. Enjoy each bowl of your Delicious Tomato Enoki Mushroom Soup warm, perhaps with a side of steamed rice or crusty bread for dipping!

Variations & Substitutions for Enoki Mushroom Soup

Feel free to explore these delightful variations that can turn your soup experience into something uniquely yours!

  • Vegetarian Option: Replace ground beef with firm tofu or a medley of mushrooms. This twist retains depth while ensuring a plant-based treat.

  • Umami Boost: Add a splash of soy sauce or a spoonful of miso paste. This enhances the savory richness and makes every sip even more satisfying.

  • Spicy Kick: Incorporate sliced jalapeños or a dash of chili oil to ramp up the heat. This brings an exciting twist that'll warm your palate.

  • Creamy Texture: Stir in a bit of coconut milk instead of stock for a silky, luscious flavor that complements the mushrooms beautifully.

  • Citrusy Brightness: Swap white vinegar for fresh lime or lemon juice, brightening the flavors and offering a refreshing zing with each bowl.

  • Noodle Add-In: Throw in some cooked rice noodles or udon towards the end of cooking. This adds a delightful chewiness that makes the soup heartier.

  • Crunchy Topping: Finish with toasted sesame seeds or crispy shallots for texture contrast. Their crunch will elevate the overall sensory experience!

  • Herb Enhancement: Sprinkle fresh cilantro or basil right before serving for a burst of freshness. Herbs can transform this dish into a vibrant feast.

As you can see, there are many ways to enjoy your Enoki Mushroom Soup, including delicious suggestions such as pairing with Grilled Mushrooms Savory or even a comforting Zuppa Toscana Soup on the side for a complete meal. Feel free to explore and adapt according to your tastes!

Tips for the Best Enoki Mushroom Soup

  • Use Fresh Ingredients: Always opt for fresh enoki mushrooms and good-quality beef. This enhances the umami flavor and overall taste of your soup.

  • Adjust Seasoning Gradually: As you're adding salt or bouillon to your Delicious Tomato Enoki Mushroom Soup, start with less and taste as you go to avoid an overly salty broth.

  • Caramelize Well: Don't rush the caramelization of the tomato paste—letting it cook long enough deepens the flavor profile and enriches the soup.

  • Simmer Gently: Maintain a gentle simmer to ensure the enoki mushrooms become tender and absorb the broth's flavors without becoming mushy.

  • Experiment with Acidity: If you want a different tang in your soup, try swapping white vinegar for a splash of lime or lemon juice for a refreshing twist.

What to Serve with Delicious Tomato Enoki Mushroom Soup with Ground Beef

Imagine the warm aromas of a well-cooked meal, inviting family and friends to gather around your table.

  • Steamed Jasmine Rice: Perfect for soaking up the rich tomato broth, this fluffy rice adds a comforting, neutral base to your meal.
  • Crusty French Bread: Dip into the soup with pieces of freshly baked bread, allowing the flavors to mingle with each bite, offering a rustic charm.
  • Crisp Asian Salad: Bright greens with a tangy dressing provide a refreshing contrast, balancing the hearty flavors while adding a delightful crunch.
  • Sesame Green Beans: Tossed in a light soy sauce and sesame oil, these green beans complement the umami notes of the soup, enhancing the dining experience.
  • Pickled Vegetables: A small side of pickled cucumbers or radishes adds a tangy punch, cutting through the richness of the soup for a dynamic flavor profile.
  • Tea or Japanese Beer: Pair your meal with a light, refreshing green tea or a cold Japanese beer, accentuating the savory aspects and enriching your dining delight.

Make Ahead Options

These Delicious Tomato Enoki Mushroom Soup with Ground Beef are perfect for meal prep enthusiasts! You can sauté the aromatics (ginger and garlic) and brown the ground beef up to 24 hours in advance. Store these components in an airtight container in the refrigerator to keep the flavors fresh. Additionally, prepare your broth with tomato paste and seasonings, refrigerating it for up to 3 days. When you're ready to enjoy your soup, simply reheat the prepped ingredients in a pot, then add the enoki mushrooms and scallion whites. Bring to a simmer, allowing the flavors to meld—resulting in a comforting dish that's just as delicious as when freshly made!

How to Store and Freeze Enoki Mushroom Soup

Fridge: Store leftovers in an airtight container in the refrigerator for up to 3 days, ensuring maximum freshness and flavor retention.

Freezer: For longer storage, freeze the soup in portions for up to 3 months. Use freezer-safe containers or bags, removing excess air before sealing.

Thawing: Thaw overnight in the fridge before reheating on the stove or in the microwave. Stir occasionally for even heating.

Reheating: Gently reheat over low to medium heat, adding a splash of water or stock if the soup thickens too much. Enjoy your Delicious Tomato Enoki Mushroom Soup warm and satisfying!

Delicious Tomato Enoki Mushroom Soup Recipe FAQs

How do I select fresh enoki mushrooms?
Absolutely! When choosing enoki mushrooms, look for firm and smooth stems with a bright white color. Avoid packs with dark spots or excessive moisture, as this could indicate spoilage. Fresh enoki mushrooms should have a slightly crunchy texture, which is essential for the best flavor in your soup.

How should I store leftovers of my enoki mushroom soup?
Very easy! Store any leftover soup in an airtight container in the refrigerator for up to 3 days. Just make sure it cools down before sealing it to maintain freshness. When reheating, gently heat it on the stove over medium-low to preserve the flavors and texture.

Can I freeze my enoki mushroom soup?
Absolutely! To freeze your soup, pour it into freezer-safe containers, leaving about an inch of space at the top for expansion. Seal them tight and label with dates. You can freeze the soup for up to 3 months. When you're ready to enjoy it again, thaw overnight in the fridge and reheat gently.

What if my soup is too salty?
If you've found your soup to be too salty, don't fret! You can add a diced potato while reheating; it absorbs some of the salt. Let it cook for about 10-15 minutes. Alternatively, incorporating additional broth (homemade or low-sodium) can help dilute the saltiness while enhancing the soup's flavor.

Is this soup suitable for gluten-free diets?
Yes, indeed! To make your Delicious Tomato Enoki Mushroom Soup gluten-free, simply use gluten-free chicken stock and ensure any other sauces or seasonings you're adding (like soy sauce) are also gluten-free. This way, everyone can relish the comforting goodness of this recipe without worries!

Enoki Mushroom Soup

Deliciously Light Japanese Clear Soup for a Cozy Night In

This Japanese Clear Soup is a comforting starter, perfect for a cozy night in, bursting with flavors from broth and vegetables.
Print Recipe Pin Recipe
Prep Time 15 minutes mins
Cook Time 30 minutes mins
Total Time 45 minutes mins
Servings: 4 bowls
Course: Soups
Cuisine: Japanese
Calories: 120
Ingredients Equipment Method Nutrition Notes

Ingredients
  

For the Broth
  • 4 cups chicken stock low-sodium preferred
  • 2 cups beef stock can substitute with vegetable broth
  • 2 cups water
For the Vegetables
  • 1 medium onion sliced thinly
  • 2 medium carrots cut into matchsticks
  • 4 stalks scallions chop greens for garnish
  • 1 cup mushrooms shiitake or button, sliced
For Seasoning
  • 2 tablespoons soy sauce low-sodium preferred
  • 1 teaspoon salt to taste
  • 1 teaspoon ground white pepper
  • 1 inch fresh ginger grated
For Garnish
  • 2 tablespoons cilantro chopped

Equipment

  • Medium pot

Method
 

Directions
  1. Heat a medium pot over medium heat and add a splash of oil. Incorporate minced ginger and sauté for about 2 minutes until fragrant.
  2. Add ground beef, breaking it apart and cooking for about 5 minutes until browned.
  3. Stir in soy sauce, salt, white pepper, and grated ginger, mixing well.
  4. Add chicken stock, beef stock, and water. Bring to a gentle simmer.
  5. Add onion, carrots, scallions, and mushrooms. Simmer for at least 15 minutes.
  6. Garnish with cilantro and lemon wedges before serving.

Nutrition

Serving: 1bowlCalories: 120kcalCarbohydrates: 15gProtein: 8gFat: 3gSaturated Fat: 1gMonounsaturated Fat: 2gCholesterol: 30mgSodium: 600mgPotassium: 300mgFiber: 2gSugar: 3gVitamin A: 500IUVitamin C: 5mgCalcium: 40mgIron: 1mg

Notes

Always opt for fresh ingredients. Adjust seasoning gradually.

Tried this recipe?

Let us know how it was!

Warm and Hearty Cannellini Bean & Pasta Soup for Comfort

September 10, 2025 by Grace Snow Leave a Comment

Standing in my cozy kitchen on a chilly evening, the rich aroma of Cannellini Bean & Pasta Soup begins to fill the air, wrapping me in a comforting embrace. This quick and easy soup is my go-to for when the cold weather hits, combining creamy cannellini beans and tender pasta with lively kale and tangy sundried tomatoes for a delightful flavor explosion. Not only is this hearty meal ready in just 30 minutes, but it also celebrates the simple joy of nutritious, homemade cooking. Perfect for a hearty lunch or a satisfying dinner, this soup transforms dreary days into moments of warmth and comfort. Are you ready to whisk this bowl of happiness into your kitchen?

Why is this soup a must-try?

Quick & Easy: Whipping up this Cannellini Bean & Pasta Soup takes only 30 minutes, making it perfect for busy weeknights when you crave something hearty.
Wholesome Ingredients: Packed with nutritious kale and creamy beans, it’s a delicious way to add greens to your diet without compromising on flavor.
Comforting Flavors: The tangy sundried tomatoes bring depth, while the combination of tender pasta and beans creates a satisfying bite in every spoonful.
Versatile Variations: Easily customize the recipe by adding your favorite vegetables or proteins; try swapping kale for spinach or adding chicken for an extra boost.
Perfect for Leftovers: This soup stores beautifully, making it an excellent option for meal prep or cozy lunches throughout the week. With its warming, hearty nature, you might just find yourself looking forward to the next chilly day!

Cannellini Bean & Pasta Soup Ingredients

• The essential flavors for this soulful dish await!

For the Soup Base
• Cannellini Beans – Provide creaminess and protein; can substitute with any white beans or chickpeas for variation.
• Mixed Pasta Shapes – Adds texture and heartiness; swap with gluten-free pasta or whole wheat pasta to suit your taste.
• Vegetable Stock – Builds the soup base and enhances flavor; chicken stock can be used for a non-vegetarian option.

For the Vegetables
• Kale – Offers a boost of greens and nutrients; feel free to use spinach or Swiss chard if you prefer.
• Onions – Adds sweetness and depth; shallots can be used as an alternative for milder flavor.
• Garlic – Delivers aromatic warmth; fresh garlic is preferred, but garlic powder may work too—just reduce the amount.
• Celery – Introduces crunch and flavor foundation; leeks make a great substitute if desired.

For Flavoring
• Sundried Tomatoes – Contributes a robust, tangy flavor; in a rush? Fresh tomatoes or tomato paste can do the trick.
• Olive Oil – Used for sautéing and flavor; vegetable oil or butter can be swapped in if needed.

Each ingredient in this Cannellini Bean & Pasta Soup plays a vital part in creating a wholesome, hearty dish you’ll love to share!

Step‑by‑Step Instructions for Cannellini Bean & Pasta Soup

Step 1: Heat the oil
In a large pot, heat 2 tablespoons of olive oil over medium heat. Allow the oil to shimmer but not smoke, which will take about 1-2 minutes. This sets a flavorful foundation for your Cannellini bean & pasta soup, preparing it for the delicious vegetables to come.

Step 2: Sauté the aromatics
Add 1 chopped onion, 2 cloves of minced garlic, and 2 stalks of diced celery to the pot. Sauté for about 5 minutes until the vegetables are softened and the onion becomes translucent. This step releases their aromatic flavors, creating a lovely base for the soup.

Step 3: Incorporate the beans and tomatoes
Stir in 1 can of drained and rinsed cannellini beans along with ½ cup of chopped sundried tomatoes. Cook for 1-2 minutes, tossing the mixture to combine well. The beans will absorb the flavors from the sautéed vegetables, enhancing the overall richness of the Cannellini bean & pasta soup.

Step 4: Add the stock
Pour in 4 cups of vegetable stock, increasing the heat to high to bring the mixture to a boil. Once boiling, reduce the heat to a gentle simmer. You'll notice the soup bubbling invitingly, which means it's time to add the pasta.

Step 5: Cook the pasta and kale
Add 1 cup of mixed pasta shapes and 2 cups of chopped kale to the simmering soup. Cook for about 10 minutes, stirring occasionally, until the pasta is al dente and the kale is tender. The pasta will soak up the savory broth, making this Cannellini bean & pasta soup even more satisfying.

Step 6: Final touches
Taste the soup and adjust the seasoning with salt and pepper as needed. Allow it to simmer for another minute or two to meld the flavors. The Cannellini bean & pasta soup should be comforting and aromatic, ready to warm you up on a chilly day.

What to Serve with Hearty Cannellini Bean & Pasta Soup

As the cozy aroma of Cannellini Bean & Pasta Soup fills your kitchen, it's the perfect time to think about delightful accompaniments that will elevate your meal experience.

  • Crusty Bread: Perfect for dipping, a warm slice of rustic bread adds a delightful crunch and complements the soup's comforting creaminess.
  • Parmesan Cheese: A sprinkle of freshly grated Parmesan on top adds a savory finish, enhancing the flavors while providing a rich texture contrast.
  • Mixed Green Salad: A fresh salad of mixed greens with a tangy vinaigrette provides a vibrant, crisp contrast to the warmth of the soup.
  • Garlic Toast: Spreading butter and garlic on toasted bread adds aromatic flavors, turning each bite into a scrumptious delight that pairs beautifully with the soup.
  • Roasted Vegetables: Roasted carrots, zucchini, or bell peppers bring out natural sweetness and add nutritional value, creating a harmonious blend with the Cannellini Bean & Pasta Soup.
  • Olive Oil Drizzle: A finishing touch of high-quality olive oil drizzled over the bowl enhances flavor while offering a glossy, inviting appeal.
  • Red Wine: A glass of light-bodied red wine, such as Pinot Noir, complements the soup’s flavors, creating an enjoyable dining experience that warms the heart.
  • Homemade Croutons: Crunchy, seasoned croutons made from leftover bread add texture and a delightful bite, enhancing the overall enjoyment of your bowl of soup.

Transform your hearty Cannellini Bean & Pasta Soup into a full meal with these delicious pairings, making every spoonful a comforting embrace of flavor!

Storage Tips for Cannellini Bean & Pasta Soup

Fridge: Store the Cannellini bean & pasta soup in an airtight container for up to 3 days to maintain its freshness and flavor.

Freezer: If you want to keep it longer, freeze the soup in freezer-safe containers for up to 3 months. Make sure to leave some room at the top for expansion.

Reheating: To enjoy it again, thaw overnight in the fridge and reheat gently on the stove, adding a splash of vegetable stock or water to adjust the consistency if needed.

Leftover Love: This soup also makes excellent leftovers, allowing you to savor hearty meals throughout the week with minimal effort!

Expert Tips for Cannellini Bean & Pasta Soup

  • Sautéing Secrets: Ensure to sauté the onions, garlic, and celery until they're fragrant and translucent. This builds a rich flavor base for your Cannellini bean & pasta soup.

  • Pasta Precision: Always check the cooking time for your chosen pasta; undercooked pasta can ruin the soup's texture. Aim for al dente for the best result.

  • Bean Basics: If using dried beans, don’t forget to soak and cook them thoroughly before adding to the soup. Canned beans save precious time and are equally tasty.

  • Seasoning Savvy: Don’t skip the final seasoning adjustment! Taste and adjust with salt and pepper before serving to enhance the flavors in your Cannellini bean & pasta soup.

  • Leftover Love: This soup has amazing leftover potential. Store it in an airtight container in the fridge—great for quick, healthy lunches throughout the week!

Cannellini Bean & Pasta Soup Variations

Feel free to make this Cannellini Bean & Pasta Soup your own with these delightful twists!

  • Dairy-Free: Swap out Parmesan for a sprinkle of nutritional yeast to keep the cheesy flavor without dairy. This will still satisfy that cheesy craving!
  • Extra Protein: Add diced chicken or turkey sausage for a heartier option or try chickpeas for a vegetarian punch of protein. Both options will keep you feeling fuller longer!
  • Gluten-Free: Use gluten-free pasta to accommodate dietary needs while keeping the comforting essence of the soup intact. You'll love how easily this soup can adapt!
  • Herb Infusion: Introduce fresh thyme or basil for an aromatic touch that elevates the soup's flavor. Just a little will go a long way!
  • Veggie Boost: Toss in diced carrots or zucchini to amp up the nutrition and add color to your soup. These extras will deliver a delightful crunch!
  • Spice It Up: For a touch of heat, add red pepper flakes or fresh diced chili peppers. This heat can bring a new dimension that'll warm you even more!
  • Vegan Delight: Replace vegetable stock with homemade vegetable broth and omit any cheese toppings for a vibrant vegan meal that everyone will enjoy. It's all about those wholesome flavors!
  • Creamy Twist: Blend a portion of the beans with stock for a creamier texture. This makes each spoonful velvety and comforting, perfect for those chilly nights!

If you're looking for more delightful soup ideas, don’t miss out on my Santa Soup Savory or a warming bowl of Asparagus Soup Healthy!

Make Ahead Options

These Cannellini Bean & Pasta Soup is a fantastic choice for meal prep, allowing you to enjoy comfort in a flash during busy weeks! You can chop your onions, garlic, celery, and kale up to 24 hours in advance and store them in the fridge, ensuring they stay fresh and ready to use. Additionally, you can soak and prepare the cannellini beans or use canned beans for ultimate convenience. When you're ready to serve, simply sauté the prepped vegetables, add the beans, sundried tomatoes, and stock, then bring everything to a boil before adding the mixed pasta and kale. This way, you’ll have a delightful pot of Cannellini Bean & Pasta Soup, made with minimal effort but maximum flavor!

Cannellini Bean & Pasta Soup Recipe FAQs

How do I select the best cannellini beans?
Absolutely! When choosing cannellini beans, look for those with a smooth, creamy texture and no dark spots or blemishes. If using canned beans, check the expiration date and opt for low-sodium varieties when possible for a healthier option.

How should I store leftover soup?
You can store your Cannellini Bean & Pasta Soup in an airtight container in the fridge for up to 3 days. Make sure to let the soup cool completely before placing it in the refrigerator to keep it fresh and tasty.

Can I freeze Cannellini Bean & Pasta Soup?
Yes, you can freeze your soup! Pour the cooled soup into freezer-safe containers, leaving some space at the top for expansion. It will keep well in the freezer for up to 3 months. When you're ready to reheat, thaw it overnight in the fridge and warm it on the stove, adding a splash of vegetable stock or water as needed to get the desired consistency.

What can I do if my pasta gets too soft in the soup?
Very! If your pasta becomes too soft, you can try a couple of things. First, be mindful of your cooking times; always cook the pasta al dente before adding it to the soup. If it has already overcooked, you might consider adding more fresh greens to restore some textures or serving it over cooked pasta to add a fresh layer.

Are there any dietary considerations for this soup?
Definitely! This recipe is vegetarian-friendly and packed with plant-based proteins, making it a great option for health-conscious eaters. If you have allergies, ensure that your vegetable stock is free from allergens like gluten or dairy. Additionally, if you’re cooking for pets, avoid adding any seasonings such as onions or garlic, as they can be harmful to them.

How can I customize the flavor of my Cannellini Bean & Pasta Soup?
For a hearty twist, you might consider incorporating fresh herbs like thyme, basil, or even a sprinkle of red pepper flakes for a little heat. You can also play with the variety of vegetables you include—carrots or zucchini can blend beautifully into the soup. Adding a splash of lemon juice before serving can enhance the flavors too!

Cannellini bean & pasta soup

Warm and Hearty Cannellini Bean & Pasta Soup for Comfort

This Cannellini bean & pasta soup is a quick and easy comfort meal that brings warmth and nourishment on chilly days.
Print Recipe Pin Recipe
Prep Time 10 minutes mins
Cook Time 20 minutes mins
Total Time 30 minutes mins
Servings: 4 servings
Course: Soups
Cuisine: Italian
Calories: 350
Ingredients Equipment Method Nutrition Notes

Ingredients
  

For the Soup Base
  • 1 can Cannellini Beans Drained and rinsed
  • 2 cups Mixed Pasta Shapes Use gluten-free pasta if desired
  • 4 cups Vegetable Stock Can substitute with chicken stock
For the Vegetables
  • 2 cups Kale Chopped, can substitute spinach
  • 1 medium Onion Chopped
  • 2 cloves Garlic Minced
  • 2 stalks Celery Diced
For Flavoring
  • ½ cup Sundried Tomatoes Chopped
  • 2 tablespoons Olive Oil For sautéing

Equipment

  • Large pot

Method
 

Cooking Instructions
  1. Heat the oil in a large pot over medium heat until shimmering.
  2. Add the chopped onion, minced garlic, and diced celery. Sauté for about 5 minutes, until softened and translucent.
  3. Stir in the cannellini beans and chopped sundried tomatoes. Cook for 1-2 minutes, mixing well.
  4. Pour in the vegetable stock and bring to a boil. Then reduce to a simmer.
  5. Add in the mixed pasta shapes and chopped kale. Cook for about 10 minutes, stirring occasionally.
  6. Taste and adjust seasoning with salt and pepper; simmer for a couple more minutes before serving.

Nutrition

Serving: 1servingCalories: 350kcalCarbohydrates: 50gProtein: 15gFat: 10gSaturated Fat: 1.5gPolyunsaturated Fat: 0.5gMonounsaturated Fat: 8gSodium: 800mgPotassium: 800mgFiber: 12gSugar: 4gVitamin A: 1500IUVitamin C: 30mgCalcium: 80mgIron: 3mg

Notes

This soup is excellent for leftovers and can be stored in an airtight container in the fridge for up to 3 days.

Tried this recipe?

Let us know how it was!

Hearty Chicken Dumpling Soup for Ultimate Comfort at Home

September 9, 2025 by Grace Snow Leave a Comment

As the chilly air wraps around my home, the comforting aroma of chicken dumpling soup fills my kitchen, instantly transforming it into a haven. With tender chicken, fluffy dumplings, and a creamy broth, this Healthy Chicken Dumpling Soup is the ultimate dish to warm your heart and satisfy your soul. Not only is it a quick stovetop recipe that can be whipped up in just one hour, but it’s also family-friendly and easily adaptable for those with gluten or dairy sensitivities. Whether you’re looking for a delicious way to feed your loved ones or simply wish to enjoy a nourishing bowl of comfort, this recipe checks all the boxes. Are you ready to dive into a bowl of cozy, homemade goodness? Let’s get started!

What Makes This Soup So Special?

Comforting warmth radiates from each bowl of this Chicken Dumpling Soup, perfect for chilly evenings. Quick and easy to prepare, it delivers homemade goodness in just an hour. Customizable for various dietary needs, this recipe is a reliable go-to for both family-friendly meals and special occasions. Nourishing ingredients like tender chicken and fresh vegetables create a wholesome experience that everyone will love. Plus, if you're feeling adventurous, try adding spices or different veggies as you enjoy this cozy dish, or pair it with a side of Lemon Chicken Soup for an extra layer of flavor!

Chicken Dumpling Soup Ingredients

For the Soup Base

  • Olive Oil – Adds healthy fat and helps sauté vegetables; substitute with avocado oil or butter if needed.
  • Yellow Onion – Provides aromatic base flavor; shallots or leeks work well as alternatives.
  • Boneless, Skinless Chicken Breasts – This is your main protein source; you can use pre-cooked, shredded chicken for a faster prep time.
  • Garlic Powder – Enhances the overall flavor of the soup; fresh garlic can be used if preferred.
  • Black Pepper – Adds spice and depth; adjust to suit your taste preferences.
  • Sage, Thyme, Rosemary – These herbs infuse fragrant flavors into the broth; dried herbs are fine if fresh aren’t available.
  • Chicken Broth – Forms the flavor-packed base of the soup; vegetable broth can be a good substitute for a vegetarian option.
  • Frozen Peas and Carrots – Adds nutrition and color with minimal prep; feel free to replace with any frozen mixed vegetables.

For the Creamy Finish

  • Heavy Cream or Half-and-Half – Contributes richness and creaminess to the soup; use coconut cream for a dairy-free alternative.

For the Dumplings

  • All-Purpose Flour – This is key for your dumpling dough; a gluten-free flour blend can be used for a gluten-free version.
  • Baking Powder – Helps the dumplings rise and become fluffy; don’t skip this ingredient!
  • Chives – Provides flavor and a fresh touch; can be omitted or replaced with green onions.

Dive into this delightful Chicken Dumpling Soup recipe, and let every spoonful bring warmth and comfort to your day!

Step‑by‑Step Instructions for Chicken Dumpling Soup

Step 1: Sauté the Onion
In a large soup pot, heat 2 tablespoons of olive oil over medium-high heat. Once shimmering, add one chopped yellow onion and sauté until it becomes translucent, about 5 minutes. The onion should be softened and fragrant, setting a flavorful base for your chicken dumpling soup.

Step 2: Cook the Chicken
Add 1 pound of boneless, skinless chicken breasts to the pot, seasoning with 1 teaspoon of garlic powder, salt, black pepper, and a mix of fresh herbs like sage, thyme, and rosemary. Pour in 4 cups of chicken broth, bring the mixture to a gentle simmer, and cook for about 20 minutes or until the chicken is cooked through and tender.

Step 3: Shred the Chicken
Once the chicken is done cooking, carefully remove it from the pot and let it cool for a few minutes. Using two forks, shred the chicken into bite-sized pieces while allowing the remaining soup to continue simmering. Return the shredded chicken to the pot along with 1 cup of frozen peas and carrots, stirring to combine.

Step 4: Add Cream
Stir in ½ cup of heavy cream or half-and-half into the simmering pot, allowing it to meld with the flavors. The broth will turn creamier and richer, creating that perfect comforting base for your chicken dumpling soup. Let the soup simmer on low for about 5 minutes to heat through.

Step 5: Prepare Dumpling Dough
In a medium mixing bowl, combine 2 cups of all-purpose flour, 1 tablespoon of baking powder, ½ teaspoon of garlic powder, and a pinch of salt. Mix well, then gradually stir in ¾ cup of milk until a sticky dough forms. Avoid overmixing to keep the dumplings light and fluffy.

Step 6: Drop in Dumplings
With the soup gently simmering, drop small spoonfuls (about ½ teaspoon each) of the dumpling dough into the pot. Cover the pot with a lid and cook for an additional 10 minutes without lifting the lid. This allows the dumplings to steam and rise, absorbing the flavors of the chicken dumpling soup.

Step 7: Season and Serve
After the dumplings have cooked through, taste the soup and adjust the seasoning with additional salt and pepper as needed. Ladle the steaming chicken dumpling soup into bowls, and sprinkle with fresh chives for a burst of flavor. Serve hot and enjoy the cozy warmth.

Chicken Dumpling Soup Variations

Feel free to get creative with this chicken dumpling soup and make it your own with these simple swaps!

  • Gluten-Free: Substitute all-purpose flour for a gluten-free blend for fluffy, delicious dumplings without the gluten.

  • Dairy-Free: Replace heavy cream with coconut cream to create a rich and creamy broth that’s perfect for those avoiding dairy.

  • Vegetable Boost: Add corn, green beans, or spinach for extra nutrition and vibrant colors in your soup.

  • Herb Power: Swapping out fresh herbs for dried herbs? Just remember to use a third of the amount for those concentrated flavors!

  • Spicy Kick: If you love heat, add a pinch of red pepper flakes or some diced jalapeños to introduce a delightful spice level to your bowl.

  • Rotisserie Chicken Shortcut: For a quick prep, use pre-cooked rotisserie chicken. This will save time while still giving you that delicious flavor.

  • Broth Variations: Experiment with using homemade stock or adding a splash of white wine to enhance the depth of flavor in your broth.

  • Creamy Dream: For an extra creamy soup, stir in a spoonful of cream cheese along with the heavy cream to create a velvety texture.

Dive into these variations and watch how they can transform your comforting chicken dumpling soup into a culinary adventure! For a different twist on chicken dishes, I also recommend checking out Chipotle Lime Chicken or a warming Crock Pot Chicken. Enjoy your cozy cooking experience!

Expert Tips for Chicken Dumpling Soup

  • Don’t Overmix Dumplings: Avoid overworking the dumpling dough, as this can make them tough rather than light and fluffy.

  • Perfect Portioning: Use small portions of dough (about ½ teaspoon) for even cooking and an ideal texture in your chicken dumpling soup.

  • Enhance Thickness: If you prefer a creamier broth, consider adding a cornstarch slurry to thicken the soup further without compromising flavor.

  • Herb Varieties: If fresh herbs aren't available, dried alternatives can still provide wonderful flavor; just use about a third of the amount.

  • Quick Chicken Prep: For quicker preparation, pre-cooked shredded chicken can be a fantastic shortcut while keeping the dish nutritious.

Storage Tips for Chicken Dumpling Soup

  • Fridge: Store leftovers in an airtight container for up to 3 days, ensuring the soup stays fresh and flavorful. Reheat gently on the stovetop for the best taste.
  • Freezer: For longer storage, freeze the chicken dumpling soup in portioned airtight containers for up to 3 months. Thaw in the refrigerator overnight before reheating.
  • Reheating: When ready to enjoy, reheat on the stovetop over low heat, stirring occasionally. You may need to add a splash of chicken broth or water to restore the creamy consistency.
  • Avoiding Texture Loss: While freezing is great, it's best to freeze the soup without dumplings, as they may become mushy upon reheating. Add freshly cooked dumplings when you're ready to serve!

What to Serve with Healthy Chicken Dumpling Soup

Transform your cozy soup into a heartwarming meal with these delightful pairings.

  • Crusty Bread: A warm, crusty bread is perfect for soaking up the rich broth of the soup, adding a wonderful texture. Try a homemade sourdough or baguette to enhance the experience.
  • Simple Side Salad: Fresh greens tossed with a light vinaigrette provide a refreshing contrast to the soup's warmth, adding crunch and brightness to your meal.
  • Roasted Vegetables: Roasted carrots, brussels sprouts, or bell peppers introduce caramelized flavors that complement the soup beautifully and add a variety of nutrients.
  • Creamy Polenta: This silky side adds a lovely creaminess that parallels the dumplings and creates a comforting, rustic vibe to your dinner table.
  • Garlic Breadsticks: Soft, buttery garlic breadsticks can be great for dipping, enticing your palate with each bite while harmonizing with the soup's flavors.
  • Herbal Tea: A light herbal tea, such as chamomile or mint, offers gentle warmth and aids digestion, enhancing your overall cozy dining experience.
  • Applesauce: The natural sweetness of applesauce can nicely balance the savory tones of the soup, making for a nostalgic, sweet finish to the meal.
  • Chocolate Chip Cookies: For dessert, classic chocolate chip cookies add a sweet touch, leaving your family with a lasting smile long after the soup is gone.
  • Sparkling Water: A refreshing sip of sparkling water can cleanse your palate and elevate the dining experience, making each bite of soup feel even more satisfying.

Make Ahead Options

These Chicken Dumpling Soup components are perfect for meal prep, saving you valuable time on busy weeknights! You can prep the soup base (the sautéed onions, chicken, and broth) up to 24 hours in advance and store it in the refrigerator for optimal flavor. To maintain the quality of the dumplings, prepare your dough, but refrain from dropping them into the soup until you're ready to serve. Instead, refrigerate the dough for up to 3 days. When it's time to enjoy your soup, simply heat up the soup base, drop in the prepped dumplings, and simmer for approximately 10 minutes until cooked through. You'll have a warm, comforting Chicken Dumpling Soup that tastes just as delightful as if it were made fresh!

Chicken Dumpling Soup Recipe FAQs

How do I choose the right chicken for the soup?
Absolutely! For this chicken dumpling soup, I recommend boneless, skinless chicken breasts for their tenderness and ease of cooking. If you're in a hurry, using pre-cooked, shredded chicken can significantly speed up your prep time. Just make sure it’s well-seasoned for maximum flavor!

What should I do with leftovers of the soup?
Very! Store any leftover chicken dumpling soup in an airtight container in the fridge for up to 3 days. To keep it tasting fresh, gently reheat on the stovetop until warmed through, adding a splash of broth or water if needed to maintain that creamy consistency.

Can I freeze chicken dumpling soup?
Of course! You can freeze chicken dumpling soup for up to 3 months. However, I recommend freezing it without the dumplings, as they can become mushy during reheating. Just freeze the soup in portioned airtight containers, thaw overnight in the refrigerator, and add freshly cooked dumplings when you're ready to serve!

What can I do if my dumplings turn out tough?
If your dumplings end up tough, it’s usually due to overmixing the dough. Remember to mix gently and only until combined. When you drop the dough into simmering soup, ensure you’re using small portions (about ½ teaspoon) to help them cook evenly and maintain a fluffy texture.

Are there any dietary considerations for this soup?
Absolutely! This chicken dumpling soup can be easily made gluten-free by using a gluten-free flour blend for the dumplings and dairy-free with coconut cream instead of heavy cream. Always double-check ingredient labels to ensure they meet your dietary needs, especially if allergies are a concern.

Can I add more vegetables to the soup?
Very! Feel free to get creative with your veggies! Adding corn, green beans, or even diced potatoes can enhance the flavor and nutrition of your chicken dumpling soup. Just adjust the cooking time slightly to ensure everything is tender and delicious!

Chicken Dumpling Soup

Hearty Chicken Dumpling Soup for Ultimate Comfort at Home

This Chicken Dumpling Soup is the ultimate comforting dish, featuring tender chicken, fluffy dumplings, and a creamy broth.
Print Recipe Pin Recipe
Prep Time 10 minutes mins
Cook Time 50 minutes mins
Total Time 1 hour hr
Servings: 6 bowls
Course: Soups
Cuisine: American
Calories: 350
Ingredients Equipment Method Nutrition Notes

Ingredients
  

For the Soup Base
  • 2 tablespoons Olive Oil Can substitute with avocado oil or butter.
  • 1 large Yellow Onion Chopped; alternatives include shallots or leeks.
  • 1 pound Boneless, Skinless Chicken Breasts Can use pre-cooked, shredded chicken.
  • 1 teaspoon Garlic Powder Fresh garlic can be used if preferred.
  • to taste Black Pepper
  • to taste Salt
  • 1 teaspoon Sage Can use dried herbs if fresh aren’t available.
  • 1 teaspoon Thyme Can use dried herbs if fresh aren’t available.
  • 1 teaspoon Rosemary Can use dried herbs if fresh aren’t available.
  • 4 cups Chicken Broth Vegetable broth can be a substitute.
  • 1 cup Frozen Peas and Carrots Can replace with any frozen mixed vegetables.
For the Creamy Finish
  • ½ cup Heavy Cream or Half-and-Half Coconut cream for a dairy-free alternative.
For the Dumplings
  • 2 cups All-Purpose Flour Can use gluten-free flour blend.
  • 1 tablespoon Baking Powder
  • ½ teaspoon Garlic Powder Can omit.
  • a pinch Salt
  • ¾ cup Milk Dairy or non-dairy option.
  • to taste Chives Can be omitted or replaced with green onions.

Equipment

  • large soup pot
  • medium mixing bowl

Method
 

Cooking Instructions
  1. Heat olive oil in a large soup pot over medium-high heat. Add chopped onion and sauté until translucent, about 5 minutes.
  2. Add chicken breasts, garlic powder, salt, black pepper, and herbs to the pot. Pour in chicken broth and let simmer for about 20 minutes until chicken is cooked through.
  3. Remove chicken, let cool, then shred. Return shredded chicken to pot along with frozen peas and carrots.
  4. Stir in heavy cream. Let soup simmer for an additional 5 minutes.
  5. In a mixing bowl, combine flour, baking powder, garlic powder, and salt. Gradually stir in milk until a sticky dough forms.
  6. Drop spoonfuls of the dumpling dough into the pot. Cover and cook for 10 minutes undisturbed.
  7. Taste and adjust seasoning with salt and pepper as needed. Serve hot, garnished with chives.

Nutrition

Serving: 1bowlCalories: 350kcalCarbohydrates: 30gProtein: 25gFat: 15gSaturated Fat: 8gPolyunsaturated Fat: 2gMonounsaturated Fat: 5gCholesterol: 80mgSodium: 600mgPotassium: 700mgFiber: 3gSugar: 2gVitamin A: 500IUVitamin C: 15mgCalcium: 150mgIron: 2mg

Notes

Avoid overmixing the dumpling dough to keep it light and fluffy. Store leftovers in the fridge for up to 3 days or freeze for up to 3 months without dumplings.

Tried this recipe?

Let us know how it was!

Hearty Beef Taco Soup: A Quick Comfort in One Pot

September 9, 2025 by Grace Snow Leave a Comment

There I was, flipping through an old family recipe book, when the colorful pages fluttered to a stunning full-page photo of Beef Taco Soup. The combination of vibrant vegetables, zesty spices, and hearty ground beef immediately sparked joy. In just 30 minutes, this comforting one-pot wonder transforms the essence of classic tacos into a soul-soothing soup. Perfect for those busy weeknights, it’s not only gluten-free but a true crowd-pleaser too! Whether you're feeding a family or planning a cozy get-together, this Beef Taco Soup will warm the hearts and bellies of all who gather around your table. Ready to discover how easy it is to whip up this flavorful feast? Let’s dive in!

Why is Beef Taco Soup Your New Favorite?

Quick, one-pot meal: This Beef Taco Soup is a lifesaver for busy weeknights, requiring minimal prep and clean-up.

Flavor-packed comfort: The perfect blend of spices and fresh ingredients means every spoonful is bursting with taste, akin to your favorite tacos in soup form.

Versatile: Easily swap ingredients based on your dietary needs or what you have on hand—ground turkey instead of beef, or adding extra veggies to boost nutrition.

Crowd-pleaser: Serve it at family dinners or gatherings, and watch everyone rave about the hearty flavors! For more comforting ideas, check out this delicious Asparagus Soup Healthy or the hearty Santa Soup Savory.

Meal prep-friendly: Store leftovers in the fridge for up to three days or freeze for future cozy meals. Don't hesitate to double the batch for extra convenience!

Beef Taco Soup Ingredients

For the Soup Base

  • Olive Oil – Adds richness and helps sauté the vegetables. Substitute with avocado oil for a different flavor.
  • Ground Beef – Provides protein and base flavor. Lean ground turkey can be used for a lighter option.
  • Onion – Adds sweetness and depth. Substitute with shallots for a milder taste.
  • Jalapeño Pepper – Introduces heat and spice. Replace with bell pepper for a milder flavor.
  • Garlic – Enhances the overall flavor profile. Fresh garlic is preferable; garlic powder can be used in a pinch.
  • Paprika – Adds smokiness and color. Smoked paprika intensifies the flavor but regular paprika can be substituted.
  • Ground Cumin – Offers earthiness, a key spice in taco flavoring. Omit for a milder soup or use taco seasoning.
  • Crushed Tomatoes (canned) – Forms the soup base, adding acidity and flavor. Fresh diced tomatoes can substitute; increase cooking time.
  • Beef Broth – Adds depth. Vegetable broth or chicken broth can also work well.
  • Salt & Black Pepper – Essential for seasoning to taste. Use low-sodium options if salt intake is a concern.
  • Black Beans (canned) – Provides fiber and protein. Any canned beans such as kidney or pinto beans can be swapped.
  • Frozen Corn – Adds sweetness and texture. Fresh corn or canned corn works too.

For Toppings

  • Tortilla Chips – Adds crunch and texture. Use crushed corn chips for a finer topping.
  • Fresh Cilantro – Brightens flavors. Omit if not a fan; parsley can be a substitute.
  • Lime Slices – Adds acidity. Lemon slices can be used instead.
  • Sour Cream (or Greek Yogurt) – Creaminess and tang. Use low-fat options or avocado for a dairy-free alternative.
  • Avocado – Adds creaminess and healthy fats. Substitute with diced mango for a fruity twist.
  • Shredded Cheddar Cheese – Classic taco topping. Use a dairy-free cheese for lactose intolerance.

Step‑by‑Step Instructions for Beef Taco Soup

Step 1: Sauté the Vegetables
In a large pot, heat 2 tablespoons of olive oil over medium heat. Add 1 diced onion and 1 chopped jalapeño pepper, stirring occasionally for about 5 minutes until they are softened and fragrant. The onion should be translucent and slightly golden, signaling it's ready for the next ingredients.

Step 2: Brown the Beef and Spices
Increase the heat slightly and add 1 pound of ground beef to the pot with the sautéed vegetables. Break the beef apart with a spoon, cooking for about 6-8 minutes until browned and no pink remains. Stir in 3 minced garlic cloves, 1 tablespoon of paprika, 1 teaspoon of ground cumin, and crushed red pepper to taste for 1-2 minutes, allowing the spices to bloom.

Step 3: Combine the Soup Base
Next, pour in 1 can of crushed tomatoes and 4 cups of beef broth, stirring to combine. Season with salt and black pepper to taste, then add 1 can of black beans (drained and rinsed) and 1 cup of frozen corn. Mix everything together well, ensuring the ingredients are evenly distributed.

Step 4: Simmer the Soup
Bring the Beef Taco Soup to a gentle simmer over medium-high heat. Once bubbling, reduce the heat to low and allow it to simmer uncovered for 15-20 minutes, stirring occasionally. You'll know it's done when the soup thickens slightly, enhancing the wonderful flavors.

Step 5: Serve with Toppings
Ladle the Beef Taco Soup into bowls and add your favorite toppings, such as crushed tortilla chips, fresh cilantro, lime wedges, a dollop of sour cream, diced avocado, and shredded cheddar cheese. This delightful combination will elevate the robust flavors of your hearty Beef Taco Soup!

What to Serve with Quick & Hearty Beef Taco Soup

Pair this delightful soup with complementary dishes that enhance its vibrant flavors and comforting essence.

  • Warm Tortillas: Soft, fluffy tortillas act as the perfect vehicle for soaking up every drop of that savory broth. Enjoy wrapped around the toppings!

  • Cornbread Muffins: Their slightly sweet and crumbly texture balances the spiced flavors of the soup, creating a delightful contrast.

  • Crunchy Salad: A fresh, crisp salad with a tangy vinaigrette introduces a refreshing element, brightening the taste buds after each hearty bite.

  • Guacamole: Creamy and rich, homemade guacamole adds a beautiful contrast to each spoonful while enhancing the taco-inspired experience.

  • Chips and Salsa: The crunchy salty chips pair perfectly with zesty salsa, creating an irresistible snack that complements the soup beautifully.

  • Lime Agua fresca: A light and refreshing drink made with lime and water is the ideal accompaniment, cutting through the richness of the soup.

  • Churros for Dessert: End the meal on a sweet note with crispy churros, dusted in cinnamon sugar, as they provide a delightful finish that's fun to share.

Each of these pairings brings its unique character to the table, making your Beef Taco Soup experience truly memorable!

Expert Tips for Beef Taco Soup

  • Thickening Tip: To achieve a thicker soup, mix in refried beans or mash some black beans. This adds richness without changing the flavor profile of your Beef Taco Soup.

  • Simmer Longer: For deeper flavors, let the soup simmer for an extra 10 minutes. This slow cooking allows the spices and ingredients to meld beautifully.

  • Taste Before Serving: Always taste and adjust seasoning right before serving. A pinch of salt or a squeeze of lime can elevate the flavors of your Beef Taco Soup.

  • Vegetable Boost: Add extra vegetables like bell peppers, zucchini, or spinach to increase nutritional value and add vibrant colors to the soup.

  • Meal Prep Magic: Store leftover Beef Taco Soup in the fridge for up to three days, or freeze it for up to six months. It's perfect for quick lunches or cozy dinners later on!

Storage Tips for Beef Taco Soup

  • Fridge: Store leftover Beef Taco Soup in an airtight container for up to 3 days. Allow it to cool completely before sealing to maintain freshness and flavor.
  • Freezer: For longer storage, freeze the soup in airtight containers or freezer bags for 4-6 months. Make sure to leave some space for expansion as it freezes.
  • Thawing: Thaw frozen Beef Taco Soup in the refrigerator overnight or use the microwave for quick defrosting. Reheat gently on the stove, stirring occasionally until heated through.
  • Reheating: Reheat in a pot over medium heat until steaming, adding a splash of broth or water to adjust the consistency if needed. Enjoy your comforting meal!

Beef Taco Soup Variations

Feel free to make this Beef Taco Soup uniquely yours with these fun and delicious twists!

  • Turkey Swap: Use ground turkey instead of beef for a leaner soup without sacrificing flavor. It’s just as comforting and tasty!
  • Veggie Lovers: Toss in diced bell peppers, zucchini, or even sweet potatoes. These additions bring a pop of color and extra nutrients.
  • Spicy Kick: For those who crave heat, add chili powder or diced serrano peppers. It’ll spice things up with a delightful punch!
  • Dairy-Free Delight: Swap sour cream with coconut yogurt or avocado for creaminess without the dairy. You won't miss a thing!
  • Beans Galore: Mix in different canned beans—like kidney or pinto—for varied textures and flavors. Don’t hesitate to use what you love!
  • Fresh Herbs: Stir in spinach or kale during the last few minutes of simmering. A nutritional boost that adds vibrant green goodness!
  • Smoky Flavor: If you’re a fan of deep flavors, use smoked paprika in place of regular paprika. It adds a beautiful depth to the soup.
  • Sweet Twist: Add diced mango or corn for a hint of sweetness. This juxtaposition of flavors makes the soup even more memorable.

For more comforting options, consider trying out the delightful Zuppa Toscana Soup or a warm, hearty Taco Spaghetti Cheesy. Happy cooking!

Make Ahead Options

This Beef Taco Soup is an ideal candidate for meal prep, allowing busy cooks to enjoy a hearty meal effortlessly! You can prep the soup base—meaning sautéing the vegetables and browning the ground beef—up to 24 hours in advance and store it in the refrigerator. Just make sure to let it cool completely before refrigerating to maintain its quality. When you're ready to serve, simply reheat the mixture in a pot, adding any canned ingredients like black beans and corn, and letting it simmer for about 10-15 minutes. This way, you’ll have a warm, flavorful Beef Taco Soup that feels just as fresh as when you first made it!

Beef Taco Soup Recipe FAQs

What kind of ground beef should I use for Beef Taco Soup?
Absolutely! For the best flavor, I recommend using lean ground beef, such as 80/20 or 90/10. If you're looking for a lighter option, ground turkey works wonderfully as a substitute without sacrificing taste. The key is to ensure the meat is browned well to develop a rich flavor base for the soup.

How should I store leftover Beef Taco Soup?
Very simple! Store your leftover Beef Taco Soup in an airtight container in the refrigerator for up to 3 days. Allow it to cool to room temperature before sealing.

Can I freeze Beef Taco Soup?
Yes, indeed! To freeze, let the soup cool completely before transferring it to airtight containers or freezer bags. Ensure you leave space for expansion—it can freeze up to 4-6 months. For easy meals, consider portioning into single servings!

What if my Beef Taco Soup is too thick?
No worries! If you find your soup is thicker than you like, just add a little warm beef broth or water during reheating to loosen it up. Stir well until you reach your desired consistency, and it’ll be as good as new.

Can pets eat Beef Taco Soup?
I wouldn’t recommend it. While some ingredients, like beef and vegetables, are safe for most pets, the spices, salt, and certain toppings (like onions) can be harmful. Always check with your veterinarian before sharing any human food with your furry friends!

What do I do if I don’t have all the ingredients?
The more the merrier! This Beef Taco Soup is very versatile. If you’re missing an ingredient, feel free to swap it out for similar options. For instance, you can use vegetable broth instead of beef broth, or mix in different beans like kidney or pinto beans as substitutes. Just remember, it’s all about what you have on hand!

Beef Taco Soup

Hearty Beef Taco Soup: A Quick Comfort in One Pot

Enjoy a flavorful Beef Taco Soup in just 30 minutes, perfect for busy weeknights and gluten-free dining.
Print Recipe Pin Recipe
Prep Time 10 minutes mins
Cook Time 20 minutes mins
Total Time 30 minutes mins
Servings: 6 bowls
Course: Soups
Cuisine: Mexican
Calories: 350
Ingredients Equipment Method Nutrition Notes

Ingredients
  

Soup Base
  • 2 tablespoons Olive Oil or avocado oil for a different flavor.
  • 1 pound Ground Beef or lean ground turkey.
  • 1 medium Onion substitute with shallots for a milder taste.
  • 1 medium Jalapeño Pepper replace with bell pepper for a milder flavor.
  • 3 cloves Garlic fresh is preferable.
  • 1 tablespoon Paprika smoked paprika intensifies flavor.
  • 1 teaspoon Ground Cumin omit for a milder soup.
  • 1 can Crushed Tomatoes substitute with fresh diced tomatoes.
  • 4 cups Beef Broth can use vegetable or chicken broth.
  • to taste Salt use low-sodium if necessary.
  • to taste Black Pepper
  • 1 can Black Beans drained and rinsed.
  • 1 cup Frozen Corn fresh or canned corn works too.
Toppings
  • 1 cup Tortilla Chips or crushed corn chips.
  • to taste Fresh Cilantro omit if not a fan.
  • 3-4 slices Lime or use lemon slices.
  • 1 cup Sour Cream or Greek yogurt.
  • 1 medium Avocado or substitute with diced mango.
  • 1 cup Shredded Cheddar Cheese use dairy-free cheese if needed.

Equipment

  • Large pot

Method
 

Step-by-Step Instructions
  1. In a large pot, heat 2 tablespoons of olive oil over medium heat. Add 1 diced onion and 1 chopped jalapeño pepper. Stir occasionally for 5 minutes until softened and fragrant.
  2. Increase the heat slightly and add 1 pound of ground beef to the pot with the sautéed vegetables. Cook for 6-8 minutes until browned. Stir in 3 minced garlic cloves, 1 tablespoon of paprika, 1 teaspoon of ground cumin, and crushed red pepper to taste. Cook for 1-2 minutes.
  3. Pour in 1 can of crushed tomatoes and 4 cups of beef broth. Season with salt and black pepper to taste. Add 1 can of black beans and 1 cup of frozen corn. Mix well.
  4. Bring the soup to a gentle simmer over medium-high heat, then reduce to low. Simmer uncovered for 15-20 minutes, stirring occasionally.
  5. Ladle the soup into bowls and add toppings such as tortilla chips, cilantro, lime wedges, sour cream, avocado, and cheddar cheese.

Nutrition

Serving: 1bowlCalories: 350kcalCarbohydrates: 30gProtein: 20gFat: 15gSaturated Fat: 6gPolyunsaturated Fat: 2gMonounsaturated Fat: 6gCholesterol: 70mgSodium: 800mgPotassium: 600mgFiber: 10gSugar: 5gVitamin A: 15IUVitamin C: 20mgCalcium: 10mgIron: 15mg

Notes

Store leftovers in the fridge for up to three days or freeze for future meals. Consider doubling the batch for extra convenience.

Tried this recipe?

Let us know how it was!

Delicious Chicken and Rice Soup That Warms Your Soul

September 9, 2025 by Grace Snow Leave a Comment

On a brisk, cloudy afternoon, there's nothing quite like the aroma of Chicken and Rice Soup curling through your kitchen. This cozy one-pot meal is not just a remedy for the chill—it’s a heartwarming embrace, packed with tender chicken and vibrant vegetables simmered in a rich broth. With its gluten-free profile and immune-boosting qualities, this recipe easily stands out as the ultimate comfort food that both novice and seasoned home-chefs can whip up in no time. Whether you're using fresh ingredients or opting for a rotisserie chicken shortcut, you’ll find this soup is not only quick to prepare but also a fantastic way to warm your soul and get the family together. Ready to dive into a bowl of warmth? Let’s get cooking!

Why is Chicken and Rice Soup Irresistible?

Comforting warmth: This Chicken and Rice Soup wraps you in a cozy hug on chilly days, making it the perfect dish for warming your soul.

Flavor-packed goodness: With tender chicken and vegetables simmered in a rich broth, each spoonful bursts with hearty flavor that your family will love.

Quick prep time: Use rotisserie chicken for a speedy meal that doesn't compromise on taste—ideal for those busy evenings.

Versatile ingredients: Feel free to get creative! Swap in leftover turkey or add your favorite veggies for a personalized touch.

Easy cleanup: This one-pot meal means fewer dishes to wash, giving you more time to kick back and enjoy.

Chicken and Rice Soup Ingredients

  • For the Soup Base
    • Large Onion – A fragrant aromatic base that enhances the soup's flavor; shallots or leeks can be used as substitutions.
    • Garlic (3 cloves) – Elevates the dish with depth and richness; substitute with garlic powder if fresh isn't handy.
    • Low Sodium Chicken Broth (4 cups) – A key component for a flavorful soup; homemade chicken stock adds even more richness.
    • Water (2 cups) – Balances the broth’s saltiness; adjust for your preferred soup consistency.
    • Ground Black Pepper (¼ teaspoon) – Adds a hint of warmth; feel free to adjust to taste.
    • Salt (½ teaspoon) – Essential for seasoning; don’t hesitate to taste and adjust according to preference.

  • For the Chicken
    • Chicken Thighs or Legs (3 pieces, bone-in, skin-on) – Provides rich flavor and protein; swap with rotisserie chicken (¾ to 1 cup, shredded) for a quicker prep.

  • For the Rice and Vegetables
    • Long Grain Rice (⅓ cup, uncooked) – Provides heartiness and texture; other rice types can be used, just keep an eye on cooking times.
    • Carrots (2 medium, chopped) – Adds a touch of sweetness and vibrant color; parsnips can make a delightful alternative.

  • For a Fresh Touch
    • Cilantro (1 bunch, chopped) – Provides a fresh, herbaceous note at the end; parsley is a great substitute if you prefer its flavor.

This Chicken and Rice Soup brims with wholesome ingredients that not only warm your heart but are also gluten-free and perfect for boosting your immune system! Enjoy the delightful process of creating this cozy dish right at home.

Step‑by‑Step Instructions for Chicken and Rice Soup

Step 1: Sauté Aromatics
Heat a large stockpot over medium heat. Add the chopped onion and sauté for about 5 minutes or until it becomes translucent and fragrant. Make sure to stir occasionally to prevent sticking. This aromatic base is key for your Chicken and Rice Soup, setting a flavorful foundation.

Step 2: Add Garlic
Stir in the minced garlic and cook for an additional 1-2 minutes until fragrant. Be careful not to let it brown, as burnt garlic can turn bitter. The aroma will fill your kitchen, making it hard to resist what’s to come!

Step 3: Combine Ingredients
Add the chicken thighs or legs into the pot, nestling them among the sautéed onions and garlic. Pour in the low sodium chicken broth and water, then sprinkle in the salt and pepper. Finally, toss in the chopped carrots, creating a rich blend of flavors that will shine throughout your Chicken and Rice Soup.

Step 4: Simmer the Soup
Bring the pot to a gentle simmer over medium-high heat. Once bubbling, reduce the heat to low and cover the pot. Allow it to cook for approximately 45 minutes; the chicken should be tender and fully cooked, easily pulling away from the bone.

Step 5: Shred the Chicken
After cooking, carefully remove the chicken from the pot and let it cool slightly. Once cool enough to handle, shred the meat from the bones using two forks. Return the shredded chicken back into the pot while ensuring you mix it well with the broth and vegetables to infuse that savory goodness into your Chicken and Rice Soup.

Step 6: Add Rice
Incorporate the uncooked long grain rice into the soup. Stir well and cover the pot again, allowing it to simmer on low heat for an additional 15-20 minutes. Check the rice for tenderness—your soup will become heartier with the addition of fluffy rice, soaking up all those delicious flavors.

Step 7: Finish with Fresh Herbs
Once the rice is tender, stir in the freshly chopped cilantro. Allow it to cook for another 2-3 minutes, enhancing the aroma of your Chicken and Rice Soup. The vibrant green cilantro adds a fresh note that brightens the entire dish.

Step 8: Serve and Enjoy
Ladle the warm Chicken and Rice Soup into bowls and enjoy it hot. Pair it with crusty bread or crackers if desired, making it the perfect comfort meal to warm both your heart and your home on a chilly day!

What to Serve with Cozy One-Pot Chicken and Rice Soup

Warm up your meal with delightful pairings that bring out the best in this comforting dish.

  • Crusty Bread: Perfect for dipping, crusty bread adds a satisfying crunch and absorbs every bit of that delicious broth.

  • Garlic Parmesan Crackers: These savory snacks complement the soup while providing a delightful twist of flavor that keeps your taste buds dancing.

  • Side Salad: A fresh salad with mixed greens and a light vinaigrette offers a crisp contrast to the warm soup, balancing texture beautifully.

  • Steamed Broccoli: Bright green, tender broccoli packs a nutritious punch and is an easy vegetable side that pairs beautifully with the rich flavors of the soup.

  • Herbed Rice: If you want to enhance the rice element of your meal, serve a side of herbed rice for added flavor while keeping it comforting.

  • Hot Tea: A cup of herbal or green tea can elevate the experience, providing warmth and soothing aromas to enjoy alongside your cozy soup.

  • Apple Crisp: Finish your meal on a sweet note with a warm apple crisp. The sweetness of apples and the crunch of the topping makes the perfect comforting dessert.

Indulge in these combinations to create a heartwarming family meal, celebrating the deliciousness of homemade comfort food.

Storage Tips for Chicken and Rice Soup

Fridge: Store leftovers in an airtight container for up to 4 days. This helps keep your Chicken and Rice Soup flavorful and fresh for easy reheating.

Freezer: To freeze, cool the soup completely, then transfer to sturdy containers or freezer bags. Consume within 3 months for the best taste and texture.

Reheating: When reheating, add a splash of broth or water to loosen it up, as rice tends to absorb liquid over time. Warm on the stove or in the microwave until heated through.

Portioning: Consider dividing the soup into individual portions before freezing. This allows for convenient single servings of Chicken and Rice Soup anytime you need a quick, satisfying meal!

Expert Tips for Chicken and Rice Soup

  • Avoid Overcooking Rice: Add the rice halfway through the simmer to prevent it from becoming mushy; you want tender but distinct grains in your Chicken and Rice Soup.

  • Use Fresh Ingredients: Whenever possible, opt for fresh vegetables and herbs. They enhance the soup's flavor and nutrients, giving your Chicken and Rice Soup that homemade essence.

  • Adjust Seasoning Gradually: Taste your broth as it simmers and modify seasoning like salt and pepper accordingly. This ensures a perfectly balanced Chicken and Rice Soup that suits your palate.

  • Shred Chicken While Warm: Shredding the chicken soon after removing it from the pot makes it easier and helps it absorb the soup's flavors better, creating a deliciously rich Chicken and Rice Soup.

  • Store Properly for Leftovers: Keep any leftovers in an airtight container in the fridge for up to four days. Reheating may require additional broth as rice absorbs liquid when resting.

Chicken and Rice Soup Variations

Feel free to explore these delightful variations to make this cozy Chicken and Rice Soup truly your own!

  • Turkey Swap: Substitute chicken with shredded turkey for a post-holiday dish that warms the heart. It's perfect for using up leftovers!

  • Veggie Boost: Add peas or green beans for an extra layer of color and nutrition. Not only does this enhance the visual appeal, but it also adds crunch and flavor.

  • Cilantro Alternative: If cilantro isn’t your favorite, swap it for parsley, chives, or even dill for a fresh twist at the end. The unique herb you choose can completely change the soup’s character!

  • Spice it Up: Incorporate cayenne pepper or smoked paprika for a spicy kick that warms you from the inside out. Just a pinch can elevate the entire dish, enhancing its depth and warmth.

  • Creamy Comfort: For a richer texture, stir in a splash of heavy cream or coconut milk as the soup finishes cooking. This little addition transforms your Chicken and Rice Soup into a creamy delight that feels indulgent.

  • Rice Variety: Experiment with quinoa or wild rice instead of long-grain for a gluten-free twist and unique texture. Each grain brings its own distinct flavor, creating a healthy alternative.

  • Herb Infusion: Try adding fresh thyme or rosemary early in the cooking process for a fragrant herbal note. The aroma will make your kitchen feel delightfully warm and inviting, perfect for chilly nights.

  • Rotisserie Short Cut: Use rotisserie chicken for an even quicker meal prep. Simply shred and add it after simmering the broth—time-saving without sacrificing flavor!

Whichever variation you choose, this Chicken and Rice Soup is sure to become a cherished family favorite. You might even find that you love it more each time you make it! If you're interested in seasoning with zesty flavors, consider checking out my recipes for Lime Chicken Rice or Chicken Adobo Again for more inspiration!

Make Ahead Options

These Chicken and Rice Soup options are perfect for home cooks looking to save time during busy weeknights! You can chop the vegetables (onion, carrots, and cilantro) and store them in an airtight container in the refrigerator for up to 3 days prior to cooking. For even quicker preparation, shred store-bought rotisserie chicken in advance and refrigerate it for up to 24 hours. To maintain quality, refrigerate all components separately until ready to combine. When you're ready to enjoy, simply sauté the aromatics, add the prepped veggies and chicken, and follow the usual instructions to simmer the soup. This way, you'll create a comforting Chicken and Rice Soup ready in no time, just perfect for warming your soul after a long day!

Chicken and Rice Soup Recipe FAQs

How do I choose the best chicken for the soup?
Absolutely! For the best flavor, I recommend using bone-in, skin-on chicken thighs or legs, as they lend richness to the broth. However, if you're in a hurry, rotisserie chicken works wonders too. Just make sure to shred about ¾ to 1 cup of it and stir it into the broth after letting it simmer.

How long can I store leftovers in the fridge?
Very good question! Leftovers from your Chicken and Rice Soup can be stored in an airtight container in the refrigerator for up to 4 days. Be sure to let it cool completely before sealing to preserve freshness.

Can I freeze Chicken and Rice Soup?
Of course! To freeze, first allow the soup to cool down completely. Then, transfer it into sturdy freezer containers or bags, leaving some space for expansion. You can enjoy it within 3 months for the best taste and texture. When you're ready to eat, just thaw overnight in the fridge and reheat on the stove, adding a bit of broth if it feels thick.

What should I do if my rice is mushy?
No worries! If the rice has turned mushy, it's likely been cooked too long. For the next time, add the rice to the simmering soup about 15-20 minutes before serving to maintain that desirable texture. If you're dealing with a current batch, you might try mashing it into a delicious porridge, but the flavor will still be comforting!

Can pets have Chicken and Rice Soup?
It's heartfelt that you care! While plain chicken and rice are generally safe for pets, avoid seasoning in your soup when sharing with furry friends. Remove some plain chicken and rice before adding herbs or salt for them to enjoy a small portion safely.

Is this soup allergy-friendly?
Absolutely! This Chicken and Rice Soup is naturally gluten-free and can be adjusted to suit various dietary needs. For dairy-free options, omit any cream additions, and always double-check ingredient labels for any potential allergens, especially if serving to family or guests.

Chicken and Rice Soup

Delicious Chicken and Rice Soup That Warms Your Soul

This Chicken and Rice Soup is a cozy, gluten-free meal that's packed with flavor and perfect for chilly days.
Print Recipe Pin Recipe
Prep Time 15 minutes mins
Cook Time 45 minutes mins
Cooling Time 10 minutes mins
Total Time 1 hour hr 10 minutes mins
Servings: 4 bowls
Course: Soups
Cuisine: American
Calories: 320
Ingredients Equipment Method Nutrition Notes

Ingredients
  

Soup Base
  • 1 large Onion A fragrant aromatic base; shallots or leeks can be used as substitutions.
  • 3 cloves Garlic Elevates the dish with depth; substitute with garlic powder if fresh isn't handy.
  • 4 cups Low Sodium Chicken Broth A key component for a flavorful soup.
  • 2 cups Water Balances the broth’s saltiness; adjust for preferred soup consistency.
  • 0.25 teaspoon Ground Black Pepper Adds a hint of warmth; feel free to adjust to taste.
  • 0.5 teaspoon Salt Essential for seasoning; taste and adjust according to preference.
Chicken
  • 3 pieces Chicken Thighs or Legs Provides rich flavor; swap with rotisserie chicken (¾ to 1 cup, shredded) for a quicker prep.
Rice and Vegetables
  • 0.33 cup Long Grain Rice Provides heartiness; other rice types can be used.
  • 2 medium Carrots Adds sweetness and vibrant color; parsnips can be used as an alternative.
Fresh Touch
  • 1 bunch Cilantro Provides a fresh note; parsley is a substitute.

Equipment

  • Large Stockpot

Method
 

Step-by-Step Instructions
  1. Heat a large stockpot over medium heat. Add the chopped onion and sauté for about 5 minutes until translucent and fragrant.
  2. Stir in the minced garlic and cook for 1-2 minutes until fragrant, being careful not to let it brown.
  3. Add the chicken thighs or legs into the pot, then pour in the chicken broth and water, and sprinkle in salt and pepper.
  4. Bring the pot to a gentle simmer over medium-high heat, then reduce to low and cover. Cook for about 45 minutes.
  5. Carefully remove the chicken, let it cool, then shred the meat from the bones and return it to the pot.
  6. Incorporate the uncooked rice into the soup, cover, and simmer for an additional 15-20 minutes.
  7. Once the rice is tender, stir in the chopped cilantro and cook for another 2-3 minutes.
  8. Ladle the soup into bowls and enjoy hot.

Nutrition

Serving: 1bowlCalories: 320kcalCarbohydrates: 32gProtein: 25gFat: 11gSaturated Fat: 3gPolyunsaturated Fat: 1gMonounsaturated Fat: 6gCholesterol: 80mgSodium: 600mgPotassium: 800mgFiber: 2gSugar: 2gVitamin A: 400IUVitamin C: 10mgCalcium: 50mgIron: 2mg

Notes

This soup is gluten-free and packed with wholesome ingredients, ideal for warming up on cold days.

Tried this recipe?

Let us know how it was!

Warm Up with Hearty Vegetarian Mushroom Barley Soup

September 9, 2025 by Grace Snow Leave a Comment

As I stirred the pot, a deep, earthy aroma filled my kitchen, reminding me of cozy evenings spent around the table. This Hearty Vegetarian Mushroom Barley Soup is more than just a meal; it’s a comforting hug in a bowl, perfect for those chilly days when you crave something nourishing and warm. Packed with sautéed mushrooms, vibrant vegetables, and chewy barley, this vegetarian soup resonates with both health and heartiness, making it a staple for any passionate home-chef. Not only can it be whipped up in just over an hour, but it's also a delightful one-pot wonder that’s ideal for meal prep or freezing. Are you ready to discover how easy and satisfying it is to create this kitchen classic?

Why is This Soup So Comforting?

Warm, Hearty Bowl: This Vegetarian Mushroom Barley Soup delivers a bowl full of warmth that melts away stress, making it a perfect dish for chilly evenings.

Nutritious Ingredients: Packed with wholesome vegetables and fiber-rich barley, this soup ensures you can indulge without guilt.

One-Pot Wonder: Simplifying cleanup, you can create this hearty meal in just one pot, saving you time for more important things!

Versatile: Excited to add your twist? You can easily swap out mushrooms or add leafy greens like spinach for delightful variations.

Whether enjoyed as a hearty solo meal or served with crusty homemade bread, this soup is sure to please everyone at the table!

Vegetarian Mushroom Barley Soup Ingredients

For the Soup

  • Vegetable Oil – Provides moisture and helps sauté the vegetables; can use olive oil for a different flavor.
  • Onion – Adds sweetness and depth to the soup base; use 1 medium-sized onion, chopped.
  • Garlic – Enhances flavor with its aromatic qualities; use 1 teaspoon, minced.
  • Carrots – Brings sweetness and color; thinly slice 1 cup of carrots.
  • Brown Mushrooms – Adds earthy flavor and texture; use 2 cups, thinly sliced; can substitute with cremini or shiitake mushrooms.
  • Barley – Acts as the main ingredient, providing heartiness and nutty flavor; use 1 cup, rinsed before adding for the best Vegetarian Mushroom Barley Soup.
  • Water – Forms the soup base; use enough to cover ingredients by about 4 inches (approximately 5-6 cups).
  • Vegetable Stock Powder – Enhances the flavor of the broth; substitute with chicken stock powder for non-vegan option.
  • Salt and Pepper – Season to taste; essential for flavor balance.
  • Fresh Parsley – Used as a garnish to add brightness and freshness.

Step‑by‑Step Instructions for Vegetarian Mushroom Barley Soup

Step 1: Heat the Oil
In a medium-large pot or Dutch oven, pour in 2 tablespoons of vegetable oil and heat over medium-high until it shimmers, about 2 minutes. This sizzling indicates the perfect temperature for sautéing, and it will create a flavorful base for your Vegetarian Mushroom Barley Soup.

Step 2: Sauté the Aromatics
Add 1 medium-sized chopped onion, 1 teaspoon of minced garlic, and 1 cup of thinly sliced carrots. Sauté the mixture for about 4 minutes until the onion is translucent and fragrant, ensuring everything is well-coated in the oil. This step builds a rich flavor foundation for your comforting soup.

Step 3: Cook the Mushrooms
Incorporate 2 cups of thinly sliced brown mushrooms into the pot and sauté for an additional 3 minutes. Cook until the mushrooms start to release their moisture and slightly brown, which enriches the broth with their earthy flavor, key for the cozy essence of the Vegetarian Mushroom Barley Soup.

Step 4: Add the Barley and Liquid
Stir in 1 cup of rinsed pearl barley, followed by enough water (approximately 5-6 cups) to cover the vegetables by 4 inches. Add in 1 tablespoon of vegetable stock powder, and season with salt and pepper to your liking. This combination creates a hearty base, essential for the final soup texture.

Step 5: Bring to a Boil
Increase the heat to high, bringing the soup to a boil while stirring occasionally to prevent sticking. Once boiling, you’ll see bubbles actively forming; this signals that it's time to reduce the heat to low. Cover the pot and let it simmer gently for 1 hour, allowing the barley to soften and absorb the flavors.

Step 6: Adjust Cooking Method (Optional)
If you prefer a slow-cooker method, carefully transfer the sautéed vegetables and all ingredients into a slow cooker. Cook on low for 6-7 hours, which melds the flavors beautifully and ensures a rich, hearty Vegetarian Mushroom Barley Soup without any additional effort.

Step 7: Serve and Garnish
After cooking, test the barley for a tender but chewy texture, then ladle the soup into bowls. Garnish with freshly chopped parsley to add a pop of color and brightness. Your hearty Vegetarian Mushroom Barley Soup is now ready to warm you from the inside out!

Storage Tips for Vegetarian Mushroom Barley Soup

  • Fridge: Store your Vegetarian Mushroom Barley Soup in an airtight container for up to 5 days. This keeps the flavors fresh and ensures a hearty meal is always within reach.

  • Freezer: For longer storage, freeze the soup in an airtight bag or container for up to 3 months. To reheat, thaw it in the fridge overnight and warm gently on the stove, stirring occasionally.

  • Reheating: When reheating, add a splash of water or vegetable broth if the soup is too thick. This retains its creamy texture and warms it back to life quickly!

  • Portioning: Consider portioning the soup before freezing. This allows for easy, quick servings on busy days when you crave a comforting bowl of goodness.

Make Ahead Options

This Hearty Vegetarian Mushroom Barley Soup is perfect for busy home cooks looking to save time during the week! You can chop your vegetables (onion, carrots, and mushrooms) and store them in an airtight container in the refrigerator for up to 3 days. Additionally, you can rinse and pre-measure the barley so it's ready to go. When you're ready to cook, simply sauté the prepared veggies and add the rinse barley, liquid, and seasonings as instructed. For an even richer flavor, consider making the soup entirely in advance and refrigerating it overnight; it will taste just as delicious and perfectly meld the flavors! Just reheat on the stove before serving.

Expert Tips for Vegetarian Mushroom Barley Soup

  • Rinse the Barley: Always rinse the barley before using it. This step removes excess starch and prevents your soup from becoming gummy, ensuring a delightful texture.

  • Don’t Skip Sautéing: Sauté your aromatics and mushrooms until browned. This crucial step deepens the flavors of your Vegetarian Mushroom Barley Soup, elevating it to comfort food status.

  • Herbs Add Depth: Experiment with fresh or dried herbs like thyme and rosemary during cooking for an extra layer of flavor. Their earthy notes can beautifully complement the mushrooms and barley.

  • Adjust Consistency: If your soup is thicker than desired, feel free to add a little more water or vegetable stock until you reach your preferred consistency.

  • Taste as You Go: Don’t hesitate to adjust the salt and pepper as you cook. Typically, taste testing ensures the seasoning is just right to elevate the overall flavor of the soup.

What to Serve with Hearty Vegetarian Mushroom Barley Soup

Enjoy the perfect meal ensemble that beautifully complements this cozy, nourishing soup!

  • Crusty Bread: A warm, chewy loaf is perfect for dipping into the soup, enhancing every comforting bite.

  • Garlic Bread Sticks: Crispy on the outside and soft inside, these savory sticks will add delightful flavor to every spoonful.

  • Simple Green Salad: A fresh mix of greens and a tangy vinaigrette helps balance the soup’s richness, offering a refreshing contrast.

  • Herbed Biscuits: Fluffy, buttery biscuits infused with herbs create a heartwarming side that elevates this meal from good to great.

  • Roasted Root Vegetables: Sweet caramelized veggies add earthiness and color, providing an exquisite taste experience alongside the hearty soup.

  • Red Wine: A glass of your favorite red wine can deepen the cozy experience, allowing rich flavors from the soup to shine.

  • Chocolate Chip Cookies: End your meal on a sweet note with warm cookies, balancing the savory nature of the soup perfectly.

Each pairing adds a unique twist, making your dinner a memorable feast that warms both heart and home!

Vegetarian Mushroom Barley Soup Variations

Feel free to let your creativity shine as you customize this delicious soup to suit your taste!

  • Mushroom Swap: Try using shiitake or cremini mushrooms for a unique flavor profile. Each variety brings its own earthiness, enhancing the overall dish.

  • Leafy Greens: Stir in some fresh spinach or kale during the last five minutes of cooking. It adds a vibrant color and boosts the nutritional value without compromising texture.

  • Spice it Up: Add a pinch of smoked paprika or cayenne for a kick of heat. This tiny adjustment can turn your cozy soup into a delightful spicy experience.

  • Creamy Texture: For a creamier version, blend half of the soup before serving. This infusion thickens the broth while keeping the hearty barley and veggies intact.

  • Herb Medley: Experiment with fresh herbs like thyme, rosemary, or even a bay leaf while simmering. These will impart an aromatic depth to your comforting bowl.

  • Nutty Addition: Toasted walnuts or pumpkin seeds make a lovely crunchy topping. Sprinkling them just before serving adds an unexpected and delightful texture.

  • Lentil Boost: Incorporate cooked lentils along with the barley for added protein and a new texture twist. They meld beautifully with the soup's flavors, making it even heartier.

  • Asian Flair: Incorporate soy sauce and sesame oil instead of vegetable stock for an Asian twist. This will envelop your soup in enticing umami, perfectly complementing the mushrooms.

Why not pair this comforting soup with a side of crusty homemade bread or a salad? If you're looking for other nutritious and flavorful recipes, check out Asparagus Soup Healthy or Santa Soup Savory for more warm, satisfying meals that your family will love!

Vegetarian Mushroom Barley Soup Recipe FAQs

What type of mushrooms should I use for this soup?
Absolutely! Brown mushrooms work wonderfully, but you can also use cremini or shiitake for different flavors. Each type adds a unique earthy quality that enhances the soup.

How long can I store the Vegetarian Mushroom Barley Soup in the refrigerator?
You can store your soup in an airtight container for up to 5 days. Just be sure to let it cool completely before sealing it up to keep the flavors fresh.

Can I freeze the soup? If so, how?
Yes, you can freeze the Vegetarian Mushroom Barley Soup for up to 3 months! Let it cool down completely, then transfer to an airtight bag or container. When you're ready to enjoy it, simply thaw it in the fridge overnight, and reheat on the stove, adding a little water or broth if needed.

What should I do if the soup is too thick after cooking?
If your soup turns out thicker than desired, no worries! Simply add a little extra water or vegetable broth while reheating. Stir gently to incorporate, and you’ll have a perfectly creamy consistency.

Are there any dietary considerations when making this soup?
Very! This recipe is vegan-friendly, but if you have allergies, ensure that your vegetable stock powder is gluten-free. Also, personal preferences matter—feel free to adjust ingredients based on what works best for your diet.

How can I enhance the flavor of my soup?
For a deeper flavor profile, consider adding fresh or dried herbs like thyme or rosemary during cooking. Sautéing the mushrooms and vegetables well also helps to caramelize their natural sugars, enriching the entire dish. Enjoy exploring flavors—it's one of my favorite parts of cooking!

Vegetarian Mushroom Barley Soup

Warm Up with Hearty Vegetarian Mushroom Barley Soup

This Vegetarian Mushroom Barley Soup is a comforting bowl, perfect for chilly days with earthy mushrooms, vibrant vegetables, and chewy barley.
Print Recipe Pin Recipe
Prep Time 15 minutes mins
Cook Time 1 hour hr
Total Time 1 hour hr 15 minutes mins
Servings: 4 cups
Course: Soups
Cuisine: Vegetarian
Calories: 250
Ingredients Equipment Method Nutrition Notes

Ingredients
  

For the Soup
  • 2 tablespoons vegetable oil can use olive oil for a different flavor
  • 1 medium onion chopped
  • 1 teaspoon garlic minced
  • 1 cup carrots thinly sliced
  • 2 cups brown mushrooms thinly sliced; can substitute with cremini or shiitake
  • 1 cup barley rinsed
  • 5-6 cups water enough to cover ingredients by about 4 inches
  • 1 tablespoon vegetable stock powder substitute with chicken stock powder for non-vegan option
  • salt and pepper to taste
  • fresh parsley used as a garnish

Equipment

  • medium-large pot or Dutch oven

Method
 

Step-by-Step Instructions
  1. In a medium-large pot or Dutch oven, pour in 2 tablespoons of vegetable oil and heat over medium-high until it shimmers, about 2 minutes.
  2. Add 1 medium-sized chopped onion, 1 teaspoon of minced garlic, and 1 cup of thinly sliced carrots. Sauté for about 4 minutes until the onion is translucent and fragrant.
  3. Incorporate 2 cups of thinly sliced brown mushrooms into the pot and sauté for an additional 3 minutes until they start to release moisture and slightly brown.
  4. Stir in 1 cup of rinsed pearl barley, followed by enough water (approximately 5-6 cups) to cover the vegetables by 4 inches. Add in 1 tablespoon of vegetable stock powder and season with salt and pepper.
  5. Increase the heat to high, bringing the soup to a boil while stirring occasionally. Once boiling, reduce the heat to low and cover the pot. Let it simmer gently for 1 hour.
  6. If using a slow cooker, transfer the sautéed vegetables and all ingredients into a slow cooker and cook on low for 6-7 hours.
  7. Test the barley for a tender but chewy texture, then ladle the soup into bowls. Garnish with freshly chopped parsley before serving.

Nutrition

Serving: 1cupCalories: 250kcalCarbohydrates: 45gProtein: 10gFat: 5gSaturated Fat: 1gPolyunsaturated Fat: 0.5gMonounsaturated Fat: 3gSodium: 400mgPotassium: 600mgFiber: 8gSugar: 4gVitamin A: 3500IUVitamin C: 12mgCalcium: 40mgIron: 3mg

Notes

Rinse the barley before using it to remove excess starch. Always sauté your aromatics and mushrooms until browned to deepen the flavors.

Tried this recipe?

Let us know how it was!

Creamy Tortellini Soup with Sausage - Cozy Comfort in a Bowl

September 9, 2025 by Grace Snow Leave a Comment

"Contentment fills the air as I set a pot on the stove for my new favorite: Creamy Tortellini Soup with Sausage. This one-pot wonder is not just a meal; it’s a warm embrace in a bowl, perfect for those chilly evenings when you want something hearty yet simple. In under 30 minutes, you’ll have a rich tomato base overflowing with tender cheese tortellini, savory Italian sausage, and vibrant greens. Not only is this soup easy to whip up, but it also promises the joy of leftovers that can be frozen for future comfort. So, whether you’re planning a cozy dinner with loved ones or seeking a soul-soothing lunch, you’re in for a treat. Ready to warm your kitchen and heart?"

Why is Creamy Tortellini Soup Special?

Comforting warmth: This soup is like a hug for your soul, perfect for chilly nights.
Quick preparation: With just under 30 minutes to cook, it's ready when you need it most.
Hearty goodness: Packed with protein-rich sausage and cheese-filled tortellini, this dish satisfies hunger with every spoonful.
One-pot convenience: Easy cleanup means more time to enjoy with family or friends.
Versatile flavor: Customize with extra veggies or spices to make it your own—perhaps try it next to a side of Asparagus Soup Healthy for a delightful meal! You’ll be reaching for this recipe again and again.

Creamy Tortellini Soup with Sausage Ingredients

For the Soup Base

  • Italian Sausage – Provides savory flavor and protein; consider spicy or sweet varieties based on preference.
  • Onion – Adds aromatic sweetness; use yellow or white onions for best results.
  • Garlic – Infuses the soup with deep flavor; fresh garlic is ideal, but garlic powder can substitute.
  • Salt – Enhances overall flavor; adjust according to taste preferences.
  • Ground Black Pepper – Offers a mild heat; white pepper can be substituted for a different flavor profile.
  • All-Purpose Flour – Helps thicken the soup slightly; gluten-free flour can be used as a substitute.
  • Tomato Sauce – Base of the soup providing acidity and body; can substitute with crushed tomatoes for a chunkier texture.

For the Tortellini and Cream

  • Cheese Tortellini – Adds a creamy, cheesy element; use gluten-free tortellini if needed.
  • Heavy Cream – Gives the soup its creamy texture; half-and-half can work as a lighter alternative.

For the Greens and Garnish

  • Baby Spinach – Adds freshness and nutrients; Swiss chard or kale can also be used.
  • Kale – Provides extra texture and nutrition; substitute with other leafy greens if desired.
  • Fresh Parsley – For garnish, adding color and a fresh herb taste; fresh basil can be an alternative.

Step‑by‑Step Instructions for Creamy Tortellini Soup with Sausage

Step 1: Brown the Sausage
In a medium pot, add the Italian sausage over medium heat. Use a wooden spoon to break it apart as it cooks, allowing it to brown for about 5–7 minutes until no longer pink. You’ll know it’s ready when the meat is nicely caramelized and fragrant, creating a savory base for your Creamy Tortellini Soup with Sausage.

Step 2: Sauté Aromatics
Add the chopped onion and minced garlic to the pot, stirring them into the sausage mixture. Continue to sauté for an additional 3–5 minutes, or until the onion is translucent and aromatic. This step enhances the flavors, and you’ll see the onions soften and turn a lovely golden hue, creating a delicious aroma.

Step 3: Thicken the Soup Base
Sprinkle in the salt, ground black pepper, and all-purpose flour, stirring well to combine. Cook this mixture for about 1–2 minutes, allowing the flour to absorb the flavors and thicken the soup base slightly. You should see a paste form, which will help create a rich texture in your Creamy Tortellini Soup with Sausage.

Step 4: Add Tomato Sauce
Pour in the tomato sauce, stirring everything together. Increase the heat slightly and bring the mixture to a gentle simmer, approximately 5 minutes. It should bubble slightly, blending the flavors of the sausage and aromatics with the acidity of the tomatoes, creating a robust soup base.

Step 5: Incorporate Tortellini
Add the cheese tortellini to the pot, following the cooking instructions on the package for timing. Typically, this will take about 4–5 minutes. Stir occasionally, watching for the tortellini to float to the top, which indicates they’re perfectly cooked and tender, ready to absorb the tasty broth.

Step 6: Stir in Cream and Greens
Once the tortellini are tender, reduce the heat and stir in the heavy cream, baby spinach, and kale. Cook for an additional 2–3 minutes, just until the greens are wilted and the soup is heated through. The mixture should turn creamy and lush, embodying the essence of your Creamy Tortellini Soup with Sausage.

Step 7: Serve and Garnish
Ladle the soup into bowls and garnish with freshly chopped parsley for a pop of color. It’s best served immediately, allowing everyone to enjoy the creamy texture and hearty warmth. The soup should look inviting, with vibrant greens contrasting beautifully against the red hues of the tomato base, perfect for a comforting meal.

Creamy Tortellini Soup with Sausage Variations

Feel free to make this Creamy Tortellini Soup with Sausage your own with these delightful twists!

  • Lean Protein: Swap out Italian sausage for chicken sausage or turkey sausage for a healthier option while keeping that savory flavor intact.
  • Extra Veggies: Toss in additional vegetables like carrots, bell peppers, or zucchini to create a colorful and nutritious twist—every bite bursting with goodness!
  • Spicy Kick: Incorporate crushed red pepper or a splash of hot sauce for an exciting kick of heat, perfect for those who love a little spice in their life.
  • Mushroom Magic: Add sautéed mushrooms for an earthy flavor that complements the creamy broth wonderfully—these little gems will elevate your soup!
  • Herb Infusion: Sprinkle in fresh herbs like thyme or basil to enhance the overall aroma and flavor profile. It’s a simple way to elevate your comforting bowl!
  • Broth Swap: Use vegetable broth instead of water to give the soup an added depth of flavor—this small change can make a big difference!
  • Lightened Up: For a lighter soup, replace heavy cream with half-and-half or coconut cream, keeping the comforting essence while trimming calories.
  • Crunchy Topping: Add a sprinkle of toasted breadcrumbs or croutons on top just before serving for a delightful crunch that contrasts beautifully with the creamy soup.

Feel inspired? Experiment with these variations and perhaps enjoy a side of Zuppa Toscana Soup alongside your creamy delight for a flavorful meal full of love and warmth!

What to Serve with Creamy Tortellini Soup with Sausage

A hearty bowl of creamy goodness deserves delightful companions to create a full meal experience.

  • Garlic Bread: The warm, crispy texture of toasted garlic bread is perfect for dipping in the rich soup, adding a savory crunch.
  • Simple Side Salad: A fresh salad with mixed greens and a light vinaigrette balances the soup's creamy richness, bringing vibrant colors to your table.
  • Roasted Vegetables: Sweet, caramelized roasted veggies like carrots and zucchini add depth and a touch of sweetness, complementing the savory flavors.
  • Parmesan Crisps: These crunchy, cheesy bites offer a delightful contrast to the soup's creaminess, elevating your meal with an irresistible crunch.
  • Crusty Focaccia: Soft, fluffy focaccia drizzled with olive oil provides a fluffy texture that soaks up the soup's delicious broth perfectly.
  • Italian Red Wine: A glass of medium-bodied red wine enhances the flavors of the sausage and tomato sauce, rounding out your cozy meal.
  • Chocolate Mousse: End on a sweet note with a light and airy chocolate mousse, giving a luxurious touch that perfectly complements the savory soup.
  • Chips: A side of lightly salted tortilla chips can add a fun, crunchy element, enhancing your meal experience with contrasting texture.

Make Ahead Options

These Creamy Tortellini Soup with Sausage preparations are perfect for busy weeknights! You can chop the onion and mince the garlic up to 24 hours in advance, and store them in airtight containers to maintain their freshness. The soup itself can be cooked and then refrigerated for up to 3 days, but it’s best to add the tortellini and greens just before serving to keep them vibrant and tender. To finish, simply reheat the soup on the stove, adding the tortellini and greens in the last few minutes until everything is heated through. This way, you’ll enjoy a comforting, home-cooked meal with minimal effort!

Expert Tips for Creamy Tortellini Soup

  • Don’t Overcook: Keep an eye on the tortellini—if overcooked, they can become mushy. Aim for that perfect al dente texture for your Creamy Tortellini Soup with Sausage.

  • Texture Adjustments: For a thinner soup, simply add more broth or water as the soup simmers. This step helps maintain the right consistency, especially as it thickens.

  • Taste as You Go: Adjust seasoning as you prepare your soup. Don’t hesitate to tweak salt and pepper to match your family's tastes, ensuring a delightful flavor in every bite.

  • Vegetable Additions: Feel free to incorporate more veggies like carrots or bell peppers for added nutrition and color. This tweak not only enhances the dish but also boosts its comfort-food appeal.

  • Storing Leftovers: If you have any leftovers, store them in an airtight container in the fridge, and remember they can stay fresh for up to 3 days. Reheat gently to enjoy the creamy goodness later!

How to Store and Freeze Creamy Tortellini Soup with Sausage

Fridge: Store leftovers in an airtight container for up to 3 days, ensuring it's completely cooled before sealing to maintain freshness.

Freezer: For longer storage, freeze the soup in a freezer-safe container for up to 3 months. Leave some space at the top for expansion as it freezes.

Reheating: Thaw overnight in the fridge, then reheat gently on the stove over low heat, adding a splash of broth or water to restore creaminess.

Airtight Tip: Always use airtight containers to prevent freezer burn and maintain the delicious flavors of your Creamy Tortellini Soup with Sausage!

Creamy Tortellini Soup with Sausage Recipe FAQs

How do I choose the best Italian sausage for this soup?
Absolutely! When selecting Italian sausage, look for options that are fresh and have a good amount of fat for flavor. Sweet sausage will give you a milder taste, while spicy sausage can add a nice kick. If you're feeling adventurous, try a mix of both for more depth in flavor!

How should I store leftover Creamy Tortellini Soup?
Store leftovers in an airtight container in the fridge for up to 3 days. Be sure to cool the soup completely before sealing it to maintain its freshness. When you're ready to enjoy it again, simply reheat it on the stove over low heat, stirring occasionally until warmed thoroughly.

Can I freeze the Creamy Tortellini Soup with Sausage?
Yes, you can! To freeze, allow the soup to cool completely, then transfer it to a freezer-safe container, leaving some space at the top for expansion. It will stay fresh for up to 3 months. When you’re ready to savor it again, thaw it overnight in the fridge, and reheat gently on the stove, adding a splash of broth or water if needed to restore its creamy consistency.

What should I do if my tortellini become mushy?
Very useful question! To avoid mushy tortellini, be sure to follow the package instructions for cooking time closely—generally, it’s about 4-5 minutes until they float. If you notice they are starting to break apart, it’s best to remove them from the heat immediately. In the future, consider cooking them separately and adding them to the soup just before serving to maintain texture.

Can I modify this recipe to be gluten-free?
The more the merrier! For a gluten-free version, substitute regular tortellini with gluten-free tortellini. You can also use gluten-free all-purpose flour to thicken the soup. This way, everyone can enjoy a comforting bowl of Creamy Tortellini Soup with Sausage without any dietary concerns! Plus, be sure to check labels on other ingredients like broth and sausage to ensure they align with gluten-free diets.

Creamy Tortellini Soup with Sausage

Creamy Tortellini Soup with Sausage - Cozy Comfort in a Bowl

This Creamy Tortellini Soup with Sausage is a quick and hearty meal, perfect for chilly nights.
Print Recipe Pin Recipe
Prep Time 10 minutes mins
Cook Time 20 minutes mins
Total Time 30 minutes mins
Servings: 4 bowls
Course: Soups
Cuisine: Italian
Calories: 450
Ingredients Equipment Method Nutrition Notes

Ingredients
  

For the Soup Base
  • 1 lb Italian Sausage can use spicy or sweet
  • 1 medium Onion yellow or white
  • 3 cloves Garlic fresh preferred
  • 1 tsp Salt adjust to taste
  • 1/2 tsp Ground Black Pepper can substitute with white pepper
  • 2 tbsp All-Purpose Flour gluten-free flour can be used
  • 15 oz Tomato Sauce can substitute with crushed tomatoes
For the Tortellini and Cream
  • 9 oz Cheese Tortellini gluten-free if needed
  • 1 cup Heavy Cream half-and-half as a lighter alternative
For the Greens and Garnish
  • 2 cups Baby Spinach can also use Swiss chard or kale
  • 1 cup Kale substitute with other leafy greens
  • 1/4 cup Fresh Parsley for garnish

Equipment

  • Medium pot

Method
 

Step‑by‑Step Instructions
  1. In a medium pot, add the Italian sausage over medium heat. Use a wooden spoon to break it apart as it cooks, browning for about 5-7 minutes until no longer pink.
  2. Add the chopped onion and minced garlic to the pot, stirring them into the sausage mixture. Sauté for an additional 3-5 minutes, until the onion is translucent.
  3. Sprinkle in the salt, ground black pepper, and all-purpose flour, stirring to combine. Cook for 1-2 minutes until the mixture thickens slightly.
  4. Pour in the tomato sauce and bring the mixture to a gentle simmer for about 5 minutes, allowing the flavors to meld.
  5. Add the cheese tortellini, cooking according to package instructions, about 4-5 minutes. Stir occasionally until they float to the top.
  6. Reduce heat and stir in the heavy cream, baby spinach, and kale. Cook for an additional 2-3 minutes until the greens are wilted.
  7. Ladle the soup into bowls and garnish with freshly chopped parsley. Serve immediately.

Nutrition

Serving: 1bowlCalories: 450kcalCarbohydrates: 30gProtein: 25gFat: 25gSaturated Fat: 12gPolyunsaturated Fat: 1gMonounsaturated Fat: 10gCholesterol: 70mgSodium: 900mgPotassium: 600mgFiber: 3gSugar: 5gVitamin A: 50IUVitamin C: 20mgCalcium: 20mgIron: 15mg

Notes

Store leftovers in an airtight container for up to 3 days; can be frozen for up to 3 months.

Tried this recipe?

Let us know how it was!

Deliciously Hearty Lentil Stew for Cozy Nights In

September 9, 2025 by Grace Snow Leave a Comment

As the sun dips below the horizon and the chill of evening sets in, I find myself drawn to the heartwarming aromas wafting from my kitchen. There's something truly special about a Hearty Vegan Lentil Stew with Potatoes—it's like wrapping yourself in a cozy blanket on a cold night. This quick meal brings together earthy lentils and vibrant vegetables, all mingling in a rich broth that’s not only utterly satisfying but also a delightful vegan comfort food. Perfect for busy weeknights, this stew comes together in just 45 minutes, allowing you to enjoy a homemade dish without the fuss. Plus, it’s packed with nutrients to keep you feeling your best, whether you’re recharging after a long day or gathering around the table with loved ones. Are you ready to discover how to conjure up this comforting bowl of goodness at home?

Why is Lentil Stew the Ultimate Comfort Food?

Heartwarming, this lentil stew offers a cozy embrace on chilly evenings, making it the perfect dish to share with loved ones.
Nutritious, packed with fiber and protein, it supports a healthy lifestyle without sacrificing flavor.
Quick to Make, ready in just 45 minutes, it's a lifesaver for busy nights.
Versatile, customize it by adding greens or swapping lentils for chickpeas to keep things exciting!
Flavor-Packed, the spices and fresh ingredients create a symphony of taste that stands out among typical comfort foods.
If you love delightful stews, check out my Lamb Stew Hearty or try my Beans Greens Stew for more cozy meal ideas.

Ingredients

Lentil Stew Ingredients

For the Stew

  • Dry Brown Lentils – Core ingredient providing protein and texture; no soaking required for this lentil stew.
  • Olive Oil – For sautéing vegetables, adding richness; can substitute with avocado oil for a different flavor.
  • Onion (1 medium) – Provides a foundational flavor; shallots can be used for a milder taste.
  • Turmeric (½ teaspoon) – Adds warmth and color; cumin can work as a substitute if allergic.
  • Carrots (2 medium) – Adds sweetness and nutrition; consider parsnips for a unique twist in flavor.
  • Russet Potato (1 large) – Adds heartiness and absorbs flavors; sweet potato works well as a substitute.
  • Garlic (3 cloves) – Enhances overall flavor with aromatic depth.
  • Tomato Paste (2 tablespoons) – Adds depth and a bit of acidity; use pureed roasted red peppers for a different dimension.
  • Vegetable Broth (4 cups) – The base for the stew; while water can substitute, broth significantly enhances flavor.
  • Italian Seasoning (½ tablespoon) – Provides a balanced flavor profile; adjust according to your taste preferences.
  • Paprika (1 teaspoon) – Adds smokiness; smoked paprika can give additional depth to the dish.
  • Salt (½ teaspoon) – Essential for proper seasoning; adjust to your personal taste.
  • Ground Black Pepper (½ teaspoon) – Adds heat and flavor; freshly ground pepper provides the best results.

Step‑by‑Step Instructions for Hearty Vegan Lentil Stew with Potatoes

Step 1: Sauté the Aromatics
In a large saucepan, heat 2 tablespoons of olive oil over medium heat. Once the oil glistens, add one chopped medium onion and sauté for about 5 minutes, stirring frequently until the onion turns translucent and fragrant. This step lays the foundation of savory goodness for your lentil stew.

Step 2: Add the Spices
Next, add 3 minced garlic cloves along with ½ teaspoon of turmeric and 1 teaspoon of paprika. Stir the mixture and continue cooking for another minute, allowing the spices to bloom and release their aromas. This will infuse your stew with rich flavors and warmth before moving on to the vegetables.

Step 3: Incorporate the Vegetables
Stir in 2 tablespoons of tomato paste, mixing it well with the aromatic base. After a minute, add 2 chopped medium carrots and 1 cubed large russet potato, stirring everything together. Cook for about 3-4 minutes to soften the vegetables, enhancing their natural sweetness before introducing the lentils.

Step 4: Introduce Lentils and Broth
Now it's time to add 1 cup of dry brown lentils and pour in 4 cups of vegetable broth. Increase the heat to high, bringing everything to a rolling boil. Once boiling, reduce the heat immediately to low and cover the pan, allowing it to simmer. This ensures that the lentils cook evenly while absorbing all those amazing flavors.

Step 5: Season and Simmer
Add ½ tablespoon of Italian seasoning, ½ teaspoon of salt, and ½ teaspoon of ground black pepper, stirring well to incorporate the seasonings throughout the stew. Maintain the simmer for about 35 minutes, or until the lentils and vegetables are tender and the stew thickens beautifully.

Step 6: Final Touches
After cooking, taste the stew and adjust the seasonings if needed. For an extra brightness, consider adding a splash of vinegar or lemon juice right before serving. This finishing touch elevates the flavors of your hearty vegan lentil stew, making each bite truly delightful.

What to Serve with Hearty Vegan Lentil Stew with Potatoes

When it comes to enjoying this comforting stew, the right accompaniments can elevate your meal to new heights.

  • Crusty Bread: Perfect for dipping, the chewiness of artisan bread enhances the hearty nature of the stew.

  • Quinoa: This light, fluffy grain adds a nutty flavor and extra protein, making it a nutritious pairing that complements the lentils.

  • Fresh Green Salad: A bright salad with mixed greens, cherry tomatoes, and a tangy vinaigrette provides a refreshing contrast to the warmth of the stew.

  • Roasted Vegetables: Crispy, caramelized vegetables like Brussels sprouts or carrots enhance the earthy tones of the lentil dish with their natural sweetness.

  • Hummus and Veggies: A side of vibrant hummus paired with crunchy carrot and cucumber sticks adds a delightful texture, making it perfect for munching between bites.

  • Lemonade or Iced Tea: A refreshing drink like homemade lemonade or iced tea complements the rich flavors and adds a zesty finish to your meal.

Expert Tips for Lentil Stew

  • Even Cuts: Ensure vegetables are cut evenly for consistent cooking time and to achieve the perfect texture throughout your lentil stew.
  • Thickening Trick: If your stew turns out too thick, simply add a bit more vegetable broth or water to reach your desired consistency without losing flavor.
  • Flavor Boost: Consider finishing your stew with a handful of fresh herbs like parsley or cilantro. It adds a vibrant touch that enhances the overall taste.
  • Adjust Seasonings: Always taste your stew before serving. Adjust the salt, pepper, and spices to match your personal preference for a fully customized lentil stew experience.
  • Storage Savvy: If you have leftovers, refrigerate them in an airtight container for up to 5 days. This stew also freezes beautifully for meal prep convenience.

Make Ahead Options

Preparing your Hearty Vegan Lentil Stew with Potatoes in advance is a fantastic way to save time during busy weeknights! You can chop all your vegetables and combine the dry lentils in a container up to 24 hours ahead. Simply refrigerate it, which helps maintain their freshness and quality. When you're ready to cook, heat your olive oil, sauté the aromatics, and then add your prepped ingredients along with the broth. Simmer until everything is tender—making sure to adjust the seasoning as needed. This method allows you to enjoy a warm, homemade meal that feels just as delicious without the last-minute rush!

How to Store and Freeze Lentil Stew

Fridge: Store your lentil stew in an airtight container for up to 5 days. Make sure to let it cool before sealing to maintain freshness.

Freezer: For longer storage, freeze the lentil stew in portions for up to 3 months. Use freezer-safe containers or bags, removing excess air to prevent freezer burn.

Thawing: When ready to enjoy, thaw the lentil stew overnight in the fridge. Reheat gently on the stove or in the microwave, adding a splash of vegetable broth if desired.

Reheating: Reheat the stew over medium heat until warmed through. Stir occasionally and add water or broth to achieve your desired consistency if it thickens too much.

Lentil Stew Variations & Substitutions

Get ready to personalize your lentil stew with these delightful twists that will tickle your taste buds and warm your heart!

  • Greens Boost: Add chopped spinach or kale in the last few minutes of cooking for a pop of color and nutrients. The greens wilt beautifully, enhancing the stew’s texture and flavor.

  • Legume Swap: Replace lentils with chickpeas or black beans for a different legume experience. Each option brings its own unique flavor while maintaining the hearty quality of the dish.

  • Spicy Kick: Spice it up with chili flakes or fresh chili peppers according to your heat preference. A little extra kick can transform this cozy dish into a fiery delight!

  • Sweet Potato Substitute: Swap out the russet potato for sweet potato for a subtly sweet flavor and creamy texture. It adds a touch of natural sweetness that complements the spices wonderfully.

  • Richer Broth: Use homemade vegetable broth instead of store-bought for a deeper, more complex flavor profile. It’s an easy way to elevate your stew while ensuring every bite bursts with goodness.

  • Different Seasonings: Try adding cumin or coriander for a different spice profile. These spices can introduce a warm, earthy flavor that pairs beautifully with the lentils and veggies.

  • Creamy Variation: Stir in a splash of coconut milk or a dollop of vegan sour cream right before serving for a creamy, indulgent finish. It adds richness and a hint of sweetness to the stew.

If you’re looking to explore further, don’t miss out on my hearty Lamb Stew Hearty or discover the delightful flavors in my Beans Greens Stew. Each of these recipes offers unique twists on comforting stews!

Hearty Vegan Lentil Stew with Potatoes Recipe FAQs

How do I choose ripe ingredients for my lentil stew?
Absolutely! For maximum flavor and nutrition, select firm, blemish-free vegetables. Look for onions that feel heavy and smell sweet, as well as potatoes that are smooth and free of dark spots. Carrots should be crisp and vibrant in color. When it comes to lentils, ensure they are dry and free from any odors, as this indicates freshness.

What is the best way to store lentil stew?
Very! To store your lentil stew, let it cool completely, then transfer it into an airtight container and refrigerate for up to 5 days. If you're keeping it longer, place it in freezer-safe containers, ensuring you remove as much air as possible to prevent freezer burn. Properly stored, it can last in the freezer for up to 3 months.

Can I freeze my lentil stew? How do I do it?
Absolutely! To freeze your lentil stew, first make sure it’s cooled completely. Portion out the stew into freezer-safe bags or containers, labeling them with the date. Lay bags flat in the freezer for easier storage. When ready to enjoy, thaw overnight in the refrigerator, then reheat in a saucepan over medium heat, stirring occasionally and adding a splash of broth if necessary to adjust the consistency.

What are some common troubleshooting tips for lentil stew?
If your lentil stew turns out too thick, simply add a little more vegetable broth or water to reach your desired consistency. Should it taste bland, consider adjusting your seasonings—more salt, pepper, or a dash of vinegar can make all the difference! If using different vegetables, keep an eye on cooking times, as they can affect overall tenderness.

Are there any dietary considerations I should take into account?
Very! This lentil stew is naturally vegan and packed with nutrients, being an excellent choice for both vegan and vegetarian diets. However, if you're making it for pets, avoid sharing as garlic and onions can be harmful to them. Always double-check for any allergies among your guests—substitutes for allergens are easily managed within this recipe, with alternatives suggested throughout.

What can I do with leftover lentil stew?
I often make extra for meal prep goodness! Leftover lentil stew can be repurposed by adding it to a grain bowl or using it as a filling for wraps or tacos. You can even blend it into a soup for a smoother texture, or toss it with cooked pasta for a heartier meal. The possibilities are endless, so feel free to get creative!

Lentil Stew

Deliciously Hearty Lentil Stew for Cozy Nights In

Enjoy a comforting bowl of vegan lentil stew, perfect for cozy nights with loved ones.
Print Recipe Pin Recipe
Prep Time 10 minutes mins
Cook Time 35 minutes mins
Total Time 45 minutes mins
Servings: 4 bowls
Course: Soups
Cuisine: Vegan
Calories: 320
Ingredients Equipment Method Nutrition Notes

Ingredients
  

For the Stew
  • 1 cup Dry Brown Lentils No soaking required
  • 2 tablespoons Olive Oil Can substitute with avocado oil
  • 1 medium Onion Shallots can be used for a milder taste
  • 0.5 teaspoon Turmeric Cumin can be used as a substitute if allergic
  • 2 medium Carrots Consider parsnips for a unique twist
  • 1 large Russet Potato Sweet potato is a suitable substitute
  • 3 cloves Garlic Minced
  • 2 tablespoons Tomato Paste Use pureed roasted red peppers for a different flavor
  • 4 cups Vegetable Broth Broth enhances flavor compared to water
  • 0.5 tablespoon Italian Seasoning Adjust to taste preferences
  • 1 teaspoon Paprika Smoked paprika adds depth
  • 0.5 teaspoon Salt Adjust according to taste
  • 0.5 teaspoon Ground Black Pepper Freshly ground is best

Equipment

  • Large saucepan

Method
 

Cooking Instructions
  1. In a large saucepan, heat 2 tablespoons of olive oil over medium heat. Once the oil glistens, add one chopped medium onion and sauté for about 5 minutes, stirring frequently until the onion turns translucent and fragrant.
  2. Next, add 3 minced garlic cloves along with ½ teaspoon of turmeric and 1 teaspoon of paprika. Stir the mixture and continue cooking for another minute.
  3. Stir in 2 tablespoons of tomato paste, mix it well with the aromatic base, then add 2 chopped medium carrots and 1 cubed large russet potato, stirring everything together.
  4. Now add 1 cup of dry brown lentils and pour in 4 cups of vegetable broth. Bring everything to a rolling boil, then reduce heat to low and cover.
  5. Add ½ tablespoon of Italian seasoning, ½ teaspoon of salt, and ½ teaspoon of ground black pepper, stirring well. Maintain the simmer for about 35 minutes.
  6. After cooking, taste the stew and adjust the seasonings if needed, then consider adding a splash of vinegar or lemon juice before serving.

Nutrition

Serving: 1bowlCalories: 320kcalCarbohydrates: 50gProtein: 18gFat: 8gSaturated Fat: 1gPolyunsaturated Fat: 2gMonounsaturated Fat: 4gSodium: 600mgPotassium: 800mgFiber: 15gSugar: 5gVitamin A: 3000IUVitamin C: 20mgCalcium: 50mgIron: 4mg

Notes

Allow the stew to cool before placing it in an airtight container if storing. This stew also freezes beautifully for meal prep.

Tried this recipe?

Let us know how it was!

Cozy Broccoli Beer Cheese Soup for Ultimate Comfort

September 4, 2025 by Grace Snow Leave a Comment

There’s something magical about cozying up with a bowl of warm, creamy Broccoli Beer Cheese Soup on a chilly evening. This recipe transforms simple ingredients into an indulgent experience that’s surprisingly easy to whip up. With rich cheddar cheese melting into tender pieces of broccoli, you’ll find comfort in every spoonful. Not only is this dish a definite crowd-pleaser, but it’s also freezer-friendly—ideal for those busy nights when homemade meals are a must. Plus, it can be made with non-alcoholic beer, so everyone can enjoy! Ready to dive into this cheesy delight? Let’s get cooking and discover the joy of this comforting soup together!

Why is This Soup a Must-Try?

Creamy Comfort: This Broccoli Beer Cheese Soup is the epitome of cozy cooking, offering a rich, smooth texture that wraps you in warmth with every bite.

Quick and Easy: With just under an hour for preparation, it’s the perfect solution for busy weeknights when you crave homemade goodness without the fuss.

Crowd-Pleaser: Packed with cheesy goodness and fresh veggies, it’s sure to please everyone at your table—perfect for family dinners or gatherings with friends.

Versatile Ingredients: Don’t hesitate to customize! Whether you swap the broccoli for cauliflower or toss in some kale, your hearty meal can easily adapt to your pantry ingredients.

Freezer-Friendly: Make a big batch for future meals! This soup stores beautifully, ensuring you always have a delicious homemade option ready, just like a comforting Asparagus Soup Healthy waiting in your freezer.

Broccoli Beer Cheese Soup Ingredients

For the Soup Base
• Butter – Adds richness and is perfect for sautéing vegetables.
• Celery (5 ribs) – Provides a foundational flavor; finely chopped.
• Carrots (3 medium) – Brings sweetness and color to the mix; finely chopped.
• Onion (1 small) – Enhances flavor depth; finely chopped.
• Broccoli florets (4 cups) – The star ingredient, loaded with nutrients; chopped.
• Sweet red pepper (1/4 cup) – Adds a touch of sweetness; chopped.
• Chicken broth (4 cans, 14.5 oz each) – Provides a flavorful liquid base for the soup.
• Pepper (1/2 teaspoon) – Enhances the overall flavor profile.

For Thickening
• All-purpose flour (1/2 cup) – Helps thicken the soup for a creamy texture.
• Water (1/2 cup) – Mix with flour to create a smooth paste before adding to the soup.

For the Cheesy Finish
• Shredded cheddar cheese (3 cups) – The primary cheese that gives this Broccoli Beer Cheese Soup its rich, melty goodness.
• Cream cheese (8 oz) – Adds extra creaminess; cube it for easy mixing.
• Beer (12 oz bottle) – Deepens the flavor; feel free to substitute with non-alcoholic beer.

Optional Toppings
• Shredded cheese – Take that cheesiness up a notch!
• Bacon – Adds a crispy, savory element.
• Green onions – Gives a fresh, zesty finish.
• Sour cream – Adds a delightful creaminess on top.
• Croutons – For that satisfying crunch.
• Soft pretzel bites – Perfect for dipping and a fun addition!

Step‑by‑Step Instructions for Broccoli Beer Cheese Soup

Step 1: Sauté Vegetables
In a Dutch oven, melt 4 tablespoons of butter over medium-high heat. Add finely chopped celery, carrots, and onion, stirring frequently until the vegetables are crisp-tender, about 5 minutes. You want them to soften slightly and become aromatic while giving your kitchen a cozy vibe.

Step 2: Add Broccoli and Broth
Stir in 4 cups of chopped broccoli florets and 1/4 cup of sweet red pepper to the pot. Pour in 4 cans of chicken broth and add 1/2 teaspoon of pepper. Bring everything to a gentle simmer, allowing the flavors to meld, which should take around 5 minutes, helping infuse the broth with that lovely veggie goodness.

Step 3: Thicken the Soup
In a small bowl, mix 1/2 cup of all-purpose flour with 1/2 cup of water until smooth. Gradually stir this paste into the pot, mixing well to avoid lumps. Bring the mixture to a boil, then reduce the heat and let it simmer uncovered for 25-30 minutes, until the soup thickens and the vegetables are tender.

Step 4: Melt Cheeses
Once the soup has thickened, reduce the heat to low and slowly stir in 3 cups of shredded cheddar cheese and 8 ounces of cubed cream cheese. Keep stirring until the cheeses melt into the Broccoli Beer Cheese Soup, creating a luscious, creamy texture. Be careful not to let it boil at this stage to maintain that smooth finish.

Step 5: Serve
Ladle the warm, comforting broccoli beer cheese soup into bowls, garnishing with your choice of toppings such as shredded cheese, crispy bacon, or green onions. Enjoy this delightful dish hot as a heartwarming meal that brings a smile to everyone’s face.

Expert Tips for Broccoli Beer Cheese Soup

• Use Room Temperature Cream Cheese: Allow cream cheese to come to room temperature or soften it in the microwave, ensuring it blends smoothly into the soup without clumping.

• Stir Continuously: When adding the cheeses, stir the soup continuously to promote even melting and keep that creamy consistency.

• Adjust Thickness: For a thicker Broccoli Beer Cheese Soup, add an extra tablespoon of flour during mixing or simmer it a bit longer until you reach your desired consistency.

• Fresh Ingredients Matter: Fresh broccoli and vegetables elevate the flavor significantly. Avoid overcooked or wilted ingredients for the best results.

• Taste and Season: Always taste your soup before serving! Adjust seasoning as needed, perhaps adding more pepper or salt to enhance the flavors.

What to Serve with Broccoli Beer Cheese Soup

Cozy up your dinner table with delightful sides that perfectly complement the warmth of this creamy soup.

  • Crusty Bread: Ideal for dipping, a warm, crusty baguette enhances the cheesy broth while adding a satisfying crunch with every bite.
  • Garden Salad: A fresh mix of greens, cherry tomatoes, and cucumbers provides a crisp contrast to the rich soup, balancing out flavors beautifully.
  • Garlic Parmesan Roasted Potatoes: These golden-brown bites offer a savory crunch that pairs wonderfully with the creamy texture of the soup. They’re a match made in comfort-food heaven!
  • Soft Pretzel Bites: Fun to dip and perfect for sopping up extra cheese, these treats echo the beer element while adding a unique twist.
  • Stuffed Mushrooms: Filled with cheese and herbs, these bite-sized delights add an earthy component that goes hand-in-hand with the broccoli flavor.
  • Apple Crisp: For a sweet ending, this comforting dessert brings a fruity freshness and comforting warmth that balances the cheesy soup perfectly.
  • Light Beer or Sparkling Water: Complement the richness of the soup with a light beer or refreshing sparkling water; both elevate the dining experience.
  • Pickled Vegetables: Their tangy crunch can cut through the creamy soup, creating a delightful complexity on your palate.

Storage Tips for Broccoli Beer Cheese Soup

Fridge: Store leftover Broccoli Beer Cheese Soup in an airtight container for up to 3 days to maintain its creamy texture and flavor.

Freezer: This soup is freezer-friendly! Cool completely before transferring to freezer-safe containers and store for up to 3 months.

Thawing: To enjoy your frozen soup, thaw it overnight in the refrigerator before reheating on the stovetop. Stir gently to restore creaminess.

Reheating: When reheating, do so over low heat and stir frequently to avoid curdling the cheese. Add a splash of broth or water if the soup is too thick.

Broccoli Beer Cheese Soup: Fun Variations

Let your creativity shine by using these delightful twists and substitutions in your Broccoli Beer Cheese Soup!

  • Cauliflower Swap: Substitute broccoli with cauliflower for a milder flavor. The result is just as creamy and comforting.

  • Dairy-Free Option: Use plant-based alternatives like coconut cream and nutritional yeast for a rich, cheesy flavor without dairy. Perfect for vegans!

  • Spicy Version: Add red pepper flakes or diced jalapeños to bring some heat. The spiciness can elevate the overall flavor and warmth of your soup.

  • Different Cheeses: Try swapping cheddar with gouda for a smoky twist, or use pepper jack for an extra kick. Each cheese brings a unique layer of flavor.

  • Add Greens: Toss in kale or spinach right before serving for a nutrient boost. Their vibrant colors will complement the soup beautifully.

  • Smoky Bacon Crumbles: Enhance the savory taste with crispy bacon bits sprinkled on top. They add crunch and depth, making each spoonful a treat.

  • Non-Alcoholic Beer: If you prefer to keep it alcohol-free, opt for non-alcoholic beer for a similar flavor profile without the alcohol content.

  • Cheesy Topping: Elevate your presentation with crispy cheese chips. Simply bake shredded cheese until golden for an impressive garnish that enhances the cheesy goodness!

These variations are sure to keep your family excited about their bowl of Broccoli Beer Cheese Soup, just as you’d find in comforting dishes like a hearty Lemon Chicken Soup or a delightful Zuppa Toscana Soup. Enjoy experimenting!

Make Ahead Options

These Broccoli Beer Cheese Soup options are perfect for busy home cooks looking to save time! You can chop the vegetables (celery, carrots, onion, and broccoli) up to 24 hours in advance and store them in an airtight container in the refrigerator to maintain freshness. Additionally, you can prepare the soup base (without the cheeses) up to 3 days ahead, allowing the flavors to develop. When ready to serve, simply reheat the soup, stir in the cheddar and cream cheese until melted, and enjoy a deliciously comforting meal without the hassle. This way, you get all the homemade goodness with minimal effort on dinner night!

Broccoli Beer Cheese Soup Recipe FAQs

How do I choose fresh broccoli for my soup?
Absolutely! When selecting broccoli, look for vibrant green florets that are tightly closed. Avoid any that have yellowing leaves or dark spots all over, as these are signs of aging. Fresh broccoli should feel firm to the touch and make a crisp sound when you snap off a stalk.

What’s the best way to store leftover Broccoli Beer Cheese Soup?
Very! Store your leftover soup in an airtight container in the refrigerator for up to 3 days. If you’d like to keep it longer, you can freeze it. Be sure to let the soup cool entirely before transferring it to freezer-safe containers to prevent freezer burn.

Can I freeze Broccoli Beer Cheese Soup? If so, how?
Certainly! To freeze your soup, allow it to cool completely after cooking. Then, pour it into freezer-safe containers or heavy-duty zip-top bags, leaving some space at the top for expansion. Label with the date and freeze for up to 3 months. When you're ready to enjoy it again, simply thaw it overnight in the refrigerator before reheating gently on the stovetop.

What if my soup is too thick?
That’s a common concern! If you find your Broccoli Beer Cheese Soup turns out thicker than you'd like, simply stir in a splash of chicken broth or water until you reach your desired consistency. Heat it over low while stirring continuously to ensure a smooth texture without clumping.

Is there a non-dairy option for this recipe?
Yes, indeed! For a dairy-free version, you can substitute the cheddar cheese and cream cheese with cashew cream or a vegan cheese alternative. Additionally, ensure your chicken broth is vegetable-based and use a plant-based butter substitute for a fully dairy-free dish.

Can I make this soup with non-alcoholic beer?
Absolutely! Non-alcoholic beer works just as beautifully in this Broccoli Beer Cheese Soup, adding that same depth of flavor without the alcohol. Just substitute it in a 1:1 ratio, and you’ll still achieve that delicious, hearty taste!

Broccoli Beer Cheese Soup

Cozy Broccoli Beer Cheese Soup for Ultimate Comfort

This cozy Broccoli Beer Cheese Soup combines rich cheddar cheese and tender broccoli for ultimate comfort.
Print Recipe Pin Recipe
Prep Time 15 minutes mins
Cook Time 35 minutes mins
Total Time 50 minutes mins
Servings: 6 servings
Course: Soups
Cuisine: American
Calories: 350
Ingredients Equipment Method Nutrition Notes

Ingredients
  

For the Soup Base
  • 4 tablespoons butter Adds richness and is perfect for sautéing vegetables.
  • 5 ribs celery Provides a foundational flavor; finely chopped.
  • 3 medium carrots Brings sweetness and color to the mix; finely chopped.
  • 1 small onion Enhances flavor depth; finely chopped.
  • 4 cups broccoli florets The star ingredient, loaded with nutrients; chopped.
  • 1/4 cup sweet red pepper Adds a touch of sweetness; chopped.
  • 4 cans chicken broth Provides a flavorful liquid base for the soup.
  • 1/2 teaspoon pepper Enhances the overall flavor profile.
For Thickening
  • 1/2 cup all-purpose flour Helps thicken the soup for a creamy texture.
  • 1/2 cup water Mix with flour to create a smooth paste before adding to the soup.
For the Cheesy Finish
  • 3 cups shredded cheddar cheese The primary cheese that gives this soup its rich, melty goodness.
  • 8 oz cream cheese Adds extra creaminess; cube it for easy mixing.
  • 12 oz beer Deepens the flavor; feel free to substitute with non-alcoholic beer.
Optional Toppings
  • shredded cheese Take that cheesiness up a notch!
  • bacon Adds a crispy, savory element.
  • green onions Gives a fresh, zesty finish.
  • sour cream Adds a delightful creaminess on top.
  • croutons For that satisfying crunch.
  • soft pretzel bites Perfect for dipping and a fun addition!

Equipment

  • Dutch oven

Method
 

Step‑by‑Step Instructions
  1. In a Dutch oven, melt 4 tablespoons of butter over medium-high heat. Add finely chopped celery, carrots, and onion, stirring frequently until the vegetables are crisp-tender, about 5 minutes.
  2. Stir in 4 cups of chopped broccoli florets and 1/4 cup of sweet red pepper to the pot. Pour in 4 cans of chicken broth and add 1/2 teaspoon of pepper. Bring everything to a gentle simmer for about 5 minutes.
  3. In a small bowl, mix 1/2 cup of all-purpose flour with 1/2 cup of water until smooth. Gradually stir this paste into the pot, mixing well to avoid lumps. Bring to a boil, then reduce heat and let it simmer uncovered for 25-30 minutes.
  4. Reduce heat to low, gradually stir in 3 cups of shredded cheddar cheese and 8 ounces of cubed cream cheese, stirring until fully melted.
  5. Ladle the soup into bowls, garnishing with your choice of toppings like shredded cheese, crispy bacon, or green onions.

Nutrition

Serving: 1bowlCalories: 350kcalCarbohydrates: 30gProtein: 15gFat: 20gSaturated Fat: 10gPolyunsaturated Fat: 1gMonounsaturated Fat: 6gCholesterol: 60mgSodium: 800mgPotassium: 600mgFiber: 5gSugar: 4gVitamin A: 2000IUVitamin C: 60mgCalcium: 300mgIron: 2mg

Notes

Use room temperature cream cheese for smooth blending. Taste and adjust seasoning as needed.

Tried this recipe?

Let us know how it was!

Firehouse Chili: A Hearty Hug in a Bowl of Comfort

September 4, 2025 by Grace Snow Leave a Comment

As I stirred the pot on a cool autumn afternoon, the fragrant aroma of my Firehouse Chili started to fill the kitchen, instantly transporting me to a cozy, fire-lit gathering. This hearty comfort food is more than just a warm meal; it’s a robust blend of flavors that brings friends and family together during chilly days. What I love most about this Firehouse Chili is its versatility—whether you prefer it packed with zesty beef or a vegetarian twist, the customization options are endless! With high-protein goodness and a satisfying texture from tender beans and vibrant veggies, this dish is sure to please a hungry crowd while keeping your cooking time efficient. Are you ready to uncover the secrets to your new favorite chili recipe?

Why Is Firehouse Chili So Special?

Hearty, Comforting Flavor: This Firehouse Chili is the quintessential comfort food, embodying a warm hug in a bowl, perfect for chilly evenings.
Versatile Ingredients: Feel free to mix and match beans or meat alternatives, making it adaptable for any taste preference.
Quick Cooking: It simmers away effortlessly, allowing you to focus on your favorite cornbread or salad while it cooks.
Crowd-Pleaser: Whether hosting a game day or a cozy dinner, this dish is guaranteed to impress and satisfy everyone at the table.
Nutritious Goodness: Packed with high-protein ingredients and vibrant veggies, it’s a nourishing option that keeps you fueled and happy.

Firehouse Chili Ingredients

For Cooking
• Canola Oil – Cooking fat that helps prevent sticking; substitute with olive oil for a flavor boost.
• Lean Ground Beef (90% lean) – Main protein source that provides essential nutrition; ground turkey is a healthy alternative.

For Vegetables
• Onions – They add a touch of sweetness and depth; yellow onions are preferable for this chili.
• Green Pepper – Contributes a crunchy texture and bold flavor; red or yellow bell peppers could enhance sweetness.

For the Chili Base
• Kidney Beans – High in protein and fiber; try black beans or pinto beans if you want a different taste or texture.
• Stewed Tomatoes – Adds acidity and sweetness; crushed tomatoes can be an effective alternative for a smoother mix.
• Beef Broth – Gives richness to the chili; vegetable broth works perfectly for a vegetarian version.

For the Spice Mix
• Chili Powder – The star spice that delivers the heat; adjust based on your desired spice level.
• Ground Coriander – Enhances the chili’s flavor; in a pinch, ground cumin can work as a substitute.
• Ground Cumin – Provides unbeatable earthiness; essential for that authentic Firehouse Chili flavor.

For Aroma and Depth
• Garlic Cloves – Boosts aroma and richness; dried garlic powder can be used if fresh isn't on hand.
• Dried Oregano – Introduces herbal notes to your dish; feel free to swap in Italian seasoning if preferred.

This Firehouse Chili is sure to warm your heart and your kitchen! Add your own twist with the ingredients to make it just the way you like.

Step‑by‑Step Instructions for Firehouse Chili

Step 1: Brown the Meat
In a large Dutch oven, heat 2 tablespoons of canola oil over medium heat until shimmering. Add the 1 pound of lean ground beef in batches, breaking it apart as it cooks. Sauté for about 5-7 minutes until browned and no longer pink, ensuring even cooking. Drain excess fat and set the browned beef aside while maintaining the flavorful drippings in the pot.

Step 2: Cook Vegetables
In the same pot, add 1 chopped onion and 1 chopped green pepper. Stir occasionally, cooking over medium heat for about 5-6 minutes, until the onion becomes translucent and tender. The aroma will be inviting as the vegetables soften and blend with the remaining beef drippings, creating the perfect base for your Firehouse Chili.

Step 3: Combine Ingredients
Return the browned beef to the pot and stir in 1 can of drained kidney beans, 1 can of stewed tomatoes, and 1 cup of beef broth. Sprinkle in the chili powder, ground coriander, ground cumin, and 1-2 minced garlic cloves. Stir well for about 1 minute, ensuring all ingredients are evenly incorporated and coated with the rich spices for a robust flavor profile.

Step 4: Simmer the Chili
Bring the mixture to a rolling boil over medium-high heat, then reduce the heat to low. Cover the pot and let your Firehouse Chili simmer for approximately 1.5 to 2 hours. Stir occasionally, checking that the chili doesn’t stick to the bottom of the pot. The chili is ready when it thickens and the flavors meld beautifully, creating an irresistible aroma.

Step 5: Serve with Love
Once your Firehouse Chili has simmered to perfection, remove it from heat. Serve it hot in generous bowls, garnished with chopped green onions or shredded cheese if desired. This hearty chili is perfect with a side of cornbread or a fresh salad, providing a cozy and satisfying meal for friends and family.

Expert Tips for Firehouse Chili

  • Avoid Overcrowding: When browning the ground beef, avoid overcrowding the pot. This ensures even cooking and a beautiful brown color without steaming.
  • Adjust Spice Levels: Taste as you go! Start with less chili powder and adjust according to your heat preference; you can always add more, but you can’t take it out.
  • Cooling for Storage: Allow your chili to cool completely before refrigerating or freezing leftovers. This helps preserve flavor and prevents bacterial growth.
  • Flavor Deepening: If you have time, let your Firehouse Chili sit for a bit after cooking. The flavors will deepen and meld together, making it even tastier.
  • Ingredient Substitutes: Feel free to experiment! Use black beans instead of kidney beans for a different texture or add lentils for a vegetarian version.
  • Serve with Sides: Pair your chili with cornbread or tortilla chips for an amazing contrast in textures and to soak up every last drop of your hearty dish!

What to Serve with Firehouse Chili?

The perfect meal is about balance, and with a dish as hearty as Firehouse Chili, you'll want delightful pairings that elevate your dining experience.

  • Cornbread: A sweet, buttery cornbread complements the spicy chili perfectly, absorbing all those rich flavors. Serve it warm with a drizzle of honey for added indulgence.

  • Fresh Garden Salad: Crisp greens tossed with a zesty vinaigrette provides a refreshing contrast to the chili's richness. Consider adding avocado or cherry tomatoes for a pop of color and freshness.

  • Tortilla Chips: Crunchy and salty, these are perfect for dipping into your chili. They add a delightful texture and can even make it more fun for gatherings.

  • Sour Cream or Greek Yogurt: A cool dollop of sour cream balances the heat while adding creamy goodness. It’s an essential topping that enhances every spoonful.

  • Cheddar Cheese: Shredded sharp cheddar melts beautifully over the hot chili. It adds richness and a burst of flavor that harmonizes with each bite.

  • Spicy Pickles: If you love extra heat, serve spicy pickles on the side. Their tangy crunch complements the robust chili flavor while providing an exciting twist.

  • Iced Tea or Lemonade: A refreshing beverage like sweet iced tea or tart lemonade enhances the chili's warmth, quenching your thirst after each hearty bite.

  • Brownies: For a sweet finish, serve fudgy brownies. Their rich chocolate flavor is a delightful contrast to the savory chili, making for a satisfying end to the meal.

Storage Tips for Firehouse Chili

  • Fridge: Store leftover Firehouse Chili in airtight containers for up to 3 to 4 days. Allow it to cool completely before sealing to maintain its delicious flavors.
  • Freezer: For longer storage, freeze the chili in portions for up to 3 months. Use freezer-safe containers or resealable bags, removing as much air as possible.
  • Reheating: When ready to enjoy, thaw in the fridge overnight and reheat on the stovetop over low heat until warmed through. Stir occasionally for even heating.
  • Microwave: You can also reheat individual servings in the microwave for 2-3 minutes, stirring halfway, ensuring the chili is piping hot before serving.

Make Ahead Options

These Firehouse Chili options are perfect for busy home cooks looking to save time on busy weeknights! You can prep the base ingredients—brown the meat, chop the veggies, and mix the spices—up to 24 hours in advance. Store everything together in an airtight container in the refrigerator to maintain freshness. On the day you're ready to cook, simply combine them in your pot with the other ingredients and simmer for about 1.5 to 2 hours. For longer storage, you can also freeze the chili after cooking for up to 3 months, and then reheat it when needed for a quick and comforting meal that’s just as delicious as the day you made it!

Firehouse Chili Variations & Substitutions

Customize your Firehouse Chili to create a unique dish that’s all your own—let your culinary creativity shine!

  • Dairy-Free: Use almond or coconut milk instead of beef broth for a creamy, non-dairy alternative while keeping the flavors rich.
  • Spicy Kick: Add diced jalapeños or cayenne powder to increase the heat; tailor it to your preference for a chili that bites back!

For those who enjoy a different spin:

  • Chili Verde: Substitute stewed tomatoes with green salsa and add tomatillos for a tangy twist that’s bright and fresh.
  • Different Beans: Swap kidney beans for black beans or white beans based on preference; each will add a unique texture.

Want to go vegetarian?

  • Vegetarian Version: Omit the beef entirely and use lentils, chickpeas, or extra beans as hearty protein-packed alternatives—delicious enough for anyone!

  • Chili Mac: Serve over cooked pasta and sprinkle with shredded cheese for a comforting twist that creates a complete meal.

  • Smoky Flavor: Add smoked paprika or a splash of liquid smoke to elevate the depth of flavor, giving your chili a smoky, barbecue essence.

By trying these variations, you'll discover exciting new flavors, just like my beloved classic recipes! Plus, if you want a refreshing side, consider pairing with homemade cornbread or a crisp side salad to complement your dish beautifully. Enjoy exploring the possibilities!

Firehouse Chili Recipe FAQs

What type of beans should I use in my Firehouse Chili?
Absolutely! Kidney beans are a great choice for traditional Firehouse Chili, as they provide excellent protein and fiber. However, feel free to swap them for black beans or pinto beans if you prefer a different flavor or texture. The more the merrier when it comes to finding the perfect combination!

How do I store leftover Firehouse Chili?
For optimal freshness, store your leftover Firehouse Chili in airtight containers in the refrigerator for up to 3 to 4 days. Always allow the chili to cool completely before sealing the containers, which helps maintain its wonderful flavors and prevents bacterial growth. Just be sure to enjoy it quickly—it's always better fresh!

Can I freeze Firehouse Chili?
Yes, you can freeze your Firehouse Chili! To do so, divide it into portions and place it in freezer-safe containers or resealable bags, removing as much air as possible. It can be kept in the freezer for up to 3 months. When ready to enjoy, thaw it in the fridge overnight and then reheat on the stove or in the microwave until piping hot.

What if my Firehouse Chili is too spicy?
Very! If you find your chili to be a bit too spicy for your taste, don’t worry. You can help mellow it out by adding a dollop of sour cream or cream cheese when serving. Alternatively, add more beef broth or canned tomatoes to dilute the heat. Sweetening it with a bit of sugar or brown sugar can also help balance the spice levels.

How can I make Firehouse Chili vegetarian?
You can easily adapt this recipe for a vegetarian version! Simply omit the ground beef and replace it with lentils or extra beans for a hearty texture. Use vegetable broth instead of beef broth and feel free to load up on more veggies for added flavor and nutrition. It's a delightful twist on the classic that even meat-lovers will enjoy!

Can my pets eat Firehouse Chili?
No, it’s best to keep Firehouse Chili away from pets. The spices, especially garlic and onions, can be toxic to dogs and cats. If you want to share a little something with your furry friends, consider cooking plain, unseasoned meat or beans just for them. Safety first!

These questions and answers should help you get the most out of your Firehouse Chili cooking adventure!

Firehouse Chili

Firehouse Chili: A Hearty Hug in a Bowl of Comfort

Firehouse Chili is a hearty comfort food, perfect for chilly evenings, offering robust flavors and versatility for customizations.
Print Recipe Pin Recipe
Prep Time 15 minutes mins
Cook Time 2 hours hrs
Total Time 2 hours hrs 15 minutes mins
Servings: 6 servings
Course: Soups
Cuisine: American
Calories: 300
Ingredients Equipment Method Nutrition Notes

Ingredients
  

For Cooking
  • 2 tablespoons canola oil Substitute with olive oil for a flavor boost
  • 1 pound lean ground beef (90% lean) Ground turkey is a healthy alternative
For Vegetables
  • 1 onion Yellow onions are preferable
  • 1 green pepper Red or yellow bell peppers could enhance sweetness
For the Chili Base
  • 1 can kidney beans Try black beans or pinto beans for a different taste
  • 1 can stewed tomatoes Crushed tomatoes can be an alternative
  • 1 cup beef broth Vegetable broth works for vegetarian version
For the Spice Mix
  • 1 tablespoon chili powder Adjust based on your desired spice level
  • 1 teaspoon ground coriander Ground cumin can work as a substitute
  • 1 teaspoon ground cumin Essential for authentic Firehouse Chili flavor
For Aroma and Depth
  • 2 cloves garlic Dried garlic powder can be used as alternative
  • 1 teaspoon dried oregano Can swap in Italian seasoning if preferred

Equipment

  • Dutch oven

Method
 

Step-by-Step Instructions for Firehouse Chili
  1. In a large Dutch oven, heat canola oil over medium heat until shimmering. Add the lean ground beef in batches, breaking it apart and sauté for about 5-7 minutes until browned. Drain excess fat and set aside.
  2. In the same pot, add chopped onion and green pepper. Stir occasionally for about 5-6 minutes until the onion is translucent and tender.
  3. Return the browned beef to the pot. Stir in kidney beans, stewed tomatoes, and beef broth. Add chili powder, ground coriander, ground cumin, and minced garlic cloves. Stir well for about 1 minute.
  4. Bring the mixture to a boil, then reduce heat to low. Cover and let simmer for approximately 1.5 to 2 hours, stirring occasionally.
  5. Once the chili is ready, serve hot in bowls, optionally garnished with green onions or shredded cheese.

Nutrition

Serving: 1bowlCalories: 300kcalCarbohydrates: 35gProtein: 20gFat: 10gSaturated Fat: 4gPolyunsaturated Fat: 1gMonounsaturated Fat: 4gCholesterol: 60mgSodium: 800mgPotassium: 600mgFiber: 8gSugar: 5gVitamin A: 1500IUVitamin C: 30mgCalcium: 50mgIron: 3mg

Notes

Feel free to experiment with ingredients and make it your own. Pair with cornbread or salad for a cozy meal.

Tried this recipe?

Let us know how it was!
  • « Previous Page
  • 1
  • …
  • 9
  • 10
  • 11
  • 12
  • 13
  • Next Page »

Welcome!

Hi, I’m Grace, a Sydney-based home cook with a passion for bold flavors and trending ingredients. Whether you’re a busy beginner or a seasoned foodie, you’ll find dishes here that are fresh, fun, and full of flavor.

More about me

Popular Recipes

  • Cheesy Chicken Garlic Bread Sandwich
    Cheesy Chicken Garlic Bread Sandwich for Cozy Family Moments
  • Easy Chicken Ranch Wraps
    Easy Chicken Ranch Wraps: Quick, Creamy & Totally Satisfying
  • Chicken Caesar Sandwiches
    Delicious Chicken Caesar Sandwiches for Quick Comfort Food
  • best Cuban sandwich
    The Best Cuban Sandwich You’ll Want Every Weeknight!

Footer

↑ back to top

About

  • Privacy Policy
  • Disclaimer
  • Terms & Conditions

Newsletter

  • Sign Up! for emails and updates

Contact

  • About me
  • Contact me

Copyright © 2025 TastyTrendIngredients