tastytrendingredients

  • Home
  • Recipes
    • Appetizers
    • Breakfast
    • Dessert
    • Dinner
    • Drinks
    • Salads
    • Snacks
    • Soups
  • About me
  • Contact me
menu icon
go to homepage
  • Home
  • Recipes
    • Appetizers
    • Breakfast
    • Dessert
    • Dinner
    • Drinks
    • Salads
    • Snacks
    • Soups
  • About me
  • Contact me
search icon
Homepage link
  • Home
  • Recipes
    • Appetizers
    • Breakfast
    • Dessert
    • Dinner
    • Drinks
    • Salads
    • Snacks
    • Soups
  • About me
  • Contact me
×

Delicious Blood Orange Black Sesame Crumb Cake in Minutes

February 20, 2026 by Grace Snow Leave a Comment

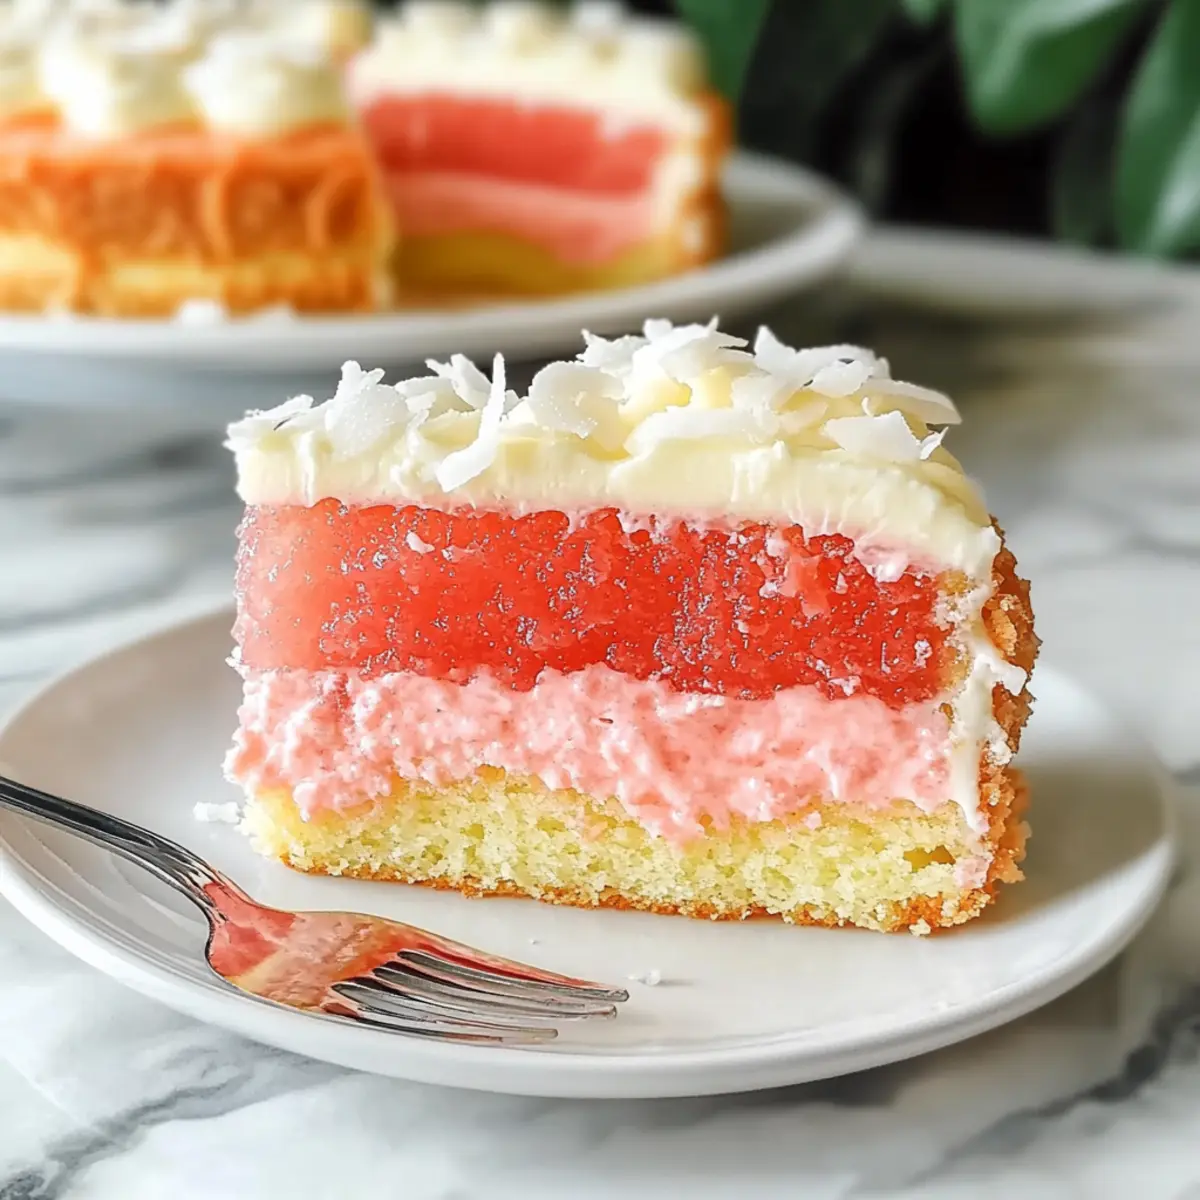
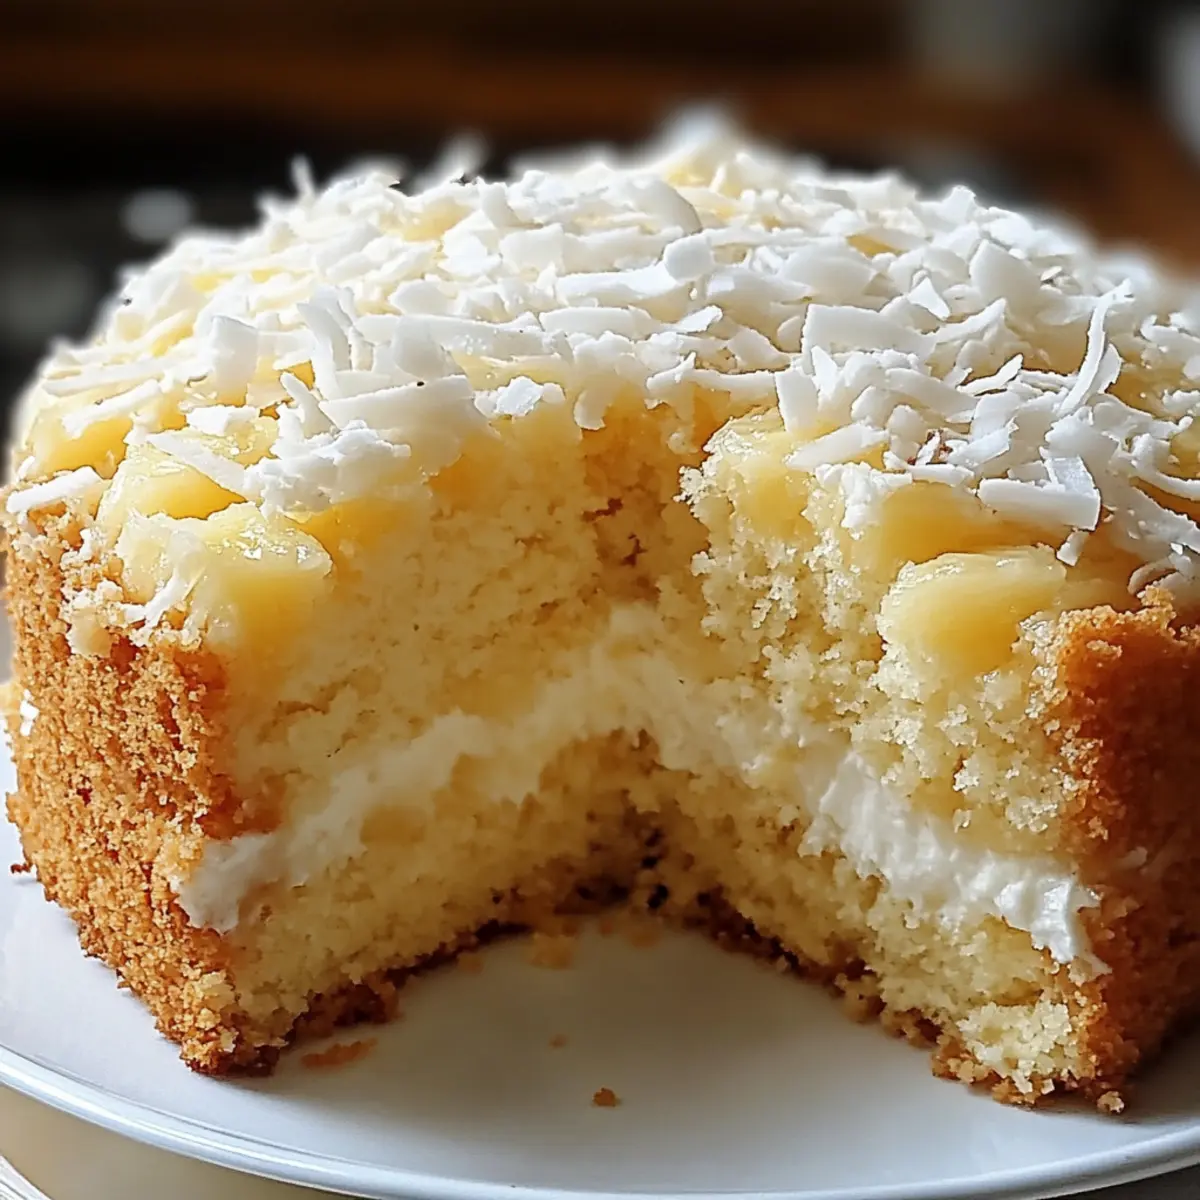
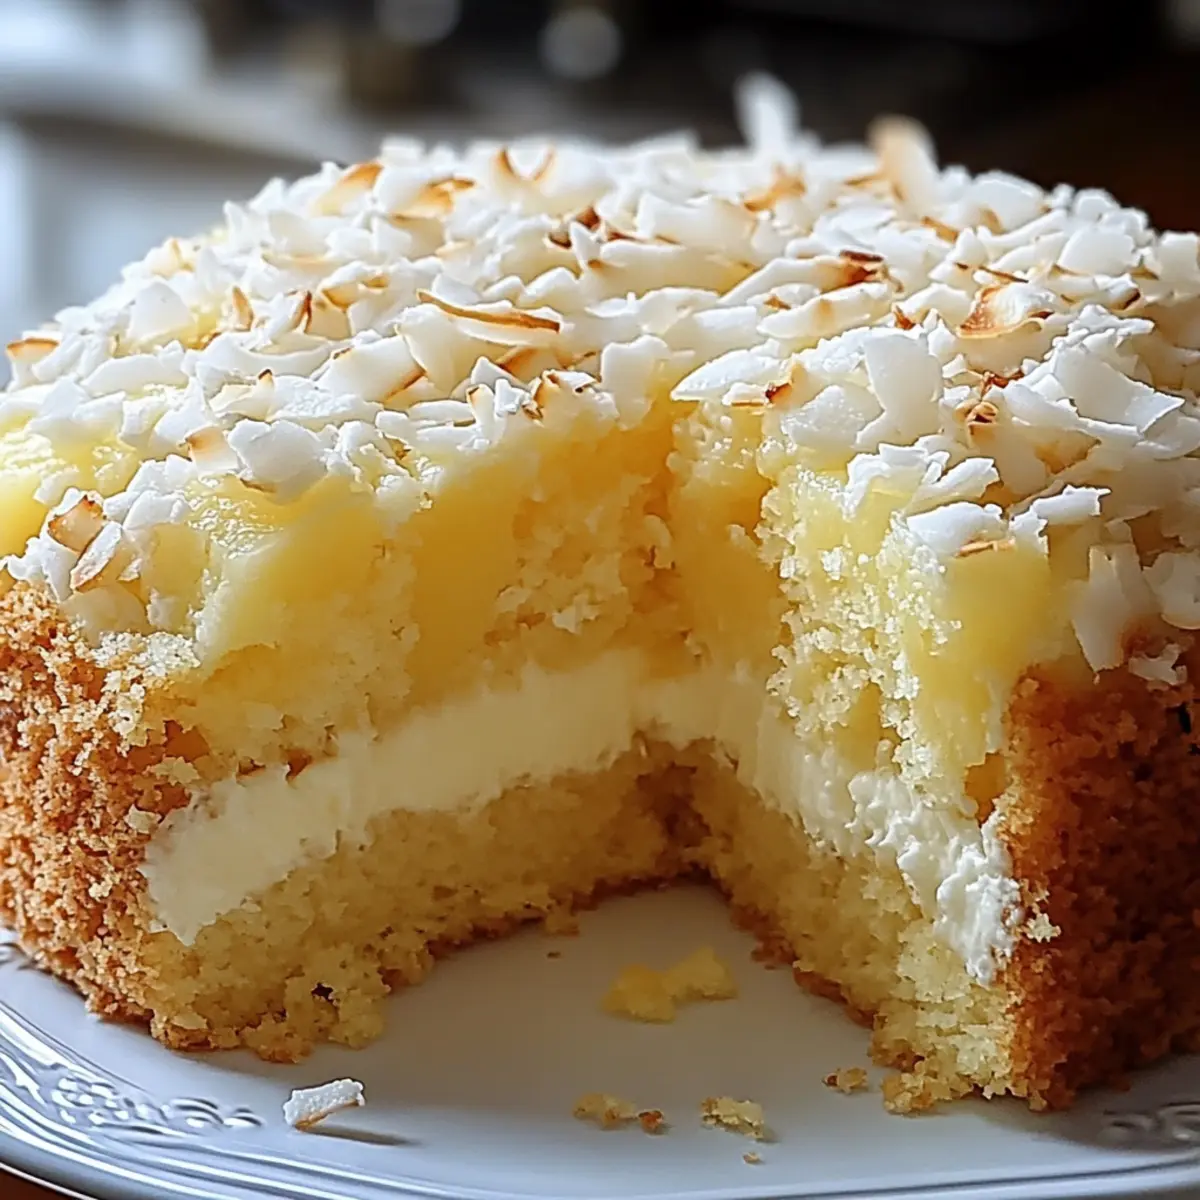
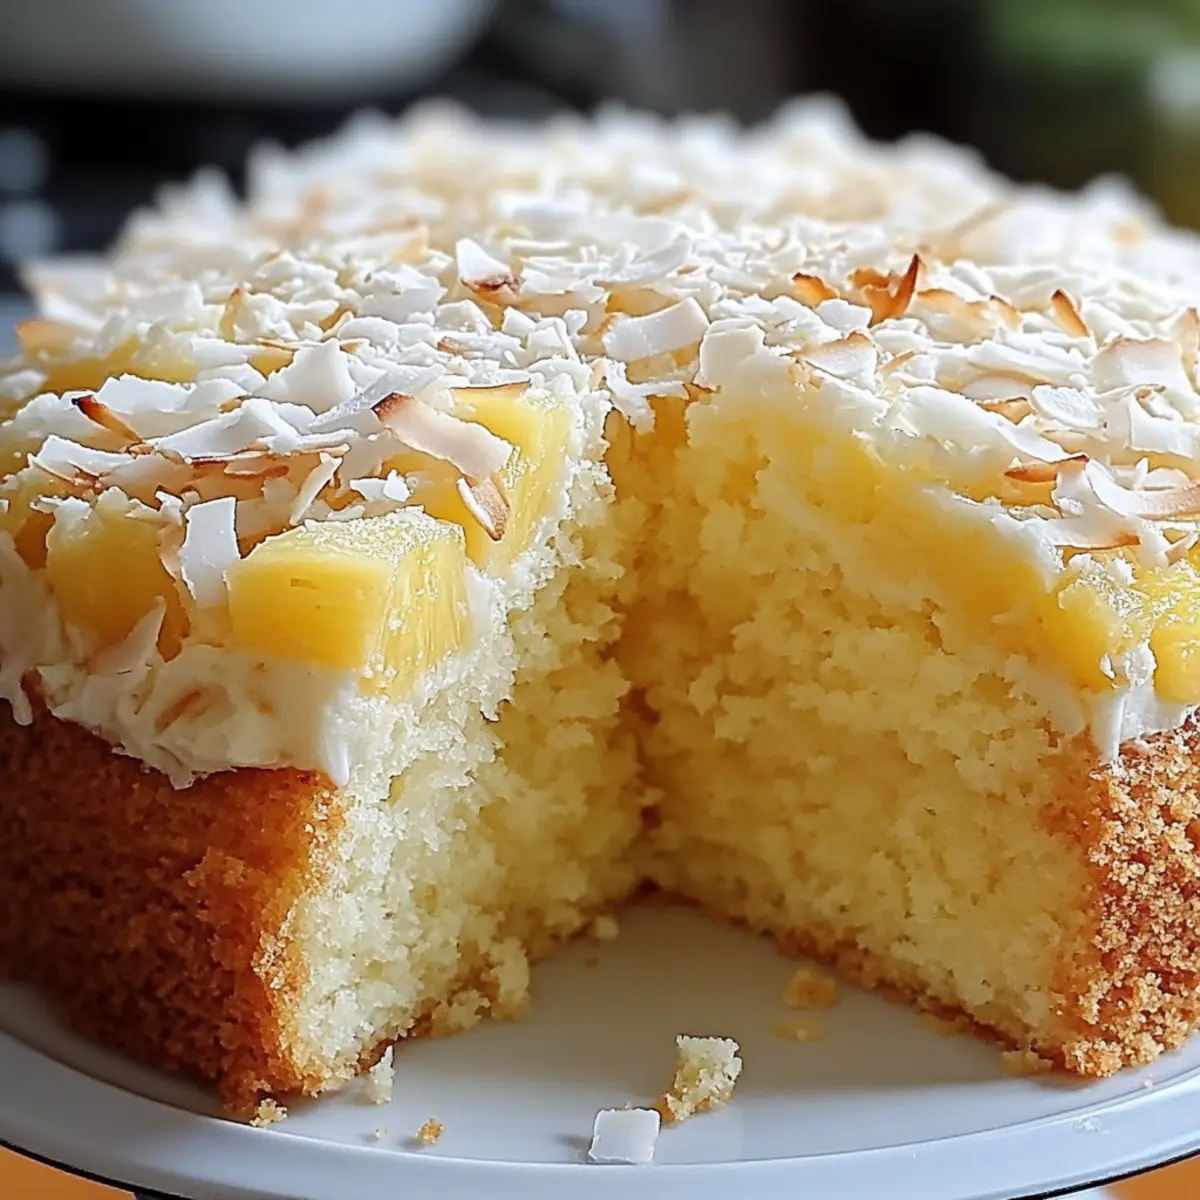
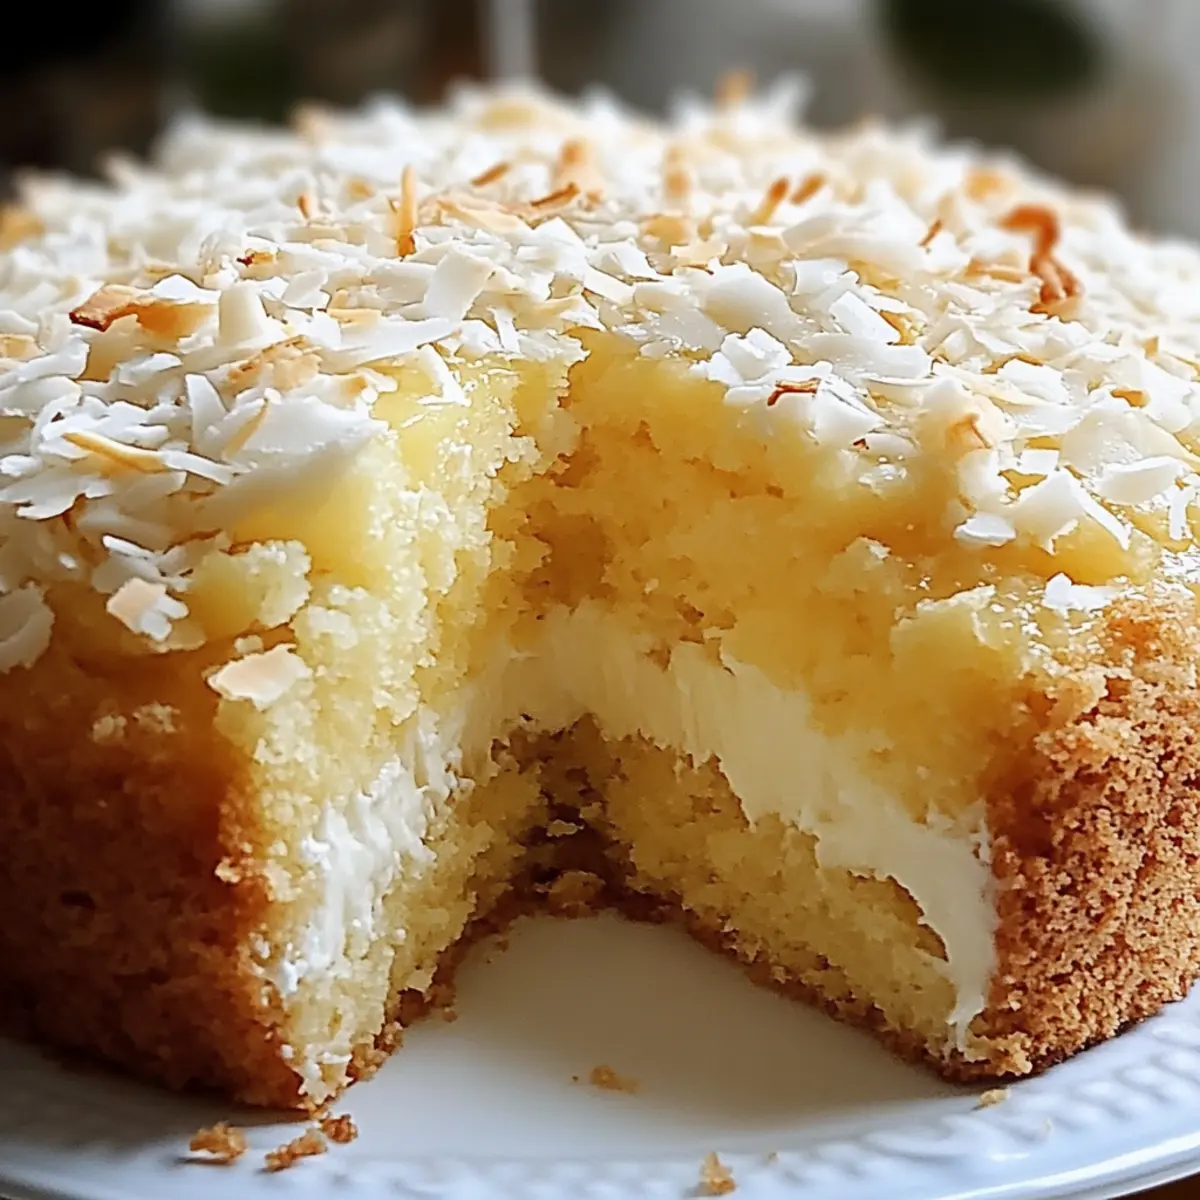
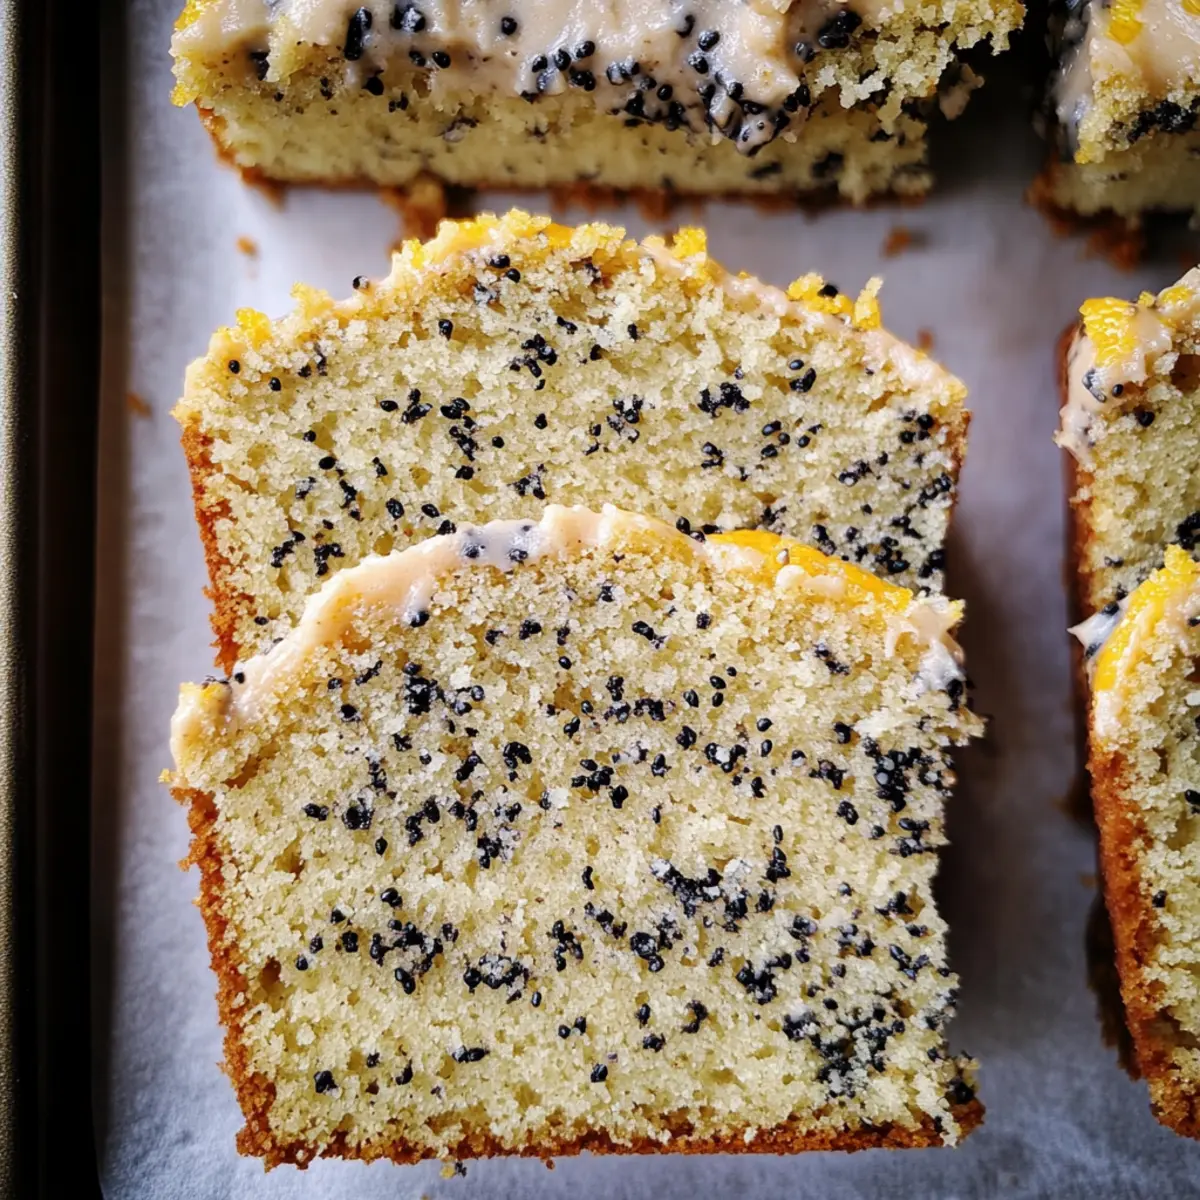
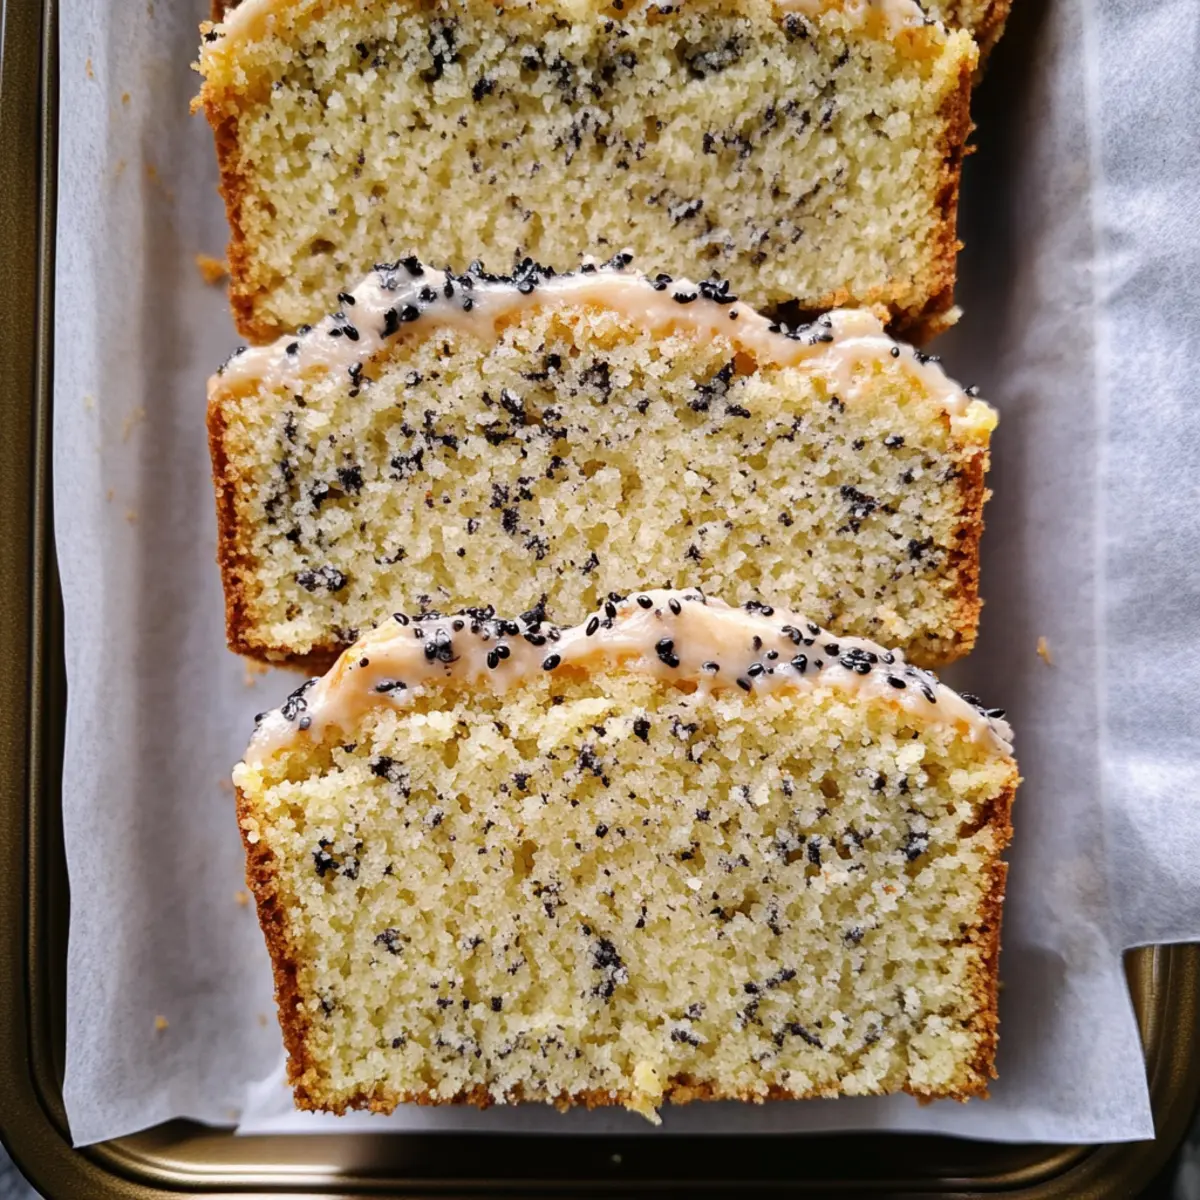
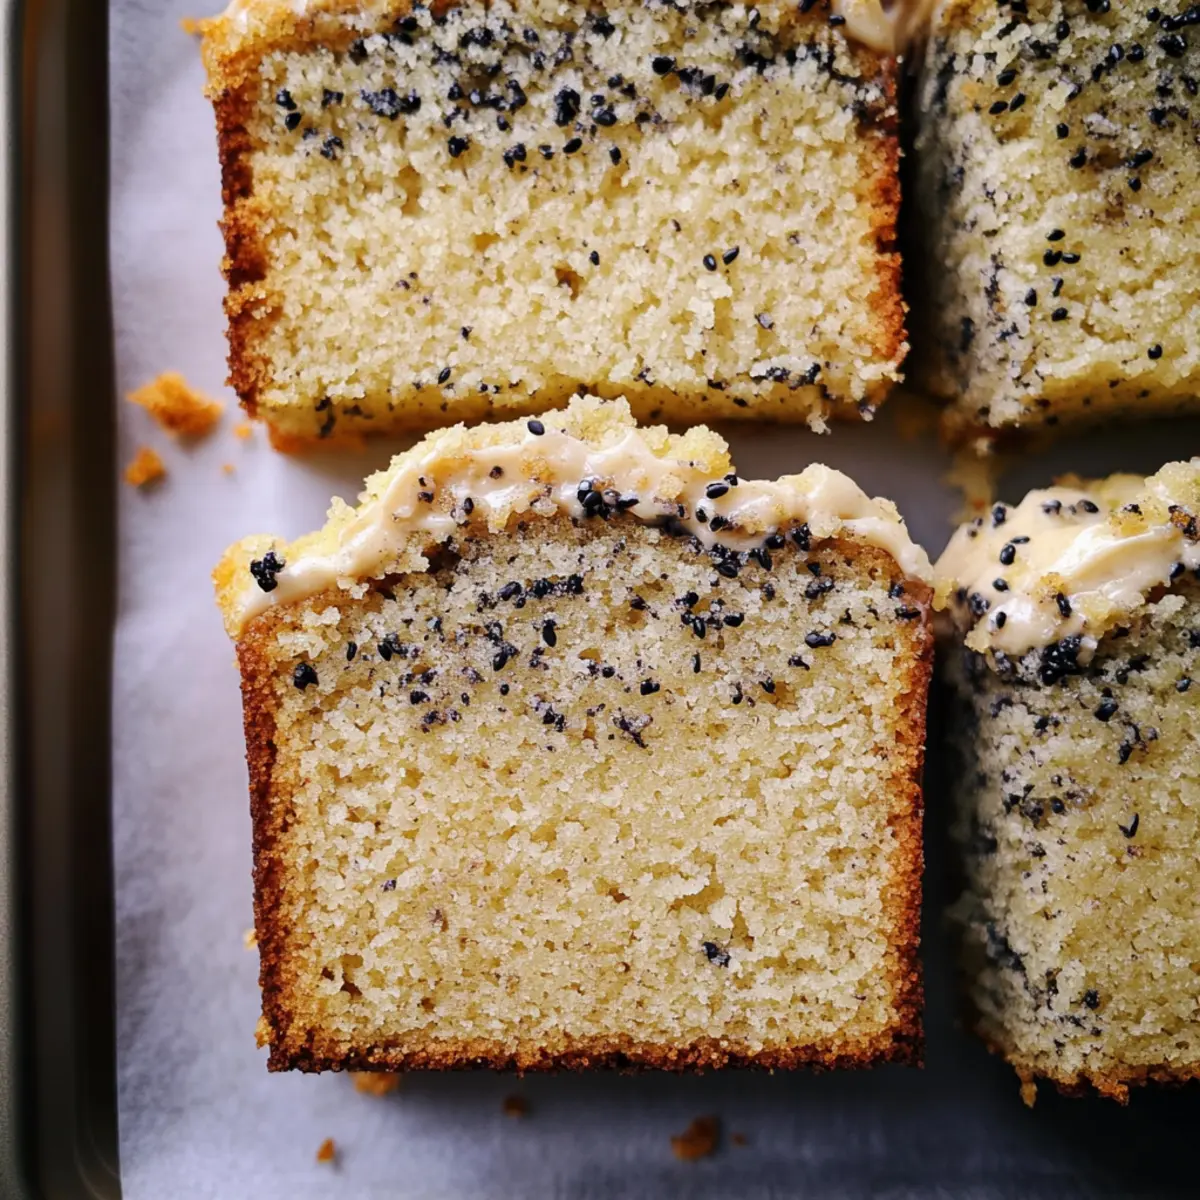
As I turned the corner into my kitchen, the zesty aroma of blood oranges mingling with the earthy notes of black sesame sent my senses into a delighted whirl. This Blood Orange Black Sesame Crumb Cake has become my go-to recipe, effortlessly combining a tender crumb with a crunchy streusel that will leave you reaching for another slice. Perfect for busy days, this simple cake comes together quickly, whether you're looking for an afternoon pick-me-up or a delightful dessert. Best of all, it's a versatile treat; swap in your favorite citrus for a twist that keeps things exciting. Curious about how you can brighten up your next baking session? Let's dive into this delicious recipe!

Why is This Cake a Game-Changer?

Simple Preparation: This Blood Orange Black Sesame Crumb Cake requires minimal effort, making it ideal for weeknight baking.

Zingy Citrus Flavor: The blood oranges infuse a vibrant and refreshing taste that wakes up your palate, especially when paired with the nuttiness of black sesame.

Versatile Options: Adapt this recipe easily by swapping the blood oranges for other citrus fruits like lemons or grapefruits.

Perfect for Any Occasion: Whether it’s a casual afternoon snack or a dessert for guests, it’s sure to impress and please.

Make-Ahead Convenience: This cake stores beautifully, allowing you to prepare it in advance for busy days or surprise visits, just like my favorite Ice Cream Cake.

Treat yourself and loved ones to a delightful slice, and brighten up your baking repertoire!

Blood Orange Black Sesame Crumb Cake Ingredients

For the Cake
• Blood Oranges – Provides zest and juice for flavor; can substitute with lemons, grapefruits, or bergamot for different citrus profiles.
• Sour Cream – Adds moisture and tenderness to the cake; Greek yogurt can be used as an alternative.
• All-Purpose Flour – Forms the structure of the cake; can be substituted with gluten-free flour if needed.
• Granulated Sugar – Sweetness balances the tang of the blood orange; use coconut sugar for a lower glycemic option.
• Baking Powder – Helps the cake rise and achieve a light texture; ensure it's fresh for best results.
• Unsalted Butter – Provides richness and moisture; can substitute with margarine or a vegan butter alternative.
• Eggs – Help retain moisture and act as a binder; for a vegan version, use flax eggs or apple sauce.

For the Streusel Topping
• Black Sesame Seeds – Adds unique flavor and texture; can be replaced with poppy seeds or omitted if unavailable.
• All-Purpose Flour – Used for the streusel texture; ensures a crumbly topping to complement the cake.
• Unsalted Butter – Creates the rich and crumbly struesel; use an alternative for a vegan version if needed.

Indulge in this Blood Orange Black Sesame Crumb Cake, where classic flavors meet delightful textures!

Step‑by‑Step Instructions for Blood Orange Black Sesame Crumb Cake

Step 1: Preheat and Prepare
Begin by preheating your oven to 350°F (175°C). While the oven warms up, grease and line a loaf pan with parchment paper, ensuring it hangs over the edges for easy removal later. This preparation step is crucial for getting your Blood Orange Black Sesame Crumb Cake baked evenly without sticking.

Step 2: Mix Wet Ingredients
In a mixing bowl, combine granulated sugar and unsalted butter. Beat on medium speed until the mixture is light and fluffy, about 3-4 minutes. Add the eggs one at a time, mixing well after each addition. Next, stir in the sour cream and the zest of blood oranges, allowing their fresh aroma to fill your kitchen.

Step 3: Combine Dry Ingredients
In a separate bowl, whisk together the all-purpose flour and baking powder until well combined. Gradually incorporate this dry mixture into the wet ingredients using a spatula, folding gently until just combined. Be careful not to overmix, as this step ensures a tender crumb in your Blood Orange Black Sesame Crumb Cake.

Step 4: Prepare Streusel
To make the streusel topping, mix together black sesame seeds, all-purpose flour, and melted butter in a small bowl. Use your fingers or a fork to blend until the mixture resembles coarse crumbs. Set this aside; it will add a delightful crunch on top of your cake after baking, creating a beautiful contrast with the moist crumb.

Step 5: Assemble and Bake
Pour the batter into the prepared loaf pan, spreading it evenly with a spatula. Generously sprinkle the black sesame streusel over the top, creating a lovely crunch. Place the pan in your preheated oven and bake for 50-60 minutes, or until the top is golden brown and a toothpick inserted into the center comes out clean.

Step 6: Cool and Serve
Once baked, remove the Blood Orange Black Sesame Crumb Cake from the oven. Allow it to cool in the pan for about 10 minutes before carefully transferring it to a wire rack to cool completely. This helps to set the crumb structure while ensuring you can slice neat pieces later on.

What to Serve with Blood Orange Black Sesame Crumb Cake

Elevate your baking experience by pairing this cake with delightful accompaniments that enhance its vibrant flavors and textures.

  • Creamy Greek Yogurt: A dollop adds tang and creaminess, perfectly balancing the zesty sweetness of the cake.

  • Fresh Berries: Strawberries, blueberries, or raspberries add a burst of freshness and a colorful contrast on your plate.

  • Herbal Tea: A fragrant cup complements the zesty notes of the cake, making it a delightful afternoon pick-me-up.

  • Vanilla Ice Cream: The decadence of vanilla ice cream brings a rich, creamy element, creating a luxurious dessert experience.

  • Citrus Salad: A light, refreshing salad of mixed citrus fruits brings a bright counterpoint to this crumb cake’s intense flavors.

  • Toasted Nuts: Chopped almonds or walnuts add a crunchy texture that pairs beautifully with the moist crumb of the cake.

  • Espresso: The boldness of coffee enhances the cake’s flavor while the slight bitterness balances the sweetness.

  • Lemonade: A chilled glass provides a refreshing drink option that syncs nicely with the citrus notes of the cake.

  • Dark Chocolate Drizzle: A simple drizzle of melted dark chocolate adds an indulgent twist that enhances the overall dessert experience.

  • Peach or Apricot Jam: Spread on the side for an extra touch of sweetness; the fruit flavor melds beautifully with the cake's citrus notes.

Make Ahead Options

These Blood Orange Black Sesame Crumb Cakes are perfect for meal prep lovers! You can prepare the batter and refrigerate it for up to 24 hours in advance, keeping all the delightful flavors intact. Simply mix the wet and dry ingredients separately, then combine them right before baking to ensure a fresh, fluffy cake. You can also make the streusel topping ahead of time and store it in an airtight container in the refrigerator for up to 3 days. When you're ready to bake, just pour the batter into your prepared pan, sprinkle on the topping, and bake as instructed for a cake that’s just as delicious as if you made it from scratch that day. Enjoy the convenience of homemade goodness during your busy week!

Expert Tips for Blood Orange Black Sesame Crumb Cake

  • Mix Ingredients Gently: Overmixing can lead to a dense cake. Fold the wet and dry ingredients just until combined for a tender crumb.

  • Zest with Care: Use the finest part of the grater to ensure your blood orange zest is fresh and aromatic, enhancing the cake's flavor.

  • Streusel Texture: Make sure the struesel achieves a crumbly texture before adding it to the cake. It should hold together yet remain light for the perfect crunch.

  • Essential Cooling Time: Allow the cake to cool adequately before slicing to prevent crumbs. Warm cake can crumble easily, ruining your beautiful slices.

  • Adaptable Flavors: Don’t hesitate to switch up the citrus! Experiment with lemons or grapefruits to create your unique twist on the blood orange black sesame crumb cake.

Blood Orange Black Sesame Crumb Cake Variations

Feel free to personalize this delightful cake and make it truly your own while enjoying its vibrant flavors!

  • Lemon Zest: Swap blood oranges for fresh lemons for a zesty, vibrant cake that brightens your day. The tartness pairs beautifully with the nutty streusel.

  • Gluten-Free Option: Replace all-purpose flour with a gluten-free blend to accommodate dietary needs. Just make sure to check the blend’s measurements for the best results.

  • Cream Cheese Swirl: Add dollops of cream cheese batter in the cake for a rich, creamy texture. A delightful surprise that’s reminiscent of cheesecake in every bite!

  • Nutty Crunch: Toss in some chopped walnuts or pecans to the streusel for an added layer of crunch. The nuts add a wonderful depth of flavor and texture to every slice.

  • Spice It Up: Incorporate a dash of ground cinnamon or cardamom into the batter for a warm, aromatic twist. This adds a cozy feeling, perfect for chilly days.

  • Citrus Mix-Up: Combine blood oranges with grapefruits for a more complex and refreshing flavor profile. It’s a vibrant twist that will keep everyone guessing!

  • Chocolate Drizzle: Drizzle melted dark chocolate over the cooled cake for a touch of decadence. This contrast of flavors will elevate your cake to a whole new level of indulgence.

Explore vibrant variations while enjoying this cake, much like how you can with my favorite Chocolate Pudding Cake. We're talking endless delicious possibilities!

Storage Tips for Blood Orange Black Sesame Crumb Cake

Room Temperature: Store the cake tightly wrapped in plastic wrap or an airtight container for up to 3 days to maintain moisture and freshness.

Fridge: If you want to extend the life of your Blood Orange Black Sesame Crumb Cake, keep it in the refrigerator for up to a week, ensuring it is well-wrapped to prevent drying out.

Freezer: For longer storage, slice the cake and wrap individual pieces in plastic wrap, then place them in a freezer-safe bag. It can be frozen for up to a month; thaw overnight in the fridge before enjoying!

Reheating: To enjoy your cake warm, simply pop a slice in the microwave for about 10-15 seconds or until heated through, enhancing those delightful citrus flavors.

Blood Orange Black Sesame Crumb Cake Recipe FAQs

What should I look for when selecting blood oranges?
Absolutely! When choosing blood oranges, look for fruit that feels heavy for its size and has a firm texture. The skin should be smooth and vibrant, with no dark spots all over, which indicates freshness. A few bruises are okay, but avoid any soft or shriveled ones.

How can I store Blood Orange Black Sesame Crumb Cake, and for how long?
You can store your Blood Orange Black Sesame Crumb Cake at room temperature, tightly wrapped in plastic wrap or an airtight container, for up to 3 days. For extended freshness, refrigerate it for up to a week. Just ensure it's securely wrapped to keep moisture in!

Can I freeze the Blood Orange Black Sesame Crumb Cake?
Very much so! To freeze, first slice the cake into individual pieces and wrap each slice tightly in plastic wrap. Then, place the wrapped slices in a freezer-safe bag. It can be frozen for up to a month. When you're ready to enjoy, simply thaw overnight in the fridge and indulge!

What should I do if my crumb cake is dense or doesn't rise?
If your Blood Orange Black Sesame Crumb Cake turns out dense, it might be due to overmixing the batter. Mix the wet and dry ingredients just until combined for a light texture. Also, ensure your baking powder is fresh, as expired leavening agents can hinder the cake from rising adequately. If it still doesn't rise, check the oven temperature to ensure it’s calibrated correctly.

Can I make this recipe allergy-friendly or vegan?
Absolutely! To create a vegan version of the Blood Orange Black Sesame Crumb Cake, you can substitute the eggs with flax eggs (1 tablespoon of ground flaxseed mixed with 2.5 tablespoons of water for each egg) or applesauce. For dairy-free options, use unsweetened almond or coconut yogurt instead of sour cream and opt for a plant-based butter alternative. This way, everyone can enjoy this delightful treat!

Is there any special consideration for feeding this cake to pets?
Definitely! While the ingredients in this cake are safe for humans, it’s best to keep it away from pets. Particularly, the sugar content and citrus can upset their stomachs, so stick to dog- or cat-friendly treats for your furry friends!

Blood Orange Black Sesame Crumb Cake

Delicious Blood Orange Black Sesame Crumb Cake in Minutes

This Blood Orange Black Sesame Crumb Cake combines zesty citrus and nutty flavors, creating a delightful dessert perfect for any occasion.
Print Recipe Pin Recipe
Prep Time 15 minutes mins
Cook Time 1 hour hr
Cooling Time 10 minutes mins
Total Time 1 hour hr 25 minutes mins
Servings: 8 slices
Course: Dessert
Cuisine: American
Calories: 220
Ingredients Equipment Method Nutrition Notes

Ingredients
  

For the Cake
  • 3 medium Blood Oranges Zest and juice needed
  • 1 cup Sour Cream Can substitute with Greek yogurt
  • 2 cups All-Purpose Flour Can substitute with gluten-free flour
  • 1 cup Granulated Sugar Use coconut sugar for lower glycemic option
  • 2 teaspoons Baking Powder Ensure it's fresh
  • 1/2 cup Unsalted Butter Can substitute with margarine or vegan butter
  • 3 large Eggs For a vegan version, use flax eggs or apple sauce
For the Streusel Topping
  • 1/4 cup Black Sesame Seeds Can be replaced with poppy seeds
  • 1/2 cup All-Purpose Flour Used for streusel texture
  • 1/4 cup Unsalted Butter Use an alternative for vegan version

Equipment

  • Loaf pan
  • Mixing Bowl
  • Whisk
  • Spatula
  • measuring cups
  • Measuring Spoons

Method
 

Step‑by‑Step Instructions
  1. Preheat your oven to 350°F (175°C) and prepare a loaf pan with grease and parchment paper.
  2. In a mixing bowl, beat together granulated sugar and unsalted butter until light and fluffy. Add eggs one at a time, mixing well. Stir in sour cream and zest of blood oranges.
  3. In a separate bowl, whisk together all-purpose flour and baking powder. Gradually fold this into the wet mixture until just combined.
  4. For the streusel, mix black sesame seeds, all-purpose flour, and melted butter until it resembles coarse crumbs.
  5. Pour the batter into the prepared loaf pan and sprinkle streusel topping on top. Bake for 50-60 minutes until golden brown.
  6. Allow the cake to cool in the pan for about 10 minutes before transferring it to a wire rack to cool completely.

Nutrition

Serving: 1sliceCalories: 220kcalCarbohydrates: 30gProtein: 3gFat: 10gSaturated Fat: 6gPolyunsaturated Fat: 1gMonounsaturated Fat: 3gCholesterol: 45mgSodium: 150mgPotassium: 120mgFiber: 1gSugar: 15gVitamin A: 550IUVitamin C: 30mgCalcium: 60mgIron: 1.2mg

Notes

This cake can be stored for up to 3 days at room temperature or in the fridge for up to a week. It can also be frozen for up to a month.

Tried this recipe?

Let us know how it was!

Delicious Neapolitan Cake: A Sweet Slice of Joy

February 19, 2026 by Grace Snow Leave a Comment

As I watched the vibrant layers of my freshly baked Neapolitan Cake emerge from the oven, I couldn't help but feel a thrill of excitement. The delightful combination of chocolate, strawberry, and vanilla offers a nostalgic nod to those classic ice cream days, bringing a splash of joy to any dining table. This easy-to-make cake not only impresses guests with its stunning presentation, but it also boasts quick preparation, making it perfect for busy weeknights and spontaneous gatherings. Each slice presents a beautiful array that is bound to bring smiles and sweet moments to your family and friends. Are you ready to indulge in this homemade delight that’s equal parts comforting and celebratory?

Why is Neapolitan Cake a must-try?

Visually Stunning: The trio of vibrant layers makes it an eye-catching centerpiece for any occasion.
Nostalgic Flavors: Enjoy the classic combination of chocolate, strawberry, and vanilla, reminiscent of ice cream treats from childhood.
Quick Preparation: Perfect for busy schedules, this cake comes together in no time without compromising flavor.
Crowd-Pleasing: It's ideal for gatherings, ensuring everyone will find their favorite flavor in each slice.
Versatile Enjoyment: Serve it as a festive dessert or a cozy after-dinner treat; it's perfect for any occasion! If you're looking for more delicious dessert ideas, check out my recipes for Ice Cream Cake and Chocolate Pudding Cake.

Neapolitan Cake Ingredients

For the Cake Base
• All-Purpose Flour – Provides structure to the cake; you can substitute with cake flour for a lighter texture.
• Cocoa Powder – Adds a rich chocolate flavor; opt for unsweetened cocoa for the best results.
• Granulated Sugar – Sweetens the cake and improves texture; brown sugar can be used for a deeper flavor.
• Baking Powder – Ensures the cake rises; make sure it's fresh for perfect lifting.
• Salt – Balances the flavors; it's essential for the overall taste.
• Eggs – Adds moisture and stability; for a vegan option, flax eggs will work as a substitute.
• Whole Milk – Contributes to moisture and richness; buttermilk can replace it for a tangy twist.
• Vanilla Extract – Enhances overall flavor; pure extract is recommended for the best taste.

For the Flavored Layers
• Melted Chocolate – Used for the chocolate layer; dark or semi-sweet chocolate creates the best depth.
• Pureed Strawberries – Provides a light, fruity flavor for that luscious strawberry layer; both fresh and frozen strawberries are suitable.

For the Frosting
• Cream Cheese Frosting – Perfect for layering and decorating; adjust sweetness by changing the amount of powdered sugar used.

This Neapolitan Cake is a delightful mix of flavors and colors, making it a favorite for both kids and adults alike!

Step‑by‑Step Instructions for Neapolitan Cake

Step 1: Preheat Oven
Begin by preheating your oven to 350°F (175°C). While the oven heats up, prepare three round cake pans by greasing them generously or lining the bottoms with parchment paper. This will ensure that your Neapolitan Cake layers release easily once baked, setting the stage for a seamless assembly.

Step 2: Mix Dry Ingredients
In a large mixing bowl, whisk together 2 cups of all-purpose flour, 1 cup of granulated sugar, 1/2 cup of cocoa powder, 2 teaspoons of baking powder, and a pinch of salt until everything is evenly combined. This dry mixture is essential for building the fluffy texture of your cake, so make sure there are no lumps and it appears light and airy.

Step 3: Combine Wet Ingredients
In a separate bowl, crack open 3 large eggs and whisk them together with 1 cup of whole milk and 1 teaspoon of vanilla extract until the mixture is smooth and fully blended. This harmonious combination of wet ingredients adds moisture and flavor to your Neapolitan Cake, ensuring each layer is delightfully rich.

Step 4: Combine Mixtures
Gradually pour the wet ingredients into the bowl of dry ingredients, mixing gently with a spatula or whisk. Aim for a few gentle strokes to combine them until just blended. Avoid overmixing to keep your cake light and fluffy; the batter should be smooth and slightly thick while maintaining a little airiness.

Step 5: Flavor Batters
Divide the combined batter evenly into three separate bowls. In one bowl, stir in melted chocolate for the chocolate layer, mixing until fully incorporated. To another, add pureed strawberries for a fresh and fruity flavor, and keep the third bowl as is for the classic vanilla layer. Each bowl should reflect its respective flavor.

Step 6: Bake
Pour each flavored batter into the prepared cake pans, ensuring an even distribution across the layers. Place them in the preheated oven and bake for 25-30 minutes, or until the cakes spring back when lightly pressed and a toothpick inserted into the center comes out clean. Your Neapolitan Cake layers should rise beautifully!

Step 7: Cool Cakes
Once baked, remove the pans from the oven and let them cool for about 10 minutes. Afterward, carefully transfer the cakes onto wire racks to cool completely. This step is crucial as fully cooled layers ensure sturdy stacking and prevent melting the frosting when you assemble your cake.

Step 8: Layer and Frost
When the cakes are completely cool, take one layer and place it on a serving plate. Generously spread a layer of cream cheese frosting on top before adding the second flavored cake layer. Repeat this process with frosting between each layer and on top for a beautifully finished Neapolitan Cake. Enjoy the delightful, colorful layers that await!

How to Store and Freeze Neapolitan Cake

Fridge: Store the Neapolitan Cake in an airtight container for up to 3 days. This helps keep its flavors fresh while preventing it from drying out.

Freezer: For longer storage, freeze individual slices wrapped tightly in plastic wrap, then place in a freezer bag. It can last for up to 2 months.

Thawing: To enjoy frozen slices, thaw in the fridge overnight before indulging in your deliciously layered treat.

Reheating: If you prefer your Neapolitan Cake warm, gently microwave individual slices for 10-15 seconds until slightly heated through.

Make Ahead Options

These Neapolitan Cake layers are perfect for meal prep, allowing you to indulge without the last-minute rush! You can bake the cake layers up to 24 hours in advance; simply allow them to cool completely before wrapping them tightly in plastic wrap to prevent drying out. The cream cheese frosting can also be made ahead and stored in the fridge for up to 3 days. When you're ready to serve, assemble the layers by spreading frosting in between and on top, giving a quick beat to the frosting if it’s a bit stiff from refrigeration. This way, your Neapolitan Cake remains just as delicious, ensuring you have a delightful dessert ready to impress!

What to Serve with Neapolitan Cake

Each delightful bite of this colorful masterpiece invites you to create a complete meal experience that resonates with joy and flavor.

  • Fresh Berries: The natural sweetness and acidity of strawberries, raspberries, or blueberries enhance the fruity notes in the cake, creating a refreshing contrast.
  • Vanilla Ice Cream: A scoop of creamy vanilla ice cream adds a luscious, melty counterpart to each slice, reminiscent of the classic ice cream flavors in the cake.
  • Chocolate Ganache: Drizzling warm chocolate ganache over the top brings an extra indulgence that chocolate lovers will adore, emphasizing the rich chocolate layer.
  • Whipped Cream: Light and airy whipped cream elevates the dessert to new heights, adding an inviting texture while balancing the sweetness perfectly.
  • Coffee or Espresso: A hot cup of coffee or a shot of espresso serves as a lovely palate cleanser, complementing the cake's flavors while enhancing the chocolate richness.
  • Mint Chutney: A surprising pairing of mint chutney offers a refreshing zing that contrasts wonderfully with the cake's sweetness, awakening your taste buds.
  • Sparkling Water: Serve chilled sparkling water with a slice to cleanse the palate and balance the richness, making it a versatile option for all tastes.
  • Chocolate Covered Pretzels: For a delightful crunch, these sweet and salty bites provide an interesting texture, making for a simple yet satisfying pairing.

Neapolitan Cake Variations & Substitutions

Feel free to get creative with this Neapolitan Cake and make it uniquely yours with these delicious alternatives!

  • Mini Neapolitan Cakes: Use smaller cake pans or muffin tins for individual-sized treats, perfect for parties or lunchboxes. These tiny cakes will be a hit with kids and adults alike!

  • Frosting Variations: Swap cream cheese frosting for whipped cream or a smooth buttercream for a different flavor experience. The lighter options will add a fluffy texture that's heavenly!

  • Flavor Infusions: Boost the vanilla layer with lemon zest for a zesty twist. This brightens up the flavor and takes your cake to a whole new level of delicious.

  • Alternative Milk Options: Use almond milk, oat milk, or coconut milk to make it dairy-free while still retaining that moist texture. Enjoy a delightful twist on this classic cake!

  • Gluten-Free Option: Substitute all-purpose flour with gluten-free flour blend. Just make sure it contains xanthan gum, as it needs a bind for an airy cake.

  • Berry Medley: Instead of pureed strawberries, mix in blueberries or raspberries for the fruity layer for a colorful and vibrant cake. Each bite will burst with flavor and freshness!

  • Layered Ice Cream Cake: Transform this recipe into an ice cream cake by sandwiching layers of ice cream between the cake layers. If you love a cold treat, this twist is perfect on a hot day.

For a touch of inspiration, you might also enjoy making a Chocolate Pudding Cake or a delicious Ice Cream Cake for your next gathering!

Expert Tips for Neapolitan Cake

• Use Room Temperature Ingredients: Make sure all ingredients, including eggs and milk, are at room temperature. This helps to create a smoother batter and ensures your Neapolitan Cake rises nicely.

• Avoid Overmixing: When combining wet and dry ingredients, mix just until incorporated. Overmixing can lead to a dense cake rather than the fluffy texture you desire.

• Double Check Doneness: Use a toothpick or cake tester in the center of each layer. If it comes out clean or with a few moist crumbs, your Neapolitan Cake is ready to come out of the oven!

• Chill Before Frosting: Allow your cake layers to cool completely on wire racks before frosting. This prevents the frosting from melting and helps it to hold its shape.

• Storage Tips: Keep leftovers in an airtight container in the fridge for up to three days, or freeze individual slices for a sweet treat later on.

Neapolitan Cake Recipe FAQs

What is the best way to select ripe strawberries for the Neapolitan Cake?
Absolutely! Look for strawberries that are bright red with a natural shine. Avoid those with dark spots or dull skin, which may indicate overripeness. When squeezed gently, they should feel firm yet slightly soft, signaling juiciness. I often choose strawberries that are in season for the best flavor!

How should I store the Neapolitan Cake once it’s baked?
To keep your cake at its best, store it in an airtight container in the fridge for up to 3 days. Be sure to stack layers with parchment in between if you want to avoid smudging the frosting.

Can I freeze leftover slices of Neapolitan Cake?
Yes, you can! To freeze, wrap individual slices tightly in plastic wrap, then place them in a freezer-safe bag. They will remain fresh for up to 3 months. When you're ready to enjoy, just thaw them in the fridge overnight for the best consistency.

What if my cake layers are too dry?
If your Neapolitan Cake turns out dry, it might be due to overbaking. Always start checking for doneness at 25 minutes. Make sure your toothpick comes out with a few moist crumbs instead of completely clean. If it’s already baked, you can drizzle a simple syrup over the layers to add moisture back in.

Is there a way to make this Neapolitan Cake vegan?
Very much so! To make a vegan Neapolitan Cake, substitute 3 flax eggs (1 tablespoon of ground flaxseed mixed with 2.5 tablespoons of water per egg) for regular eggs. Additionally, use plant-based milk, and opt for dairy-free cream cheese for the frosting.

How can I make sure my frosting doesn’t melt?
To prevent your cream cheese frosting from melting, make sure all your cake layers are completely cool before applying it. If it’s a warm day, you can refrigerate the frosted cake for about 15-20 minutes before serving to help it set.

Neapolitan Cake

Delicious Neapolitan Cake: A Sweet Slice of Joy

Indulge in a delicious Neapolitan Cake, a nostalgic blend of chocolate, strawberry, and vanilla for any occasion.
Print Recipe Pin Recipe
Prep Time 30 minutes mins
Cook Time 30 minutes mins
Cooling Time 10 minutes mins
Total Time 1 hour hr 10 minutes mins
Servings: 8 slices
Course: Dessert
Cuisine: Italian
Calories: 350
Ingredients Equipment Method Nutrition Notes

Ingredients
  

For the Cake Base
  • 2 cups All-Purpose Flour Can substitute with cake flour for a lighter texture.
  • 1 cup Granulated Sugar Brown sugar can be used for deeper flavor.
  • 0.5 cups Cocoa Powder Opt for unsweetened cocoa for the best results.
  • 2 teaspoons Baking Powder Ensure it’s fresh for perfect lifting.
  • 1 pinch Salt Essential for balancing flavors.
  • 3 large Eggs Flax eggs can be used for a vegan option.
  • 1 cup Whole Milk Buttermilk can be used for a tangy twist.
  • 1 teaspoon Vanilla Extract Pure extract is recommended.
For the Flavored Layers
  • 0.5 cups Melted Chocolate Dark or semi-sweet chocolate recommended.
  • 1 cup Pureed Strawberries Fresh or frozen strawberries are suitable.
For the Frosting
  • 2 cups Cream Cheese Frosting Adjust sweetness by changing powdered sugar.

Equipment

  • Oven
  • Mixing bowls
  • Cake Pans
  • Whisk
  • Spatula
  • wire rack

Method
 

Step-by-Step Instructions for Neapolitan Cake
  1. Preheat oven to 350°F (175°C) and prepare three round cake pans by greasing or lining with parchment paper.
  2. In a large bowl, whisk together flour, sugar, cocoa powder, baking powder, and salt.
  3. In another bowl, whisk eggs, milk, and vanilla until smooth.
  4. Gradually combine wet and dry ingredients, mixing gently.
  5. Divide batter into three bowls, flavor one with melted chocolate, another with pureed strawberries, and leave the third plain.
  6. Pour flavored batters into prepared pans and bake for 25-30 minutes.
  7. Remove from oven and cool for 10 minutes, then transfer to wire racks to cool completely.
  8. Layer and frost with cream cheese frosting between each cake layer.

Nutrition

Serving: 1sliceCalories: 350kcalCarbohydrates: 50gProtein: 5gFat: 15gSaturated Fat: 8gCholesterol: 50mgSodium: 200mgPotassium: 150mgFiber: 2gSugar: 25gVitamin A: 500IUVitamin C: 2mgCalcium: 50mgIron: 1mg

Notes

Use room temperature ingredients for best results. Avoid overmixing to prevent a dense cake. Ensure cake layers cool completely before frosting.

Tried this recipe?

Let us know how it was!

Cozy Up With Authentic Irish Apple Cake That's Pure Joy

February 19, 2026 by Grace Snow Leave a Comment

As the leaves turn golden and the crisp autumn air sweeps in, there's nothing quite like the scent of freshly baked goods wafting from the kitchen. This is where my Authentic Irish Apple Cake comes into play, with its delightful blend of tart Granny Smith apples enveloped in a moist, spiced cake. It’s a simple dessert that's perfect for cozy gatherings or a quiet afternoon treat! One of the best things about this cake is how effortlessly it brightens up a chilly day, and paired with a creamy custard sauce, it transforms into a comforting indulgence. Plus, it’s a fantastic way to showcase seasonal apples while honing your baking skills. Curious to uncover the secrets behind this warm slice of Irish tradition? Let’s dive in!

Why is this cake a must-bake?

Unforgettable Flavor: The combination of tart apples and warm cinnamon creates a delightful balance that's hard to resist.

Homestyle Comfort: Each bite evokes the feeling of cozy afternoons spent at home, perfect for sharing with family and friends.

Versatile Serving Options: Whether enjoyed warm with custard or chilled with ice cream, this cake adapts to any occasion, making it a crowd-pleaser.

Simple and Straightforward: Even if you're new to baking, this recipe requires only basic skills and embraces forgiving ingredients.

Autumn Delight: With seasonal apple varieties like Honeycrisp or Bramley, you're bound to discover new flavor dimensions with every bake, elevating your fall gatherings.

Perfect for Celebrations: Pair it with a cup of tea or coffee, and you’ll have a comforting dessert fit for any celebration, just like my Chocolate Pudding Cake or German Chocolate Poke Cake!

Authentic Irish Apple Cake Ingredients

• For the Cake

  • Unsalted Butter – Adds richness and moisture; can substitute with margarine for a dairy-free option.
  • Granulated Sugar – Provides sweetness and lovely browning; brown sugar can deepen the flavor.
  • Large Eggs – Acts as a binder and helps the cake rise; no substitutes recommended for best results.
  • Whole Milk or Cream – Contributes to the cake’s tenderness; feel free to use almond milk for a non-dairy version.
  • All-Purpose Flour – Gives the cake its structure; gluten-free flour blends work for a gluten-free option.
  • Baking Powder – This leavening agent is essential for the perfect rise.
  • Cinnamon – Introduces a warm spice; nutmeg can be a wonderful complement.
  • Salt – Enhances the flavor balance and rounds out the sweetness.

• For the Apples

  • Granny Smith Apples – Their tartness beautifully contrasts the sweetness of the cake; try substituting with Honeycrisp or Bramley apples for a unique twist.

• For the Streusel Topping

  • Old Fashioned Rolled Oats – Adds texture; quick oats can be used but the texture may differ.
  • Confectioner’s Sugar – Perfect for dusting and adds an aesthetic appeal.

• For the Custard Sauce

  • Egg Yolks, Sugar, Whole Milk, Vanilla – These create a creamy topping; using store-bought custard can save time.

Embrace the joy of homemade desserts this season with this Authentic Irish Apple Cake—it’s a hug in cake form, waiting to be savored!

Step‑by‑Step Instructions for Authentic Irish Apple Cake

Step 1: Preheat the Oven
Preheat your oven to 350°F (175°C) and grease a 9-inch springform pan for easy release later. This step is crucial as a properly heated oven will help the cake rise evenly. Ensure your pan is well-greased to prevent sticking, setting the stage for a beautifully baked Authentic Irish Apple Cake.

Step 2: Prepare the Custard Sauce
In a small saucepan, heat 2 cups of whole milk over medium heat until it just begins to simmer. While it warms, whisk together 4 egg yolks and 1/2 cup sugar until creamy. Gradually temper the yolks by incorporating the hot milk, then return the mixture to the stove. Cook on low heat, stirring constantly, until it thickens slightly, about 5 minutes. Strain it through a sieve and chill while you make the cake.

Step 3: Make the Streusel Topping
In a mixing bowl, combine 1 cup of all-purpose flour, 1/3 cup of sugar, and 1 cup of old-fashioned rolled oats. Cut in 1/2 cup of cold, unsalted butter until the mixture resembles coarse crumbs. This streusel will add a delightful crunch to your Authentic Irish Apple Cake. Once ready, chill the mixture in the refrigerator while you prepare the cake batter.

Step 4: Prepare the Cake Batter
In a large bowl, cream together 1 cup of softened unsalted butter and 1 cup of granulated sugar until light and fluffy—this should take about 4-5 minutes. Add in 3 large eggs, one at a time, mixing well after each addition. Then, combine the dry ingredients which include 2 cups of all-purpose flour, 1 teaspoon of baking powder, 1 teaspoon of cinnamon, and 1/4 teaspoon of salt. Gradually add this to the butter mixture, alternating with 1 cup of whole milk.

Step 5: Assemble the Cake
Pour the cake batter evenly into the prepared 9-inch springform pan. Peel and slice 3-4 Granny Smith apples, fanning them out on top of the batter for a lovely presentation. Sprinkle your chilled streusel topping generously over the apples, ensuring even coverage. This assembly not only looks appealing but also adds fantastic textures to the Authentic Irish Apple Cake.

Step 6: Bake the Cake
Place the pan in the preheated oven and bake for 50-60 minutes, until the cake is golden brown and a toothpick inserted into the center comes out clean. The aroma of baking apples and spices will fill your kitchen, creating an enticing atmosphere. Keep an eye on it towards the end of the baking time to prevent over-browning.

Step 7: Cool and Serve
Once baked, remove the cake from the oven and allow it to cool in the pan for about 15 minutes before carefully releasing the sides of the springform pan. Dust the top with confectioners' sugar for that final touch of sweetness. Serve your Authentic Irish Apple Cake while warm, alongside the chilled custard sauce for a delightful dessert experience.

How to Store and Freeze Authentic Irish Apple Cake

Room Temperature: Store leftover cake covered at room temperature for up to 3 days for optimal freshness. This keeps the crumb moist and delicious.

Fridge: If you need to store it longer, wrap the cake tightly and refrigerate for up to a week, which helps maintain flavor and texture.

Freezer: For longer storage, freeze slices of the cake in an airtight container for up to 2 months. Thaw in the fridge overnight before serving.

Reheating: To enjoy the cake warm, reheat individual slices in the microwave for about 15-20 seconds or in a preheated oven at 350°F (175°C) for 10-15 minutes. Pair with custard for a comforting treat!

Expert Tips for Authentic Irish Apple Cake

• Cold Ingredients: Ensure your butter and other ingredients are cold for a crumbly streusel. This prevents it from becoming too wet.

• Custard Care: Cook your custard slowly and stir constantly to avoid curdling. A gentle hand ensures a silky finish.

• Apple Preparation: To prevent browning, toss your sliced apples in lemon juice if preparing them ahead of time. This maintains freshness.

• Springform Pan Use: Opt for a springform pan for easy release. This helps maintain the cake's structure when serving.

• Texture Variation: Experiment with different apple varieties, like Honeycrisp or Bramley, for unique flavors in your Authentic Irish Apple Cake.

Authentic Irish Apple Cake Variations

Feel free to let your creativity shine and customize this delightful cake according to your taste and preferences!

  • Different Apples: Experiment with Honeycrisp or Bramley apples for unique flavor profiles. Each variety offers its distinct sweetness and tartness, making every bake a new adventure.

  • Nutty Streusel: Swap out the oats in the streusel for walnuts or pecans for an added crunch. The nutty flavor brings a delightful twist and complements the apples beautifully.

  • Gluten-Free Option: Use a gluten-free flour blend in place of all-purpose flour to make this cake gluten-free without sacrificing taste.

  • Spice It Up: Add a pinch of nutmeg or allspice to the cake batter for a deeper, more complex flavor profile. These warm spices enhance the cozy autumn vibe of the cake.

  • Creamy Contrast: Serve with a dollop of whipped cream or vanilla ice cream for a brighter dessert experience. The contrasting temperatures create an indulgent moment.

  • Fruity Add-Ins: Toss in a handful of raisins or dried cranberries into the batter for a chewy texture and bursts of sweetness. They complement the apples wonderfully and add a savory surprise.

  • Vegan Twist: Replace butter with coconut oil and eggs with flax eggs or mashed banana for a vegan-friendly adaptation. It’s a delicious way to make a beloved dessert inclusive.

  • Caramel Drizzle: Drizzle some caramel sauce over the finished cake for an indulgent treat. The sweet, rich flavor elevates your cake into a luxurious dessert.

Looking for other delightful options? You might also enjoy trying my Ice Cream Cake or indulging in the rich flavors of a Chocolate Pudding Cake, perfect companions to your cozy baking adventures!

What to Serve with Authentic Irish Apple Cake

As you savor each bite of this delightful cake, elevate your dessert experience by considering these perfect pairings.

  • Custard Sauce: Creamy and rich, it amplifies the warm spices and tart apples, creating a luscious combination.

  • Freshly Brewed Coffee: The bold flavors and aromatic profile balance the sweetness of the cake beautifully, making every slice more enjoyable.

  • Whipped Cream: Light and fluffy, a dollop of whipped cream adds a delightful texture that contrasts with the moist cake.

  • Vanilla Ice Cream: The cold creaminess melts alongside the warm cake, enhancing the spiced flavors for an indulgent treat.

  • Caramel Drizzle: Sweet and buttery, a drizzle of caramel elevates the cake's earthy notes, offering a touch of decadence.

  • Tea: A classic choice—choose an Earl Grey or chai; both complement the cake’s warming spices beautifully, while enhancing the cozy atmosphere of your gathering.

  • Spiced Cider: Warm spiced cider echoes the cake’s cinnamon, making it a perfect companion for chilly fall evenings.

  • Cheese Plate: Sharp cheddar or tangy goat cheese provides a delightful contrast, balancing the sweet flavors of the cake with zest and richness.

With these suggestions, you’re all set to create a comforting and memorable dessert experience that celebrates the irresistible charm of this Authentic Irish Apple Cake!

Make Ahead Options

These Authentic Irish Apple Cakes are perfect for busy home cooks looking to save time! You can prepare the cake batter and store it in the refrigerator for up to 24 hours in advance, ensuring it's ready when you need it. Additionally, the streusel topping can be mixed and chilled for up to 3 days to enhance texture. Just remember to slice and toss your Granny Smith apples in lemon juice (to prevent browning) if you're prepping them ahead of time. When you’re ready to bake, simply layer the apples on top of the batter, sprinkle the streusel, and pop it in the oven for a fresh, delicious dessert that's just as delightful, even after making it ahead!

Authentic Irish Apple Cake Recipe FAQs

What type of apples should I use for the best flavor?
For the best results in your Authentic Irish Apple Cake, I highly recommend using Granny Smith apples. Their tartness beautifully contrasts the sweetness of the cake. If you're feeling adventurous, you can also experiment with Honeycrisp or Bramley apples for delightful variations in flavor and texture!

How should I store leftover apple cake?
You can store any leftover cake covered at room temperature for up to 3 days. If you want to extend its freshness, wrap the cake tightly in plastic wrap and refrigerate for up to a week. This helps maintain its delicious flavor and texture!

Can I freeze Authentic Irish Apple Cake?
Absolutely! To freeze, slice the cake into individual pieces and place them in an airtight container or zip-top freezer bag, separating layers with parchment paper if needed. It can be stored in the freezer for up to 2 months. When you're ready to enjoy it, simply thaw the slices in the refrigerator overnight and reheat as desired.

What should I do if my custard sauce curdles?
If your custard sauce curdles, don’t worry! To fix it, you can pass it through a sieve to remove the curds. For future attempts, remember to cook the custard over low heat while constantly stirring; this will help maintain a smooth texture. If it's too thick, simply whisk in a bit of warm milk until you reach the desired consistency.

Can I substitute ingredients in the recipe for dietary restrictions?
Yes, this recipe is quite flexible! If you’re looking for a dairy-free option, you can substitute unsalted butter with margarine and use almond milk instead of whole milk. For a gluten-free version, swap out the all-purpose flour for a gluten-free flour blend. Just remember that these substitutions may slightly alter the flavor and texture of the cake.

How can I determine when the cake is done baking?
To check if your Authentic Irish Apple Cake is done, insert a toothpick into the center of the cake. If it comes out clean or with just a few moist crumbs attached, it’s ready! Additionally, you should notice a lovely golden-brown color on top and a slight spring when you gently press the surface.

Authentic Irish Apple Cake

Cozy Up With Authentic Irish Apple Cake That's Pure Joy

Delight in the comforting flavors of Authentic Irish Apple Cake, a perfect dessert for autumn gatherings.
Print Recipe Pin Recipe
Prep Time 30 minutes mins
Cook Time 1 hour hr
Cooling Time 15 minutes mins
Total Time 1 hour hr 45 minutes mins
Servings: 8 slices
Course: Dessert
Cuisine: Irish
Calories: 350
Ingredients Equipment Method Nutrition Notes

Ingredients
  

For the Cake
  • 1 cup Unsalted Butter Softened
  • 1 cup Granulated Sugar
  • 3 Large Eggs At room temperature
  • 1 cup Whole Milk Or cream
  • 2 cups All-Purpose Flour
  • 1 teaspoon Baking Powder
  • 1 teaspoon Cinnamon
  • 1/4 teaspoon Salt
For the Apples
  • 3-4 Granny Smith Apples Peeled and sliced
For the Streusel Topping
  • 1 cup Old Fashioned Rolled Oats
  • 1/3 cup Sugar
  • 1 cup All-Purpose Flour
  • 1/2 cup Unsalted Butter Cold, cut into pieces
For the Custard Sauce
  • 4 Egg Yolks
  • 1/2 cup Sugar
  • 2 cups Whole Milk
  • 1 teaspoon Vanilla Extract

Equipment

  • 9-inch springform pan
  • Mixing bowls
  • Whisk
  • Saucepan
  • sieve

Method
 

Preparation
  1. Preheat your oven to 350°F (175°C) and grease a 9-inch springform pan.
  2. In a small saucepan, heat 2 cups of whole milk over medium heat.
  3. Whisk together 4 egg yolks and 1/2 cup sugar until creamy.
  4. Combine in saucepan and cook on low heat until slightly thickened, about 5 minutes.
  5. Chill while you make the cake.
Making the Streusel Topping
  1. In a mixing bowl, combine 1 cup of flour, 1/3 cup of sugar, and 1 cup of oats.
  2. Cut in 1/2 cup of cold butter until the mixture resembles coarse crumbs.
  3. Chill in the refrigerator.
Baking the Cake
  1. Cream together 1 cup of softened butter and 1 cup of sugar until light and fluffy.
  2. Add in 3 large eggs, one at a time, mixing well after each.
  3. Combine dry ingredients and add to the butter mixture, alternating with 1 cup of milk.
  4. Pour into prepared pan, top with sliced apples, and sprinkle with streusel.
  5. Bake for 50-60 minutes until golden brown and a toothpick comes out clean.
Serving
  1. Allow the cake to cool for 15 minutes before removing from the springform pan.
  2. Dust with confectioners' sugar and serve with custard sauce.

Nutrition

Serving: 1sliceCalories: 350kcalCarbohydrates: 46gProtein: 5gFat: 16gSaturated Fat: 10gPolyunsaturated Fat: 1gMonounsaturated Fat: 4gCholesterol: 120mgSodium: 200mgPotassium: 150mgFiber: 2gSugar: 20gVitamin A: 500IUVitamin C: 6mgCalcium: 80mgIron: 1mg

Notes

Experiment with different apple varieties like Honeycrisp or Bramley for unique flavors.

Tried this recipe?

Let us know how it was!

Moist and Rich Guinness Chocolate Cake for Celebrations

February 17, 2026 by Grace Snow Leave a Comment

In the heart of every home bake lies a hidden treasure waiting to emerge from the oven, and this Guinness Chocolate Bundt Cake is just that! Picture a luscious chocolate cake that harmoniously fuses the deep flavors of stout with creamy Baileys buttercream—perfect for celebrating St. Patrick's Day or any occasion that calls for a little indulgence. Not only is this dessert a crowd-pleaser, but it's also simple to whip up, making it an excellent choice for both seasoned bakers and newcomers. You'll love how the stout elevates the rich chocolate experience, while the buttercream adds a decadent touch that keeps you coming back for more. Are you ready to turn your kitchen into a bakery? Let’s dive into making this delightful treat!

Why is Guinness Chocolate Cake so special?

Irresistible Flavor: The rich combination of chocolate and Guinness brings an incredible depth of flavor, creating a cake that's far from ordinary.

Effortless Preparation: Even if you're new to baking, this simple recipe is easy to follow—no complicated techniques or fancy equipment needed!

Showstopper Presentation: Its stunning bundt shape makes it visually impressive, perfect for gatherings and celebrations—guaranteed to impress your guests.

Versatile Options: Feel free to swap out Guinness for different stouts or exchange Baileys for alternative liqueurs, allowing for personalized variations each time you bake.

Perfect for Any Occasion: Although ideal for St. Patrick's Day, this cake is a delightful treat year-round—think birthdays, anniversaries, or just a special dessert night.

Ready to combine flavors and textures in this delightful recipe? You might also want to explore more chocolate indulgence with our delicious Chocolate Pudding Cake for another satisfying dessert!

Guinness Chocolate Cake Ingredients

For the Cake
• Nonstick Baking Spray – Prevents sticking; use any quality baking spray for best results.
• Granulated Sugar – Provides sweetness and moisture; can substitute with coconut sugar for a hint of caramel.
• Light Brown Sugar – Adds depth and moisture; can replace with more granulated sugar, but texture might vary.
• All-purpose Flour – Offers structure; swap for a gluten-free blend if needed.
• Unsweetened Cocoa Powder – Delivers rich chocolate flavor; Dutch-process cocoa can be used for a deeper taste.
• Espresso Powder – Enhances chocolate intensity; omit if unavailable or use brewed espresso to add moisture.
• Baking Soda & Baking Powder – Essential leavening agents; ensure freshness for optimal rise.
• Salt – Balances sweetness; kosher or sea salt works best.
• Eggs – Provides structure and moisture; ensure they’re at room temperature for proper mixing.
• Full-fat Sour Cream – Adds richness; Greek yogurt can be used as a substitute.
• Guinness Beer – The key flavor ingredient enhancing the chocolate notes; replace with any stout beer if desired.
• Vegetable Oil – Adds moisture and tenderness; can substitute with melted coconut oil for added flavor.
• Whole Milk – Contributes moisture; any milk or plant-based options work.
• Vanilla Extract – A flavor enhancer; opt for high-quality extract for the best results.

For the Buttercream
• Unsalted Butter – Provides richness; salted butter can work if you adjust the salt in the recipe.
• Confectioners' Sugar – Creates sweetness and a smooth texture for the buttercream; no substitutes recommended.
• Baileys Irish Cream – Adds a delightful flavor to the buttercream; any Irish cream liqueur can be used.
• White Chocolate – Offers creaminess; omit if you prefer a lighter frosting.

For the Caramel Drizzle
• Granulated Sugar – Essential for caramel; be mindful not to stir while cooking to prevent crystallization.
• Water – Assists in dissolving the sugar for caramel.
• Unsalted Butter – Adds richness to the caramel; use salted butter if desired.
• Heavy Whipping Cream – Creates a luxurious texture in the caramel.
• Irish Whiskey – Infuses the caramel with depth; can be adjusted to taste.
• Vanilla Extract – Enhances the overall flavor of the caramel.
• Sea Salt – Balances richness and sweetness in the caramel drizzle.

Now that you have everything ready, let’s bring this Guinness Chocolate Cake to life! With its lush texture and irresistible flavor, it’ll be the star of any celebration.

Step‑by‑Step Instructions for Decadent Guinness Chocolate Bundt Cake with Baileys Buttercream

Step 1: Preheat the Oven
Begin by preheating your oven to 325°F (162°C). This ensures that your Guinness Chocolate Bundt Cake will bake evenly and rise beautifully. While it warms up, gather your nonstick baking spray and 10-inch Bundt pan, preparing for easy cake release after baking.

Step 2: Combine Dry Ingredients
In a large mixing bowl, whisk together the granulated sugar, light brown sugar, all-purpose flour, unsweetened cocoa powder, espresso powder, baking soda, baking powder, and salt. Mix these dry ingredients on low speed until well combined. The aroma of cocoa will fill your kitchen as you prepare for the rich chocolate flavor that will define your cake.

Step 3: Whisk Wet Ingredients
In a separate bowl, whisk together the eggs, full-fat sour cream, Guinness beer, whole milk, vegetable oil, and vanilla extract until fully combined. This mixture should be smooth and creamy, creating a luscious base for your Guinness Chocolate Cake. Ensure all wet ingredients are at room temperature for the best emulsion.

Step 4: Combine Wet and Dry Mixtures
Slowly pour the wet mixture into the bowl of dry ingredients. Gently stir with a spatula until just incorporated—be careful not to overmix! The batter should be thick, smooth, and heavenly chocolate-scented. This is where the magic happens, blending flavors for your decadent dessert.

Step 5: Prepare the Bundt Pan
Generously spray your 10-inch Bundt pan with nonstick baking spray, ensuring all crevices are covered to prevent sticking. Carefully pour the rich chocolate batter into the prepared pan, smoothing the top for an even bake. This step is vital; a well-prepared pan is crucial for the perfect release.

Step 6: Bake the Cake
Place the Bundt pan in the preheated oven and bake for 50 minutes, or until a toothpick inserted into the center comes out clean. Keep an eye on the cake as it bakes; it will rise and develop a glossy top, giving you a tantalizing hint of the chocolate goodness within.

Step 7: Cool the Cake
Once baked, remove the Bundt pan from the oven and let it cool for about 15 minutes. Then, carefully invert the cake onto a wire rack to cool completely. This cooling process allows the cake to settle and helps maintain its moist texture, setting the stage for the final touches.

Step 8: Make the Buttercream
While the cake cools, prepare the Baileys buttercream by beating softened unsalted butter in a mixing bowl until it’s smooth and creamy. Gradually add the confectioners' sugar, then mix in Baileys Irish Cream, whole milk, vanilla extract, salt, and melted white chocolate until fluffy. The buttercream should be delightful and decadent, perfect for frosting.

Step 9: Frost the Cool Cake
Once the cake is completely cooled, generously frost the top with the fluffy Baileys buttercream, creating a beautiful layer of sweetness. Spread it evenly, allowing some to cascade down the sides for a visually appealing finish. The contrast of rich frosting against the dark chocolate cake will make it irresistible.

Step 10: Drizzle with Caramel
Prepare a salted caramel drizzle by following your caramel recipe, then carefully drizzle it over the frosted Guinness Chocolate Cake just before serving. This finishing touch will not only add an exquisite flavor but also a stunning visual appeal, turning your dessert into an unforgettable centerpiece.

What to Serve with Guinness Chocolate Bundt Cake

Indulging in a slice of this luscious cake opens the door to a world of delightful pairings that truly enhance the experience.

  • Vanilla Ice Cream: A classic pairing, the creaminess of vanilla ice cream balances the richness of the cake, providing an irresistible contrast.
  • Fresh Berries: Juicy strawberries or raspberries add a refreshing tartness, brightening each bite and perfectly complementing the chocolate.
  • Whipped Cream: Light and airy, a dollop of whipped cream adds another layer of texture while keeping things sweet and creamy.
  • Chocolate Ganache: For the chocolate lovers, a silky ganache intensifies the flavor, making your dessert experience decadent and luxurious.
  • Irish Coffee: This warm, coffee-infused cocktail with a hint of whiskey enhances the chocolate notes, creating a pleasing harmony with the cake.
  • Caramel Sauce: Drizzling extra caramel sauce over the top elevates the cake to new heights, offering a sweet touch that envelopes every slice.

These delicious accompaniments not only enhance the sensory experience of your dessert but also create the perfect celebration atmosphere—some flavors belong together, and this is one of them!

How to Store and Freeze Guinness Chocolate Cake

Fridge: Store leftover Guinness Chocolate Cake in an airtight container for up to 5 days. This helps retain its moist texture and rich flavor, ensuring each slice is just as delightful.

Freezer: To freeze, wrap the cooled cake tightly in plastic wrap and then in aluminum foil. It can be frozen for up to 3 months. Thaw in the fridge overnight before enjoying again.

Buttercream Storage: Keep any leftover Baileys buttercream in the fridge in an airtight container for up to a week. Before reusing, bring to room temperature and re-whip for a smooth consistency.

Reheating: To enjoy each slice warm, gently microwave for 10-15 seconds. A warm slice pairs beautifully with a scoop of ice cream or a dollop of whipped cream!

Expert Tips for Making Guinness Chocolate Cake

  • Room Temperature Ingredients: Ensure all wet ingredients are at room temperature to create a smooth batter and enhance the emulsion, resulting in a moist Guinness chocolate cake.

  • Don’t Overmix: When combining wet and dry ingredients, stir until just incorporated. Overmixing can lead to a dense cake; the goal is light and fluffy!

  • Fresh Leavening Agents: Use fresh baking soda and baking powder for the best rise. Stale agents can result in a flat cake that doesn’t reach its full potential.

  • Cool Properly: Allow the cake to cool in the pan for 15 minutes before inverting it. This helps prevent breakage and ensures the cake maintains its moist texture.

  • Perfect Buttercream Consistency: Adjust the thickness of your Baileys buttercream by adding more powdered sugar for thickness or a splash of cream for a lighter texture; make it just right for spreading!

  • Caramel Caution: When making the salted caramel, avoid stirring the sugar while it cooks to prevent crystallization. Keep a close eye on it to avoid burning!

Make Ahead Options

These decadent Guinness Chocolate Bundt Cakes are perfect for meal prep enthusiasts! You can bake the cake up to 2 days in advance and store it in an airtight container at room temperature to maintain its moist texture. For the Baileys buttercream, you can prepare it up to 3 days ahead and refrigerate it in an airtight container; just give it a quick mix before frosting the cake. Additionally, you can make the salted caramel drizzle in advance and keep it refrigerated for up to 5 days – simply reheat it gently before serving. This way, when it's time to enjoy, all you'll need to do is frost the cooled cake and drizzle with caramel for a delightful, time-saving treat!

Guinness Chocolate Cake Variations & Substitutions

Feel free to get creative with this delicious cake recipe, and make it your own with these fun variations!

  • Dark Beer: Swap out Guinness for any rich stout or dark beer, like a coffee stout, for added complexity. The flavor will soar, bringing new depth to your cake.
  • Flavored Liqueurs: Instead of Baileys Irish Cream, experiment with other flavored liqueurs like Kahlua or Frangelico to give the buttercream a unique twist. This allows you to create exciting variations with each bake!
  • Gluten-Free: Use a gluten-free flour blend in place of regular all-purpose flour to make the cake suitable for gluten-sensitive guests. Achieving that moist texture is still delightful with the right blend!
  • Extra Texture: Toss in some chocolate chips or chopped nuts into the batter for a delightful surprise in each bite. The bursts of flavor and crunch will elevate your cake.
  • Dairy-Free: For a dairy-free version, replace the sour cream with unsweetened coconut yogurt and use dairy-free butter for the frosting. Perfect for those following a plant-based diet!
  • Caramel Variations: Add a hint of sea salt to your caramel drizzle for an exquisite balance of sweet and salty. This simple addition can transform the flavor profile into something extraordinary.
  • Moisture Boost: Substitute half the vegetable oil with applesauce for a lighter cake that still maintains moisture and flavor. You might even surprise yourself with how deliciously effective this swap is!
  • Spicy Touch: For a hint of warmth, add a pinch of cayenne pepper or cinnamon to the batter. This secret ingredient can create a surprising and delightful depth to the chocolate.

Your baking adventure doesn’t end here! If you crave more chocolate decadence, don’t miss our irresistible Chocolate Pudding Cake for another fantastic dessert option. Happy baking!

Guinness Chocolate Bundt Cake Recipe FAQs

Which type of Guinness beer should I use for this cake?
Absolutely! For the best flavor, I recommend using a classic Guinness stout. Its rich, deep flavor enhances the chocolate notes beautifully. If you want to experiment, any dark stout will work, such as a milk stout or a different Irish stout!

How should I store leftover Guinness Chocolate Cake?
You can store leftover Guinness Chocolate Cake in an airtight container in the fridge for up to 5 days. To ensure its moist texture remains intact, keep it tightly covered and avoid leaving it exposed to air.

Can I freeze this cake, and if so, how?
Yes, you can certainly freeze this cake! Wrap the cooled Guinness Chocolate Cake tightly in plastic wrap, and then wrap it in aluminum foil to keep it protected. It can be frozen for up to 3 months. When you're ready to enjoy it again, thaw it in the fridge overnight for the best results.

What if my cake doesn’t rise properly?
If your cake doesn't rise, there may be a few culprits: ensure your baking powder and baking soda are fresh, as stale leavening agents can hinder the rise. Also, avoid overmixing the batter, as this compacts the cake and can lead to a dense texture. Lastly, make sure your oven temperature is accurate; an oven thermometer can be a great tool to check this.

Is this cake suitable for people with dietary restrictions?
While this Guinness Chocolate Bundt Cake is not gluten-free, you can easily swap out the all-purpose flour for a gluten-free blend if needed. Additionally, if anyone is avoiding dairy, consider substituting the sour cream and butter in the frosting with suitable alternatives, such as dairy-free yogurt and vegan butter. Always verify ingredients to keep everyone safe and happy while indulging!

Can I make this cake a day in advance?
Very! Making the Guinness Chocolate Bundt Cake a day in advance is an excellent idea. Storing it overnight actually allows flavors to meld and enhances the overall taste. Just be sure to keep it covered in an airtight container at room temperature or in the fridge if you're in a warm environment. Enjoy the extra time you gain for your celebrations!

Guinness Chocolate Cake

Moist and Rich Guinness Chocolate Cake for Celebrations

Indulge in a rich and moist Guinness Chocolate Cake perfect for celebrations or St. Patrick's Day.
Print Recipe Pin Recipe
Prep Time 30 minutes mins
Cook Time 50 minutes mins
Cooling Time 15 minutes mins
Total Time 1 hour hr 35 minutes mins
Servings: 12 slices
Course: Dessert
Cuisine: Irish
Calories: 490
Ingredients Equipment Method Nutrition Notes

Ingredients
  

For the Cake
  • 1 can Guinness Beer key flavor ingredient enhancing the chocolate notes
  • 2 cups Granulated Sugar provides sweetness and moisture; can substitute with coconut sugar for a hint of caramel
  • 1 cup Light Brown Sugar adds depth and moisture; can replace with more granulated sugar
  • 2 cups All-purpose Flour offers structure; swap for a gluten-free blend if needed
  • ¾ cup Unsweetened Cocoa Powder delivers rich chocolate flavor; Dutch-process cocoa can be used for a deeper taste
  • 1 tbsp Espresso Powder enhances chocolate intensity; omit if unavailable
  • 1 tsp Baking Soda essential leavening agent
  • 1 tsp Baking Powder essential leavening agent
  • ½ tsp Salt balances sweetness; kosher or sea salt works best
  • 3 large Eggs provides structure and moisture; ensure they’re at room temperature
  • 1 cup Full-fat Sour Cream adds richness; Greek yogurt can be used as a substitute
  • ½ cup Vegetable Oil adds moisture and tenderness; can substitute with melted coconut oil
  • 1 cup Whole Milk contributes moisture; any milk or plant-based options work
  • 2 tsp Vanilla Extract a flavor enhancer; opt for high-quality extract for the best results
For the Buttercream
  • 1 cup Unsalted Butter provides richness; adjust salt if using salted butter
  • 4 cups Confectioners' Sugar creates sweetness and a smooth texture
  • ½ cup Baileys Irish Cream adds flavor to the buttercream; any Irish cream liqueur can be used
  • 1 cup White Chocolate offers creaminess; omit for lighter frosting
For the Caramel Drizzle
  • 1 cup Granulated Sugar essential for caramel
  • ¼ cup Water assists in dissolving the sugar
  • ½ cup Unsalted Butter adds richness; use salted butter if desired
  • ½ cup Heavy Whipping Cream creates a luxurious texture in the caramel
  • 2 tbsp Irish Whiskey infuses the caramel with depth; adjust to taste
  • 1 tsp Vanilla Extract enhances overall flavor of the caramel
  • ¼ tsp Sea Salt balances richness and sweetness in the caramel drizzle

Equipment

  • 10-inch Bundt pan
  • Mixing bowls
  • Whisk
  • Spatula
  • wire rack

Method
 

Preparation
  1. Preheat your oven to 325°F (162°C).
  2. In a large bowl, whisk together the granulated sugar, light brown sugar, all-purpose flour, unsweetened cocoa powder, espresso powder, baking soda, baking powder, and salt.
  3. In a separate bowl, whisk together the eggs, full-fat sour cream, Guinness beer, whole milk, vegetable oil, and vanilla extract until fully combined.
  4. Slowly pour the wet mixture into the dry ingredients and gently stir with a spatula until just incorporated.
  5. Generously spray your Bundt pan with nonstick baking spray and pour the batter into the prepared pan.
  6. Bake for 50 minutes or until a toothpick inserted comes out clean.
  7. Let the cake cool in the pan for about 15 minutes before inverting onto a wire rack.
  8. Prepare the buttercream by beating softened butter and gradually adding confectioners' sugar, then mix in Baileys, whole milk, vanilla extract, salt, and melted white chocolate until fluffy.
  9. Frost the top of the cooled cake with the Baileys buttercream.
  10. For the caramel drizzle, prepare it according to your caramel recipe and drizzle it over the frosted cake just before serving.

Nutrition

Serving: 1sliceCalories: 490kcalCarbohydrates: 62gProtein: 5gFat: 25gSaturated Fat: 15gCholesterol: 70mgSodium: 250mgPotassium: 200mgFiber: 2gSugar: 40gVitamin A: 5IUCalcium: 2mgIron: 10mg

Notes

Ensure all wet ingredients are at room temperature for best results. Store leftovers in an airtight container.

Tried this recipe?

Let us know how it was!

Grasshopper Cake: A Festive Chocolate-Mint Delight

February 17, 2026 by Grace Snow Leave a Comment

Ever had one of those days where you crave a dessert that brings back warm memories? The first time I tasted Grasshopper Cake at a friend's holiday gathering, I was instantly smitten by its lively minty flavor paired with luscious chocolate. This delightful Grasshopper Cake is perfect for any festive occasion, whether it’s Christmas, St. Patrick’s Day, or simply a treat for yourself on a Wednesday night. With minimal prep time and a pleasing balance of creamy and chocolaty goodness, it’s the type of cake that truly impresses without making you sweat in the kitchen. Packed with a refreshingly minty twist and rich chocolate fudge, this dessert is bound to bring smiles to the faces of your loved ones. Are you ready to whisk together some nostalgic magic?

Why is Grasshopper Cake a Must-Try?

Nostalgic Delight: This Grasshopper Cake is a trip down memory lane, evoking fond childhood favorites with its refreshing mint and rich chocolate layers. Simple Steps: With an easy-to-follow recipe, even novice bakers can whip this up! Perfect for Festivities: Whether it’s Christmas or St. Patrick's Day, this cake will be the star of your dessert table. Versatile Variations: You can easily switch up flavors to suit any occasion, or try pairing it with a scoop of vanilla ice cream for an extra treat! In search of similar delightful desserts? Check out Chocolate Pudding Cake for another crowd-pleaser!

Grasshopper Cake Ingredients

• Dive into the magic of Grasshopper Cake with these simple ingredients!

For the Cake

  • Duncan Hines Classic White Cake Mix – Forms the delightful base; feel free to substitute with any standard white or vanilla cake mix if needed.
  • All-Purpose Flour – Enhances the cake's texture; using cake flour can make it even lighter!
  • Water – Essential for hydrating the cake mix; stick to this ingredient for the best results.
  • Vegetable Oil – Keeps the cake moist; melted butter is a tasty alternative for a richer flavor.
  • Egg Whites – Provide structural support; whole eggs can be used for a deeper flavor and color.
  • Creme de Menthe Syrup or Liqueur – Infuses the cake with a minty kick; opt for mint syrup for a non-alcoholic version.

For the Topping

  • Thick Hot Fudge Topping – Adds decadence and richness; ensure it’s thick for optimal spreadability—Mrs. Richardson's is a favorite!
  • Cool Whip "Extra Creamy" – Stabilizes the whipped cream layer, preventing collapse; avoid regular Cool Whip for best results.
  • Chopped Andes Mints (Optional) – A charming garnish to elevate both appearance and mint flavor; skip if you prefer simplicity.

Now that you have the ingredients ready, let’s embark on creating your delightful Grasshopper Cake!

Step‑by‑Step Instructions for Grasshopper Cake

Step 1: Preheat and Prepare the Pan
Start by preheating your oven to 350°F (175°C). While the oven warms up, take a light-colored 9'' x 13'' pan and spray it thoroughly with non-stick cooking spray. This will ensure your Grasshopper Cake releases easily after baking, allowing for a beautiful presentation.

Step 2: Mix the Cake Batter
In a large mixing bowl, combine the Duncan Hines Classic White Cake Mix, all-purpose flour, water, vegetable oil, and egg whites. Using a mixer, blend the ingredients on low speed for about 30 seconds, then increase to medium speed for 2 minutes. The batter should be slightly lumpy but well-combined, which is perfect for your cake's moist texture.

Step 3: Add the Minty Flavor
Once your batter is mixed, gently stir in the creme de menthe syrup or liqueur, allowing the mint flavor to infuse into the cake. Afterward, pour the mixture into your prepared pan, spreading it evenly to ensure a uniform bake. Your Grasshopper Cake is now ready to go into the oven!

Step 4: Bake the Cake
Place the pan in the preheated oven and bake your Grasshopper Cake for 28-30 minutes. To check for doneness, insert a toothpick into the center; it should come out clean when the cake is fully baked. Once done, remove the cake from the oven and allow it to cool completely in the pan.

Step 5: Spread the Hot Fudge
After the cake has cooled, take your thick hot fudge topping and spread it evenly over the top of the cake using a spatula. The warm fudge will seep slightly into the cake layers, creating a rich chocolate layer that enhances the overall flavor of your Grasshopper Cake.

Step 6: Prepare the Whipped Topping
In a separate mixing bowl, fold the Cool Whip "Extra Creamy" together with a few tablespoons of creme de menthe syrup. This step is crucial for adding a delightful minty cream layer. Gently spread the whipped mixture over the fudge topping, creating a luscious contrast on your Grasshopper Cake.

Step 7: Chill Before Serving
Once layered, cover the cake with plastic wrap and place it in the refrigerator for at least 2 hours. Chilling allows the flavors to meld beautifully, resulting in a refreshing and decadent cake. The cake can be made a day ahead to save time before your festivities!

Step 8: Garnish and Serve
Finally, just before serving, consider garnishing your Grasshopper Cake with chopped Andes mints for a touch of elegance and added mintiness. Slice into pieces and enjoy this festive treat chilled, perhaps with a scoop of vanilla or mint ice cream for an extra indulgence.

Grasshopper Cake Variations & Substitutions

Delight in the creativity of making this Grasshopper Cake truly your own with these fun and tempting variations!

  • Gluten-Free: Substitute the cake mix and flour with gluten-free alternatives for everyone to enjoy this minty treat.
  • Dairy-Free: Use coconut cream in place of Cool Whip and coconut oil instead of vegetable oil for a delicious, dairy-less dessert.
  • Minty Flavor Boost: Enhance the mint flavor by adding a few drops of peppermint extract to the whipped topping—each bite will be a mint explosion!
  • Chocolate Drizzle: For an extra chocolatey goodness, top the finished cake with a drizzle of melted chocolate before chilling. It adds an eye-catching touch!
  • Layered Delight: Consider layering the cake with fresh mint leaves between the fudge and the whipped topping for a fresh, herbal twist. They add a vibrant pop of color too!
  • Cupcake Version: Transform this cake into cupcakes by baking in a muffin tin; adjust baking time to about 18-20 minutes for perfectly portable treats.
  • Adult-Friendly: For a little extra flair, fold in a splash of creme de menthe liqueur to the whipped topping for those special adult gatherings.
  • Fruity Twist: Swap out the hot fudge layer with a rich chocolate ganache for a fruity version topped with strawberries or raspberries for a fresh contrast.

As you can see, there are plenty of ways to make this Grasshopper Cake just as unique as your gatherings. If you're feeling adventurous, check out other delicious cakes like Chocolate Pudding Cake or a festive Chocolate Poke Cake when looking for delightful dessert options!

How to Store and Freeze Grasshopper Cake

Fridge: Store leftover Grasshopper Cake covered in the refrigerator for up to 3 days to maintain its delicious freshness.

Freezer: If you want to keep it longer, wrap individual slices in plastic wrap and place them in an airtight container; it can stay frozen for up to 2 months.

Thawing: When ready to enjoy, simply transfer slices to the fridge overnight to thaw; this helps retain its delightful texture.

Reheating: If you'd like it slightly warm, remove the Cool Whip layer and microwave a slice for about 10-15 seconds before adding fresh cream back on top.

What to Serve with Grasshopper Cake?

Looking to elevate your Grasshopper Cake experience? Here are some delightful pairings that will complement its minty chocolate goodness perfectly!

  • Mint Chocolate Chip Ice Cream: A classic pairing that enhances the mint flavor and adds a creamy, cool element to your dessert.

  • Fresh Berries: Strawberries or raspberries add a tart balance to the cake's richness and introduce a pop of color to your plate.

  • Chocolate-Covered Strawberries: These add an elegant and indulgent touch; their freshness brightens up the dessert table.

  • Whipped Cream with Crushed Mint Candies: A simple garnish that brings a textural crunch and a burst of mintiness to each slice.

  • Espresso or Dark Roast Coffee: The bitterness of a rich coffee perfectly contrasts the sweetness of the cake and enhances the chocolate flavors.

  • Chocolate Milkshake: This nostalgic drink pairs wonderfully, combining two cherished childhood favorites into one indulgent treat.

  • Vanilla Bean Gelato: Creamy and velvety, gelato creates a luxurious experience with the cake's mint and chocolate layers.

  • Chocolate Mint Cookies: For an extra sweet crunch, serve alongside some homemade or store-bought cookies that echo the cake’s flavors.

  • Lemon Sorbet: Providing a bright, refreshing end note, this light dessert cleanses the palate after every rich bite of Grasshopper Cake.

Make Ahead Options

These Grasshopper Cake layers are perfect for meal prep enthusiasts! You can bake and cool the cake up to 24 hours in advance, keeping it covered at room temperature to maintain its moisture. Additionally, the fudge topping can be prepared and stored in the refrigerator for up to 3 days—just warm it slightly before spreading for easy application. When you're ready to serve, simply combine the Cool Whip and creme de menthe syrup ahead of time, layering it on top of the fudge layer. Chill the entire cake for at least 2 hours to let the flavors meld, ensuring delicious results that are just as fresh and delightful as when made the day of your gathering!

Expert Tips for Grasshopper Cake

  • Room Temperature Ingredients: Ensure your ingredients are at room temperature for better mixing; this will improve the texture of your Grasshopper Cake.

  • Hot Fudge Consistency: If the hot fudge topping is too thick to spread, slightly warm it to soften before applying; this ensures a smooth layer over your cake.

  • Chilling Time Matters: Allow the cake to chill for at least 2 hours to meld the flavors; this crucial step enhances the overall taste and texture of your Grasshopper Cake.

  • Layering Technique: Spread the fudge layer evenly for a perfect distribution of chocolate flavor; use a spatula for a smooth finish that makes serving easier.

  • Garnish Wisely: Consider garnishing with chopped Andes mints for added flair; this optional touch not only enhances appearance but also intensifies the mint flavor.

Grasshopper Cake Recipe FAQs

How do I choose the right ingredients for my Grasshopper Cake?
When selecting ingredients, ensure your eggs are fresh and your flour is properly stored. For the cake mix, I recommend using Duncan Hines Classic White Cake Mix for best results. If you're considering the creme de menthe syrup, make sure it’s vibrant green for the best mint flavor. Fresh mint is a delightful option for garnishing, but if unavailable, chopped Andes mints can also add that refreshing touch!

How should I store leftover Grasshopper Cake?
For optimal freshness, cover the leftover Grasshopper Cake tightly with plastic wrap and store it in the refrigerator. It will stay fresh for about 3 days. Make sure to keep the cake completely chilled, as the whipped topping may become runny otherwise.

Can I freeze Grasshopper Cake?
Absolutely! To freeze, cut the cake into individual slices and wrap each piece in plastic wrap, then place them in an airtight container. This method allows you to enjoy a slice whenever you want and keeps the cake fresh for up to 2 months.

What if my Grasshopper Cake turns out dry?
If you find your Grasshopper Cake is dry, here are a few troubleshooting tips. Ensure you measure your cake mix and other dry ingredients accurately, as excess flour can lead to dryness. Also, be careful not to overbake; check for doneness a few minutes earlier than suggested. If the cake still ends up a bit dry, you can brush a simple syrup (equal parts sugar and water) over the layers before adding the fudge for extra moisture.

Is Grasshopper Cake safe for those with allergies?
It’s important to be aware of any allergies when making Grasshopper Cake. The recipe includes eggs, dairy (from the Cool Whip), and gluten (from the cake mix and flour). If anyone has gluten intolerance, consider using gluten-free cake mix and flour alternatives. Additionally, for non-dairy options, a dairy-free whipped topping can be used to replace Cool Whip.

Can I use a different type of cake mix?
Very! While Duncan Hines Classic White Cake Mix is the recommended choice for this Grasshopper Cake, you can substitute it with any standard white or vanilla cake mix. If you’d like a fun twist, consider using chocolate cake mix instead to amplify the rich chocolate flavor!

Grasshopper Cake

Grasshopper Cake: A Festive Chocolate-Mint Delight

Grasshopper Cake is a delightful dessert that combines minty freshness with rich chocolate, perfect for festive occasions.
Print Recipe Pin Recipe
Prep Time 15 minutes mins
Cook Time 30 minutes mins
Chilling Time 2 hours hrs
Total Time 2 hours hrs 45 minutes mins
Servings: 12 slices
Course: Dessert
Cuisine: American
Calories: 350
Ingredients Equipment Method Nutrition Notes

Ingredients
  

For the Cake
  • 1 box Duncan Hines Classic White Cake Mix Can substitute with standard white or vanilla cake mix.
  • 1 cup All-Purpose Flour Using cake flour can make it even lighter.
  • 1 cup Water Essential for hydrating the cake mix.
  • 1/2 cup Vegetable Oil Melted butter is an alternative.
  • 3 large Egg Whites Whole eggs can be used for deeper flavor.
  • 1/4 cup Creme de Menthe Syrup or Liqueur Opt for mint syrup for non-alcoholic version.
For the Topping
  • 1 cup Thick Hot Fudge Topping Ensure it’s thick for optimal spreadability; Mrs. Richardson's is recommended.
  • 1 container Cool Whip 'Extra Creamy' Avoid regular Cool Whip for best results.
  • 1/2 cup Chopped Andes Mints Optional for garnish; can skip for simplicity.

Equipment

  • 9 x 13 inch baking pan
  • Mixing Bowl
  • Mixer
  • Spatula

Method
 

Preparation Steps
  1. Preheat your oven to 350°F (175°C) and prepare a 9'' x 13'' pan with non-stick cooking spray.
  2. In a large mixing bowl, combine the cake mix, flour, water, vegetable oil, and egg whites. Blend on low for 30 seconds, then on medium for 2 minutes.
  3. Stir in the creme de menthe syrup gently, then pour the mixture into the prepared pan.
  4. Bake for 28-30 minutes, checking for doneness with a toothpick.
  5. Once cooled, spread the thick hot fudge topping evenly over the cake.
  6. In a separate bowl, mix the Cool Whip with creme de menthe syrup and spread over the fudge.
  7. Cover and chill in the refrigerator for at least 2 hours before serving.
  8. Garnish with chopped Andes mints just before serving and enjoy!

Nutrition

Serving: 1sliceCalories: 350kcalCarbohydrates: 45gProtein: 3gFat: 16gSaturated Fat: 6gPolyunsaturated Fat: 1gMonounsaturated Fat: 8gCholesterol: 30mgSodium: 200mgPotassium: 100mgFiber: 1gSugar: 28gVitamin A: 300IUCalcium: 50mgIron: 0.5mg

Notes

Use room temperature ingredients for better mixing and texture. Ensure the hot fudge is spreadable. Chilling the cake enhances the flavors.

Tried this recipe?

Let us know how it was!

Irresistible Easy Oreo Fluff Recipe Everyone Will Love

February 17, 2026 by Grace Snow Leave a Comment

A playful debate erupted over who could create the ultimate no-bake dessert at our last family gathering, and that’s when I shared my secret weapon: the Easy Oreo Fluff Recipe. Imagine a fluffy mixture that marries the crunch of Oreo cookies with the creamy delight of vanilla pudding and whipped topping. It’s a breeze to whip up—taking just 10 minutes of prep—and is sure to be a crowd-pleaser, especially for the little ones. What truly sets it apart is its adaptability; feel free to mix in your favorite treats or different flavored Oreos for a unique twist. Are you ready to add this sweet indulgence to your dessert repertoire and impress everyone with your effortless cooking skills?

Why is this Oreo Fluff Recipe a Must-Try?

Simplicity at Its Best: This no-bake dessert comes together in just 10 minutes, making it perfect for busy days or last-minute gatherings.
Kid-Friendly Fun: Kids will love getting involved, whether they’re crushing the Oreos or mixing the ingredients!
Versatile Flavor: With the option to swap in chocolate pudding or flavored Oreos, you can tailor this fluff to delight different palates. Try adding layers of fresh berries for a refreshing touch.
Crowd-Pleasing Delight: This Easy Oreo Fluff is sure to impress guests, mixing light textures with a nostalgic crunch that everyone adores.
Perfect for Sharing: Serve it up in cute mason jars or a large bowl, making it a beautiful centerpiece at your next event!

Easy Oreo Fluff Ingredients

  • For the Fluff
    • Instant Vanilla Pudding Mix – Serves as the creamy base; swap with chocolate pudding for a different taste.
    • Cold Milk (2 cups) – Activates the pudding mix to achieve the right consistency.
    • Whipped Topping (8 oz, thawed) – Adds airy lightness; substitute with homemade whipped cream if preferred.
    • Oreo Cookies (14-16 cookies, coarsely crushed) – Infuses crunch and rich flavor; different Oreo varieties will add unique twists.
    • Mini Marshmallows (1/2 cup, optional) – Introduces chewy sweetness; feel free to omit for a less sweet option.

Step‑by‑Step Instructions for Easy Oreo Fluff Recipe

Step 1: Prepare Pudding
In a large mixing bowl, whisk together the instant vanilla pudding mix and 2 cups of cold milk. Continue whisking for about 2 minutes until the mixture starts to thicken and becomes smooth. After about 5 minutes, it should be creamy and ready for the next step.

Step 2: Fold in Whipped Topping
Next, gently fold in the 8 ounces of thawed whipped topping into the pudding until fully combined. Use a spatula to incorporate the whipped topping carefully, ensuring the mixture remains light and fluffy. Aim for a uniform blend without any lumps, creating a creamy base for your Easy Oreo Fluff.

Step 3: Mix in Cookies and Marshmallows
Add the coarsely crushed Oreo cookies to the fluffy mixture, along with the optional mini marshmallows. Stir until the cookies and marshmallows are evenly distributed throughout the fluff. This step will infuse the dessert with delightful bits of crunch and chewy sweetness, enhancing your Easy Oreo Fluff.

Step 4: Chill
Transfer your delightful mixture into a serving bowl or individual cups for a charming presentation. Cover with plastic wrap and chill in the refrigerator for at least 1 hour. Chilling allows the flavors to meld together beautifully, giving your Easy Oreo Fluff a richer taste and better texture.

Step 5: Serve
Once chilled, it’s time to serve your Easy Oreo Fluff! You can garnish it with additional crushed Oreos or a dollop of whipped cream for an extra touch. Enjoy this delightful dessert deliciously chilled, perfect for parties or family gatherings with a sweet finish.

What to Serve with Easy Oreo Fluff Recipe

Elevate your dessert experience by pairing this creamy delight with complementary flavors and textures that your family will adore.

  • Fresh Berries: Bright and juicy, they add a fruity tang that contrasts beautifully with the rich fluffiness of the dessert.

  • Chocolate Drizzle: A drizzling of warm chocolate sauce enhances the sweetness while introducing a luxurious texture to each bite.

  • Graham Cracker Crust: Serve the fluff atop crumbled graham crackers for a delightful crunch that echoes classic s'mores nostalgia.

  • Whipped Cream: A dollop of extra whipped cream on top takes the dessert to new heights, making it even more luscious and inviting.

  • Ice Cream: The combination of cold vanilla or chocolate ice cream with the Oreo Fluff creates a divine creamy texture.

  • Coffee or Milk: Serve with a steaming cup of coffee or a glass of cold milk to wash down the sweetness and enhance every bite.

  • Mini Cupcakes: Pair with light, airy cupcakes to balance the richness of the fluff, creating a delightful dessert spread that's perfect for sharing.

  • Mint Chocolate Chip Cookies: The cool minty flavor adds a refreshing twist that beautifully contrasts with the sweetness of the fluff.

Make Ahead Options

The Easy Oreo Fluff recipe is perfect for meal prep, allowing you to prepare elements in advance for those busy weeknights! You can make the entire fluff mixture up to 24 hours ahead—just follow the instructions until the chilling step. After mixing, transfer it into an airtight container and refrigerate to keep it fresh. To maintain that delightful texture, avoid adding cookie crumbs until right before serving, as they can soften. When you're ready to enjoy, simply give it a quick stir, garnish with fresh Oreo bits or whipped cream, and serve. With these tips, you'll have a stress-free dessert that’s just as delicious!

Easy Oreo Fluff Recipe Variations

Feel free to get creative with this Easy Oreo Fluff recipe, as it’s perfect for personal touches and delightful twists!

  • Chocolate Pudding: Swap vanilla pudding for chocolate pudding to create a richer, more decadent treat that chocolate lovers will adore.
    Imagine the velvety smoothness of chocolate mingling with the crunchy Oreos—pure bliss!

  • Flavored Oreos: Use Mint, Peanut Butter, or Pumpkin Spice Oreos to give your fluff a unique flavor profile.
    The surprising flavors will add delightful complexity and make each scoop an adventure.

  • Fruit Layers: Add fresh berries or banana slices in between layers of fluff for a refreshing twist.
    The natural sweetness and tartness of the fruit will brighten the dessert and create a stunning presentation.

  • Add Cream Cheese: For an ultra-creamy texture, fold in softened cream cheese along with the whipped topping.
    This addition takes the richness up a notch, making each bite creamy and irresistible.

  • Nutty Crunch: Incorporate chopped nuts, such as walnuts or almonds, for an added crunch that beautifully contrasts with the softness of the fluff.
    This elevates the overall texture while adding a nutty flavor that pairs well with the Oreos.

  • Drizzle of Chocolate: Finish off your fluff with a delicious drizzle of chocolate syrup for a touch of indulgence.
    The sweet, chocolaty ribbon will enhance both the visual appeal and flavor, making it even more tempting.

  • S'mores Style: Mix in mini chocolate chips and crushed graham crackers for a S'mores-inspired twist.
    This fun variation adds a nostalgic element that will take you back to summer campfires in every bite!

Explore these variations to make your Easy Oreo Fluff truly yours. And if you’re looking for more delightful dessert ideas, check out these recipes for Breakfast Egg Muffins or try a zesty Chicken Adobo to balance your sweet tooth!

How to Store and Freeze Oreo Fluff

Fridge: Store leftover Easy Oreo Fluff in an airtight container in the refrigerator for up to 3 days. This will keep it fresh and maintain its delightful texture.

Freezer: While it's best enjoyed fresh, you can freeze Oreo Fluff for up to 1 month. Use a freezer-safe container, but note that the texture may change once thawed.

Reheating: Thaw frozen Oreo Fluff in the refrigerator overnight. For best results, serve chilled; re-whipping with a bit of whipped topping can help restore some fluffiness.

Serving Tip: If you're storing in jars, layer crushed Oreos on top just before serving for an added crunch!

Expert Tips for Easy Oreo Fluff

  • Thaw Completely: Ensure the whipped topping is entirely thawed before folding it into the pudding. This prevents lumps and guarantees a smooth texture in your Easy Oreo Fluff.

  • Add Cream Cheese: For a richer and creamier texture, consider folding in softened cream cheese before adding the whipped topping. This adds an extra layer of delight!

  • Avoid Sogginess: To keep your dessert from becoming too soggy, try to enjoy the Easy Oreo Fluff within 1-2 days. This ensures optimal freshness and texture.

  • Customize Add-Ins: Don’t shy away from experimenting! Different flavored Oreos or your favorite candies can add exciting twists to your dessert. Mix it up and see what new combinations you can create!

  • Presentation Matters: For a beautiful presentation, serve in individual jars or cups. This adds charm and allows guests to have their own portion, making your dessert feel more special!

Easy Oreo Fluff Recipe FAQs

How do I choose the best Oreos for this recipe?
Absolutely! For the best flavor, select fresh Oreos without any visible damage. I recommend checking for intact packaging and avoiding cookies with dark spots, which could indicate spoilage. If you want to mix it up, consider using flavored Oreos like Mint or Peanut Butter for a playful twist!

How long does Easy Oreo Fluff last in the fridge?
Very! You can store your Easy Oreo Fluff in an airtight container in the refrigerator for up to 3 days. Just make sure it’s sealed well to keep it fresh and maintain that creamy texture. If it starts to separate, simply give it a gentle stir before serving!

Can I freeze Oreo Fluff?
Yes, you can! To freeze your Easy Oreo Fluff, transfer it into a freezer-safe container, leaving some space at the top to allow for expansion. It can be stored for up to 1 month. When you're ready to enjoy it, thaw it in the refrigerator overnight, and a quick re-whip with a bit of whipped topping will help restore some fluffiness.

What should I do if my fluff becomes too soggy?
To avoid sogginess, enjoy your Easy Oreo Fluff within 1-2 days of preparation. If you notice it getting too wet, try adding a handful of crushed Oreos before serving to help absorb excess moisture. This will revitalize the texture and add that crunchy bite we all love!

Is this dessert suitable for pets or those with allergies?
Not necessarily! Always check for allergies related to ingredient components like milk and cream. This dessert is not suitable for pets, as many ingredients are harmful to them, including chocolate found in Oreos. If you’re serving guests, ensure you communicate if anyone has dietary restrictions!

Easy Oreo Fluff Recipe

Irresistible Easy Oreo Fluff Recipe Everyone Will Love

Enjoy this Easy Oreo Fluff Recipe, a delightful no-bake dessert that features a delicious blend of Oreo cookies, vanilla pudding, and whipped topping.
Print Recipe Pin Recipe
Prep Time 10 minutes mins
Chilling Time 1 hour hr
Total Time 1 hour hr 10 minutes mins
Servings: 8 servings
Course: Dessert
Calories: 240
Ingredients Equipment Method Nutrition Notes

Ingredients
  

For the Fluff
  • 1 box Instant Vanilla Pudding Mix swap with chocolate pudding for a different taste
  • 2 cups Cold Milk activates the pudding mix
  • 8 oz Whipped Topping thawed, can substitute with homemade whipped cream
  • 14-16 cookies Oreo Cookies coarsely crushed
  • 1/2 cup Mini Marshmallows optional

Equipment

  • large mixing bowl
  • Spatula
  • plastic wrap
  • serving bowl or individual cups

Method
 

Step-by-Step Instructions
  1. In a large mixing bowl, whisk together the instant vanilla pudding mix and 2 cups of cold milk. Continue whisking for about 2 minutes until the mixture starts to thicken and becomes smooth.
  2. Gently fold in the 8 ounces of thawed whipped topping into the pudding until fully combined using a spatula.
  3. Add the coarsely crushed Oreo cookies and optional mini marshmallows to the mixture. Stir until evenly distributed.
  4. Transfer the mixture into a serving bowl or individual cups, cover with plastic wrap, and chill in the refrigerator for at least 1 hour.
  5. Once chilled, serve your Easy Oreo Fluff with additional crushed Oreos or a dollop of whipped cream for garnish.

Nutrition

Serving: 1cupCalories: 240kcalCarbohydrates: 29gProtein: 3gFat: 12gSaturated Fat: 7gPolyunsaturated Fat: 0.5gMonounsaturated Fat: 3gCholesterol: 30mgSodium: 200mgPotassium: 150mgFiber: 1gSugar: 15gVitamin A: 400IUCalcium: 70mgIron: 1mg

Notes

Ensure the whipped topping is completely thawed to avoid lumps. Enjoy within 1-2 days for best texture!

Tried this recipe?

Let us know how it was!

Decadent Hawaiian Guava Cake: Your Tropical Escape Awaits

February 17, 2026 by Grace Snow Leave a Comment

The aroma of sun-soaked beaches and tropical fruits enveloped me as I took my first bite of the Decadent Hawaiian Guava Cake. There’s something undeniably magical about this dessert, with its luscious guava essence paired with hints of creamy coconut that transport you straight to paradise. What I love most is how effortlessly this cake comes together—ready in just an hour, it's perfect for spontaneous gatherings and impressive enough to wow your guests. Plus, with an easy gluten-free option, everyone can enjoy this slice of heaven! Are you ready to dive into this tropical delight? Let’s get baking!

Why is Hawaiian Guava Cake a Must-Try?

Tropical Escape: This cake brings the flavors of a beach vacation straight to your kitchen with its guava and coconut notes.

Effortless Preparation: In just an hour, you can whip up this delightful dessert, making it perfect for last-minute celebrations or cozy family dinners.

Gluten-Free Potential: With easy substitutions, everyone can indulge in this cake, catering to gluten-sensitive friends and family.

Impressive Presentation: The glossy guava glaze and fluffy cream cheese layer make it a showstopper at any gathering, leaving guests asking for seconds.

Versatile Pairing: Pair it with tropical fruit salad or a scoop of vanilla ice cream for a balanced meal that evokes summer vibes year-round.

Decadent Hawaiian Guava Cake Ingredients

For the Cake
• Strawberry Cake Mix – This serves as the delightful base for the cake, and you can easily substitute it with a gluten-free cake mix for a gluten-free option.
• Guava Nectar or Guava Juice – This provides the signature tropical flavor that makes this cake stand out; consider using fresh guava juice for an even more authentic taste.
• Large Eggs – These add necessary moisture and act as a binder; room temperature eggs help achieve a better cake texture.
• Coconut Oil – Enhances the cake’s moisture with a lovely coconut hint; feel free to replace it with vegetable oil if you prefer.

For the Cream Cheese Layer
• Cream Cheese – This creates the rich, smooth layer on the cake; make sure it's at room temperature for the best mixing. You can substitute it with dairy-free cream cheese if needed.
• Granulated Sugar – Sweetens the cream cheese layer perfectly; consider using brown sugar for a richer caramel flavor.
• Vanilla Extract – Adds aromatic sweetness; almond extract is a unique alternative to try.
• Cool Whip – This gives a fluffy texture to the cream cheese layer; opt for a dairy-free whipped topping as a substitute if desired.

For the Guava Gel
• Cornstarch – Thickens the guava gel for a glossy finish; while there's no direct substitute, arrowroot can work as an alternative.
• Water – Used for making the slurry to thicken the gel.

For Garnishing
• Sweetened Coconut Flakes – These add a delightful tropical touch to the finished cake; if you're looking for less sweetness, unsweetened coconut can be a great substitute.

Embrace the tropical flavors and effortless preparation of this Decadent Hawaiian Guava Cake, and bring a slice of sunny paradise to your table!

Step‑by‑Step Instructions for Decadent Hawaiian Guava Cake

Step 1: Preheat the Oven
Preheat your oven to 350°F (175°C) and prepare a 13x9-inch baking dish by coating it generously with vegetable spray. This will ensure your Decadent Hawaiian Guava Cake doesn’t stick and comes out smoothly after baking. Set the prepared dish aside as we mix the cake batter.

Step 2: Mix the Batter
In a large mixing bowl, combine the strawberry cake mix, guava juice, large eggs, and melted coconut oil. Using a mixer, blend on low speed for about 30 seconds to combine the ingredients without creating a mess, then increase the speed to medium-high and mix for 2 minutes until you achieve a smooth and slightly airy batter.

Step 3: Bake the Cake
Pour the batter into the prepared baking dish, spreading it evenly. Place the dish in the preheated oven and bake for 24 to 26 minutes. Keep an eye on the cake; it’s done when the top is light golden and a toothpick inserted into the center comes out clean or with just a few crumbs attached.

Step 4: Cool the Cake
Once baked, remove the cake from the oven and let it cool completely in the baking dish on a wire rack. This cooling step is crucial—it allows the flavors to settle and prepares the cake for the creamy topping we’ll add next, ensuring a delightful texture.

Step 5: Prepare the Cream Cheese Layer
While the cake cools, beat the cream cheese in a medium bowl until it's fluffy and smooth. Gradually mix in the granulated sugar and vanilla extract. Once combined, gently fold in the Cool Whip until everything is well incorporated and the mixture is light and airy. Set aside in the refrigerator to firm up slightly.

Step 6: Make the Guava Gel
In a small saucepan, heat the guava juice and a bit of sugar over medium heat until it reaches a gentle boil. Meanwhile, mix cornstarch with water in a small bowl to create a slurry. Once boiling, add the slurry into the pan, stirring continuously until the mixture thickens and becomes glossy—this takes about 2-3 minutes.

Step 7: Cool the Guava Gel
Remove the thickened guava gel from heat and transfer it to a bowl. Let it cool at room temperature before placing it in the refrigerator. Cooling will help it set further, allowing for a beautiful glaze on top of your Decadent Hawaiian Guava Cake.

Step 8: Assemble the Cake
Once the cake has cooled completely, spread the cream cheese mixture evenly over the top of the cake. Next, pour the cooled guava gel over the cream cheese layer, spreading it carefully to create a beautiful glossy finish.

Step 9: Chill Before Serving
Refrigerate the assembled cake for at least 1 hour to allow the flavors to meld together and the layers to set. This chilling step enhances the cake's overall taste and makes it easier to slice when you’re ready to serve.

Step 10: Garnish and Serve
Before serving, sprinkle sweetened coconut flakes on top of the cake for an added tropical touch. Slice the cake into squares and serve chilled, reveling in the flavors of your Decadent Hawaiian Guava Cake that’s sure to impress family and friends!

Decadent Hawaiian Guava Cake Variations

Feel free to customize this delightful cake to suit your tastes and dietary needs while enjoying its incredible tropical essence!

  • Gluten-Free: Substitute with a gluten-free cake mix and consider using gluten-free cream cheese for a completely gluten-free treat. This allows everyone to savor the magic of the cake without worry.

  • Add Fruits: Incorporate diced fresh pineapple or mango into the batter for a burst of tropical flavor. The juicy fruits infuse extra moisture and sweetness, making every bite even more delightful.

  • Dairy-Free: Opt for plant-based substitutes like dairy-free cream cheese and whipped topping. This way, you can enjoy the creamy texture and taste without the dairy!

  • Flavor Enhancements: Consider adding fresh lemon zest to the cream cheese layer for a refreshing citrus twist. Its bright notes harmonize beautifully with the guava.

  • Nutty Crunch: Fold in crushed macadamia nuts or walnuts into the batter for added texture and a delicious crunch that complements the cake's soft layers.

  • Tropical Twist: Switch up the guava juice with other tropical juices like passion fruit or pineapple juice to create a whole new flavor profile while keeping the essence of the islands alive.

  • Frosting Options: Instead of the guava gel, top the cake with a coconut whipped cream. It adds a lovely lightness that contrasts perfectly with the dense cake.

  • Spicy Heat: For a little kick, try adding a dash of cayenne or chili powder to the batter. The subtle heat will create an intriguing and exciting flavor profile that adventurous eaters will adore.

Consider pairing your Decadent Hawaiian Guava Cake with a refreshing tropical fruit salad or a scoop of creamy vanilla ice cream for an irresistibly balanced dessert experience! If you're in love with layered desserts, you might enjoy mixing it up with my Chocolate Pudding Cake as a delightful alternative!

Storage Tips for Decadent Hawaiian Guava Cake

Fridge: Store leftovers in an airtight container in the refrigerator for up to 3 days. This helps maintain the cake's moisture and keeps it fresh.

Freezer: For longer storage, freeze individual slices wrapped in plastic wrap and then aluminum foil for up to 2 months. Thaw in the fridge overnight before serving for the best taste and texture.

Reheating: If desired, you can gently warm slices in the microwave for about 10-15 seconds to enjoy a cozy treat that brings out the tropical flavors of the Decadent Hawaiian Guava Cake.

Serving Tip: When serving cold from storage, consider adding a sprinkle of fresh coconut flakes on top to revive that lovely tropical vibe!

What to Serve with Decadent Hawaiian Guava Cake

Dive into a delightful tropical feast that transports you straight to your happy place, where flavors mingle and laughter fills the air.

  • Tropical Fruit Salad: Fresh fruits like pineapple, mango, and kiwi add a refreshing crunch that pairs harmoniously with the cake’s sweetness.
  • Coconut Curry: The rich, savory flavors of coconut curry create a delightful contrast, enhancing the tropical vibe of your meal.
  • Vanilla Ice Cream: Creamy vanilla ice cream provides a smooth, cool contrast to the cake's richness, making every bite irresistible.
  • Lemon Sorbet: A zesty and light option that cleanses the palate, the sorbet's tartness beautifully balances the sweet guava.
  • Pineapple Upside-Down Cake: For the adventurous, complement the guava flavors with another tropical cake, ensuring a delightful dessert spread.
  • Sparkling Water with Lime: A refreshing drink enhances the tropical theme while offering a bubbly contrast to the cake’s texture.
  • Coconut Macaroons: These chewy treats echo the coconut notes in the cake, creating a cohesive and delightful dessert experience.

Embrace the tropical theme of your gathering and watch everyone return for seconds!

Expert Tips for Decadent Hawaiian Guava Cake

  • Room Temperature Ingredients: Ensure your cream cheese and eggs are at room temperature for a smooth and creamy texture in both the cake and topping.

  • Avoid Overbaking: Watch your cake closely to prevent it from drying out. A toothpick should come out clean or with a few moist crumbs for perfect moisture.

  • Cooling is Key: Allow the cake to cool completely before adding the cream cheese layer and guava gel—this prevents melting and blends the flavors beautifully.

  • Chill for Easy Slicing: Refrigerate the cake before serving. This step not only enhances the flavor but also ensures cleaner slices, making for a more appealing presentation.

  • Experiment with Flavors: Feel free to add zest like lemon or include diced fruits such as pineapple into your batter for an extra tropical twist in your Decadent Hawaiian Guava Cake!

Make Ahead Options

These Decadent Hawaiian Guava Cakes are perfect for meal prep, allowing you to enjoy tropical flavors without the last-minute rush! You can prepare the cake layers up to 24 hours in advance; simply bake, cool, and wrap it tightly in plastic wrap before refrigerating. The cream cheese mixture can also be made ahead and stored in the fridge for up to 3 days—just be sure to give it a good mix before spreading it on the cake to restore its creamy texture. When you're ready to serve, add the guava gel on top and refrigerate for at least 1 hour to let the flavors meld beautifully. With these make-ahead options, you can enjoy a stunning dessert that is just as delicious and hassle-free, even on the busiest of days!

Decadent Hawaiian Guava Cake Recipe FAQs

What type of guava juice should I use for the cake?
Absolutely! For the best flavor, I recommend using fresh guava juice if you can find it. However, store-bought guava nectar or juice works wonderfully too and provides that signature tropical taste that makes this cake special.

How should I store leftovers?
You can store any leftovers in an airtight container in the refrigerator, where they will stay fresh for up to 3 days. Make sure to keep it well-sealed to maintain its moisture and flavor.

Can I freeze the Hawaiian Guava Cake?
Yes! For freezing, wrap individual slices tightly in plastic wrap, followed by aluminum foil to avoid freezer burn. They can be stored for up to 2 months. When you're ready to enjoy, simply thaw the slices in the refrigerator overnight before serving.

What if my guava gel isn't thickening properly?
If your guava gel isn’t thickening, check that you mixed the cornstarch with water thoroughly before adding it to the hot juice. It’s important to continuously stir the mixture while it cooks for about 2-3 minutes until it becomes glossy and thick. If needed, you can add a tiny bit more cornstarch mixed with water to help thicken it further.

Is this recipe suitable for gluten-free diets?
Very! To make this Decadent Hawaiian Guava Cake gluten-free, simply swap out the strawberry cake mix with a gluten-free cake mix. Additionally, you can use a gluten-free cream cheese alternative to cater to those who are avoiding gluten. Enjoy without worry!

Decadent Hawaiian Guava Cake

Decadent Hawaiian Guava Cake: Your Tropical Escape Awaits

Experience the tropical bliss of Decadent Hawaiian Guava Cake, combining luscious guava and creamy coconut for an unforgettable dessert.
Print Recipe Pin Recipe
Prep Time 30 minutes mins
Cook Time 26 minutes mins
Cooling Time 30 minutes mins
Total Time 1 hour hr
Servings: 12 slices
Course: Dessert
Cuisine: Hawaiian
Calories: 320
Ingredients Equipment Method Nutrition Notes

Ingredients
  

For the Cake
  • 1 box Strawberry Cake Mix Can substitute with gluten-free cake mix.
  • 1 cup Guava Nectar or Guava Juice Fresh guava juice preferred for authentic taste.
  • 3 large Eggs Use room temperature for better texture.
  • 1/2 cup Coconut Oil Can replace with vegetable oil.
For the Cream Cheese Layer
  • 8 oz Cream Cheese Use at room temperature.
  • 1/2 cup Granulated Sugar Brown sugar can enhance flavor.
  • 1 tsp Vanilla Extract Almond extract is a unique alternative.
  • 8 oz Cool Whip Use dairy-free alternative if desired.
For the Guava Gel
  • 2 tbsp Cornstarch Arrowroot can be used as an alternative.
  • 1/2 cup Water To make slurry for thickening.
For Garnishing
  • 1 cup Sweetened Coconut Flakes Unsweetened coconut can be used as an alternative.

Equipment

  • Mixing Bowl
  • Electric mixer
  • Baking Dish
  • Saucepan
  • wire rack

Method
 

Step-by-Step Instructions
  1. Preheat your oven to 350°F (175°C) and prepare a 13x9-inch baking dish with vegetable spray.
  2. In a large mixing bowl, combine the strawberry cake mix, guava juice, eggs, and melted coconut oil. Mix on low for 30 seconds, then medium-high for 2 minutes.
  3. Pour the batter into the prepared baking dish and bake for 24 to 26 minutes, until golden and a toothpick comes out clean.
  4. Let the cake cool completely in the baking dish on a wire rack.
  5. While the cake cools, beat the cream cheese in a bowl until fluffy. Gradually mix in sugar and vanilla, then fold in Cool Whip.
  6. In a saucepan, heat guava juice and sugar until boiling. Mix the cornstarch with water, then add to the pan and stir until thickened.
  7. Remove the guava gel from heat and let it cool before refrigerating.
  8. Spread the cream cheese mixture evenly over the cooled cake, then pour the guava gel on top.
  9. Refrigerate for at least 1 hour before serving.
  10. Garnish with coconut flakes, slice, and serve chilled.

Nutrition

Serving: 1sliceCalories: 320kcalCarbohydrates: 40gProtein: 4gFat: 15gSaturated Fat: 7gPolyunsaturated Fat: 0.5gMonounsaturated Fat: 3.5gCholesterol: 80mgSodium: 300mgPotassium: 150mgFiber: 1gSugar: 20gVitamin A: 500IUVitamin C: 3mgCalcium: 50mgIron: 1mg

Notes

Use room temperature ingredients for the best texture and flavor. Review the cooling and chilling times to enhance the cake's taste and texture.

Tried this recipe?

Let us know how it was!

Pineapple Coconut Cake for a Tropical Escape at Home

February 17, 2026 by Grace Snow Leave a Comment

As I sifted through my pantry, I stumbled upon a can of crushed pineapple and a bag of sweetened shredded coconut. It felt like the perfect moment to create something magical, leading me to the delightful Pineapple Coconut Cake. This tropical treat is a fantastic crowd-pleaser, bringing the sunshine straight to your table without a hefty price tag. Whether you're an experienced baker or just starting out, the simplicity of this recipe will make it a staple in your home. With its luscious, moist crumb and the ability to transform any gathering into a festive celebration, this cake is your ticket to a mini-vacation with every bite. Curious how to make this slice of paradise? Let’s dive into the recipe!

Why is Pineapple Coconut Cake a must-try?

Tropical Escape: This Pineapple Coconut Cake transports you straight to a sun-soaked beach with its refreshing flavors.
Easy to Make: Even beginner bakers can whip this up with just a few steps, making it stress-free and accessible.
Crowd-Pleaser: Its delightful sweetness and moist texture make it perfect for any gathering, pleasing both family and friends.
Budget-Friendly: Using simple, affordable ingredients, you can bring a taste of paradise home without breaking the bank.
Versatile Treat: Whether topped with a light glaze or enjoyed plain, it’s a delightful addition to brunch or dessert.
Elevate your dessert game today, and serve it alongside cool whipped cream or a scoop of vanilla ice cream for an unforgettable experience!

Pineapple Coconut Cake Ingredients

For the Batter
• Unsalted Butter (0.25 cup) – Adds richness and tenderness to the cake; ensure it’s softened, not melted.
• Granulated Sugar (1.5 cups) – Provides sweetness that nicely balances the pineapple's tang.
• Large Eggs (3) – Help bind ingredients together for a moist cake; bring to room temperature for better incorporation.
• Vanilla Extract (1 teaspoon) – Enhances flavor, beautifully complementing the tropical notes of the cake.
• All-Purpose Flour (2.5 cups) – Creates the cake's structure, turning it into a delightful treat.
• Baking Soda (1 teaspoon) – Acts as a leavening agent, ensuring your cake rises perfectly.
• Salt (0.5 teaspoon) – Balances sweetness and enhances all the flavors in the cake.

For the Key Flavors
• Crushed Pineapple (1 cup, undrained) – The star of the show that keeps the cake moist and flavorful; stir well before measuring.
• Sweetened Shredded Coconut (0.5 cup) – Adds a lovely texture and sweetness; for less sweetness, use unsweetened coconut with added sugar.
• Buttermilk (0.5 cup) – Contributes moisture and a slight tang; you can substitute it with milk mixed with vinegar or lemon juice if needed.

This Pineapple Coconut Cake is not just a dessert; it’s an experience that brings tropical vibes into your home!

Step‑by‑Step Instructions for Pineapple Coconut Cake

Step 1: Preheat the Oven
Begin by preheating your oven to 350°F (175°C). While it warms up, grab a 9x13 inch baking pan and grease it generously with butter or cooking spray, then dust it lightly with flour. This preparation ensures that your delicious Pineapple Coconut Cake won’t stick to the pan when it’s baked to perfection.

Step 2: Mix Dry Ingredients
In a large mixing bowl, whisk together 2.5 cups of all-purpose flour, 1.5 cups of granulated sugar, 1 teaspoon of baking soda, and 0.5 teaspoon of salt. This dry mixture sets the foundation for your cake. Keep whisking until the ingredients are thoroughly combined and no lumps remain, creating a light and airy blend that’s essential for a fluffy cake.

Step 3: Cream Butter and Sugar
In a separate bowl, use an electric mixer to cream together 0.25 cup of softened unsalted butter until it's light and fluffy, which will take about 2-3 minutes. Gradually add in the sugar, continuing to mix until well combined. Next, add 3 large eggs one at a time, mixing well after each addition, along with 1 teaspoon of vanilla extract, ensuring each ingredient is fully incorporated before moving on to the next step.

Step 4: Combine Mixtures
Now that you have your wet ingredients ready, slowly add the dry mixture to the butter and sugar blend. Alternate this with 0.5 cup of buttermilk, beginning and ending with the dry ingredients. Mix gently until just combined; you want to avoid overmixing to keep your Pineapple Coconut Cake tender and moist, with no dry flour visible in the batter.

Step 5: Incorporate Pineapple and Coconut
Gently fold in 1 cup of undrained crushed pineapple and 0.5 cup of sweetened shredded coconut into the batter. Use a spatula to ensure the fruits are evenly distributed throughout the mixture without overmixing. This step adds the tropical flavors that make your cake special—creating that delightful, moist texture we all love!

Step 6: Bake the Cake
Pour the batter into your prepared baking pan, spreading it evenly with a spatula. Place the pan in the preheated oven and bake for 30-35 minutes. Keep an eye on your cake as it bakes, and check for doneness by inserting a toothpick into the center; it should come out clean or with a few moist crumbs clinging to it.

Step 7: Cool the Cake
Once baked to perfection, remove your Pineapple Coconut Cake from the oven and let it cool in the pan for about 10 minutes. Then, carefully invert the cake onto a wire rack to cool completely. This step is crucial as it allows the cake to set, ensuring a lovely texture that’s irresistible to your guests!

How to Store and Freeze Pineapple Coconut Cake

  • Room Temperature: Store the cake covered at room temperature for up to 2 days. This keeps it moist and ready to delight your taste buds.
  • Fridge: For longer storage, refrigerate the cake for up to 4-5 days. Allow it to come to room temperature before serving for the best flavor and texture.
  • Freezer: Wrap the Pineapple Coconut Cake tightly in plastic wrap or foil and freeze for up to 2-3 months. Defrost in the fridge overnight before glazing for a sensational treat.
  • Reheating: If desired, reheat individual slices in the microwave for about 15-20 seconds. This will restore its warmth and delightful texture, making each bite feel fresh!

Pineapple Coconut Cake Variations

Feel free to explore these delightful twists on the classic Pineapple Coconut Cake that are sure to tantalize your taste buds!

  • Glaze Options: Substitute some of the milk in the glaze with fresh lime juice or add citrus zest for a refreshing twist. Bright citrus elevates each bite, bringing a burst of flavor that harmonizes perfectly with the cake's sweetness.

  • Frosting Alternatives: Consider topping with cream cheese frosting for extra richness or omitting the glaze entirely for a simpler presentation. Each choice offers a unique way to enhance the cake's tropical essence.

  • Add-ins: Mix in chopped nuts such as toasted almonds for an added crunchy texture. This touch provides a delightful contrast to the cake's soft crumb, taking your indulgence to the next level.

  • Flavor Boost: Add a teaspoon of coconut extract for a deeper coconut flavor or combine it with almond extract for a nutty twist. Each variation will dance on your palate, making this cake even more enchanting.

  • Fruit Swap: Use fresh mango or banana instead of pineapple for an equally delightful tropical flavor. Experimenting with different fruits can open up new sensory experiences with each slice.

  • Dairy-Free: Substitute the buttermilk with almond or coconut milk to create a delicious dairy-free version. Giving you a chance to accommodate everyone at your dinner table.

  • Gluten-Free: Replace the all-purpose flour with a gluten-free flour blend that works in baking. This ensures all your friends can enjoy this sweet escape without missing out!

Don’t forget to serve your Pineapple Coconut Cake with a dollop of whipped cream or a scoop of vanilla ice cream for a truly indulgent experience! If you're inspired by other delightful cakes, check out my recipes for Ice Cream Cake and Chocolate Pudding Cake.

Helpful Tricks for Pineapple Coconut Cake

  • Ingredient Prep: Make sure your eggs are at room temperature; this helps them incorporate better, making your Pineapple Coconut Cake light and fluffy.
  • Don’t Overmix: Gentle mixing is key! Overmixing can make the cake dense. Stop mixing as soon as no dry flour is visible to ensure a tender crumb.
  • Proper Cooling: Allow the cake to cool in the pan for 10 minutes before inverting. This helps maintain its moisture and prevents it from breaking apart.
  • Oven Check: Every oven is different! Keep an eye on your cake during the last few minutes of baking and start checking doneness at the 30-minute mark.
  • Moisture Magic: For an extra moist cake, be sure to add the crushed pineapple undrained; it contributes to the cake's luscious texture and flavor.

Make Ahead Options

These Pineapple Coconut Cakes are perfect for meal prep enthusiasts! You can mix the dry ingredients and store them in an airtight container for up to 3 days. Additionally, cream the butter and sugar and keep the mixture refrigerated for up to 24 hours. This allows you to simply combine the prepared components and bake when ready. To maintain the quality, be sure to bring your refrigerated ingredients to room temperature before mixing. When you're ready to bake, just follow the final steps of incorporating the wet ingredients, pouring the batter into your pan, and baking. You’ll have a delicious, tropical delight with minimal effort, making it the ideal treat for busy weeknights!

What to Serve with Pineapple Coconut Cake

To create the perfect tropical meal, consider these delightful pairings that enhance the flavors of your cake.

  • Whipped Cream: A dollop of fresh whipped cream adds a light and airy element, making each slice even more indulgent.
  • Vanilla Ice Cream: The creamy, cool texture of vanilla ice cream harmonizes beautifully with the cake’s warm, fruity notes.
  • Fresh Berries: Juicy strawberries or plump blueberries provide a pop of tartness that complements the sweetness of the cake perfectly.
  • Pineapple Salsa: A refreshing pineapple salsa brings an extra burst of tropical flavor, perfect for those who love heightened fruitiness.
  • Mango Sorbet: The smooth, icy texture of mango sorbet creates a refreshing contrast to the soft, moist cake, making for a fantastic combo.
  • Coconut Milk Smoothie: A coconut milk smoothie adds creaminess and a luscious tropical flair, elevating the entire dessert experience.
  • Limeade: A glass of tangy limeade refreshes the palate, balancing the sweetness of the cake with a zesty twist.
  • Toasted Coconut Topping: Sprinkling toasted coconut on top of the cake enhances its tropical profile while providing a crunchy texture.
  • Tropical Fruit Salad: A mix of tropical fruits keeps the spirit of the cake alive, offering vibrant colors and refreshing flavors alongside your dessert.

Pineapple Coconut Cake Recipe FAQs

What type of pineapple is best for the cake?
Absolutely! For this Pineapple Coconut Cake, using crushed pineapple in juice (undrained) is perfect. The undrained version adds extra moisture, making the cake deliciously moist. Make sure to stir well before measuring to ensure an even distribution throughout the batter.

How should I store leftover cake?
You can keep your Pineapple Coconut Cake covered at room temperature for up to 2 days. For longer storage, refrigerate it for 4-5 days. Just let it come to room temperature before enjoying the leftovers so it regains its moist texture!

Can I freeze Pineapple Coconut Cake?
Yes, definitely! To freeze your cake, wrap it tightly in plastic wrap or aluminum foil to prevent freezer burn and maintain freshness. It can be frozen for up to 2-3 months. When you’re ready to enjoy, thaw it in the fridge overnight, and then feel free to apply the glaze after thawing for that fresh-out-of-the-oven taste!

What if my cake is too dense?
If your cake turns out too dense, it might be due to overmixing the batter. Remember, stop mixing as soon as no dry flour is visible. For a lighter texture, ensure your ingredients, especially eggs, are at room temperature. Also, too much flour can be a culprit, so be careful when measuring—using the scoop and level method helps ensure accuracy.

Is this recipe suitable for those with dietary restrictions?
Great question! Since this Pineapple Coconut Cake contains eggs and dairy, it's not suitable for strict vegans or those with egg or dairy allergies. However, substitutions like flax eggs for the eggs and a dairy-free milk option (such as almond or coconut milk) can work, although adjustments might be needed to maintain moisture. Additionally, be sure to use gluten-free flour if gluten is a concern.

Pineapple coconut cake

Pineapple Coconut Cake for a Tropical Escape at Home

Delight in a tropical Pineapple Coconut Cake that’s a crowd-pleaser and budget-friendly.
Print Recipe Pin Recipe
Prep Time 15 minutes mins
Cook Time 35 minutes mins
Cooling Time 10 minutes mins
Total Time 1 hour hr
Servings: 12 slices
Course: Dessert
Cuisine: Tropical
Calories: 300
Ingredients Equipment Method Nutrition Notes

Ingredients
  

For the Batter
  • 0.25 cup Unsalted Butter Ensure it’s softened, not melted.
  • 1.5 cups Granulated Sugar Provides sweetness.
  • 3 large Eggs Bring to room temperature.
  • 1 teaspoon Vanilla Extract Enhances flavor.
  • 2.5 cups All-Purpose Flour Creates the cake's structure.
  • 1 teaspoon Baking Soda Acts as a leavening agent.
  • 0.5 teaspoon Salt Balances sweetness.
For the Key Flavors
  • 1 cup Crushed Pineapple Undrained, stir well before measuring.
  • 0.5 cup Sweetened Shredded Coconut For less sweetness, use unsweetened coconut with added sugar.
  • 0.5 cup Buttermilk Can substitute with milk mixed with vinegar or lemon juice.

Equipment

  • 9x13-inch baking pan
  • Mixing Bowl
  • Electric mixer

Method
 

Step‑by‑Step Instructions
  1. Preheat your oven to 350°F (175°C) and grease a 9x13 inch baking pan.
  2. In a large mixing bowl, whisk together flour, sugar, baking soda, and salt.
  3. Cream together softened butter until light and fluffy, then gradually add sugar and mix well.
  4. Add eggs one at a time and include the vanilla extract.
  5. Slowly add the dry mixture to the wet ingredients, alternating with buttermilk.
  6. Gently fold in the crushed pineapple and shredded coconut.
  7. Pour the batter into the pan and bake for 30-35 minutes until a toothpick comes out clean.
  8. Let the cake cool in the pan for about 10 minutes before inverting onto a wire rack.

Nutrition

Serving: 1sliceCalories: 300kcalCarbohydrates: 45gProtein: 3gFat: 12gSaturated Fat: 7gPolyunsaturated Fat: 1gMonounsaturated Fat: 4gCholesterol: 60mgSodium: 200mgPotassium: 150mgFiber: 1gSugar: 20gVitamin A: 300IUVitamin C: 2mgCalcium: 50mgIron: 1mg

Notes

Make sure your eggs are at room temperature for better incorporation. Avoid overmixing to maintain the cake's tenderness. Allow the cake to cool properly to retain moisture.

Tried this recipe?

Let us know how it was!

Moist Hawaiian Carrot Pineapple Cake That You'll Adore

February 17, 2026 by Grace Snow Leave a Comment

There I was, sifting through my pantry for inspiration, when the thought of tropical flavors whisked me away to a sun-soaked beach. That's when I decided to create a Hawaiian Carrot Pineapple Cake, an irresistible fusion of sweet carrots and juicy pineapple, topped with a delightfully creamy frosting. It’s amazing how this simple cake can transport you to a summer paradise with just one bite! Not only is this recipe incredibly easy to prepare, making it perfect for busy weeknights or spontaneous gatherings, but its moist texture ensures that it’ll become a crowd favorite at any celebration. So, are you ready to let your kitchen shine with this tropical twist? Let’s dive in!

Why is Hawaiian Carrot Pineapple Cake a must-try?

Tropical Delight: This cake wonderfully blends sweet carrots with juicy pineapple for a burst of tropical flavor.
Effortless Preparation: With easy-to-follow steps, it’s perfect for bakers of all skill levels—no need to stress!
Moist and Fluffy: Each bite is a delightful balance of moist texture and soft crumb, making it hard to stop at just one slice.
Versatile for Any Occasion: Whether it's a family gathering or a casual coffee date, this cake impresses every time.
Creamy Frosting: The luscious cream cheese frosting elevates the cake, adding a rich finish without overpowering its tropical essence.
Healthy Indulgence: Packed with nutritious ingredients, you can enjoy this cake without the guilt—perfect for satisfying those sweet cravings!

Hawaiian Carrot Pineapple Cake Ingredients

For the Cake

  • All-Purpose Flour – Provides structure and a soft crumb. Best results with purpose flour.
  • Baking Powder – Raises the cake for a light texture. Use a good-quality baking powder.
  • Baking Soda – Helps with leavening for a fluffy cake.
  • Ground Cinnamon – Adds warmth and flavor.
  • Salt – Enhances sweetness and balances flavors.
  • Granulated Sugar – Sweetens the cake and contributes to its moist texture.
  • Large Eggs – Provides binding and moisture. Beaten until pale yellow for best results.
  • Vegetable Oil – Adds moisture; helps keep the cake tender.
  • Vanilla Extract – Enhances flavor depth.
  • Grated Carrots – Adds moisture, sweetness, and texture.
  • Crushed Pineapple – Infuses tropical flavor and moisture. If unavailable, finely diced fresh pineapple or unsweetened applesauce can be used.
  • Chopped Walnuts (optional) – Adds crunch and nuttiness.

For the Cream Cheese Frosting

  • Cream Cheese – Forms the base of a rich frosting. Must be softened for smooth mixing.
  • Unsalted Butter – Creates a creamy frosting texture.
  • Powdered Sugar – Sweetens and stiffens the frosting.
  • Vanilla Extract (for frosting) – Complements the cream cheese flavor.

Optional Garnish

  • Fresh Pineapple Chunks & Shredded Carrots – Decorate for an attractive finish that enhances the tropical vibe of your Hawaiian Carrot Pineapple Cake.

Step‑by‑Step Instructions for Hawaiian Carrot Pineapple Cake

Step 1: Preheat and Prepare Pans
Begin by preheating your oven to 350°F (175°C). While it warms, grease two 9-inch round cake pans with butter or cooking spray to prevent sticking. You might also want to place parchment paper at the bottom of each pan for added protection, ensuring a smooth release of your delightful Hawaiian Carrot Pineapple Cake once baked.

Step 2: Mix Dry Ingredients
In a large mixing bowl, whisk together the dry ingredients: all-purpose flour, baking powder, baking soda, ground cinnamon, and salt. This combination creates the foundation for your cake, ensuring it rises beautifully. Make sure to blend the dry ingredients until evenly combined, which will help distribute the leavening agents and spices throughout the batter.

Step 3: Combine Wet Ingredients
In a separate bowl, whisk together the granulated sugar, large eggs, vegetable oil, and vanilla extract until the mixture is smooth and a pale yellow color. This step is vital for creating a moist Hawaiian Carrot Pineapple Cake, as the sugar and eggs should be well incorporated to provide the necessary moisture and sweetness.

Step 4: Merge Wet and Dry Mixtures
Gradually pour the wet mixture into the bowl of dry ingredients, stirring gently with a spatula or wooden spoon. Be careful not to overmix; a few lumps in the batter are perfectly fine! This will retain moisture and create a tender crumb in your cake. You'll notice the batter coming together, ready to embrace the star ingredients.

Step 5: Fold in Carrots and Pineapple
Gently fold in the grated carrots and crushed pineapple into the batter using a spatula. If you’re adding chopped walnuts for extra crunch, now is the time! The carrots and pineapple will add moisture and sweetness, making this Hawaiian Carrot Pineapple Cake a delightful tropical treat that’s hard to resist.

Step 6: Bake the Cake
Divide the batter evenly between the prepared cake pans, ensuring an even level for both layers. Place the pans in the preheated oven and bake for 30-35 minutes, or until a toothpick inserted in the center comes out clean. You’ll know the cakes are done when they bounce back slightly when pressed gently.

Step 7: Cool the Cakes
Once baked, allow the cakes to cool in the pans for about 10 minutes. Afterward, carefully transfer them to wire racks to cool completely. This step is essential for letting the flavors develop further and ensures that your Hawaiian Carrot Pineapple Cake is ready to be frosted without melting the cream cheese frosting.

Step 8: Prepare the Cream Cheese Frosting
While the cakes are cooling, prepare the frosting. In a mixing bowl, beat the softened cream cheese and unsalted butter together until smooth and creamy. Gradually add the powdered sugar and vanilla extract, continuing to mix until the frosting is light and fluffy. This rich frosting will beautifully complement the tropical flavors of your cake.

Step 9: Frost and Decorate
Once your cakes are completely cool, place one layer on a serving platter and spread a generous layer of cream cheese frosting on top. Carefully add the second layer and frost the top and sides of the cake. Feel free to decorate with fresh pineapple chunks and shredded carrots for an appealing finish that highlights your lovely Hawaiian Carrot Pineapple Cake.

How to Store and Freeze Hawaiian Carrot Pineapple Cake

Room Temperature: Allow the cake to cool completely before storing. Keep it covered on the counter for up to 2 days to maintain its moisture.

Fridge: To keep the cake fresh, store it in an airtight container in the fridge for up to 5 days. This helps preserve its tropical flavor and moist texture.

Freezer: Wrap the unfrosted cake tightly in plastic wrap and then in aluminum foil. It can be frozen for up to 3 months; thaw in the fridge overnight before frosting.

Reheating: If you enjoy a warm slice, place individual pieces in the microwave for 10-15 seconds to revive that fresh-baked taste of your Hawaiian Carrot Pineapple Cake.

Hawaiian Carrot Pineapple Cake Variations

Feel free to get creative and make this recipe your own with these fun and easy variations!

  • Nut-Free: Omit the walnuts or swap them for sunflower seeds for a delightful crunch without the nuts.
    This option is perfect for those with nut allergies, ensuring everyone can enjoy this luscious cake without worry.

  • Dairy-Free: Use a dairy-free cream cheese alternative and margarine in the frosting for a delicious dairy-free option.
    This swap keeps the tropical flavor while catering to those with dietary restrictions, so nobody misses out on the fun!

  • Flavor Boost: Add shredded coconut to the batter for an extra touch of tropical goodness.
    Shredded coconut pairs beautifully with the pineapple, taking you on a mini-vacation with every bite!

  • Apple Twist: Substitute crushed pineapple with unsweetened applesauce for a different fruit profile.
    This swap gives the cake a mild sweetness while still delivering that juicy moisture we all love.

  • Spice It Up: Mix in a pinch of nutmeg or ginger along with the cinnamon for added warmth.
    This little twist elevates the flavor profile, providing a more complex and inviting taste to your cake.

  • Layer It Up: Make a three-layer cake by duplicating the batter and assembling with extra frosting in between.
    A taller cake not only looks impressive but also brings more of that delightful creaminess with each slice!

  • Tropical Remix: Incorporate chopped fresh mango or shredded papaya for a fruity twist on the classic.
    These tropical fruits enhance the cake's flavor and make it an enticing centerpiece for any gathering.

Why not indulge in deeper adventures by exploring similar recipes like Ice Cream Cake or try your hand at the Chocolate Pudding Cake for a rich dessert option?

Expert Tips for Hawaiian Carrot Pineapple Cake

  • Use Room Temperature Eggs: Make sure your eggs are at room temperature for better mixing, as this helps achieve a smooth batter and a moist cake.
  • Don’t Overmix: Once the wet ingredients are added, avoid overmixing the batter to keep your Hawaiian Carrot Pineapple Cake tender and fluffy.
  • Check Doneness Carefully: Insert a toothpick into the center to check if the cake is done; it should come out clean to ensure a perfectly baked cake.
  • Wrap for Storage: If not serving immediately, wrap the unfrosted cake in plastic wrap to maintain freshness and moisture for up to three months.
  • Experiment with Frosting: For a lighter option, try using whipped coconut cream or Greek yogurt instead of cream cheese frosting for a unique twist on this delightful cake.

Make Ahead Options

This Hawaiian Carrot Pineapple Cake is a fantastic choice for meal prep! You can bake the cake layers up to 3 days in advance. Once cooled, store the unfrosted layers wrapped tightly in plastic wrap to keep them moist and fresh. The cream cheese frosting can also be prepared up to 24 hours ahead; simply store it in an airtight container in the refrigerator. When you're ready to serve, bring the frosting to room temperature for easier spreading, then frost your cakes and garnish as desired. This way, you'll enjoy all the delicious tropical flavors with minimal effort, making it perfect for a busy weeknight or special occasion!

What to Serve with Moist Hawaiian Carrot Pineapple Cake?

Savor the delightful experience of a tropical feast with these perfect pairings that enhance each bite of your beloved cake.

  • Fresh Fruit Salad: Bursting with vibrant seasonal fruits, this refreshing salad brings a bright and juicy contrast to the sweetness of the cake.

  • Coconut Cream Whipped Topping: Light and fluffy, this topping creates a tropical symphony, adding a rich, velvety texture that complements the cake beautifully.

  • Toasted Coconut Flakes: A sprinkle of toasted coconut enhances the tropical essence, providing a crunchy texture that pairs well with the moist cake.

  • Vanilla Bean Ice Cream: The creamy sweetness of vanilla bean ice cream melts beautifully on a warm slice, enhancing the cake’s flavors and making each bite indulgent.

  • Iced Hibiscus Tea: Sip on this floral tea for a refreshing and lightly sweetened drink that mirrors the cake's tropical notes, perfect for offsetting its warmth.

  • Lemon Pudding Parfait: A zesty pudding layered with whipped cream will add a tart balance to the sweetness of the cake, giving a burst of flavor with each forkful.

These delightful accompaniments will bring your dessert experience to another level!

Hawaiian Carrot Pineapple Cake Recipe FAQs

How do I select ripe pineapples for this cake?
When choosing pineapples, look for ones that feel heavy for their size, indicating juiciness. The skin should be a vibrant yellow and give slightly when pressed. If you notice dark spots or wrinkled skin, it may be overripe. Selecting a fresh, ripe pineapple will elevate the tropical flavor of your Hawaiian Carrot Pineapple Cake!

How should I store Hawaiian Carrot Pineapple Cake?
After letting the cake cool completely, you can store it at room temperature, covered, for up to 2 days if you plan to serve it quickly. For longer storage, wrap it tightly in plastic wrap and place it in an airtight container in the fridge for up to 5 days. This will help maintain its moisture and flavor without drying out.

Can I freeze Hawaiian Carrot Pineapple Cake?
Absolutely! For best results, wrap the unfrosted cake in plastic wrap and then in aluminum foil to prevent freezer burn. It can be frozen for up to 3 months. When you're ready to indulge, simply transfer it to the fridge to thaw overnight before frosting. This method keeps the cake tender and delicious for when you're ready to enjoy it.

What if my cake is too dense or doesn’t rise well?
If your Hawaiian Carrot Pineapple Cake turns out dense, it may be due to overmixing the batter or using old leavening agents like baking powder or baking soda. Remember to carefully combine the wet and dry ingredients and always check the expiry dates on your baking powder and baking soda to ensure they’re fresh and effective!

Is this cake suitable for people with nut allergies?
Yes! You can easily make this cake nut-free by omitting the walnuts or substituting them with seeds like sunflower or pumpkin seeds for a bit of crunch. Always double-check your baking ingredients for any potential cross-contaminants if you’re serving someone with a nut allergy to ensure everyone can enjoy this delightful Hawaiian Carrot Pineapple Cake!

Can I make this recipe vegan?
Absolutely! For a vegan version of Hawaiian Carrot Pineapple Cake, simply replace the eggs with flaxseed meal (1 tablespoon of flaxseed meal mixed with 3 tablespoons of water equals one egg). Use a plant-based oil and opt for vegan cream cheese in the frosting. You’ll still end up with a moist, flavorful cake that everyone will adore!

Hawaiian Carrot Pineapple Cake

Moist Hawaiian Carrot Pineapple Cake That You'll Adore

This Hawaiian Carrot Pineapple Cake is a delightful fusion of sweet carrots and juicy pineapple, topped with creamy frosting.
Print Recipe Pin Recipe
Prep Time 20 minutes mins
Cook Time 35 minutes mins
Cooling Time 10 minutes mins
Total Time 1 hour hr 5 minutes mins
Servings: 12 slices
Course: Dessert
Cuisine: Hawaiian
Calories: 350
Ingredients Equipment Method Nutrition Notes

Ingredients
  

For the Cake
  • 2 cups All-Purpose Flour Best results with purpose flour.
  • 2 teaspoons Baking Powder Use a good-quality baking powder.
  • 1 teaspoon Baking Soda
  • 1 teaspoon Ground Cinnamon
  • 1/2 teaspoon Salt
  • 1.5 cups Granulated Sugar
  • 3 Large Eggs Beaten until pale yellow for best results.
  • 1 cup Vegetable Oil
  • 1 teaspoon Vanilla Extract
  • 2 cups Grated Carrots
  • 1 cups Crushed Pineapple If unavailable, use finely diced fresh pineapple or unsweetened applesauce.
  • 1/2 cup Chopped Walnuts optional
For the Cream Cheese Frosting
  • 8 oz Cream Cheese Must be softened for smooth mixing.
  • 1/2 cup Unsalted Butter
  • 3 cups Powdered Sugar
  • 1 teaspoon Vanilla Extract for frosting
Optional Garnish
  • Fresh Pineapple Chunks
  • Shredded Carrots

Equipment

  • Oven
  • Mixing bowls
  • Cake Pans
  • Spatula
  • Wire Racks

Method
 

Step‑by‑Step Instructions
  1. Preheat your oven to 350°F (175°C) and grease two 9-inch round cake pans with butter or cooking spray.
  2. In a large bowl, whisk together the all-purpose flour, baking powder, baking soda, ground cinnamon, and salt.
  3. In a separate bowl, whisk together the granulated sugar, large eggs, vegetable oil, and vanilla extract until smooth and pale yellow.
  4. Gradually pour the wet mixture into the dry ingredients, stirring gently until just combined.
  5. Fold in the grated carrots and crushed pineapple, and add walnuts if desired.
  6. Divide the batter between the prepared pans and bake for 30-35 minutes until a toothpick comes out clean.
  7. Allow the cakes to cool in the pans for 10 minutes, then transfer them to wire racks to cool completely.
  8. Beat the softened cream cheese and unsalted butter until smooth, then gradually add the powdered sugar and vanilla extract.
  9. Frost the top of one layer with cream cheese frosting, add the second layer, and frost the top and sides of the cake.
  10. Decorate with fresh pineapple chunks and shredded carrots if desired.

Nutrition

Serving: 1sliceCalories: 350kcalCarbohydrates: 54gProtein: 3gFat: 15gSaturated Fat: 8gPolyunsaturated Fat: 1gMonounsaturated Fat: 6gCholesterol: 60mgSodium: 300mgPotassium: 200mgFiber: 1gSugar: 30gVitamin A: 500IUVitamin C: 5mgCalcium: 50mgIron: 1mg

Notes

Use room temperature eggs for better mixing. Don’t overmix the batter and check doneness carefully.

Tried this recipe?

Let us know how it was!

Delightful Wisconsin Apple Kringle with Sweet Vanilla Glaze

February 14, 2026 by Grace Snow Leave a Comment

As I wandered through the charming streets of Wisconsin last fall, the air was filled with the warm scent of apples and cinnamon wafting from every bakery. It was there that I first discovered the delightful Wisconsin Apple Kringle—a flaky pastry that combines buttery layers with a spiced apple filling and a sweet vanilla glaze. This recipe is not just a dessert; it’s a comforting slice of Midwestern tradition, perfect for brunch or a cozy evening tea. With quick prep time and the ability to customize flavors with spices or toppings, it’s a crowd-pleaser that everyone will adore. So, are you ready to bring a taste of Wisconsin into your kitchen? Let’s roll up our sleeves and create this scrumptious treat together!

Why is Wisconsin Apple Kringle Unique?

Deliciously Unique: This Wisconsin Apple Kringle blends flaky pastry with a warm, spiced apple filling that will transport your taste buds to a cozy bakery.

Customizable Options: Feel free to swap spices or add nuts for a personal twist!

Quick Preparation: With minimal hands-on time, you can easily whip up this delightful treat to impress family and friends during brunch or tea.

Perfectly Indulgent: The sweet vanilla glaze adds a luxurious touch that elevates an already scrumptious dessert. Pair it with coffee or chai to complete the experience!

Nostalgic Flavor: Celebrating Midwestern tradition, this kringle captures the essence of autumn in every bite, making it a must-try for anyone seeking comfort food. Try serving it alongside this Chicken Salad Apples for a perfect gathering!

Wisconsin Apple Kringle Ingredients

For the Dough
• Active Dry Yeast – Causes dough to rise and create a light texture; ensure yeast is fresh for best results.
• Warm Milk and Water – Activates the yeast and hydrates the dough; use just warm to the touch, not hot.
• All-Purpose Flour – Provides structure to the pastry; no substitutes needed for texture.
• Sugar – Adds sweetness and helps activate yeast; optional to use less for a less sweet Wisconsin Apple Kringle.
• Salt – Enhances flavor and balances sweetness.
• Cold Butter – Creates flakiness by leaving pockets in the dough; keep butter cold before use.
• Egg – Provides richness and aids in binding; can substitute with a flax egg for a vegan option.

For the Filling
• Apple Pie Filling – The delicious spiced apple center; homemade can elevate flavors.
• Cardamom – Adds a unique, warm spice profile; swap for cinnamon or nutmeg if desired.

For the Glaze
• Powdered Sugar – Essential for the glaze.
• Vanilla Extract – Adds depth to the glaze; use pure vanilla for the best flavor.
• Water – Adjusts glaze consistency.

Step‑by‑Step Instructions for Wisconsin Apple Kringle

Step 1: Prepare Yeast
In a small bowl, combine 1/4 cup warm milk and 1/4 cup warm water, then sprinkle in 2 1/4 teaspoons of active dry yeast. Allow the mixture to sit for about 5 minutes until it becomes frothy, signifying the yeast is activated. This critical step ensures your Wisconsin Apple Kringle dough will rise beautifully.

Step 2: Mix Dry Ingredients
In a large mixing bowl, whisk together 2 cups of all-purpose flour, 1/4 cup of sugar, and 1/2 teaspoon of salt until combined. Next, use a pastry cutter or your fingers to cut in 1/2 cup of cold butter until the mixture resembles coarse crumbs. This step is essential for achieving those flaky layers in your kringle.

Step 3: Combine Dough
With the dry ingredients ready, stir in the yeast mixture and 1 beaten egg until the dough just comes together. Avoid overmixing to keep your Wisconsin Apple Kringle tender. Form the mixture into a ball, wrap it tightly in plastic wrap, and refrigerate for at least 1 hour, allowing the flavors to meld and the butter to firm up.

Step 4: Roll Dough
Once chilled, place the dough on a floured surface and roll it into a rectangle about 12 inches by 8 inches. Make sure to use enough flour to prevent sticking, creating a smooth surface. This rolled dough will form the base of your delicious Wisconsin Apple Kringle.

Step 5: Add Filling
Spoon 1 cup of apple pie filling down the center of the dough, leaving about an inch of space on each side. For an aromatic touch, sprinkle 1 teaspoon of cardamom over the filling. It’s the perfect way to enhance the flavors that will harmonize in your kringle.

Step 6: Shape Kringle
Now, gently fold the sides of the dough over the apple filling, sealing the edges tightly to prevent any filling from leaking out. Shape the dough into a ring or horseshoe on a parchment-lined baking sheet, creating a beautiful centerpiece for your Wisconsin Apple Kringle.

Step 7: Bake
Preheat your oven to 375°F (190°C). Brush the top of the shaped kringle with an egg wash for a golden finish. Bake for 22-25 minutes, or until the pastry is golden brown and fragrant. Keep an eye on it as it bakes; the aroma will fill your kitchen and tempt everyone around!

Step 8: Cool and Glaze
Once baked, let your Wisconsin Apple Kringle cool on a wire rack for at least 15 minutes. Meanwhile, whisk together 1 cup of powdered sugar, 1 teaspoon of vanilla extract, and enough water to achieve a drizzling consistency. Drizzle this glaze over the kringle before serving to add a sweet, glossy finish.

Make Ahead Options

These Wisconsin Apple Kringles are a fantastic choice for meal prep enthusiasts! You can prepare the dough and filling up to 24 hours in advance, ensuring that it’s ready when you need it. Simply complete steps 1 through 3, then wrap the dough tightly in plastic wrap after chilling and refrigerate it, while keeping the apple pie filling stored in an airtight container. When you're ready to serve, roll out the dough, add the filling, shape the kringle, and bake as directed. This prep method saves you precious time on busy mornings or last-minute gatherings, and your kringle will be just as delicious as if you made it fresh!

What to Serve with Wisconsin Apple Kringle

Indulge in a delightful meal that harmonizes flavors and textures, perfectly complementing each mouthwatering bite of kringle.

  • Coffee or Chai: The warm, spiced notes of chai or the robustness of coffee enhance the kringle's flavors, making for a cozy pairing.

  • Vanilla Ice Cream: A scoop of creamy vanilla ice cream melts beautifully over the warm pastry, offering a contrast that’s simply irresistible.

  • Whipped Cream: Light and fluffy whipped cream adds a lovely, airy touch, balancing the sweetness of the glaze and enriching the overall experience.

  • Fresh Fruit Salad: A vibrant medley of seasonal fruits brings a refreshing brightness, cutting through the richness of the pastry for a balanced bite.

  • Caramel Sauce: Drizzle warm caramel over individual slices for an extra layer of decadence—sweetness meets spiced apple goodness perfectly!

  • Chardonnay: A chilled glass of Chardonnay with its fruity notes complements the spiced apple filling beautifully, enhancing the dessert’s indulgence.

Storage Tips for Wisconsin Apple Kringle

  • Room Temperature: Store your Wisconsin Apple Kringle in an airtight container at room temperature for up to 2 days, ensuring it stays fresh and delightful for your cravings.

  • Fridge: If you prefer a chillier treat, keep it in the fridge for up to 5 days, but note that the texture may become slightly denser.

  • Freezer: For longer storage, freeze slices wrapped tightly in plastic wrap and placed in a freezer-safe bag for up to 2 months.

  • Reheating: To regain flakiness, reheat slices at 300°F (150°C) for 8–10 minutes, allowing the aroma of warm apples and sweetness to fill your kitchen once again!

Expert Tips for Wisconsin Apple Kringle

  • Keep Butter Cold: Ensure your cold butter remains chilled until ready to use; this is key for achieving the flaky layers that define a perfect Wisconsin Apple Kringle.

  • Don’t Overmix: Gently combine your dough just until incorporated. Overmixing can lead to toughness, so embrace a light touch!

  • Use Parchment Paper: Line your baking sheet with parchment for an even bake and to prevent sticking. This will help the kringle maintain its beautiful shape.

  • Cool Completely Before Glazing: Allow the kringle to cool for at least 15 minutes before drizzling the glaze. This prevents it from melting and losing that beautiful finish.

  • Experiment with Spices: Don’t hesitate to swap cardamom for cinnamon or nutmeg for a different flavor profile. Customizing your Wisconsin Apple Kringle is part of the fun!

Wisconsin Apple Kringle Variations

Feel free to get creative and personalize your Wisconsin Apple Kringle experience; your taste buds will thank you!

  • Spice Swap: Substitute cardamom with cinnamon or nutmeg for a different warm spice profile. This small change can dramatically alter the flavor, giving a whole new character to your kringle.

  • Nutty Crunch: Add chopped toasted pecans or walnuts for added texture and flavor. Their delightful crunch pairs perfectly with the soft, sweet apple filling, making each bite more exciting.

  • Fruit Medley: Swap out half of the apple filling for pear or cranberry to create a fruit medley. It brightens the flavor and adds even more festive appeal to your kringle!

  • Vegan Twist: Use a flax egg instead of a regular egg and replace butter with coconut oil or vegan butter. This way, you can delight in this delightful pastry while sticking to a plant-based diet.

  • Chocolate Drizzle: For a decadent take, melt dark chocolate and drizzle it over the vanilla glaze. This combination elevates your kringle to a whole new level of indulgence.

  • Citrus Zest: Stir in some lemon or orange zest into the apple filling for a refreshing twist. That citrus brightness will complement the spices beautifully and add a lovely aromatic note.

  • Maple Glaze: Instead of a vanilla glaze, whip up a maple glaze using powdered sugar and pure maple syrup. The unique flavor will create a lovely pairing with the apple filling that feels extra cozy.

  • Savory Touch: For something different, introduce savory elements like crumbled bacon or cheddar cheese to the filling. This surprising twist will take your kringle in a new, adventurous direction!

Each variation provides a delightful opportunity to experiment, so don’t hesitate to make this Wisconsin Apple Kringle your own. And remember, when you think of flavors that complement apple, consider pairing this with a refreshing Chicken Salad Apples for a well-rounded meal!

Wisconsin Apple Kringle Recipe FAQs

How do I select the best apples for the filling?
Absolutely! For the most flavorful filling, I recommend using a mix of tart and sweet apples, such as Granny Smith and Honeycrisp. Look for firm apples without any dark spots or bruises, and ideally, those that are in season. Freshness will enhance the overall taste of your Wisconsin Apple Kringle.

What is the best way to store leftover Wisconsin Apple Kringle?
For optimal freshness, store your Wisconsin Apple Kringle in an airtight container at room temperature for up to 2 days. If you want to extend its life, you can refrigerate it for up to 5 days, although be aware that it may lose some flakiness. If freezing, wrap slices in plastic wrap and place them in a freezer-safe bag for up to 2 months.

Can I freeze the Wisconsin Apple Kringle, and if so, how?
Very! To freeze your Wisconsin Apple Kringle, allow it to cool completely, then wrap it tightly in plastic wrap. Next, place it in a freezer-safe bag or container to protect it from freezer burn. It can be stored for up to 2 months. When you're ready to enjoy it, just reheat slices at 300°F (150°C) for about 8–10 minutes to restore that delectable flakiness.

What should I do if my dough is too sticky?
If your dough turns out sticky, don’t worry! Simply sprinkle a little extra flour on your work surface and your hands while rolling it out. Take care not to overdo it, as too much flour can affect the texture of your Wisconsin Apple Kringle. If it remains too sticky, refrigerate it for about 15–20 minutes to help firm it up before rolling.

Is there a vegan alternative for the egg in the Wisconsin Apple Kringle?
Yes, indeed! You can replace the egg with a flax egg. To make a flax egg, mix 1 tablespoon of ground flaxseed with 2.5 tablespoons of water. Let it sit for about 5 minutes until it thickens. This will bind your dough just as effectively while keeping your Wisconsin Apple Kringle entirely vegan!

Can I use different spices in my apple filling?
The more the merrier! While cardamom beautifully complements the apple flavor, feel free to swap it with cinnamon or nutmeg if you prefer. You can even experiment by adding a pinch of ginger for warmth or some citrus zest for brightness, making this Wisconsin Apple Kringle uniquely yours!

Wisconsin Apple Kringle

Delightful Wisconsin Apple Kringle with Sweet Vanilla Glaze

This Wisconsin Apple Kringle features flaky pastry with a spiced apple filling and a sweet vanilla glaze, making it a delightful dessert.
Print Recipe Pin Recipe
Prep Time 1 hour hr
Cook Time 25 minutes mins
Cooling Time 15 minutes mins
Total Time 1 hour hr 40 minutes mins
Servings: 8 slices
Course: Dessert
Cuisine: American, Midwestern
Calories: 320
Ingredients Equipment Method Nutrition Notes

Ingredients
  

For the Dough
  • 2 1/4 teaspoons active dry yeast Ensure yeast is fresh for best results.
  • 1/4 cup warm milk Warm to the touch, not hot.
  • 1/4 cup warm water Warm to the touch.
  • 2 cups all-purpose flour No substitutes needed for texture.
  • 1/4 cup sugar Optional to use less for a less sweet kringle.
  • 1/2 teaspoon salt Enhances flavor and balances sweetness.
  • 1/2 cup cold butter Keep butter cold before use.
  • 1 large egg Can substitute with a flax egg for a vegan option.
For the Filling
  • 1 cup apple pie filling Homemade can elevate flavors.
  • 1 teaspoon cardamom Can swap for cinnamon or nutmeg.
For the Glaze
  • 1 cup powdered sugar Essential for the glaze.
  • 1 teaspoon vanilla extract Use pure vanilla for the best flavor.
  • water Adjusts glaze consistency.

Equipment

  • Mixing Bowl
  • Whisk
  • Pastry cutter
  • plastic wrap
  • Baking Sheet
  • wire rack

Method
 

Step-by-Step Instructions
  1. In a small bowl, combine warm milk and warm water, then sprinkle in active dry yeast. Allow the mixture to sit for about 5 minutes until frothy.
  2. In a large mixing bowl, whisk together all-purpose flour, sugar, and salt. Use a pastry cutter to cut in cold butter until the mixture resembles coarse crumbs.
  3. Stir in the yeast mixture and the beaten egg until the dough just comes together. Form into a ball, wrap in plastic wrap, and refrigerate for at least 1 hour.
  4. Roll the dough into a rectangle about 12 inches by 8 inches on a floured surface.
  5. Spoon apple pie filling down the center of the dough and sprinkle cardamom over the filling.
  6. Fold the sides of the dough over the filling, sealing edges tightly, and shape into a ring or horseshoe on a parchment-lined baking sheet.
  7. Preheat oven to 375°F (190°C) and brush the kringle with an egg wash. Bake for 22-25 minutes or until golden brown.
  8. Let the kringle cool for at least 15 minutes. Whisk together powdered sugar, vanilla extract, and enough water to achieve a drizzling consistency. Drizzle the glaze over the kringle.

Nutrition

Serving: 1sliceCalories: 320kcalCarbohydrates: 45gProtein: 3gFat: 15gSaturated Fat: 9gPolyunsaturated Fat: 1gMonounsaturated Fat: 4gCholesterol: 55mgSodium: 150mgPotassium: 100mgFiber: 1gSugar: 18gVitamin A: 500IUVitamin C: 1mgCalcium: 20mgIron: 1mg

Notes

Keep butter cold for flaky layers and avoid overmixing the dough. Use parchment paper for an even bake and store the kringle properly to maintain freshness.

Tried this recipe?

Let us know how it was!
  • « Previous Page
  • 1
  • …
  • 5
  • 6
  • 7
  • 8
  • 9
  • …
  • 49
  • Next Page »

Welcome!

Hi, I’m Grace, a Sydney-based home cook with a passion for bold flavors and trending ingredients. Whether you’re a busy beginner or a seasoned foodie, you’ll find dishes here that are fresh, fun, and full of flavor.

More about me

Popular Recipes

  • Cheesy Chicken Garlic Bread Sandwich
    Cheesy Chicken Garlic Bread Sandwich for Cozy Family Moments
  • Easy Chicken Ranch Wraps
    Easy Chicken Ranch Wraps: Quick, Creamy & Totally Satisfying
  • Chicken Caesar Sandwiches
    Delicious Chicken Caesar Sandwiches for Quick Comfort Food
  • best Cuban sandwich
    The Best Cuban Sandwich You’ll Want Every Weeknight!

Footer

↑ back to top

About

  • Privacy Policy
  • Disclaimer
  • Terms & Conditions

Newsletter

  • Sign Up! for emails and updates

Contact

  • About me
  • Contact me

Copyright © 2025 TastyTrendIngredients