tastytrendingredients

  • Home
  • Recipes
    • Appetizers
    • Breakfast
    • Dessert
    • Dinner
    • Drinks
    • Salads
    • Snacks
    • Soups
  • About me
  • Contact me
menu icon
go to homepage
  • Home
  • Recipes
    • Appetizers
    • Breakfast
    • Dessert
    • Dinner
    • Drinks
    • Salads
    • Snacks
    • Soups
  • About me
  • Contact me
search icon
Homepage link
  • Home
  • Recipes
    • Appetizers
    • Breakfast
    • Dessert
    • Dinner
    • Drinks
    • Salads
    • Snacks
    • Soups
  • About me
  • Contact me
×

Irresistibly Soft Easy Ube Cinnamon Rolls You’ll Crave

February 26, 2026 by Grace Snow Leave a Comment

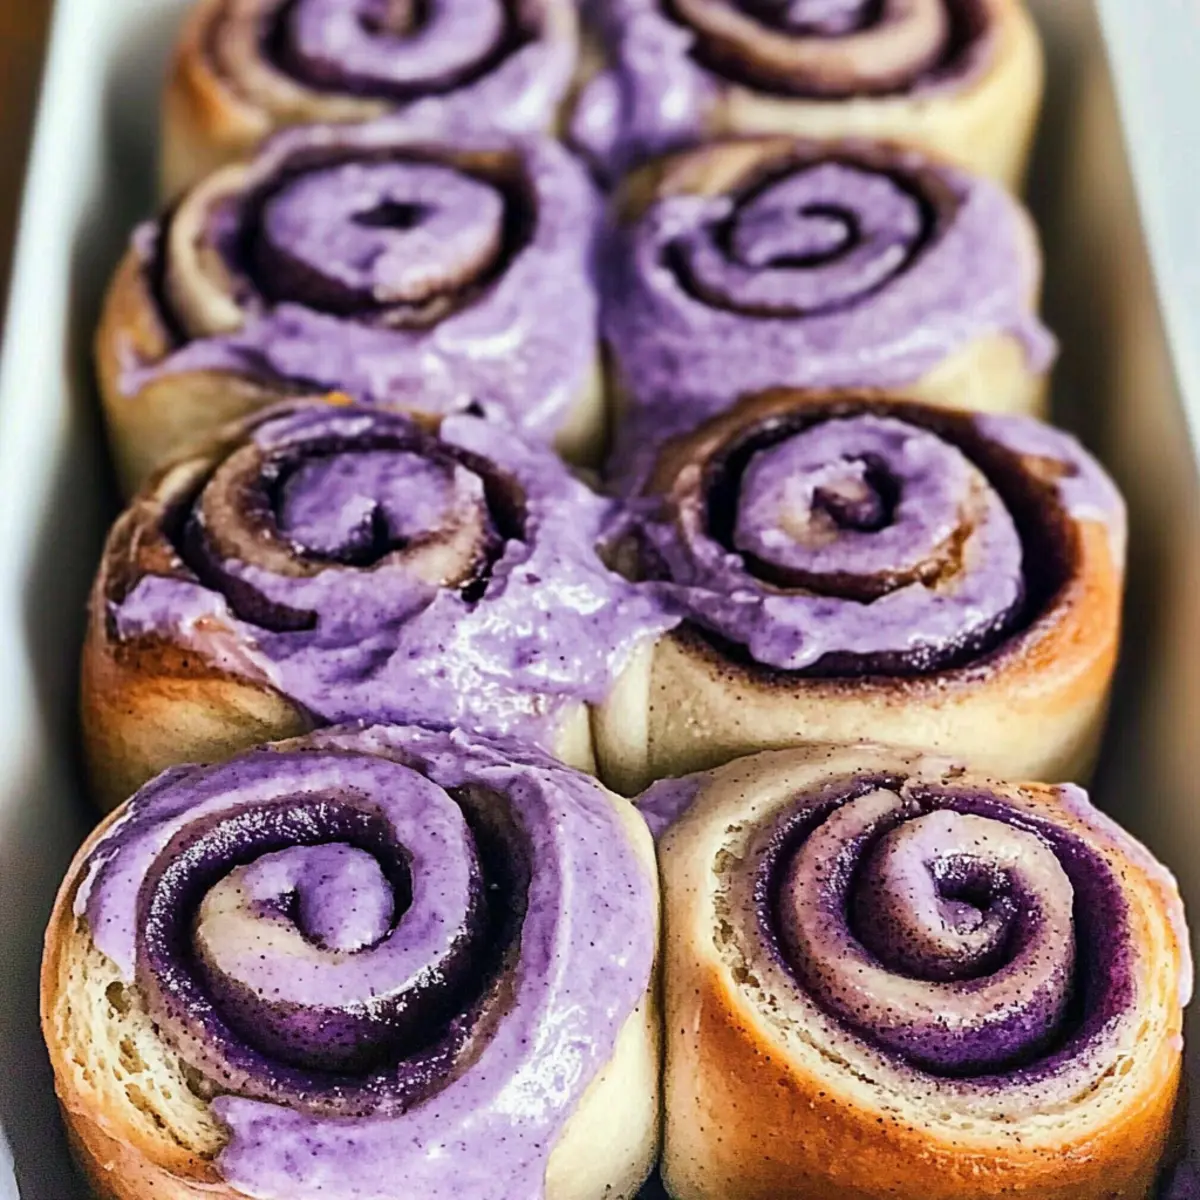
The warm scent of cinnamon wafting through the kitchen is enough to make anyone’s mouth water. As I rolled out the dough for these easy Ube Cinnamon Rolls, I couldn't help but feel a surge of excitement. The combination of the fluffy, soft dough with a nutty ube filling topped with a creamy frosting creates a comfort food experience that's as visually stunning as it is delicious. With no complicated techniques required, these rolls are perfect for breakfast, brunch, or a sweet afternoon treat. Plus, they’re a delightful fusion of American and Asian flavors, sure to impress both family and friends. Ready to bring a colorful twist to your baking routine? Let’s dive into making these irresistible ube cinnamon rolls!

Why are Ube Cinnamon Rolls irresistible?

Irresistible Flavor: The sweet nutty ube filling combines beautifully with warm cinnamon, creating a flavor that’s impossible to resist.

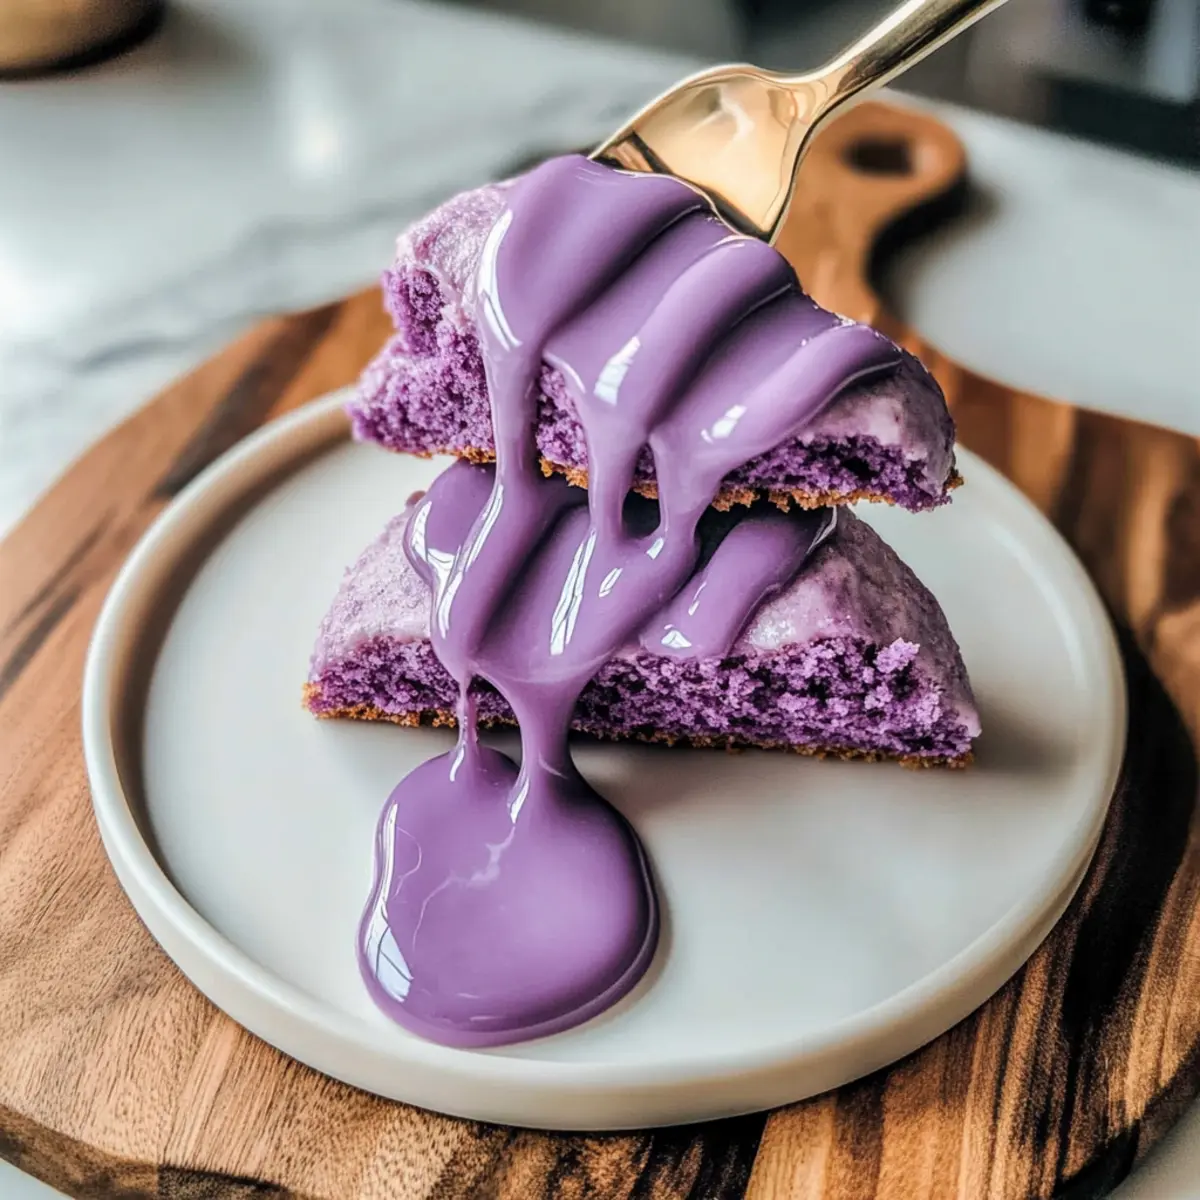
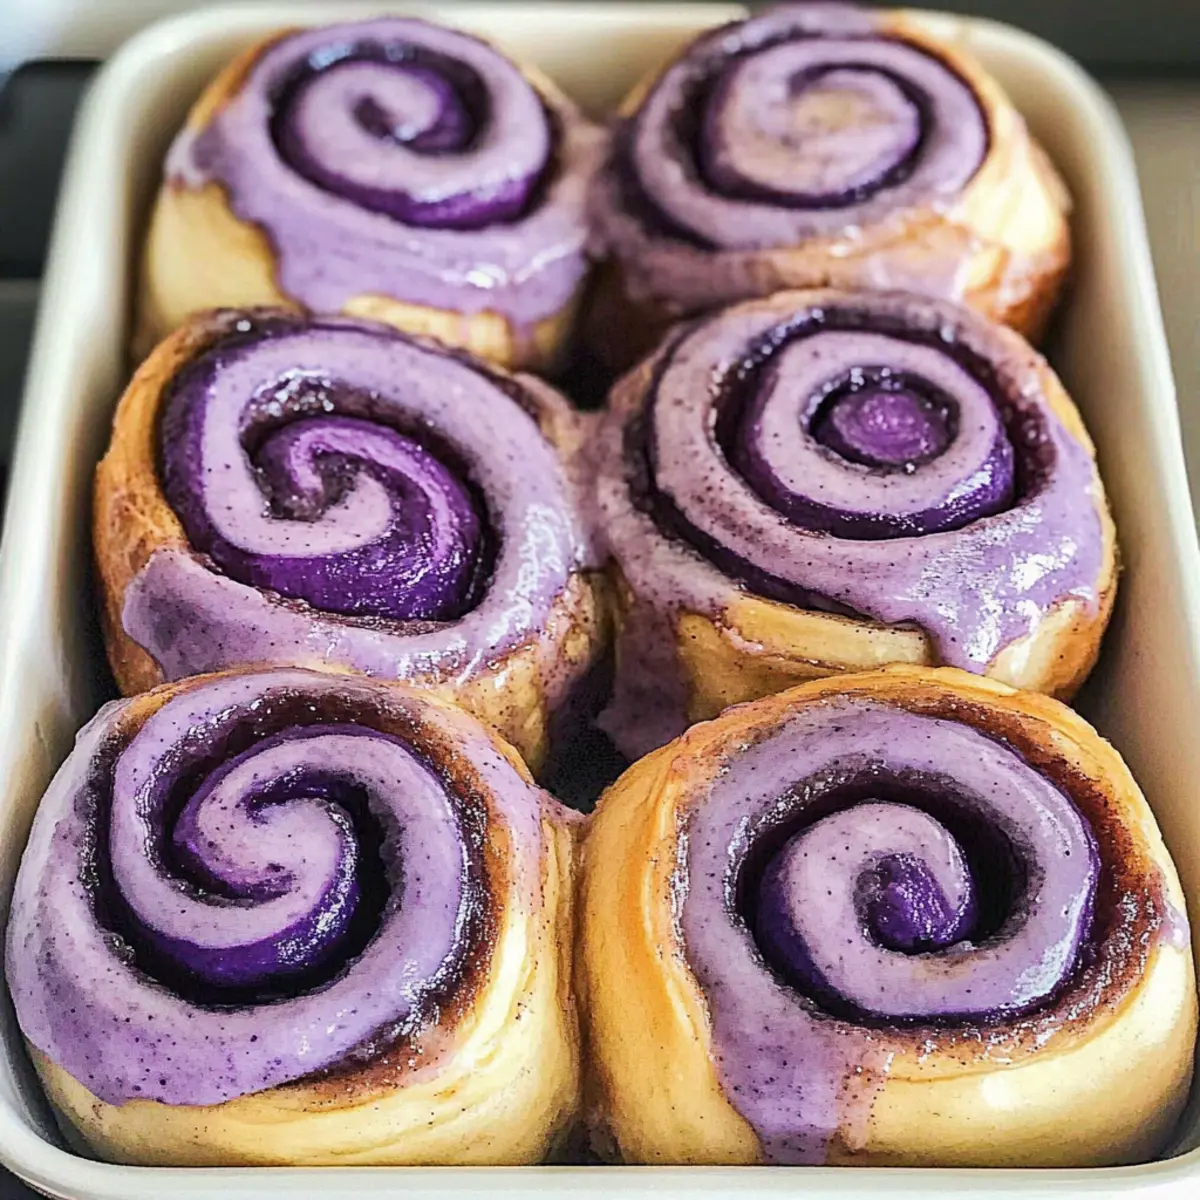
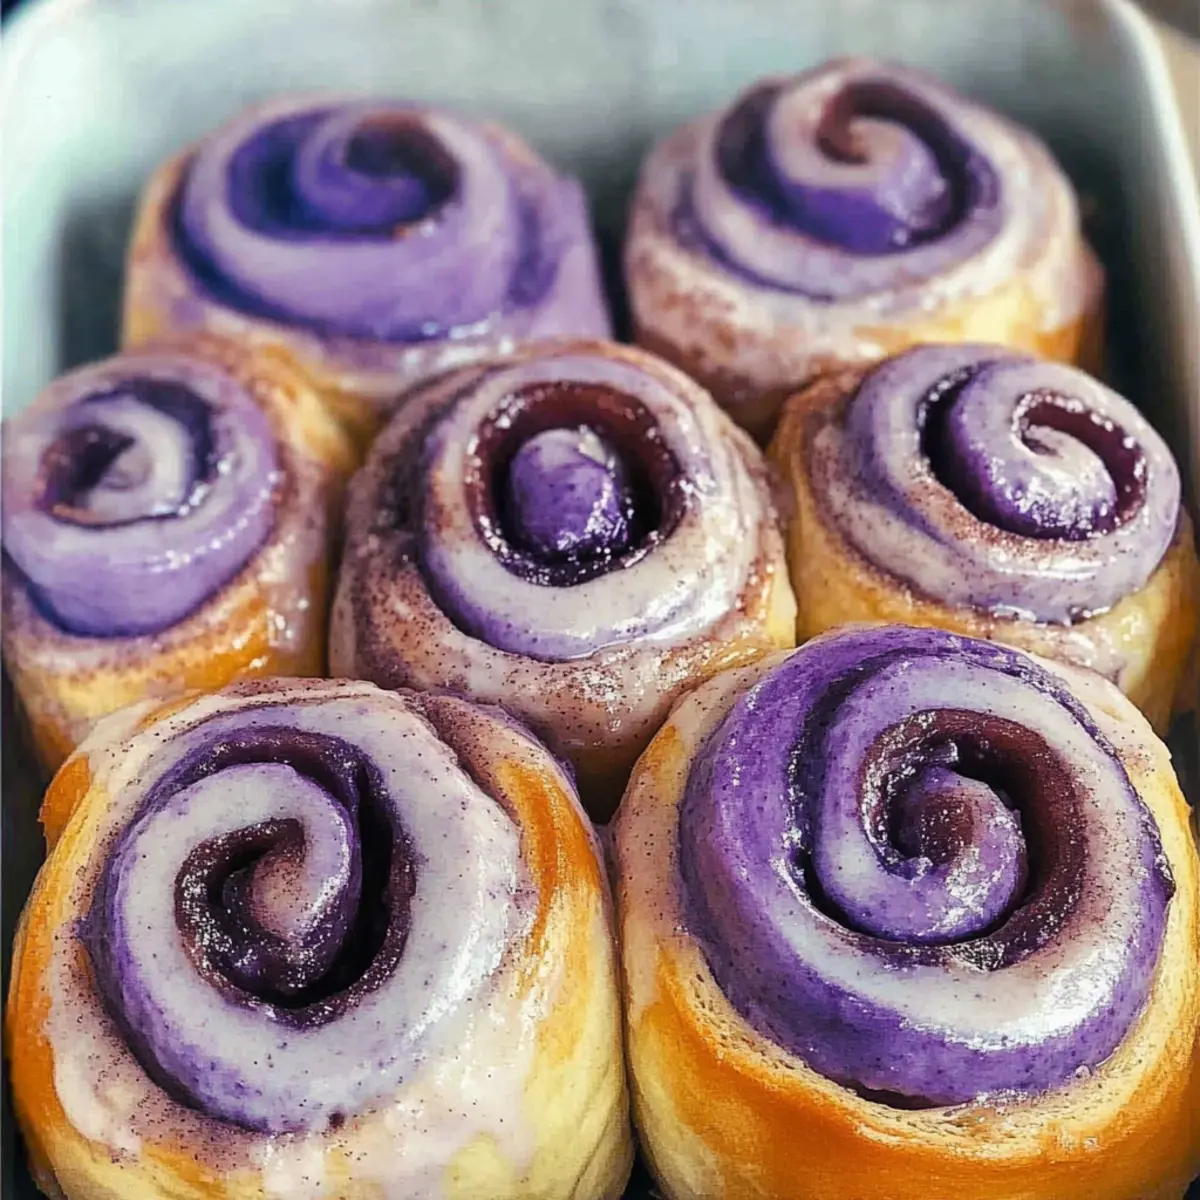
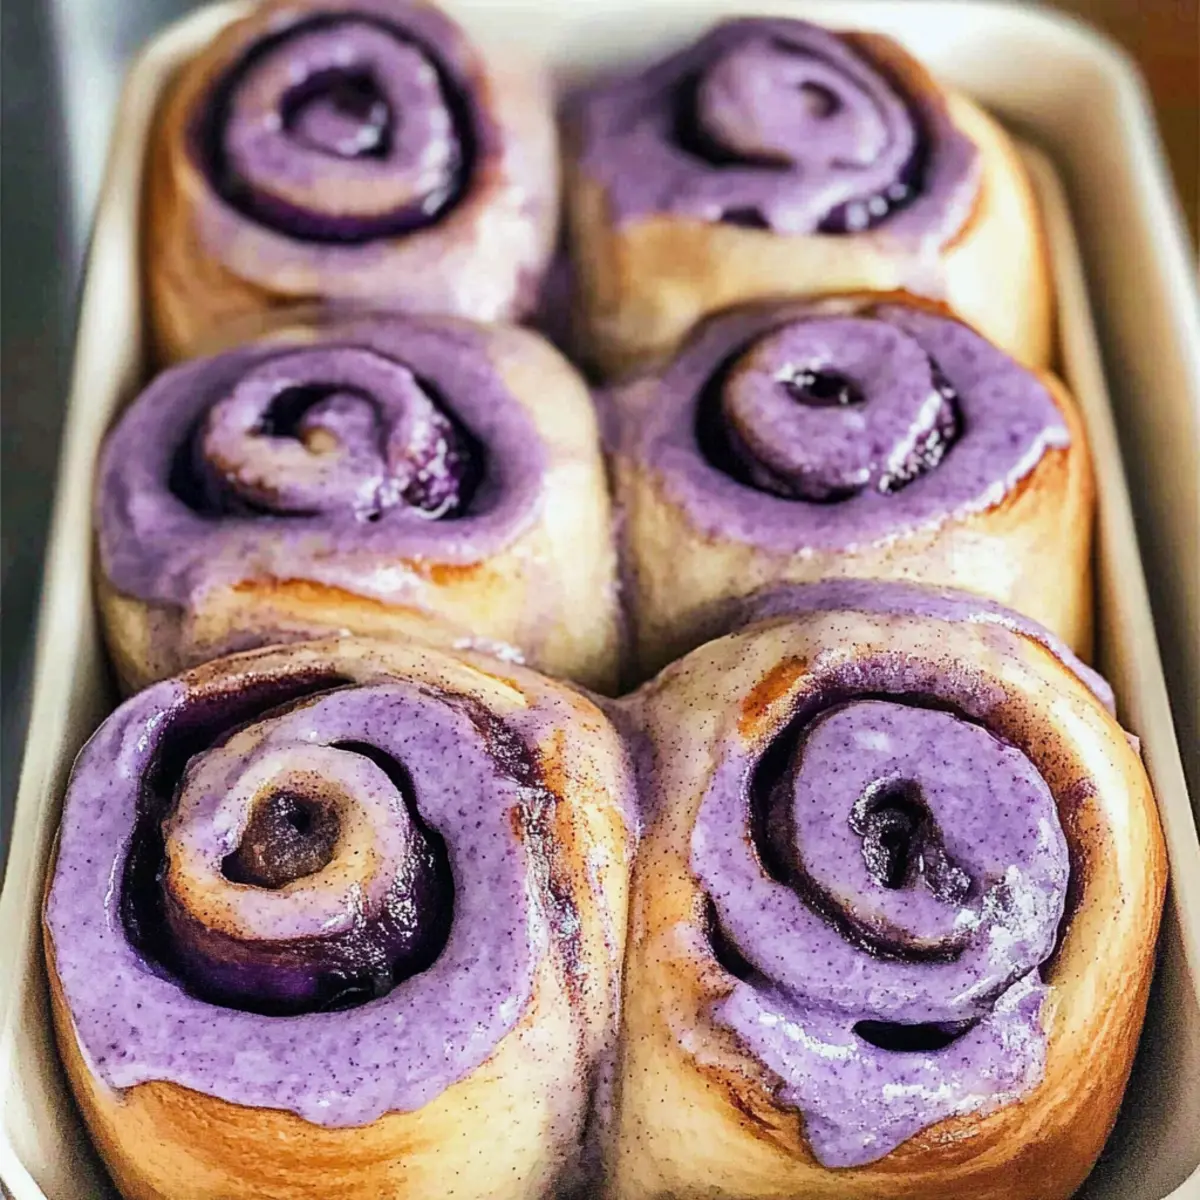
Stunning Appearance: The vibrant purple hue of these rolls adds a cheerful touch to any table, instantly grabbing attention.

Comforting Delight: With a soft, fluffy texture and rich cream cheese frosting, they're the ultimate comfort food, perfect for both cozy mornings and special occasions.

Easy to Make: You don’t need to be a pro to nail this recipe. With straightforward steps, anyone can master these rolls!

Versatile Treats: Looking for more inspiration? You can experiment with other fillings or frostings, making them a delightful treat in many variations.

Add a personal touch at your next brunch with these easy Ube Cinnamon Rolls – you'll be the star of the show!

Easy Ube Cinnamon Rolls Ingredients

For the Dough
• Warm Milk – Activates yeast for dough rise; ensure milk is around 120°F for best results.
• Active Dry Yeast – The leavening agent that makes the dough fluffy.
• Large Eggs – Adds moisture, richness, and helps with structure.
• Salted Butter – Enhances flavor and provides fat for tender rolls.
• Granulated Sugar – Sweetens the dough and aids in browning.
• Ube Extract – Gives the rolls their signature nutty flavor and vibrant purple color.
• All-Purpose Flour – The main structural component that ensures dough elasticity.

For the Filling
• Ube Halaya/Jam – A creamy, sweet filling that adds flavor and moisture.
• Brown Sugar (Optional) – Boosts sweetness and adds richness to the filling.
• Saigon Cinnamon Powder – Provides warm, aromatic flavor that complements ube.

For Topping and Frosting
• Heavy Cream (Optional) – Soaks the rolls for added moisture and richness.
• Confectioners’ Sugar – Essential for sweetening the cream cheese frosting.
• Cream Cheese – A creamy base for the frosting with a delightful tang.
• Vanilla Extract – Enhances the frosting’s flavor profile.
• Salt – Balances the sweetness in the frosting.

These easy Ube Cinnamon Rolls are sure to bring a smile to anyone's face!

Step‑by‑Step Instructions for easy Ube Cinnamon Rolls

Step 1: Activate the Yeast
In a small bowl, combine the warm milk (around 120°F), active dry yeast, and 1 tablespoon of granulated sugar. Gently stir and let it sit for about 5-10 minutes until the mixture becomes bubbly and frothy. This signals that your yeast is active, which is essential for fluffiness in your easy Ube Cinnamon Rolls.

Step 2: Mix the Dough
In a large mixing bowl, add the ube extract, eggs, softened salted butter, the remaining sugar, and salt. Gradually sift in the all-purpose flour while blending until the dough begins to come together. Knead the mixture on a floured surface for about 10 minutes until smooth and elastic. Your dough should feel soft and slightly tacky, perfect for rolling later!

Step 3: First Rise
Place the kneaded dough in a lightly greased bowl and cover it with a damp cloth or plastic wrap. Allow it to rise in a warm place for approximately 1 to 1.5 hours, or until it has doubled in size. This is an important step for achieving the perfect texture in your easy Ube Cinnamon Rolls.

Step 4: Prepare the Filling
Once the dough has risen, punch it down gently to release the air. On a floured surface, roll it out into a rectangle measuring roughly 20x10 inches. Spread an even layer of ube halaya over the surface, reaching every corner to ensure a tasty filling in each roll.

Step 5: Add Cinnamon Sugar
Sprinkle a generous mixture of brown sugar and Saigon cinnamon evenly over the ube halaya. This layer of flavor will enhance the sweetness and warmth of your rolls. Feel free to adjust the cinnamon to your taste, ensuring every bit of the filling is coated.

Step 6: Roll and Slice
Starting from one long edge, carefully roll the dough tightly into a log shape. Use a sharp knife or dental floss to slice the roll into 12 equal pieces, about 1-1.5 inches thick. Place the slices in a greased baking pan, ensuring they are snug but not overcrowded, allowing room to rise.

Step 7: Second Rise
Cover the sliced rolls with a clean towel and let them rise again for 30-60 minutes until they have puffed up. This final rise is crucial for the fluffy texture of your easy Ube Cinnamon Rolls. If desired, you can pour warm heavy cream over the top to enhance moisture.

Step 8: Bake the Rolls
Preheat your oven to 325°F. Once the rolls have risen, bake them for 30-35 minutes or until they turn golden brown and their internal temperature reads 180-190°F. Your kitchen will fill with a delightful aroma as the rolls bake, heightening the anticipation for this delicious treat!

Step 9: Make the Frosting
While the rolls are baking, prepare the cream cheese frosting. In a mixing bowl, blend softened cream cheese, softened butter, confectioners’ sugar, and vanilla extract until smooth and creamy. It should have a fluffy consistency, perfect for spreading over your warm cinnamon rolls.

Step 10: Frost and Serve
Once the easy Ube Cinnamon Rolls are out of the oven, let them cool slightly before spreading the cream cheese frosting generously over the top. The frosting will melt slightly into the warm rolls, creating a heavenly finish for your delightful, fluffy creation.

Expert Tips for Easy Ube Cinnamon Rolls

Temperature Check: Ensure your warm milk is about 120°F to properly activate the yeast; too hot will kill it!

Tight Rolls: Roll your dough tightly to prevent filling leakage; an even layer of ube halaya is key to delicious bites.

Clean Slicing: Use dental floss to slice the rolls; it creates perfect cuts without squishing the dough, preserving fluffiness.

Cooling Matters: Allow rolls to cool slightly before frosting; this helps the frosting maintain its creaminess and avoid sliding off.

Freeze for Later: Want to enjoy later? Freeze unbaked rolls, then thaw and let rise before baking for fresh rolls anytime!

These helpful tips are essential for perfecting your easy Ube Cinnamon Rolls, ensuring each bite is as delightful as the last!

How to Store and Freeze Easy Ube Cinnamon Rolls

Fridge: Store leftover easy Ube Cinnamon Rolls in an airtight container in the fridge for up to 3 days. This keeps them fresh while helping maintain their soft texture.

Freezer: For longer storage, freeze unbaked rolls in an airtight container for up to 1 month. Thaw them overnight in the fridge before allowing them to rise and bake.

Reheating: To reheat baked rolls, place them in a microwave for about 15-20 seconds or warm them in the oven at 350°F for about 5-10 minutes to restore their fluffy goodness.

Make-Ahead Tip: You can assemble the rolls and keep them in the fridge overnight before the second rise, allowing for a quick bake in the morning—a perfect shortcut for busy days!

Make Ahead Options

These easy Ube Cinnamon Rolls are a fantastic choice for meal prep, saving you valuable time on busy mornings! You can prepare the rolled and unbaked cinnamon rolls up to 24 hours in advance. Simply slice the rolls and arrange them in a greased baking pan, then cover tightly with plastic wrap and refrigerate. In the morning, allow the rolls to rise for 30-60 minutes until fluffy before pouring the warm heavy cream over the top and baking them. For longer storage, consider freezing the unbaked rolls for up to one month; just thaw them in the fridge overnight before baking. This makes it easy to enjoy fresh, fluffy Ube Cinnamon Rolls with minimal effort!

Easy Ube Cinnamon Rolls Variations

Invite your creativity and taste buds to dance with these delightful twists on easy Ube Cinnamon Rolls that will spark joy in your kitchen!

  • Dairy-Free: Substitute the butter and cream cheese with coconut oil and dairy-free cream cheese for a deliciously creamy result. The unique flavors will still shine through and keep everyone satisfied!

  • Gluten-Free: Swap all-purpose flour for a gluten-free blend, ensuring it's suitable for baking. Adjust the liquid slightly for the right dough consistency and enjoy fluffy rolls without gluten.

  • Nutty Addition: Incorporate finely chopped nuts such as walnuts or pecans into the filling for a delightful crunch. The texture will elevate the overall experience, adding layers of flavor in every bite.

  • Coconut Flavor: Replace ube extract with coconut extract for a tropical twist. This will harmoniously blend with the sweetness of the rolls, allowing you to savor the essence of the tropics.

  • Spiced Up: Boost the heat by adding a pinch of cayenne pepper or chili powder to the cinnamon mixture. This unexpected twist offers warming flavor notes that will surprise and delight.

  • Frosting Variations: Experiment with alternative frostings such as chocolate or caramel for a fun change. Each brings its unique sweetness and richness, making these rolls adaptable to your cravings.

  • Swirled Layers: For extra visual appeal, roll the dough with a layer of Nutella or chocolate spread, then sprinkle with nuts and cinnamon sugar. The result will be a luscious chocolate-infused treat!

  • Pumpkin Delight: Substitute ube halaya with pumpkin puree for a seasonal twist. Combine it with some pumpkin spice, and you’ll have a warm, autumnal flavor perfect for gatherings.

  • Cinnamon Sugar Enhancer: Instead of using just regular sugar in the cinnamon mixture, try brown sugar for rich caramel notes that can enhance each bite's sweetness.

With these customizable variations, you can create a unique version of the beloved easy Ube Cinnamon Rolls, making every baking experience a delicious adventure. And if you’re inspired, consider trying out the enticing Pumpkin Cinnamon Roll variation for even more delight!

What to Serve with Easy Ube Cinnamon Rolls

The colors and aromas of these delightful rolls create an inviting atmosphere that makes every meal feel special.

  • Fresh Fruit Salad: A burst of vibrant, juicy fruits complements the sweet rolls and balances the richness, adding freshness to each bite.

  • Creamy Yogurt Parfait: Layered with granola, this creamy treat provides a delightful contrast in texture, making it a perfect partner for the cinnamon rolls.

  • Maple-Glazed Bacon: The savory, smoky crunch of bacon pairs beautifully with the sweet flavor of the rolls, creating a mouthwatering contrast that delights the palate.

  • Fluffy Scrambled Eggs: Soft and fluffy, scrambled eggs add a touch of protein and creaminess that rounds out the breakfast or brunch experience perfectly.

  • Coffee or Tea: A warm cup of your favorite brew enhances the sweetness of these rolls, making each bite even more enjoyable while adding comfort to your morning ritual.

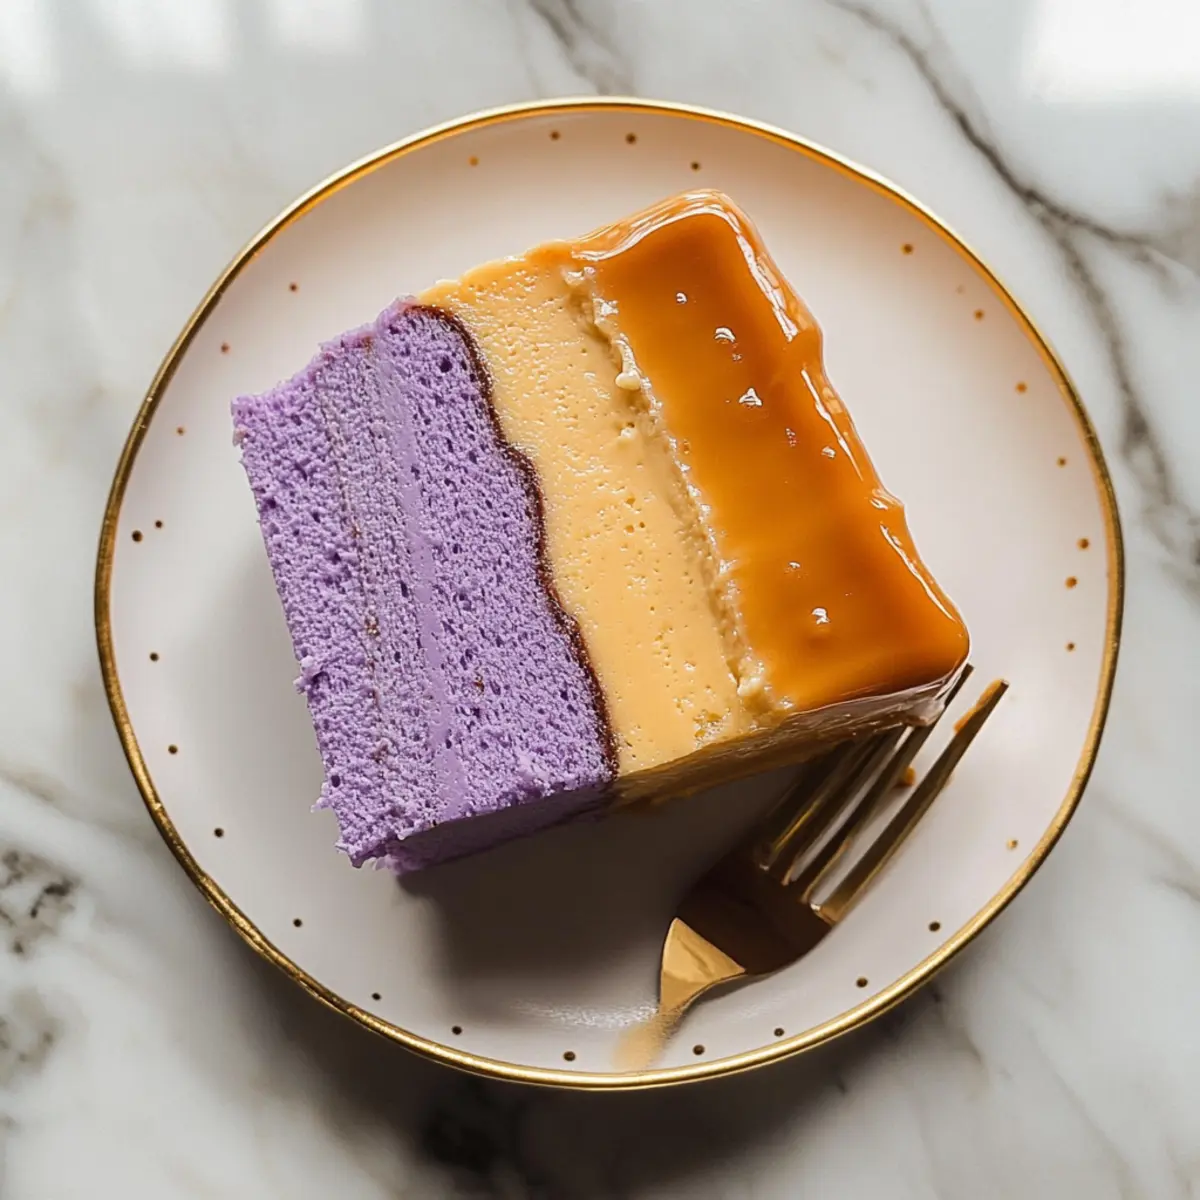
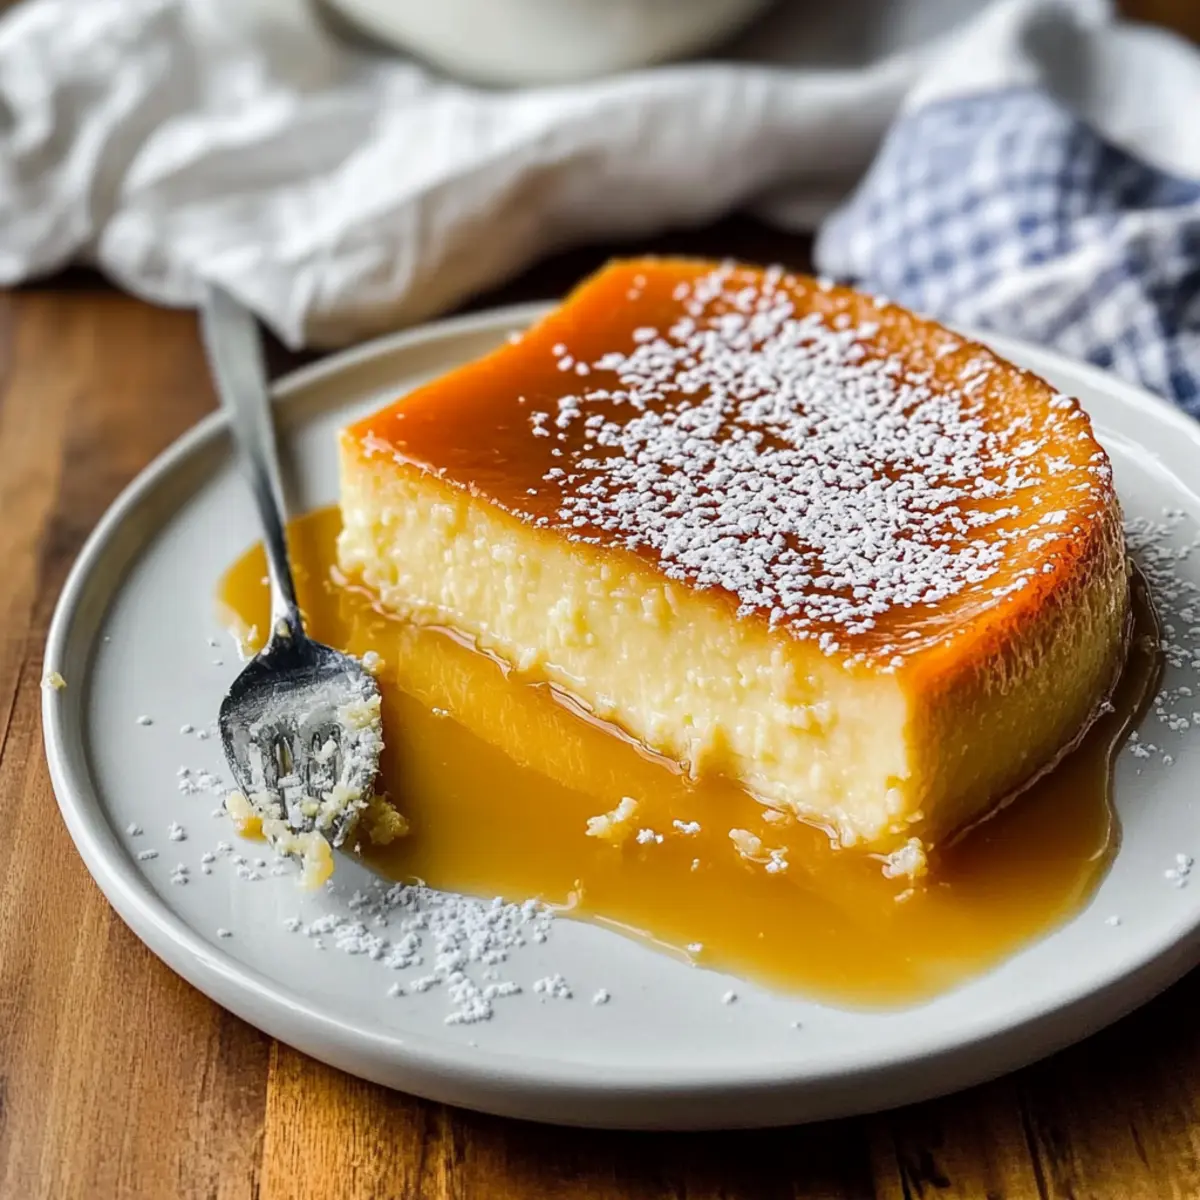
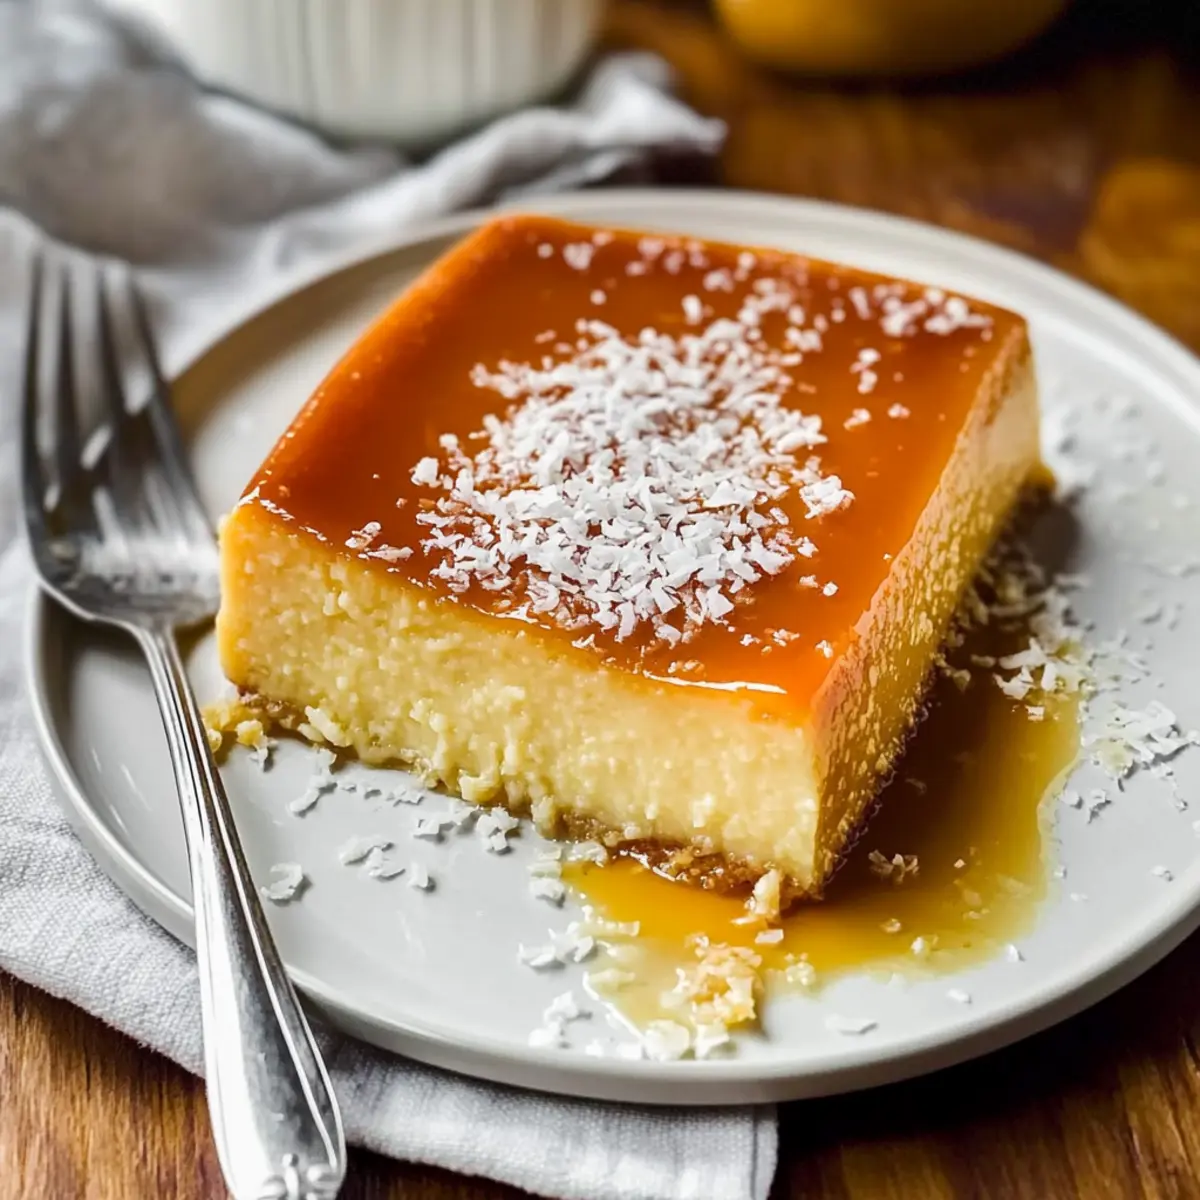
  • Coconut Flan: For a touch of indulgence, this smooth and creamy dessert echoes ube's flavors while providing a delightful end to your meal.

  • Sweetened Almond Milk: A refreshing drink that complements the nutty notes of the rolls, providing a smooth and soothing palate cleanser.

Easy Ube Cinnamon Rolls Recipe FAQs

How do I select the right ube extract?
Absolutely! When choosing ube extract, look for
natural varieties for the best flavor. Check the ingredient list for minimal additives. The extract should have a rich purple color and a pleasant nutty aroma. If you're feeling adventurous, you can also use fresh ube, but remember to steam and mash it first before adding it to the dough.

What’s the best way to store leftover Ube Cinnamon Rolls?
I recommend storing your leftover easy Ube Cinnamon Rolls in an airtight container in the refrigerator for up to 3 days. Make sure they completely cool first to preserve their fluffy texture. You can also wrap them in plastic wrap and place them in a storage bag for extra freshness.

Can I freeze these rolls for later?
Yes, you can! To freeze unbaked easy Ube Cinnamon Rolls, assemble them in a greased baking pan, cover, and freeze for up to 1 month. When you're ready to enjoy them, simply thaw them overnight in the refrigerator, then let them rise for about 30-60 minutes before baking according to the instructions. You'll have fresh rolls with minimal effort!

What should I do if my dough doesn’t rise?
Very! If your dough doesn’t rise, it could be that the yeast was too old or the milk was too hot when added. Always ensure your active dry yeast is fresh and check the temperature of the milk — it should be around 120°F. If it still doesn’t rise after 1.5 hours, try placing it in a warmer area or gently re-kneading and giving it another try.

Are these rolls suitable for people with allergies?
Definitely! These easy Ube Cinnamon Rolls can be adapted for certain dietary needs. If you're allergic to eggs, you can substitute with a flaxseed meal (1 tablespoon ground flaxseed mixed with 3 tablespoons water equals one egg). For dairy-free options, use almond milk and vegan butter. Always check your specific ingredients for allergens!

How do I ensure my rolls are fluffy and soft?
To ensure fluffy and soft rolls, make sure to knead the dough well — about 10 minutes should do it. You can also let the dough rise in a warm, draft-free area to help it puff up. After cutting the rolls, allow them enough time to rise again, and consider covering them while they do to trap warmth and moisture, leading to that light, airy texture you’re aiming for!

easy Ube Cinnamon Rolls

Irresistibly Soft Easy Ube Cinnamon Rolls You’ll Crave

These easy Ube Cinnamon Rolls combine fluffy dough with a nutty ube filling and creamy frosting, perfect for breakfast or a sweet treat.
Print Recipe Pin Recipe
Prep Time 1 hour hr
Cook Time 35 minutes mins
Rising Time 1 hour hr 30 minutes mins
Total Time 3 hours hrs 5 minutes mins
Servings: 12 rolls
Course: Dessert
Cuisine: Fusion
Calories: 320
Ingredients Equipment Method Nutrition Notes

Ingredients
  

For the Dough
  • 1 cup Warm Milk Around 120°F
  • 2 teaspoons Active Dry Yeast
  • 2 Large Eggs
  • 4 tablespoons Salted Butter Softened
  • 1/4 cup Granulated Sugar
  • 1 tablespoon Ube Extract
  • 4 cups All-Purpose Flour
For the Filling
  • 1 cup Ube Halaya/Jam Creamy filling
  • 1/4 cup Brown Sugar Optional
  • 2 tablespoons Saigon Cinnamon Powder
For Topping and Frosting
  • 1/2 cup Heavy Cream Optional
  • 2 cups Confectioners’ Sugar
  • 8 ounces Cream Cheese Softened
  • 1 teaspoon Vanilla Extract
  • 1/4 teaspoon Salt To balance sweetness

Equipment

  • Mixing Bowl
  • Baking pan
  • Floured surface
  • Sharp knife or dental floss

Method
 

Directions
  1. In a small bowl, combine warm milk, active dry yeast, and 1 tablespoon of granulated sugar. Stir and let sit for 5-10 minutes until bubbly.
  2. In a large mixing bowl, mix ube extract, eggs, softened butter, remaining sugar, and salt. Gradually sift in flour until dough forms. Knead for 10 minutes until smooth.
  3. Place dough in a greased bowl, cover, and let rise in a warm place for 1 to 1.5 hours until doubled in size.
  4. Punch down dough, roll out into a rectangle. Spread ube halaya evenly across.
  5. Sprinkle brown sugar and Saigon cinnamon over ube halaya.
  6. Roll tightly from one edge into a log. Slice into 12 equal pieces and place in a greased pan.
  7. Cover rolls and let rise for 30-60 minutes until puffed up. Optionally pour heavy cream on top.
  8. Preheat oven to 325°F. Bake for 30-35 minutes until golden brown, internal temperature should be 180-190°F.
  9. Prepare frosting by blending cream cheese, softened butter, confectioners’ sugar, and vanilla until creamy.
  10. Let rolls cool slightly before generously frosting them. Enjoy!

Nutrition

Serving: 1rollCalories: 320kcalCarbohydrates: 45gProtein: 5gFat: 15gSaturated Fat: 8gPolyunsaturated Fat: 0.5gMonounsaturated Fat: 5gCholesterol: 60mgSodium: 300mgPotassium: 150mgFiber: 1gSugar: 20gVitamin A: 400IUCalcium: 20mgIron: 1mg

Notes

Store in an airtight container in the fridge for up to 3 days or freeze unbaked rolls for up to 1 month.

Tried this recipe?

Let us know how it was!

Deliciously Soft Ube Scones with Luscious Ube Glaze

February 26, 2026 by Grace Snow Leave a Comment

As I unwrapped the vibrant purple ube halaya, a wave of excitement washed over me, reminding me of cozy afternoons spent in the kitchen with family. These Soft & Flaky Ube Scones with Ube Glaze are no ordinary baked goods; they offer a delightful twist on classic scones that is sure to impress. With their buttery, crumbly texture and the beautiful hue of ube, these scones aren't just visually stunning—they're incredibly easy to make! Plus, they serve as a delightful treat for any occasion, whether it’s a quiet breakfast or a festive gathering. The sweet glaze adds a final flourish, ensuring that every bite is a heavenly experience. Ready to elevate your baking game and impress your loved ones? Let’s dive into this scrumptious recipe together!

Why are Ube Scones So Irresistible?

Delightful Flavor: The natural sweetness of ube shines through in every bite, making these scones a standout.

Easy to Make: With simple, accessible ingredients, you can whip up a batch in no time.

Beautiful Presentation: Their vibrant purple color makes them a stunning addition to any table or gathering.

Versatile Treat: Enjoy them for breakfast, brunch, or even as an afternoon snack paired with your favorite coffee.

Family Tradition: Discover the cultural roots of ube and create lasting memories as you bake these together with loved ones—just like I did with my family! If you're seeking more unique flavors, don't forget to check out my Smoky Sweet Corn recipe for an exciting side dish!

Ube Scones with Ube Glaze Ingredients

Delight in crafting these flavorful scones!

For the Scones

  • All-purpose flour – Provides structure to the scones; can use gluten-free flour for a gluten-free version.
  • Baking powder – Acts as a leavening agent for a fluffy texture.
  • Salt – Enhances the overall flavor profile of the scones.
  • Sugar – Adds the perfect sweetness to balance the ube.
  • Cold unsalted butter – Ensures that your scones are flaky; keep it cold for best results.
  • Ube halaya – Delivers that unique, authentic ube flavor; substitute with ube extract and extra cream if needed.
  • Heavy cream – Keeps the dough moist and binds everything together; full-fat milk can work in a pinch.
  • Vanilla extract – Provides a lovely depth of flavor; no substitutes needed here.

For the Glaze

  • Powdered sugar – For a sweet, smooth glaze that enhances the scones.
  • Milk – Used to achieve the perfect glaze consistency; any type of milk can be utilized.

These Ube Scones with Ube Glaze are not only a delectable treat but also a delightful way to indulge in Filipino flavors!

Step‑by‑Step Instructions for Ube Scones with Ube Glaze

Step 1: Prep Dry Ingredients
In a large mixing bowl, whisk together 2 cups of all-purpose flour, 1 tablespoon of baking powder, 1/2 teaspoon of salt, and 1/4 cup of sugar. Ensure there are no lumps as this will help achieve that light, fluffy texture in your ube scones. Setting up your dry ingredients properly is the key to success, so be thorough!

Step 2: Incorporate Butter
Add 1/2 cup of cold, diced unsalted butter to the dry mixture. Using your hands or a pastry cutter, mix until the mixture resembles coarse, pea-sized crumbs. This step is essential for creating flaky layers in your ube scones, so be careful not to overwork it; you're looking for a crumbly texture.

Step 3: Mix in Wet Ingredients
Gently stir in 1/2 cup of ube halaya, 1/2 cup of heavy cream, and 1 teaspoon of vanilla extract. Mix until just combined, being cautious not to overmix, as this can lead to dense scones. The dough should be moist but not overly sticky. If it feels too wet, you can dust a bit more flour.

Step 4: Form Dough
Turn the dough onto a lightly floured surface and gently pat it into an 8-inch circle. With a sharp knife or a bench scraper, slice the dough into 8 wedges. This simple shaping technique is crucial for even baking, ensuring that each piece of your ube scone has the perfect golden edge.

Step 5: Bake
Place the wedges onto a parchment-lined baking sheet, making sure to leave space between them. Bake in a preheated oven at 400°F (200°C) for 15–18 minutes, or until the edges are golden brown. It’s important to keep an eye on them as you want that beautiful color for your ube scones, which gives them a delicious appeal.

Step 6: Prepare Glaze
While the scones are baking, whisk together 1 cup of powdered sugar, 1/4 cup of ube halaya, and 2-3 tablespoons of milk in a bowl until the mixture is smooth and free of lumps. You want a pourable consistency that will beautifully coat your scones once they cool, enhancing their sweet flavor.

Step 7: Glaze Scones
After the scones have cooled for about 10 minutes on a wire rack, drizzle the ube glaze generously over each scone. Allow the glaze to set for another 15 minutes before serving. This finishing touch not only elevates the flavor but also makes your ube scones visually stunning for family and friends!

Expert Tips for Perfect Ube Scones

  • Keep Ingredients Cold: Ensure that your butter and cream are cold to achieve that light, flaky texture in your ube scones. Warm ingredients can lead to dense scones.

  • Gentle Mixing: Avoid overmixing when combining wet and dry ingredients. Stir until just combined for tender scones; overworking the dough can result in a tough texture.

  • Proper Baking Time: Keep an eye on your scones as they bake. Remove them from the oven when they are golden brown on the edges, usually around 15-18 minutes at 400°F (200°C).

  • Freezing Tips: If you want to prepare in advance, freeze unbaked wedges. Add an extra 3-5 minutes to the baking time when cooking from frozen for perfect ube scones every time.

  • Glaze Consistency: Make sure your ube glaze is smooth and pourable after mixing. Adjust the milk as needed to achieve the perfect consistency for drizzling over your scones.

Make Ahead Options

These Ube Scones with Ube Glaze are perfect for meal prep enthusiasts! You can prepare the scone dough up to 24 hours in advance for busy mornings. Simply mix the dry ingredients and incorporate the cold butter as usual, then wrap the dough tightly in plastic wrap and refrigerate. When you're ready to bake, just shape the dough into wedges and follow the baking instructions without any extra steps. The glaze can also be made a day ahead; just store it in an airtight container in the fridge. This way, your scones will be just as delicious and fresh when you serve them, saving you time while still impressing your family and friends!

Storage Tips for Ube Scones with Ube Glaze

  • Room Temperature: Keep the scones in an airtight container for up to 3 days to maintain freshness while avoiding sogginess.

  • Fridge: If you prefer, they can also be stored in the fridge for up to 5 days, but allow them to come to room temperature for the best texture.

  • Freezer: For longer storage, freeze unbaked scone wedges for up to 2 months. Add an extra 3-5 minutes to the baking time if baking from frozen.

  • Reheating: To reheat, place scones in a warm oven (about 350°F or 175°C) for 5-7 minutes, ensuring they're heated through without losing their lovely texture.

Ube Scones with Ube Glaze Variations

Feel free to make these delightful scones your own with these fun and easy twists!

  • Gluten-Free: Substitute all-purpose flour with your favorite gluten-free flour blend for a gluten-free treat that everyone can enjoy.
  • Choco-Ube Delight: Mix in some chocolate chips to the dough for a rich and indulgent flavor—each bite will be a sweet surprise!
  • Nutty Crunch: Add a handful of chopped nuts, such as walnuts or pecans, to the dough for a delightful crunch that complements the softness of the scones.
  • Tropical Twist: Top with shredded coconut for a lovely tropical flair; it pairs beautifully with the sweet ube flavor.
  • Less Sweet Option: If you prefer a less sweet flavor profile, try replacing the sugar with a sugar alternative, such as stevia or coconut sugar.
  • Berry Boost: Fold in fresh or dried berries like blueberries or cranberries to add a burst of fruity flavor—a great way to brighten up the scones!
  • Savory Ube Scones: Omit the glaze and add cheese, such as sharp cheddar, to the dough for a savory scone that's perfect for breakfast or brunch.
  • Pairing Suggestions: Serve these scones alongside my Chicken Salad Apples or Pan Fried Shrimp for a deliciously balanced meal!

Let your creativity flow as you adapt these scones to fit your taste and occasion. Happy baking!

What to Serve with Ube Scones with Ube Glaze

Imagine a cozy afternoon spent savoring these delightful treats, perfectly complemented by flavors that dance on your palate.

  • Creamy Mashed Potatoes: This indulgent side dish adds richness that contrasts beautifully with the sweet, nutty notes of ube. A perfect pairing for a robust meal.

  • Chilled Coconut Pineapple Salad: Refreshing and light, this tropical salad balances the sweetness of the scones while bringing in a burst of acidity. It’s a vibrant addition to any table.

  • Rich Philippine Coffee: The deep, rich flavors of this coffee enhance the subtle sweetness of the scones, making for a delightful breakfast or afternoon snack.

  • Sweet Lavender Lemonade: This refreshing drink adds a floral note that harmonizes with the ube flavor. It’s the ideal quencher for warm, sunny days.

  • Chocolate Ganache Dip: For an indulgent twist, serve a small bowl of chocolate ganache alongside the scones. It brings a luxurious depth to your dessert experience.

  • Vanilla Bean Ice Cream: Pairing warm scones with creamy ice cream creates a luscious contrast, making each bite feel like a special occasion.

Consider these combinations to craft a memorable meal or snack that showcases the delightful flavors of your ube scones!

Ube Scones with Ube Glaze Recipe FAQs

What type of ube should I use for the best scones?
Absolutely! For the finest flavor and moisture, I recommend using ube halaya, which is a sweet purple yam jam that's rich and creamy. If ube halaya isn’t available, you can substitute with ube extract and a bit of extra cream for moisture, but keep in mind the sweetness may need adjusting—start with 1-2 tablespoons less sugar and taste as you go!

How should I store leftover ube scones?
You can store your ube scones with ube glaze in an airtight container at room temperature for up to 3 days. If they are not glazed yet, they will keep better. For longer storage, they can be placed in the fridge for up to 5 days; just let them come to room temperature again for the best texture before enjoying!

Can I freeze ube scones? How do I do it?
Yes! Freezing is a great option if you want to prepare ahead. To freeze, simply place the unbaked scone wedges on a baking sheet, ensuring they're well spaced. Once frozen solid (about 1-2 hours), transfer them to a freezer bag or airtight container. They can be frozen for up to 2 months. When ready to bake, don’t defrost—just add an extra 3-5 minutes to your baking time!

What if my scones turn out too dense?
Very! If your scones are too dense, it might be due to overmixing the dough or using warm ingredients. For the lightest texture, always mix until just combined and ensure your butter and heavy cream are cold. If it happens again, try incorporating a little extra baking powder to help them rise and lighten up next time.

Are these scones suitable for kids or people with allergies?
Definitely! The ube scones don’t have any common allergenic ingredients. However, please be cautious with substitutions; for instance, if someone has a gluten allergy, you may use gluten-free flour. These scones are a fun treat for all ages—just watch portions as they're quite sweet!

How do I know when my ube scones are done baking?
To check for doneness, look for a golden brown edge on the scones—it typically takes 15-18 minutes at 400°F (200°C). You can also lightly tap the top; if it springs back, you're good to go! For added goodness, let them cool on a wire rack to keep their fluffiness intact before drizzling with glaze.

Ube Scones with Ube Glaze

Deliciously Soft Ube Scones with Luscious Ube Glaze

These Ube Scones with Ube Glaze are delightfully soft and visually stunning, offering a unique twist on traditional scones.
Print Recipe Pin Recipe
Prep Time 20 minutes mins
Cook Time 18 minutes mins
Cooling Time 15 minutes mins
Total Time 53 minutes mins
Servings: 8 scones
Course: Dessert
Cuisine: Filipino
Calories: 200
Ingredients Equipment Method Nutrition Notes

Ingredients
  

For the Scones
  • 2 cups all-purpose flour can use gluten-free flour for a gluten-free version
  • 1 tablespoon baking powder acts as a leavening agent
  • 0.5 teaspoon salt enhances flavor
  • 0.25 cup sugar adds sweetness
  • 0.5 cup cold unsalted butter diced
  • 0.5 cup ube halaya substitute with ube extract and extra cream if needed
  • 0.5 cup heavy cream full-fat milk can work in a pinch
  • 1 teaspoon vanilla extract provides flavor
For the Glaze
  • 1 cup powdered sugar for the glaze
  • 0.25 cup milk to achieve glaze consistency

Equipment

  • Mixing Bowl
  • Whisk
  • Baking Sheet
  • Pastry cutter
  • Oven
  • wire rack

Method
 

Step‑by‑Step Instructions
  1. In a large mixing bowl, whisk together flour, baking powder, salt, and sugar.
  2. Add cold, diced unsalted butter to the dry mixture and mix until it resembles coarse crumbs.
  3. Gently stir in ube halaya, heavy cream, and vanilla extract until just combined.
  4. Turn the dough onto a lightly floured surface and pat it into an 8-inch circle. Slice into 8 wedges.
  5. Place wedges on a parchment-lined baking sheet. Bake in a preheated oven at 400°F (200°C) for 15–18 minutes.
  6. While baking, whisk together powdered sugar, ube halaya, and milk until smooth.
  7. After cooling, drizzle the ube glaze over each scone and let set for 15 minutes before serving.

Nutrition

Serving: 1sconeCalories: 200kcalCarbohydrates: 28gProtein: 2gFat: 10gSaturated Fat: 6gCholesterol: 30mgSodium: 180mgPotassium: 100mgFiber: 1gSugar: 5gVitamin A: 200IUCalcium: 20mgIron: 0.5mg

Notes

Keep ingredients cold for the best texture. Avoid overmixing to ensure tender scones. Store in an airtight container for freshness.

Tried this recipe?

Let us know how it was!

Ube Leche Flan Layer Cake: Slice into Filipino Bliss

February 26, 2026 by Grace Snow Leave a Comment

As I stood in my kitchen, the vibrant purple of ube drew me in like a siren song, igniting a quest for the perfect dessert. Enter the Ube Leche Flan Layer Cake—a stunning fusion of Filipino flavors that will elevate any gathering. This delightful treat features airy ube chiffon and a luscious leche flan topped with a glossy caramel glaze, making it a feast for both the eyes and palate. It’s not just a cake; it’s a celebration in every slice, offering the irresistible perks of being both a showstopper and relatively easy to assemble. Whether you're honoring a special occasion or simply wishing to treat yourself, this dessert is sure to become a favorite. Are you ready to dive into this delightful culinary adventure?

Why is Ube Leche Flan Layer Cake special?

Unique Flavor Profile: The combination of ube and leche flan creates a delightful fusion that tantalizes your taste buds.
Visually Stunning: Its vibrant purple hue makes it a centerpiece at any gathering, instantly drawing attention.
Easy to Make: With straightforward steps, even novice bakers can impress their friends and family effortlessly.
Crowd-Pleaser: Perfect for celebrations, this cake is loved by both Filipinos and those new to the flavors of Filipino cuisine.
Versatile Enjoyment: Enjoy it chilled for a refreshing dessert or at room temperature for a softer texture.
Don't forget to pair it with a warm cup of Filipino coffee or tea for a truly delightful dessert experience!

Ube Leche Flan Layer Cake Ingredients

For the Flan:
• Sugar – Sweetness; consider using brown sugar for a deeper caramel flavor.
• Egg Yolks (10) – Provides structure and richness; reserve egg whites for the chiffon.
• Sweetened Condensed Milk (1 can) – Adds creamy sweetness; no substitutes for texture.
• Evaporated Milk (1 can) – Contributes moisture and richness; can swap with whole milk, although flavor may vary.
• Vanilla Extract (1 tsp) – Enhances flavor depth; opt for pure extract for the best taste.

For the Cake Batter:
• Cake Flour (1 cup) – Necessary for structure; all-purpose flour can be used, but expect a different texture.
• Baking Powder (1.5 tsp) – Acts as a leavening agent; ensure it’s fresh for proper rising.
• Salt (0.25 tsp) – Balances sweetness; no substitutes are necessary.
• Egg Yolks (5) – Helps incorporate air into the chiffon; use room temperature for better blending.
• Sugar (0.25 cup) – Sweetness; feel free to replace with a suitable sugar alternative if desired.
• Oil (0.25 cup) – Moisture; neutral oils work best, or melted butter for added flavor.
• Ube Halaya (0.33 cup) – Provides flavor and vibrant color; other purple yam products can be used if ube halaya is unavailable.
• Ube Extract (0.5 tsp) – Enhances the ube flavor, recommended for a stronger taste.
• Water (0.33 cup) – Adds moisture to the chiffon batter; no substitutes.

For the Meringue:
• Egg Whites (5) – Gives fluffiness; fresher eggs yield better results.
• Cream of Tartar (0.25 tsp) – Stabilizes egg whites; can alternatively use lemon juice.

Indulge in the delightful experience of creating this Ube Leche Flan Layer Cake—where every ingredient plays a crucial role in crafting a truly unforgettable dessert!

Step‑by‑Step Instructions for Ube Leche Flan Layer Cake

Step 1: Prepare Caramel
Begin by melting ¾ cup of sugar in a dry saucepan over medium heat. Stir gently until the sugar dissolves and turns a golden amber color, which takes about 8-10 minutes. Once the desired color is achieved, quickly pour the caramel into a 9-inch round cake pan, tilting it to coat the bottom evenly. Set the pan aside to let the caramel solidify.

Step 2: Make Leche Flan Mixture
In a mixing bowl, whisk together 10 egg yolks, one can of sweetened condensed milk, one can of evaporated milk, and 1 teaspoon of vanilla extract until the mixture is smooth and well combined. After whisking, strain this mixture through a fine-mesh sieve to ensure a velvety texture. Pour it gently into the prepared caramel-lined cake pan, setting it aside while you prepare the cake batter.

Step 3: Prepare Cake Batter
In a medium bowl, combine 1 cup of cake flour, 1.5 teaspoons of baking powder, and 0.25 teaspoons of salt, mixing well. In a separate bowl, whisk together 5 egg yolks, 0.25 cup of sugar, 0.25 cup of oil, 0.33 cup of ube halaya, 0.5 teaspoons of ube extract, and 0.33 cup of water until thoroughly combined. Gradually incorporate the dry ingredients into the wet mixture, stirring gently to form a smooth batter.

Step 4: Whip Egg Whites
Using a clean mixing bowl, beat 5 egg whites with 0.25 teaspoons of cream of tartar until frothy. Gradually add 0.25 cup of sugar and continue beating until stiff peaks form, which will take about 4-5 minutes. The egg whites should be glossy and maintain their shape. This will provide a light and airy texture for the cake.

Step 5: Combine Batters
Carefully fold the whipped egg whites into the ube mixture in thirds, using a rubber spatula to gently blend them together without deflating the egg whites. Continue this process just until no visible streaks remain. This step will help create a fluffy structure for the Ube Leche Flan Layer Cake.

Step 6: Bake the Cake
Slowly pour the chiffon batter over the leche flan mixture in the cake pan, ensuring a smooth layer without mixing the two. Next, place the cake pan into a larger roasting pan and pour hot water around it until it reaches about 1 inch up the sides of the cake pan. Bake in a preheated oven at 350°F (175°C) for 1 hour or until a toothpick inserted in the center comes out clean.

Step 7: Cool and Refrigerate
Once the cake is baked, remove it from the oven and let it cool for about 10 minutes on a wire rack. After cooling, transfer the cake to the refrigerator and chill for a minimum of 4 hours, or overnight if possible. Chilling allows the layers to set properly and enhances the flavors of the Ube Leche Flan Layer Cake.

Step 8: Serve the Cake
To serve, run a knife around the edges of the cake pan to loosen it. Carefully invert the pan onto a serving plate, allowing the flan and caramel to flow over the ube layer. Cut the cake into slices, enjoying the beautiful layers of creamy leche flan and vibrant ube chiffon. Serve chilled for a refreshing dessert experience.

What to Serve with Ube Leche Flan Layer Cake

Prepare to delight your loved ones as we explore the perfect companions for this dessert masterpiece.

  • Filipino Coffee: A warm, rich beverage that beautifully contrasts the sweetness of the cake, enhancing its flavors even more.
  • Coconut Macaroons: Chewy and sweet, these add a delightful tropical twist that pairs well with the ube's earthiness.
  • Fresh Mango Slices: Juicy and sweet, fresh mango adds a refreshing contrast that complements the creamy texture of the cake perfectly.
  • Sago or Tapioca Pearls: Serve these chewy pearls with sweetened coconut milk as a light treat alongside the cake, making for a delightful dessert duo.
  • Vanilla Ice Cream: The cold creaminess of vanilla ice cream provides a luxurious counterbalance to the warmth and richness of the cake. A scoop next to a slice is heavenly.
  • Ube Halaya: Duplicate the ube flavor by serving a dollop of this sweet purple yam jam, emphasizing the cake’s unique taste while providing a rustic touch.

When served together, these pairings elevate the Ube Leche Flan Layer Cake experience into a memorable occasion that friends and family will cherish!

Ube Leche Flan Layer Cake Variations

Feel free to make this delightful dessert your own by trying these variations and substitutions!

  • Dairy-Free: Swap sweetened condensed milk and evaporated milk with respective non-dairy alternatives like coconut cream and almond milk for a delicious twist.
  • Flavored Layers: Add a hint of pandan extract to either the flan or cake batter for an extra layer of flavor that beautifully complements the ube.
  • Fruit Topping: Experiment with different fruit toppings on your cake. Fresh mango slices or berries provide a refreshing and vibrant contrast to the rich flan.
  • Dark Chocolate Drizzle: Drizzle melted dark chocolate over the top for a decadent touch that pairs wonderfully with ube's buttery flavors.
  • Nutty Crunch: Sprinkle toasted coconut flakes or crushed peanuts on top before serving for a satisfying crunch and extra texture.
  • Caffeine Boost: For a coffee-infused flavor, incorporate a teaspoon of instant coffee granules into the flan mixture—it flows beautifully alongside the ube!
  • Mini Servings: Opt for mini versions in ramekins instead of a full cake; they’re cute and perfect for portion control at gatherings.
  • Layered Cake: Instead of a single-layer cake, stack multiple layers of chiffon and flan for a more dramatic presentation, just like my Chocolate Pudding Cake or Ice Cream Cake.

Get creative and make this Ube Leche Flan Layer Cake truly yours!

Expert Tips for Ube Leche Flan Layer Cake

  • Room Temperature Eggs: Ensure your egg whites and yolks are at room temperature for better mixing and fluffiness in your Ube Leche Flan Layer Cake.
  • Slow Pour: To maintain distinct layers, pour the chiffon batter gently over the flan mixture to avoid mixing.
  • Fresh Baking Powder: Always check your baking powder’s freshness to ensure proper rising; expired powder can lead to a dense cake.
  • Sifting Flour: Sift your cake flour before measuring to ensure a light texture; avoid packing the flour into the measuring cup.
  • Chill Time: Be patient and chill the cake for at least 4 hours (or overnight) for layers to set properly, enhancing flavor and texture.

Make Ahead Options

These Ube Leche Flan Layer Cakes are an excellent choice for busy home cooks looking to save time! You can prepare the leche flan mixture and refrigerate it up to 24 hours in advance, allowing the flavors to meld beautifully overnight. The ube chiffon batter can also be made a day ahead and stored in an airtight container in the fridge. When you're ready to bake, simply pour the chilled chiffon batter over the flan layer and pop it in the oven. For the best quality, remember to chill the assembled cake for a minimum of 4 hours after baking, ensuring it's just as delicious when served. Enjoy your time-saving culinary adventure!

How to Store and Freeze Ube Leche Flan Layer Cake

Fridge: Store the Ube Leche Flan Layer Cake in an airtight container in the refrigerator for up to 3 days, maintaining its smooth and creamy texture.

Freezer: To freeze, wrap individual slices in plastic wrap and then place them in a freezer-safe container. It can be frozen for up to 2 months; simply thaw in the fridge overnight before serving.

Reheating: If desired, enjoy slices at room temperature or gently warm them in the microwave for 10-15 seconds to slightly soften the flan layer without losing its quality.

Make-Ahead Tip: The cake can be prepared a day in advance. After baking and chilling, keep it refrigerated and enjoy its delightful taste at your next celebration!

Ube Leche Flan Layer Cake Recipe FAQs

What type of ube should I use?
I highly recommend using ube halaya, which is a sweet purple yam jam, for authentic flavor and vibrant color. If unavailable, other purple yam products can work, but ube halaya provides the best taste and texture for your Ube Leche Flan Layer Cake.

How should I store leftovers?
Store your Ube Leche Flan Layer Cake in an airtight container in the refrigerator. It will stay fresh for up to 3 days. If you have more cake than you can finish, do not worry—you can freeze it!

Can I freeze this cake?
Absolutely! To freeze, wrap individual slices of the Ube Leche Flan Layer Cake in plastic wrap first, then place them in a freezer-safe container. It can be kept in the freezer for up to 2 months. When you're ready to enjoy it, thaw each slice in the refrigerator overnight for the best flavor and texture.

What should I do if my cake didn’t rise properly?
If your Ube Leche Flan Layer Cake didn’t rise as expected, the culprit might be outdated baking powder. Always check that your baking powder is fresh before use. Also, ensure your egg whites were whipped to stiff peaks, as this provides the necessary lift to the chiffon. If all else fails, don't despair—your cake will still taste delicious!

Is this cake suitable for people with allergies?
This Ube Leche Flan Layer Cake contains common allergens like eggs and dairy. If you're making it for someone with allergies, consider using dairy alternatives, but note that they may affect the final texture and flavor. Always consult with your guests about their dietary preferences before serving.

How can I enhance the flavor of the cake?
To elevate the flavor of your Ube Leche Flan Layer Cake, consider adding 0.5 teaspoons of ube extract for an even stronger taste. Additionally, topping with a layer of whipped cream or fresh fruits like mango can complement the ube flavor beautifully!

Ube Leche Flan Layer Cake

Ube Leche Flan Layer Cake: Slice into Filipino Bliss

Experience the delightful fusion of flavors in Ube Leche Flan Layer Cake, a unique Filipino dessert perfect for any gathering.
Print Recipe Pin Recipe
Prep Time 30 minutes mins
Cook Time 1 hour hr
Chill Time 4 hours hrs
Total Time 5 hours hrs 30 minutes mins
Servings: 10 slices
Course: Dessert
Cuisine: Filipino
Calories: 320
Ingredients Equipment Method Nutrition Notes

Ingredients
  

For the Flan
  • 0.75 cup Sugar Consider using brown sugar for a deeper caramel flavor
  • 10 pieces Egg Yolks Reserve egg whites for the chiffon
  • 1 can Sweetened Condensed Milk No substitutes for texture
  • 1 can Evaporated Milk Can swap with whole milk, although flavor may vary
  • 1 tsp Vanilla Extract Opt for pure extract for the best taste
For the Cake Batter
  • 1 cup Cake Flour All-purpose flour can be used, but expect a different texture
  • 1.5 tsp Baking Powder Ensure it’s fresh for proper rising
  • 0.25 tsp Salt No substitutes are necessary
  • 5 pieces Egg Yolks Use room temperature for better blending
  • 0.25 cup Sugar Feel free to replace with a suitable sugar alternative if desired
  • 0.25 cup Oil Neutral oils work best, or melted butter for added flavor
  • 0.33 cup Ube Halaya Other purple yam products can be used if ube halaya is unavailable
  • 0.5 tsp Ube Extract Recommended for a stronger taste
  • 0.33 cup Water No substitutes
For the Meringue
  • 5 pieces Egg Whites Fresher eggs yield better results
  • 0.25 tsp Cream of Tartar Can alternatively use lemon juice

Equipment

  • 9-inch round cake pan
  • Mixing bowls
  • Whisk
  • Spatula
  • Saucepan
  • Roasting pan
  • wire rack

Method
 

Step-by-Step Instructions
  1. Prepare Caramel: Melt ¾ cup of sugar in a dry saucepan over medium heat, stirring until golden amber, about 8-10 minutes, then pour into the cake pan to solidify.
  2. Make Leche Flan Mixture: Whisk together 10 egg yolks, sweetened condensed milk, evaporated milk, and vanilla until smooth. Strain and pour into the caramel-lined pan.
  3. Prepare Cake Batter: Mix cake flour, baking powder, and salt. In another bowl, whisk the egg yolks, sugar, oil, ube halaya, ube extract, and water. Combine wet and dry ingredients.
  4. Whip Egg Whites: Beat 5 egg whites and cream of tartar until frothy, then gradually add 0.25 cup sugar and beat until stiff peaks form.
  5. Combine Batters: Fold whipped egg whites into the ube mixture gently until no streaks remain.
  6. Bake the Cake: Pour chiffon batter over leche flan in the cake pan, place in a larger pan with hot water and bake at 350°F (175°C) for 1 hour.
  7. Cool and Refrigerate: Let cool for 10 minutes, then chill in the refrigerator for a minimum of 4 hours.
  8. Serve the Cake: Run a knife around edges of the pan, invert onto a serving plate, cut into slices, and serve chilled.

Nutrition

Serving: 1sliceCalories: 320kcalCarbohydrates: 40gProtein: 6gFat: 15gSaturated Fat: 5gPolyunsaturated Fat: 2gMonounsaturated Fat: 8gCholesterol: 160mgSodium: 180mgPotassium: 200mgFiber: 1gSugar: 25gVitamin A: 450IUCalcium: 100mgIron: 1mg

Notes

Ensure egg whites and yolks are at room temperature for fluffiness. Chill the cake for at least 4 hours for best results.

Tried this recipe?

Let us know how it was!

Lemon Crème Brûlée Cookies: A Chewy Tangy Delight

February 26, 2026 by Grace Snow Leave a Comment

Have you ever craved the elegance of crème brûlée but wanted the cozy comfort of a cookie? That’s exactly where my Lemon Crème Brûlée Cookies come in! These delightful treats marry the chewy texture of a sugar cookie with a creamy lemon pastry filling and a perfectly caramelized top. Not only are they a dream for lemon lovers, but they also make for an impressive dessert at any occasion. The best part? They’re surprisingly quick to whip up, allowing you to impress guests without breaking a sweat. Whether you serve them at a gathering or indulge in one with a cup of tea, I promise these cookies will have everyone asking for seconds. Curious about how to achieve that perfect balance of tenderness and crunch? Let’s dive into the recipe!

Why Are Lemon Crème Brûlée Cookies Amazing?

Unique Flavor Fusion: These cookies combine the best of two worlds, merging the tangy brightness of lemon with the creamy decadence of crème brûlée.

Quick Preparation: Surprisingly simple to make, you can whip up these treats in no time, making them perfect for when unexpected company arrives.

Crowd-Pleasing Delight: Their eye-catching caramelized tops and gooey lemon filling will wow friends and family, ensuring your baking skills shine.

Chewy and Creamy: You'll love the delightful contrast between the soft, chewy cookie and the rich, creamy pastry filling—an irresistible duo that leaves you wanting more.

Versatile Option: Want to personalize your cookies? Experiment with different citrus flavors or toppings for a unique twist. Whether served at parties or enjoyed over tea, these Lemon Ricotta Protein pancakes or Thumbprint Cookies Melt are the perfect companion.

Lemon Crème Brûlée Cookies Ingredients

For the Pastry Cream

  • Whole Milk – Adds creaminess to the pastry cream; you can substitute it with low-fat milk for a lighter version.
  • Egg Yolks – Provide richness and help thicken the pastry cream; consider using egg whites in another recipe to minimize waste.
  • Granulated White Sugar – Sweetens the cream beautifully; opt for brown sugar if you prefer a deeper flavor.
  • Salt – Enhances the sweetness for both the pastry cream and cookies; a small amount goes a long way!
  • Vanilla Bean Paste – Adds a fragrant touch; feel free to substitute with vanilla extract if that’s what you have.
  • Lemon Zest – Imparts a fresh lemon flavor; fresh zest is essential, but you can use frozen zest in a pinch.
  • Cornstarch – Helps thicken the pastry cream perfectly; all-purpose flour can work as a substitute, though it may not be as effective.
  • Unsalted Butter – Provides richness and moisture; to make it dairy-free, simply replace it with plant-based margarine.

For the Cookie Dough

  • Granulated Sugar (for lemon sugar) – Gives those cookies a sweet, citrusy coating; you can use superfine sugar for smoother results.
  • All-Purpose Flour – The main structure of the cookies; gluten-free flour can work if you require a gluten-free option.
  • Baking Powder & Baking Soda – Essential leavening agents for the perfect rise; be mindful of measurements, as too much or too little can affect texture.
  • Lemon Zest (for cookies) – Adds even more lemon flavor; same substitutions apply as mentioned before.
  • Egg – Binds the cookie dough together; consider using a flax egg for a vegan alternative.

For the Brûlée Topping

  • Granulated Sugar (for brûlée topping) – Caramelizes beautifully to form the crispy top; using superfine sugar will yield better results for that perfect crunch.

These Lemon Crème Brûlée Cookies are not only a treat for your taste buds but a feast for the eyes, making them an unforgettable addition to any dessert spread!

Step‑by‑Step Instructions for Lemon Crème Brûlée Cookies

Step 1: Make Pastry Cream
Begin by heating 2 cups of whole milk in a saucepan over medium heat until steaming but not boiling. In a separate bowl, whisk together 4 egg yolks, ½ cup granulated sugar, the zest of 1 lemon, a pinch of salt, 1 tablespoon vanilla bean paste, and 2 tablespoons cornstarch until smooth. Gradually pour the hot milk into the egg mixture, whisking constantly, then return this mixture to the saucepan. Cook over medium heat for 5-7 minutes, stirring continuously until thickened. Remove from heat and add 2 tablespoons of unsalted butter, stirring until melted. Transfer the cream to a bowl, cover it with plastic wrap, and chill in the refrigerator.

Step 2: Prepare Dough
In a medium bowl, whisk together 2 cups of all-purpose flour, ½ teaspoon baking powder, ½ teaspoon baking soda, and a pinch of salt. In a large mixing bowl, beat ½ cup of softened unsalted butter and 1 cup of granulated sugar until the mixture is light and fluffy, about 2-3 minutes. Next, add 1 large egg, 1 teaspoon of vanilla extract, and the zest of another lemon to the butter mixture, stirring until well combined. Gradually mix in the dry ingredients until just combined, forming a soft dough.

Step 3: Shape Cookies
Preheat your oven to 350°F (175°C) and line a baking sheet with parchment paper. Roll portions of the cookie dough into 1-inch balls and then roll each ball in a mixture of ¼ cup granulated sugar and the zest of 1 lemon to coat them evenly. Once coated, flatten each dough ball slightly and place them on the prepared baking sheet, leaving space between each cookie to allow for spreading during baking.

Step 4: Bake
Bake the cookies in your preheated oven for 9-10 minutes, or until they are just set and the edges are lightly golden, but remain soft in the center. After baking, let the cookies cool on the baking sheet for about 5 minutes. This short cooling time will help them firm up before transferring them to a wire rack to cool completely.

Step 5: Assemble
Once the cookies are completely cooled, take the chilled lemon pastry cream and use a piping bag to pipe a generous swirl onto the center of each cookie. Prepare your brûlée topping by sprinkling a thin layer of granulated sugar evenly over the pastry cream. Carefully use a kitchen torch to caramelize the sugar until it forms a crispy, golden-brown layer. Be sure to keep the torch moving to avoid burning any spots and achieve that perfect crème brûlée finish.

Storage Tips for Lemon Crème Brûlée Cookies

Room Temperature: Keep uneaten cookies at room temperature for up to 2 days in an airtight container to preserve their chewy texture.

Fridge: For the best taste, store prepared pastry cream in the fridge for up to 4 days, separately from the cookies. This helps maintain each component's freshness.

Freezer: You can freeze the cookies without the pastry cream for up to 3 months—simply wrap them tightly in plastic wrap and place in a freezer-safe bag.

Reheating: To enjoy that fresh-baked taste, reheat frozen cookies in the oven at 350°F (175°C) for about 5-7 minutes, allowing them to regain their chewy texture.

Expert Tips for Lemon Crème Brûlée Cookies

  • Chill the Cream: Allow the pastry cream to chill completely before piping; it helps maintain the integrity of the lemon filling inside the cookies.
  • Precision in Baking: Make sure to bake just until the edges are golden to keep the centers soft and chewy; overbaking can lead to dry cookies.
  • Use Superfine Sugar: When caramelizing, opt for superfine sugar for the brûlée topping; it melts more evenly, creating a perfect, crunchy crust.
  • Do Not Overmix: When combining dry and wet ingredients, mix until just combined to maintain a tender texture in your Lemon Crème Brûlée Cookies.
  • Avoid Moisture: Assemble the cookies just before serving to prevent the pastry cream from making the cookies soggy; it’s all about that delightful contrast!

Make Ahead Options

These Lemon Crème Brûlée Cookies are perfect for meal prep enthusiasts! You can make the lemon pastry cream up to 3 days in advance. Simply prepare it as instructed, then store it in an airtight container in the refrigerator. The cookie dough can also be shaped into balls and frozen for up to 1 month; just place them on a baking sheet to freeze, then transfer to a zip-top freezer bag. When you're ready to bake, bake frozen cookies directly from the freezer for a few extra minutes. For the best quality, assemble the cookies and add the pastry cream just before serving to prevent sogginess, ensuring each bite is just as delicious and fresh!

What to Serve with Lemon Crème Brûlée Cookies?

Indulge in the delightful dance of flavors these cookies bring as you build a charming dessert spread.

  • Creamy Vanilla Ice Cream: The cold creaminess complements the warm, caramelized top of the cookies, creating a luscious contrast.
  • Fresh Berries Medley: A mix of strawberries, blueberries, and raspberries adds a burst of tanginess that brightens the lemon flavor.
  • Whipped Cream Topping: Light and airy, it enhances the richness of the cookie while offering a satisfying texture.
  • Herbal Tea Blend: A warm cup of chamomile or mint tea balances the sweetness of the cookies, providing a soothing experience.
  • Sparkling Lemonade: Refreshingly citrusy drinks tie in the lemon theme and cleanse the palate beautifully.
  • Chocolate Dipping Sauce: For an indulgent twist, drizzling chocolate pairs surprisingly well with lemon, creating a decadent flavor fusion.
  • Almond Biscotti: The crunchiness of biscotti offers a delightful contrast to the chewy cookies, making for an appealing texture experience.
  • Fruit Salad: A vibrant fruit salad incorporating citrus fruits enhances the bright notes in the cookies while adding freshness.
  • Espresso or Coffee: A rich cup of espresso or coffee enhances the sweetness of the cookies, creating an elegant dessert pairing.
  • Lemon Bars: For a themed dessert table, serving lemon bars alongside these cookies will allow guests to enjoy varied lemon delights!

Lemon Crème Brûlée Cookies: Customization Ideas

Feel free to let your creativity shine with these Lemon Crème Brûlée Cookies, transforming them into a personal masterpiece just for you!

  • Lemon-Lavender: Add dried lavender buds to your dough for a floral note that perfectly complements the lemon zest. The aroma will transport you to a sunny garden.
  • Swap Citrus: Experiment with orange or lime zest for a different flavor profile, bringing a zesty twist to your cookies. Each option brightens the cookie experience.
  • Healthier Version: Replace granulated sugar with a sugar alternative like monk fruit for a reduced-calorie option without sacrificing flavor. You won’t even miss the sugar!
  • Nutty Crunch: Mix in crushed almonds or pecans to the dough for an unexpected crunch and extra flavor. The nutty goodness pairs beautifully with the creamy filling.
  • Chocolate Drizzle: Drizzle melted dark chocolate over the caramelized topping for an indulgent finish that adds richness with every bite. Chocolate lovers will rejoice!
  • Spice It Up: Add a dash of ground ginger or cinnamon to the dough for an exciting warmth that complements the lemony brightness. It’s a flavorful surprise!
  • Add Sprinkles: For a playful touch, sprinkle colorful nonpareils on top of the caramelized sugar before it hardens, making these cookies perfect for celebrations.
  • Mini Size: Create mini cookie versions for bite-sized delights that are perfect for sharing. These little gems will disappear in no time!

If you're interested in more treats, why not pair these cookies with delicious Eggnog Cookies Soft or serve alongside a warm bowl of Lemon Chicken Soup? Each of these has its own unique flavor that will make your gatherings memorable!

Lemon Crème Brûlée Cookies Recipe FAQs

How do I select the best lemons for the cookies?
When choosing lemons, look for ones that are vibrant yellow, firm, and free from dark spots. A good lemon will also have a nice, aromatic fragrance. If you can, give them a gentle squeeze—avoid those that feel overly soft, as they may be overripe.

What’s the best way to store Lemon Crème Brûlée Cookies?
I recommend storing your cookies in an airtight container at room temperature for up to 2 days to keep them chewy. The pastry cream should be stored separately in the fridge for up to 4 days; this keeps both components fresh and delicious!

Can I freeze these cookies, and if so, how?
Absolutely! You can freeze the cookies without the pastry cream for up to 3 months. Just wrap each cookie tightly in plastic wrap and place them in a freezer-safe bag. When ready to enjoy, reheat them in the oven at 350°F (175°C) for 5-7 minutes for that warm, chewy goodness!

What should I do if the pastry cream is too thin?
If your pastry cream is too thin, fear not! You can cook it a little longer, whisking constantly until it thickens. If you’d like to prevent this from happening in the future, ensure you're measuring your cornstarch correctly and always mix it well with the other ingredients before adding hot milk.

Are there any dietary considerations I should keep in mind?
If you’re concerned about allergies, be aware that this recipe contains dairy, eggs, and gluten. For a dairy-free option, use plant-based milk and margarine; for a gluten-free version, swap out all-purpose flour with a gluten-free flour blend. And remember, if making these for pets, keep them away—chocolate, sugar, and certain other ingredients can be harmful to animals.

Lemon Crème Brûlée Cookies

Lemon Crème Brûlée Cookies: A Chewy Tangy Delight

Lemon Crème Brûlée Cookies combine chewy sugar cookie texture with creamy pastry filling, perfect for dessert lovers.
Print Recipe Pin Recipe
Prep Time 20 minutes mins
Cook Time 10 minutes mins
Chilling Time 30 minutes mins
Total Time 1 hour hr
Servings: 12 cookies
Course: Dessert
Cuisine: American
Calories: 150
Ingredients Equipment Method Nutrition Notes

Ingredients
  

For the Pastry Cream
  • 2 cups Whole Milk Substitute with low-fat milk for a lighter version.
  • 4 large Egg Yolks Use egg whites in another recipe to minimize waste.
  • ½ cup Granulated White Sugar Opt for brown sugar for a deeper flavor.
  • 1 pinch Salt Enhances sweetness.
  • 1 tablespoon Vanilla Bean Paste Substitute with vanilla extract if necessary.
  • 1 tablespoon Lemon Zest Fresh zest is essential, can use frozen if needed.
  • 2 tablespoons Cornstarch All-purpose flour can work as a substitute.
  • 2 tablespoons Unsalted Butter Replace with plant-based margarine for a dairy-free option.
For the Cookie Dough
  • ½ cup Granulated Sugar (for lemon sugar) Can use superfine sugar for smoother results.
  • 2 cups All-Purpose Flour Gluten-free flour can work if needed.
  • ½ teaspoon Baking Powder Essential leavening agent.
  • ½ teaspoon Baking Soda Essential leavening agent.
  • 1 pinch Salt
  • 1 large Egg Consider using a flax egg for a vegan alternative.
  • 1 tablespoon Lemon Zest (for cookies) Same substitutions apply.
For the Brûlée Topping
  • ¼ cup Granulated Sugar (for brûlée topping) Using superfine sugar yields better results.

Equipment

  • Saucepan
  • Mixing Bowl
  • piping bag
  • Oven
  • kitchen torch

Method
 

Step-by-Step Instructions
  1. Make Pastry Cream: Heat 2 cups of whole milk in a saucepan over medium heat until steaming. In a bowl, whisk together 4 egg yolks, ½ cup granulated sugar, zest of 1 lemon, salt, vanilla bean paste, and cornstarch. Gradually pour hot milk into the egg mixture, whisking constantly. Return to saucepan, cook over medium heat for 5-7 minutes until thick. Remove from heat, stir in butter, chill covered in refrigerator.
  2. Prepare Dough: Whisk together 2 cups all-purpose flour, baking powder, baking soda, and salt in a bowl. Beat ½ cup softened unsalted butter and 1 cup granulated sugar until fluffy. Add 1 egg, vanilla extract, and another lemon zest, stirring well. Mix in dry ingredients until just combined.
  3. Shape Cookies: Preheat oven to 350°F (175°C). Roll dough into 1-inch balls, coat in a mixture of ¼ cup granulated sugar and lemon zest. Flatten each ball slightly, place on lined baking sheet, leaving space between cookies.
  4. Bake: Bake for 9-10 minutes until set and edges golden, but centers remain soft. Cool on baking sheet for 5 minutes before transferring to wire rack.
  5. Assemble: Once cooled, pipe chilled lemon pastry cream onto each cookie. Sprinkle sugar evenly over pastry cream and use a kitchen torch to caramelize it. Move the torch to avoid burning spots.

Nutrition

Serving: 1cookieCalories: 150kcalCarbohydrates: 20gProtein: 2gFat: 7gSaturated Fat: 4gMonounsaturated Fat: 3gCholesterol: 40mgSodium: 100mgPotassium: 50mgSugar: 10gVitamin A: 200IUVitamin C: 1mgCalcium: 50mgIron: 0.5mg

Notes

Chill the cream completely before piping for better results. Do not overmix ingredients to maintain cookie texture. Assemble just before serving to keep cookies from getting soggy.

Tried this recipe?

Let us know how it was!

Delicious Strawberry Pop-Tart Pie for Sweet Nostalgia

February 26, 2026 by Grace Snow Leave a Comment

Diving into the kitchen, I couldn't help but feel a wave of nostalgia wash over me as I set out to create this delightful Strawberry Pop-Tart Pie. This recipe brings together the beloved essence of childhood pastries with a twist that’s perfect for any occasion. Imagine a buttery, golden crust filled with fresh or frozen strawberries, topped with smooth royal icing and colorful sprinkles—such a simple dessert that can brighten up breakfast or serve as a charming end to dinner. Plus, it's a breeze to whip up, making it ideal for those lazy afternoons when you crave something sweet without the fuss. Ready to indulge in this comforting slice of nostalgia? Let’s get baking!

Why You'll Love This Pop-Tart Pie

Nostalgic Flavor: This pie captures the delightful taste of childhood Pop-Tarts, making it a hit for both kids and adults.

Easy to Make: With minimal ingredients and simple steps, it’s perfect for those who want a delicious dessert without spending hours in the kitchen.

Versatile Ingredients: Whether you use fresh strawberries or frozen ones, this recipe adapts to your pantry, ensuring scrumptious results every time.

Visual Appeal: Topped with smooth royal icing and colorful sprinkles, it's a feast for the eyes as well as the taste buds—ideal for parties or family gatherings!

Time-Saving Delight: Bake ahead of time and freeze for later enjoyment, just like our Tamale Pie Hearty recipes that prioritize convenience without compromising flavor.

Crowd-Pleaser: Serve it warm with a scoop of vanilla ice cream for a decadent treat that your guests will rave about!

Strawberry Pop-Tart Pie Ingredients

• Whip up this nostalgic delight with these simple ingredients!

For the Crust

  • Pie Crust – Use homemade or store-bought for a quick and easy base.

For the Filling

  • Strawberries – Fresh or frozen; if using frozen, ensure they’re properly thawed for the best consistency.
  • Water – Helps par-cook the strawberries, keeping their shape intact.
  • Sugar – Sweetens the filling, balancing the natural tartness of the strawberries.

For the Frosting

  • Royal Icing – Perfect for topping; swap for a simple glaze if you're short on time.
  • Sprinkles – Optional but adds a fun, colorful touch to your finished pie!

This delightful Strawberry Pop-Tart Pie is sure to be a hit at your next gathering!

Step‑by‑Step Instructions for Strawberry Pop-Tart Pie

Step 1: Prepare Strawberries
Begin by washing your strawberries thoroughly, then trim the tops and slice them into small pieces. In a medium saucepan over medium heat, combine the strawberries with a splash of water, allowing them to cook for about 5–7 minutes until softened. Stir gently to ensure even cooking, then drain any excess liquid and set the strawberries aside to cool slightly while you prepare the crust.

Step 2: Make Pie Crust
Preheat your oven to 375°F (190°C). If you’re using a homemade pie crust, roll it out into a circle approximately 12 inches in diameter, then carefully fit it into a pie dish, pressing it into the edges. If using store-bought crust, unroll it directly into the dish. Trim any excess crust hanging over the edges and prick the bottom with a fork to prevent bubbling as it bakes.

Step 3: Fill the Pie
Spread the cooled strawberry mixture evenly across the bottom of the pie crust, ensuring each slice will have a generous amount of filling. Sprinkle sugar over the strawberries to enhance their sweetness and create a delicious contrast. Make sure to distribute the sugar evenly, then gently press down on the filling to compact it slightly for even cooking.

Step 4: Bake
Place your filled pie into the preheated oven and bake for 25–30 minutes, or until the crust is golden brown and the filling is bubbly. Keep an eye on the pie towards the end of cooking; the crust should have a beautiful light golden color, and you may see some bubbling juices escaping from the edges, signaling it’s nearly ready.

Step 5: Cool and Frost
Once baked, remove the Strawberry Pop-Tart Pie from the oven and let it cool on a wire rack for about 20–30 minutes. This cooling step is crucial, as it helps the filling set properly. After the pie has cooled, prepare the royal icing and generously frost the top, allowing it to cascade over the edges for a beautiful finish.

Step 6: Add Sprinkles and Serve
After frosting the pie, sprinkle colorful decorations all over the icing while it's still wet to ensure they stick. Let the pie sit for an additional 10 minutes for the icing to set slightly. Now, slice a generous piece and serve it warm, perhaps with a scoop of vanilla ice cream alongside for an irresistible combo that showcases your delightful Strawberry Pop-Tart Pie!

How to Store and Freeze Strawberry Pop-Tart Pie

Fridge: Store leftovers in an airtight container in the refrigerator for up to 3 days. This keeps the flavors fresh while allowing easy access for a sweet snack.

Freezer: If you want to save the pie for later, it can be frozen (unfrosted) for up to 2 months. Wrap it tightly in plastic wrap and foil to prevent freezer burn.

Reheating: To enjoy a slice, thaw overnight in the fridge or at room temperature. Reheat in the oven at 350°F (175°C) for about 10–15 minutes until warm, and then frost if desired.

Note on Icing: If you've already frosted your pie, it’s best to refrigerate and consume within 3 days for optimal texture and taste.

What to Serve with Frosted Strawberry Pop-Tart Pie

This delightful dessert is perfect for creating a memorable meal that captures the spirit of togetherness.

  • Vanilla Ice Cream: A classic pairing, the creamy sweetness complements the tart strawberry filling, enhancing each bite. The contrasting temperatures create a delightful experience.

  • Whipped Cream: Light and airy, whipped cream adds a luscious texture while balancing the pie’s sweetness. Serve dollops generously for an indulgent touch.

  • Fresh Fruit Salad: A refreshing side of mixed berries and citrus adds brightness and acidity, cutting through the richness of the pie for a well-rounded plate.

  • Hot Chocolate: Whether it’s a chilly evening or a cozy gathering, a warm cup of hot chocolate offers comforting flavors that echo childhood memories, making it a perfect companion.

  • Minty Lemonade: This refreshing drink elevates the meal with its zesty and invigorating notes. The citrus notes complement the strawberry flavor beautifully, making each sip enjoyable.

  • Coffee: A rich cup of coffee provides a sophisticated boost that pairs beautifully with the sweetness of the pie, enhancing the overall flavor profile of the dessert.

  • Sugar Cookies: These soft, buttery treats can be a delightful addition filled with sprinkles, providing a whimsical contrast to the pie’s textures while maintaining that nostalgic feel.

  • Cheesecake Bites: Bite-sized and decadent, these little treats offer a creamy contrast to the flaky crust of the pie, creating a duo that’s simply irresistible.

  • Chocolate Dipped Strawberries: For an elevated dessert experience, these add a touch of elegance and indulgence, echoing the fresh fruit theme of your main dish.

  • Sparkling Water: A bubbly and refreshing drink option that cleanses the palate between bites of the sweet pie, keeping the meal light and enjoyable.

Expert Tips for Strawberry Pop-Tart Pie

  • Choose the Right Strawberries: Use small strawberries for a better texture and easier handling in your pie, ensuring they bake evenly.

  • Avoid Overbaking: Keep a close eye on your pie while it bakes; overbaking can lead to a dry crust. Aim for golden brown, not too dark.

  • Cool Down Time: Allow your Strawberry Pop-Tart Pie to cool completely before frosting. This helps the icing to set and keeps the filling intact.

  • Customize Your Icing: Feel free to play with flavors in the frosting! A touch of lemon or almond extract can add a delightful twist to the royal icing.

  • Make Ahead: This pie can be baked in advance and frozen before frosting, making it a convenient dessert for future gatherings or sweet cravings.

Make Ahead Options

Creating your Strawberry Pop-Tart Pie in advance is a fantastic way to save time during busy weeks! You can prepare the pie crust up to 24 hours ahead; simply wrap it tightly in plastic wrap and refrigerate. The strawberry filling can be made and stored in an airtight container for up to 3 days in the fridge—this helps the flavors meld beautifully. To maintain freshness, avoid frosting the pie until you’re ready to serve. When you're set to enjoy your pie, simply bake it directly from the fridge (add a few extra minutes if cold), cool, frost, and add sprinkles for that delightful finish. Enjoy your slice of nostalgia with minimal effort!

Strawberry Pop-Tart Pie Variations

Feel free to explore and personalize this recipe for a delightful twist that suits your taste!

  • Berry Medley: Swap out strawberries for a mix of blueberries and raspberries for a colorful and flavorful twist. This combination bursts with a variety of fruity goodness and vibrant colors!

  • Gluten-Free Crust: Use a gluten-free pie crust to make this dessert accessible for everyone. Simply substitute your favorite gluten-free flour mix for a deliciously inclusive treat.

  • Coconut Icing: Replace royal icing with coconut cream for a tropical vibe. This swap adds a rich, creamy texture that complements the strawberries beautifully.

  • Mini Hand Pies: Use muffin tins to create individual-sized pop-tart hand pies for a fun party treat. Kids love these portable versions that are perfect for sharing!

  • Spiced Filling: Add a dash of cinnamon and nutmeg to the strawberry filling for an unexpected warmth that’s just divine. This little twist elevates the flavor profile, creating something truly special.

  • Nutty Crunch: Top the icing with crushed nuts or granola for added texture. This adds a crunch that contrasts beautifully with the smooth icing and flaky crust.

  • Chocolate Drizzle: Once frosted, drizzle melted chocolate over the top for an indulgent upgrade. This rich addition pairs wonderfully with sweet strawberries for a decadent treat.

  • Fruity Icing: Play around with flavored icings by adding fruit puree or extracts. A splash of lemon or vanilla elevates the taste and adds a lovely aroma, reminiscent of homemade desserts from childhood.

Explore these creative variations, and don't forget to check out some of our other tempting recipes, like our delightful Spinach Pie Deliciously, for more delicious ideas!

Strawberry Pop-Tart Pie Recipe FAQs

How should I choose my strawberries for the filling?
Absolutely! Select small, fresh strawberries for the best flavor and texture; these will bake evenly and are easier to eat. If you opt for frozen strawberries, ensure they are fully thawed and drained to avoid excess moisture in the filling.

How do I store leftovers of the Strawberry Pop-Tart Pie?
You can store any uneaten pie in an airtight container in the refrigerator for up to 3 days. This keeps the pie fresh for quick access to a sweet treat. Make sure to let it cool completely before covering it to maintain its delightful texture.

Can I freeze the Strawberry Pop-Tart Pie?
Yes, indeed! If you’d like to save your pie for a later indulging session, it can be frozen un-frosted for up to 2 months. Wrap it tightly in plastic wrap followed by aluminum foil to prevent freezer burn. When you’re ready to enjoy, simply thaw overnight in the fridge and reheat in the oven for about 10–15 minutes at 350°F (175°C) for best results.

What if my pie crust turns out soggy?
Very good question! A soggy crust may result from excessive moisture in the filling. To combat this, ensure your strawberries are drained well if using frozen and consider pre-baking the crust for about 5–7 minutes before adding the filling. Pricking the bottom helps too, allowing steam to escape while it bakes.

Can I make the icing ahead of time?
Definitely! You can prepare the royal icing in advance and store it in an airtight container in the refrigerator for up to 1 week. Just give it a good stir before using, as it may thicken in the fridge. Not only does this save time, but it also allows the flavors to meld beautifully.

Is this recipe suitable for freezing? How long can I keep it?
Absolutely! If you want to enjoy your Strawberry Pop-Tart Pie later, it freezes beautifully. Simply freeze it un-frosted for up to 2 months, wrapped tightly to hold in moisture. When you’re ready to indulge, allow it to thaw overnight in the refrigerator and then reheat in the oven for a delicious, warm treat just like fresh-baked!

Strawberry Pop-Tart Pie

Delicious Strawberry Pop-Tart Pie for Sweet Nostalgia

A delightful Strawberry Pop-Tart Pie that captures childhood nostalgia in every bite, perfect for any occasion.
Print Recipe Pin Recipe
Prep Time 30 minutes mins
Cook Time 30 minutes mins
Cooling Time 30 minutes mins
Total Time 1 hour hr 30 minutes mins
Servings: 8 slices
Course: Dessert
Cuisine: American
Calories: 240
Ingredients Equipment Method Nutrition Notes

Ingredients
  

For the Crust
  • 1 each Pie Crust homemade or store-bought
For the Filling
  • 2 cups Strawberries fresh or frozen
  • 2 tablespoons Water for par-cooking strawberries
  • 1/2 cup Sugar to sweeten filling
For the Frosting
  • 1 cup Royal Icing or simple glaze
  • 1/4 cup Sprinkles optional for decoration

Equipment

  • Medium saucepan
  • Pie dish
  • Rolling Pin
  • wire rack

Method
 

Step-by-Step Instructions
  1. Wash and slice strawberries; cook with water for 5–7 minutes, drain and let cool.
  2. Preheat oven to 375°F (190°C). Prepare pie crust in dish and prick base with a fork.
  3. Spread cooled strawberries in pie crust; sprinkle with sugar and compact gently.
  4. Bake pie for 25–30 minutes until crust is golden and filling is bubbly.
  5. Cool pie for 20–30 minutes, then frost with royal icing.
  6. Sprinkle colorful decorations on icing while wet; let sit for 10 minutes before serving.

Nutrition

Serving: 1sliceCalories: 240kcalCarbohydrates: 36gProtein: 2gFat: 10gSaturated Fat: 4gPolyunsaturated Fat: 1gMonounsaturated Fat: 2gCholesterol: 30mgSodium: 150mgPotassium: 120mgFiber: 1gSugar: 15gVitamin A: 250IUVitamin C: 15mgCalcium: 30mgIron: 1mg

Notes

Use small strawberries for better pie texture. Monitor baking to avoid a dry crust. Customize icing flavors with lemon or almond extract. Can be baked ahead and frozen before frosting.

Tried this recipe?

Let us know how it was!

Lemon Cake Roll: A Delightful Twist with Creamy Filling

February 25, 2026 by Grace Snow Leave a Comment

The kitchen buzzed with excitement as I rolled out my latest sweet creation—classic flavors infused with a delightful twist. Enter the Lemon Cake Roll, a cheerful dessert that combines a light and fluffy sponge with a luscious cream cheese filling! Not only is this recipe a true showstopper perfect for gatherings, but it’s also surprisingly easy to whip up in no time. Whether you’re entertaining guests or simply craving something fresh and zesty, this lemon roll with cream cheese filling is the answer. Plus, it’s the ideal make-ahead treat, letting you savor every moment with your loved ones. What better way to brighten up your day than with a slice of this sunshine in cake form? Curious how to create this irresistibly delicious dessert? Let’s dive in!

Why is this Lemon Cake Roll special?

Delightful contrast: The zesty lemon flavor pairs beautifully with the creamy, rich filling, creating a taste explosion that’s both refreshing and indulgent.

Effortless elegance: This Lemon Cake Roll looks stunning on any dessert table, making it a perfect centerpiece for parties or family gatherings.

Versatile twist: Not only can you enjoy it as is, but you can also switch things up by adding your favorite nuts or spices for a unique take!

Make-ahead magic: Prepare it in advance to enhance the flavors, so you can enjoy your time with guests without the last-minute stress.

Crowd-pleaser: Perfectly suitable for both casual and formal get-togethers, this cake roll will leave everyone asking for seconds. Whether you're inspiring others with the joyful flavors of lemon or finding new ways to impress your friends, this cake is always a hit!

Lemon Cake Roll Ingredients

• Get ready to create this delightful dessert!

For the Cake

  • Lemon Cake Mix – A convenient base for a light, fluffy cake; you can also use a homemade lemon cake if you’re feeling adventurous.
  • Eggs – Essential for structure and lightness; opt for large, room-temperature eggs for the best results.
  • Cold Water – Keeps the batter moist without affecting the flavor.
  • Canola Oil – Keeps the cake tender and moist; feel free to substitute with vegetable oil or melted coconut oil.
  • Lemon Juice and Zest – Infuse vibrant flavor into the batter, and don't shy away from adding extra zest for an even brighter taste.
  • Non-Stick Baking Spray – Prevents the cake from sticking to the pans; don't forget parchment paper for optimal results!

For the Filling

  • Cream Cheese – The star of the filling, adding richness; full-fat is best for a creamy texture.
  • Marshmallow Fluff – Adds sweetness and volume to the filling; alternatives include whipped cream or powdered sugar for a personal touch.
  • Whipped Topping – Lightens the texture of the filling; homemade whipped cream works wonderfully as a substitute.

This Lemon Cake Roll recipe bursts with fresh flavors and is sure to impress your family and friends!

Step‑by‑Step Instructions for Lemon Cake Roll

Step 1: Preheat and Prepare
Preheat your oven to 375°F (190°C). While the oven heats, prepare your baking sheets by spraying them with non-stick baking spray and lining them with parchment paper. This will ensure your Lemon Cake Roll easily lifts from the pan after baking.

Step 2: Beat the Eggs
In a stand mixer, beat 4 large eggs on high speed for approximately 8 minutes until they become pale and thick. This step is crucial for achieving the light, fluffy texture of your Lemon Cake Roll, so keep an eye on the color and consistency as they blend.

Step 3: Mix the Batter
Once your eggs are ready, gradually mix in the lemon cake mix, cold water, canola oil, lemon juice, and lemon zest. Start on a low speed to prevent splattering, then increase to medium speed. Continue mixing until just combined, ensuring a smooth batter free of lumps.

Step 4: Bake the Cakes
Divide the batter evenly between your prepared baking sheets. Bake in the preheated oven for 10-14 minutes or until the cakes are springy to the touch. They should lightly golden around the edges, signaling that they are perfectly done and ready to be rolled.

Step 5: Roll the Cakes
As soon as you remove the cakes from the oven, turn them upside down onto clean parchment paper. Gently peel off the original parchment while the cakes are still hot. Carefully roll the cakes into a tight log shape to maintain their form.

Step 6: Cool the Cakes
Allow the rolled cakes to cool for about 15 minutes at room temperature. After they have cooled slightly, transfer them to the refrigerator for at least 1 hour to help them firm up before spreading the filling.

Step 7: Prepare the Cream Cheese Filling
While the cakes are cooling, prepare the filling by beating 8 ounces of cream cheese until smooth. Gradually incorporate marshmallow fluff and whipped topping, mixing until the filling is light and fluffy. This creamy mixture will create a wonderful contrast to the lemon sponge.

Step 8: Unroll and Fill the Cakes
Remove the cooled cakes from the refrigerator and gently unroll them. Spread an even layer of the cream cheese filling over the entire surface of each cake, making sure to cover it all the way to the edges for maximum flavor.

Step 9: Reroll the Cakes
Starting from one edge, carefully reroll each cake, ensuring the filling remains intact inside. The rolled cake should maintain its shape as you wrap it tightly. This step helps achieve the beautiful swirl effect of the Lemon Cake Roll.

Step 10: Chill the Filled Cakes
Once rerolled, wrap the cakes tightly in plastic wrap and place them in the refrigerator overnight. Chilling helps the flavors meld and sets the filling, making your Lemon Cake Roll even more delightful when served.

Step 11: Serve and Enjoy
When you're ready to serve, carefully unwrap the chilled cakes. Dust the tops with powdered sugar for a touch of elegance, and consider adding a dollop of cool whip for an extra creamy finishing touch. Slice and share this beautiful Lemon Cake Roll with family and friends!

What to Serve with Lemon Cake Roll

Imagine a sunny picnic or a cheerful gathering, enhanced by delicious flavors that harmonize beautifully with your sweet lemon delight.

  • Fresh Berries: Plump strawberries, blueberries, or raspberries add a refreshing contrast to the rich cream cheese filling. Their tartness complements the sweetness of the lemon roll perfectly.

  • Whipped Cream: Light and fluffy, a dollop of homemade whipped cream elevates each slice, adding extra creaminess that enhances the overall dessert experience.

  • Mint Salad: A simple mint salad with a drizzle of lemon vinaigrette brings a bright, herbaceous touch that refreshes the palate after every indulgent bite.

  • Lemon Sorbet: This icy treat mirrors the lemony goodness of the cake and provides a palate-cleansing brightness that's utterly refreshing on warm days.

  • Almond Biscotti: Crunchy almond biscotti offer a delightful textural contrast, bringing a nutty flavor that pairs marvelously with the cake’s lightness.

  • Iced Tea or Lemonade: Quench your thirst with a cool glass of brewed iced tea or freshly-squeezed lemonade. The flavors will dance harmoniously with the zesty notes of the roll!

  • Chocolate Drizzle: For a decadent flair, a drizzle of rich chocolate sauce adds a contrasting sweetness that wonderfully balances the tartness of lemon.

  • Cheesecake Bites: Mini cheesecake bites can elevate your dessert table with a creamy richness that beautifully complements the Lemon Cake Roll while providing a delightful variety.

Lemon Cake Roll Variations & Substitutions

Feel free to get creative with this Lemon Cake Roll and make it truly your own!

  • Gluten-Free: Use a gluten-free cake mix to cater to gluten-sensitive friends without sacrificing flavor.

  • Dairy-Free: Substitute cream cheese with a dairy-free cream cheese alternative, and replace whipped topping with coconut whipped cream for a delicious twist.

  • Bolder Citrus: Enhance the lemon flavor by adding a teaspoon of lemon extract in addition to juice and zest. This will intensify the citrusy goodness.

  • Spicy Kick: Add a hint of warmth by incorporating ground ginger or cardamom into the cake batter for a spicy twist that complements the sweet lemon.

  • Nutty Delight: Fold in chopped walnuts or pecans into the cream cheese filling to add rich texture and nutty flavor. It pairs beautifully with the lemon cake!

  • Fruit-Filled: Add a layer of fresh berries, like raspberries or blueberries, to the cream cheese filling for a delightful burst of flavor and a pop of color.

  • Meringue Top: For an elegant twist, pipe a sweet meringue on top after rolling and torch it lightly for a gourmet finish that adds both crunch and sweetness.

  • Pumpkin Flare: Interested in a seasonal spin? Try swapping the lemon flavor for pumpkin in this roll, drawing inspiration from delicious Pumpkin Cinnamon Roll desserts for fall festivities.

With so many ways to customize your Lemon Cake Roll, your baking adventures are limitless!

Tips for the Best Lemon Cake Roll

  • Use Room Temperature Eggs: Ensuring your eggs are at room temperature helps them whip up fluffier, creating a lighter sponge in your Lemon Cake Roll.

  • Don’t Skip Cooling: Be patient and let the cakes cool properly after rolling; this prevents them from cracking when you unroll them later.

  • Treat the Filling Gently: When spreading the cream cheese filling, use a light hand to keep the cake intact, ensuring a beautiful finish to your Lemon Cake Roll.

  • Adjust Zest for More Flavor: If you love a zesty kick, feel free to add more lemon zest to both the batter and the filling for extra brightness.

  • Refrigerate Overnight: Chilling the filled cakes overnight allows every flavor to develop fully, resulting in a more luscious and well-rounded dessert.

Make Ahead Options

These Lemon Cake Rolls are a brilliant choice for meal prep! You can prepare the cakes and refrigerate them for up to 24 hours before serving, which enhances their flavor and keeps them moist. Simply bake the cakes, roll them while hot, and let them cool in the fridge. The cream cheese filling can also be made in advance and stored in an airtight container in the refrigerator for up to 3 days; this helps the flavors meld beautifully. When you're ready to serve, simply unroll the chilled cakes, spread the filling, re-roll, and dust with powdered sugar. This way, you’ll enjoy a dazzling, show-stopping dessert with minimal last-minute effort!

How to Store and Freeze Lemon Cake Roll

Fridge: Store your Lemon Cake Roll in an airtight container in the refrigerator for up to 4-5 days to maintain its freshness and prevent the cream cheese filling from becoming runny.

Freezer: For longer storage, wrap the Lemon Cake Roll tightly in plastic wrap and aluminum foil, then freeze for up to 2 months. Thaw in the fridge overnight before serving.

Reheating: If you prefer your cake roll warm, gently thaw it and warm individual slices in the microwave for about 10-15 seconds, but be careful not to overheat, which can affect texture.

Make-Ahead: This delightful cake can be made a day in advance; storing it overnight in the fridge actually enhances the flavors, allowing you to enjoy quality time with your loved ones.

Lemon Cake Roll Recipe FAQs

What should I look for when selecting lemons for this recipe?
Absolutely! When choosing lemons, look for ones that are firm, bright yellow, and heavy for their size. Avoid lemons with dark spots or imperfections, as these may indicate overripeness. For the best flavor, select juicy lemons that yield slightly when you press them.

How long can I store my Lemon Cake Roll, and what’s the best method?
To store your Lemon Cake Roll, keep it in an airtight container in the refrigerator for up to 4-5 days. This will maintain its freshness and prevent the cream cheese filling from becoming runny. Make sure it's wrapped tightly to avoid absorbing any odors from the fridge.

Can I freeze the Lemon Cake Roll? How do I do it?
Yes, you can absolutely freeze the Lemon Cake Roll! To do this, wrap it tightly in plastic wrap followed by aluminum foil to protect it from freezer burn. It can be frozen for up to 2 months. When you’re ready to enjoy it, thaw the roll in the refrigerator overnight before serving. This method keeps it fresh and delicious!

What should I do if my cake falls apart while rolling it?
Very! If your cake starts to crack or falls apart while rolling, don’t worry! First, ensure that you roll the cake while it’s still warm, as this makes it more pliable. If cracks do occur, simply use the cream cheese filling to "glue" the pieces back together. When you serve it, just make sure to dust it with powdered sugar—no one will notice!

Are there any dietary considerations for the Lemon Cake Roll?
Of course! If you're accommodating dietary restrictions, you can slightly modify this recipe. For a gluten-free version, you can substitute the lemon cake mix with a gluten-free cake mix. If anyone has lactose intolerance, consider using a dairy-free cream cheese alternative and coconut whipped topping. Always double-check all ingredient labels for allergens to be safe!

Is there a way to enhance the lemon flavor in my cake roll?
Certainly! If you want to boost the lemon flavor, you can add more lemon zest to both the batter and the filling. Additionally, a splash of pure lemon extract can intensify the lemony brightness without making it too tart. Enjoy experimenting with citrus to find the perfect balance that brings joy to your taste buds!

Lemon Cake Roll

Lemon Cake Roll: A Delightful Twist with Creamy Filling

This Lemon Cake Roll combines a fluffy lemon sponge with a luscious cream cheese filling, creating a refreshing and indulgent dessert.
Print Recipe Pin Recipe
Prep Time 25 minutes mins
Cook Time 14 minutes mins
Chilling Time 1 hour hr
Total Time 1 hour hr 39 minutes mins
Servings: 10 slices
Course: Dessert
Cuisine: American
Calories: 250
Ingredients Equipment Method Nutrition Notes

Ingredients
  

For the Cake
  • 1 box Lemon Cake Mix A convenient base for a light, fluffy cake
  • 4 large Eggs Room temperature for best results
  • 1 cup Cold Water Keeps the batter moist
  • 1/3 cup Canola Oil Can substitute with vegetable oil or melted coconut oil
  • 1/4 cup Lemon Juice Freshly squeezed for best flavor
  • 1 tablespoon Lemon Zest Add extra for brighter taste
  • 1 can Non-Stick Baking Spray Prevents sticking, use with parchment paper
For the Filling
  • 8 ounces Cream Cheese Full-fat for creaminess
  • 1 cup Marshmallow Fluff Adds sweetness and volume
  • 1 cup Whipped Topping Homemade whipped cream is a good substitute

Equipment

  • Stand Mixer
  • Baking Sheets
  • Parchment Paper
  • plastic wrap

Method
 

Step‑By‑Step Instructions
  1. Preheat your oven to 375°F (190°C) and prepare baking sheets with non-stick spray and parchment paper.
  2. In a stand mixer, beat 4 large eggs on high speed for approximately 8 minutes until pale and thick.
  3. Gradually mix in lemon cake mix, cold water, canola oil, lemon juice, and lemon zest until just combined.
  4. Divide batter between prepared baking sheets. Bake for 10-14 minutes until springy and golden.
  5. Turn cakes upside down onto clean parchment paper; gently peel off original parchment and roll tightly.
  6. Allow the cakes to cool for about 15 minutes, then transfer to the refrigerator for at least 1 hour.
  7. Beat 8 ounces of cream cheese until smooth, then mix in marshmallow fluff and whipped topping until fluffy.
  8. Unroll the cooled cakes and spread cream cheese filling evenly over each, covering to edges.
  9. Reroll each cake tightly from one edge, maintaining its shape.
  10. Wrap the rerolled cakes tightly in plastic wrap and refrigerate overnight.
  11. When ready to serve, unwrap and dust with powdered sugar; optionally add a dollop of cool whip.

Nutrition

Serving: 1sliceCalories: 250kcalCarbohydrates: 33gProtein: 3gFat: 12gSaturated Fat: 5gPolyunsaturated Fat: 1gMonounsaturated Fat: 2gCholesterol: 65mgSodium: 200mgPotassium: 120mgFiber: 1gSugar: 18gVitamin A: 300IUVitamin C: 2mgCalcium: 20mgIron: 0.5mg

Notes

For best results, use room temperature eggs and allow the cakes to cool properly before unrolling.

Tried this recipe?

Let us know how it was!

Delightful Hawaiian Mini Guava Cakes for a Tropical Treat

February 25, 2026 by Grace Snow Leave a Comment

“Can you smell that?” I overheard someone remarking at a backyard barbecue, where the scent of something sweet and tropical lingered in the air. That’s the magic of Hawaiian Mini Guava Cakes! These delightful little treats are more than just desserts; they capture a taste of paradise right in your own kitchen. With their light, moist texture and a creamy topping that feels like a vacation for your palate, they’re effortlessly simple to whip up. Perfect for any gathering—from casual family meals to lively parties—this tropical dessert is a crowd-pleaser and can easily be made gluten-free with the right cake mix. Got some fresh guava on hand? Let’s dive in and bring a slice of the islands to our homes! What flavor combinations do you think would be a must-try with this sweet treat?

Why Are Hawaiian Mini Guava Cakes Irresistible?

Tropical Bliss: Each cake is a mini vacation on your plate, bursting with the exotic sweetness of guava.
Effortless Assembly: With simple ingredients and straightforward steps, even beginners will shine in the kitchen.
Versatile Delight: Feel free to experiment with different cake flavors or a hint of coconut for a unique twist!
Crowd-Pleasing Treat: Ideal for everything from family dinners to festive gatherings, they’ll have everyone coming back for seconds.
Gluten-Free Option: Use a gluten-free cake mix to cater to all your guests, without compromising on flavor! Why not serve these alongside Mini Tropical Pavlovas for an exciting dessert spread?

Hawaiian Mini Guava Cake Ingredients

For the Cake
• Strawberry Cake Mix – This provides a sweet and vibrant base; feel free to swap for vanilla or coconut for a different flavor experience.
• Guava Nectar/Juice – This is crucial for that tropical taste; fresh guava can also be used if pureed and strained.
• Eggs (3, room temperature) – They bind the ingredients and add moisture; using eggs at room temperature promotes better mixing.
• Coconut Oil (1/3 cup, liquid) – Adds a hint of coconut and moisture; can be swapped with vegetable or canola oil if preferred.

For the Cream Topping
• Cream Cheese (6 oz, softened) – This lends richness and creates a creamy texture; remember to let it soften fully for easier mixing.
• Cool Whip (6 oz, thawed) – Provides a light, airy texture; you can substitute this with freshly whipped cream if you like.
• Sugar (1/4 cup) – Sweetens the cream topping; adjust the amount to suit your sweetness preference.
• Vanilla Extract (1 teaspoon) – Enhances flavors beautifully; using pure vanilla will give you the best results.

For the Glaze
• Sugar (1/2 cup for glaze) – Sweetens and balances the flavors in the glaze; consider using less if you prefer a less sweet finish.
• Cornstarch (1/4 cup) – Thickens the glaze; be sure you mix it well with water to avoid clumps.
• Water (3 tablespoons) – Used in combination with cornstarch to create that glossy glaze; stir thoroughly to combine.

These Hawaiian Mini Guava Cakes are wonderfully simple yet pack a deliciously tropical punch that can easily steal the show at any gathering!

Step‑by‑Step Instructions for Hawaiian Mini Guava Cakes

Step 1: Preheat and Prepare
Begin by preheating your oven to 350°F (175°C). While the oven warms, line a cupcake pan with paper liners to prevent the mini cakes from sticking. This allows for easy removal after baking, helping to keep the Hawaiian Mini Guava Cakes intact and looking great.

Step 2: Mix the Batter
In a large mixing bowl, combine the strawberry cake mix, guava juice, room temperature eggs, and melted coconut oil. Using a handheld mixer, blend on low for 30 seconds to combine the ingredients, then increase to medium speed and mix for 2 minutes until the batter is smooth and slightly fluffy. This ensures all the flavors meld together perfectly.

Step 3: Fill the Liners
Carefully fill each cupcake liner about one-third full with the batter. This allows room for the cakes to rise without overflowing. Once filled, place the pan in the preheated oven and bake for 19-22 minutes, or until the tops are light golden and a toothpick inserted in the center comes out clean.

Step 4: Cool the Cakes
After baking, remove the cupcake pan from the oven and let it cool in the pan for about 5 minutes. Then, transfer the mini cakes to a wire rack to cool completely. This step is essential for the texture of the Hawaiian Mini Guava Cakes, allowing them to firm up before adding the creamy topping.

Step 5: Prepare the Glaze
For the guava glaze, combine guava juice and sugar in a saucepan over medium heat. Bring to a gentle boil. In a separate bowl, mix cornstarch with water to create a slurry, then whisk this mixture into the boiling juices. Cook for an additional minute until the glaze thickens, then set aside to cool.

Step 6: Make the Cream Topping
In a mixing bowl, beat the softened cream cheese with an electric mixer until fluffy, approximately 2-3 minutes. Gradually add sugar and vanilla extract, mixing until fully incorporated. Gently fold in the thawed Cool Whip until the mixture is smooth and creamy. This topping will add richness to the Hawaiian Mini Guava Cakes.

Step 7: Assemble the Cakes
Once the mini cakes have completely cooled, spread a generous layer of the cream cheese mixture over the top of each cake. Ensure the layer is even for a delightful presentation. After topping, place the cakes in the refrigerator to set for about 30 minutes, providing a firmer texture for serving.

Step 8: Add the Glaze
Finally, drizzle the cooled guava glaze over each mini cake, allowing the glossy finish to enhance their tropical charm. You can serve the Hawaiian Mini Guava Cakes immediately or keep them chilled in the refrigerator for later. The beautiful glaze makes these treats irresistible and ready for any occasion!

What to Serve with Hawaiian Mini Guava Cakes

Elevate your dessert experience by pairing these delightful treats with complementary dishes that enhance their tropical flavors.

  • Coconut Macaroons: These chewy coconut confections provide a sweet contrast with a delightful texture that matches the lightness of the cakes. Their rich flavor brings a tropical vibe to your dessert table.

  • Fresh Fruit Salad: A mix of pineapple, mango, and kiwi brightens the palate, balancing the sweetness of the mini cakes. This fresh element adds a refreshing crunch and enhances the overall tropical theme.

  • Mango Sorbet: Cool and creamy, this sorbet offers a refreshing finish after indulging in the guava cakes. The mango flavor harmonizes perfectly, creating a tropical symphony that transports you to a sunny beach.

  • Pineapple Upside-Down Cake: This classic dessert echoes tropical flavors with its caramelized pineapple and rich cake base. The nostalgic taste pairs beautifully with the lightness of the Hawaiian Mini Guava Cakes, creating a well-rounded dessert spread.

  • Mint Limeade: A refreshing beverage with zesty lime and fresh mint to cleanse the palate. This drink complements the sweetness of the cakes while keeping the tropical theme alive.

  • Whipped Cream Topping: Serve an extra dollop of lightly sweetened whipped cream alongside each mini cake for those who crave a creamy touch. It rounds out the dessert with its airy texture and adds a subtle sweetness.

  • Coconut Cream Pie: The rich, creamy filling and flaky crust of this pie will contrast nicely with the guava cakes, providing a delightful texture variety. Each bite will offer a taste of paradise.

  • Hibiscus Iced Tea: A floral and slightly tangy drink that pairs wonderfully with the tropical notes of the mini cakes. It’s a unique choice that adds a vibrant color to your gathering.

These pairings ensure your Hawaiian Mini Guava Cakes shine even brighter at your next gathering!

Expert Tips for Perfect Hawaiian Mini Guava Cakes

  • Room Temperature Ingredients: Make sure your eggs and cream cheese are at room temperature. This helps achieve a smoother batter and cream topping.

  • Don't Overfill Liners: Fill the cupcake liners only about one-third full; this allows the Hawaiian Mini Guava Cakes to rise without spilling over.

  • Cooling Time: Allow the cakes to cool completely on a wire rack before adding the cream topping. This prevents the cream from melting and ensures a nice presentation.

  • Glaze Thickness: Ensure your cornstarch and water mixture is well-combined before adding it to the boiling glaze. This avoids clumps and ensures a silky finish.

  • Chill Before Serving: After you’ve topped the mini cakes, refrigerate them for at least 30 minutes before serving. This helps the flavors meld and the topping set for a perfect bite!

How to Store and Freeze Hawaiian Mini Guava Cakes

Fridge: Store leftover Hawaiian Mini Guava Cakes in an airtight container for up to 3-4 days. This keeps them moist and fresh for your next tropical treat.

Freezer: To freeze, ensure the cakes are completely cooled. Wrap each cake securely in plastic wrap and place them in a zip-top freezer bag for up to 2 months.

Thawing: When ready to enjoy, remove from the freezer and let them thaw in the fridge overnight. This way, they'll maintain their delightful texture.

Reheating: If you prefer them warm, briefly microwave for about 10-15 seconds. Just make sure to keep an eye on them to prevent drying out!

Hawaiian Mini Guava Cakes Variations

Feel free to let your creativity flow with these delightful twists on Hawaiian Mini Guava Cakes!

  • Gluten-Free: Use a gluten-free cake mix for a tropical treat that caters to all dietary needs, maintaining that perfect flavor punch.
  • Coconut Delight: Add shredded coconut to the batter for added texture and a more pronounced coconut flavor. It brings the tropics even closer to home!
  • Fruity Surprise: Incorporate diced fresh pineapple or mango into the batter to enhance the tropical vibe and provide extra juiciness.
  • Sweetened Sour: Opt for cream cheese sweetened with honey or maple syrup instead of sugar for a natural sweetness and lovely depth of flavor.
  • Spicy Kick: Add a pinch of cayenne or chili powder to the glaze for a surprising yet delightful spicy flavor that complements the sweetness of the guava.
  • Nutty Crunch: Fold in finely chopped macadamia nuts for an irresistible crunch; a perfect nod to Hawaiian flavors.
  • Elegant Presentation: Top with sliced fresh fruit or edible flowers before serving for that eye-catching aesthetic, turning your cakes into a stunning centerpiece.
  • Rich Chocolate: Swirl in melted chocolate into the cream topping for a decadent chocolate-gauva experience that will leave your guests enchanted. Why not elevate this dessert alongside some scrumptious Ricotta Protein Pancakes for a brunch spread that’s sure to impress?

Explore these variations to create your own tropical masterpiece, and share your delicious creations with friends and family!

Make Ahead Options

These Hawaiian Mini Guava Cakes are a fantastic choice for meal prep, making your busy weeknights a breeze! You can prepare the cake base up to 24 hours in advance; simply bake and allow them to cool completely before storing them in an airtight container in the refrigerator. For the creamy topping, prepare it a day ahead as well and keep it chilled until you’re ready to spread it on. The guava glaze can also be made ahead and stored in the fridge for up to 3 days. When it’s time to serve, just assemble by topping each mini cake with the cream mixture and drizzling with the glaze. This way, you'll have flavorful tropical treats ready to impress your family and friends with minimal last-minute effort!

Hawaiian Mini Guava Cakes Recipe FAQs

What should I look for when selecting guava juice?
When selecting guava juice, look for 100% juice options without added sugars or preservatives. Fresh guava is a wonderful alternative; just puree it, strain to remove seeds, and use it in the same quantity as the juice for an extra fresh flavor.

How should I store leftover Hawaiian Mini Guava Cakes?
Store leftover Hawaiian Mini Guava Cakes in an airtight container in the refrigerator for 3-4 days. This will keep them moist and delicious. If you wish to extend their shelf life, consider freezing them instead.

Can I freeze Hawaiian Mini Guava Cakes?
Absolutely! To freeze, allow the cakes to cool completely. Wrap each cake tightly in plastic wrap, then place in a zip-top freezer bag, and store for up to 2 months. When ready to enjoy, simply thaw in the fridge overnight. For a warm treat, microwave briefly for 10-15 seconds.

What are some common troubleshooting tips for this recipe?
If your Hawaiian Mini Guava Cakes are too dry, make sure not to overbake them; check for doneness around the 19-minute mark. If they come out flat, it could be that you overfilled the liners, so stick to filling them one-third full next time!

Is there a gluten-free option for Hawaiian Mini Guava Cakes?
Yes! You can easily make them gluten-free by opting for a gluten-free cake mix instead of regular cake mix. Just ensure that all other ingredients, such as guava juice, are also gluten-free to keep this sweet treat safe for those with sensitivities.

Can I use something other than Cool Whip for the cream topping?
Certainly! If you prefer a fresher taste, feel free to substitute Cool Whip with freshly whipped cream. Just whip heavy cream until soft peaks form, then gently fold in sweetened cream cheese for a delightful homemade topping.

Hawaiian Mini Guava Cakes

Delightful Hawaiian Mini Guava Cakes for a Tropical Treat

These Hawaiian Mini Guava Cakes are sweet, tropical desserts that burst with flavor and are perfect for any gathering.
Print Recipe Pin Recipe
Prep Time 30 minutes mins
Cook Time 22 minutes mins
Cooling Time 30 minutes mins
Total Time 1 hour hr 22 minutes mins
Servings: 12 cakes
Course: Dessert
Cuisine: Hawaiian
Calories: 150
Ingredients Equipment Method Nutrition Notes

Ingredients
  

For the Cake
  • 1 box Strawberry Cake Mix can substitute with vanilla or coconut
  • 1 cup Guava Nectar/Juice or fresh guava, pureed and strained
  • 3 large Eggs room temperature
  • 1/3 cup Coconut Oil liquid; or substitute with vegetable or canola oil
For the Cream Topping
  • 6 oz Cream Cheese softened
  • 6 oz Cool Whip thawed; can substitute with freshly whipped cream
  • 1/4 cup Sugar adjust to taste
  • 1 tsp Vanilla Extract pure vanilla recommended
For the Glaze
  • 1/2 cup Sugar for glaze
  • 1/4 cup Cornstarch
  • 3 tbsp Water

Equipment

  • Cupcake pan
  • Mixing Bowl
  • Electric mixer
  • Saucepan
  • wire rack

Method
 

Step-by-Step Instructions
  1. Preheat your oven to 350°F (175°C) and line a cupcake pan with paper liners.
  2. In a large mixing bowl, combine the strawberry cake mix, guava juice, eggs, and melted coconut oil. Mix until smooth.
  3. Fill each cupcake liner about one-third full with the batter and bake for 19-22 minutes.
  4. Let the cakes cool in the pan for 5 minutes, then transfer to a wire rack to cool completely.
  5. For the glaze, combine guava juice and sugar in a saucepan; bring to a boil. Mix cornstarch with water, then add to the boiling mixture.
  6. In another bowl, beat cream cheese until fluffy, add sugar and vanilla, then fold in Cool Whip.
  7. Once cooled, spread the cream cheese topping over each cake, and refrigerate for 30 minutes.
  8. Drizzle the cooled guava glaze over each mini cake before serving.

Nutrition

Serving: 1cakeCalories: 150kcalCarbohydrates: 25gProtein: 2gFat: 5gSaturated Fat: 3gMonounsaturated Fat: 1gCholesterol: 40mgSodium: 200mgPotassium: 60mgSugar: 15gVitamin A: 200IUVitamin C: 2mgCalcium: 30mgIron: 0.5mg

Notes

Remember to use room temperature ingredients for a smoother batter and topping. Allow cakes to cool completely before adding the topping.

Tried this recipe?

Let us know how it was!

French Antilles Coconut Flan: Creamy Tropical Bliss Awaits

February 25, 2026 by Grace Snow Leave a Comment

As the warm tropical breeze dances through my kitchen, the sweet scent of coconuts fills the air, transporting me to the vibrant shores of the French Antilles. This French Antilles Coconut Flan, or Flan Coco, is my go-to dessert when I crave something light and refreshing. With its luscious layers of creamy coconut flan topped by a delightful crispy shredded coconut crust, it’s truly a slice of paradise on a plate. Plus, this gluten-free gem is not just delicious; it’s a make-ahead masterpiece that ensures you spend less time in the kitchen and more time enjoying your company. So, are you ready to whisk up a tropical escape right in your home?

Why is Coconut Flan So Irresistible?

Creamy Dreaminess: The rich coconut milk creates a velvety flan that melts in your mouth, offering a truly indulgent experience.

Tropical Escape: Each bite transports you to the sunny French Antilles, making it perfect for warm-weather gatherings or a cozy night in.

Make-Ahead Marvel: This dessert can be made a day in advance, giving you the freedom to enjoy your time without the rush.

Gluten-Free Delight: A dessert that everyone can enjoy, ensuring no one is left out at your table. For more gluten-free options, check out my Coconutty Beans Greens for a satisfying meal!

Versatile Variations: Feel free to customize with rum or fresh grated coconut, making it your own unique creation. It pairs beautifully with toasted coconut flakes, similar to my favorite Cherry Clafoutis French dessert!

French Antilles Coconut Flan Ingredients

For the Flan
• Sweetened Condensed Milk – Adds sweetness and creaminess; use a standard can (14oz/400ml).
• Coconut Milk – Provides a rich coconut flavor; opt for full-fat (1¼ cup / 300ml) for the best results.
• Large Eggs – Acts as a binder to create the flan's creamy texture.
• Vanilla Extract – Enhances flavor; can be substituted with the seeds from half a vanilla bean.
• Unsweetened Shredded Coconut – Adds texture and depth; remember to reserve some for garnish.

For the Caramel
• Sugar – Used to create a delicious, sweet syrup base; you'll need ½ cup (100g) for that perfect caramel layer.

This French Antilles Coconut Flan is not just a dessert; it's a sweet journey to a tropical paradise that you can create at home!

Step‑by‑Step Instructions for French Antilles Coconut Flan

Step 1: Prepare Caramel
In a saucepan, heat ½ cup of sugar over medium heat, allowing it to melt undisturbed until it turns golden and bubbly—this should take about 5-7 minutes. Once it reaches a deep amber color, quickly pour the caramel into an ungreased loaf pan, tilting to evenly coat the bottom. Set aside to harden while you prepare the flan mixture.

Step 2: Mix Flan Ingredients
In a large mixing bowl, whisk together one can of sweetened condensed milk, 1¼ cups of full-fat coconut milk, three large eggs, and 1 teaspoon of vanilla extract. Stir in ½ cup of unsweetened shredded coconut until well combined, creating a smooth and creamy mixture. This blend will give your French Antilles Coconut Flan its luscious texture.

Step 3: Bake in Water Bath
Carefully transfer the flan mixture into the prepared loaf pan over the cooled caramel. To bake, place the loaf pan into a larger baking dish. Fill the outer dish with hot water until it reaches halfway up the sides of the loaf pan. Bake at 350°F (180°C) for approximately 50-55 minutes, or until the top is golden and firm to the touch.

Step 4: Cool and Chill
Once baked, remove the flan from the oven and allow it to cool to room temperature for about 30 minutes. After it has cooled, cover it with plastic wrap and refrigerate for at least 3 hours, or ideally, overnight. This chilling time allows the French Antilles Coconut Flan to set fully, ensuring perfect slices.

Step 5: Unmold and Serve
To serve your delightful Coconut Flan, dip the bottom of the loaf pan in warm water for about 10 seconds to loosen the flan. Invert the pan onto a serving plate; tap gently to release. Garnish with the reserved shredded coconut, and watch as the caramel cascades over the smooth flan, creating a beautiful presentation that’s sure to impress!

What to Serve with French Antilles Coconut Flan

As you savor the creamy tropical notes of this flan, let’s create an unforgettable experience with delightful side dishes and beverages.

  • Tropical Fruit Salad: Bursting with fresh mango, pineapple, and passion fruit, this salad adds vibrant colors and flavors that complement the flan's richness. The juiciness of the fruit balances the creamy texture beautifully.

  • Toasted Coconut Ice Cream: A scoop of this creamy delight enhances the coconut experience while its coolness contrasts perfectly with the warmth of the flan. It's like a tropical vacation in each spoonful!

  • Citrus Sorbet: A refreshing, zesty sorbet helps cleanse the palate after indulging in the flan's sweet richness. Lemon or lime flavors add a bright touch that creates a harmonious balance with the dessert.

  • Lightly Sweetened Iced Tea: Brew some hibiscus or green tea and serve chilled for a colorful drink that echoes the flan's tropical essence. It’s a refreshing choice that completes a warm-weather meal without overpowering your dessert.

  • Caramelized Pineapple: Sautéing pineapple slices in brown sugar caramelizes their natural sugars, echoing the flan's caramel notes while adding a juicy, tangy twist. Serve warm on the side for an extra layer of flavor.

  • Chocolate Covered Espresso Beans: For an unexpected crunch and the perfect blend of sweetness and bitterness, these make for a delightful post-flan treat that pairs well with coffee. It’s an exciting finish to a tropical feast!

  • Coconut Chia Pudding: Easy to make ahead, this light and nutritious pudding can act as a small bite for anyone wanting another coconut experience. Its texture and taste will delight coconut lovers.

  • Complementary Coffee: A cup of freshly brewed coffee, perhaps with a hint of coconut milk, pairs beautifully with flan, providing a rich contrast and stimulating finish to your meal.

With these pairing options, your French Antilles Coconut Flan is bound to be the star of a memorable culinary experience!

Make Ahead Options

If you're looking to simplify your meal planning, this French Antilles Coconut Flan is your perfect make-ahead dessert! You can prepare the flan up to 24 hours in advance, allowing the flavors to marry beautifully. After baking, let it cool to room temperature, then cover it tightly with plastic wrap and refrigerate. This not only keeps it fresh but ensures that the flan sets perfectly. When you're ready to serve, just unmold and garnish with reserved shredded coconut for that stunning look. Trust me, it will taste just as delicious, providing the perfect tropical treat with minimal last-minute work. Enjoy your free time while impressing your guests!

Expert Tips for French Antilles Coconut Flan

• Caramel Clarity: Avoid stirring the sugar while it melts. Gently shake the pan instead to prevent crystallization and achieve a smooth caramel base.

• Flan Firmness: Check for firmness—your flan should feel set in the center. If it's wobbly, bake for a few extra minutes to avoid undercooking.

• Chill Time: Patience is key; allow the flan to chill for at least 4 hours or overnight for the best texture and flavor.

• Moisture Balance: Ensure the water bath maintains a steady level during baking. Too little can lead to dry flan, while too much may dilute your caramel.

• Presentation Tips: Use warm water to help release the flan easily from the pan. This ensures a beautiful, intact presentation when serving your French Antilles Coconut Flan.

How to Store and Freeze French Antilles Coconut Flan

Refrigerator: Store the flan in an airtight container in the fridge for up to 3 days. This maintains its creamy texture and rich flavors while ensuring it’s ready whenever you need a sweet treat.

Freezer: For longer storage, wrap the flan tightly in plastic wrap, then in aluminum foil. It can be frozen for up to 2 months. Thaw in the refrigerator overnight before serving.

Reheating: Gently warm individual slices in the microwave for 15-20 seconds if you prefer a warm dessert. Alternatively, enjoy it chilled for a refreshing taste of tropical bliss.

Make-Ahead Tip: The French Antilles Coconut Flan is an excellent make-ahead dessert, allowing you to prepare it a day in advance for any gathering, creating less stress on the day of serving.

French Antilles Coconut Flan Variations

Feel free to put your own spin on this delightful dessert to make it even more special!

  • Richer Flavor: Substitute coconut milk with coconut cream for an ultra-creamy texture and richer taste.
  • Adult Twist: Add a splash of dark rum into the flan mixture for a fragrant and flavorful kick.
  • Fresh Coconut: Swap out the shredded coconut for fresh grated coconut to enhance the texture and coconut essence.
  • Nutty Addition: Mix in a handful of toasted almonds or macadamia nuts for a crunchy surprise in each bite.
  • Vanilla Bean Upgrade: Use the seeds from half a vanilla bean instead of extract for a more luxurious flavor profile.
  • Chocolate Drizzle: Drizzle melted dark chocolate over the flan before serving to create a decadent treat that’s sure to impress.
  • Fruit Fusion: Top with fresh tropical fruits like mango or pineapple for a refreshing burst of flavor that brightens up the dish.
  • Spiced Delight: Incorporate a pinch of cinnamon or nutmeg into the flan mixture for a warm, aromatic note.

And don't forget, if you're looking for more delicious options, try pairing your Coconut Flan with my Coconutty Beans Greens for a complete tropical experience or serve alongside my exquisite Cherry Clafoutis French for dessert!

French Antilles Coconut Flan Recipe FAQs

What ripe ingredients should I pick for French Antilles Coconut Flan?
Absolutely! For the best flavor and texture, always choose high-quality coconut milk—look for full-fat varieties with no added preservatives. If you're using fresh coconuts or shredded coconut, opt for moist, plump pieces without dark spots. They should smell sweet and fragrant.

How should I store leftovers of French Antilles Coconut Flan?
You can store the flan in an airtight container in the refrigerator for up to 3 days. This keeps the creamy texture and rich flavors intact. It’s a great make-ahead dessert, allowing you to whip it up a day before your gathering!

Can I freeze French Antilles Coconut Flan?
Yes, you can! Wrap the flan tightly in plastic wrap, then seal it with aluminum foil. It can be frozen for up to 2 months. When you’re ready to enjoy, simply thaw it in the refrigerator overnight before serving. This way, you'll retain the delightful texture and flavor of this tropical treat.

What should I do if my flan doesn’t set properly?
No worries, it happens! If you find that your flan is wobbly or not set, you can return it to the oven for an additional 5-10 minutes. Make sure that the center feels firm to the touch. Check on it every few minutes to avoid overbaking. The water bath is also crucial; ensure it holds a steady level during baking for even cooking.

Is this French Antilles Coconut Flan suitable for those with dietary restrictions?
Certainly! This dessert is naturally gluten-free, making it perfect for gluten-sensitive guests. If you’re concerned about allergies, always double-check the labels on your ingredients, particularly the sweetened condensed milk and shredded coconut. Additionally, for less sweetness, you can reduce the volume of condensed milk to suit your taste or dietary needs.

Can I modify the ingredients in French Antilles Coconut Flan?
Very much! Feel free to substitute coconut milk with coconut cream for an even richer flan. You can also add a splash of rum or use fresh grated coconut for enhanced flavor and texture. Customize it to your heart's content, and it may even become your personal twist!

French Antilles Coconut Flan

French Antilles Coconut Flan: Creamy Tropical Bliss Awaits

This French Antilles Coconut Flan, a creamy dessert that captures tropical bliss, is a gluten-free delight perfect for gatherings.
Print Recipe Pin Recipe
Prep Time 15 minutes mins
Cook Time 55 minutes mins
Chilling Time 3 hours hrs
Total Time 4 hours hrs 10 minutes mins
Servings: 8 slices
Course: Dessert
Cuisine: French Antilles
Calories: 250
Ingredients Equipment Method Nutrition Notes

Ingredients
  

For the Flan
  • 1 can (14oz) Sweetened Condensed Milk Adds sweetness and creaminess
  • 1 1/4 cups Coconut Milk Use full-fat for best results
  • 3 large Eggs Acts as a binder
  • 1 teaspoon Vanilla Extract Enhances flavor; substitute with vanilla bean seeds
  • 1/2 cup Unsweetened Shredded Coconut Reserve some for garnish
For the Caramel
  • 1/2 cup Sugar Used to create caramel

Equipment

  • Loaf pan
  • Saucepan
  • Mixing Bowl
  • Baking Dish

Method
 

Step‑by‑Step Instructions
  1. In a saucepan, heat ½ cup of sugar over medium heat until it melts and turns golden, about 5-7 minutes. Pour into an ungreased loaf pan and let harden.
  2. Whisk together sweetened condensed milk, coconut milk, eggs, and vanilla extract in a large bowl. Stir in shredded coconut until combined.
  3. Transfer the flan mixture into the loaf pan over the cooled caramel. Bake in a water bath at 350°F (180°C) for 50-55 minutes.
  4. Let the flan cool for about 30 minutes, then refrigerate for at least 3 hours or ideally overnight.
  5. To serve, dip the loaf pan in warm water for 10 seconds, invert onto a plate, and garnish with reserved shredded coconut.

Nutrition

Serving: 1sliceCalories: 250kcalCarbohydrates: 35gProtein: 4gFat: 12gSaturated Fat: 10gCholesterol: 80mgSodium: 90mgPotassium: 140mgFiber: 1gSugar: 25gVitamin A: 500IUCalcium: 150mgIron: 0.5mg

Notes

This dessert is gluten-free and can be made a day in advance for convenience. Enhance with variations like rum or fresh grated coconut.

Tried this recipe?

Let us know how it was!

Moist Pineapple Carrot Cream Cake for Tropical Bliss

February 25, 2026 by Grace Snow Leave a Comment

As the warm, tropical breeze dances through the palms, I can’t help but smile thinking about the delight of baking a Hawaiian Pineapple Carrot Cream Cake. This easy-to-make dessert showcases the perfect marriage of sweet, juicy pineapple and freshly grated carrots, creating a moist cake that feels like a bite of paradise. What I love most about this recipe is its beginner-friendly nature—anyone can master this cake while impressing friends and family alike. Plus, it’s versatile enough to be transformed into cupcakes for that special gathering! Are you ready to devour a slice of sunshine? Let’s get baking!

Why is this cake a crowd-pleaser?

Moisture is key! The combination of crushed pineapple and freshly grated carrots guarantees a wonderfully moist cake that melts in your mouth.

Effortless to prepare—perfect for beginner bakers looking to make a delicious dessert without stress.

Versatile transformation from a luscious layer cake to delightful cupcakes means this recipe can fit any occasion seamlessly.

Tropical bliss radiates from each bite, making it a delightful surprise at parties or family gatherings, just like our Peaches Cream Cookies.

Serious WOW-factor with its beautiful presentation and delicious cream cheese frosting that everyone loves. This cake is sure to be a new favorite!

Pineapple Carrot Cream Cake Ingredients

• Dive into this tropical delight with essential ingredients that make each slice unforgettable!

For the Cake

  • All-Purpose Flour – Provides structure; ensure sifting to aerate for a lighter cake.
  • Baking Soda – Helps the cake rise; don't substitute with baking powder.
  • Baking Powder – Works with baking soda for leavening; ensure it's fresh for best results.
  • Ground Cinnamon – Adds warmth and spice flavor; can substitute with nutmeg for a different spice profile.
  • Salt – Enhances flavor; essential for balancing sweetness—do not omit.
  • Fresh Carrots – Main ingredient, adds moisture and sweetness; use freshly grated for best texture.
  • Crushed Pineapple – Adds tropical sweetness and moisture; use canned but drain well to avoid excess liquid.
  • Eggs – Provides richness and binds the ingredients; room temperature eggs yield better emulsion.
  • Vegetable Oil – Keeps the cake moist; can use melted coconut oil for a tropical flavor.

For the Frosting

  • Cream Cheese – Adds tanginess to the frosting; can replace with mascarpone for a different taste.
  • Powdered Sugar – Sweetens and thickens the frosting; adjust quantity based on desired sweetness.

Step‑by‑Step Instructions for Pineapple Carrot Cream Cake

Step 1: Preheat the Oven
Begin by preheating your oven to 350°F (175°C). Prepare two 9-inch round cake pans by greasing them with butter or oil, then dusting with flour to prevent sticking. Alternatively, you can line the bottoms with parchment paper for easier release. This ensures your Pineapple Carrot Cream Cake will bake evenly and smoothly without any hassle during serving.

Step 2: Mix the Dry Ingredients
In a large mixing bowl, whisk together the all-purpose flour, baking soda, baking powder, ground cinnamon, and salt until combined. This dry blend should be aerated and homogeneous, creating a fluffy base for your cake. Set the mixture aside, allowing the baking agents to mingle while you prepare the wet ingredients for the Pineapple Carrot Cream Cake.

Step 3: Combine the Wet Ingredients
In another large bowl, combine the freshly grated carrots, drained crushed pineapple, room-temperature eggs, and vegetable oil. Mix these ingredients well using a spatula or whisk until fully integrated. This vibrant mixture adds moisture and sweetness to your cake while ensuring the flavors infuse beautifully, making each bite a tropical delight.

Step 4: Combine Wet and Dry Ingredients
Slowly add the dry ingredient mixture to the wet ingredients, gently stirring until just combined. Be careful not to overmix, as this can lead to a denser cake texture. Your batter should remain slightly lumpy, creating a light and fluffy crumb in your Pineapple Carrot Cream Cake once baked—this is the key to moisture and tenderness!

Step 5: Bake the Cakes
Evenly pour the batter into the prepared cake pans, smoothing the tops with a spatula. Place them in the preheated oven and bake for 25-30 minutes, or until a toothpick inserted into the center comes out clean. Keep an eye on the cakes as they bake, and look for a golden-brown color on the tops to signal they are ready.

Step 6: Cool the Cakes
Once baked, remove the cakes from the oven and allow them to cool in the pans for about 10 minutes. This helps them set before transferring to a wire rack. Gently run a knife around the edges to loosen if needed, then flip them out carefully to prevent breakage. Allow the cakes to cool completely on the rack while you prepare the frosting.

Step 7: Prepare the Cream Cheese Frosting
In a mixing bowl, combine the chilled cream cheese and powdered sugar. Using a hand mixer or stand mixer, beat them together until smooth and creamy, about 3-4 minutes. The frosting should be light and fluffy, ready to generously spread over your cooled cakes, adding a tangy contrast to the sweet, tropical flavors of the Pineapple Carrot Cream Cake.

Step 8: Frost the Cake and Serve
Once the cakes are fully cooled, place one layer on a serving plate and spread a generous amount of cream cheese frosting on top. Gently place the second layer on top and frost the entire cake, smoothing the frosting for a beautiful finish. Slice, serve, and enjoy your delightful Pineapple Carrot Cream Cake with friends and family for a truly tropical treat!

What to Serve with Pineapple Carrot Cream Cake

Imagine the sweet aroma of fresh pineapples and warm spices mingling in your kitchen as you create the perfect meal alongside this tropical delight.

  • Tropical Fruit Salad: A colorful medley of fresh fruits balances the cake's sweetness while adding a refreshing crunch.

  • Vanilla Ice Cream: Creamy vanilla ice cream complements the rich cream cheese frosting, creating an indulgent dessert experience.

  • Coconut Whipped Cream: Light and airy, this topping enhances the tropical vibes while keeping things light and fluffy.

  • Spiced Honey Glazed Carrots: Roasting carrots with honey and spices echoes the cake's flavors, providing a warm side dish that delights the palate.

  • Ginger Lemonade: A zesty twist on a classic drink, this refreshing beverage pairs beautifully with the tropical notes of the cake.

  • Chocolate Dipped Pineapple: For a decadent dessert platter, these treats enhance the cake’s pineapple notes while providing a contrast in texture.

  • Pineapple Coconut Smoothie: Blend this vibrant drink with coconut milk for a creamy, flavorful sip that ties seamlessly into the cake's tropical theme.

Let your imagination run wild and enjoy these delightful pairings that will elevate your Pineapple Carrot Cream Cake experience!

How to Store and Freeze Pineapple Carrot Cream Cake

Fridge: Store leftover cake in an airtight container in the refrigerator for up to 5 days to keep it fresh and moist.

Freezer: For longer storage, wrap the cake tightly in plastic wrap, then foil, and freeze for up to 3 months. This keeps the flavors locked in!

Thawing: When ready to enjoy, remove the cake from the freezer and let it thaw in the fridge overnight. Frost the cake after it's completely defrosted for the best texture.

Reheating: If you'd like to warm up individual slices, you can microwave them for about 10-15 seconds. Enjoy your Pineapple Carrot Cream Cake with a little extra cream cheese frosting for a delightful treat!

Make Ahead Options

These Hawaiian Pineapple Carrot Cream Cakes are perfect for meal prep enthusiasts! You can prepare the batter up to 24 hours in advance by mixing the wet and dry ingredients, then refrigerate it to maintain freshness. To prevent browning from the carrots, tightly cover the bowl with plastic wrap or a lid. Additionally, the cakes can be baked and cooled up to 3 days ahead of time; simply wrap each cake layer in plastic wrap and seal in an airtight container. When ready to serve, frost them with the cream cheese frosting—just whip it until smooth if it has been chilled. This way, you’ll enjoy a delightful, moist Pineapple Carrot Cream Cake with minimal effort!

Pineapple Carrot Cream Cake Variations

Feel free to customize your tropical masterpiece with these delightful twists and substitutions!

  • Vegan Version: Use flaxseed meal mixed with water instead of eggs, and choose a plant-based cream cheese for frosting.
    For a vibrant, vegan-friendly cake, this twist is perfect, allowing everyone to enjoy a slice.

  • Gluten-Free: Swap all-purpose flour with a gluten-free blend, ensuring your baking soda and powder are gluten-free.
    This way, your cake can still shine, delivering that moist texture without compromising flavor.

  • Coconut Twist: Add shredded coconut to the batter for extra tropical flavor and texture.
    This delightful enhancement brings a touch of island paradise to each bite, especially when combined with coconut oil.

  • Pineapple Coconut Layer Cake: Bake in three layers and incorporate a layer of coconut cream in between.
    It's like a mini vacation on your plate, light and airy, making it a stunning centerpiece for gatherings.

  • Spicy Kick: Add a pinch of cayenne pepper to the dry ingredients for a surprising heat.
    This unexpected twist creates a delicious contrast to the sweetness, perfect for adventurous palates.

  • Cupcakes: Transform the batter into cupcakes, baking for 18-20 minutes instead of in cake pans.
    These cute, portable treats are perfect for parties and picnics, letting everyone enjoy a bite of paradise!

  • Chocolate Drizzle: Melt dark chocolate and drizzle over the frosted cake for a decadent finish.
    This sweet addition enhances both flavor and presentation, making your Pineapple Carrot Cream Cake the talk of the town.

  • Serving Suggestion: Pair with a scoop of vanilla ice cream or a dollop of whipped cream for an extra creamy delight.
    A light, refreshing addition that provides the perfect cooling balance to the tropical flavors, making every bite a true treat!

Feel free to explore these delightful options as you whip up this delightful cake. And if you're in the mood for more tropical sweetness, don’t forget to check out the irresistible Vegan Cacao Cream or our decadent Chocolate Pudding Cake!

Expert Tips for Baking Pineapple Carrot Cream Cake

  • Avoid Overmixing: Mix your batter just until combined to prevent a dense cake. This helps maintain the moist texture of the Pineapple Carrot Cream Cake.

  • Room Temperature Eggs: Make sure your eggs are at room temperature for better emulsion. This will result in a fluffier cake, elevating the tropical flavors.

  • Drain the Pineapple: Always drain the crushed pineapple thoroughly before adding it to the batter. Excess liquid can make the cake soggy, detracting from its deliciousness.

  • Sift Your Flour: Sifting your all-purpose flour aerates it, leading to a lighter texture. Don’t skip this step for the best results with your cake.

  • Chill Your Frosting: Allow your cream cheese frosting to chill for about 15 minutes before spreading. This makes it easier to apply and helps create a smooth finish.

Pineapple Carrot Cream Cake Recipe FAQs

How do I choose the right pineapples for this cake?
Absolutely! When selecting crushed pineapple, I recommend opting for canned varieties as they are more convenient and consistent in sweetness. Look for cans labeled "in juice" rather than "in syrup" to avoid unnecessary added sugars. Drain well before adding to your mix to prevent excess moisture, which could lead to a soggy cake.

How should I store the leftover Pineapple Carrot Cream Cake?
Store your leftover cake in an airtight container in the refrigerator for up to 5 days. If you want to enjoy it later, it's best to freeze it. Wrap the cooled cake tightly in plastic wrap, followed by aluminum foil, to maintain optimal moisture and flavor, and freeze for up to 3 months.

Can I freeze Pineapple Carrot Cream Cake?
Yes, indeed! To freeze your cake, ensure it’s completely cooled. Wrap individual slices or the whole cake in plastic wrap, then place it in a freezer-safe bag or container. This prevents freezer burn. When you're ready to enjoy, simply let it thaw in the fridge overnight, then frost it just before serving for the best texture.

What do I do if my cake sinks in the middle?
Very common! If your Hawaiian Pineapple Carrot Cream Cake sinks in the center, it may be due to overmixing the batter or not baking it long enough. To avoid this, mix your ingredients just until combined and test for doneness with a toothpick. It should come out clean when gently inserted in the center!

Is this cake suitable for those with dietary restrictions?
For sure! If you have dietary concerns, there are easy adaptations. To make it vegan, substitute eggs with flaxseed meal (1 tablespoon flaxseed meal + 3 tablespoons water = 1 egg) and use plant-based cream cheese for the frosting. Also, make sure to confirm all your other ingredients, especially the flour and baking powder, are certified gluten-free if necessary.

Can I turn this cake into cupcakes?
Absolutely! Transforming this delightful Pineapple Carrot Cream Cake into cupcakes is a breeze. Simply pour the batter into a lined muffin tin, filling each cup about two-thirds full. Bake for 18-20 minutes, or until a toothpick inserted comes out clean. They’ll make adorable and portable treats for any occasion!

Pineapple Carrot Cream Cake

Moist Pineapple Carrot Cream Cake for Tropical Bliss

Indulge in the tropical flavors of Pineapple Carrot Cream Cake, a moist and delightful dessert perfect for any occasion.
Print Recipe Pin Recipe
Prep Time 30 minutes mins
Cook Time 30 minutes mins
Cooling Time 10 minutes mins
Total Time 1 hour hr 10 minutes mins
Servings: 10 slices
Course: Dessert
Cuisine: Hawaiian
Calories: 350
Ingredients Equipment Method Nutrition Notes

Ingredients
  

For the Cake
  • 2 cups All-Purpose Flour Ensure sifting to aerate for a lighter cake.
  • 1 teaspoon Baking Soda Helps the cake rise; don't substitute with baking powder.
  • 1 teaspoon Baking Powder Ensure it's fresh for best results.
  • 1 teaspoon Ground Cinnamon Can substitute with nutmeg for a different spice profile.
  • 1/2 teaspoon Salt Essential for balancing sweetness—do not omit.
  • 2 cups Fresh Carrots Use freshly grated for best texture.
  • 1 cup Crushed Pineapple Use canned but drain well to avoid excess liquid.
  • 3 large Eggs Room temperature eggs yield better emulsion.
  • 1 cup Vegetable Oil Can use melted coconut oil for a tropical flavor.
For the Frosting
  • 8 ounces Cream Cheese Can replace with mascarpone for a different taste.
  • 2 cups Powdered Sugar Adjust quantity based on desired sweetness.

Equipment

  • Mixing bowls
  • hand mixer
  • measuring cups
  • Measuring Spoons
  • Spatula
  • 9-inch Round Cake Pans

Method
 

Step-by-Step Instructions for Pineapple Carrot Cream Cake
  1. Preheat your oven to 350°F (175°C). Prepare two 9-inch round cake pans by greasing them with butter or oil, then dusting with flour.
  2. In a large mixing bowl, whisk together the all-purpose flour, baking soda, baking powder, ground cinnamon, and salt until combined.
  3. In another bowl, combine the freshly grated carrots, drained crushed pineapple, room-temperature eggs, and vegetable oil. Mix well.
  4. Slowly add the dry ingredients to the wet ingredients, stirring until just combined.
  5. Evenly pour the batter into the prepared cake pans and bake for 25-30 minutes until a toothpick inserted in the center comes out clean.
  6. Remove the cakes from the oven and allow to cool in the pans for about 10 minutes before transferring to a wire rack.
  7. In a mixing bowl, combine the chilled cream cheese and powdered sugar. Beat until smooth and creamy.
  8. Once the cakes are cooled, spread frosting on the first layer, place the second layer on top, and frost the entire cake.

Nutrition

Serving: 1sliceCalories: 350kcalCarbohydrates: 55gProtein: 3gFat: 14gSaturated Fat: 4gPolyunsaturated Fat: 0.5gMonounsaturated Fat: 8gCholesterol: 50mgSodium: 280mgPotassium: 180mgFiber: 1gSugar: 30gVitamin A: 1800IUVitamin C: 5mgCalcium: 40mgIron: 0.5mg

Notes

Ensure to drain the crushed pineapple thoroughly before adding it to the batter to avoid excess moisture.

Tried this recipe?

Let us know how it was!

Decadent Brownie-Stuffed Chocolate Chip Cookies to Indulge In

February 25, 2026 by Grace Snow Leave a Comment

It’s that moment when you open the oven door, and the warm, buttery aroma of baking cookies wraps around you like a cozy blanket. Today, I’m excited to share my recipe for Brownie-Stuffed Chocolate Chip Cookies, a perfect blend of nostalgia and indulgence that will make your sweet tooth sing. With just one bite, you'll experience the delightful contrast of a soft, golden cookie embracing a fudgy brownie center, creating a truly unforgettable treat. Whether you're a seasoned chef or a beginner, this recipe is an effortless triumph that requires minimal prep time and offers the ultimate crowd-pleaser for any gathering. So, who’s ready to elevate their dessert game and take a trip down sweet memory lane with me? Let's dive into this delicious adventure together!

Why are These Cookies a Must-Try?

Irresistible Flavor: The combination of chocolate chip cookies and fudgy brownies creates an explosion of taste that satisfies every sweet craving.

Effortless Indulgence: You'll whip these together in no time, making them perfect for busy days or spontaneous cravings.

Crowd-Pleaser: Whether at a party or a bake sale, these cookies win over everyone’s heart – and taste buds!

Customizable Delight: Feel free to add your favorite nuts or drizzles to personalize each batch; try adding walnuts for crunch, or topping with a sprinkle of sea salt.

Perfect for Sharing: These decadent treats make lovely gifts – pair with a scoop of vanilla ice cream for ultimate enjoyment and to impress friends and family!

As you embark on this baking adventure, keep in mind similar delights like Matcha Cookies Soft or Thumbprint Cookies Melt. Happy baking!

Brownie-Stuffed Chocolate Chip Cookies Ingredients

For the Cookie Dough
• All-purpose flour – Provides structure; can be substituted with gluten-free flour for a gluten-free option.
• Baking soda – Acts as a leavening agent; make sure it’s fresh for the best rise.
• Salt – Enhances the flavor of the cookies; try sea salt for a gourmet touch.
• Unsalted butter – Adds richness and moisture; consider coconut oil for a dairy-free version.
• Brown sugar – Gives sweetness and chewiness; can be swapped with white sugar for a lighter flavor.
• Granulated sugar – For sweetness and texture; coconut sugar can be a healthier alternative.
• Eggs – Serves as a binding agent; use flax eggs for a vegan option.
• Vanilla extract – Provides flavor; opt for pure vanilla extract for the best taste.
• Chocolate chips – Adds flavor and texture; substitute with white chocolate or butterscotch chips for variety.

For the Brownie Center
• Brownies (prepared) – Creates a fudgy center; use homemade or store-bought brownies based on your taste preference.

These Brownie-Stuffed Chocolate Chip Cookies are sure to become a new favorite! Enjoy diving into this delightful recipe and savoring every indulgent bite.

Step‑by‑Step Instructions for Brownie-Stuffed Chocolate Chip Cookies

Step 1: Preheat the Oven
Begin by preheating your oven to 350°F (175°C). This ensures that your Brownie-Stuffed Chocolate Chip Cookies bake evenly and achieve that golden-brown hue. While the oven is heating, take a moment to gather all your ingredients and equipment, including mixing bowls, a whisk, and a baking sheet lined with parchment paper.

Step 2: Mix the Dry Ingredients
In a medium bowl, whisk together the all-purpose flour, baking soda, and salt until well combined. This step is crucial as it helps to evenly distribute the leavening agent and the salt, enhancing the flavor of your cookies. Set this mixture aside while you work on the wet ingredients to ensure a smooth cookie dough later on.

Step 3: Cream the Sugars and Butter
In a large mixing bowl, cream together the unsalted butter, brown sugar, and granulated sugar using an electric mixer on medium speed until the mixture becomes light and fluffy, about 2-3 minutes. The creamy texture signifies that the sugars are well incorporated, which is key for the rich taste of your Brownie-Stuffed Chocolate Chip Cookies.

Step 4: Incorporate Eggs and Vanilla
Add the eggs and vanilla extract to the creamed butter and sugars. Mix until everything is combined and smooth, about 1-2 minutes. This mixture will create a beautiful, rich base for your cookies, ensuring they are both chewy and soft. Make sure to scrape down the sides of the bowl as needed to incorporate all the ingredients.

Step 5: Combine Wet and Dry Ingredients
Gradually add the dry ingredient mixture into the wet mixture, mixing until just incorporated. Be careful not to overmix; you want to maintain a light texture in your Brownie-Stuffed Chocolate Chip Cookies. The dough should come together nicely, forming a cohesive mass that holds its shape.

Step 6: Form the Cookie Dough
Scoop tablespoon-sized portions of the cookie dough and flatten each scoop slightly in your palm. Place a small piece of brownie in the center of each dough portion, then carefully fold the dough over the brownie, sealing it inside. This creates a delightful surprise in each cookie, ensuring that fudgy goodness awaits with every bite.

Step 7: Arrange on Baking Sheet
Place the stuffed cookies onto the prepared baking sheet, spacing them about 2 inches apart to allow for spreading. You should see beautiful, round dough balls ready to be baked. If you like, you can sprinkle a few extra chocolate chips on top for an added chocolatey touch before baking.

Step 8: Bake the Cookies
Bake in the preheated oven for 12-15 minutes, or until the edges are golden and the centers appear slightly underbaked. This will help maintain a gooey brownie center surrounded by soft cookie dough. Trust your nose—the delightful aroma will fill your kitchen, signaling they are almost done.

Step 9: Cool and Enjoy
Once baked, let the cookies cool on the baking sheet for 5 minutes before transferring them to a wire rack to cool completely. This cooling period allows the cookies to firm up while still retaining a soft, warm interior. Enjoy these Brownie-Stuffed Chocolate Chip Cookies warm, perhaps with a scoop of ice cream for an indulgent treat!

Make Ahead Options

These Brownie-Stuffed Chocolate Chip Cookies are a dream for busy home cooks looking to save time! You can prepare the cookie dough and chill it in the refrigerator for up to 24 hours to help enhance the flavors. Simply scoop and stuff the cookies, then cover and refrigerate until ready to bake. Additionally, you can prepare the brownie centers in advance; just ensure they are chilled before using them in the cookies to maintain their shape. When you’re ready to enjoy these decadent treats, bake them straight from the fridge for about 12-15 minutes. This way, you'll have gooey, indulgent cookies in no time!

What to Serve with Brownie-Stuffed Chocolate Chip Cookies

Indulging in these cookies is just the beginning; elevate your dessert experience by pairing them with these delightful companions.

  • Vanilla Ice Cream: The classic pairing that adds a creamy, cold contrast to the warm, gooey cookies. A scoop of vanilla ice cream will enhance every rich, chocolatey bite.

  • Fresh Berries: Bright, tart berries like raspberries or strawberries offer a refreshing balance to the decadent sweetness of the cookies, creating a delightful mix of flavors.

  • Milkshake: A luscious chocolate or vanilla milkshake serves as a dreamy beverage counterpart, making each mouthful of cookie even more satisfying and indulgent.

  • Chocolate Ganache: Drizzling a rich chocolate ganache over each cookie turns an already indulgent treat into a true extravagance. The silky texture perfectly complements the chewy cookie and brownie layers.

  • Almond Milk: For a lighter beverage option, chilled almond milk adds a subtle nutty flavor that pairs beautifully with the chocolate without overpowering it.

  • Coffee: A warm cup of coffee or espresso brings out the deep flavors of the brownies and enhances the sweet notes of the cookies, making it a perfect adult treat.

  • Caramel Sauce: Drizzling warm caramel sauce on top elevates your dessert into indulgent territory, adding a rich sweetness and a touch of decadence.

These pairings are designed to bring texture, flavor, and warmth into your dessert experience, making each moment even more special.

Expert Tips for Brownie-Stuffed Chocolate Chip Cookies

Chill the Brownies: Ensure your brownies are chilled before stuffing them into the cookie dough. This helps keep their shape during baking.

Mind the Bake Time: Avoid over-baking; cookies should remain soft in the center for the ideal texture. Trust your instincts—slightly underbaked is better!

Use Parchment Paper: Line your baking sheet with parchment paper to prevent sticking and promote even baking for all your Brownie-Stuffed Chocolate Chip Cookies.

Portion Control: Scoop tablespoon-sized amounts for even baking and consistency; larger portions may not cook through evenly.

Experiment with Mix-Ins: Don’t hesitate to customize! Add nuts or flavored extracts to the dough for a unique twist that complements the brownie filling.

Brownie-Stuffed Chocolate Chip Cookies Variations

Feel free to let your creativity shine with these delicious twists on the classic recipe!

  • Nuts: Add chopped walnuts or pecans to the brownie filling for a delightful crunch that contrasts with the softness of the cookies. It’s a wonderful way to elevate the texture!

  • Flavored Extracts: Experiment with a few drops of almond or hazelnut extract in the cookie dough. This will introduce an unexpected depth of flavor that adds an exciting kick to each bite.

  • Ice Cream Sandwich: Once the cookies are baked and cooled, sandwich a scoop of your favorite ice cream between two cookies. Imagine the bliss when you bite into a soft cookie surrounding creamy ice cream!

  • Chocolate Ganache Drizzle: After baking, drizzle warm chocolate ganache over the cookies for an extra layer of indulgence. The chocolatey richness will take these treats to dizzying heights!

  • Sea Salt Finish: Sprinkle a pinch of sea salt on the top of each cookie before baking. This simple step brings out the sweetness and enhances the overall flavor profile, making each morsel even more tempting.

  • Spicy Kick: Add a dash of cinnamon or cayenne pepper to the cookie dough for a surprising flavor twist that blends beautifully with chocolate. It’s a fun way to wake up your taste buds!

  • Swirled Brownies: Instead of cubes, swirl brownie batter into the cookie dough for a marbled effect. This stunning presentation is both eye-catching and scrumptious!

Feel inspired by these variations? You might also love the delicious flavor profiles found in Eggnog Cookies Soft or the classic charm of German Chocolate Poke. Enjoy experimenting!

How to Store and Freeze Brownie-Stuffed Chocolate Chip Cookies

Room Temperature: Store cookies in an airtight container at room temperature for up to 5 days to maintain their softness and flavor.

Fridge: For longer freshness, you can refrigerate the cookies in an airtight container for up to 1 week, though they may lose some of their original texture.

Freezer: These delightful Brownie-Stuffed Chocolate Chip Cookies can be frozen for up to 3 months. Place them in a single layer in a freezer-safe bag, separating layers with parchment paper.

Reheating: To enjoy warm cookies, reheat frozen cookies in a 350°F (175°C) oven for about 10 minutes, or until warmed through.

Brownie-Stuffed Chocolate Chip Cookies Recipe FAQs

How do I choose the right brownies for the filling?
I recommend using brownies that are fudgy and rich for the best experience! You can use homemade brownies or store-bought ones; just make sure they are chilled before cutting them into small pieces. This helps maintain their shape when stuffing into the cookie dough.

How should I store leftover cookies?
Store your Brownie-Stuffed Chocolate Chip Cookies in an airtight container at room temperature for up to 5 days. If you prefer to keep them even longer, you can refrigerate them for up to a week, but note that they may lose a bit of their original softness.

Can I freeze these cookies?
Absolutely! These cookies can be frozen for up to 3 months. Here’s how: Place them in a single layer on a baking sheet, freeze until solid, then transfer to a freezer-safe bag, separating layers with parchment paper. When you're ready to enjoy them, reheat in a preheated oven at 350°F (175°C) for about 10 minutes.

What if my cookie dough is too sticky?
If you find your cookie dough is too sticky to handle, you can refrigerate it for about 30 minutes to help firm it up. If it's still challenging, try adding a little extra flour, a tablespoon at a time, until the dough is workable.

Are these cookies safe for those with allergies?
These Brownie-Stuffed Chocolate Chip Cookies contain common allergens like gluten, dairy, and eggs. For those with dietary restrictions, you can use gluten-free flour, coconut oil for a dairy-free option, and flax eggs for a vegan version. Always check ingredient labels to avoid any specific allergens.

What do I do if the cookies spread too much while baking?
If your cookies spread excessively, it may be due to warm butter in the dough or too much moisture. Try chilling the cookie dough for 30 minutes before baking to help them maintain their shape. Additionally, ensure that you are using the correct measurements for your ingredients.

Brownie-Stuffed Chocolate Chip Cookies

Decadent Brownie-Stuffed Chocolate Chip Cookies to Indulge In

These Brownie-Stuffed Chocolate Chip Cookies combine rich flavors that will satisfy every sweet craving.
Print Recipe Pin Recipe
Prep Time 15 minutes mins
Cook Time 15 minutes mins
Cooling Time 5 minutes mins
Total Time 35 minutes mins
Servings: 12 cookies
Course: Dessert
Cuisine: American
Calories: 250
Ingredients Equipment Method Nutrition Notes

Ingredients
  

For the Cookie Dough
  • 2 cups all-purpose flour can be substituted with gluten-free flour
  • 1 teaspoon baking soda make sure it’s fresh
  • 0.5 teaspoon salt try sea salt for a gourmet touch
  • 0.75 cup unsalted butter consider coconut oil for a dairy-free version
  • 0.5 cup brown sugar can be swapped with white sugar
  • 0.5 cup granulated sugar coconut sugar can be a healthier alternative
  • 2 large eggs use flax eggs for a vegan option
  • 1 teaspoon vanilla extract opt for pure vanilla extract
  • 1 cup chocolate chips substitute with white chocolate or butterscotch chips for variety
For the Brownie Center
  • 2 cups brownies (prepared) use homemade or store-bought

Equipment

  • Mixing bowls
  • Whisk
  • Baking Sheet
  • Parchment Paper
  • Electric mixer

Method
 

Step-by-Step Instructions
  1. Preheat your oven to 350°F (175°C).
  2. In a medium bowl, whisk together the all-purpose flour, baking soda, and salt until well combined.
  3. In a large mixing bowl, cream together the unsalted butter, brown sugar, and granulated sugar using an electric mixer until light and fluffy.
  4. Add the eggs and vanilla extract to the creamed mixture and mix until combined and smooth.
  5. Gradually add the dry ingredient mixture into the wet mixture, mixing until just incorporated.
  6. Scoop tablespoon-sized portions of the cookie dough, flatten each scoop slightly, place a small piece of brownie in the center, and fold the dough over the brownie.
  7. Place the stuffed cookies onto the prepared baking sheet, spacing them about 2 inches apart.
  8. Bake in the preheated oven for 12-15 minutes, or until the edges are golden and the centers are slightly underbaked.
  9. Let the cookies cool on the baking sheet for 5 minutes before transferring them to a wire rack to cool completely.

Nutrition

Serving: 1cookieCalories: 250kcalCarbohydrates: 30gProtein: 3gFat: 12gSaturated Fat: 7gPolyunsaturated Fat: 1gMonounsaturated Fat: 4gCholesterol: 30mgSodium: 150mgPotassium: 100mgFiber: 1gSugar: 15gVitamin A: 200IUCalcium: 30mgIron: 1mg

Notes

Chill the brownies before stuffing, avoid over-baking, and use parchment paper for even baking.

Tried this recipe?

Let us know how it was!
  • « Previous Page
  • 1
  • 2
  • 3
  • 4
  • 5
  • 6
  • …
  • 49
  • Next Page »

Welcome!

Hi, I’m Grace, a Sydney-based home cook with a passion for bold flavors and trending ingredients. Whether you’re a busy beginner or a seasoned foodie, you’ll find dishes here that are fresh, fun, and full of flavor.

More about me

Popular Recipes

  • Cheesy Chicken Garlic Bread Sandwich
    Cheesy Chicken Garlic Bread Sandwich for Cozy Family Moments
  • Easy Chicken Ranch Wraps
    Easy Chicken Ranch Wraps: Quick, Creamy & Totally Satisfying
  • Chicken Caesar Sandwiches
    Delicious Chicken Caesar Sandwiches for Quick Comfort Food
  • best Cuban sandwich
    The Best Cuban Sandwich You’ll Want Every Weeknight!

Footer

↑ back to top

About

  • Privacy Policy
  • Disclaimer
  • Terms & Conditions

Newsletter

  • Sign Up! for emails and updates

Contact

  • About me
  • Contact me

Copyright © 2025 TastyTrendIngredients