
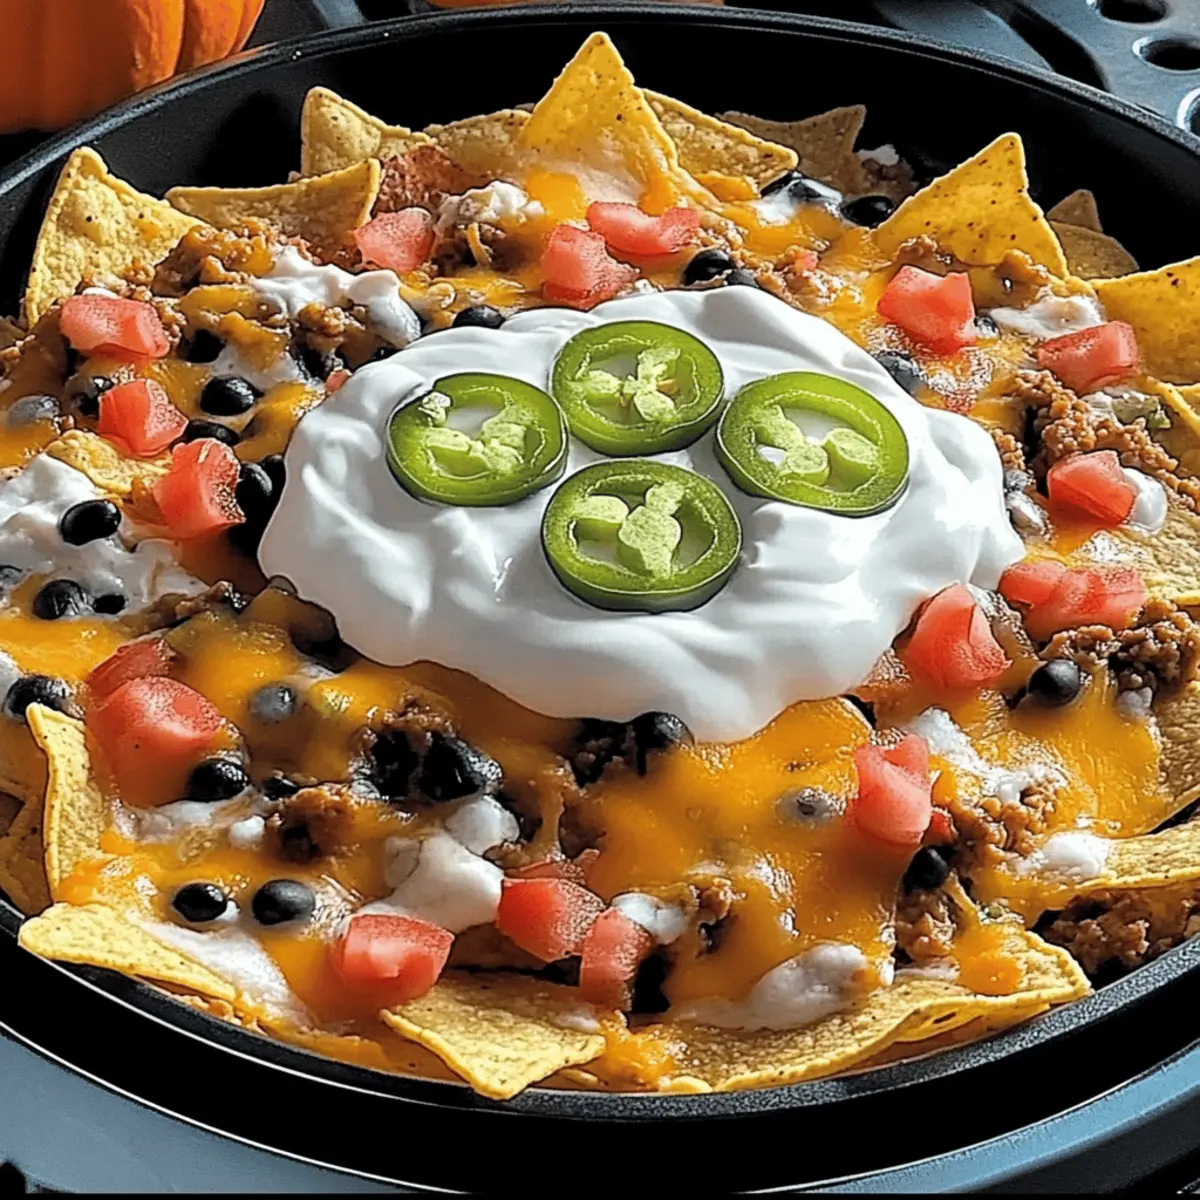
As I rummaged through my pantry last Halloween, I stumbled upon a bag of tortilla chips that sparked an idea—a fun, festive twist on a classic that would haunt my guests with delight! Enter the Spooktacular Haunted Nachos Recipe, a playful creation that layers crispy chips with gooey cheese and a medley of customizable toppings. Not only are these nachos a guaranteed crowd-pleaser for your Halloween bash, but they also invite creativity with easy vegetarian options that cater to every palate. With just a few simple steps, you’ll conjure an enchanting dish that brings everyone together, making it a brilliant addition to any festive gathering. Are you ready to dive into an ooey-gooey, ghoulishly good experience that will leave everyone wanting more?
Why Are Haunted Nachos a Must-Try?
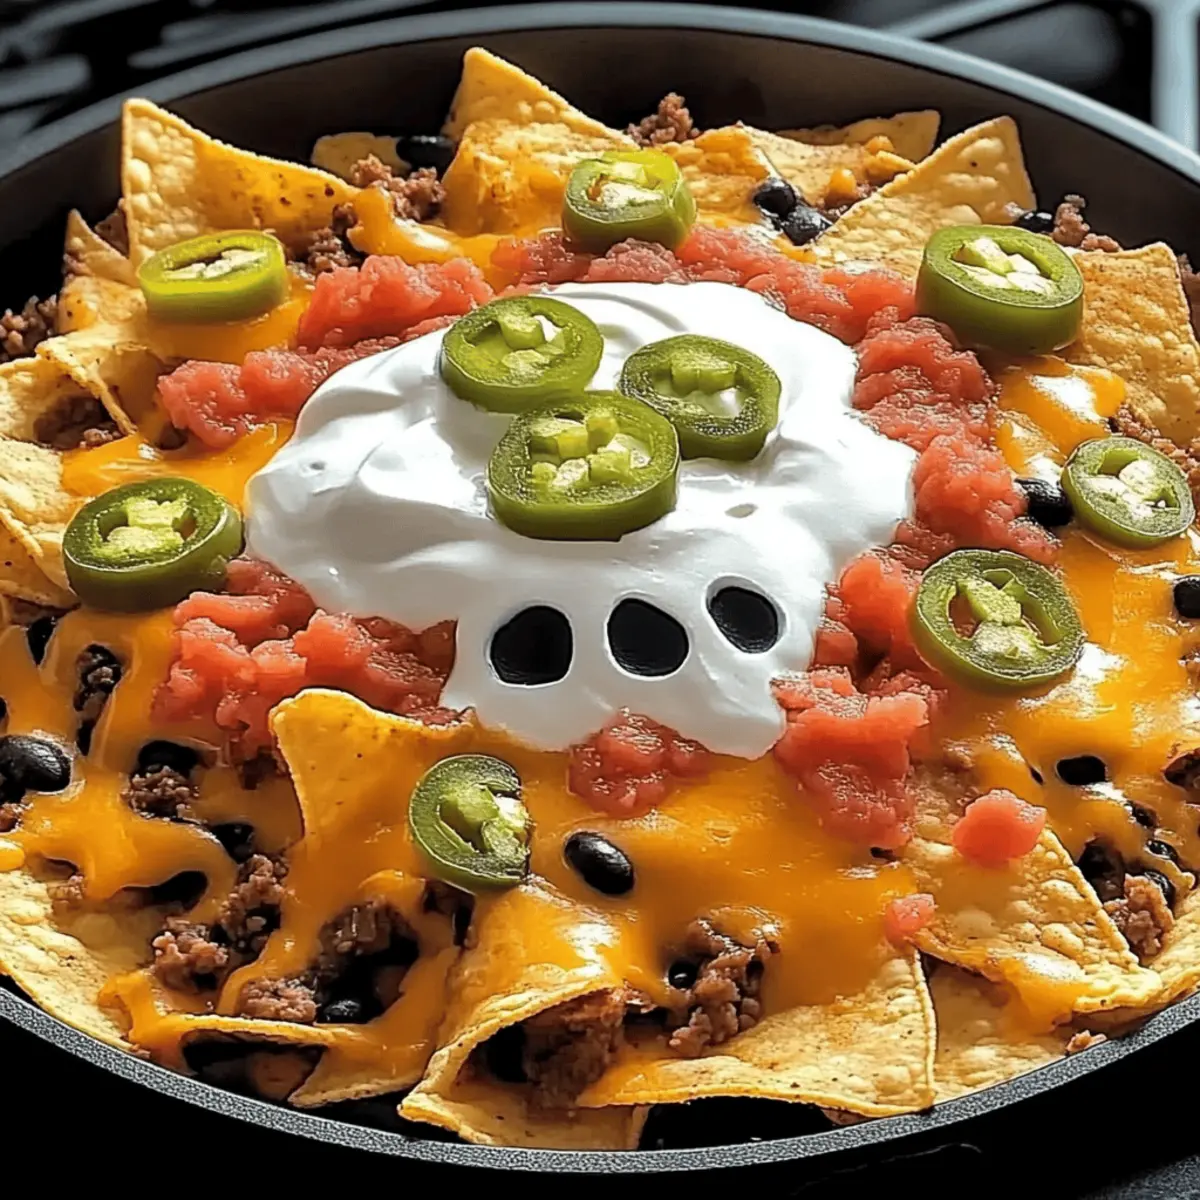
Crowd-Pleasing Creation: These nachos are guaranteed to impress your friends and family at any Halloween gathering! Endless Customization: Mix and match toppings to suit everyone's tastes, including delicious vegetarian options. Quick & Easy Prep: With simple baking steps, you’ll have a show-stopping dish in no time. Festive Presentation: Their vibrant colors and spooky shapes will bring fun to your table. Plus, these nachos pair perfectly with unique drinks, like a spooky fruit punch, setting the mood for an unforgettable night. So gather your ingredients and get ready for a ghoulishly delightful experience!
Spooktacular Haunted Nachos Ingredients
For the Nachos Base
• Tortilla Chips – A sturdy base that provides essential crunch; opt for thicker chips for better holding of toppings.
• Shredded Cheese – Creamy and melty, choose cheddar or plant-based options for a vegetarian version that complements every topping.
For the Protein
• Black Beans – Adds protein and a hearty texture; can be replaced with kidney beans for variety or omitted for a lighter snack.
For the Heat
• Jalapeños – Brings a kick of spice; choose mild peppers for gentler flavor or leave them out for a completely non-spicy option.
For the Creamy Touch
• Sour Cream – Perfect for drizzling on top; Greek yogurt makes a great healthier alternative and adds a tangy flavor.
• Guacamole – Fresh and creamy; use homemade or store-bought for added convenience and flavor.
These Spooktacular Haunted Nachos are the perfect dish to customize for Halloween fun!
Step‑by‑Step Instructions for Spooktacular Haunted Nachos Recipe
Step 1: Preheat Oven
Begin by preheating your oven to 350°F (175°C). This temperature will ensure that your Spooktacular Haunted Nachos bake evenly, allowing the cheese to melt perfectly without burning. A properly heated oven is crucial for achieving that gooey, melty layer that everyone loves!
Step 2: Prepare Baking Sheet
While the oven warms up, line a large baking sheet with parchment paper. This step makes cleanup a breeze and prevents the nachos from sticking to the pan. Using a baking sheet provides ample space for your nachos to spread out, which is key for even baking and easy serving.
Step 3: Layer Tortilla Chips
Spread the tortilla chips evenly across the baking sheet, ensuring they overlap slightly but aren’t overcrowded. This arrangement allows for the toppings to distribute evenly, creating that perfect bite of crispy chips and gooey cheese. You want to see the vibrant chips peek through, promising a crunchy foundation for your nachos.
Step 4: Add Cheese and Toppings
Sprinkle half of the shredded cheese generously over the tortilla chips. Next, add black beans and jalapeños for an exciting flavor kick. Finish by layering the remaining cheese on top, ensuring it covers the toppings. This creates a delicious mountain of gooey goodness, perfect for your Spooktacular Haunted Nachos.
Step 5: Bake
Place your loaded nachos in the preheated oven and bake for 10-15 minutes. Watch closely as the cheese melts and begins to bubble; the perfect sign that your nachos are ready. You want a golden brown bubbly surface, not burnt edges, so keep an eye on them as they bake.
Step 6: Finish & Serve
Once the cheese is melted and bubbly, carefully remove the nachos from the oven. Drizzle with sour cream and guacamole for that creamy touch. Now, gather your friends and family around—your Spooktacular Haunted Nachos are ready to be enjoyed immediately, promising a deliciously eerie delight at your Halloween gathering!

Spooktacular Haunted Nachos Variations
Feel free to get creative and customize these nachos to suit your taste and dietary needs!
-
Vegetarian Delight: Load your nachos with colorful veggies like bell peppers, corn, and mushrooms for a delicious non-meat option. The vibrant colors not only enhance the presentation but also add a delightful crunch.
-
Seasonal Twist: Add in roasted pumpkin or use ghost-shaped tortilla chips for a festive flair. These playful additions make your nachos even more fun and on-theme for Halloween.
-
Mild Spice: For those who prefer less heat, switch jalapeños for sweet bell peppers or omit them entirely. You can still achieve flavor without overwhelming heat, allowing everyone to enjoy this dish.
-
Cheesy Overload: If you can’t resist an extra cheesy finish, double the cheese and mix in a variety, like Monterey Jack or gooey mozzarella, for a melty masterpiece. It’s hard to resist more cheese in a party dish!
-
Substitutes for Sour Cream: Try Greek yogurt or a dollop of avocado for a unique take on creamy toppings that add rich flavor without the extra calories. These swaps also cater to different dietary preferences nicely.
-
Spicy Black Beans: Spice up your black beans by adding a sprinkle of chili powder or cumin for a flavorful twist. This little addition not only pumps up the flavor but also adds a nice kick.
-
Nutty Goodness: Incorporate some roasted nuts like sliced almonds or chopped pecans for an unexpected crunch. This adds texture and depth to your nacho experience, making each bite interesting!
-
Fishy Flavor: Feeling adventurous? Swap out cheese or beans for some seasoned shredded fish, like tilapia, for a sea-inspired nacho variation that will surprise your guests and tempt their taste buds.
Remember, the key to truly Spooktacular Haunted Nachos is customization! Don’t hesitate to experiment and find combinations that your crowd will love. For even more delicious options, consider pairing them with spooky drinks like a vibrant fruit punch or serving them alongside Chicken Adobo Again for a complete feast!
What to Serve with Spooktacular Haunted Nachos
Elevate your Halloween gathering with complementary dishes that delight the senses and keep the festive spirit alive.
-
Creamy Guacamole: This velvety dip adds a fresh, rich touch, enhancing the flavors of the nachos and inviting guests to indulge more.
-
Spooky Fruit Punch: A vibrant, colorful drink to quench thirst, its sweetness balances the savory flavors of the nachos—perfect for young and old alike.
-
Zesty Mexican Street Corn: The sweetness of corn combined with creamy dressing and spices offers a delightful contrast to the nachos, creating a symphony of flavors.
-
Black Bean Salsa: This chunky salsa, bursting with freshness, is rich in textures and pairs beautifully with the crunchy nachos while keeping the theme festive.
-
Roasted Pepper Veggie Platter: A medley of crunchy vegetables not only adds brightness to the table but also offers a refreshing contrast to the spicy nachos.
-
Chilled Beer or Margaritas: Both drinks enhance the relaxed atmosphere of a Halloween party; their crispness complements the rich cheese and toppings on the nachos.
-
Sweet Halloween Cupcakes: Tempt your guests with festive treats that provide a touch of sweetness to close the meal, making the entire experience a delicious triumph.
Storage Tips for Spooktacular Haunted Nachos
Room Temperature: Enjoy your nachos hot out of the oven for the best texture. However, if left at room temperature, consume them within 2 hours for food safety.
Fridge: Leftover nachos can be stored in the fridge for up to 3 days in an airtight container. Reheat them in the oven to restore their crispy goodness.
Freezer: For longer storage, freeze the nachos (without toppings) in a freezer-safe bag for up to 2 months. When ready to enjoy, thaw and reheat in the oven.
Toppings Storage: Store toppings like sour cream and guacamole separately in airtight containers to maintain freshness, and use them within 2 days for the best flavor.
Make Ahead Options
These Spooktacular Haunted Nachos are perfect for meal prep enthusiasts! You can prep the toppings (black beans, jalapeños, and any other veggies) up to 3 days in advance. Simply refrigerate them in airtight containers to maintain freshness and prevent sogginess. You can also pre-shred the cheese and keep it in the fridge, ready to sprinkle on your nachos when it's time to bake. When you're ready to serve, layer the tortilla chips on a baking sheet, add your prepped toppings, sprinkle the cheese, and bake for 10-15 minutes until bubbly. This way, you’re saving time on busy Halloween nights while still delivering a delicious, crowd-pleasing dish!
Expert Tips for Spooktacular Haunted Nachos
• Watch the Bake Time: Keep a close eye on your nachos while they bake to avoid burning. It only takes a moment for them to go from perfectly bubbly to charred.
• Layer Smartly: For the best texture, layer your toppings in two phases. Start with cheese and toppings, then finish with more cheese to keep everything together.
• Mix It Up: Don't hesitate to get creative! Consider using various toppings like roasted corn or black olives for extra flavor and visual appeal in your Spooktacular Haunted Nachos.
• Go Vegetarian: If you're opting for a vegetarian twist, load your nachos with colorful veggies like bell peppers and mushrooms. This adds both nutrition and flavor!
• Make Ahead: Prepare your toppings in advance and keep them separate from the chips. This reduces stress when it’s time to bake and allows for quick assembly!

Spooktacular Haunted Nachos Recipe FAQs
What type of tortilla chips should I use?
Absolutely! For the best results, opt for thicker tortilla chips that can hold up under the weight of your toppings. This ensures a satisfying crunch combined with your melted cheese. Regular or organic varieties will also work, just avoid overly thin chips that might crumble under the toppings.
How should I store leftover nachos?
Leftovers can be tricky, but here’s a helpful tip! Store your nachos in an airtight container and refrigerate them for up to 3 days. To reheat, place them back in a preheated oven around 350°F (175°C) for about 10 minutes. This helps to restore their crispiness, making them enjoyable once again!
Can I freeze Spooktacular Haunted Nachos?
Yes, you can! For freezer storage, layer the assembled nachos (without the toppings like sour cream and guacamole) in a freezer-safe bag. Seal it tightly, removing as much air as possible, and freeze for up to 2 months. When you're ready to enjoy, thaw it in the fridge overnight and then bake in the oven at 350°F (175°C) until heated through and the cheese melts beautifully.
Are there any dietary considerations for this recipe?
Very! The Spooktacular Haunted Nachos can easily cater to various dietary needs. If you have vegetarians or those sensitive to gluten in your group, simply use gluten-free tortilla chips and plant-based cheese options. Additionally, double-check for allergies with toppings like beans, jalapeños, or sour cream and substitute as necessary to ensure everyone has a delicious experience together!
What if my nachos get soggy?
It's all about assembly! To prevent sogginess, layer your nachos thoughtfully. Start with a layer of chips, followed by cheese, and then toppings. You can create a second layer of chips and repeat the process with more cheese on top. Also, serve your nachos right away after baking—waiting too long can lead to sogginess from the heat and moisture.
Spooktacular Haunted Nachos Recipe for a Fun Halloween Feast
Ingredients
Equipment
Method
- Preheat your oven to 350°F (175°C).
- Line a large baking sheet with parchment paper.
- Spread the tortilla chips evenly across the baking sheet.
- Sprinkle half of the shredded cheese over the tortilla chips, then add black beans and jalapeños, finishing with the remaining cheese.
- Bake for 10-15 minutes until the cheese is melted and bubbly.
- Remove from the oven and drizzle with sour cream and guacamole.


Leave a Reply