tastytrendingredients

  • Home
  • Recipes
    • Appetizers
    • Breakfast
    • Dessert
    • Dinner
    • Drinks
    • Salads
    • Snacks
    • Soups
  • About me
  • Contact me
menu icon
go to homepage
  • Home
  • Recipes
    • Appetizers
    • Breakfast
    • Dessert
    • Dinner
    • Drinks
    • Salads
    • Snacks
    • Soups
  • About me
  • Contact me
search icon
Homepage link
  • Home
  • Recipes
    • Appetizers
    • Breakfast
    • Dessert
    • Dinner
    • Drinks
    • Salads
    • Snacks
    • Soups
  • About me
  • Contact me
×

Taco Spaghetti: Quick and Cheesy Weeknight Delight

August 8, 2025 by Grace Snow Leave a Comment

Racing against the clock can be a recipe for chaos, but with this 30-Minute Cheesy Taco Spaghetti, you’ll feel like a culinary superhero. This dish is a mouthwatering dance of two beloved meal staples—pasta and tacos— that the whole family will adore. Packed with seasoned ground beef, zesty salsa, and melty cheddar, Taco Spaghetti comes together effortlessly, making it the perfect weeknight meal, especially when time is short. Not only is it a breeze to whip up using pantry staples, but it also caters to those picky eaters who often turn their noses up at dinner. Ready to transform your weeknight dinners into a joyous occasion? Let’s dive into this comforting recipe that promises to be a hit around your table!

Why is Taco Spaghetti a Must-Try?

Quick Preparation: This 30-minute meal is designed for busy nights, allowing you to savor delicious flavors without spending hours in the kitchen.

Family-Friendly: Even the pickiest eaters won’t be able to resist the cheesy goodness and familiar taco flavors, ensuring a stress-free dinner experience.

Pantry Staples: Utilize ingredients you probably already have on hand, making it a convenient choice for spontaneous weeknight cravings.

Versatile Options: Feel free to swap in your favorite proteins or add extra spices to tailor it to your family's preferences.

Crowd-Pleasing Appeal: Perfect for family dinners or casual get-togethers, Taco Spaghetti is a guaranteed hit with guests. Whether you're serving it at a gathering or just whipping it up for the family, this dish is bound to impress!

Taco Spaghetti Ingredients

For the Pasta
• Spaghetti Noodles – The base for this dish that holds all the flavors together; consider using any long noodle, such as bucatini or linguini, if you are out!

For the Filling
• Lean Ground Beef – Provides wholesome protein while keeping the dish flavorful; aim for 90/10 or 93/7 lean beef, or drain excess fat if using 80/20.
• Yellow Onion – Adds a gentle sweetness that enhances the overall savoriness; red onion or shallots make great substitutes, too.
• Taco Seasoning – The secret to achieving authentic taco flavors in your dish; you can opt for store-bought mixes or make your own, adjusting to taste!
• Rotel Tomatoes – Brings acidity and a delightful touch of spice; if unavailable, regular diced tomatoes with green chiles make an excellent replacement.

For the Cheesy Goodness
• Shredded Cheddar Cheese – Melts beautifully, adding creaminess and flavor depth; feel free to swap for a Mexican cheese blend or pepper jack for extra kick!

For the Fresh Touch
• Fresh Cilantro – Brightens up the dish with its vibrant aroma; flat-leaf parsley works well for those who prefer a milder flavor.

Let your taste buds explore the delightful layers and textures of this Taco Spaghetti, a dish that marries simplicity with mouthwatering flavor in a matter of minutes!

Step‑by‑Step Instructions for Taco Spaghetti

Step 1: Boil the Pasta
Begin by bringing a large pot of salted water to a rolling boil. Add spaghetti noodles and cook according to the package instructions, usually about 8-10 minutes, until al dente. Just before draining, reserve ½ cup of the pasta water to help thicken the sauce later. Drain the spaghetti in a colander and set aside.

Step 2: Cook the Beef and Onions
In a large skillet, heat a drizzle of oil over medium-high heat. Add lean ground beef and finely chopped yellow onion to the skillet, browning the meat for approximately 5 minutes. Stir frequently until the beef is fully cooked and no longer pink, and the onions become translucent. This step will create the flavorful base for your Taco Spaghetti.

Step 3: Incorporate Taco Flavors
Stir in the taco seasoning and Rotel tomatoes into the meat mixture, ensuring even distribution. Pour in the reserved pasta water, which will help create a deliciously thick sauce. Allow the mixture to simmer for about 5 minutes, stirring occasionally. The flavors will meld beautifully, creating a savory blend that's essential for your Taco Spaghetti.

Step 4: Combine with Pasta
Carefully add the drained spaghetti to the skillet with the beef and sauce mixture. Use tongs to toss everything together, ensuring that the pasta is well-coated with the flavorful sauce. The warmth of the mixture will help to bring all the delicious flavors together, setting the stage for your comforting Taco Spaghetti.

Step 5: Add the Cheesy Goodness
Sprinkle the shredded cheddar cheese over the pasta mixture, stirring continuously until the cheese melts completely and creates a creamy texture throughout. This step not only enhances the flavor of Taco Spaghetti but also makes it irresistibly cheesy and comforting. Allow it to cook for an additional minute to ensure everything is hot.

Step 6: Serve and Garnish
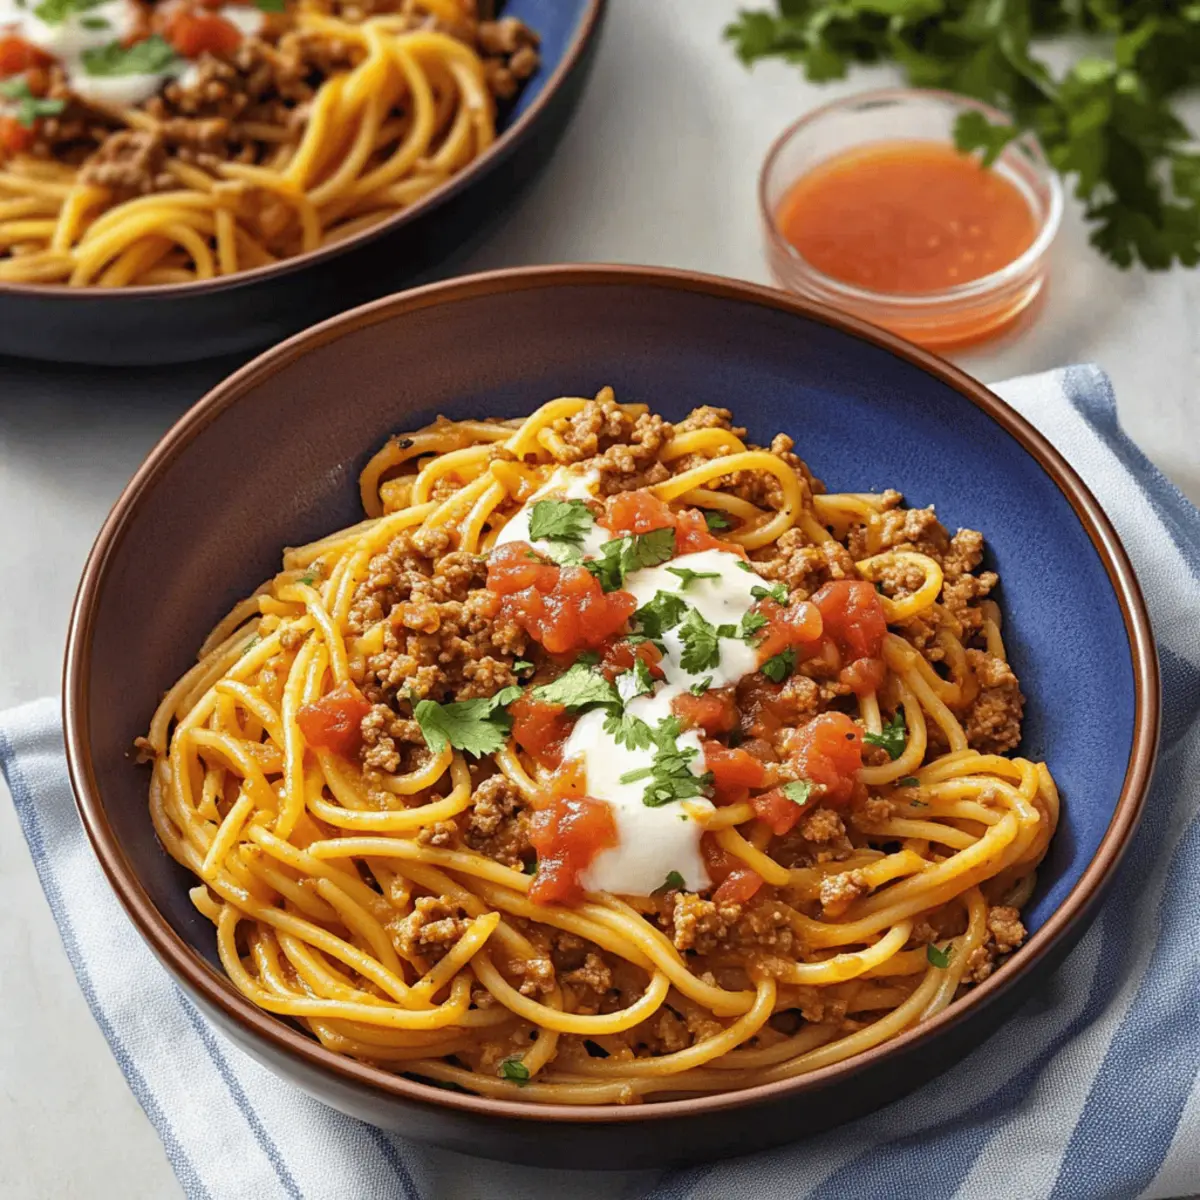
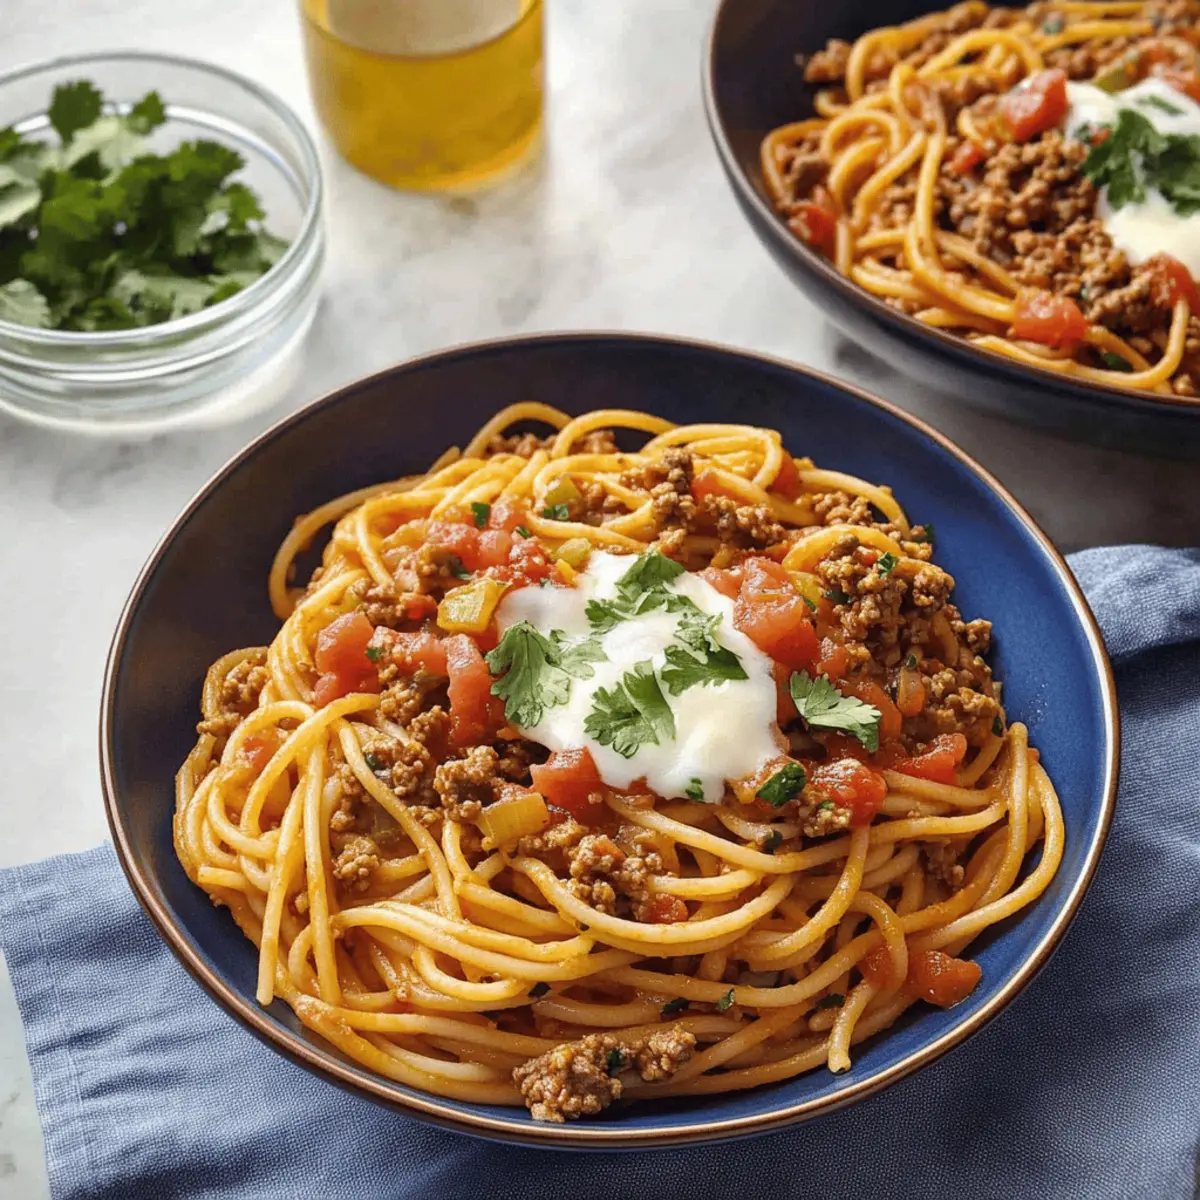
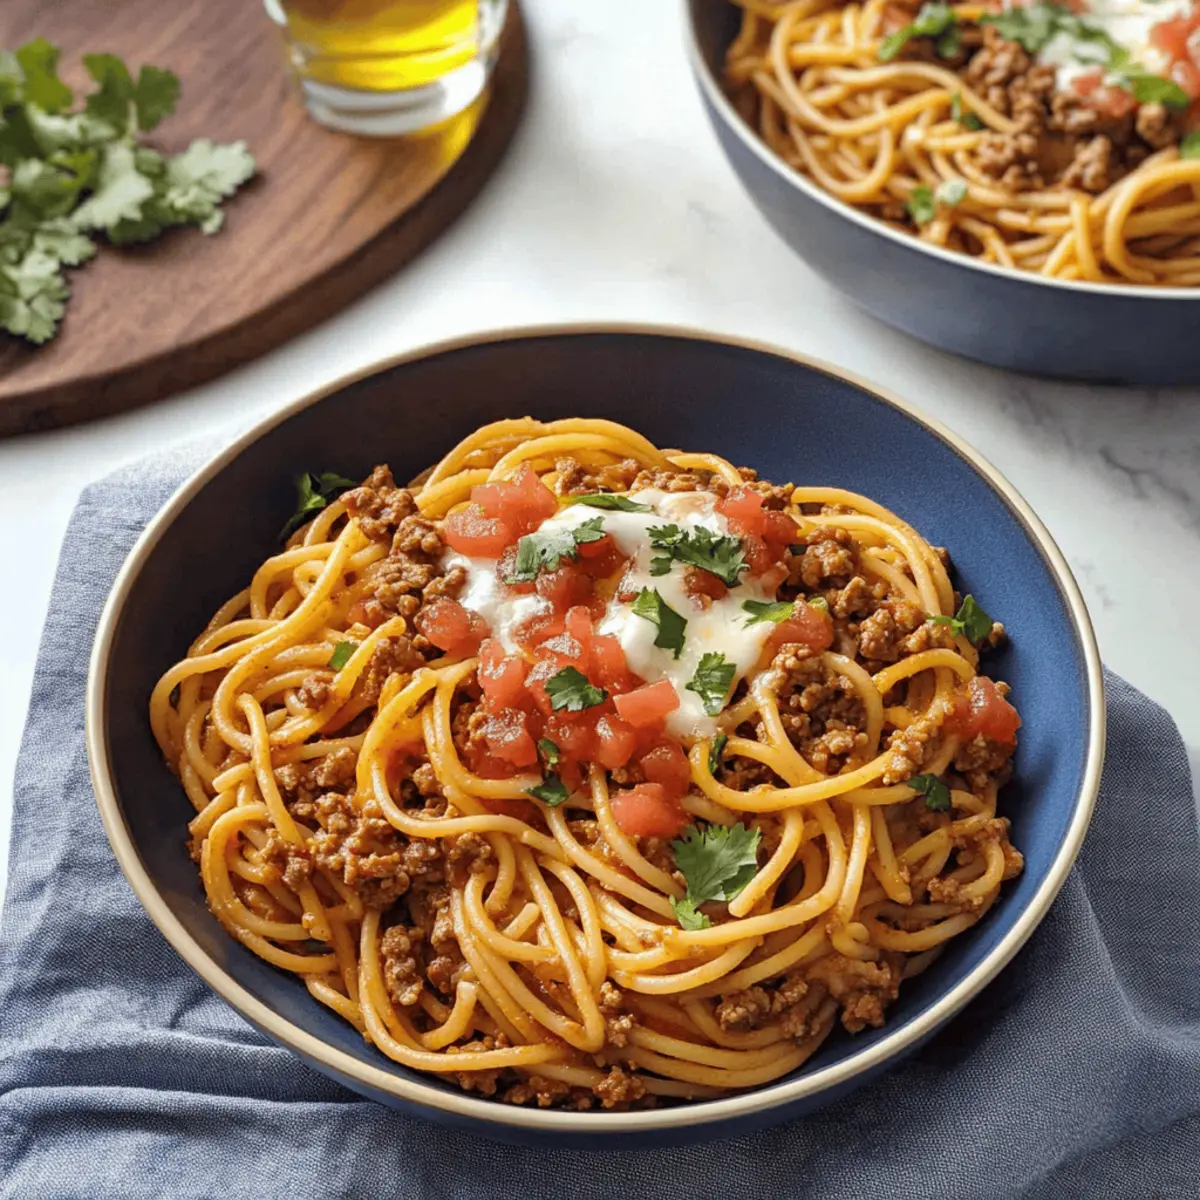
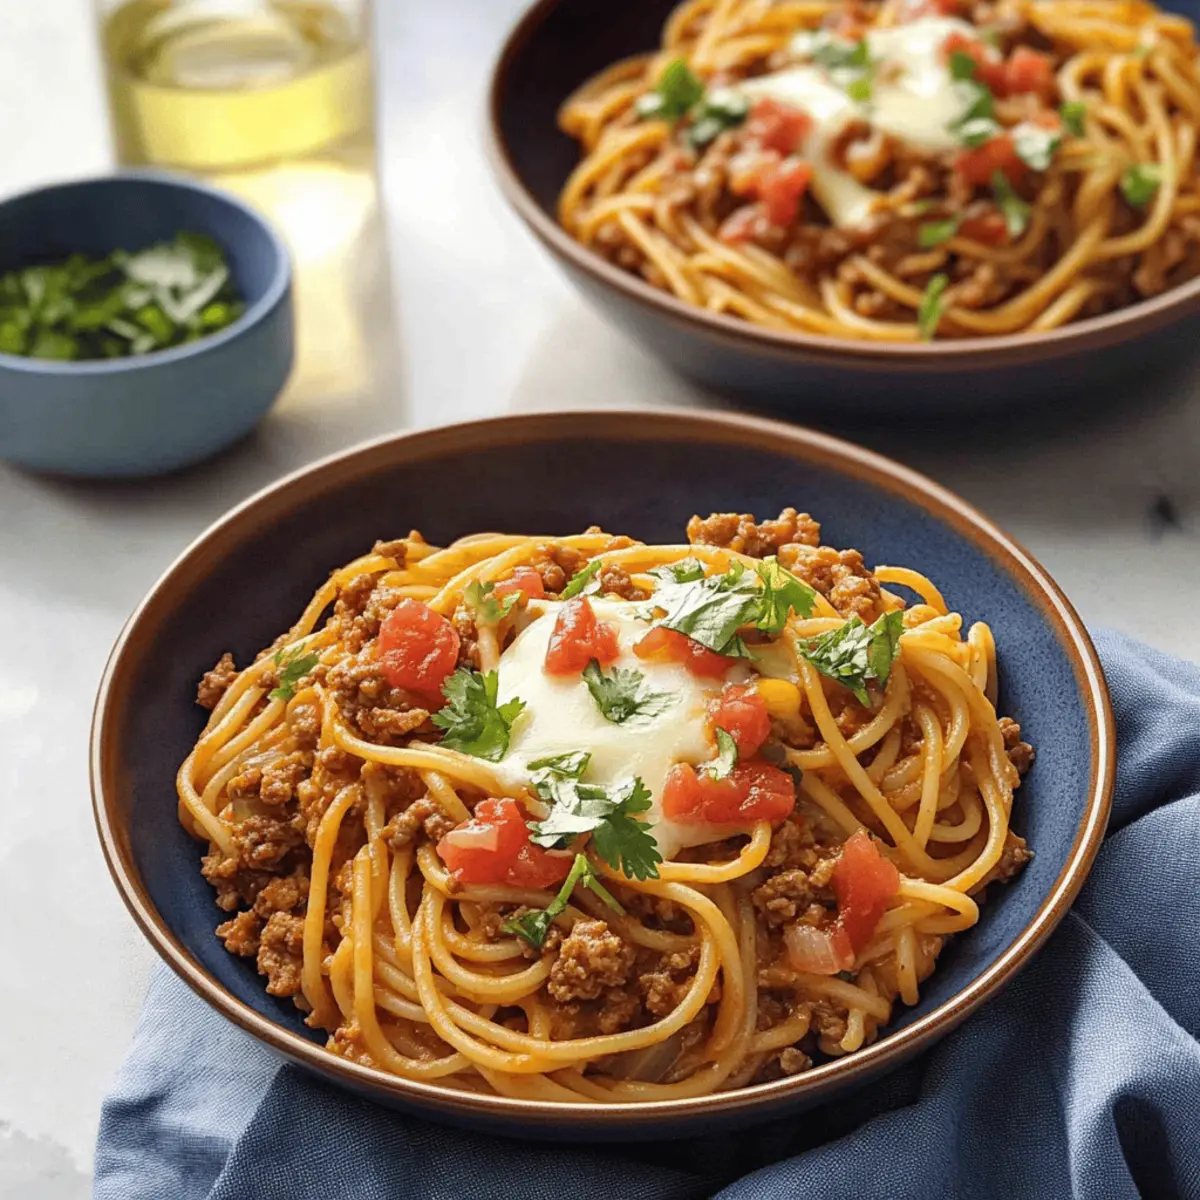
Once the cheese has melted and the dish is well combined, remove the skillet from heat. Serve your Taco Spaghetti in bowls, garnishing each serving with fresh cilantro and optional toppings like sour cream or salsa. This final touch adds a burst of freshness, completing your delightful weeknight meal.

Storage Tips for Taco Spaghetti

  • Fridge: Store leftover Taco Spaghetti in an airtight container for up to 5 days. Make sure it cools to room temperature first to prevent condensation.

  • Freezer: Freeze Taco Spaghetti for up to 3 months in a freezer-safe container. Label the container with the date for easy tracking.

  • Reheating: When ready to enjoy again, reheat in a skillet over medium heat. Add a splash of water or broth to prevent drying out and ensure it stays creamy.

  • Separation Tip: If you think you might have leftovers, consider storing the cheese separately to maintain its creamy texture during storage.

Expert Tips for Taco Spaghetti

  • Perfect Pasta: Use salted water when boiling spaghetti; it enhances the flavor of the noodles and prevents blandness in your Taco Spaghetti.
  • Lean Meat Choice: Opt for lean ground beef (90/10 or 93/7) to reduce grease; if using higher fat beef, always drain excess fat before adding ingredients.
  • Seasoning Adjustments: Start with less taco seasoning; you can always add more to suit your taste without overpowering the dish.
  • Cheese Strategy: For best melting, shred cheese from a block rather than using pre-shredded options, which contain anti-caking agents that hinder melting.
  • Keep It Creamy: If the sauce is too thick, splash in a bit of the reserved pasta water to reach your desired consistency, ensuring your Taco Spaghetti is perfectly saucy!

What to Serve with Taco Spaghetti

Pairing this delightful dish with complementary sides can elevate your meal experience, creating a wonderfully satisfying dining occasion.

  • Crispy Garlic Bread: A buttery, crispy side that contrasts perfectly with the creamy Taco Spaghetti, making every bite irresistible. You can never go wrong with the classic combo of pasta and fresh bread!

  • Fiesta Salad: Light and zesty with a mix of greens, tomatoes, corn, and lime dressing, this salad adds freshness and crunch that balances the richness of the pasta.

  • Refried Beans: Rich and creamy, these beans lend a comforting texture and earthy flavor that enhances the overall meal. They also bring an authentic taco experience to your table!

  • Mexican Street Corn: Grilled corn smothered in mayo, cheese, and spices, this dish brings a pop of sweetness and spice that complements the savory notes of Taco Spaghetti beautifully.

  • Avocado Slices: Creamy and buttery, fresh avocado adds a luscious finish while contributing healthy fats, making your meal feel indulgent yet wholesome.

  • Salsa and Tortilla Chips: A tangy, crunchy pairing that invites everyone to dig in. The freshness of salsa and the satisfying crunch of chips create a fiesta vibe that resonates with the Taco Spaghetti flavors.

  • Coconut Lime Rice: Light and fluffy, this subtly sweet rice offers tropical notes that can elevate your dish’s flavors, creating an exotic twist on your taco night!

  • Margaritas: A classic pairing, refreshing margaritas are perfect for cutting through the richness of the dish, adding a festive touch and complementing the taco flavors in each bite.

Taco Spaghetti Variations & Substitutions

Feel free to explore the delightful possibilities that can make your Taco Spaghetti even more personal and satisfying!

  • Spicy Twist: Add diced jalapeños to the meat mixture for an extra kick. This spicy addition elevates the dish and tantalizes the taste buds.

  • Lean Alternatives: Use ground chicken or turkey instead of beef. These lean proteins keep the flavors intact while providing a lighter option for health-conscious eaters.

  • Creamy Baked Dish: Transform your Taco Spaghetti into a baked casserole. Layer the spaghetti and meat mixture in a baking dish, top with more cheese, and bake until golden and bubbly, for a comforting twist!

  • Veggie Delight: Swap the meat for black beans or lentils for a vegetarian-friendly version. This hearty alternative enhances the dish with fiber while maintaining that desirable taco flavor.

  • Extra Zesty: Incorporate lime juice and zest into the sauce for a refreshing twist. Pairing the acidity from citrus with rich flavors creates a vibrant burst of taste.

  • Cheese Variety: Experiment with different cheese blends, such as pepper jack or queso fresco. Each variety adds a unique profile, making every bite enjoyable in a different way.

  • Herb Swaps: Substitute fresh cilantro with green onions or basil for a flavor that’s equally fresh but with a distinct twist. Each herb brings its own profile, enhancing the entire dish.

  • Garnish Galore: Top your finished dish with sour cream, avocado slices, or pico de gallo for an added layer of flavor and texture. These toppings create a colorful contrast that pleases the eyes and palate.

With these variations, your Taco Spaghetti can be a fresh and exciting meal each time you make it! Don’t forget to sprinkle on some of that delicious cheese from the cheesy goodness section for extra yum!

Make Ahead Options

These Taco Spaghetti are perfect for meal prep enthusiasts! You can brown the ground beef and sauté the onions up to 3 days in advance, storing them in an airtight container in the refrigerator to maintain their tenderness. Additionally, you can cook the spaghetti noodles up to 24 hours ahead of time; just toss them with a bit of olive oil to prevent sticking. When you’re ready to enjoy your meal, simply reheat the beef mixture and noodles in a skillet, add the taco seasoning and Rotel tomatoes, and stir in the cheese until melted. You'll have a delicious, comforting dish with minimal effort on busy weeknights!

Taco Spaghetti Recipe FAQs

How can I tell if my ingredients are ripe or good to use?
Absolutely! When selecting produce, look for firm, vibrant fruits and vegetables. For example, onions should be dry and firm, without soft spots or sprouting. When checking tomatoes, avoid those with dark spots all over or wrinkled skins. Fresh cilantro should be bright green and fragrant, while, if using ground beef, ensure it’s a bright red color with no off odors.

How should I store leftover Taco Spaghetti?
Very easy! Store your Taco Spaghetti in an airtight container in the fridge for up to 5 days. Make sure to let it cool completely to room temperature first to avoid condensation, which can make your dish watery. When reheating, I recommend using a skillet to maintain its creaminess!

Can I freeze Taco Spaghetti, and how should I do it?
Absolutely! You can freeze Taco Spaghetti for up to 3 months. To do this, first let it cool to room temperature. Then, transfer it to a freezer-safe container, making sure to leave some space for expansion. Don't forget to label the container with the date. When you’re ready to enjoy it, just thaw in the fridge overnight and reheat in a skillet, adding a splash of water or broth to keep it creamy.

What if my Taco Spaghetti turns out too dry?
If you find that your Taco Spaghetti is a bit on the dry side, don’t fret! You can add some of the reserved pasta water during reheating to loosen it up. Start with a couple of tablespoons and stir well until you reach your desired consistency. This will help rejuvenate the dish and keep it nice and saucy.

Are there any dietary considerations for Taco Spaghetti?
Yes, while Taco Spaghetti is generally a family-friendly dish, those with dietary restrictions should choose ingredients carefully. If you’re making it gluten-free, opt for gluten-free pasta. For vegan alternatives, try using lentils or chickpeas as protein substitutes, while also swapping ground beef for a plant-based alternative and using dairy-free cheese. Additionally, check taco seasoning packets for hidden gluten or allergens.

Taco Spaghetti

Taco Spaghetti: Quick and Cheesy Weeknight Delight

Enjoy a quick and tasty Taco Spaghetti that's perfect for busy weeknights with the whole family.
Print Recipe Pin Recipe
Prep Time 10 minutes mins
Cook Time 20 minutes mins
Total Time 30 minutes mins
Servings: 4 servings
Course: Dinner
Cuisine: Mexican
Calories: 450
Ingredients Equipment Method Nutrition Notes

Ingredients
  

For the Pasta
  • 8 ounces Spaghetti Noodles Any long noodle can be used
For the Filling
  • 1 pound Lean Ground Beef Aim for 90/10 or 93/7
  • 1 medium Yellow Onion Substitutes include red onion or shallots
  • 2 tablespoons Taco Seasoning Store-bought or homemade
  • 1 can Rotel Tomatoes Can substitute with regular diced tomatoes
For the Cheesy Goodness
  • 1 cup Shredded Cheddar Cheese Can use Mexican cheese blend or pepper jack
For the Fresh Touch
  • 1/4 cup Fresh Cilantro Flat-leaf parsley can be used as an alternative

Equipment

  • Large pot
  • Colander
  • Large skillet
  • Tongs

Method
 

Step‑by‑Step Instructions
  1. Boil salted water in a large pot. Add spaghetti noodles and cook according to package instructions, about 8-10 minutes. Reserve ½ cup pasta water, then drain spaghetti.
  2. Heat oil in a large skillet over medium-high heat. Brown the lean ground beef with chopped yellow onion for about 5 minutes until meat is fully cooked and onions are translucent.
  3. Stir in taco seasoning and Rotel tomatoes, then pour in reserved pasta water. Simmer for about 5 minutes, stirring occasionally.
  4. Add drained spaghetti to the skillet and toss with the beef and sauce mixture using tongs.
  5. Sprinkle in shredded cheddar cheese and stir until melted and creamy. Cook for an additional minute.
  6. Serve Taco Spaghetti hot, garnished with fresh cilantro and optional toppings like sour cream or salsa.

Nutrition

Serving: 1servingCalories: 450kcalCarbohydrates: 52gProtein: 28gFat: 18gSaturated Fat: 8gPolyunsaturated Fat: 1gMonounsaturated Fat: 8gCholesterol: 60mgSodium: 600mgPotassium: 500mgFiber: 3gSugar: 4gVitamin A: 400IUVitamin C: 2mgCalcium: 250mgIron: 3mg

Notes

Use salted water when boiling for better flavor. Store leftovers in an airtight container for up to 5 days.

Tried this recipe?

Let us know how it was!

Mini Tropical Pavlovas: A Refreshing Twist on Classic Dessert

August 7, 2025 by Grace Snow Leave a Comment

The kitchen was filled with the sweet, airy scent of meringue as I pulled my first batch of Mini Tropical Pavlovas from the oven. These delightful little desserts not only offer a light and crispy shell with a cloud-like center, but they also bring a tropical twist to any gathering. Perfect for summer get-togethers or an elegant dinner party, this easy-to-make recipe is a true people-pleaser. Imagine topping these pavlovas with luscious mango and a zesty passionfruit sauce or indulging in strawberries drizzled with velvety white chocolate. Not only are they gluten-free, but they can also be prepared ahead of time, leaving you free to enjoy the company of your friends and family. Ready to dive into a dessert that’s as visually stunning as it is delicious? Let's get started!

Why are Mini Tropical Pavlovas a must-try?

Delightfully Unique: These pavlovas offer a fresh take on dessert, combining a light meringue with luscious, tropical flavors. Effortlessly Elegant: They present beautifully, making them a standout at any gathering. Versatile Toppings: Choose between refreshing mango with passionfruit sauce or classic strawberries with white chocolate. Make-Ahead Convenience: Prepare them in advance, so you can relax and enjoy your evening. Gluten-Free Goodness: Perfect for those with dietary restrictions without compromising on flavor! Dive into this dessert that will impress even the most discerning guests—don’t forget to check out more tips in our baking basics section for a hassle-free experience!

Mini Tropical Pavlovas Ingredients

For the Meringue Base

  • Egg Whites – The foundation for your pavlova; make sure they’re at room temperature for better whipping.
  • Caster Sugar – Provides sweetness and stability; a finer sugar will dissolve easily for a smooth texture.
  • Vanilla Essence – Adds a lovely flavor; while optional, it enhances the overall taste of your pavlovas.
  • White Vinegar – Helps stabilize the meringue, preventing it from collapsing; substitute with lemon juice if needed.

For the Toppings

  • Whipped Cream – Adds a creamy texture; for a dairy-free version, swap with coconut cream.
  • Mango (1, sliced) – Offers a sweet tropical topping; you can also use kiwi or pineapple for variety.
  • Strawberries (250g, sliced) – Provides a fresh, tart contrast; raspberries make a wonderful alternative.
  • Passionfruit Pulp (100g) – Ideal for a tart and fragrant sauce; fruit puree can be used if passionfruit isn’t available.
  • White Chocolate (100g) – Essential for the creamy white chocolate sauce; dark chocolate can substitute for a richer taste.
  • Cream (100ml) – Base for the white chocolate sauce; adds a luxurious richness to your dessert.
  • Icing Sugar (2 Tbsp) – Lightly dust to enhance visual appeal; not necessary but adds a beautiful finishing touch.

Step‑by‑Step Instructions for Mini Tropical Pavlovas

Step 1: Preheat the Oven
Begin by preheating your oven to 170°C (340°F) using the fan bake setting. Line two baking trays with baking paper, ensuring the paper doesn’t touch another to maintain a smooth surface for the meringues. This setup will provide a perfect base for your Mini Tropical Pavlovas, allowing them to bake evenly and achieve that delightful crispiness we love.

Step 2: Whip the Egg Whites
In a clean, dry electric mixer, add your room-temperature egg whites and start whisking on high speed. Whisk until you achieve stiff peaks, which should take around 5 minutes. This step is crucial, as it creates the airy volume necessary for your pavlovas. Once you have stiff peaks, you’ll be ready for the next flavor-intensive step.

Step 3: Add Sweetness and Stability
With the mixer on low, gently add in the vanilla essence and vinegar to your fluffy egg whites. Gradually, sprinkle in the caster sugar, increasing the mixer’s speed back to high. Continue whisking for about 5 minutes until the mixture becomes stiff, glossy, and shiny. This beautiful meringue is the foundation of your Mini Tropical Pavlovas, promising a wonderful texture.

Step 4: Shape the Meringues
Using a spoon or a piping bag, dollop eight rounds of the meringue mixture onto the prepared baking trays. Create little nests by making slight indentations in the centers. Once formed, reduce the oven temperature to 120°C (250°F) and bake the pavlovas for about 40 minutes until they are crisp and lightly golden on the outside, with a soft center.

Step 5: Cool in the Oven
After baking, turn off the oven and crack the door slightly to let your Mini Tropical Pavlovas cool completely inside. This step is essential, as it helps prevent cracking due to sudden temperature changes. Let them sit for at least an hour while you prepare the toppings.

Step 6: Prepare the White Chocolate Sauce
To make the creamy white chocolate sauce, combine 100 grams of white chocolate and 100 milliliters of cream in a heatproof bowl. Microwave the mixture for about 60 seconds until just melted. Let it sit for 2 minutes to allow the chocolate to soften, then stir until it becomes smooth and velvety. Chill the sauce until you’re ready to serve.

Step 7: Whip the Cream and Serve
Once the pavlovas are cool, whip the cream until soft peaks form. Slice your tropical fruits: mango and strawberries, or any other combination you like. Top each pavlova with a generous dollop of whipped cream, layer on the fruit, drizzle with the prepared white chocolate sauce, and finish with a light dusting of icing sugar for that special touch.

Make Ahead Options

These Mini Tropical Pavlovas are perfect for meal prep, allowing you to delight your guests without the last-minute rush! You can prepare the meringue base up to 4 days in advance and store them in an airtight container at room temperature to maintain their crispiness. Additionally, you can make the white chocolate sauce a day ahead; simply refrigerate it until you’re ready to serve. When it’s time to enjoy your pavlovas, whip the cream and slice the fruits just before serving to ensure freshness. This way, you’ll create impressive, restaurant-quality desserts with minimal effort, leaving you more time to celebrate!

Mini Tropical Pavlovas Variations & Substitutions

Feel free to get creative and make these Mini Tropical Pavlovas truly your own with these tempting twists!

  • Dairy-Free: Substitute whipped cream with coconut cream for a rich, non-dairy alternative that brings a hint of tropical flavor.

  • Dark Chocolate: Swap the white chocolate for dark chocolate in the sauce to add a touch of richness and depth that pairs beautifully with strawberries.

  • Different Fruits: Instead of mango, try using pineapple, papaya, or even a medley of berries for a vibrant and colorful topping selection.

  • Nutty Crunch: Add crushed nuts such as pistachios or almonds on top for a delightful crunch that complements the creamy pavlova.

  • Flavor Infusions: Enhance the whipped cream with a splash of rum or coconut extract to elevate the flavor profile—perfect for a festive touch!

  • Zesty Citrus: Drizzle with a citrus glaze made from lime or orange juice mixed with a bit of sugar to add a refreshing zing that pairs marvelously with sweet fruit.

  • Mini Pavlovas: Shape the meringue into bite-sized mini pavlovas for a fun, shareable dessert that’s perfect for gatherings or children’s parties.

No matter how you decide to personalize your pavlovas, they’re sure to bring joy to your table. Want more inspiration? Don’t forget to check out our tips on baking basics to up your dessert game and ensure perfect results every time!

Expert Tips for Mini Tropical Pavlovas

  • Room Temperature Eggs: Ensure your egg whites are at room temperature for the best volume when whisking, resulting in fluffy meringues.
  • Sifting Sugar: Always sift the caster sugar before adding it to the egg whites to prevent any graininess in your meringue.
  • Avoid Humidity: Meringues are sensitive to humidity. Try to make these Mini Tropical Pavlovas on a dry day for the best texture.
  • Cooling Time: Allow pavlovas to cool in the oven. This gradual cooling process prevents cracks and maintains their lovely shape.
  • Customize Toppings: Don’t hesitate to swap out the toppings! Experiment with seasonal fruits or different sauces for a delightful twist.
  • Icing Sugar Finish: Dust with icing sugar just before serving. This adds a beautiful touch and enhances the visual appeal without getting soggy.

What to Serve with Mini Tropical Pavlovas

Imagine a refreshing summer meal bursting with flavors that perfectly complement your sweet pavlovas.

  • Coconut Water: Hydrating with a hint of sweetness, coconut water enhances the tropical theme beautifully.
  • Fresh Fruit Salad: Bright, colorful fruits like pineapple, kiwi, and berries provide a fresh, zesty contrast to the pavlovas.
  • Mango Salsa: A vibrant mix of diced mango, red onion, and lime adds a tangy twist that pairs wonderfully with the meringue’s sweetness.
  • Grilled Shrimp Skewers: Lightly spiced, perfectly grilled shrimp offer a savory balance, making your meal feel festive and hearty.
  • Chilled White Wine: A crisp, fruity white wine or sparkling wine enhances the fruity flavors and adds a celebratory touch.
  • Lemon Sorbet: Light and refreshing, lemon sorbet clears the palate while echoing the fruity undertones of the pavlovas.
  • Chocolate Drizzle: For the chocolate lovers, a drizzle of dark chocolate over the pavlovas adds a decadent touch of richness.
  • Cucumber Mint Salad: A cool, refreshing salad can counterbalance the sweetness, providing a clean and crisp side option.

How to Store and Freeze Mini Tropical Pavlovas

Room Temperature: Enjoy your Mini Tropical Pavlovas on the day they’re made for the best texture; however, they can sit at room temperature for up to 1 hour.

Fridge: If there's any leftover, store the baked pavlovas in an airtight container in the fridge for up to 3 days. Keep in mind that exposure to moisture can make them lose their crispiness.

Freezer: For longer storage, freeze the baked pavlovas in a single layer in an airtight container for up to 1 month. Let them thaw at room temperature before serving, but expect slight changes in texture.

Reheating: Refrain from reheating pavlovas, as this can compromise their delightful texture. Instead, enjoy them cold, topped with your favorite fruits and sauces for a refreshing treat.

Mini Tropical Pavlovas Recipe FAQs

How do I select the best egg whites for my pavlovas?
Absolutely! For the best results, choose fresh, high-quality eggs, and ensure that the egg whites are at room temperature before whipping. This helps achieve maximum volume and a fluffy texture. Always be sure that no yolks are mixed with the whites, as even a tiny bit of yolk can prevent them from whipping up correctly.

What is the best way to store leftover Mini Tropical Pavlovas?
To keep your Mini Tropical Pavlovas fresh and enjoyable, store them in an airtight container at room temperature for up to 3 days. If you want to preserve them longer, I recommend freezing them. Just ensure they stay in a single layer in a freezer-safe container, where they can be kept for up to 1 month.

Can I freeze Mini Tropical Pavlovas? If so, how?
Very! To freeze your Mini Tropical Pavlovas, let them cool completely after baking. Place them in an airtight container, ensuring they don’t touch each other, and freeze for up to 1 month. When ready to enjoy, simply thaw them at room temperature for about 30 minutes. Keep in mind, while they’ll still taste delicious, you might notice a slight change in texture.

What should I do if my pavlovas crack during baking?
No worries! Cracking can occur for several reasons, often due to rapid temperature changes. Make sure to cool your pavlovas slowly inside the oven after baking. If they do crack, don’t be disheartened! Just add a generous topping of whipped cream and fruits; it will look delightful and taste fabulous!

Are Mini Tropical Pavlovas suitable for people with dietary restrictions?
Absolutely! Mini Tropical Pavlovas are naturally gluten-free and can be adapted for dairy-free diets by using coconut cream instead of whipped cream. If your guests have allergies, just check the toppings carefully, as fruits like mango and strawberries are generally safe, but ensure no additives are included in sauces or other toppings.

How can I enhance the flavors of my Mini Tropical Pavlovas?
For an extra flavor boost, consider infusing your whipped cream with a bit of vanilla or even a swirl of citrus zest. You can also experiment with different sauces and toppings; for instance, add lime juice to your fruits for a zesty kick or switch up the fruits based on what’s in season for freshness and vibrancy!

Mini tropical pavlovas

Mini Tropical Pavlovas: A Refreshing Twist on Classic Dessert

Mini Tropical Pavlovas are a delightful dessert that combines a light, crispy shell with tropical flavors, perfect for gatherings.
Print Recipe Pin Recipe
Prep Time 20 minutes mins
Cook Time 40 minutes mins
Cooling Time 1 hour hr
Total Time 2 hours hrs
Servings: 8 pavlovas
Course: Dessert
Cuisine: Tropical
Calories: 200
Ingredients Equipment Method Nutrition Notes

Ingredients
  

For the Meringue Base
  • 4 whites Eggs At room temperature
  • 250 g Caster Sugar Provides sweetness and stability
  • 1 tsp Vanilla Essence Optional, enhances flavor
  • 1 tsp White Vinegar Helps stabilize the meringue
For the Toppings
  • 300 ml Whipped Cream Dairy-free option: coconut cream
  • 1 piece Mango Sliced, offers a tropical topping
  • 250 g Strawberries Sliced
  • 100 g Passionfruit Pulp Ideal for tart sauce
  • 100 g White Chocolate For creamy sauce; dark chocolate can substitute
  • 100 ml Cream Base for white chocolate sauce
  • 2 Tbsp Icing Sugar For dusting before serving

Equipment

  • Electric mixer
  • Baking trays
  • Baking paper
  • Heatproof bowl
  • Microwave

Method
 

Step-by-Step Instructions
  1. Preheat your oven to 170°C (340°F) using the fan bake setting. Line two baking trays with baking paper.
  2. In a clean, dry electric mixer, whisk the room-temperature egg whites on high speed until stiff peaks form, about 5 minutes.
  3. With the mixer on low, add the vanilla essence and vinegar, then gradually sprinkle in the caster sugar while whisking at high speed for 5 minutes until glossy.
  4. Dollop eight rounds of meringue onto the prepared baking trays, making slight indentations in the centers. Reduce the oven temperature to 120°C (250°F) and bake for 40 minutes.
  5. Turn off the oven and crack the door slightly to cool the pavlovas inside for at least an hour.
  6. Combine 100 grams of white chocolate and 100 milliliters of cream in a heatproof bowl and microwave for about 60 seconds. Stir until smooth and chill until ready to serve.
  7. Once cooled, whip the cream to soft peaks, slice your fruits, and top each pavlova with cream, fruit, chocolate sauce, and a dusting of icing sugar.

Nutrition

Serving: 1pavlovaCalories: 200kcalCarbohydrates: 30gProtein: 3gFat: 8gSaturated Fat: 5gCholesterol: 10mgSodium: 40mgPotassium: 120mgFiber: 1gSugar: 20gVitamin A: 200IUVitamin C: 10mgCalcium: 30mgIron: 0.5mg

Notes

Pavlovas can be made ahead of time for convenience. Enjoy them cold with various toppings.

Tried this recipe?

Let us know how it was!
  • « Previous Page
  • 1
  • …
  • 178
  • 179
  • 180

Welcome!

Hi, I’m Grace, a Sydney-based home cook with a passion for bold flavors and trending ingredients. Whether you’re a busy beginner or a seasoned foodie, you’ll find dishes here that are fresh, fun, and full of flavor.

More about me

Popular Recipes

  • Butter Pecan Cookies
    Irresistibly Soft Butter Pecan Cookies for Cozy Moments
  • Decadent Turtle Bars
    Decadent Turtle Bars: Indulge in Sweet Gooey Perfection
  • Salted Caramel Butter Bars
    Decadent Salted Caramel Butter Bars You Can't Resist
  • Easy Italian Pasta Salad
    Easy Italian Pasta Salad: A Summer Delight to Share

Footer

↑ back to top

About

  • Privacy Policy
  • Disclaimer
  • Terms & Conditions

Newsletter

  • Sign Up! for emails and updates

Contact

  • About me
  • Contact me

Copyright © 2025 TastyTrendIngredients