
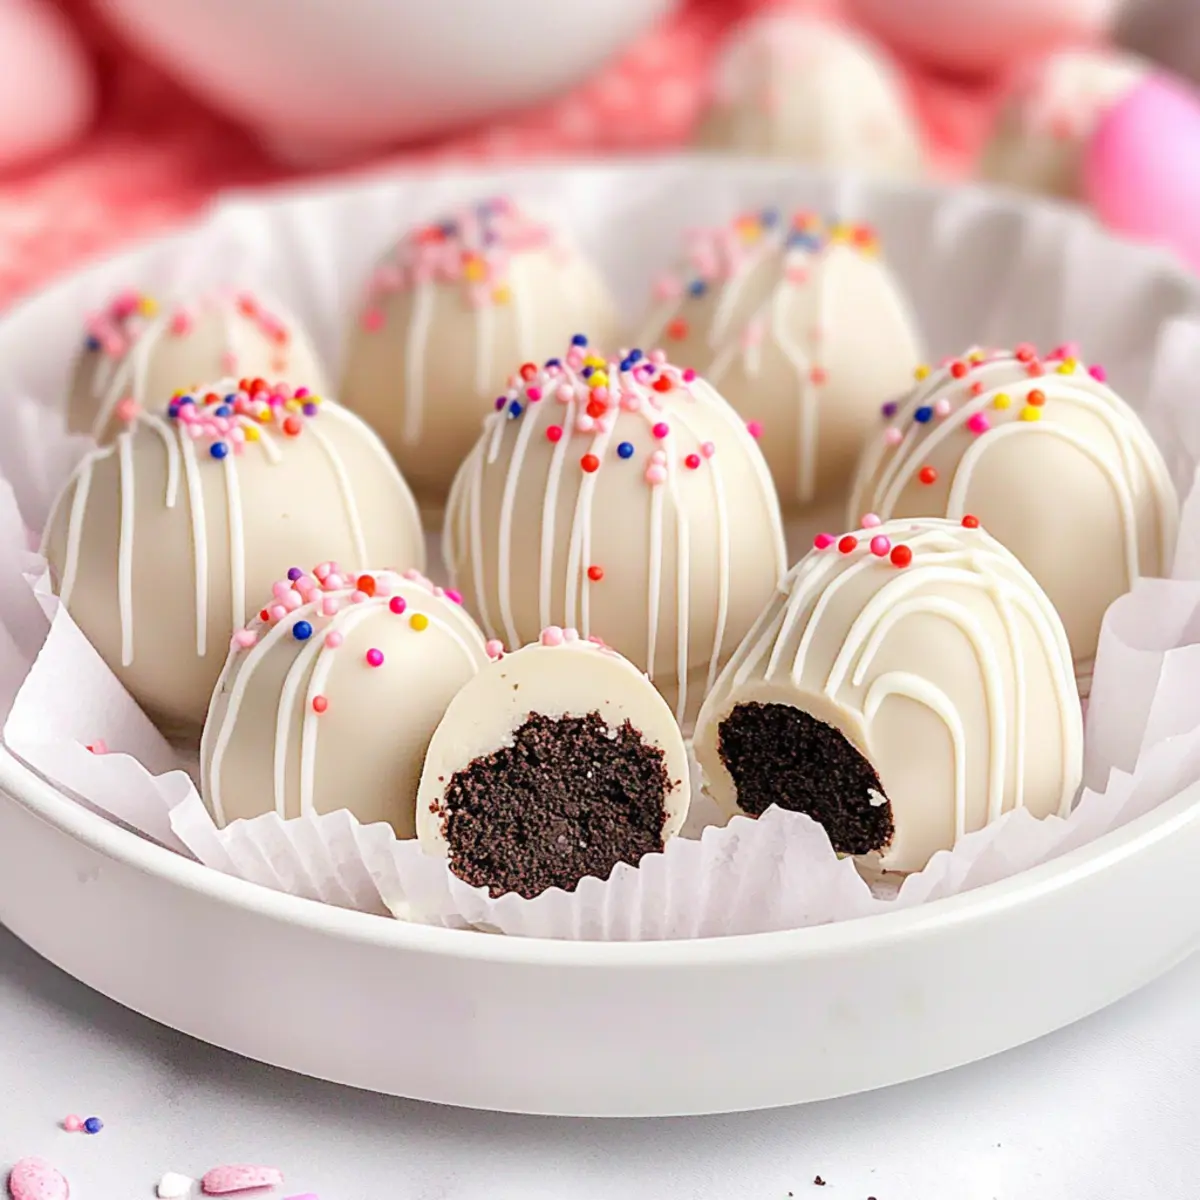
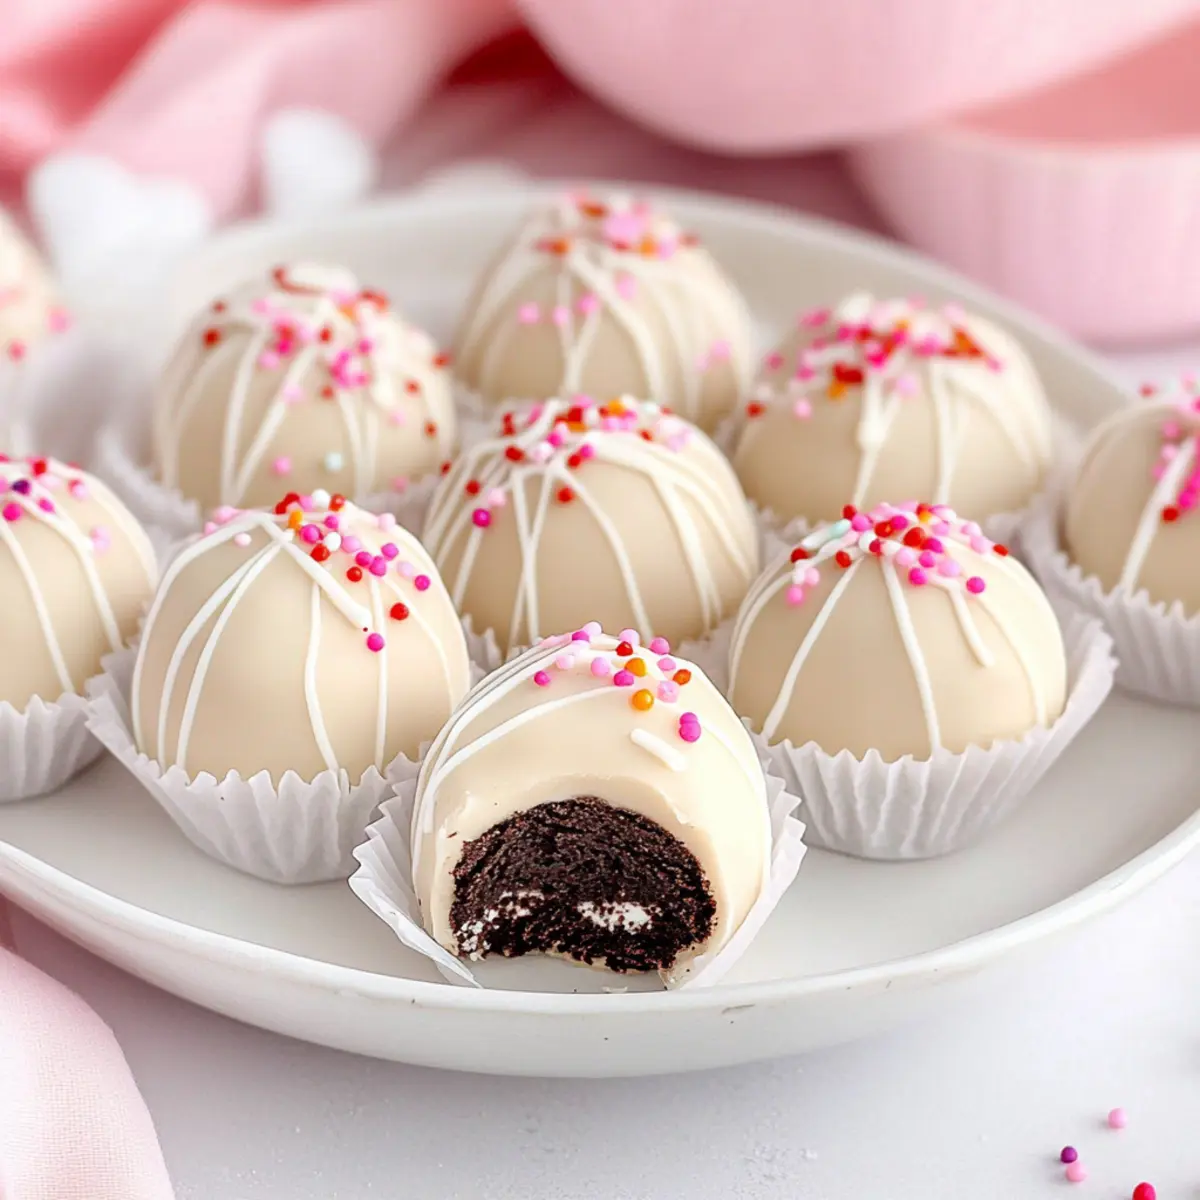
While scrolling through Instagram the other day, I stumbled upon a tantalizing image of truffles that instantly took me back to childhood Valentine’s Days filled with sweet surprises. Today, I’m excited to share my recipe for Creamy No-Bake Valentine’s Day Oreo Truffles, a delightful treat that captures the essence of love in every bite. With an easy preparation method and creamy, cheesecake-like filling, these truffles are perfect for impressing your special someone or simply treating yourself. Not only do they require no baking, but they’re also a fun way to get creative with decorations, making them an enjoyable project for all skill levels. Whether you're planning a romantic dinner or just want to brighten someone’s day, these truffles are bound to be a hit! Ready to dive into a world of rich flavors and festive fun? Let’s get started!
Why Are These Truffles a Must-Try?
Creamy, Dreamy Texture: Each bite offers a fudgy center that melts in your mouth, reminiscent of classic cheesecake.
No Bake Needed: With no baking required, these truffles are super easy to whip up, making them perfect for busy home cooks.
Endless Customization: Experiment with various Oreo flavors or chocolate coatings for a personal twist!
Perfect for Sharing: Whether for Valentine’s Day or just because, they’ll impress everyone and are easy to gift.
Make-Ahead Magic: Prep them in advance and store in the fridge for a stress-free dessert option on special occasions.
Try pairing them with a cup of coffee or surprising the kids with a sweet treat after dinner. They're just as delightful as my Cinnamon Roll Muffins or a cozy plate of Shakshuka Savor Bold.
Valentine’s Day Truffles Ingredients
For the Truffle Center
• Vanilla Oreos – Provides sweetness and a rich, cookie base for the truffle center; feel free to use any Oreo flavor for fun variations.
• Cream Cheese – Adds creaminess and structure, giving a delightful cheesecake-like texture; ensure it's softened for easy blending.
For the Chocolate Coating
• White Chocolate Melts – Creates a sweet and glossy finish on each truffle; dark chocolate can be a delicious alternative if preferred.
• Red Oil-Based Food Coloring – Optional; adds a festive touch to the melted white chocolate for that perfect Valentine’s Day vibe.
For Decoration
• Sprinkles – Optional; perfect for adding a colorful touch, sprinkle them on while the chocolate is still wet.
These Valentine’s Day Truffles are an indulgent treat that’s sure to impress!
Step‑by‑Step Instructions for Creamy No-Bake Valentine’s Day Oreo Truffles
Step 1: Prepare the Baking Sheet
Begin by lining a sheet pan with parchment paper to ensure your truffles don't stick. This will be where your Chocolate Coated Valentine’s Day Truffles will rest as they set. Make sure the sheet is ready before you move on to mixing the filling.
Step 2: Crush the Oreos
In a food processor, add your Vanilla Oreos and pulse them into fine crumbs. This should take about 30 seconds, using 10-second increments to avoid overprocessing. Once you achieve a sandy texture, your base is ready for the creamy filling.
Step 3: Mix the Filling
In a mixing bowl, combine the Oreo crumbs with softened cream cheese. Using your hands or a spatula, mix until the ingredients are smoothly blended and form a dough-like consistency. This step is crucial for creating the cheesecake-like texture of your Valentine’s Day Truffles, so make sure there are no dry spots.
Step 4: Form the Truffles
Using a 1.5-tablespoon cookie scoop, portion out the mixture and roll it into small balls. Place each ball on your prepared parchment-lined sheet. Once all the balls are formed, place them in the freezer for 30 minutes or refrigerate for 1 hour to firm up; this will help them hold shape when dipped.
Step 5: Melt the Chocolate
In a microwave-safe bowl, add the white chocolate melts. Microwave in 20-second intervals, stirring between each burst until fully melted and smooth. Alternatively, you can melt the chocolate using a double boiler. Keep the melted chocolate warm but not too hot, to avoid burning.
Step 6: Dip the Truffles
Once the truffles are firm, take them out of the freezer. Dip each truffle in the melted white chocolate using a fork, ensuring it's fully covered. Gently tap the fork on the edge of the bowl to remove excess chocolate, allowing for a nice, even coating on your Valentine’s Day Truffles.
Step 7: Add Decorations
If you want to add a drizzle of colored chocolate or sprinkles, chill the dipped truffles for about 10 minutes to allow the coating to set slightly. Once cooled, drizzle extra melted chocolate or sprinkle decorations while the coating is still wet for the cutest presentation.
Step 8: Let the Chocolate Set
After decorating, allow the truffles to set at room temperature for approximately 2 hours. This will ensure the chocolate coating hardens completely, making them ready for gifting or serving. Store any leftovers in an airtight container in the fridge and enjoy these delightful Valentine’s Day Truffles!

What to Serve with Creamy No-Bake Valentine’s Day Oreo Truffles
Indulge in a delightful array of accompaniments that will elevate your Valentine’s Day celebration!
-
Fresh Strawberries: Their natural sweetness and tangy flavor make a perfect contrast to the rich truffles, bringing a burst of freshness to each bite.
-
Chocolate-Covered Pretzels: Combining salty and sweet, these crunchy treats add a fun texture that complements the creamy truffles beautifully.
-
Vanilla Ice Cream: A scoop of smooth vanilla ice cream adds a cool, creamy element, perfect for a decadent dessert experience.
-
Coffee or Espresso: The rich, bold flavors of coffee create a delightful balance to the sweetness of the truffles, making it an ideal pairing for an after-dinner treat.
-
Sparkling Wine: Bubbly adds an air of celebration and lightness to your dessert experience, enhancing the overall festive mood.
-
Chocolate Mousse: For chocolate lovers, pairing with a light, airy mousse creates a layered dessert that satisfies every craving.
-
Red Velvet Cake Slices: Keep the theme going with this classic dessert; the moist, velvety cake harmonizes beautifully with these truffles.
Each of these pairings brings its own unique flavor, texture, and charm that complements the creamy allure of your Valentine’s Day truffles, making your occasion even more special!
How to Store and Freeze Valentine’s Day Truffles
Fridge: Place the truffles in an airtight container and store in the fridge for up to one week. This keeps them fresh and delicious for your special occasions.
Freezer: If you want to enjoy these treats later, freeze the truffles in a single layer on a baking sheet for about 1-2 hours, then transfer to an airtight container. They can last up to 3 months in the freezer!
Thawing: To thaw frozen Valentine’s Day Truffles, simply remove them from the freezer and let them sit at room temperature for about 30 minutes before enjoying.
Reheating: There's no need to reheat the truffles; enjoy them chilled for the best flavor and texture!
Valentine’s Day Truffles Variations & Substitutions
Feel free to unleash your creativity with these delightful treats and explore fun twists that are sure to intrigue your taste buds!
- Gluten-Free: Use gluten-free Oreos to enjoy these truffles without sacrificing flavor or texture. It’s a simple swap that ensures everyone can indulge!
- Nutty Delight: Incorporate finely chopped nuts into your truffle filling for added crunch and flavor. Chopped almonds or hazelnuts work beautifully, giving a lovely earthy taste.
- Chocolate Coating Varieties: Experiment with dark or milk chocolate for the coating to delight different chocolate lovers. Each option offers a unique richness that complements the creamy filling.
- Flavor Variations: Swap Vanilla Oreos with flavors like mint or peanut butter for a fun twist. This twist will create a surprising and delightful taste experience!
- Spiced Up: Add a pinch of cinnamon or a splash of vanilla extract to the filling for an extra depth of flavor. It’s a subtle change that will elevate your truffles to the next level.
- Fruity Touch: Mix in crushed freeze-dried strawberries or raspberries for a fruity burst in the truffles. This will give them a refreshing tanginess that pairs well with the sweetness!
- Heat It Up: For a spicy kick, blend some cayenne pepper or chili powder into the filling. It’s a daring twist that will tantalize adventurous palates!
- Decorate Differently: Instead of sprinkles, try using edible glitter or a drizzle of caramel for a show-stopping presentation. These finishing touches will make your truffles truly special!
Feeling inspired? Just like my scrumptious Eggnog Cookies, these customizable truffles can be tailored to fit every occasion. Enjoy swirling your culinary magic!
Expert Tips for Valentine’s Day Truffles
• Chill for Better Dipping: Freezing the truffles for 30 minutes before dipping helps them retain their shape and ensures a neat coating.
• Soften Cream Cheese: Make sure the cream cheese is at room temperature, as this makes mixing with the Oreo crumbs easier and gives the truffles that creamy texture.
• Choose Quality Chocolate: Use high-quality white chocolate melts for a smooth and tasty coating. Avoid chocolate chips, as they may not melt as smoothly.
• Avoid Overmixing: When combining the ingredients, mix just until they are combined to avoid a dense texture; overworking can lead to heavy truffles.
• Decorate While Wet: For sprinkles to stick effectively, apply them immediately after dipping the truffles in chocolate, before the coating sets.
These tips will help you create the perfect Valentine’s Day Truffles that are sure to impress!
Make Ahead Options
These Creamy No-Bake Valentine’s Day Truffles are perfect for busy home cooks looking to save time! You can prepare the truffle filling up to 24 hours in advance — simply follow all the steps up to forming the balls, then refrigerate the mixture. Once you're ready to serve, roll the mixture into balls and freeze them for an hour before dipping in chocolate. To maintain quality, store the formed truffles in an airtight container and keep them chilled until ready to coat. After dipping, let them set for about 2 hours; they’ll be just as delightful as if made fresh!

Valentine’s Day Truffles Recipe FAQs
What type of Oreos should I use for the truffles?
Absolutely! While Vanilla Oreos are a classic choice for these Valentine’s Day Truffles, feel free to experiment with any flavor of Oreos you love. From chocolate to peanut butter or even seasonal varieties, the different flavors can create delightful twists that personalize your truffles!
How should I store my truffles and how long do they last?
It's super easy! Simply place your truffles in an airtight container and store them in the fridge for up to one week. If you want to make them last longer, they can be frozen for up to 3 months, which is great for planning ahead!
Can I freeze Valentine’s Day Truffles? How do I do it properly?
Certainly! To freeze your Valentine’s Day Truffles, place them in a single layer on a baking sheet and freeze for about 1-2 hours until firm. Then, transfer them to an airtight container or freezer bag, separating layers with parchment paper to prevent sticking. When you're ready to enjoy them, just thaw them at room temperature for about 30 minutes before diving in!
What should I do if my chocolate coating isn’t smooth?
No worries! If your chocolate isn't smooth, it might be too hot or not tempered correctly. To fix it, try adding a tablespoon of vegetable oil or shortening to the melted chocolate, stirring until it emulsifies. If it starts to seize, lower the heat and add a small amount of heavy cream while mixing gently. This will help achieve that glossy finish you desire!
Are these truffles safe for people with dairy allergies?
While these Valentine’s Day Truffles do contain cream cheese and white chocolate, you can make them dairy-free by substituting with non-dairy cream cheese and dairy-free chocolate. Just be sure to check labels for hidden dairy ingredients, ensuring your sweet treats can be enjoyed by everyone!
Can I decorate the truffles in different colors or styles?
Very much so! Get creative with your decorations! You can use different colors of oil-based food coloring to tint the white chocolate or swap in festive sprinkles, chopped nuts, or even drizzles of dark or milk chocolate for a personal touch. The more, the merrier when it comes to customizing your Valentine’s Day Truffles!
Decadent No-Bake Valentine’s Day Truffles You'll Love
Ingredients
Equipment
Method
- Prepare the Baking Sheet by lining a sheet pan with parchment paper.
- Crush the Oreos in a food processor until fine crumbs are formed.
- Mix the crushed Oreos with softened cream cheese until well combined.
- Form the mixture into small balls and place on the prepared sheet. Freeze for 30 minutes.
- Melt the white chocolate in a microwave-safe bowl, stirring until smooth.
- Dip each truffle in the melted chocolate, ensuring full coverage.
- Add sprinkles or drizzle chocolate while the coating is still wet.
- Let the truffles set at room temperature for about 2 hours.


Leave a Reply