
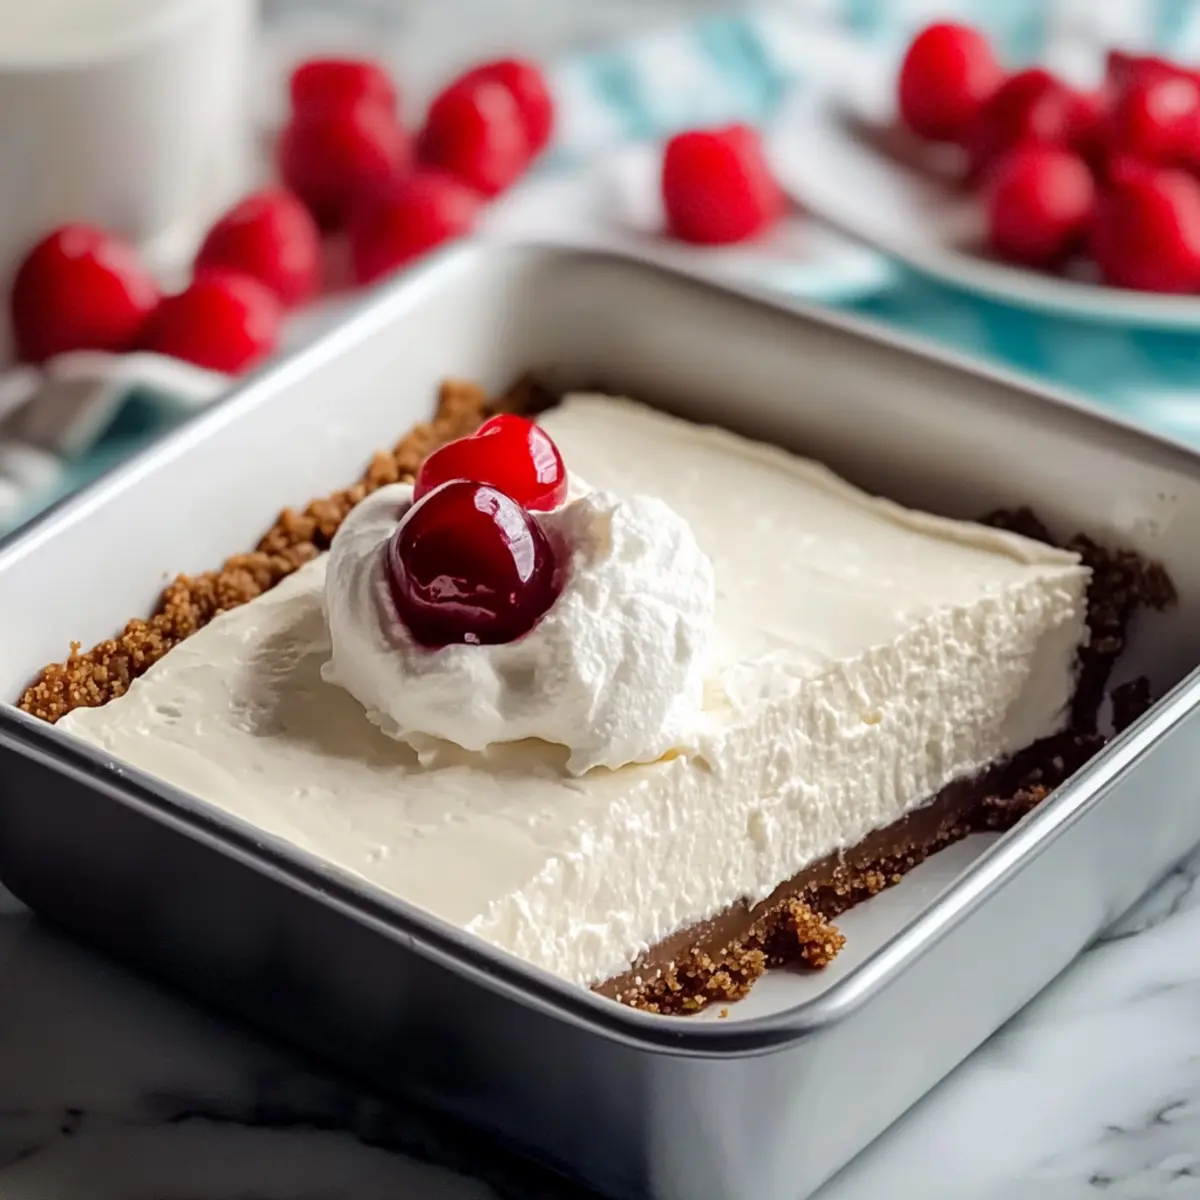
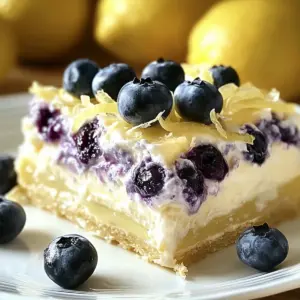
As I shuffled through my kitchen, an unexpected craving for something light yet indulgent tugged at my heart. Enter the Tasty Greek Yogurt No Bake Cheesecake—a refreshing solution that meets both cravings without demanding hours in the kitchen. This easy, no-bake dessert features a creamy filling crafted from Greek yogurt and cream cheese, perfectly sweetened with honey and brightened with a hint of lemon. One of the best parts? It’s ready to serve in just a few short hours! Not only is this cheesecake a crowd-pleaser, but it also provides a healthier twist to your typical dessert, making it perfect for warm summer evenings and gatherings alike. Are you ready to impress your loved ones with a delightful slice of heaven?
Why is this cheesecake a must-try?
Creamy, Dreamy Texture: The combination of Greek yogurt and cream cheese creates a silky smooth filling that melts in your mouth, offering the perfect balance of creaminess and tanginess.
No Baking Required: Perfect for hot days, this no-bake cheesecake simplifies dessert prep, freeing up your time to enjoy with family and friends.
Quick and Convenient: With just a few hours in the fridge, you’ll have a refreshing treat ready to impress everyone at your gathering without the need for extensive cooking.
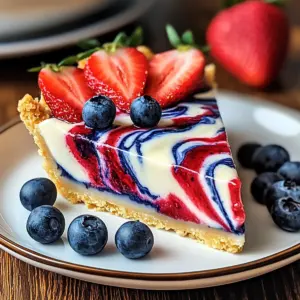
Versatile Flavor Profile: Whether served plain or topped with fresh berries or a drizzle of berry compote, this dessert shines in any topping combination you choose.
For another delicious treat, you might also want to check out these Cheesy Zucchini Bake or Matcha Baked Doughnuts. You can never go wrong with delightful homemade desserts!
Tasty Greek Yogurt No Bake Cheesecake Ingredients
• Get ready to whip up this luscious dessert!
For the Crust
- Graham Cracker Crumbs – Base for crust; provides structure and texture. Use Honey Maid for best flavor.
- Coconut Oil – Binder for crust; adds richness. Substitute with unsalted butter if preferred.
- Sugar – Sweetens the crust; enhances flavors. Brown sugar can work as a substitute.
For the Filling
- Cream Cheese – Main filling ingredient; adds creaminess and tang. Ensure it is fully softened for a smooth texture.
- Greek Yogurt – Creates a light, tangy filling. Use full-fat for the best richness; Fage 5% is preferred.
- Honey – Natural sweetener that complements the yogurt. Maple syrup can be used for a vegan option.
- Lemon Juice – Adds acidity and brightness to balance the sweetness. Fresh lemon juice is recommended for best flavor.
- Vanilla Extract – Enhances overall flavor profile. Pure vanilla extract is preferred over imitation.
- Salt – Balances sweetness and enhances flavor.
For Toppings
- Whipped Cream – Topping for serving; adds lightness and sweetness. Use freshly whipped for best results.
- Maraschino Cherries – Garnish for a classic touch.
Step‑by‑Step Instructions for Tasty Greek Yogurt No Bake Cheesecake
Step 1: Prepare the Crust
Start by combining 1 and ½ cups of graham cracker crumbs, ⅓ cup of melted coconut oil, and ¼ cup of sugar in a mixing bowl. Stir until the mixture resembles wet sand. Firmly press this crust mixture into the bottom of a 9-inch springform pan using a measuring cup or your fingers, ensuring an even layer. Refrigerate for at least 15 minutes while you prepare the filling.
Step 2: Make the Filling
In a large bowl, beat 8 ounces of softened cream cheese with an electric mixer on medium speed until smooth and creamy, about 2 minutes. Gradually add 2 cups of Greek yogurt, ⅓ cup honey, ¼ cup of fresh lemon juice, 1 teaspoon of vanilla extract, and a pinch of salt. Continue mixing until the filling is completely smooth, which should take another 2-3 minutes.
Step 3: Assemble the Cheesecake
Once your filling is ready, pour it over the chilled crust in the springform pan. Use a spatula to spread the filling evenly across the surface, ensuring it reaches the edges. Smooth the top for an attractive finish, which will help it look professionally made.
Step 4: Chill
Cover the cheesecake with plastic wrap and refrigerator it for at least 2 hours, but ideally overnight. Chilling will firm up the cheesecake and enhance its flavor, so be patient! You’ll know it’s ready when the filling is set but still creamy to the touch.
Step 5: Serve
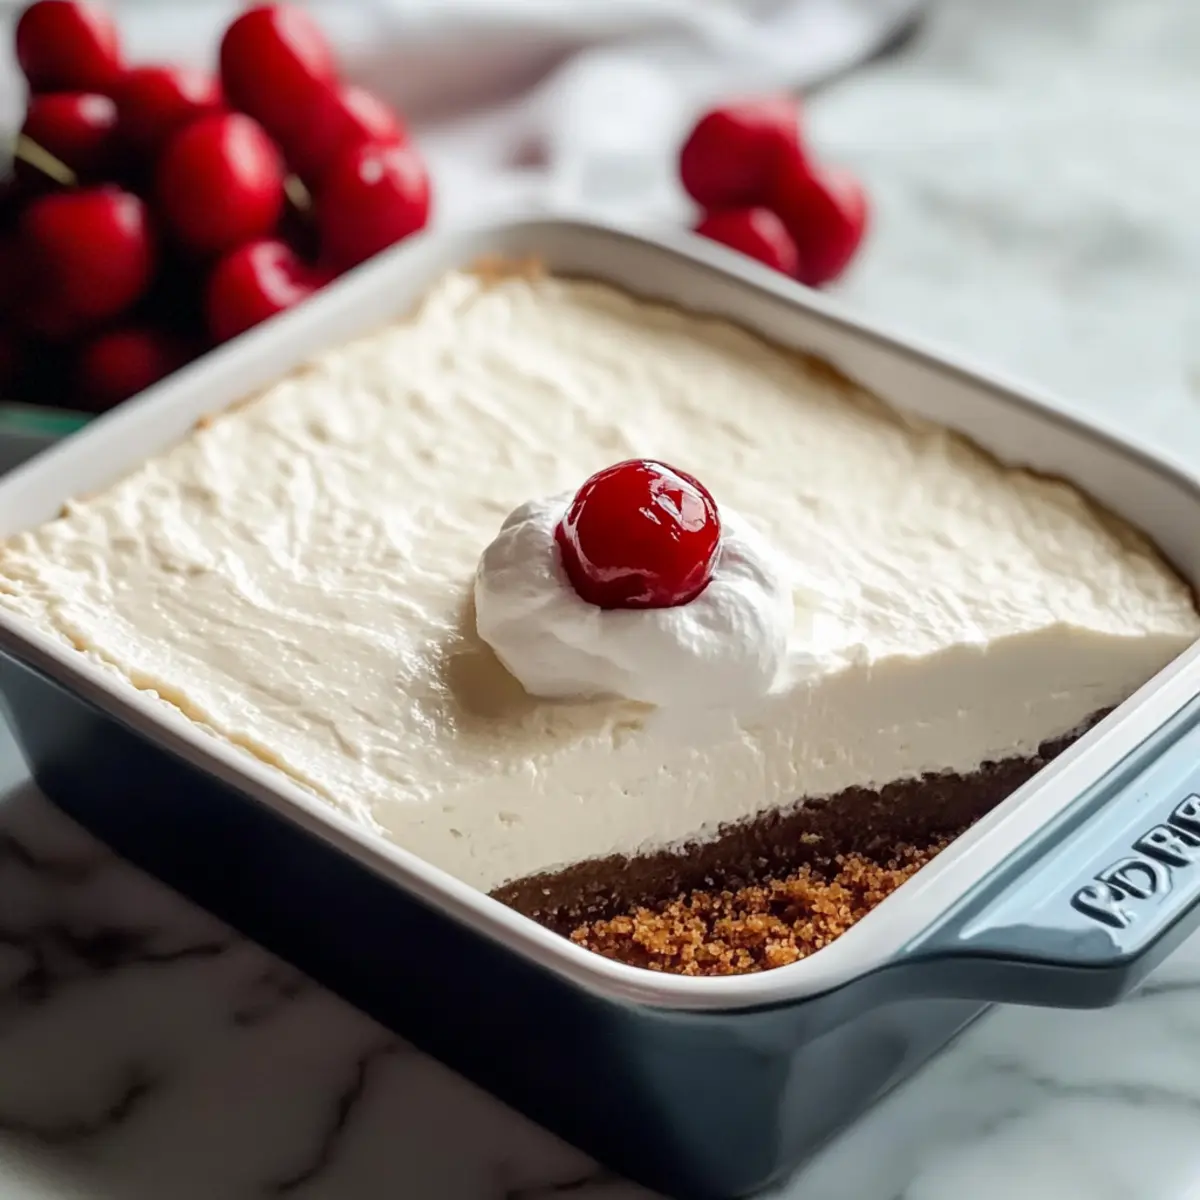
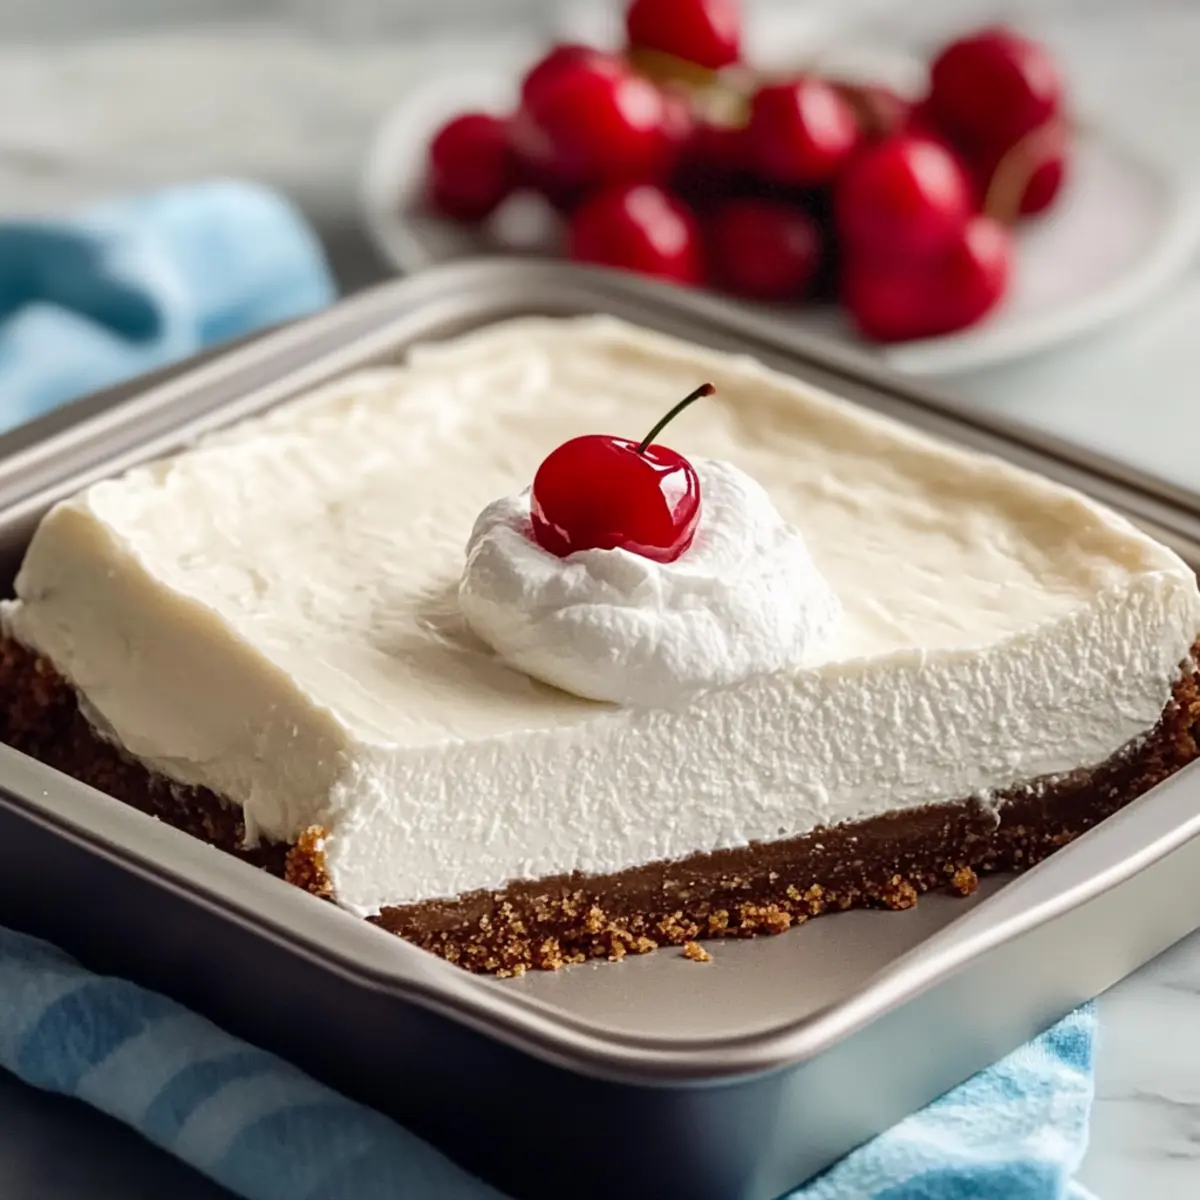
When you’re ready to serve your Tasty Greek Yogurt No Bake Cheesecake, remove it from the fridge. Run a knife around the edges of the pan to loosen it, then carefully remove the springform ring. Top with freshly whipped cream and maraschino cherries to add a festive touch. Slice and enjoy immediately for the best taste!
Tasty Greek Yogurt No Bake Cheesecake Variations
Feel free to get creative with your cheesecake and make it your own delightfully unique treat!
- Mascarpone Swap: Replace Greek yogurt with mascarpone for a richer, creamier cheesecake experience that indulges the senses.
- Fruit Fusion: Blend in fresh fruit puree like strawberry or raspberry into the filling for a refreshing burst of flavor that complements the tanginess.
- Cocoa Twist: Stir in cocoa powder to the filling for a lovely chocolate twist, marrying the tang of yogurt with chocolatey richness.
- Nutty Crunch: Add crushed nuts like almonds or walnuts to the crust for an extra layer of texture and a nutty flavor that contrasts beautifully with the creaminess.
- Vegan Option: Swap out yogurt for coconut yogurt and use a plant-based cream cheese combined with maple syrup for a delicious vegan version.
- Citrusy Burst: Experiment with lime juice in place of lemon juice for a zesty flavor twist that brightens up each bite.
- Herbal Touch: Infuse fresh herbs, such as mint or basil, into the filling for an unexpected flavor combination that adds freshness and depth.
- Spice it Up: Incorporate spices like cinnamon or cardamom for a warm flavor profile that can take the cheesecake to an entirely new culinary level.
For another delightful treat, don’t miss out on the Cheesy Zucchini Bake or try the Matcha Baked Doughnuts—both are sure to impress your guests!
Make Ahead Options
These Tasty Greek Yogurt No Bake Cheesecake preparations are perfect for busy home cooks looking to save time! You can prepare the crust up to 24 hours in advance by pressing it into the springform pan and refrigerating it tightly covered. The filling can also be made up to 3 days ahead; simply mix until smooth and store it in an airtight container in the fridge. When you're ready to serve, pour the filling over the crust, allowing it to set in the refrigerator for at least 2 hours or ideally overnight for best results. To maintain its quality, refrigerate any leftovers promptly and top with whipped cream and cherries just before serving to keep everything fresh and delicious!
Storage Tips for Tasty Greek Yogurt No Bake Cheesecake
Fridge: Store the cheesecake tightly covered in plastic wrap or an airtight container for up to 5 days. The flavors will deepen and improve overnight, making it even more delightful!
Freezer: For longer storage, wrap the cheesecake in plastic wrap and then in aluminum foil to protect it from freezer burn. It can be frozen for up to 2 months; just thaw in the fridge before serving.
Reheating: This cheesecake is best served cold straight from the fridge. If you have any leftovers, simply slice and enjoy—no reheating needed for this creamy treat!
Serving Tips: Consider topping the cheesecake with fresh whipped cream and cherries just before serving to maintain freshness and visual appeal.
What to Serve with Tasty Greek Yogurt No Bake Cheesecake
As you prepare to serve this delightful dessert, consider pairing it with complementary sides that will elevate your dining experience.
-
Fresh Berries: Bursting with flavor, berries like strawberries and blueberries add a vibrant, sweet-tart contrast to the creamy cheesecake.
-
Berry Compote: A warm drizzle of berry compote enhances sweetness while providing a lovely swirl of color on your plate.
-
Light Salad: A refreshing arugula salad with citrus vinaigrette balances the richness of the cheesecake, making each bite feel lighter.
-
Crushed Nuts: Chopped pistachios or almonds sprinkled on top adds an inviting crunch and a nutty flavor to each creamy slice.
-
Iced Coffee: A chilled cup of coffee offers a delightful contrast, with notes of roasted flavor that pair perfectly with the lemony cheesecake.
-
Lemon Sorbet: For a refreshing palate cleanser, a scoop of lemon sorbet adds a zesty touch that keeps the flavor profile bright.
-
Sparkling Water: A bubbly drink helps cleanse the palate, making it a refreshing option that enhances the cheesecake's lightness.
-
Chocolate Drizzle: A delicate ribbon of melted chocolate on top can enhance indulgence, creating a decadent flavor combination with the tangy cheesecake.
Expert Tips for Tasty Greek Yogurt No Bake Cheesecake
-
Chill Longer for Best Results: Allow your cheesecake to chill for at least 4 hours, or even overnight, to achieve the perfect firm texture.
-
Avoid Lumps: Make sure your cream cheese is at room temperature before mixing. This helps create a smooth filling without lumps, making your Tasty Greek Yogurt No Bake Cheesecake truly indulgent.
-
Pack the Crust: Firmly pack the graham cracker crust into the pan; otherwise, it may crumble when sliced. Use a measuring cup for even pressure.
-
Top Just Before Serving: Add whipped cream and maraschino cherries right before serving to keep them fresh and prevent them from wilting.
-
Taste as You Go: Adjust sweetness by adding more honey if desired, keeping in mind the overall balance of flavors in your cheesecake.
Tasty Greek Yogurt No Bake Cheesecake Recipe FAQs
How do I choose the right Greek yogurt?
Absolutely! For the most luxurious and creamy texture, I recommend using full-fat Greek yogurt, like Fage 5%. Full-fat yogurt will give your cheesecake that rich taste and lovely mouthfeel. If you prefer a lighter option, low-fat Greek yogurt can still work, but the cheesiness might not be as prominent.
How long can I store the cheesecake in the fridge?
Very! You can keep your Tasty Greek Yogurt No Bake Cheesecake tightly covered in plastic wrap or an airtight container for up to 5 days. The flavors actually deepen as it sits, making the next-day slice even more delicious and enjoyable for everyone!
Can I freeze this cheesecake?
Yes, indeed! To freeze your cheesecake, wrap it tightly in plastic wrap and then cover it with aluminum foil to prevent freezer burn. It can be frozen for up to 2 months. When you're ready to serve, simply transfer it to the refrigerator to thaw overnight.
Why is my cheesecake turning out lumpy?
Nothing to worry about! Lumps often come from using cold cream cheese. Always allow your cream cheese to reach room temperature before mixing. Once softened, beat it vigorously until smooth before gradually adding the Greek yogurt and other ingredients. This will give you the creamy filling you’re aiming for!
Are there any dietary considerations I should keep in mind?
The more the merrier! This cheesecake can be made suitable for many dietary preferences. For vegan diets, substitute the cream cheese with a dairy-free cream cheese alternative and replace honey with maple syrup. Additionally, always check for allergies to ensure everyone can enjoy a slice without concerns.
How do I prevent a soggy crust?
Great question! To keep the crust from becoming soggy, firmly pack the graham cracker mixture into the base of the pan. Popping it in the refrigerator while you prepare the filling helps to set it, and consider adding a thin layer of melted chocolate before you pour in the filling for extra protection and a delightful flavor twist!

Leave a Reply