
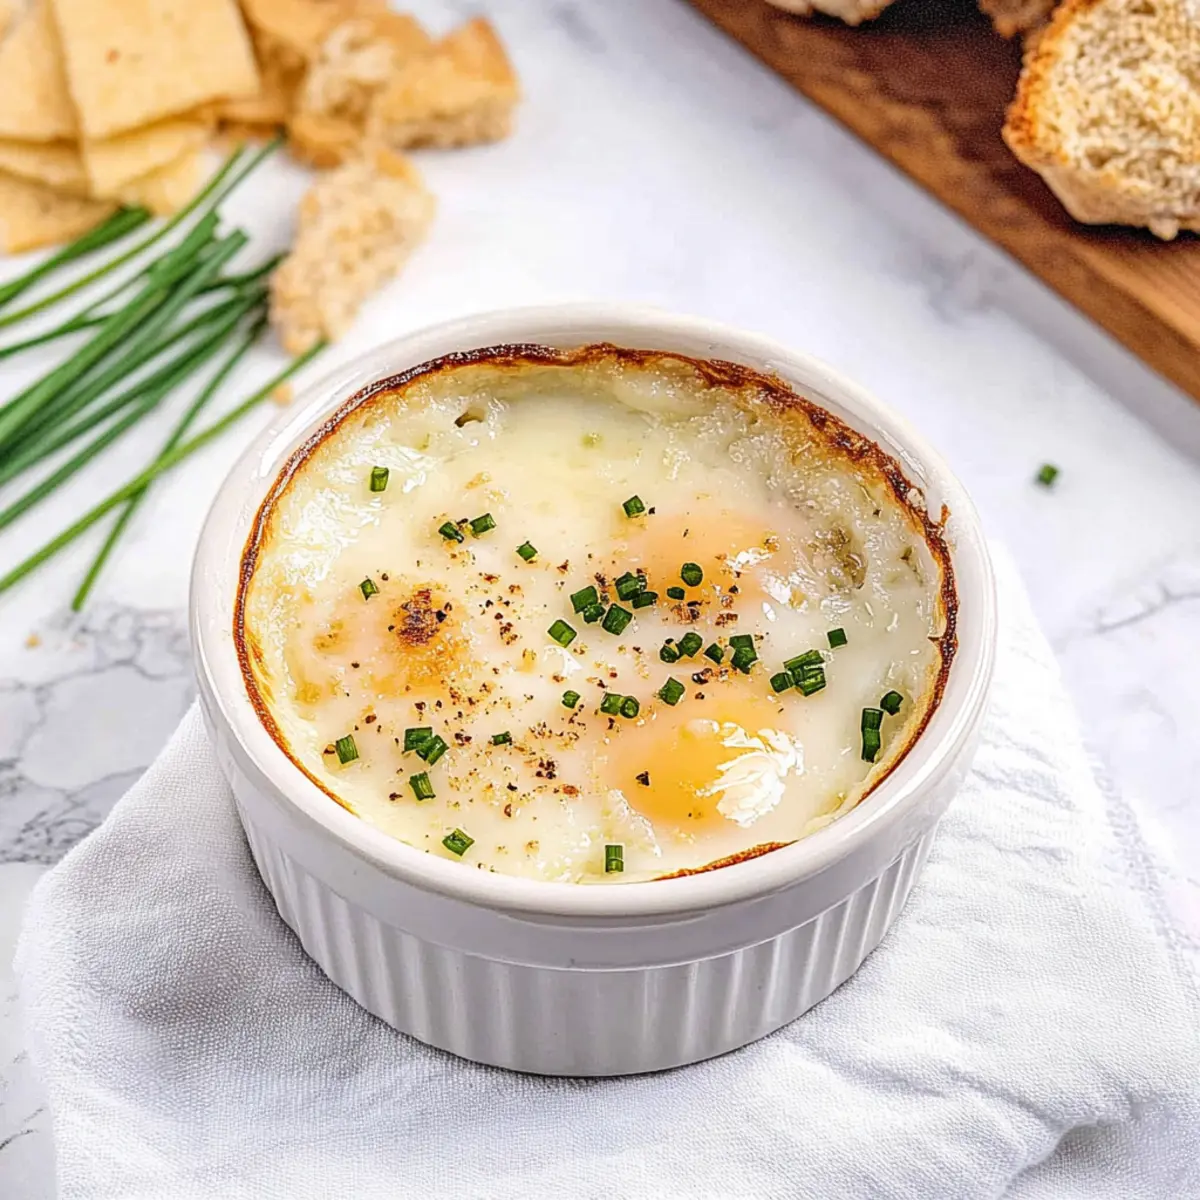
The aroma of freshly baked eggs wafts through the kitchen, inviting everyone to gather for a cozy brunch. That's how I felt the first time I made these Simple & Elegant Shirred Eggs. This delightful dish features perfectly runny yolks nestled within tender, silky whites, all baked to divine perfection. Not only is this recipe incredibly easy to prepare, but it also makes a stunning centerpiece for any gathering. With just a handful of ingredients and a few minutes of your time, you can serve a gourmet breakfast that dazzles without the fuss. Plus, for those who prefer dairy-free options, I've included simple substitutions to ensure everyone can enjoy this classic French favorite. Are you ready to elevate your brunch game and impress your friends with these delectable shirred eggs? Let’s get started!
Why are Shirred Eggs a Must-Try?
Simplicity at its Finest: With only a few ingredients and minimal prep work, this recipe is perfect for those who want gourmet brunch at home without the hassle.
Decadent Flavor: The combination of rich cream and fresh eggs creates a dish that's both luxurious and satisfying, making it a crowd-pleaser every time.
Versatile Additions: Feel free to customize your shirred eggs with toppings like spinach or smoked salmon for an extra flavor boost—check out these tips for adorning your eggs.
Dairy-Free Adaptations: This recipe is adaptable for those with dietary preferences. Substituting coconut cream makes it completely dairy-free without sacrificing taste!
Impressive Presentation: Serve in beautiful ramekins for that elegant touch, making your brunch feel special and sophisticated. Enjoy your shirred eggs alongside a crisp salad or some toasted bread for the perfect pairing.
Shirred Eggs Ingredients
• To create these delightful shirred eggs, gather a few simple ingredients to enhance the flavor and texture of this classic dish.
For the Base
- Unsalted Butter – Adds richness and helps grease the ramekin for easy release; swap with cooking spray for a lighter option.
- Heavy Cream – Enhances creaminess and texture, creating a luxurious mouthfeel; use high-fat oat milk for a dairy-free version.
- Large Eggs – The star of the dish providing protein and flavor; fresh, local eggs yield the best results.
For Seasoning
- Salt – Enhances flavor; adjust based on your preference.
- Freshly Ground Black Pepper – Adds a slight kick and depth of flavor.
For the Toppings
- Minced Fresh Chives – Introduces a mild onion flavor and color; substitute with fresh parsley or green onions.
- Grated Parmesan Cheese – Adds a savory umami note and creaminess; use nutritional yeast for a dairy-free option.
With these ingredients, your shirred eggs will not only satisfy but also bring a touch of gourmet flair to your home-cooked brunch!
Step‑by‑Step Instructions for Shirred Eggs
Step 1: Preheat the Oven
Begin by preheating your oven to 375°F (190°C). This temperature is ideal for baking shirred eggs, ensuring they cook evenly and become perfectly tender. While the oven heats up, gather your equipment: a 6-ounce ramekin and a baking sheet, which will catch any spills as your eggs bake.
Step 2: Prepare the Ramekin
Take your ramekin and generously grease it with unsalted butter. Make sure to coat the bottom and sides thoroughly to prevent the eggs from sticking. This step not only aids in releasing the shirred eggs but also adds an extra touch of richness to the dish.
Step 3: Add the Cream
Pour a tablespoon or two of heavy cream into the greased ramekin, allowing it to settle at the bottom. This creamy layer is key to achieving a luxurious texture in your shirred eggs. Feel free to use a dairy-free cream alternative if you prefer.
Step 4: Crack the Eggs
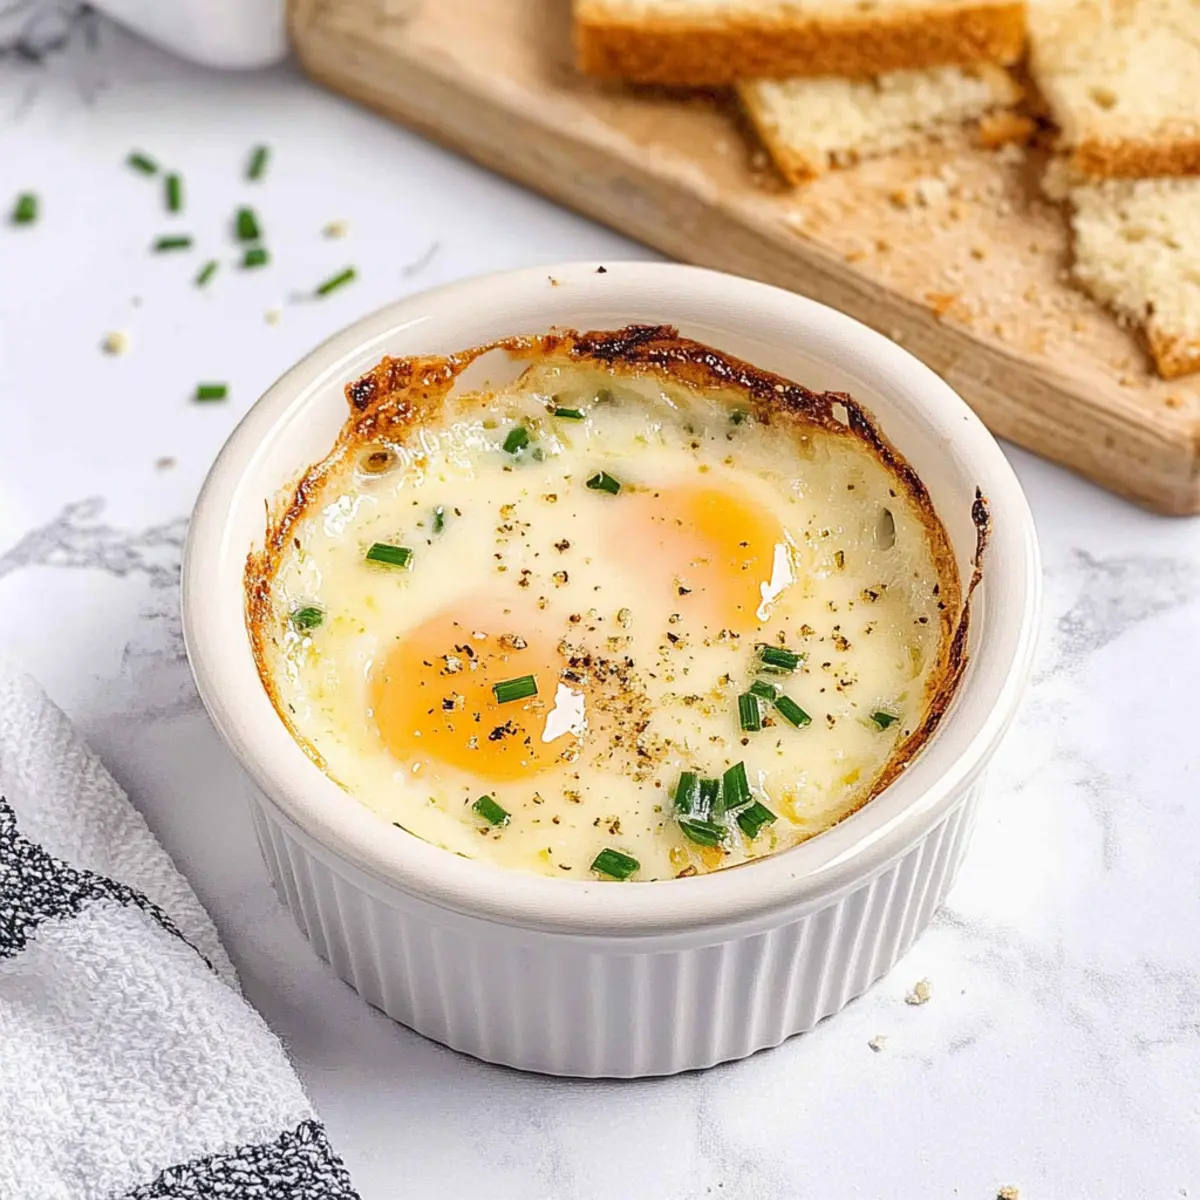
Gently crack two large eggs over the cream in the ramekin, being careful not to break the yolks. The whites should rest on the cream, creating a beautiful presentation as the eggs bake. This step assures you get that delightful runny yolk that makes shirred eggs so special.
Step 5: Season Thoughtfully
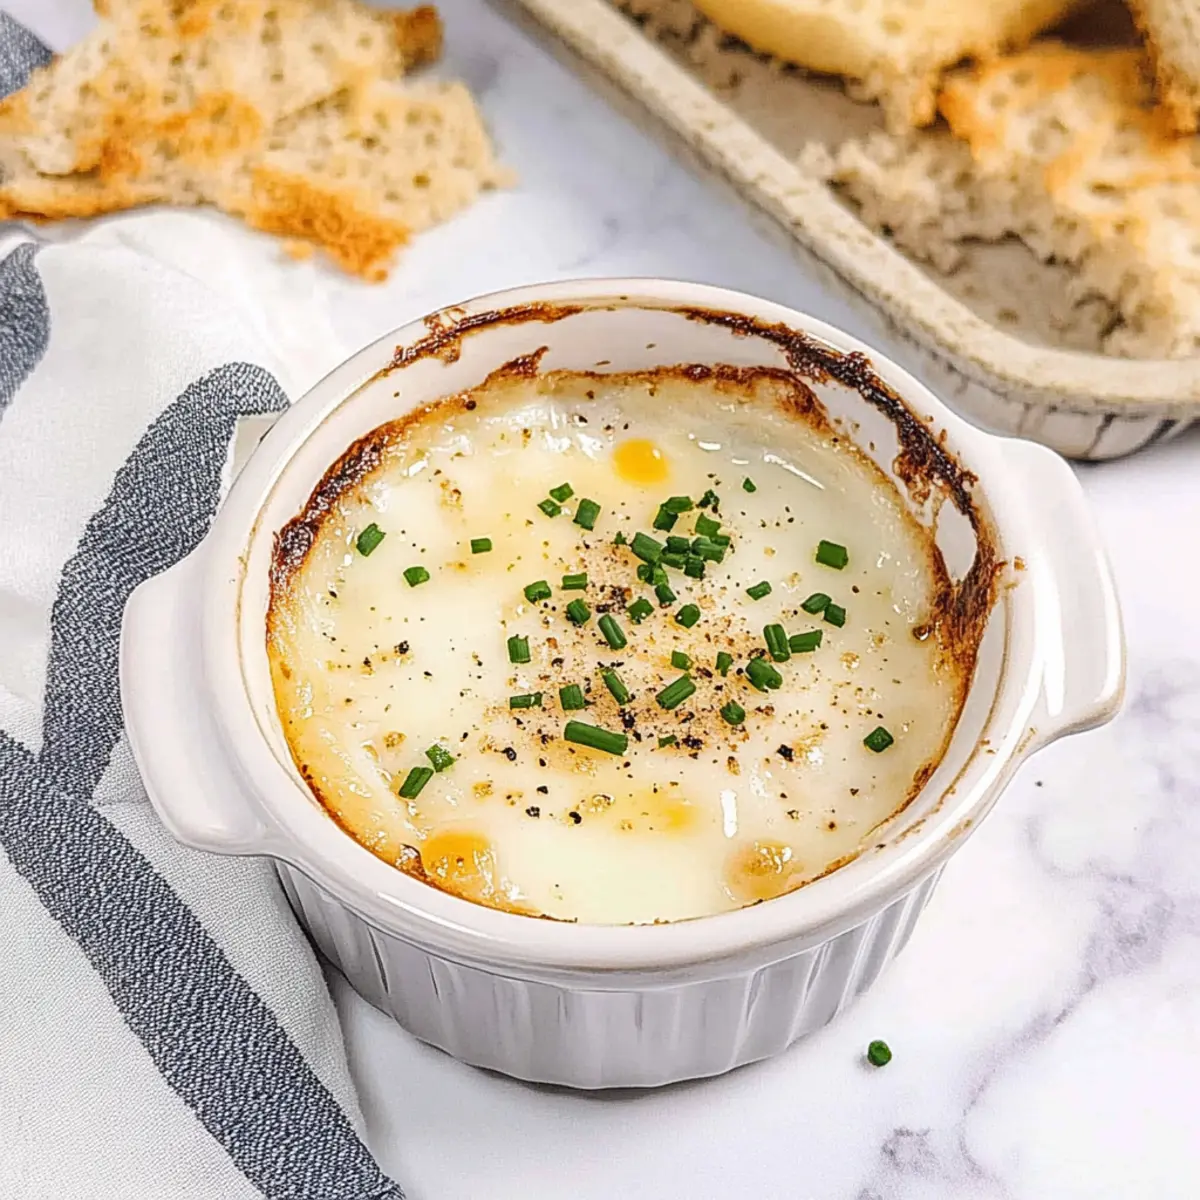
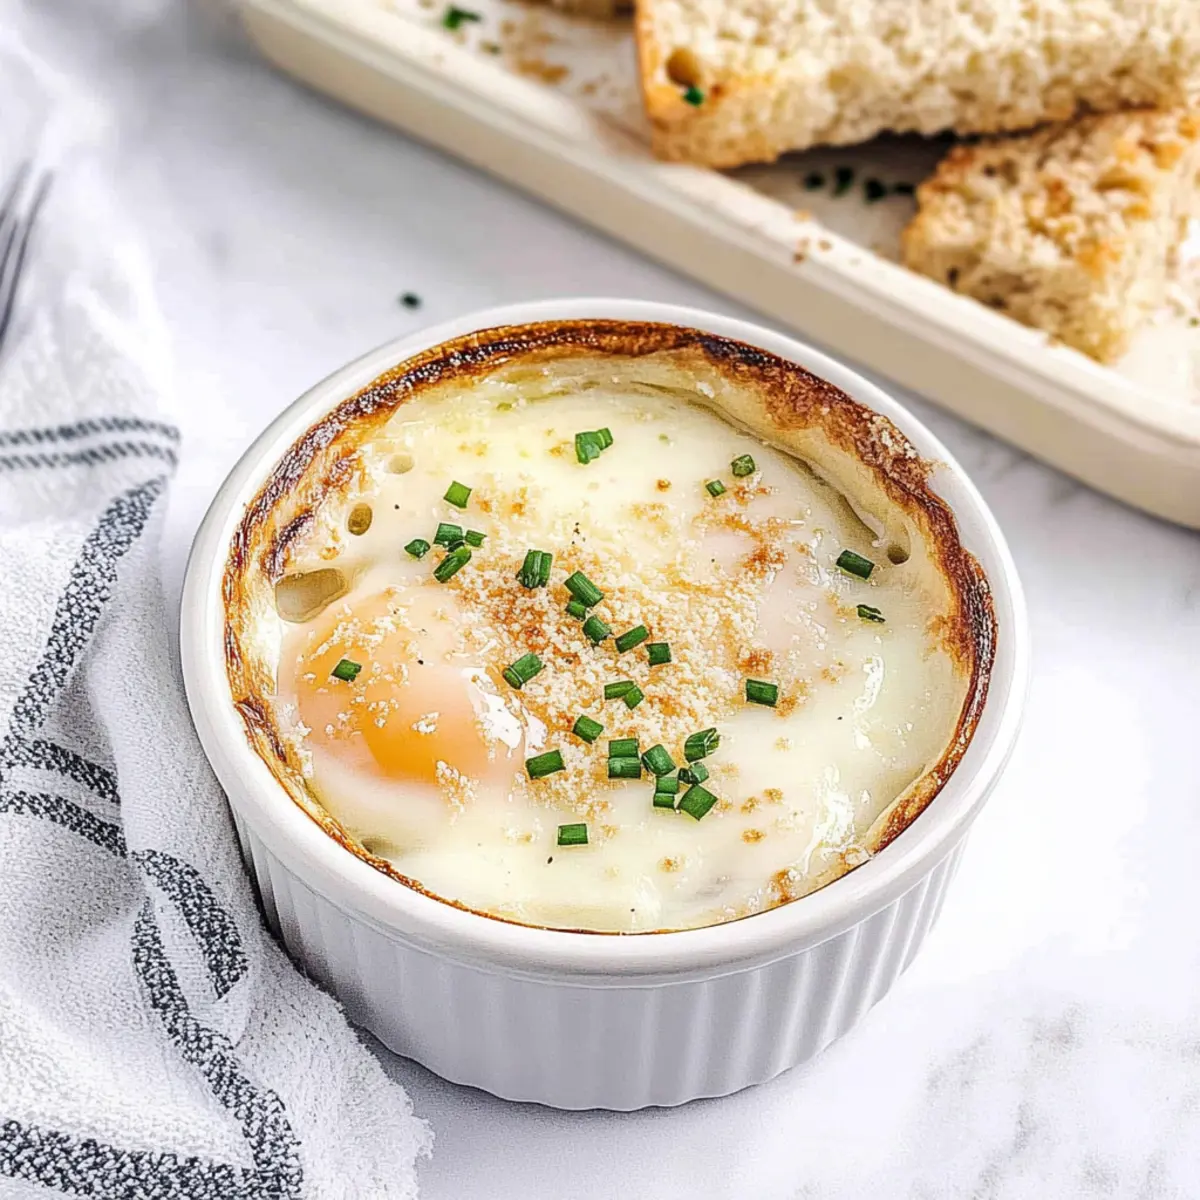
Sprinkle a pinch of salt and freshly ground black pepper onto the eggs, enhancing their flavor. Next, add a generous sprinkle of minced fresh chives for brightness, and top with some grated Parmesan cheese for a savory depth. The combination of these toppings creates an aromatic and flavorful dish.
Step 6: Bake Your Shirred Eggs
Place the ramekin on the prepared baking sheet, making it easier to transfer in and out of the oven. Bake for about 12-15 minutes, keeping a close eye. The whites should be set, while the yolks remain delightfully runny. Use this time to savor the enticing aroma that fills your kitchen.
Step 7: Cool and Serve
Once the baking time is up, carefully remove the ramekin from the oven, allowing it to cool for a couple of minutes. This cooling period helps the eggs firm up slightly, making them easier to serve. Enjoy your beautifully baked shirred eggs warm, preferably alongside some toasted bread or a refreshing salad for a complete brunch experience.
Storage Tips for Shirred Eggs
Room Temperature: Enjoy shirred eggs immediately after baking for the best texture; they are not suitable for room temperature storage.
Fridge: If you have leftovers, place the shirred eggs in an airtight container and refrigerate for up to 1 day. Reheating is not recommended, as they will lose their creamy texture.
Freezer: Freezing is not recommended as the delicate balance of the egg whites and yolks will change, resulting in an undesirable texture upon thawing.
Reheating: If you must reheat, do so gently in the oven at a low temperature (around 300°F) to avoid overcooking, but note that the quality will not match freshly baked shirred eggs.
Shirred Eggs Variations & Substitutions
Feel free to unleash your creativity and make this shirred eggs recipe your own with these delightful twists and swaps!
- Dairy-Free: Swap unsalted butter for a vegan alternative and use coconut cream or oat milk instead of heavy cream for a luscious, dairy-free option.
- Flavor Boost: Add a pinch of smoked paprika or a dash of hot sauce on top before baking for a flavorful kick.
- Veggie Lover's Delight: Incorporate sautéed spinach or roasted bell peppers to amp up the nutrition and freshness in your dish.
- Texture Twist: Sprinkle panko breadcrumbs over the top before baking for a delightful crunch that contrasts beautifully with the creamy eggs.
- Protein-Packed: Top with crumbled feta or goat cheese before baking for an extra layer of flavor and creaminess.
- Hearty Addition: Mix in some diced cooked bacon or sausage for a heartier version that's sure to satisfy those big appetites.
- Herb Infusion: Experiment with different herbs like fresh dill or basil instead of chives for a unique flavor profile—each brings its own magic to the dish.
- Sunny Side Up: For a sunny twist, simply bake the eggs without the heavy cream, letting the yolks shine and setting slightly less than with the cream for a runny finish.
As you embark on these delicious variations, why not explore these <a href="https://tastytrendingredients.com/turkish-eggs/">Turkish Eggs Discover</a> recipes for even more inspiration? You’ll find that the culinary world is full of possibilities! Don't be afraid to experiment. Happy cooking!
Expert Tips for Shirred Eggs
-
Use Fresh Eggs: Fresh eggs yield the best results, ensuring the yolks are vibrant and the whites cook evenly.
-
Monitor Baking Time: Keep an eye on your eggs while they bake. Overcooking will lead to firm yolks—aim for that perfectly runny center!
-
Adapt for Portions: If you're using a different ramekin size, adjust the baking time accordingly to prevent under or overcooking.
-
Experiment with Toppings: Feel free to mix in vegetables or proteins, such as spinach or smoked salmon, to customize your shirred eggs flavor.
-
Serve Warm: Serve your shirred eggs immediately after baking for the best texture—reheating alters their creamy consistency.
What to Serve with Simple & Elegant Shirred Eggs
There's nothing quite like a cozy brunch spread, and these shirred eggs can be the centerpiece of your morning feast.
- Toasted Bread: Perfect for dipping into those runny yolks, this crispy addition complements the creamy texture of the eggs. Consider sourdough for a slightly tangy flavor.
- Air-Fryer Breakfast Potatoes: These crispy little bites add a delightful crunch and heartiness, making your brunch feel complete and satisfying. Toss with herbs for an extra layer of flavor!
- Fresh Salad: A light, zesty salad with mixed greens and a citrus vinaigrette balances the richness of the shirred eggs, refreshing your palate.
- Fruit Platter: Bright, juicy fruits like berries and melons offer a sweet contrast, providing a pop of color and a burst of natural sweetness to your meal.
- Mimosa: This bubbly classic pairs beautifully with the elegance of shirred eggs, adding a splash of festive cheer to your brunch table.
- Coffee: A warm cup of freshly brewed coffee brings richness to the meal, complementing the flavors of the creamy eggs while providing a cozy warmth.
- Crispy Bacon: The savory crunch of bacon or pancetta pairs beautifully with the delicate flavors of shirred eggs, making it a beloved brunch staple for many.
- Herbed Quinoa: For a nutritious twist, serve fluffy quinoa tossed with fresh herbs; its nutty flavor is a delightful contrast to the creamy eggs.
Make Ahead Options
These shirred eggs are a fantastic choice for meal prep, saving you time on busy mornings! You can prepare the ramekins by greasing them with butter and adding the heavy cream, up to 24 hours in advance. Just cover them tightly with plastic wrap and refrigerate to maintain freshness. When you're ready to enjoy, crack the eggs on top right before baking, season, and pop them in the oven. Baking takes just 12-15 minutes, and you'll have a deliciously elegant brunch ready to impress. Following this make-ahead method ensures your shirred eggs are just as delightful as if made fresh!
Shirred Eggs Recipe FAQs
What kind of eggs should I use for shirred eggs?
Absolutely! Fresh, large eggs are essential for making the best shirred eggs. When you use farm-fresh eggs, you'll get vibrant yolks and tender whites that will cook evenly. If you have access to local eggs, go for them; their flavor and quality are often superior.
How should I store leftover shirred eggs?
While it’s best to enjoy shirred eggs immediately, you can store any leftovers in the refrigerator for up to 1 day. Place them in an airtight container to keep them fresh. However, reheating is not recommended, as it can lead to a less-than-desirable texture.
Can I freeze shirred eggs?
Unfortunately, freezing is not advisable for shirred eggs. The delicate composition of the eggs can result in a grainy texture once thawed. If you want to save time, consider prepping the ingredients and assembling them right before baking instead.
How do I prevent the yolks from overcooking?
Great question! To achieve that perfect runny yolk, keep a close eye on your eggs while they bake. Aim for a baking time of 12-15 minutes at 375°F (190°C) and use a timer to remove them from the oven as soon as the whites are set.
Can I make shirred eggs dairy-free?
Very! You can easily make this recipe dairy-free by swapping the heavy cream with high-fat oat milk or coconut cream. For the butter, use a vegan alternative or cooking spray. Substitute nutritional yeast for the Parmesan cheese, and enjoy this delicious dish without sacrificing flavor!
What are some tasty toppings for shirred eggs?
The more the merrier! You can elevate your shirred eggs by adding toppings like sautéed spinach, smoked salmon, or roasted vegetables. A sprinkle of breadcrumbs on top adds an enticing crunch. Let your creativity shine and adjust the toppings to suit your taste!
Decadent Shirred Eggs for Your Perfect Brunch Escape
Ingredients
Equipment
Method
- Begin by preheating your oven to 375°F (190°C).
- Take your ramekin and generously grease it with unsalted butter.
- Pour a tablespoon or two of heavy cream into the greased ramekin.
- Gently crack two large eggs over the cream in the ramekin.
- Sprinkle a pinch of salt and freshly ground black pepper onto the eggs, then add minced fresh chives and grated Parmesan cheese.
- Place the ramekin on the prepared baking sheet and bake for about 12-15 minutes.
- Once baking is complete, allow the ramekin to cool for a couple of minutes before serving.


Leave a Reply