
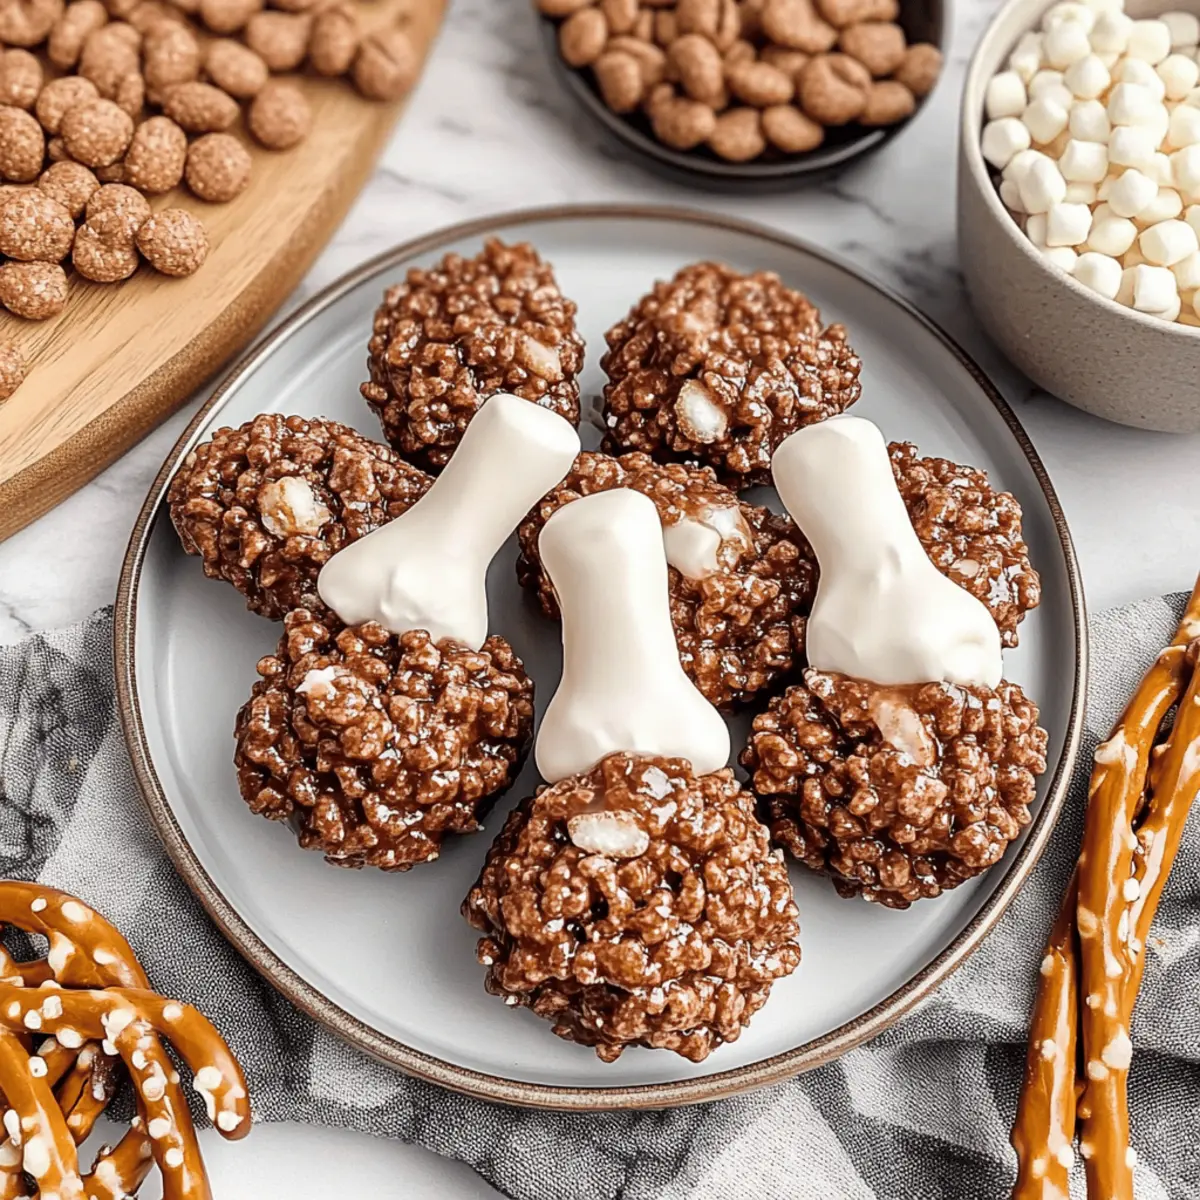
As I wandered through the bustling aisles of my local market, I stumbled upon a delightful sight: a gaggle of joyful kids, eyes wide with wonder, crafting their own Thanksgiving treats. That's when it hit me—these adorable Rice Krispie Turkey Legs are just what we need to bring a sprinkle of magic to our holiday celebrations! These kid-friendly snacks not only look like mini drumsticks but are also incredibly easy to whip up using simple ingredients like marshmallows and pretzels. In no time, you’ll have a festive treat that’s perfect for both young chefs and big kids at heart. What's even better? They lend themselves to gluten-free options, making them a guilt-free indulgence for everyone at your table. Ready to impress your loved ones? Let's dive into this fun recipe that will surely become a cherished staple on your holiday dessert spread!
Why Are Rice Krispie Turkey Legs a Hit?
Kid-Friendly Fun: These delightful treats turn snack time into a creative adventure for both kids and adults. Quick to Make: With just a few easy steps, you can have a festive dessert ready in no time. Visual Appeal: Their cute, drumstick appearance will make them the star of your holiday table. Customizable: Feel free to use gluten-free pretzels or change the flavor of melting wafers to suit your taste preferences. Crowd-Pleaser: Kids and adults alike will love these sweet, crunchy creations, making them a hit at any gathering. Pair them with pumpkin s’mores cookies for an extra festive touch!
Rice Krispie Turkey Legs Ingredients
For the Turkey Legs
• Pretzel Rods – The main structure for turkey leg bones; substitute with gluten-free pretzels for dietary needs.
• Vanilla Melting Wafers – Provides a smooth coating and sweet flavor; any brand can be used.
• Vanilla Extract – Enhances the vanilla flavor; can be replaced with vanilla paste for a more intense taste.
• Salt – Balances sweetness; can reduce or omit if desired, especially if using salted butter.
• Mini Marshmallows – Used for shaping the bone ends and coating the legs; keep extra on hand for adjustments.
• Unsalted Butter – Offers richness; substitute with salted butter by halving the added salt.
• Cocoa Krispies Cereal – Gives the turkey legs an appealing brown color and crunchy texture; consider using gluten-free cereal for a gluten-free version.
Step‑by‑Step Instructions for Rice Krispie Turkey Legs
Step 1: Melt Candy Wafers
Begin by placing your vanilla melting wafers in a microwave-safe bowl. Heat in the microwave on low power for 30 seconds at a time, stirring after each interval until the mixture is smooth and glossy. This process should take about 1-2 minutes total. Set the melted wafers aside as you prepare to dip the pretzel rods.
Step 2: Dip and Shape Pretzel Rods
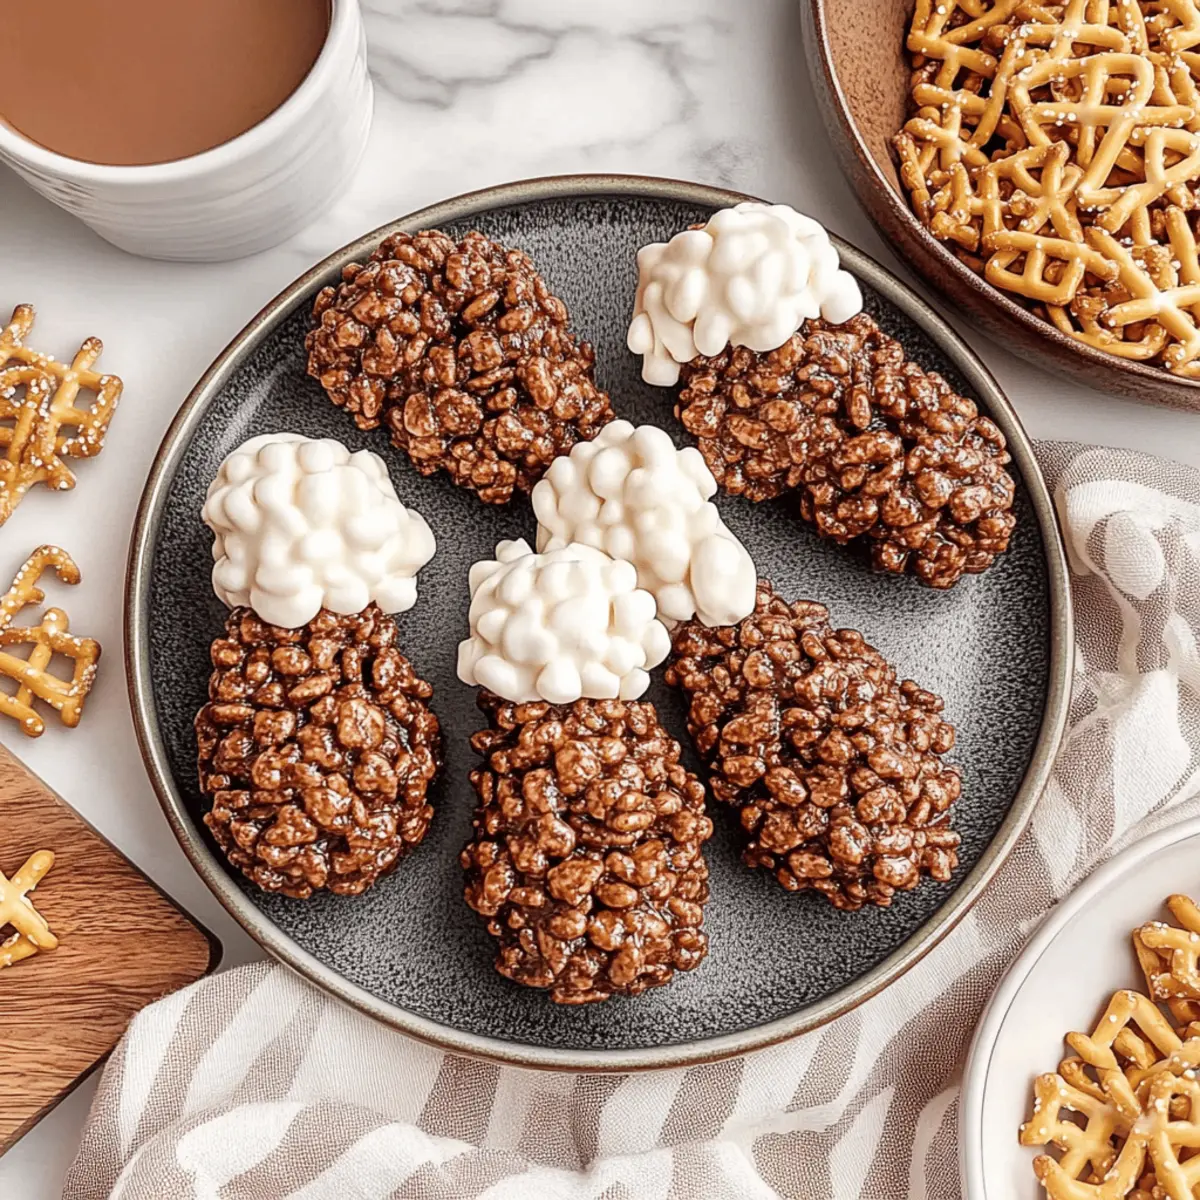
Take your pretzel rods and gently dip them halfway into the melted candy wafers, allowing any excess to drip off. While the coating is still soft, firmly press two mini marshmallows onto the ends of each rod to create the “bone” of your turkey leg. Place the dipped pretzel rods on a parchment-lined tray and chill in the refrigerator for about 5 minutes, or until the coating has set.
Step 3: Prepare Rice Krispie Mixture
In a large pot over low heat, melt the unsalted butter. Once melted, add the remaining mini marshmallows, stirring continuously until they are completely melted and the mixture is smooth. Remove from heat, then stir in a pinch of salt and vanilla extract for added flavor. This mixture will be the sweet base for your Rice Krispie turkey legs.
Step 4: Combine Cereal
Once the marshmallow mixture is smooth, gently fold in the Cocoa Krispies cereal with a spatula. Be careful to mix thoroughly but gently to avoid breaking the cereal pieces. Allow the mixture to cool for a few minutes, which will make it easier to shape as you prepare to form the turkey legs.
Step 5: Shape Turkey Legs
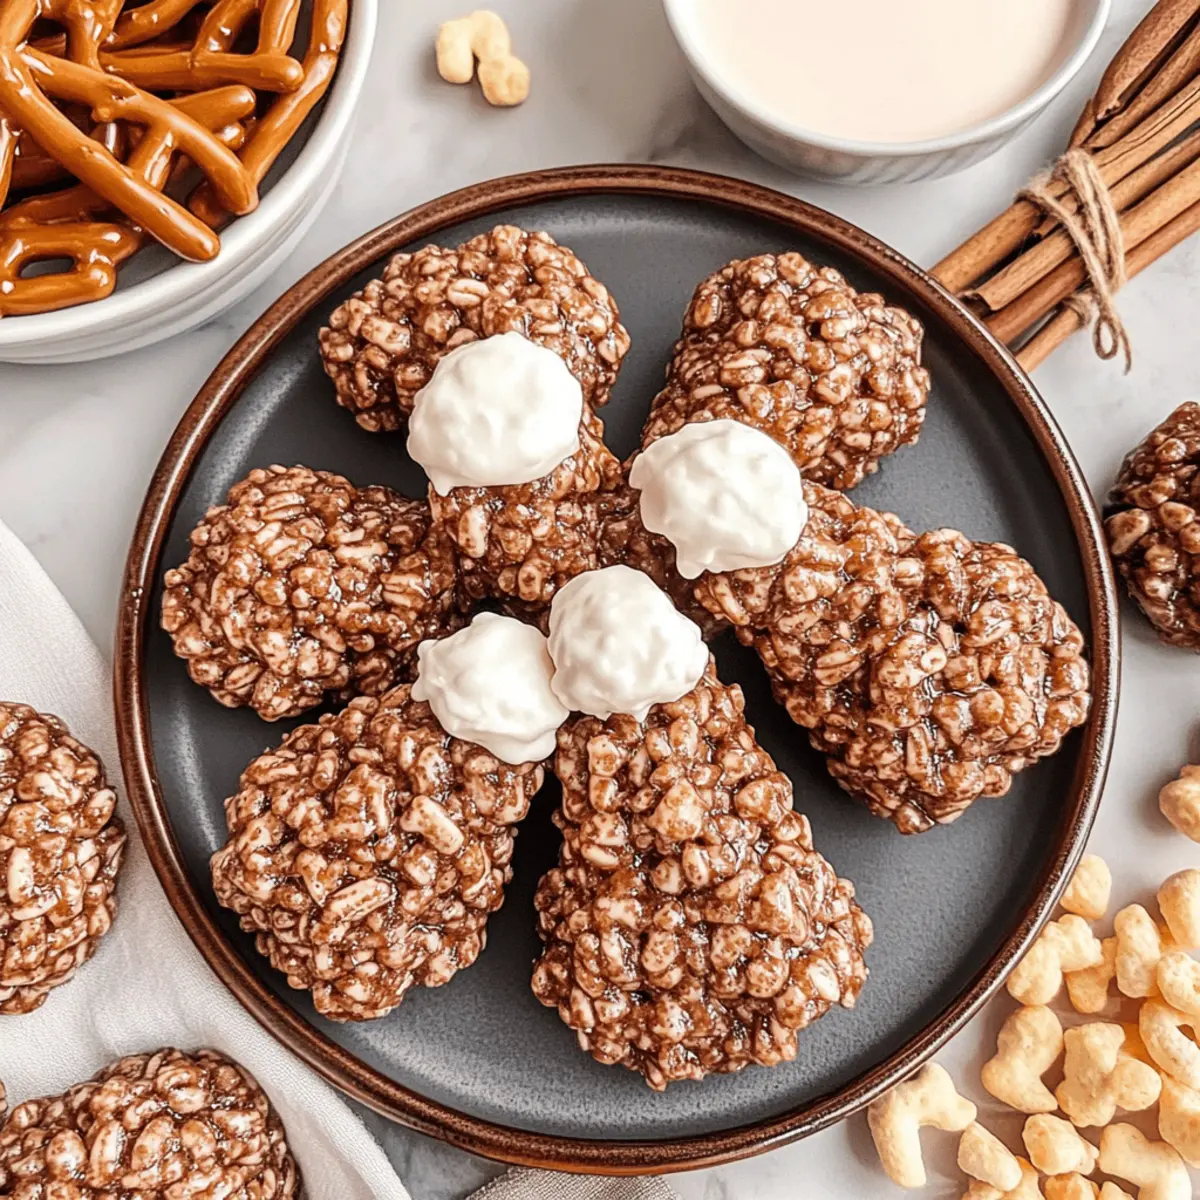
With your hands slightly greased to prevent sticking, take about ½ cup of the Rice Krispie mixture and mold it around each pretzel bone, forming the shape of a turkey leg. Ensure that the mixture adheres well to the pretzel rod. Repeat this process for all the pretzel rods and set each shaped leg on the same parchment-lined tray.
Step 6: Final Setting
Once all the turkey legs are shaped, set them aside to cool completely at room temperature for 10-20 minutes. This time allows the Rice Krispie mixture to firm up, creating a delightful crunchy texture that perfectly complements the creamy marshmallow coating. Now they're ready to serve and impress during your festive celebrations!
How to Store and Freeze Rice Krispie Turkey Legs
-
Room Temperature: Keep your Rice Krispie turkey legs in an airtight container at room temperature for up to 2-3 days to maintain their freshness and crunch.
-
Fridge: If you want to extend their shelf life, you can refrigerate them for up to 5 days. Just be aware that the texture may firm up slightly, so let them sit at room temperature for a few minutes before enjoying.
-
Freezer: For longer storage, wrap individual turkey legs tightly in plastic wrap and place them in a freezer-safe container. They can be frozen for up to 3 months. Thaw in the refrigerator overnight before serving.
-
Reheating: There's no need to reheat these treats; simply enjoy them at room temperature for the best taste and texture!
Expert Tips for Rice Krispie Turkey Legs
• Nonstick Spray: Use nonstick spray on your hands to prevent the Rice Krispie mixture from sticking while shaping the turkey legs.
• Cooling Time: Make sure the Rice Krispie mixture cools for a few minutes before molding; if it's too warm, it can become gooey and difficult to handle.
• Quick Work: After coating the pretzels in melted wafers, shape the Turkey Legs quickly to maintain the best presentation. Don't let the coating set up too much before molding.
• Texture Balance: If using salted butter, be sure to adjust the amount of added salt to maintain the sweet-salty balance in your Rice Krispie Turkey Legs.
• Customization Options: Feel free to experiment with different melting wafer flavors for unique looks and tastes; chocolate and colorful candy melts can add fun variations!
What to Serve with Thanksgiving Rice Krispie Turkey Legs
Add a delightful touch to your holiday feast by pairing these whimsical treats with complementary flavors and textures.
- Pumpkin S’mores Cookies: The warm, spiced flavor of pumpkin cookies provides a cozy contrast to the sweet crunch of the Rice Krispie turkey legs.
- Festive Fruit Salad: Bright, juicy fruits offer a refreshing palette cleanser, balancing the sweetness of the turkey legs while adding a burst of color to your table.
- Whipped Cinnamon Butter: Spread this creamy, spiced butter on warm rolls for a mouthwatering side that enhances the sweet notes of your Rice Krispie legs.
- Chocolate-Dipped Strawberries: The rich chocolate paired with tart strawberries makes for a joyful bite that pairs beautifully with the playful theme of the turkey legs.
- Warm Apple Cider: This fragrant drink adds an aromatic warmth, echoing the delectable flavors of the season while providing a comforting sip alongside your treats.
- Mini Pumpkin Spice Lattes: A small but flavorful coffee treat that ties in the festive spirit, offering a cozy drink option to accompany your playful dessert.
- Marshmallow Fluff Dip: Serve this sweet and creamy dip on the side, allowing guests to dunk their turkey legs for an extra marshmallowy indulgence.
Make Ahead Options
These Rice Krispie Turkey Legs are perfect for meal prep enthusiasts looking to save time during the busy holiday season! You can prepare the pretzel rods dipped in melted wafers and shaped with marshmallows up to 24 hours in advance. Simply store them in an airtight container at room temperature to maintain their crunch. Additionally, the Rice Krispie mixture can be made ahead and stored in the refrigerator for up to 3 days; just make sure it's tightly covered. When you're ready to finish, mold the cooled mixture around the pretzel bones and allow them to set for about 10-20 minutes before serving. This way, you'll have delightful, homemade treats ready with minimal effort—just as delicious as when freshly made!
Rice Krispie Turkey Legs Variations
Feel free to get creative with these fun Rice Krispie turkey legs to match your family's preferences or dietary needs!
- Gluten-Free: Substitute pretzel rods with gluten-free pretzels to keep this tasty treat accessible for everyone.
- Flavorful Wafers: Use chocolate or colored melting wafers for a unique taste and festive flair that’ll wow your guests.
- Nutty Twist: Add crushed nuts, like peanuts or almonds, to the Rice Krispie mixture for an extra crunch and delicious flavor.
- Dipping Delight: Serve with a side of melted chocolate or caramel sauce for dipping, adding a luscious layer of flavor.
- Marshmallow Fluff: Incorporate marshmallow fluff into the Rice Krispie mixture for an even chewier texture that kids will love.
- Fruit Fusion: Mix in dried fruits such as cranberries or cherries to add a sweet, chewy burst that complements the treat.
- Spicy Surprise: If you're feeling adventurous, sprinkle a little cayenne pepper on the melted wafers for a sweet-and-spicy combo that'll thrill your taste buds.
- Crispy Coating: Roll the shaped turkey legs in crushed graham crackers or coconut for an extra layer of texture and flavor.
Feel inspired? Pair these fun Rice Krispie turkey legs with a delicious batch of pumpkin s’mores cookies or festive Lime Chicken Rice for the perfect holiday spread!

Rice Krispie Turkey Legs Recipe FAQs
How do I know when my pretzel rods are fresh?
Absolutely! Look for pretzel rods that are crisp and free from any dark spots or peculiar odors. Fresh pretzels should be firm to the touch and maintain their shape, which ensures your turkey legs will have a solid structure.
Can I store Rice Krispie turkey legs?
Yes, you can store your Rice Krispie turkey legs! Keep them in an airtight container at room temperature for up to 2-3 days. If you want to keep them longer, refrigerate them for up to 5 days, but be aware that they may become a bit firmer in texture.
How do I freeze Rice Krispie turkey legs?
Absolutely! To freeze your Rice Krispie turkey legs, first wrap each turkey leg tightly in plastic wrap to prevent freezer burn. Place them in a freezer-safe container, and they can last up to 3 months. When you're ready to enjoy them, simply thaw overnight in the refrigerator, and let them come to room temperature before serving.
What should I do if my Rice Krispie mixture is too sticky?
Very! If your Rice Krispie mixture feels sticky and hard to mold, try letting it cool for a few minutes longer. You can also lightly grease your hands with nonstick spray to prevent sticking while shaping the legs. If all else fails, add a handful of extra Cocoa Krispies to the mixture to tone down the stickiness.
Can I make Rice Krispie turkey legs gluten-free?
Absolutely! Substitute regular pretzel rods with gluten-free pretzels to make the entire treat gluten-free. Additionally, ensure you use gluten-free Cocoa Krispies, and you’re all set for a delightful, inclusive dessert that everyone can enjoy!
Are there any allergy considerations for this recipe?
Very! This recipe contains common allergens like dairy (from butter and marshmallows) and gluten (from traditional pretzels and Cocoa Krispies). If preparing for someone with allergies, opt for dairy-free butter and ensure all ingredients are certified gluten-free to keep your Rice Krispie turkey legs safe for all your loved ones!
Delicious Rice Krispie Turkey Legs for a Fun Holiday Treat
Ingredients
Equipment
Method
- Begin by placing your vanilla melting wafers in a microwave-safe bowl. Heat in the microwave on low power for 30 seconds at a time, stirring after each interval until the mixture is smooth and glossy. This process should take about 1-2 minutes total. Set the melted wafers aside as you prepare to dip the pretzel rods.
- Take your pretzel rods and gently dip them halfway into the melted candy wafers, allowing any excess to drip off. While the coating is still soft, firmly press two mini marshmallows onto the ends of each rod to create the 'bone' of your turkey leg. Place the dipped pretzel rods on a parchment-lined tray and chill in the refrigerator for about 5 minutes, or until the coating has set.
- In a large pot over low heat, melt the unsalted butter. Once melted, add the remaining mini marshmallows, stirring continuously until they are completely melted and the mixture is smooth. Remove from heat, then stir in a pinch of salt and vanilla extract for added flavor.
- Once the marshmallow mixture is smooth, gently fold in the Cocoa Krispies cereal with a spatula. Be careful to mix thoroughly but gently to avoid breaking the cereal pieces. Allow the mixture to cool for a few minutes.
- With your hands slightly greased, take about ½ cup of the Rice Krispie mixture and mold it around each pretzel bone, forming the shape of a turkey leg. Ensure that the mixture adheres well to the pretzel rod.
- Once all the turkey legs are shaped, set them aside to cool completely at room temperature for 10-20 minutes.


Leave a Reply