
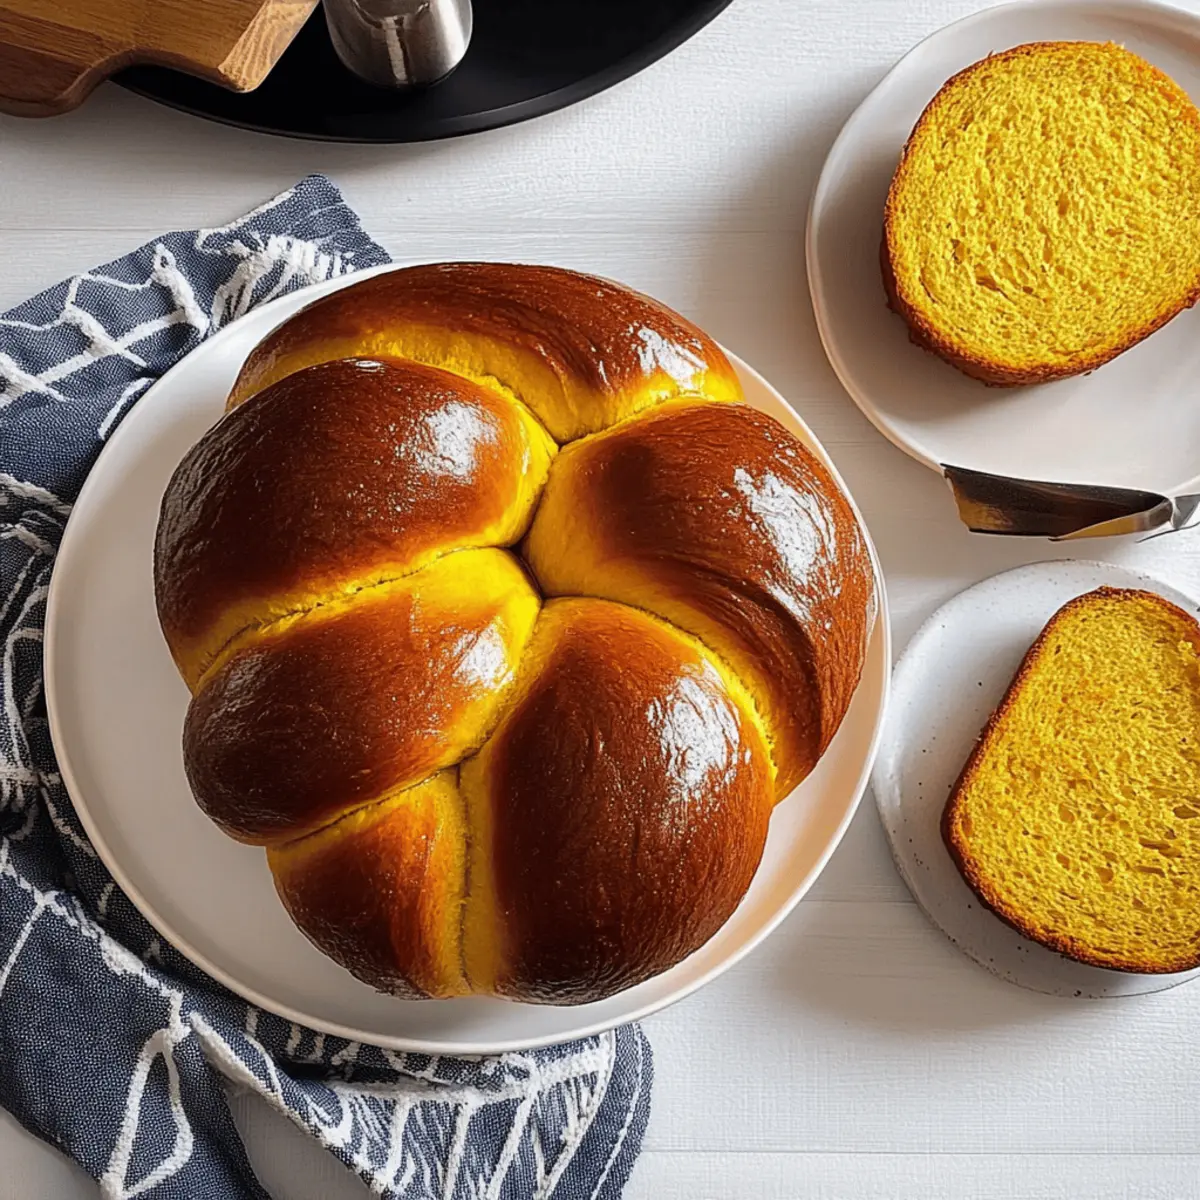
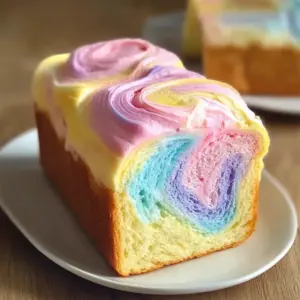
Autumn is here, and with it comes the warm, inviting aroma of freshly baked bread wafting through my kitchen—a comforting reminder of cozy family gatherings. This Golden Pumpkin Challah embodies everything I love about fall baking, with its tender crumb and delicate sweetness enhanced by a hint of cinnamon. Perfect for Rosh Hashanah or any seasonal celebration, this enriched bread is simple enough for any home baker to master, be you a novice or seasoned pro. Not only does it elevate your festive table, but its straightforward preparation ensures you can bring joy to the family without the fuss. Curious to learn how to create this stunning centerpiece? Let’s dive into the delightful world of making your own pumpkin challah!
Why Make Pumpkin Challah at Home?
Irresistible aroma: Baking this challah fills your kitchen with a delightful scent that captures the essence of fall.
Striking centerpiece: With its golden hue and inviting texture, this pumpkin challah is sure to impress your guests.
Easy preparation: The simple steps ensure that anyone can bake it, making it perfect for both beginners and experienced bakers looking for a joyful challenge.
Versatile use: Delicious on its own or paired with butter, this rich bread elevates breakfasts and festive gatherings alike. Enjoy it with soups or salads for a cozy meal!
Seasonal delight: It’s the ideal recipe for celebrating holidays like Rosh Hashanah, ensuring your celebrations are sweet and memorable. If you love holiday baking, check out my Pumpkin Brownies Decadent for another seasonal treat!
Pumpkin Challah Ingredients
-
For the Dough
• King Arthur Unbleached All-Purpose Flour – Provides structure and tenderness; substitute with bread flour for a chewier texture.
• Granulated Sugar – Adds sweetness and enhances browning; can replace with honey for a unique flavor profile.
• Instant Yeast – Leavens the dough for lightness; active dry yeast can be used but may require proofing.
• Table Salt – Balances sweetness and enhances flavor; do not omit as it regulates yeast activity.
• Cinnamon – Adds warmth and aromatic quality; it's optional but highly recommended for flavor depth.
• Water (lukewarm) – Activates yeast and hydrates the flour; ensure it is not too hot to avoid killing the yeast.
• Pumpkin Purée – Contributes moisture, natural sweetness, and color; feel free to use homemade or canned pumpkin purée.
• Vegetable Oil – Adds fat for tenderness; substitute with melted butter for a richer flavor.
• Large Egg – Provides richness and aids in browning the crust; an egg wash enhances the color of the crust. -
Optional Topping
• Egg Wash – A mixture of beaten egg to brush on the dough for that glossy, attractive finish; applying two layers gives the best shine.
Step‑by‑Step Instructions for Pumpkin Challah
Step 1: Measure the Flour
Start by weighing out 630 grams of flour or measure 5 1/4 cups by spooning flour into a measuring cup, leveling it off with a knife. This foundational step ensures a consistent texture for your delicious pumpkin challah. Set the flour aside, and prepare to mix the dry ingredients.
Step 2: Combine Dry Ingredients
In a large mixing bowl, combine the measured flour with sugar, instant yeast, table salt, and cinnamon, stirring well to distribute evenly. This blend of ingredients creates the perfect foundation for your pumpkin challah. It’s important to ensure the yeast and salt are not directly mixed together, as this can affect yeast activation.
Step 3: Whisk Wet Ingredients
In a separate bowl, whisk together the lukewarm water, pumpkin purée, vegetable oil, and large egg until smooth. This mixture should be well-blended, helping to incorporate the moisture and richness needed for a tender bread. Make sure the water is warm but not hot to avoid compromising the yeast.
Step 4: Mix to Form Dough
Pour the wet mixture into the bowl of dry ingredients. Mix with a spatula or wooden spoon until a shaggy dough begins to form, ensuring everything is combined. This is a crucial step before kneading, as it allows for all the flavors to meld together in your pumpkin challah.
Step 5: Knead the Dough
Transfer the dough to a floured surface or use a stand mixer with a dough hook to knead. Knead for about 6 minutes if using a stand mixer, or 10 minutes by hand until the dough is elastic and smooth. As you knead, incorporate any remaining flour as necessary, aiming for a slightly tacky but cohesive dough texture.
Step 6: First Rise
Place the kneaded dough in a greased bowl, covering it with plastic wrap or a clean kitchen towel. Allow it to rise in a warm spot until it has approximately doubled in size, which should take around 2 hours. This step is essential for developing the airy texture of your pumpkin challah.
Step 7: Preheat the Oven
With your dough rising, preheat your oven to 350°F (175°C). This step ensures that your oven is at the perfect temperature for baking once your pumpkin challah is ready. Preheating will give your loaf a beautiful golden crust and allow it to rise properly.
Step 8: Shape the Dough
Once the dough has risen, gently deflate it on a floured surface. Divide it into two equal pieces and shape each piece into a rectangle. Roll the rectangles tightly into logs, ensuring they’re secure yet not overly tight, as this will create a nice shape during baking.
Step 9: Coil the Dough
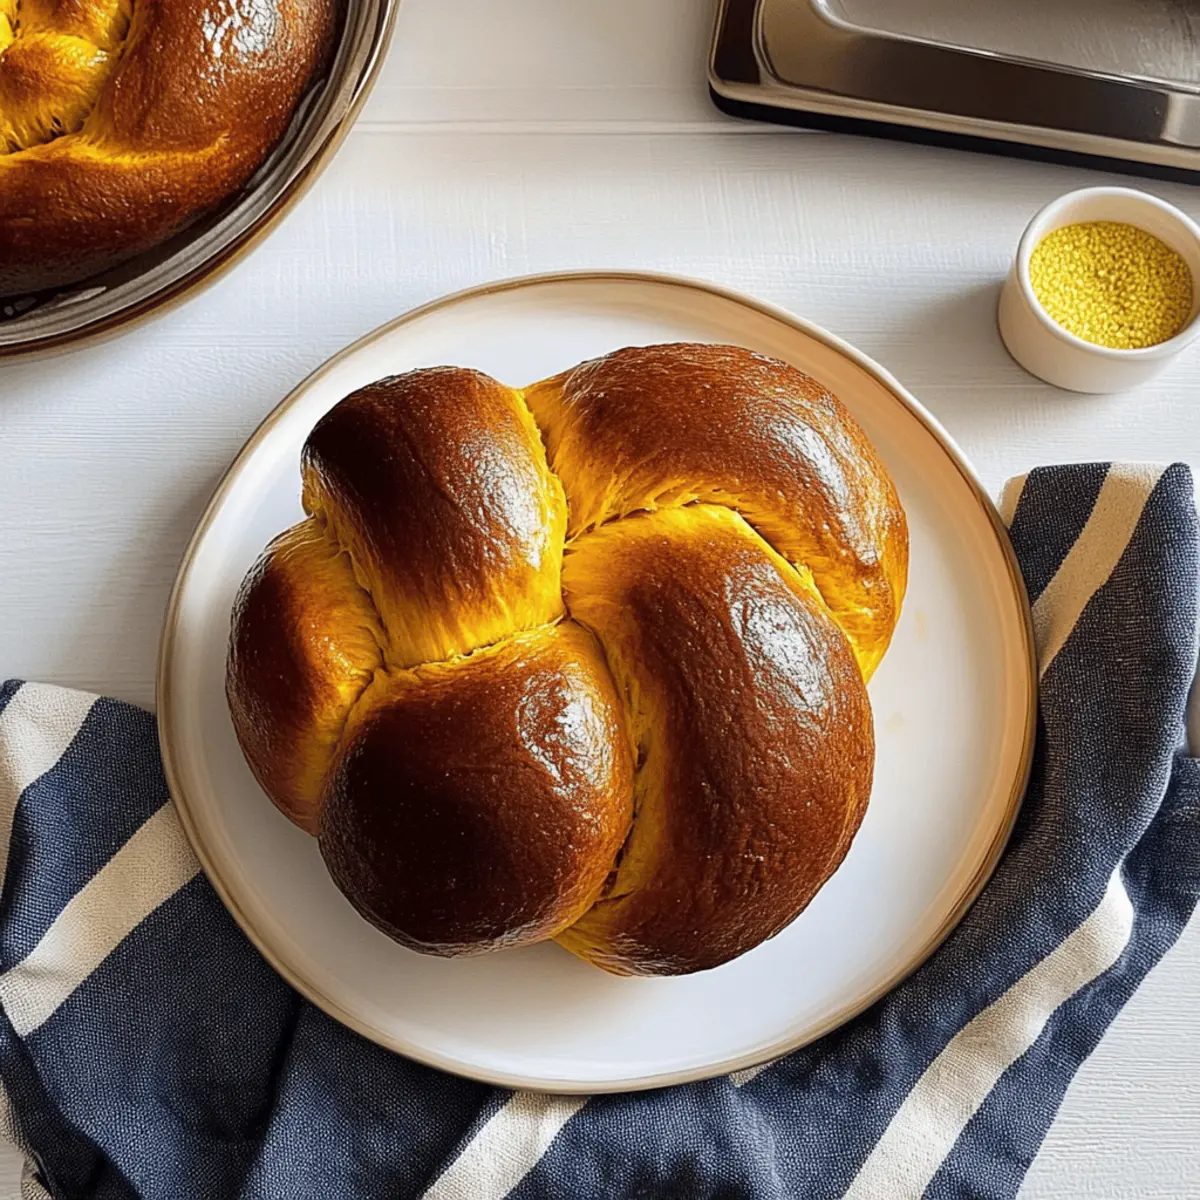
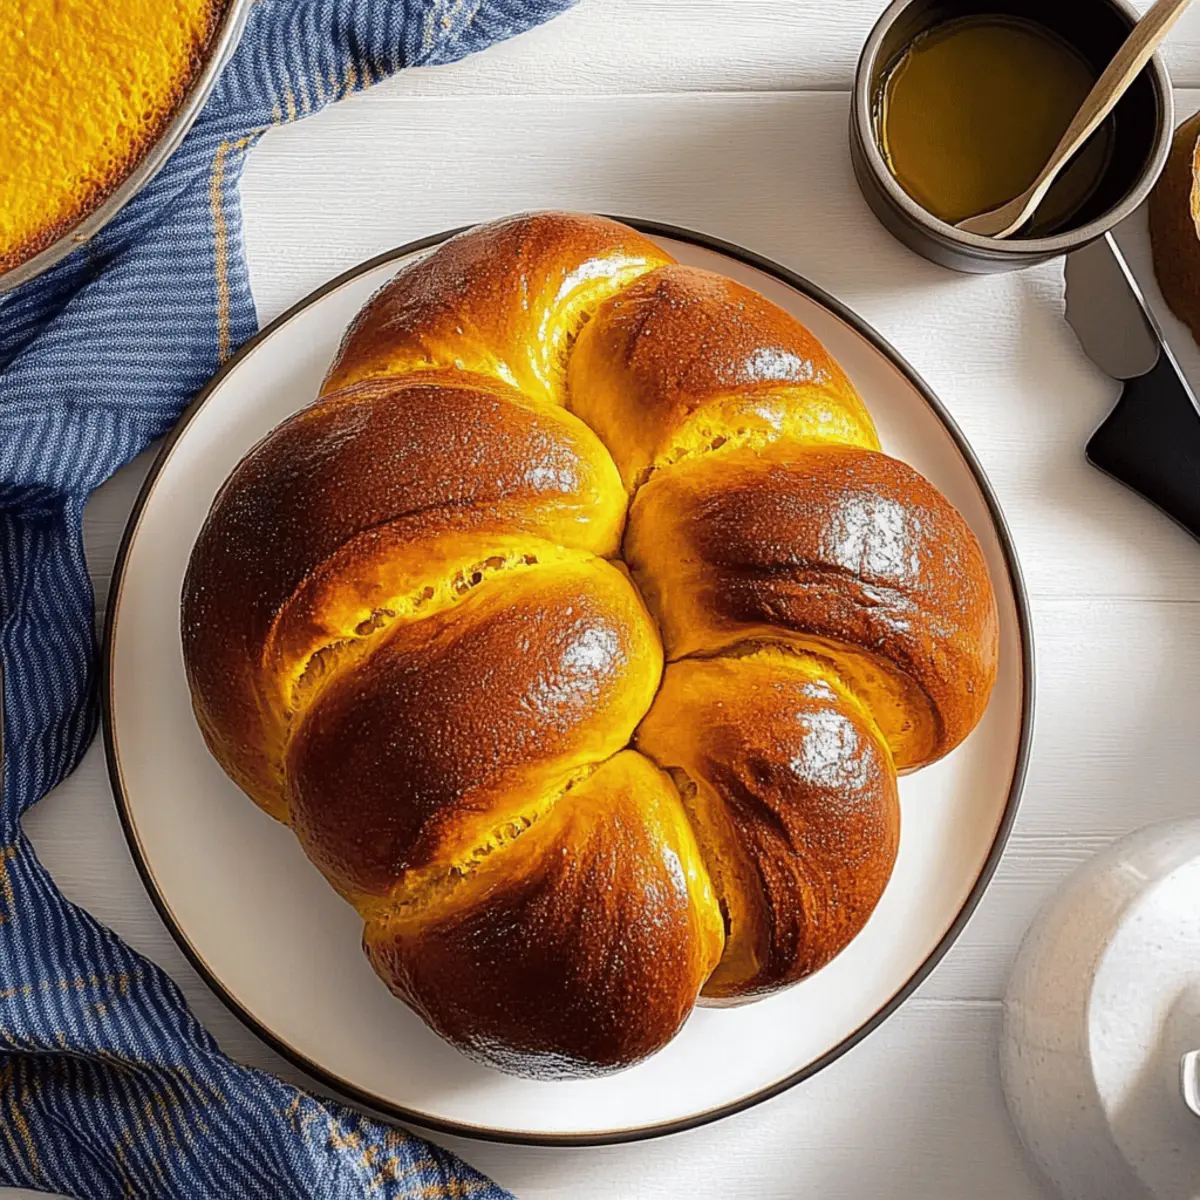
Coil each log loosely on a baking sheet lined with parchment paper, tucking the end underneath to secure it. This shaping technique helps the pumpkin challah rise beautifully while baking, giving it an appealing look and tantalizing aroma as it cooks.
Step 10: Second Rise
Cover the coiled dough lightly with a kitchen towel and allow it to rise again until puffy. This should take about 1 hour, allowing the dough to grow in size while developing air pockets for that light and fluffy texture. Keep an eye on it so it doesn’t over-proof.
Step 11: Egg Wash
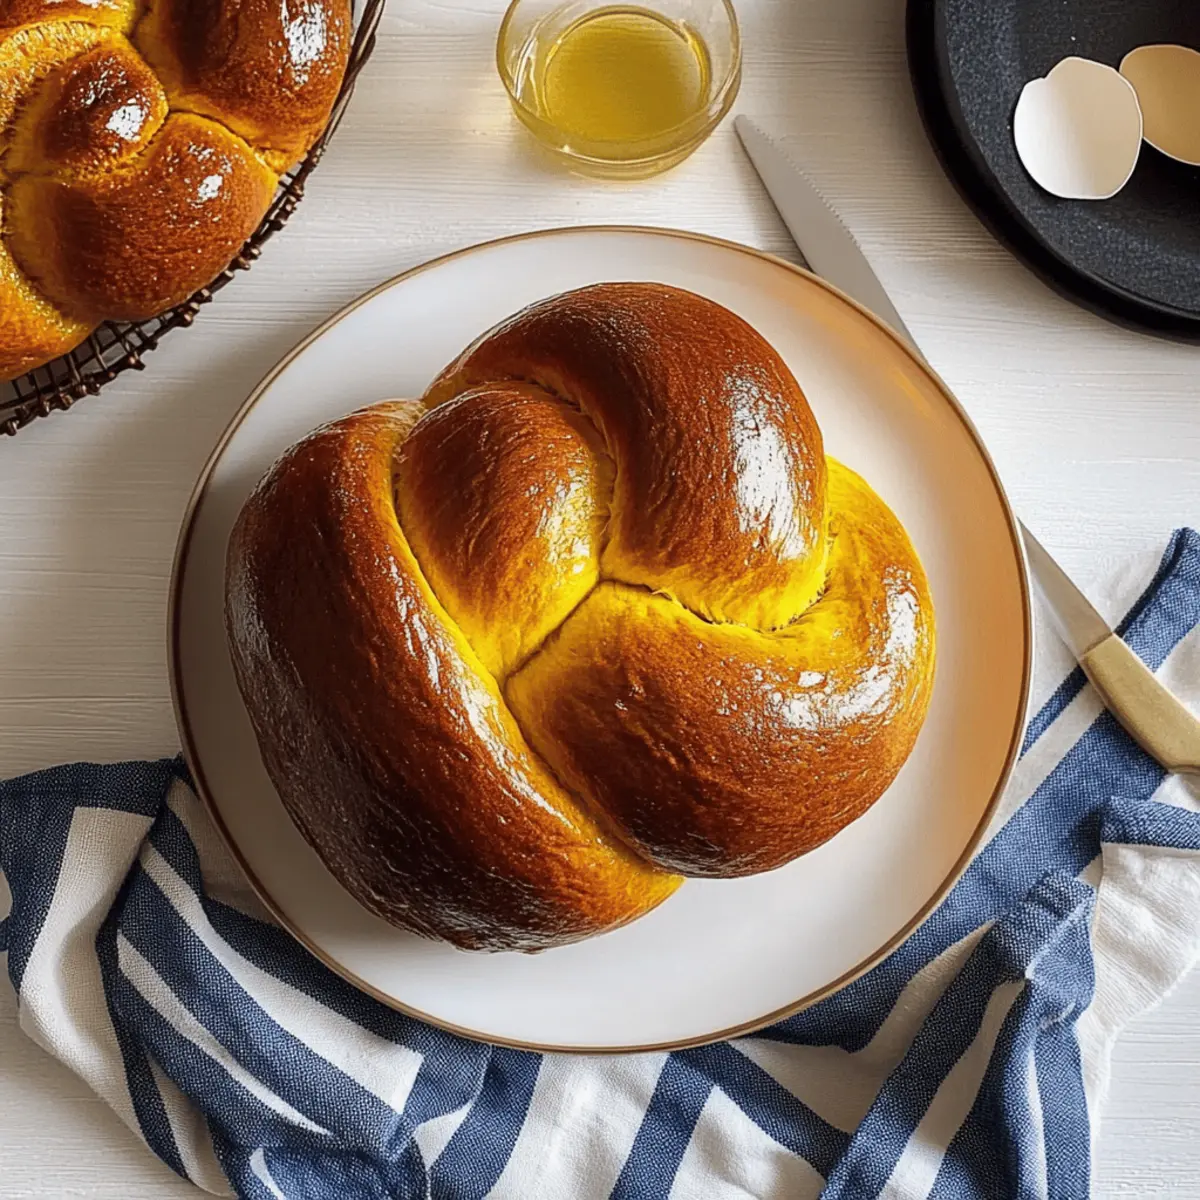
Once the dough has puffed up, prepare an egg wash by beating an egg. Brush this mixture generously onto the surface of the dough, ensuring even coverage. For an extra glossy finish, apply a second layer after the first has set slightly, helping your pumpkin challah achieve a beautiful golden hue.
Step 12: Bake the Challah
Place the baking sheet in the preheated oven and bake for 35-40 minutes. The pumpkin challah is ready when it turns a deep golden brown and reaches an internal temperature of 190°F (88°C). Enjoy the delightful aroma filling your kitchen as it bakes!
Step 13: Cool and Serve
Once baked, remove your pumpkin challah from the oven and let it cool completely on a wire rack. This step is vital to achieving the perfect texture—slice only when it has cooled down, allowing you to enjoy its soft, tender crumb and mildly sweet flavor.
What to Serve with Golden Pumpkin Challah?
Freshly baked pumpkin challah brings warmth and joy to any gathering, inviting you to create an unforgettable meal.
-
Creamy Mashed Potatoes: The richness of buttery mashed potatoes provides a delightful contrast to the tender sweetness of pumpkin challah, making every bite comforting.
-
Hearty Chicken Soup: A bowl of warm, savory chicken soup complements the subtle spices in the challah while adding a cozy touch to your meal. The heartiness of the soup pairs wonderfully with the fluffy texture of the bread.
-
Crisp Garden Salad: A refreshing salad with mixed greens, apples, and walnuts contrasts the bread's richness, balancing flavors and adding a bright touch to your table.
-
Roasted Vegetables: Sweet, caramelized roasted veggies like carrots and Brussels sprouts enhance the fall theme, pairing perfectly with the challah's sweetness. This combination reflects the essence of autumn on your plate.
-
Cheese Platter: Serve alongside a variety of cheeses like Brie or aged cheddar for a delightful charcuterie spread. The creamy textures and rich flavors elevate your pumpkin challah experience.
-
Warm Apple Cider: A cup of spiced apple cider can transport you to a cozy fall day. Its warm sweetness invites you to sip and savor with every bite of your bread, creating a comforting pairing.
-
Chocolate Chip Cookies: For a sweet ending, offer warm chocolate chip cookies. The rich chocolate swirls harmonize beautifully with the flavors of the pumpkin challah, adding a touch of indulgence to your gathering.
-
Pumpkin Spice Latte: Complete the experience with a comforting pumpkin spice latte. The spicy notes resonate with the bread, providing a seasonal flavor embrace that warms the heart and soul.
Pumpkin Challah Variations & Substitutions
Feel free to explore your creativity and tailor this recipe to suit your tastes and dietary needs!
-
Dairy-Free: Substitute vegetable oil with coconut oil and use a flax egg instead of a large egg for a plant-based option. This will keep your pumpkin challah deliciously moist.
-
Sweetness Swap: Replace granulated sugar with maple syrup for a more complex flavor. Just remember to reduce the amount of water slightly to maintain the dough consistency.
-
Add-Ins Galore: Fold in chocolate chips or dried cranberries into the dough for an indulgent twist. These sweet bursts will elevate your bread and make it a perfect treat for any occasion.
-
Gluten-Free: Use a 1:1 gluten-free flour blend to create a gluten-free version of your pumpkin challah. This adaptation may yield a different texture, but it will still bring the taste of fall to your table.
-
Spice It Up: Exchange cinnamon for nutmeg or ginger for a bolder seasonal flavor. Each spice brings its own character, creating a unique tasting experience.
-
Twisted Presentation: Instead of coiling the dough, shape it into a beautiful braid or knots for an eye-catching centerpiece. This gentle twist not only enhances its appearance but adds a delightful texture.
-
Layer of Flavor: Brush the dough with a mixture of melted butter and brown sugar after the first rise for a sweet caramelized crust. This will give a lovely extra layer of flavor to your pumpkin challah.
-
Herb Infusion: Add fresh herbs like rosemary or thyme for an unexpected savory element. This can be particularly delightful when paired with soups or served alongside cheese platters.
If you're intrigued by seasonal baking, also check out my indulgent Pumpkin Brownies Decadent or delightfully warm Pumpkin Cinnamon Roll recipes for more ways to embrace pumpkin this fall!
Expert Tips for Pumpkin Challah
-
Accurate Measurement: Weighing your flour is crucial; it prevents the dough from becoming too dry or dense, ensuring your pumpkin challah has the perfect texture.
-
Warm Water: Always use lukewarm water to activate the yeast properly. If it’s too hot, you risk killing the yeast and ruining your dough.
-
Kneading Time: Knead the dough until it’s elastic and smooth. Over-kneading can make it tough, while under-kneading results in a dense bread.
-
Proper Shaping: Avoid coiling the logs too tightly to allow them to expand beautifully during baking. This results in a light and fluffy pumpkin challah.
-
Egg Wash Technique: For the best glossy finish, brush two layers of egg wash on your dough. This helps create an appealing crust that makes your bread shine.
-
Cooling Period: Let your pumpkin challah cool completely before slicing. Cutting into it too soon can lead to a gummy texture!
Make Ahead Options
These Pumpkin Challah rolls are perfect for meal prep enthusiasts! You can prepare the dough up to 24 hours in advance by following the first five steps, then placing the dough in a greased bowl, covered tightly, and refrigerating. This allows the flavors to develop beautifully overnight while preventing any yeast over-activity. On the day you wish to bake, simply remove the dough from the fridge, let it come to room temperature for about 30 minutes, and continue with the shaping and second rise. You’ll end up with a fresh, soft loaf that’s just as delicious as if you’d made it all in one go! Enjoy the time-saving benefits and the warm aroma filling your kitchen.
Storage Tips for Pumpkin Challah
Room Temperature: Store the pumpkin challah well-wrapped in plastic or a bread bag for up to 3 days. This keeps it soft while allowing the flavors to meld together.
Fridge: If you need to store it longer, you can refrigerate the bread wrapped in a breathable cloth. However, this may dry it out a bit faster than at room temperature.
Freezer: Freeze the challah for up to 3 months. Slice it before freezing for easy access to individual portions. Wrap it tightly in plastic wrap, then place it in a freezer bag.
Reheating: Thaw overnight in the refrigerator before serving. Reheat slices in a toaster or oven at a low temperature for a warm, freshly-baked taste!
Pumpkin Challah Recipe FAQs
How do I select ripe ingredients like pumpkin purée?
Absolutely! When choosing pumpkin purée, look for a deep and vibrant orange color, indicating a rich flavor and good quality. If you're using fresh pumpkin, opt for sugar pumpkins or pie pumpkins, which are sweeter and more tender than regular field pumpkins. Make sure they feel firm and heavy for their size, without any dark spots or blemishes.
What is the best way to store leftover pumpkin challah?
Very important! Store your pumpkin challah at room temperature in an airtight container or wrapped in plastic wrap for up to 3 days. If you need to keep it longer, you can freeze it for up to 3 months. Slice it beforehand for convenient thawing; wrap each slice in plastic wrap or foil, and place them in a freezer bag. When you’re ready to enjoy, just thaw overnight in the fridge.
Can I freeze pumpkin challah? If so, how?
Absolutely! Freezing pumpkin challah is easy. First, slice it into portions for convenience. Wrap each slice individually in plastic wrap or foil to prevent freezer burn, then place them all in a freezer bag or airtight container. It will stay fresh for up to 3 months. When ready to serve, simply thaw in the refrigerator overnight, then warm in the toaster or oven for a freshly-baked taste!
What if my dough doesn’t rise?
Very frustrating! If your dough doesn’t rise, the yeast may not have activated properly. This could be due to water that’s too hot, killing the yeast, or using expired yeast. To troubleshoot, check if your yeast is still active by mixing it with warm water and a pinch of sugar; it should bubble after about 5-10 minutes if it’s alive. If it’s not bubbling, try repeating the process with fresh yeast.
Is this pumpkin challah suitable for those with gluten allergies?
Great question! Unfortunately, traditional pumpkin challah contains gluten due to the use of flour. However, you can substitute the all-purpose flour with a gluten-free all-purpose flour blend, ensuring it includes xanthan gum, which helps replicate the elasticity gluten provides. Just keep in mind that the texture may differ slightly from the original recipe, but it will still be delicious!
What types of dietary needs should I consider when making pumpkin challah?
Very thoughtful! For those with egg allergies or following a vegan diet, consider using flaxseed meal or chia seeds as an egg substitute. Mix 1 tablespoon of either with 2.5 tablespoons of water and let it sit until it gels. Additionally, ensure your sugar is vegan, as some may be processed with bone char. Always check your ingredient labels for potential allergens.
Delicious Pumpkin Challah: A Cozy Twist for Your Holidays
Ingredients
Equipment
Method
- Measure the flour and set it aside.
- Combine dry ingredients in a large mixing bowl.
- Whisk wet ingredients in a separate bowl.
- Mix wet mixture into dry ingredients to form dough.
- Knead the dough until elastic and smooth.
- Place in a greased bowl and allow it to rise until doubled in size.
- Preheat the oven to 350°F (175°C).
- Gently deflate the dough and shape it into logs.
- Coil the logs on a baking sheet lined with parchment paper.
- Cover and allow to rise again until puffy.
- Prepare and apply the egg wash.
- Bake for 35-40 minutes until deep golden brown.
- Cool completely on a wire rack before slicing.
Leave a Reply