
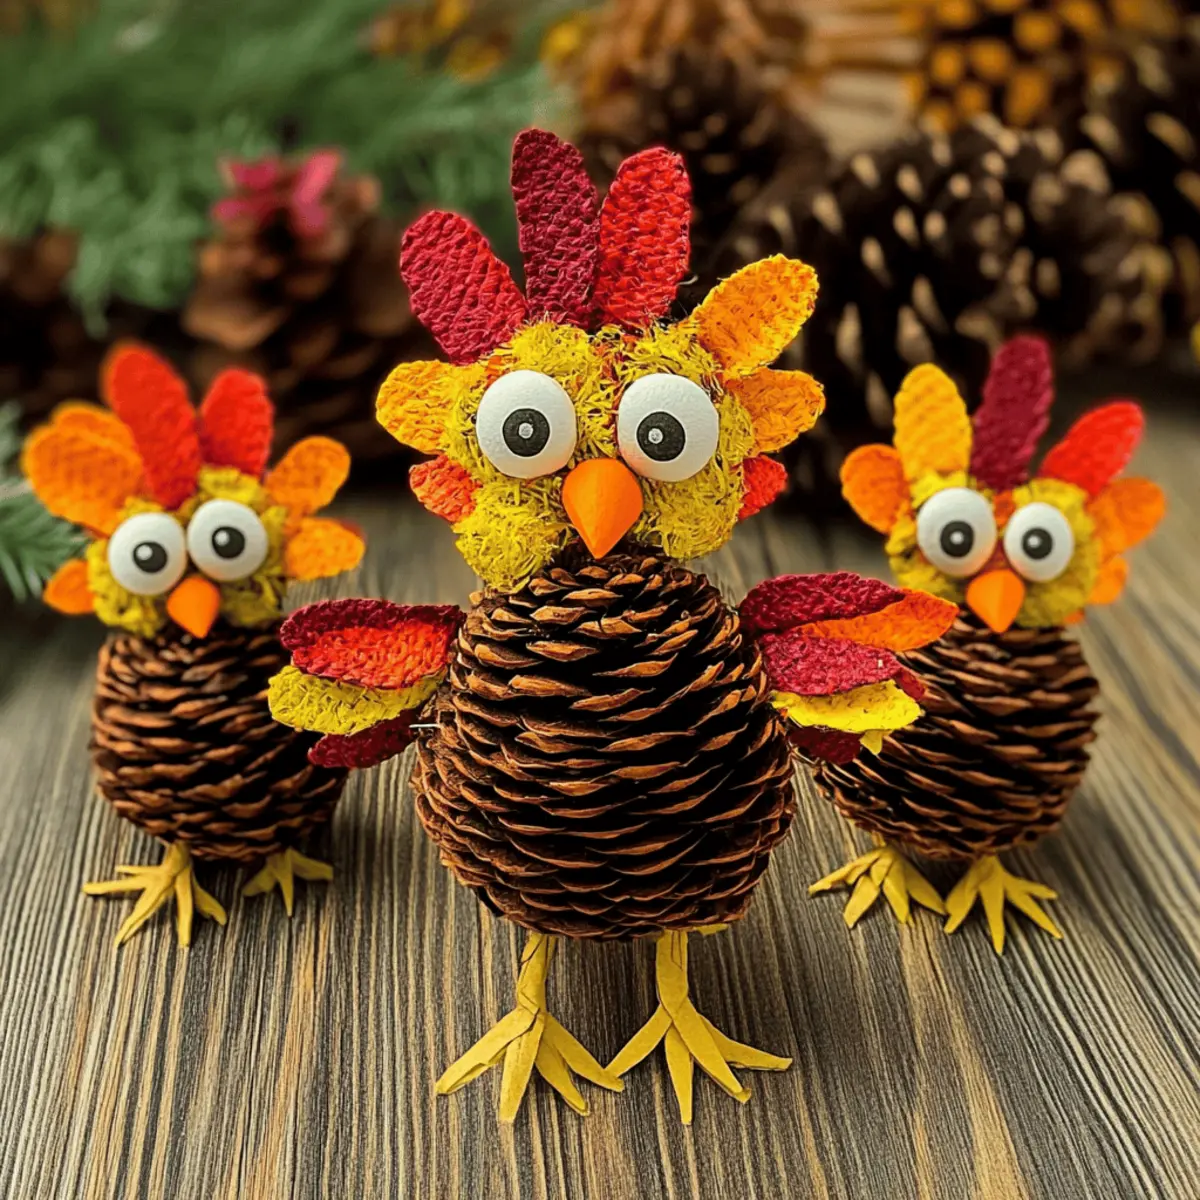
As I rummaged through the autumn leaves, I stumbled upon an idea that combines nature's charm with our holiday spirit—adorable Pine Cone Turkeys! This delightful DIY craft not only provides a perfect way to engage kids and adults alike but also creates personalized decorations that will brighten any Thanksgiving gathering. With just a few simple materials like pinecones, acrylic paint, and pipe cleaners, you can whip up these whimsical turkeys without breaking the bank. Plus, they double as unique table centerpieces or festive gifts, adding a warm, homey touch to your holiday decor. Are you ready to unleash your creativity and embrace this fun crafting adventure? Let's dive in!
Why Make Pine Cone Turkeys?
Family Fun: This craft is perfect for both kids and adults, making it a fantastic way to bond over creativity during the Thanksgiving season.
Budget-Friendly: Using simple supplies like pinecones, acrylic paint, and pipe cleaners means you can create deliciously charming decor without overspending.
Unique Decor: Each turkey is a one-of-a-kind masterpiece, adding a personal touch to your holiday table or mantle.
Versatile Use: Not only do they serve as adorable centerpieces, but they also make perfect gifts or festive party favors to delight your guests!
Memorable Tradition: Crafting Pine Cone Turkeys can become a cherished family tradition, linking your loved ones to the joy of Thanksgiving decor.
Pine Cone Turkey Ingredients
• Gather your supplies to start crafting these delightful Pine Cone Turkeys!
For the Turkey Body
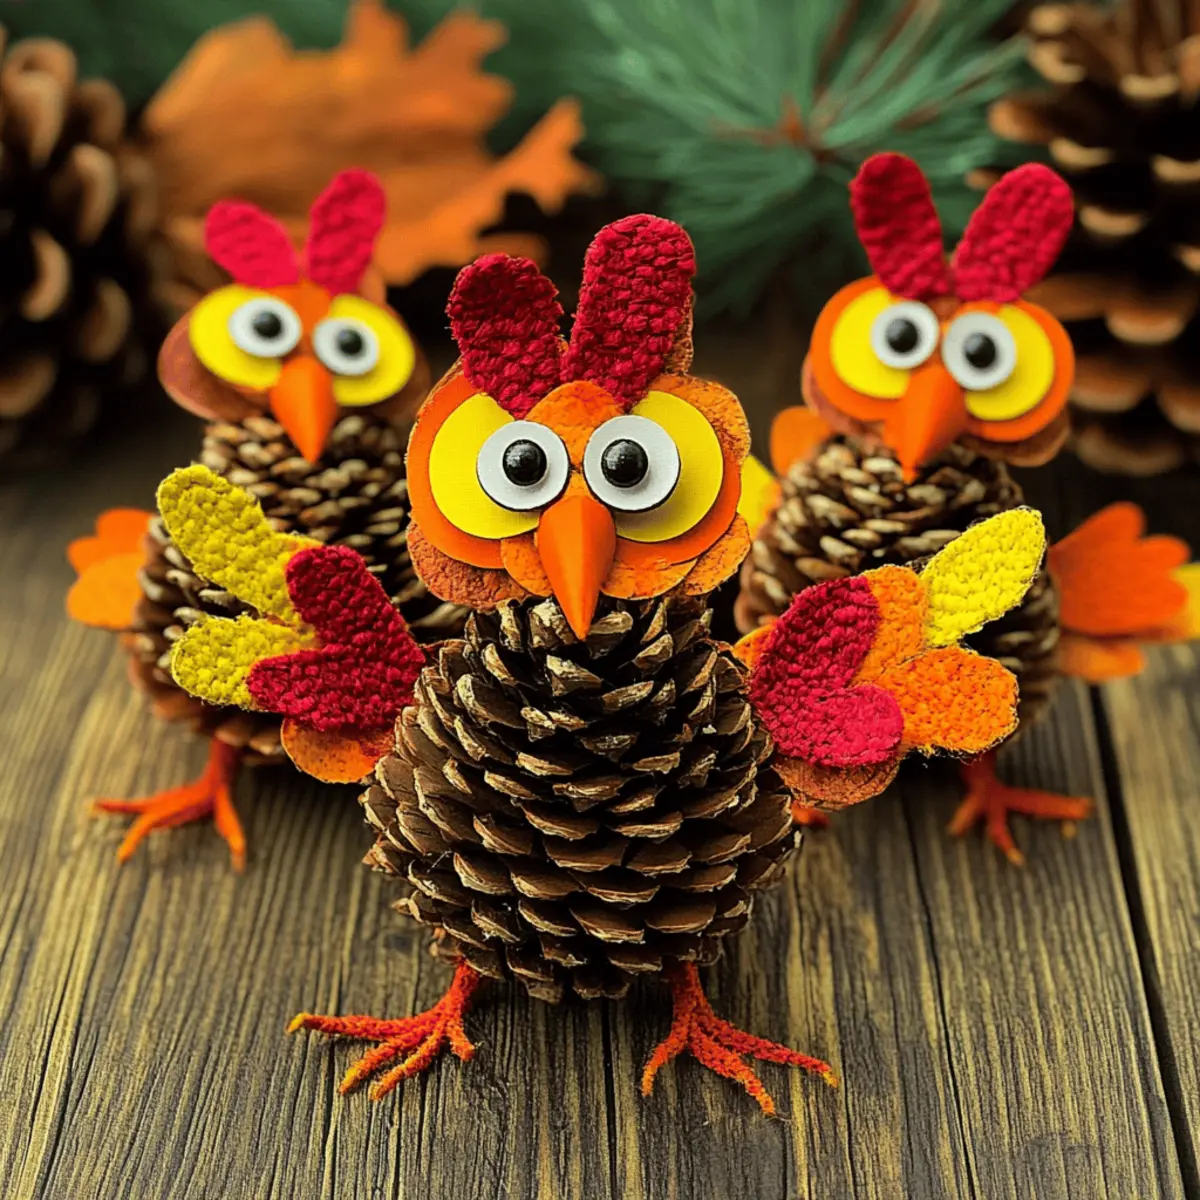
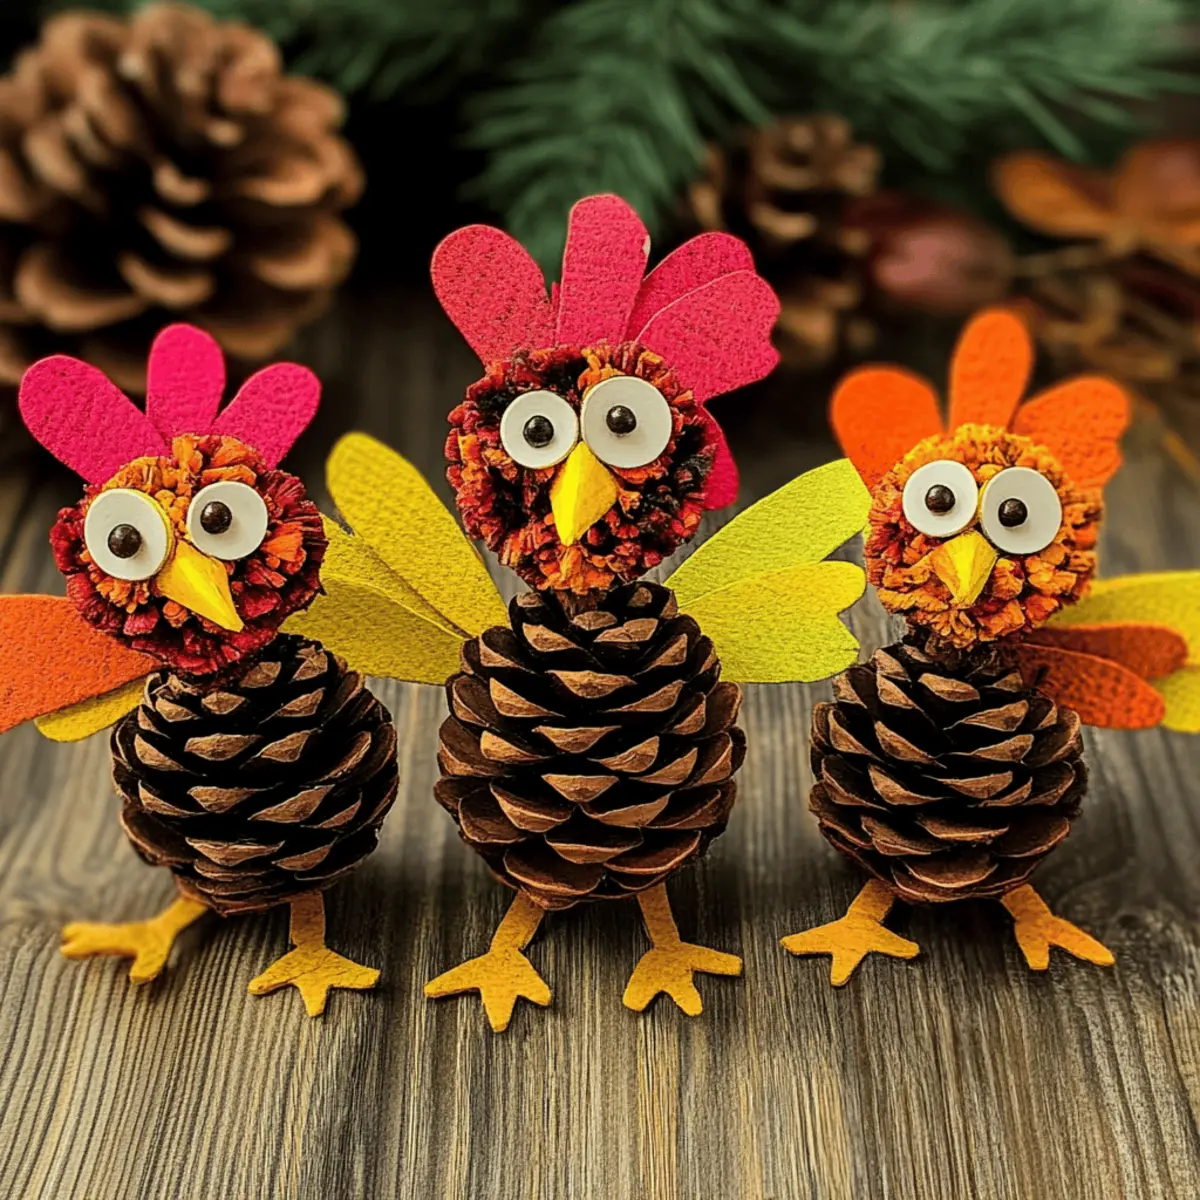
- Pinecones – Look for medium-sized ones (about 3x3 inches) for a sturdy base; they provide rustic charm to your decorations.
For the Feathers
- Matte Acrylic Craft Paint – Choose vibrant colors like orange, yellow, and red to brighten your turkeys' feathers; easily found at craft or dollar stores for budget-friendly fun.
For the Features
- Craft Paper Scraps – Use colorful scraps to create beaks and wattles; orange, yellow, and red are festive color choices to match the Thanksgiving spirit.
- Pipe Cleaners – Use these lively colors for legs and facial features; they’re flexible and can easily be shaped into charming turkey legs.
- Googly Eyes – 15mm (0.6-inch) eyes add an adorable touch to each turkey's personality; they make your creations come alive!
Enjoy crafting these Pine Cone Turkeys and let your creativity shine as you personalize each turkey!
Step‑by‑Step Instructions for Pine Cone Turkeys
Step 1: Paint the Feathers
Begin by selecting your matte acrylic craft paint in vibrant colors like orange, yellow, and red. Using a paintbrush, apply the paint to the tips of each pinecone, making sure to cover them generously while leaving some sections natural for a charming contrast. Allow the painted feathers to dry for about 15-20 minutes before proceeding, ensuring the colors stay bold and lively.
Step 2: Make the Legs
While the feathers dry, take your pipe cleaners and cut them into lengths suited for turkey legs. Bend each piece into a U-shape to form the legs. Once shaped, secure them to the base of the pinecone by applying hot glue, making sure they are firmly attached. Ensure the legs are evenly spaced and provide a sturdy foundation for your Pine Cone Turkeys.
Step 3: Shape the Faces
Next, take a pipe cleaner and curl it into a spiral shape to create the turkey’s head. This will add whimsy and character to your Pine Cone Turkeys. Once shaped, carefully secure the spiral to the top of the pinecone using a small amount of hot glue. This step starts giving your turkey its charming personality, so have fun with the shape!
Step 4: Cut and Attach Features
Now it's time to bring your Pine Cone Turkeys to life! Cut small shapes from your craft paper scraps to form beaks and wattles, sticking with festive colors like orange and red. Use hot glue to attach these features along with googly eyes to the curled pipe cleaner. Position them to give your turkey an endearing expression, ensuring the features are securely glued.
Step 5: Assemble
Finally, attach the completed face to the front of the pinecone using a generous dab of hot glue. Hold it in place for a few moments to allow the glue to set. Once secure, step back and admire your Pine Cone Turkeys, ready to bring warmth and charm to your Thanksgiving decorations. Make sure to let your creations fully dry in a stable location before displaying them.
Pine Cone Turkeys Variations & Substitutions
Feel free to get creative and customize your Pine Cone Turkeys to make them uniquely yours!
-
Metallic Paints: Use metallic paints instead of matte for a glamorous holiday look. These shimmering turkeys will catch everyone's eye on your table.
-
Pastel Colors: Swap bright colors for soft pastels if you're aiming for a cheerful, springtime vibe rather than traditional autumn hues. This gives a fresh and fun twist!
-
Hand-Drawn Eyes: Instead of googly eyes, draw or paint faces for a personal touch. You can let kids create their own unique expressions, making every turkey truly special.
-
Patterned Paper: Integrate patterned scrapbook paper for more colorful beaks and wattles. Think polka dots or florals to add flair and personality to your turkeys.
-
Twisted Pipe Cleaners: Create spiral or braided legs using multiple colors of pipe cleaners for extra pizzazz, adding a whimsical twist to your turkey creations.
-
Felt Features: Try using felt instead of paper for the beaks and wattles. They offer a soft texture that can elevate the aesthetic of your turkey while being easy to cut and glue.
-
Natural Decor: Incorporate small pine needles or acorns as additional decorations around your turkeys, enhancing their connection to nature.
-
Spicy Touch: Add a little heat to your crafting vibe by sharing some spicy recipes or hot beverages to enjoy while creating these adorable decorations. Cozy blankets and a hot cup of pumpkin spice latte will warm up your crafting time!
Make Ahead Options
These adorable Pine Cone Turkeys are perfect for busy home cooks looking to simplify their Thanksgiving preparations! You can paint the pinecones and shape the legs up to 24 hours in advance; just store them in a cool, dry place to maintain their vibrant colors and quality. For the facial features, cut out the beaks and wattles, as well as prepare the googly eyes ahead of time—keeping them in a sealed bag will ensure they stay fresh until you’re ready to finish. When it’s time to gather your family and assemble, simply glue the features onto your painted pinecones, and you’ll have delightful decorations ready in no time, allowing you to enjoy the holiday spirit without stress!
What to Serve with Adorable Pine Cone Turkeys?
Bring your Thanksgiving table to life with delightful pairings that enhance both your meal and this charming decor.
-
Savory Stuffing: A classic walnut and sage stuffing complements the earthy flavor of your Thanksgiving feast while echoing the rustic charm of the pine cone turkeys.
-
Cranberry Sauce: This tangy, sweet sauce adds a refreshing contrast to the savory meats and side dishes, brightening your table and palate alongside your creative decor.
-
Maple Glazed Carrots: Roasted carrots tossed in maple syrup create a luscious sweetness that ties harmoniously with your holiday spread and echoes the autumn colors of your turkeys.
-
Pumpkin Pie: Nothing celebrates Thanksgiving quite like creamy pumpkin pie. Its warm spices create a comforting end to your meal, echoing the festive spirit brought by your crafted turkeys.
-
Herb Roasted Turkey: While you showcase your adorable pine cone versions, savor a succulent herb-roasted turkey, a centerpiece that ties together your crafting journey with a delicious tradition.
-
Spiced Apple Cider: Warm spiced apple cider is a perfect seasonal drink to serve guests, embracing the cozy holiday atmosphere while inviting them to sip and enjoy their surroundings.
-
Garlic Mashed Potatoes: Creamy garlic mashed potatoes provide the ultimate comfort food, enriching your meal while bringing a delightful balance to your Thanksgiving table.
-
Roasted Brussels Sprouts: Crispy Brussels sprouts with a hint of balsamic glaze engage your guests with their texture and flavor, making them an ideal side alongside your festive decor.
Each of these pairings not only blends perfectly with your homemade meal but also complements the whimsical charm of your pine cone turkeys!
Storage Tips for Pine Cone Turkeys
-
Room Temperature: Keep your Pine Cone Turkeys in a dry, stable area, away from direct sunlight to maintain their colorful appearance and structure.
-
Fridge: Not recommended; these decorations do not require refrigeration as they’re not perishable.
-
Display: Arrange turkeys on your mantel or dining table where they can be appreciated. Just ensure they are secure on the surface to prevent tipping.
-
Make-Ahead Tips: You can craft these turkeys in advance. They can be stored in a box or basket, keeping them safe until it's time for Thanksgiving display!
Expert Tips for Pine Cone Turkeys
-
Choose Dry Pinecones: Ensure your pinecones are completely dry to help glue adhere better and make painting easier.
-
Allow Drying Time: After painting, permit 15-20 minutes of drying time between applications to avoid mixing colors and maintain vibrancy.
-
Second Coat Advantage: For a deeper color, don’t hesitate to apply a second coat of paint—this enhances the brightness of your Pine Cone Turkeys.
-
Trim Legs if Necessary: If the pipe cleaner legs seem too long, gently trim them to create a better proportion for your turkey’s appearance.
-
Mix Feature Shapes: Get creative with various shapes and colors for beaks and wattles, adding a unique flair to each of your delightful turkeys.
Pine Cone Turkeys Recipe FAQs
How do I choose the right pinecones for my turkeys?
Choosing the right pinecones is essential for building sturdy Pine Cone Turkeys. Look for medium-sized pinecones, approximately 3x3 inches, that are dry and free from dark spots or mold. This ensures a solid base for decoration and makes painting easier.
How should I store my Pine Cone Turkeys after making them?
Store your Pine Cone Turkeys at room temperature in a dry, stable area, away from direct sunlight. Placing them on a mantel or a dining table where they can be admired is ideal. Just make sure they're secured on the surface to prevent them from tipping over.
Can I freeze my Pine Cone Turkeys for later use?
Freezing is not recommended for Pine Cone Turkeys, as they are decorative items and don’t require refrigeration. Keeping them in a stable environment is best to preserve their appearance and structural integrity.
What should I do if my paint is mixing on the pinecones?
If you notice your colors mixing while painting, it's likely the paint isn't dry yet. To prevent this, allow each layer of paint to dry for 15-20 minutes before applying additional coats. If you're already mixing colors, let it dry fully, then consider painting over with a second coat once it's hardened.
Are these turkeys safe for pets or children?
Yes, Pine Cone Turkeys can be safe around pets and children, but supervision is encouraged. Some materials, like googly eyes and pipe cleaners, could pose a choking hazard if removed. It's always best to keep an eye on little ones and furry friends while they’re around your festive decorations.

Craft Adorable Pine Cone Turkeys for Your Thanksgiving Decor
Ingredients
Equipment
Method
- Begin by selecting your matte acrylic craft paint in vibrant colors. Using a paintbrush, apply the paint to the tips of each pinecone, making sure to cover them generously while leaving some sections natural. Allow to dry for about 15-20 minutes.
- While the feathers dry, take your pipe cleaners and cut them to form turkey legs. Bend into a U-shape and secure to the base with hot glue.
- Curl a pipe cleaner into a spiral shape for the turkey’s head and secure it to the top of the pinecone with hot glue.
- Cut shapes from craft paper scraps for beaks and wattles. Use hot glue to attach these features along with googly eyes to the curled pipe cleaner.
- Attach the completed face to the front of the pinecone using hot glue. Hold in place to set. Let dry before displaying your Pine Cone Turkeys.


Leave a Reply