
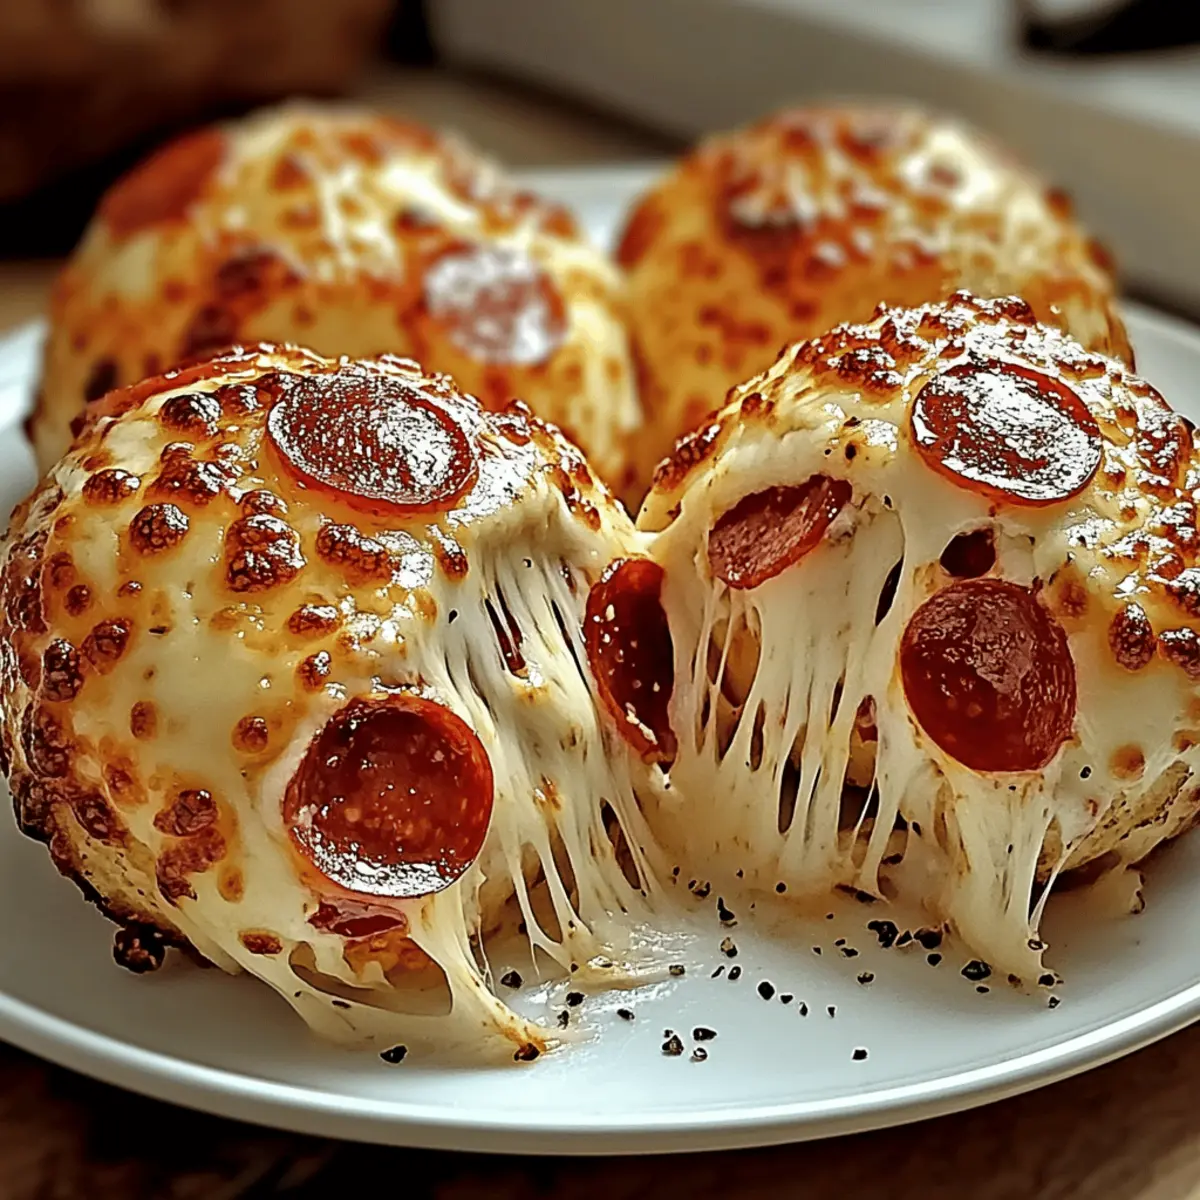
The scent of buttery dough and melted cheese wafts through the air as I pull a tray of Easy Pepperoni Pizza Bombs from the oven, their golden exteriors beckoning for a bite. These delightful snacks are not only a hit with kids, but they're also a lifesaver for busy adults looking to reclaim their evenings from fast food. Ready in under 30 minutes, these customizable bites are a fantastic party or game night option, and the best part? They’re freezer-friendly! Imagine pulling a batch of these cheesy, savory treats straight from the freezer for a satisfying snack any time. Ready to dive into this tasty adventure? Let’s make your kitchen the heart of homemade comfort!
Why Are Pepperoni Pizza Bombs So Irresistible?
Convenience at its finest: In just 30 minutes, you can whip up these delicious treats, perfect for busy weeknights or unexpected guests.
Kid-approved flavors: With gooey cheese and pepperoni, they're a guaranteed hit with children and adults alike—say goodbye to mealtime battles!
Versatile options: Feel free to explore various fillings, from veggies to different cheeses, catering to every taste preference.
Make ahead magic: These freezer-friendly bites can be prepped in advance, allowing you to enjoy quick snacks whenever cravings strike.
Crowd-pleasing appeal: Whether it’s game night or a cozy family movie, these pizza bombs transform any gathering into a festive occasion. For more delicious ideas, check out our Blue Cheese Pizza or explore unique variations on our freezer-friendly recipe page!
Pepperoni Pizza Bombs Ingredients
For the Dough
• Refrigerated Biscuit Dough – Provides a flaky texture; you can also use crescent roll dough for extra fluffiness.
• Melted Butter – Adds richness to the crust; olive oil is a healthy alternative for a lighter taste.
For the Filling
• Shredded Mozzarella Cheese – Creates a gooey, melty center; substitute cheddar for a sharp flavor twist.
• Mini Pepperoni Slices – Delivers classic pizza taste; try diced bell peppers for a vegetarian alternative.
• Garlic Powder – Elevates the flavor profile; fresh minced garlic can be used for a punchier aroma.
• Italian Seasoning – Adds authentic Italian herb notes; mix in dried herbs like basil and oregano if you don’t have this on hand.
For the Topping
• Seasoned Butter Mixture – Combine melted butter with garlic powder and Italian seasoning for a flavorful wash that enhances the crust.
With these Pepperoni Pizza Bombs ingredients at the ready, you're set to create a dish that's sure to delight everyone in the family!
Step‑by‑Step Instructions for Easy Pepperoni Pizza Bombs
Step 1: Preheat and Prepare
Preheat your oven to 375°F (190°C) while preparing a baking sheet lined with parchment paper. The parchment will help prevent sticking and promote even browning. As the oven warms, gather your ingredients and recall the excitement of making these delicious Pepperoni Pizza Bombs!
Step 2: Create the Seasoned Butter
In a small bowl, combine melted butter, garlic powder, and Italian seasoning until well blended. This aromatic mixture will enhance the flavor of your pizza bombs. Set this aside for brushing later, adding a mouthwatering golden hue to the crust as they bake.
Step 3: Shape the Dough
Open the refrigerated biscuit dough and separate each piece. On a clean surface or a lightly floured countertop, flatten each biscuit into a 3-4 inch circle using your hands or a rolling pin. Aim for an even thickness, ensuring these rounds will cradle the delicious filling of your Pepperoni Pizza Bombs.
Step 4: Fill Each Dough Circle
Now, it’s time to fill! Place a tablespoon of shredded mozzarella cheese and several mini pepperoni slices right in the center of each dough circle. Don’t skimp on the filling; the gooey cheese and pepperoni are what make these pizza bombs irresistible.
Step 5: Seal the Bombs
Using your fingers, pinch the edges of each dough circle together tightly to seal in the filling. Roll each stuffed dough into a ball to form a secure, easy-to-handle snack. This step is crucial for preventing any cheesy goodness from leaking out during baking.
Step 6: Arrange and Brush
Place the sealed dough balls seam-side down on the prepared baking sheet, giving them a bit of space to puff up. Brush the tops generously with the seasoned butter mixture you prepared earlier. This will not only add flavor but also create that desirable golden-brown crust.
Step 7: Bake to Perfection
Slide the baking sheet into the preheated oven and bake the Pepperoni Pizza Bombs for 12-15 minutes. Keep a close eye on them; they should be golden brown and puffed when done. The inviting aroma filling your kitchen will be a sure sign that they’re almost ready!
Step 8: Cool and Serve
Once baked, remove the pizza bombs from the oven and allow them to cool briefly on the baking sheet. The interior will be hot and gooey; letting them rest for a few minutes allows the filling to set. Serve warm with marinara or ranch dipping sauces for a delightful finish!
Make Ahead Options
These Easy Pepperoni Pizza Bombs are a fantastic choice for meal prep! You can prepare the filling (cheese and mini pepperoni) and assemble the bombs up to 24 hours in advance. Simply place them in an airtight container and refrigerate until you’re ready to bake. Alternatively, you can freeze uncooked pizza bombs for up to 2 months; just arrange them on a baking sheet to freeze individually before transferring to a freezer bag. When you’re ready to serve, bake them directly from frozen, adding a few extra minutes to the cooking time, and you’ll enjoy fresh, cheesy goodness with minimal effort. Each bite will be just as delicious as if you made them on the spot!
How to Store and Freeze Pepperoni Pizza Bombs
Fridge: Store any leftovers in an airtight container for up to 3 days to maintain freshness and flavor.
Freezer: Uncooked Pepperoni Pizza Bombs can be frozen for up to 2 months. Arrange them on a baking sheet to freeze individually, then transfer to a freezer-safe bag.
Baking from Frozen: Bake directly from frozen, extending the baking time by about 3-5 minutes to achieve that perfect golden brown crust.
Reheating: For leftovers, reheat in a preheated oven at 350°F (175°C) for 10-12 minutes until warmed through and crispy.
Expert Tips for Perfect Pepperoni Pizza Bombs
• Seal the Edges: Ensure all edges are pinched tightly to avoid any filling leaks during baking. This will keep your pizza bombs perfectly gooey on the inside.
• Mind the Baking Time: Ovens can vary, so start checking for doneness at the 12-minute mark. You're looking for a golden brown color and puffed appearance.
• Let Them Cool: Allow the pizza bombs to cool for a few minutes after baking. This helps the cheese filling firm up a bit, making for a less messy experience when you take a bite.
• Experiment with Fillings: Don’t hesitate to get creative! Swap out mini pepperoni for vegetables or different cheese blends to make your Pepperoni Pizza Bombs uniquely yours.
• Freezer Friendly: Prep extra batches and freeze before baking. When you're in a pinch, bake them straight from the freezer, adjusting your baking time as needed for a quick snack!
What to Serve with Easy Pepperoni Pizza Bombs
Savoring these cheesy bites is just the beginning—let's create a delightful meal around them!
-
Creamy Garlic Dip: This rich dip perfectly complements the pizza bombs, adding a velvety contrast that enhances their flavors. The garlic infusion elevates every bite, making it irresistible.
-
Fresh Garden Salad: Crisp mixed greens tossed with a tangy vinaigrette offer a refreshing balance to the warm, savory pizza bombs. Toss in tomatoes, cucumbers, and olives for extra texture and taste.
-
Marinara Sauce: A classic pairing, this thick, rich sauce provides a zesty dip that complements the cheesy interior of the pizza bombs beautifully. It invokes memories of traditional pizza nights, making each bomb even more nostalgic.
-
Sweet Corn on the Cob: Grilled or boiled, sweet corn adds a crunchy, buttery side that contrasts with the fluffy pizza bombs. The sweetness of the corn balances out the savory flavors, creating an enjoyable spectrum of tastes.
-
Caprese Skewers: Juicy cherry tomatoes, fresh mozzarella, and aromatic basil drizzled with balsamic glaze create a colorful, fresh side. These skewers add a delightful burst of flavor, effortlessly elevating your meal.
-
Sparkling Lemonade: Keep thirst at bay with this light, refreshing drink that enhances the overall dining experience. The citrus notes are a perfect complement, cutting through the richness of the pizza bombs.
-
Chocolate Chip Cookies: Finish the meal with a classic dessert that pairs delightfully with the savory notes of your main dish. Their soft, gooey centers add a sweet closure to your tasty experience!
Variations & Substitutions for Pepperoni Pizza Bombs
Feel free to unleash your creativity in the kitchen and customize these delightful bites to suit your taste!
-
Dairy-Free: Substitute mozzarella with dairy-free cheese alternatives for a delicious, lactose-free version.
-
Veggie Lovers: Replace mini pepperoni with a colorful mix of diced bell peppers, mushrooms, and olives for a fresh vegetarian twist. Your pizza bombs will burst with vibrant flavors!
-
Cheese Galore: Mix different cheeses like cheddar or provolone for an exciting flavor fusion. Blend them together for a gooey experience that will make each bite unforgettable.
-
BBQ Delight: Swap out marinara for a rich BBQ sauce and fill the bombs with shredded chicken for a smoky twist. This addition will transform your pizza bombs into a festive treat that’s perfect for gatherings.
-
Breakfast Bombs: Use scrambled eggs, cooked sausage, and cheese for a hearty breakfast option. These breakfast bites can be a game changer for busy mornings!
-
Spicy Kick: Add jalapeños or red pepper flakes for some heat. Perfect for those who love added spice in their meals, these tweaks will awaken your taste buds!
-
Crescent Roll Upgrade: If you're looking for a lighter texture, substitute biscuit dough with crescent roll dough for an extra flaky bite. The result will be irresistibly fluffy and delicious!
-
Herby Infusion: Experiment with different herbs in your butter mixture, like parsley or thyme. This simple change will elevate the flavor profile and make your Pepperoni Pizza Bombs truly special.
No matter which variation you choose, these twists ensure that every batch of pizza bombs can be tailored to your unique cravings. For more cheesy inspiration, check out our Blue Cheese Pizza or explore other creative variations on our freezer-friendly recipe page!
Easy Pepperoni Pizza Bombs Recipe FAQs
How do I select the best refrigerated biscuit dough for my pizza bombs?
Absolutely! When choosing refrigerated biscuit dough, opt for brands that offer a classic flakiness. Check the expiration date, and look for any visible punctures or tears in the packaging that might affect freshness. If you love variety, crescent roll dough gives a fluffier texture, while traditional pizza dough is perfect for a chewier bite.
What’s the best way to store leftover Pepperoni Pizza Bombs?
Very! Store any uneaten pizza bombs in an airtight container in the fridge for up to 3 days. If packed properly, they will maintain their delicious flavor and texture. For longer storage, consider freezing them!
Can I freeze uncooked Pepperoni Pizza Bombs, and how do I do it?
Yes, you can! To freeze the uncooked pizza bombs, first follow the assembly steps but leave them unbaked. Arrange them on a baking sheet lined with parchment to avoid sticking, then freeze until solid. Once firm, transfer them to a freezer-safe bag or container. This way, they’ll last for up to 2 months! When you're ready to bake, simply place them directly in the oven from frozen, adding an extra 3-5 minutes to the baking time.
What should I do if my pizza bombs leak filling during baking?
Don't worry! If you find leakage during baking, it usually means the edges weren’t sealed tightly. To prevent this, make sure to pinch the edges firmly and roll the dough into a ball after filling. If they're already baked and leaking, serve them with extra sauce for dipping—they're still delicious!
Are there any dietary considerations I should keep in mind for Pepperoni Pizza Bombs?
Absolutely! If you’re catering to dietary restrictions, consider swapping mini pepperoni with diced bell peppers or mushrooms for a vegetarian option. For a leaner choice, turkey pepperoni works wonderfully. If allergies are a concern, always verify that your alternative dough, cheese, or toppings are safe and suitable for those who will be enjoying these delightful bites.
Pepperoni Pizza Bombs: Quick, Cheesy Joy for Everyone
Ingredients
Equipment
Method
- Preheat your oven to 375°F (190°C) and prepare a baking sheet lined with parchment paper.
- In a small bowl, combine melted butter, garlic powder, and Italian seasoning until well blended.
- Flatten each biscuit into a 3-4 inch circle on a clean surface.
- Place a tablespoon of shredded mozzarella cheese and several mini pepperoni slices in the center of each dough circle.
- Pinch the edges of the dough circle tightly to seal in the filling and roll into a ball.
- Place sealed dough balls seam-side down on the prepared baking sheet and brush with the seasoned butter mixture.
- Bake in the preheated oven for 12-15 minutes until golden brown and puffed.
- Remove from the oven, allow to cool briefly, and serve warm with marinara or ranch dipping sauces.


Leave a Reply