
As I rummaged through my pantry in search of a Halloween treat, a delightful idea struck me—why not whip up some Scary Cute No-Bake Monster Truffles? These adorable little bites not only capture the whimsical spirit of the spooky season but are also incredibly simple to make. With just a handful of ingredients like crushed Oreos and creamy cream cheese, you'll create a delectable dessert that’s perfect for parties or family gatherings. Plus, the no-bake nature of these truffles means you can enjoy your creative cooking without the heat of the oven. Ready to impress your friends and family with these fun and eerie treats? Let’s dive into the world of Monster Truffles together!
Why Are Monster Truffles So Irresistible?
Easy to Make: This no-bake recipe requires minimal effort, perfect for busy home cooks looking to whip up a festive dessert without the hassle.
Creative Fun: Personalize your Monster Truffles with a variety of decorations—think spooky colors and playful toppings that will thrill both kids and adults alike!
Decadent Flavor: The rich combination of Oreo and cream cheese creates a creamy, indulgent truffle that will satisfy your sweet tooth.
Perfect for Parties: These adorable treats are ideal for Halloween parties, school events, or a casual family movie night—guaranteed crowd-pleasers!
Versatile Treat: Experiment with different candies and toppings to make these truffles uniquely yours. For more ideas, check out our variation suggestions to truly make them shine!
Store Well: Keep leftovers (if there are any!) in an airtight container, and they’ll hold their deliciousness for up to a week.
Monster Truffles Ingredients
For the Truffles
- Oreos – The base ingredient that provides a rich chocolatey flavor; feel free to use any chocolate sandwich cookie as a substitute.
- Cream Cheese – Adds a creamy texture and binds the truffles together; mascarpone can be swapped in for a tangier taste.
- Finely Chopped Snickers – Introduces a chewy texture and caramel flavor; you can use any nutty chocolate bar in its place.
- Reese's Pieces – Offers a crunchy peanut butter taste and vibrant colors; substitute with M&Ms for a nut-free option.
For the Coating
- White Chocolate Chips – Provides sweetness and a smooth finish when melted; dark chocolate can be used for a richer flavor.
- Coconut or Vegetable Oil – Helps to melt the chocolate smoothly and achieve a glossy finish; any neutral oil is a good alternative.
- Green Gel Food Coloring – Adds a fun pop of color to the white chocolate for decoration; you can omit this for a classic look.
For the Decoration
- Candy Eyeballs – Essential for the monster appearance; swap with chocolate or fruit-flavored candies if desired.
- Purple Sprinkles – Optional but adds a touch of spookiness to your Monster Truffles; feel free to use any sprinkles you fancy!
These Monster Truffles are not just visually delightful; they also pack a punch of flavor, making them the ideal treat to celebrate Halloween with loved ones!
Step‑by‑Step Instructions for Monster Truffles
Step 1: Crush the Oreos
Begin by placing 24 Oreos in a large Ziploc bag and crush them into fine crumbs using a rolling pin. Alternatively, pulse them in a food processor until you achieve a powder-like consistency. In a mixing bowl, combine the crushed Oreos with 8 ounces of softened cream cheese and mix until fully integrated and smooth, which should take about 2-3 minutes.
Step 2: Fold in the Candies
Once your mixture is smooth, gently fold in 1 cup of finely chopped Snickers and 1 cup of Reese's Pieces using a spatula. Ensure the candies are evenly distributed throughout the mixture, adding delightful texture and flavor to your Monster Truffles. This process should take just a couple of minutes until you see the candies well incorporated.
Step 3: Shape the Truffles
Using your hands, scoop out a tablespoon of the mixture and roll it into a bite-sized ball, about 1 inch in diameter. Place each formed ball onto a parchment-lined tray, making sure to leave space between them. Once all the mixture is shaped, refrigerate the tray for about 30 minutes to firm up the truffles, which will help them hold their shape while coating.
Step 4: Melt the Chocolate Coating
While your truffles chill, prepare the chocolate coating by melting 1 cup of white chocolate chips and 1 tablespoon of coconut oil in a microwave-safe bowl. Heat in 30-second intervals, stirring in between until the mixture is smooth and shiny. Once melted, add a few drops of green gel food coloring, stirring until the color is evenly incorporated for that spooky touch.
Step 5: Dip the Truffles
Retrieve your chilled Monster Truffles from the refrigerator, and using a fork or a dipping tool, dip each truffle into the melted chocolate, ensuring they are fully coated. Allow excess chocolate to drip back into the bowl before placing them back on the parchment-lined tray. This step will create a lovely chocolate shell while keeping your hands clean.
Step 6: Decorate
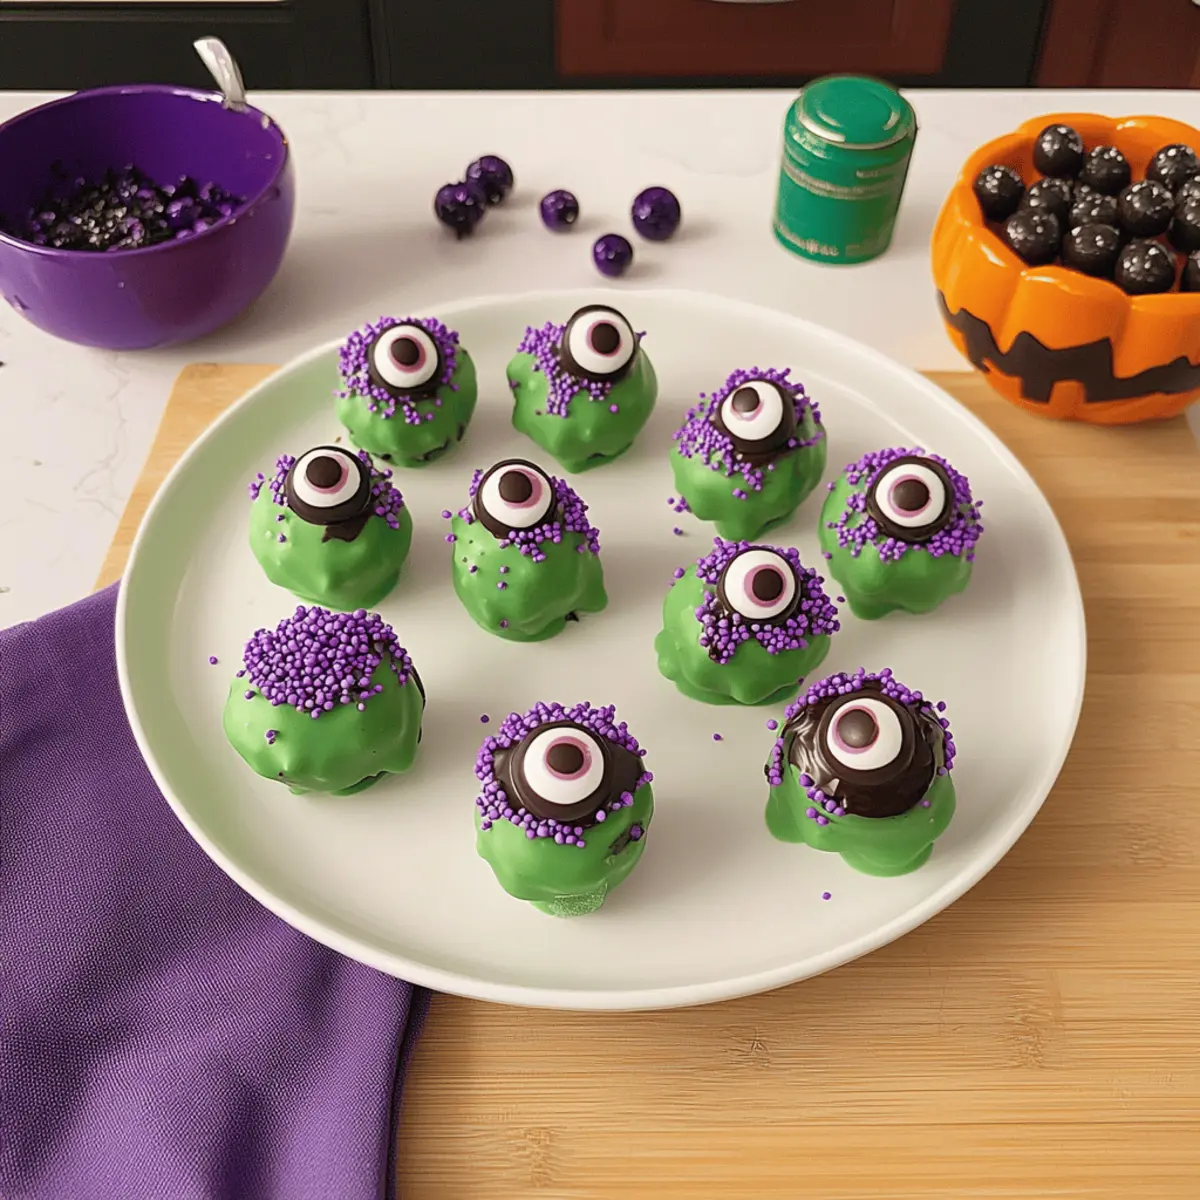
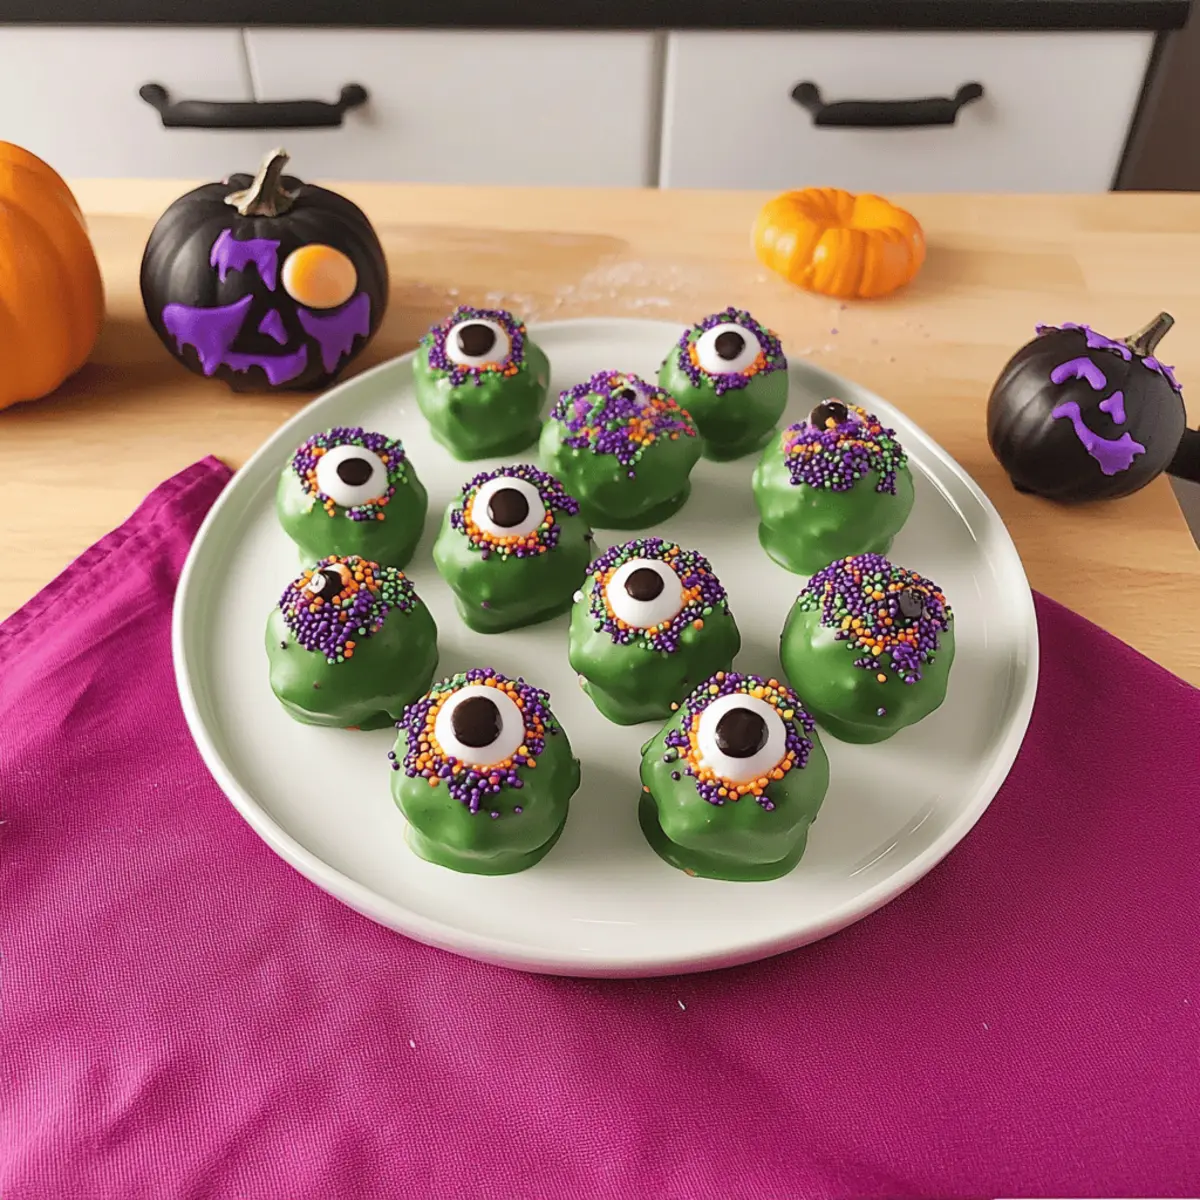
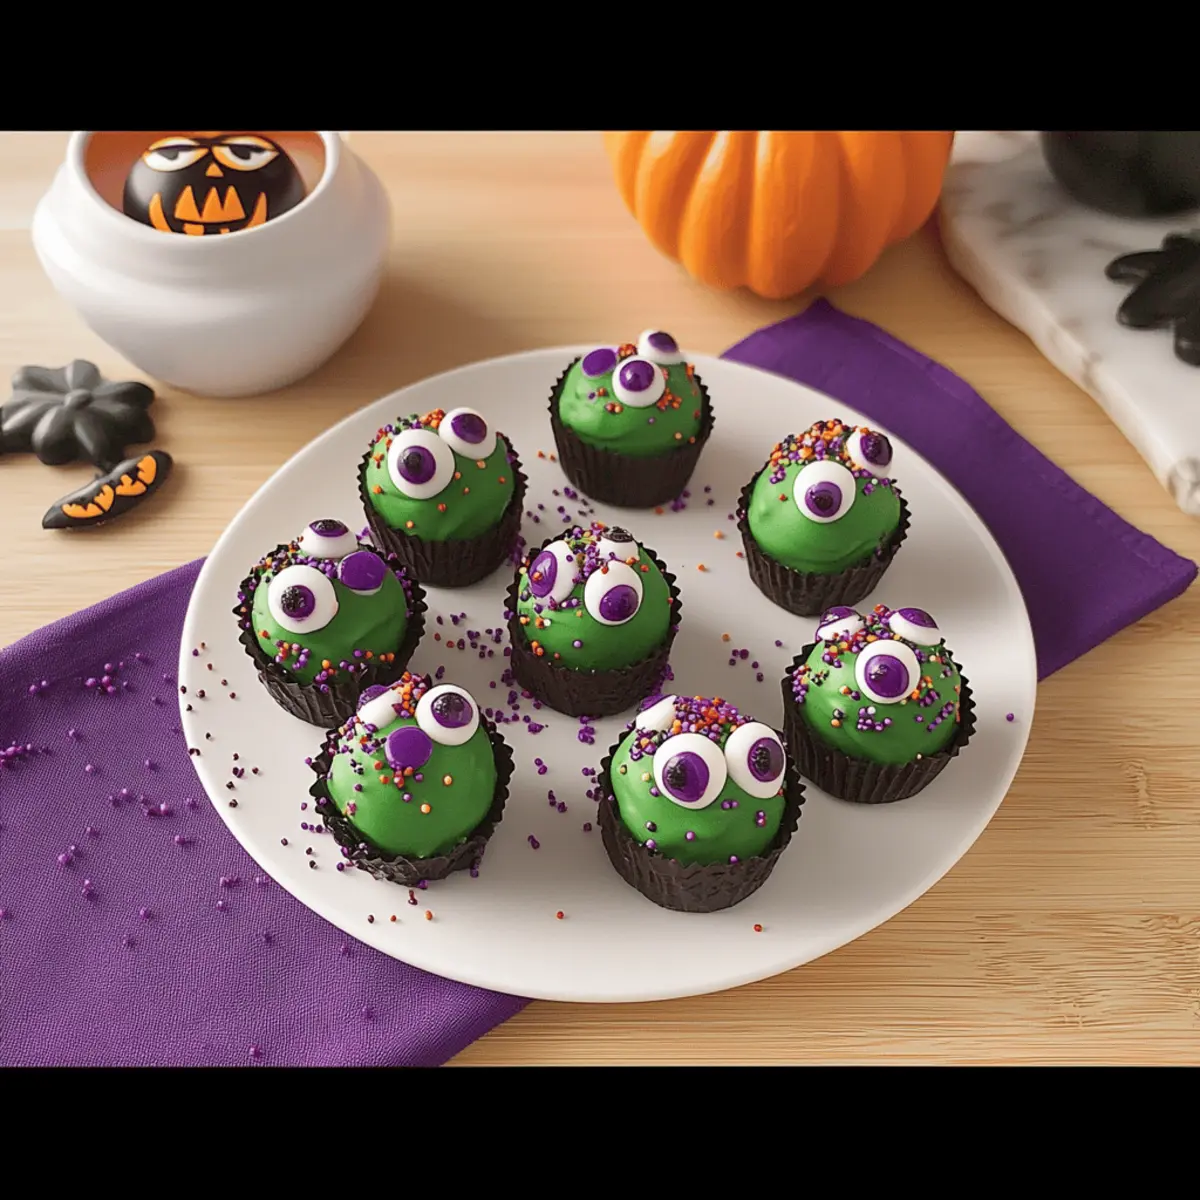
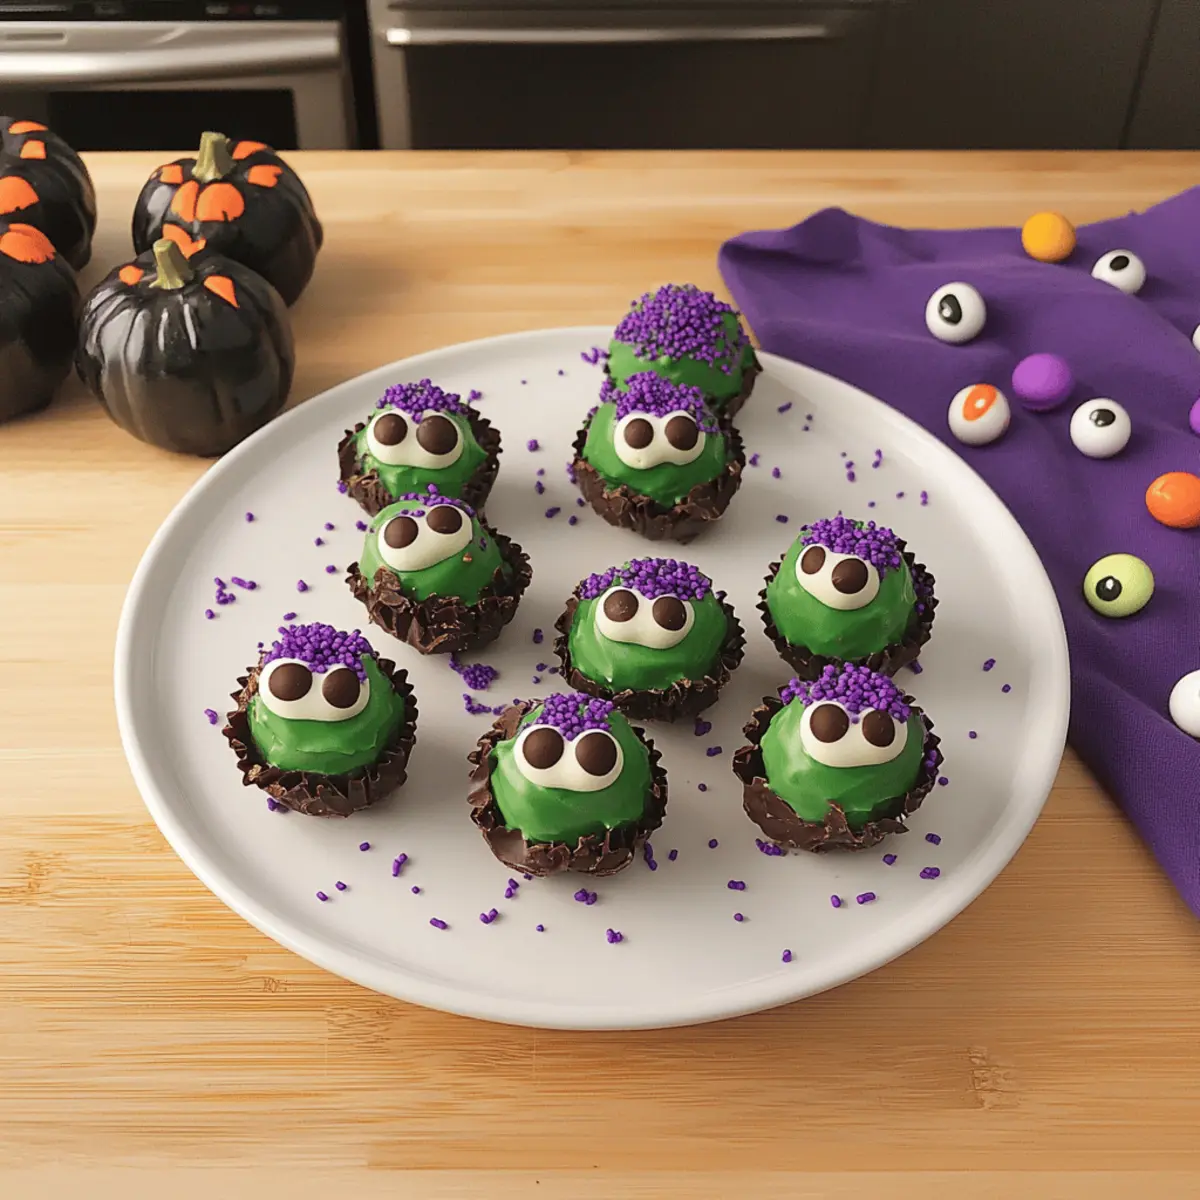
Before the chocolate coating hardens, it’s time to bring your Monster Truffles to life! Strategically place candy eyeballs on the tops of each truffle and sprinkle a few purple sprinkles for added flair. Get creative with your decor, and let your playful side shine as you make these adorable treats reflect the Halloween theme.
Step 7: Allow to Set
Let the decorated Monster Truffles sit at room temperature or in the refrigerator for about 15-20 minutes, or until the chocolate has fully set and is firm to touch. Afterward, they’re ready to serve at your next Halloween party or spooky gathering, bringing smiles to everyone, young and old!
What to Serve with Scary Cute No-Bake Monster Truffles
Hosting a Halloween party or a family gathering? Elevate the spooky fun with these delightful creations and treat your guests to a sweet symphony of flavors.
- Pumpkin Spice Cupcakes: The warm, spiced flavor of these cupcakes brings a cozy autumnal vibe that complements the sweetness of the truffles.
- Fruity Gummy Worms: These fun, chewy candies add a playful touch that fits right into the Halloween theme, inviting joyful memories.
- Crispy Apple Slices: The crunch of fresh apple pairs beautifully with the creamy truffles, creating a delightful contrast that refreshes the palate. They’ll serve as a bright, healthy offset, making the meal feel balanced.
- Hot Chocolate Bar: Create a warm drink station featuring marshmallows, whipped cream, and colorful sprinkles. This creamy delight pairs like a dream with your truffles and adds a cozy atmosphere.
- Spooky Cheese Board: Include a mix of creamy Brie, sharp cheddar, and fun crackers arranged with pumpkin-shaped cookies for an enticing spread. The savory notes will playfully balance the sweetness of the Monster Truffles.
- Candy Corn Milkshakes: A festive, swirling blend that mirrors the truffles' colors while offering an extra sweet treat; it’s sure to be a crowd-pleaser.
- Caramel Popcorn: Sweet and salty popcorn drizzled with caramel gives a fun crunch that complements the creamy texture of your truffles, adding texture variety.
- Apple Cider: Refreshing and full of warm spices, this drink enhances the Halloween spirit and pairs wonderfully with sweet desserts, creating a cozy aura.
- Chocolate Dipped Pretzels: The salty crunch of pretzels coated in chocolate serves as a perfect counterpart to the richness of your monster truffles, adding depth to your sweet spread.
Tips for the Best Monster Truffles
-
Crush Smoothly: Ensure your Oreos are finely crushed to prevent large chunks, which can affect the truffle's texture.
-
Chill for Shape: Refrigerate your shaped truffles for at least 30 minutes; this keeps them sturdy during coating and serving.
-
Use Dipping Tools: Utilize a fork or dipping tool to coat the truffles. This minimizes mess and ensures even coverage with melted chocolate.
-
Get Creative: Don’t hesitate to experiment with different candies and toppings for variations of these Monster Truffles.
-
Storage Matters: Keep your Monster Truffles stored in an airtight container in the refrigerator for up to a week to maintain freshness and flavor.
Monster Truffles Variations & Substitutions
Why not put your own spin on these adorable treats? Customize your Monster Truffles with playful twists that will make them uniquely yours!
-
Nut-Free: Substitute Reese's Pieces with M&Ms to create a nut-free option, ensuring everyone can indulge in these spooky delights.
-
Different Chocolate Coating: Try using dark chocolate or milk chocolate for the coating instead of white chocolate. This will add a deeper flavor and a contrasting appearance.
-
Add More Crunch: Incorporate chopped pretzels or crushed nuts to the mix for a surprising crunch, perfect for those who love a bit of texture in their treats.
-
Flavored Cream Cheese: Use flavored cream cheese, such as chive, or flavored Greek yogurt, to introduce a new dimension of taste in every bite!
-
Fun Color Variations: Change up the color of your melted chocolate using different food colorings, creating a rainbow of Monster Truffles perfect for any celebration.
-
No Chocolate: If you want to skip the chocolate coating altogether, roll the truffles in crushed graham crackers or coconut for a unique twist on presentation and flavor.
-
Halloween Sprinkles: Elevate your design game by using Halloween-themed sprinkles to further enhance the festive spirit. Check out our decorating tips to create a spooky masterpiece!
-
From Boo to Yummy: Change the context by swapping in a seasonal flavor like pumpkin spice or peppermint during the holidays to enjoy an entirely new treat!
Explore these variations and make these Monster Truffles truly your own; after all, who says Halloween treats can’t be as unique as you are? Happy cooking!
Storage Tips for Monster Truffles
Fridge: Store your Monster Truffles in an airtight container in the refrigerator for up to 1 week, ensuring they stay fresh and creamy.
Freezer: For longer storage, freeze the truffles in a single layer on a tray before transferring them to a sealed freezer bag. They can last for up to 2 months.
Reheating: Thaw frozen truffles in the fridge overnight before serving. Avoid microwaving, as it may affect their texture and appearance.
Serving Suggestion: Before serving, allow refrigerated truffles to sit at room temperature for about 10 minutes for a softer bite and to enhance their deliciousness!
Make Ahead Options
These Scary Cute No-Bake Monster Truffles are perfect for busy home cooks looking to save time during the hectic Halloween season! You can prepare the truffle mixture up to 24 hours in advance; simply crush the Oreos, mix with the cream cheese and candies, and form them into balls. Keep the truffles covered in an airtight container in the refrigerator to maintain their shape and flavor. When you're ready to serve, just dip them in the melted chocolate, decorate, and let them set for about 15-20 minutes. This way, you'll have adorable, delicious treats ready to impress your guests with minimal last-minute effort!
Scary Cute No-Bake Monster Truffles Recipe FAQs
How do I choose the right Oreos for the monster truffles?
Absolutely! For the best flavor, use classic Oreos, but feel free to experiment with different chocolate sandwich cookies. Look for cookies that aren't broken and have a fresh appearance without any visible dark spots or signs of moisture.
How should I store my monster truffles?
Keep your Monster Truffles in an airtight container in the refrigerator. They’ll stay fresh for up to 1 week. If you have leftovers (if that’s even possible!), ensure they’re well sealed to avoid drying out, retaining their creamy texture.
Can I freeze monster truffles for later?
Very! To freeze, first arrange the truffles in a single layer on a baking sheet to firm them up. Once frozen solid, transfer them to a sealed freezer bag. They can last up to 2 months in the freezer! When you're ready to indulge, just thaw them in the fridge overnight, avoiding microwave reheating to preserve texture.
What if my truffle mixture is too crumbly?
No worries! If your mixture is too dry, try adding a little more softened cream cheese, about a tablespoon at a time, until it’s moist enough to hold together. You can also let the mixture sit at room temperature for a few minutes to soften slightly if it's too stiff to shape.
Are these truffles safe for kids with nut allergies?
Excellent question! If you're making these truffles for kids with nut allergies, simply substitute the Reese's Pieces with M&Ms. Be sure to check the labels on all ingredients to ensure they are nut-free, especially if you're using chocolates with mixed fillings.
What’s the best way to achieve the perfect chocolate coating?
Start by melting the chocolate slowly in the microwave at 30-second intervals, stirring in between to avoid burning. Make sure to use a fork or dipping tool when coating the truffles, allowing excess chocolate to drip back into the bowl. This way, you’ll get an even layer that looks gorgeous and tantalizing!
Delightful Monster Truffles You Can Make in a Snap
Ingredients
Equipment
Method
- Crush the Oreos and mix with cream cheese until smooth.
- Fold in Snickers and Reese's Pieces until evenly distributed.
- Shape the mixture into bite-sized balls and refrigerate for 30 minutes.
- Melt white chocolate chips with coconut oil and add green gel food coloring.
- Dip each truffle into the melted chocolate and let excess drip off.
- Decorate with candy eyeballs and purple sprinkles before chocolate sets.
- Let the truffles set at room temperature for 15-20 minutes.


Leave a Reply