
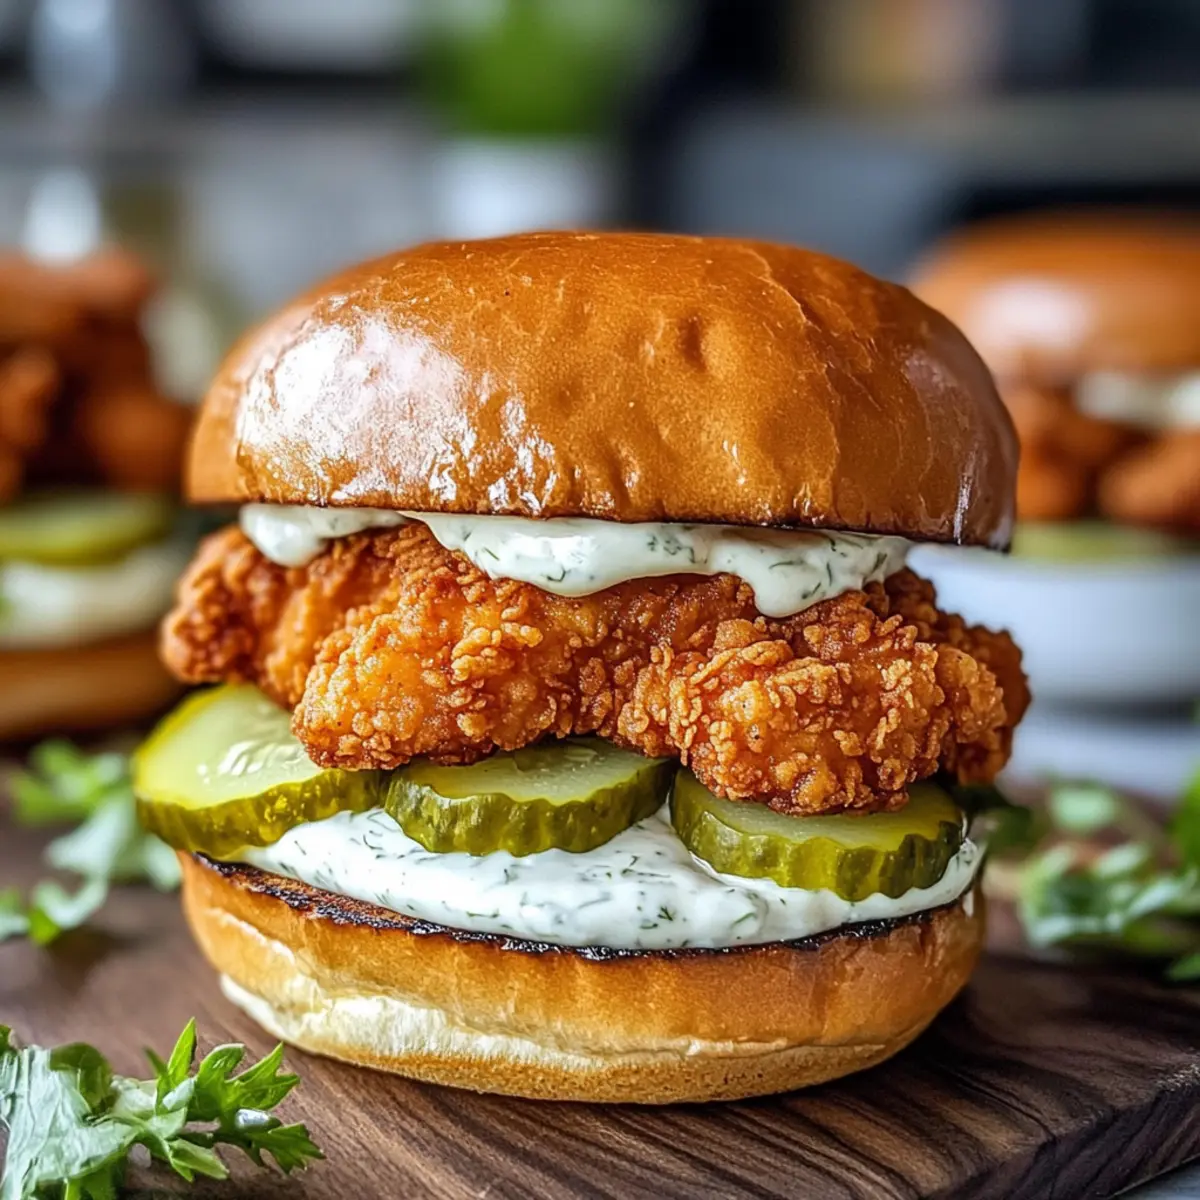
The tantalizing aroma of fried chicken can make any home feel like a bustling diner, and that’s exactly what my kitchen transforms into with this Crispy Dill Chicken Sandwich Recipe. Each juicy piece of chicken is marinated in dill pickle juice, bringing a delightful tanginess that sets it apart from your typical sandwich. The savory coating crisps to perfection while the creamy dill aioli adds a luscious finish, making this dish a true crowd-pleaser perfect for busy weeknights or laid-back gatherings. With minimal prep time, hearty flavors, and a touch of gourmet flair, you’ll find it’s an indulgence everyone will want to dig into. Are you ready to elevate your sandwich game and treat your taste buds to something extraordinary?
Why Is This Chicken Sandwich a Must-Try?
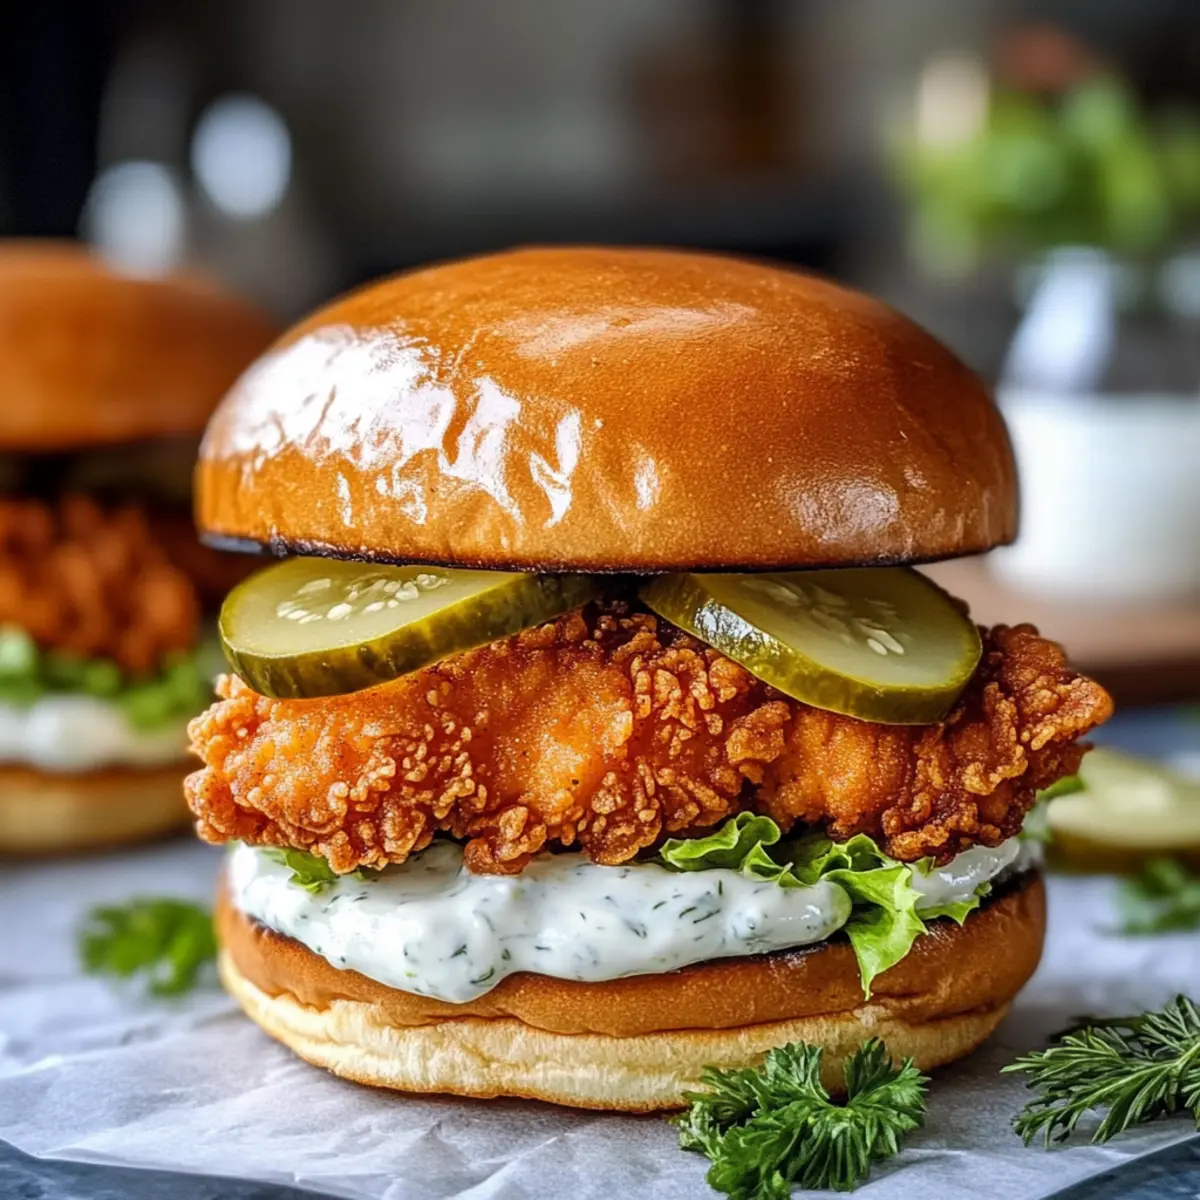
Incredible Flavor: The crispy dill coating creates a mouthwatering crunch that perfectly complements the succulent chicken.
Simplicity: With easy-to-follow steps, you’ll whip this up in no time, leaving you more moments to enjoy with family or friends.
Versatile Ingredients: Swap ingredients easily—use different cheeses or add spicy dill pickles to customize your favorite taste.
Crowd-Pleasing: This sandwich is a guaranteed hit, turning ordinary weeknight dinners into memorable feasts—just like my Chipotle Lime Chicken or Crock Pot Chicken!
Perfect Pairing: Serve it with crispy French fries or a light salad for a delightful meal that hits all the right notes.
Ready to dive in? Your taste buds won’t be disappointed!
Crispy Dill Chicken Sandwich Ingredients
• Let’s gather everything to make your delicious Crispy Dill Chicken Sandwich!
For the Chicken
- Chicken Breasts – Main protein for your sandwich; for added tenderness, consider swapping for boneless, skinless thighs.
- Buttermilk – Tenderizes the chicken; if you don’t have any, mix 1 tablespoon of lemon juice with 1 cup of milk and let it sit for 5 minutes to create a quick substitute.
- Dill Pickle Juice – Adds essential tang and flavor; it’s crucial for marinating the chicken.
- Egg – Binds the coating and enhances crisping; no substitutions are needed.
For the Coating
- All-Purpose Flour – The main coating ingredient for that perfect crunch; feel free to use gluten-free flour as a substitute if needed.
- Cornstarch – Adds an extra crispy texture; keep it as-is for optimal crunch.
- Dried Dill Weed – Infuses herbal flavor into the coating; fresh dill can be used for a more vibrant taste.
- Baking Powder – Helps achieve a light, airy coating; don’t skip this for best results.
- Salt & Pepper – Essential for seasoning throughout; adjust according to your taste preferences.
For Frying
- Vegetable Oil – Used for frying the chicken; consider canola or peanut oil as alternatives for frying.
For the Assembly
- Brioche Buns – A soft and buttery base; swap for other burger buns or gluten-free options if desired.
- Cheddar Cheese – Melts beautifully atop the chicken; feel free to swap with Monterey Jack for a different flavor.
- Pickles – Add that signature crunch and tang; fresh sliced cucumbers can be used as a mild substitute.
Now that you're all set with ingredients, let's get cooking! Your Crispy Dill Chicken Sandwich awaits!
Step‑by‑Step Instructions for Crispy Dill Chicken Sandwich Recipe
Step 1: Marinate Chicken
In a large bowl, combine buttermilk, dill pickle juice, egg, salt, and pepper. Add the chicken breasts and ensure they are fully submerged in the marinade. Cover with plastic wrap and let it marinate in the refrigerator for at least 2 hours, ideally overnight. This allows the flavors to meld and tenderizes the chicken, setting the stage for a juicy Crispy Dill Chicken Sandwich.
Step 2: Prepare Coating
In a shallow dish, mix all-purpose flour, cornstarch, dried dill, baking powder, salt, and pepper until well combined. Make sure the mixture is evenly mixed to ensure a uniform coating. This crispy coating will be key to achieving that delightful crunch in your Crispy Dill Chicken Sandwich, so be thorough as you prepare this step!
Step 3: Coat Chicken
Once marinated, remove the chicken breasts from the buttermilk mixture, letting any excess drip off. Press each breast firmly into the flour mixture, ensuring an even coating. Next, dip the coated chicken back into the buttermilk for a second time, then re-coat it in the flour mixture. This double-dipping technique will give you an extra crispy texture that elevates your sandwich.
Step 4: Heat Oil
In a heavy-bottomed pot or deep skillet, pour in vegetable oil and heat it over medium-high heat until it reaches 350°F (175°C). To test the temperature, drop a pinch of the flour mixture into the oil; it should sizzle immediately. Maintaining the right oil temperature is crucial for frying crispy chicken, so keep an eye on it!
Step 5: Fry Chicken
Carefully place the coated chicken breasts into the hot oil, ensuring not to overcrowd the pot. Fry each piece for about 6-8 minutes on one side until it turns golden brown. Then, flip and cook for an additional 6-8 minutes until the chicken reaches an internal temperature of 165°F (74°C). The crispy exterior should shatter beautifully as you slice into each piece.
Step 6: Make Dill Aioli
While the chicken is frying, prepare the creamy dill aioli by whisking together mayonnaise, chopped fresh dill, lemon juice, minced garlic, and a pinch of salt in a mixing bowl. Stir until smooth and well combined. Chill the aioli in the refrigerator for about 30 minutes to let the flavors mingle, enhancing the overall experience of your Crispy Dill Chicken Sandwich.
Step 7: Toast Buns
In a skillet over medium heat, melt some butter, then place the brioche buns cut-side down. Toast them for 1-2 minutes, or until they are golden and slightly crispy. This simple step adds incredible flavor and texture to your sandwich, making each bite even more memorable.
Step 8: Assemble Sandwich
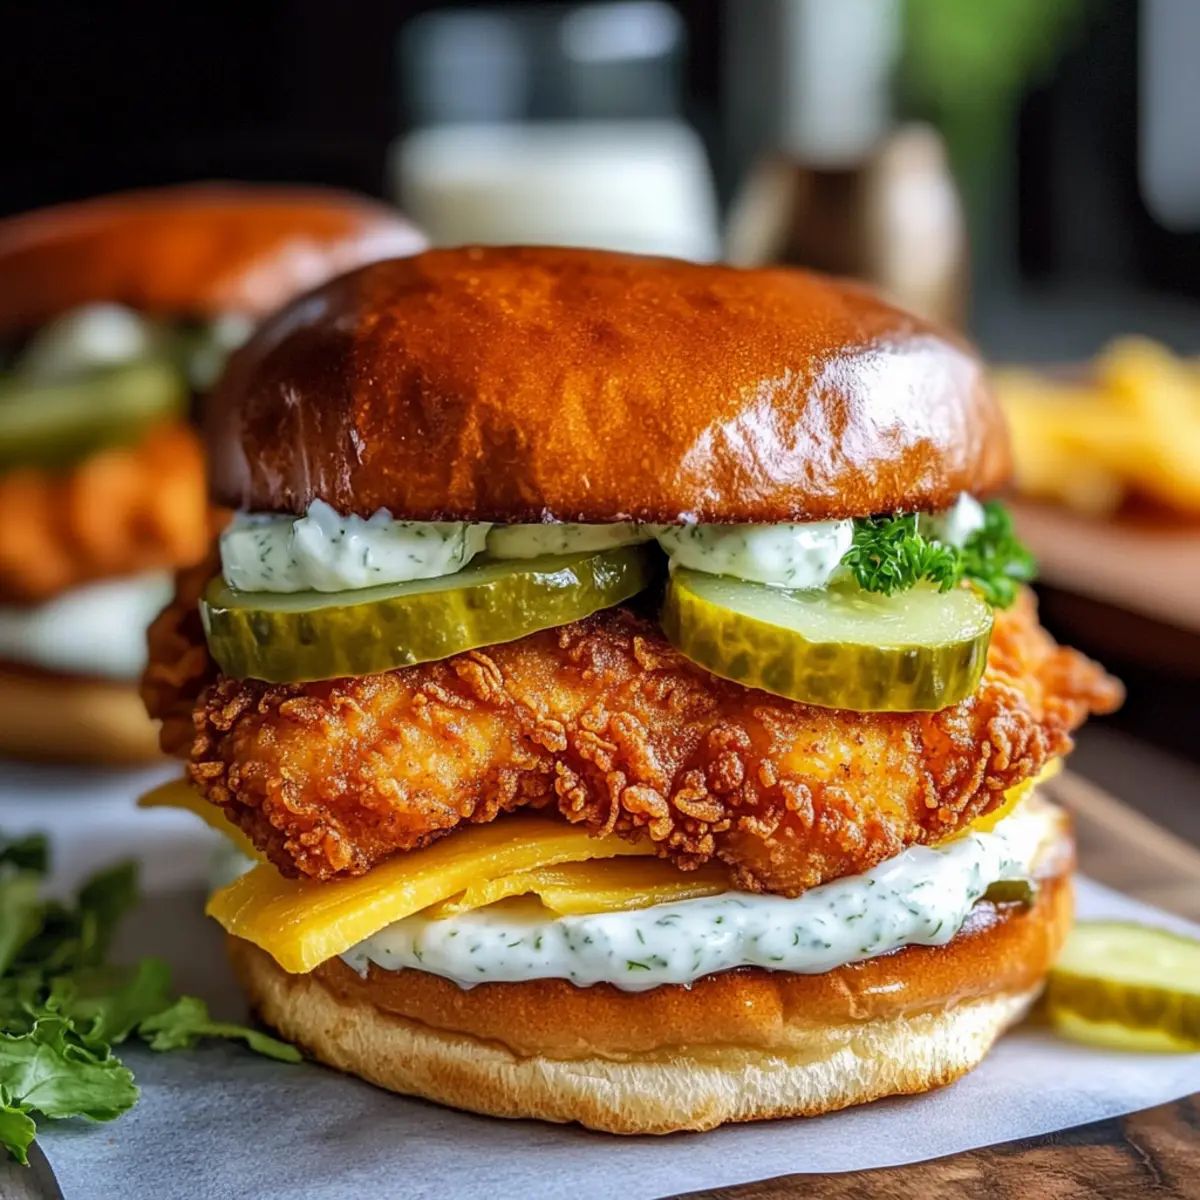
Now it’s time to build your Crispy Dill Chicken Sandwich! Spread a generous layer of the chilled dill aioli on the bottom half of each toasted bun. Add a layer of crisp lettuce, followed by the juicy fried chicken, a slice of melted cheddar cheese, and the dill pickles. Top with the other half of the bun, creating a glorious sandwich ready for devouring.
Step 9: Serve Immediately
Enjoy your Crispy Dill Chicken Sandwich hot for the best texture and flavor. Pair it with crispy French fries or a light salad for a delightful meal. With the warm bread, crunchy chicken, and creamy flavors, you'll find it hard to resist digging in right away!
Crispy Dill Chicken Sandwich Variations
Feel free to get creative and personalize your Crispy Dill Chicken Sandwich with these delicious variations!
-
Spicy Twist: Add spicy dill pickles or jalapeños for a delightful kick that elevates flavor and heat.
-
Cheese Swap: Use Pepper Jack cheese for a creamy, spicy alternative that adds wonderful depth to each sandwich bite.
-
Herb Boost: Replace dried dill weed with fresh dill for a brighter, more herby flavor—it's a delightful transformation!
-
Crunch Factor: Add a layer of crispy onions on top of the fried chicken for an extra crunch that enhances the overall texture.
-
Creamy Slaw: Top the chicken with a light cabbage slaw dressed in a tangy vinegar dressing; it adds a fresh bite alongside the crunchy chicken.
-
Gluten-Free Option: For a gluten-free variation, use gluten-free breading or almond flour instead of all-purpose flour for the coating.
-
Vegetable Layer: Add fresh veggies like sliced tomatoes or avocado for creaminess and additional nutrients, making it even more wholesome.
-
Make It a Salad: Serve the fried chicken over a bed of mixed greens instead of in a bun for a lighter, yet still satisfying meal.
These variations make it easy to adapt the recipe to suit your palate, creating a meal that feels both familiar and exciting. Don't forget to check out my favorite Honey Garlic Chicken for another delectable option!
Expert Tips for the Crispy Dill Chicken Sandwich Recipe
-
Chicken Marinade: Allow the chicken to marinate overnight for the juiciest results. This extra time helps infuse the dill pickle flavor deeply into the chicken.
-
Coating Crunch: After coating, let the chicken rest on a wire rack for 10 minutes before frying to set the batter, enhancing the overall crispiness of your sandwich.
-
Oil Temperature: Maintain a steady oil temperature at 350°F (175°C). If the oil is too hot, the coating may burn before the chicken is cooked through.
-
Check Doneness: Use a meat thermometer to ensure your chicken reaches an internal temperature of 165°F (74°C) for safe and delicious results every time.
-
Customize Flavor: Don’t hesitate to experiment with fresh herbs or add spices to the coating mix for a personalized twist to your Crispy Dill Chicken Sandwich!
Storage Tips for Crispy Dill Chicken Sandwich
Fridge: Store any leftover sandwiches in an airtight container for up to 3 days. Keep the dill aioli separate to protect its freshness and flavor.
Freezer: For longer storage, freeze the fried chicken pieces individually in a freezer-safe bag for up to 2 months. Reheat in the oven to restore crispiness.
Reheating: When ready to enjoy leftovers, reheat the chicken in an air fryer or oven at 375°F (190°C) until warmed through, about 10-15 minutes. This will help keep your Crispy Dill Chicken Sandwich deliciously crunchy!
What to Serve with Crispy Dill Chicken Sandwich Recipe
Elevate your sandwich experience with the perfect sides and beverages that complement its bold flavors and crunch.
- Crispy French Fries: The ultimate classic, they provide a satisfying crunch that contrasts beautifully with the tender chicken.
- Mixed Greens Salad: A light, refreshing salad with a lemon vinaigrette cleanses the palate, balancing the sandwich's rich flavors wonderfully.
- Coleslaw: The crunchy, tangy slaw adds a delightful crunch and a creamy contrast that complements the crispy chicken.
- Potato Chips: Opt for dill-flavored chips to echo the sandwich's key flavors while adding extra texture and satisfaction with each bite.
- Sweet Potato Fries: The natural sweetness of the fries aligns well with the savory, crispy chicken, creating a well-rounded meal.
- Pickle Brine Lemonade: A refreshing drink that ties into the dill flavor profile, providing a zesty twist to your meal.
- Iced Tea: Unsweetened iced tea adds a refreshing touch without overwhelming the dish's taste, making it a great pairing.
- Chocolate Chip Cookies: For dessert, these warm, gooey treats provide the perfect sweet ending to a savory meal, leaving everyone smiling.
Make Ahead Options
These Crispy Dill Chicken Sandwiches are perfect for meal prep, saving you precious time during busy weeknights! You can marinate the chicken in buttermilk and dill pickle juice up to 24 hours in advance, allowing the flavors to penetrate deeply for that juicy, savory taste. Additionally, the creamy dill aioli can be made ahead and stored in the fridge for up to 3 days, ensuring it’s fresh and flavorful when you’re ready to assemble. When it’s time to enjoy, simply fry the chicken and toast the buns, and you’ll have a delicious meal ready to serve with minimal effort, just like the ones from your favorite diner!
Crispy Dill Chicken Sandwich Recipe FAQs
What type of chicken is best for this recipe?
I recommend using chicken breasts for this Crispy Dill Chicken Sandwich, as they provide a hearty texture and flavor. However, if you prefer more tenderness, boneless, skinless thighs are a fantastic alternative.
How should I store leftovers?
Leftover Crispy Dill Chicken Sandwiches can be stored in an airtight container in the refrigerator for up to 3 days. To retain the quality of the creamy dill aioli, it’s best to store it separately. Place a piece of parchment paper in between the sandwich layers to prevent sogginess.
Can I freeze the fried chicken?
Absolutely! To freeze the fried chicken, allow it to cool completely, then place each piece in a single layer on a baking sheet and freeze for an hour. Once frozen, transfer the chicken to a freezer-safe zip-top bag, where it can be kept for up to 3 months. Reheat in the oven at 375°F (190°C) for about 10-15 minutes to regain that delightful crunch.
What if the chicken coating doesn’t get crispy?
If your coating isn’t getting crispy, there are a few things to check. First, ensure the oil is heated properly to 350°F (175°C) before adding the chicken. If the oil isn’t hot enough, the coating can absorb excess oil and become soggy. Additionally, consider letting the coated chicken rest on a wire rack for about 10 minutes before frying; this will help set the coating for that perfect crisp!
Is there a way to make this recipe gluten-free?
Very! You can easily substitute all-purpose flour with a 1:1 gluten-free flour blend, which will still give you that satisfying crunch in your Crispy Dill Chicken Sandwich. Just ensure that your cornstarch and any other seasonings are also gluten-free to maintain a safe, allergy-friendly meal!
Can I make this sandwich in advance?
Certainly! You can marinate the chicken overnight for deeper flavor and even prepare the dill aioli a day ahead to save time. Just remember to assemble the sandwich close to serving time to enjoy it at its best flavor and texture.

Crispy Dill Chicken Sandwich Recipe That's a Family Favorite
Ingredients
Equipment
Method
- In a large bowl, combine buttermilk, dill pickle juice, egg, salt, and pepper. Add the chicken breasts and ensure they are fully submerged in the marinade. Cover with plastic wrap and let it marinate in the refrigerator for at least 2 hours, ideally overnight.
- In a shallow dish, mix all-purpose flour, cornstarch, dried dill, baking powder, salt, and pepper until well combined.
- Once marinated, remove the chicken breasts from the buttermilk mixture, letting any excess drip off. Press each breast firmly into the flour mixture, ensuring an even coating. Dip the coated chicken back into the buttermilk for a second time, then re-coat it in the flour mixture.
- In a heavy-bottomed pot or deep skillet, pour in vegetable oil and heat it over medium-high heat until it reaches 350°F (175°C).
- Carefully place the coated chicken breasts into the hot oil, frying each piece for about 6-8 minutes on one side until golden brown. Then, flip and cook for an additional 6-8 minutes until the chicken reaches an internal temperature of 165°F (74°C).
- While frying, prepare the creamy dill aioli by whisking together mayonnaise, chopped fresh dill, lemon juice, minced garlic, and a pinch of salt in a mixing bowl.
- In a skillet over medium heat, melt some butter and toast the brioche buns cut-side down for 1-2 minutes until golden.
- Spread a generous layer of the chilled dill aioli on the bottom half of each toasted bun. Add lettuce, the fried chicken, a slice of melted cheddar cheese, and dill pickles, then top with the other half of the bun.
- Enjoy your Crispy Dill Chicken Sandwich hot for the best texture and flavor.


Leave a Reply