
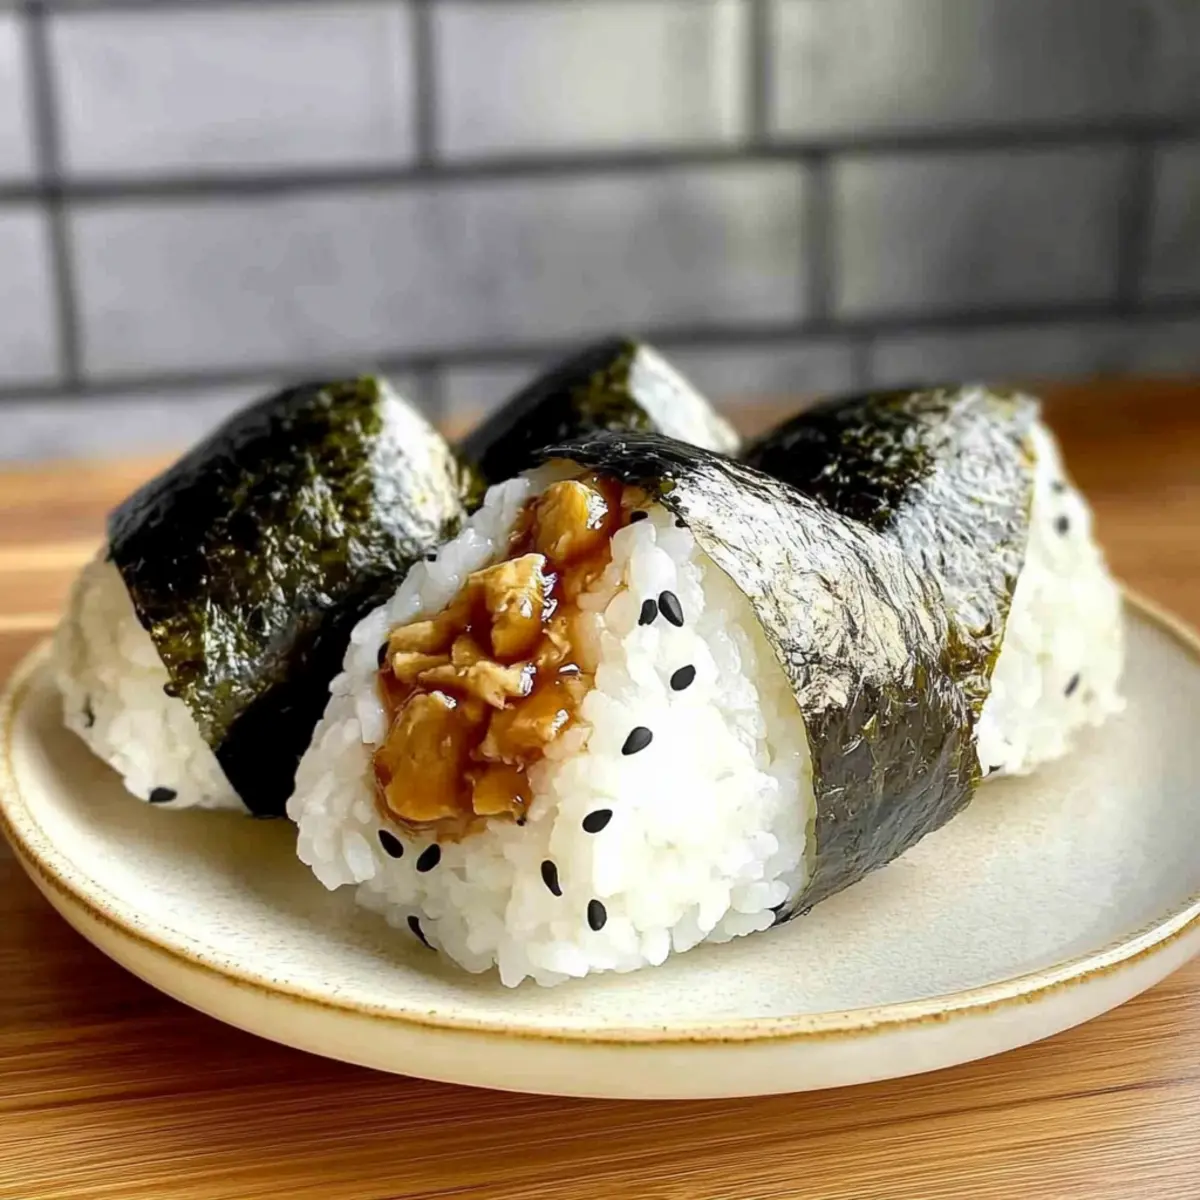
As I pulled back the nori and revealed the glistening triangle of Chicken Onigiri nestled within, my kitchen transformed into a little corner of Japan. This easy-to-make Japanese delight is not only a feast for the eyes but also a portable snack that’s perfect for those busy days when fast food just won't cut it. These savory chicken onigiri, ideally made with tender drumsticks but versatile enough to accommodate thighs or ground chicken, bring the gift of a quick and satisfying bite anytime. Infused with a delicious teriyaki glaze, they blend flavors and textures in each mouthful. Whether you’re preparing a meal for yourself or entertaining friends, this recipe promises to impress—while being gluten-free if you choose the right soy sauce. Curious to learn how to create these handheld bites of joy? Let’s dive in!
Why Are Chicken Onigiri So Special?
Unique and Flavorful: The combination of tender chicken and sushi rice with a delightful teriyaki glaze makes every bite a symphony of savory goodness.
Easy-to-Make: Even if you're new to Japanese cuisine, this recipe simplifies onigiri preparation—perfect for home cooks of all levels!
Portable Snack: Take these delectable treats on-the-go or pack them in lunchboxes as a wholesome alternative to fast food.
Gluten-Free Option: Easily adapt this recipe to suit dietary preferences by using gluten-free soy sauce, ensuring everyone can enjoy.
Versatile Ingredients: From chicken drumsticks to veggies, feel free to experiment with fillings to cater to your taste buds or what you have on hand.
Pair your onigiri with a bowl of miso soup for a full meal, or try adding them to a charcuterie board for a fun twist!
Chicken Onigiri Ingredients
Get ready to create these delicious Chicken Onigiri with this simple ingredient list!
For the Rice
• Sushi Rice – 4 cups cooked sushi rice; it's the key for texture, so use short-grain rice for perfect stickiness.
• Salt – ½ teaspoon fine salt; this enhances the rice flavor, ensuring it distributes well.
• Furikake – 2 tablespoons (optional); sprinkle on after shaping for an extra umami boost.
For the Chicken Filling
• Boneless Skinless Chicken – ½ pound (drumsticks preferred); this serves as the primary protein with options to substitute with thighs or ground chicken.
• Soy Sauce – 2 teaspoons (for marinade) and 1 ½ tablespoons (for teriyaki sauce); it adds umami and enhances flavor—just make it gluten-free if you want.
• Sake – 1 tablespoon (or water); enhances depth, but rice vinegar can work as a substitute.
• Baking Soda – ¼ teaspoon; vital for tenderizing meat and ensuring an ideal texture.
• Cornstarch – 1 teaspoon; it adds a delightful crispiness to the cooked chicken.
• Mirin – 1 tablespoon; adds a sweet note and depth to the teriyaki sauce.
• Brown Sugar – 1 tablespoon, firmly packed; contributes to the sweetness of the teriyaki glaze.
• Oil – 1 tablespoon; for cooking the chicken—vegetable oil or sesame oil works perfectly.
• Minced Garlic – 1 tablespoon; this enhances the flavor profile of the chicken filling.
For Assembly
• Nori – 1 sheet cut into small rectangles; wrap around your onigiri for flavor and convenience, making it easy to enjoy your Chicken Onigiri on-the-go!
Step‑by‑Step Instructions for Chicken Onigiri
Step 1: Prepare the Rice
Begin by rinsing 4 cups of sushi rice under cold water until the water runs clear, which removes excess starch and ensures stickiness. Cook the rice according to your rice cooker’s instructions, usually about 20 minutes. Once it's ready, transfer the hot rice to a mixing bowl and sprinkle with ½ teaspoon fine salt and 2 tablespoons of furikake (if desired), gently folding to combine while it cools to room temperature.
Step 2: Marinate the Chicken
Cut ½ pound of boneless, skinless chicken into small bite-sized pieces. In a bowl, mix together 2 teaspoons of soy sauce, 1 tablespoon of sake, ¼ teaspoon of baking soda, and 1 teaspoon of cornstarch. Add the chicken to the mixture and toss until fully coated. Cover and refrigerate for 30 minutes to allow the flavors to meld and the chicken to tenderize.
Step 3: Make the Teriyaki Sauce
In a small bowl, whisk together 1 ½ tablespoons of soy sauce, 1 tablespoon of mirin, and 1 tablespoon of packed brown sugar. Mix until the sugar is dissolved, creating a rich and glossy teriyaki sauce. Set aside as this will be drizzled over the chicken later for added flavor.
Step 4: Cook the Chicken
Heat 1 tablespoon of oil in a large skillet over medium-high heat. Once the oil shimmers, add the marinated chicken pieces. Cook for about 2-3 minutes until they turn golden brown, ensuring to stir frequently for even cooking. Add 1 tablespoon of minced garlic during the last 30 seconds of cooking for a fragrant finish, then pour in the teriyaki sauce. Stir until the sauce thickens, about 1-2 minutes.
Step 5: Shape the Onigiri
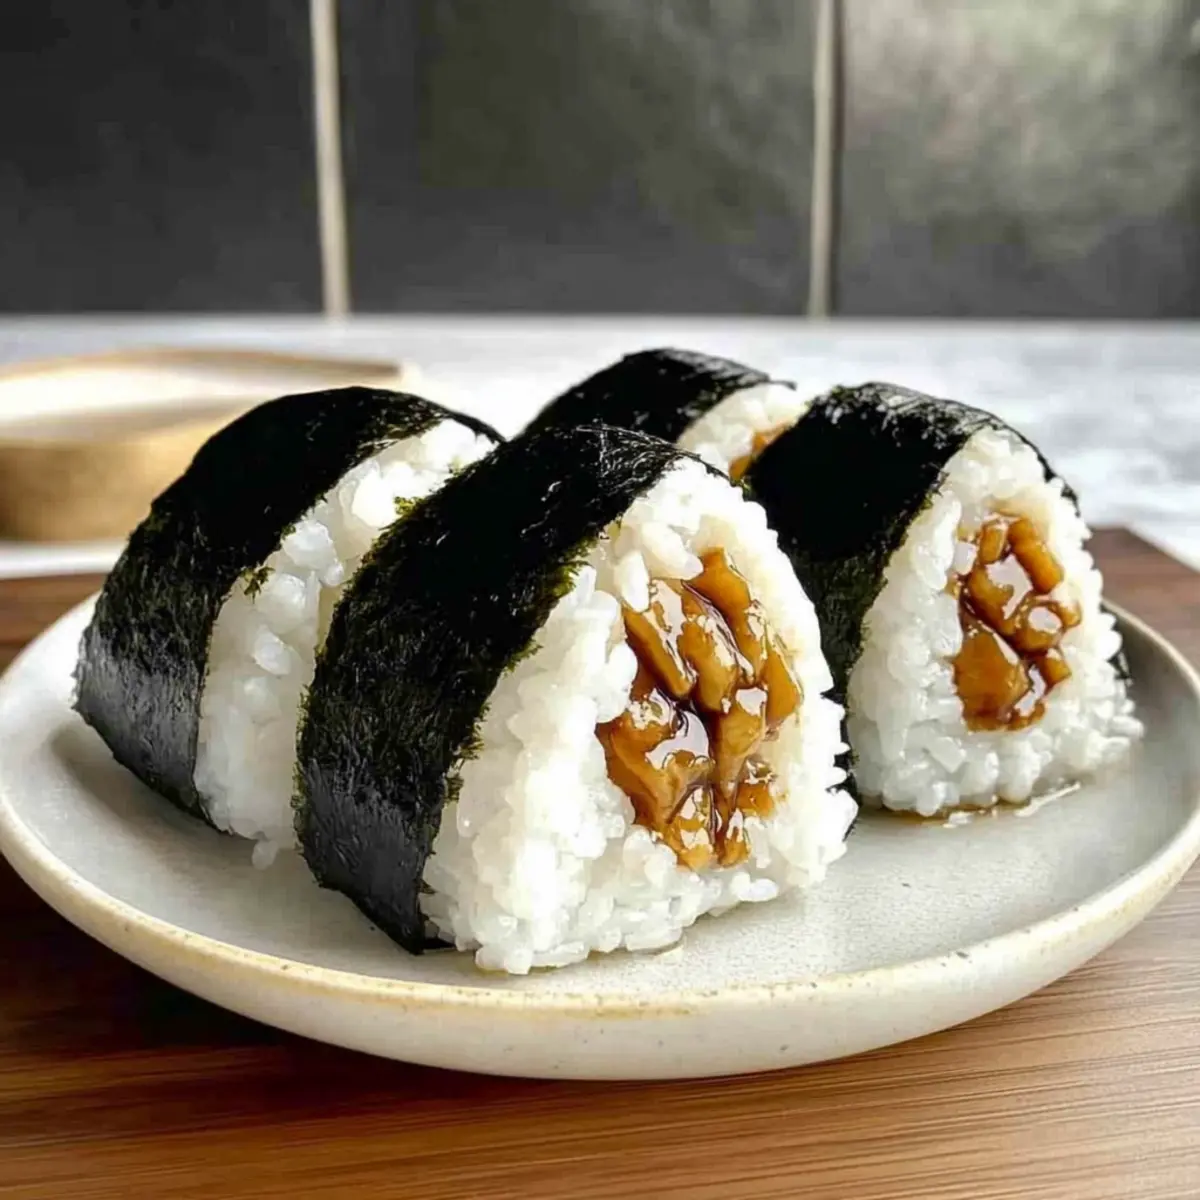
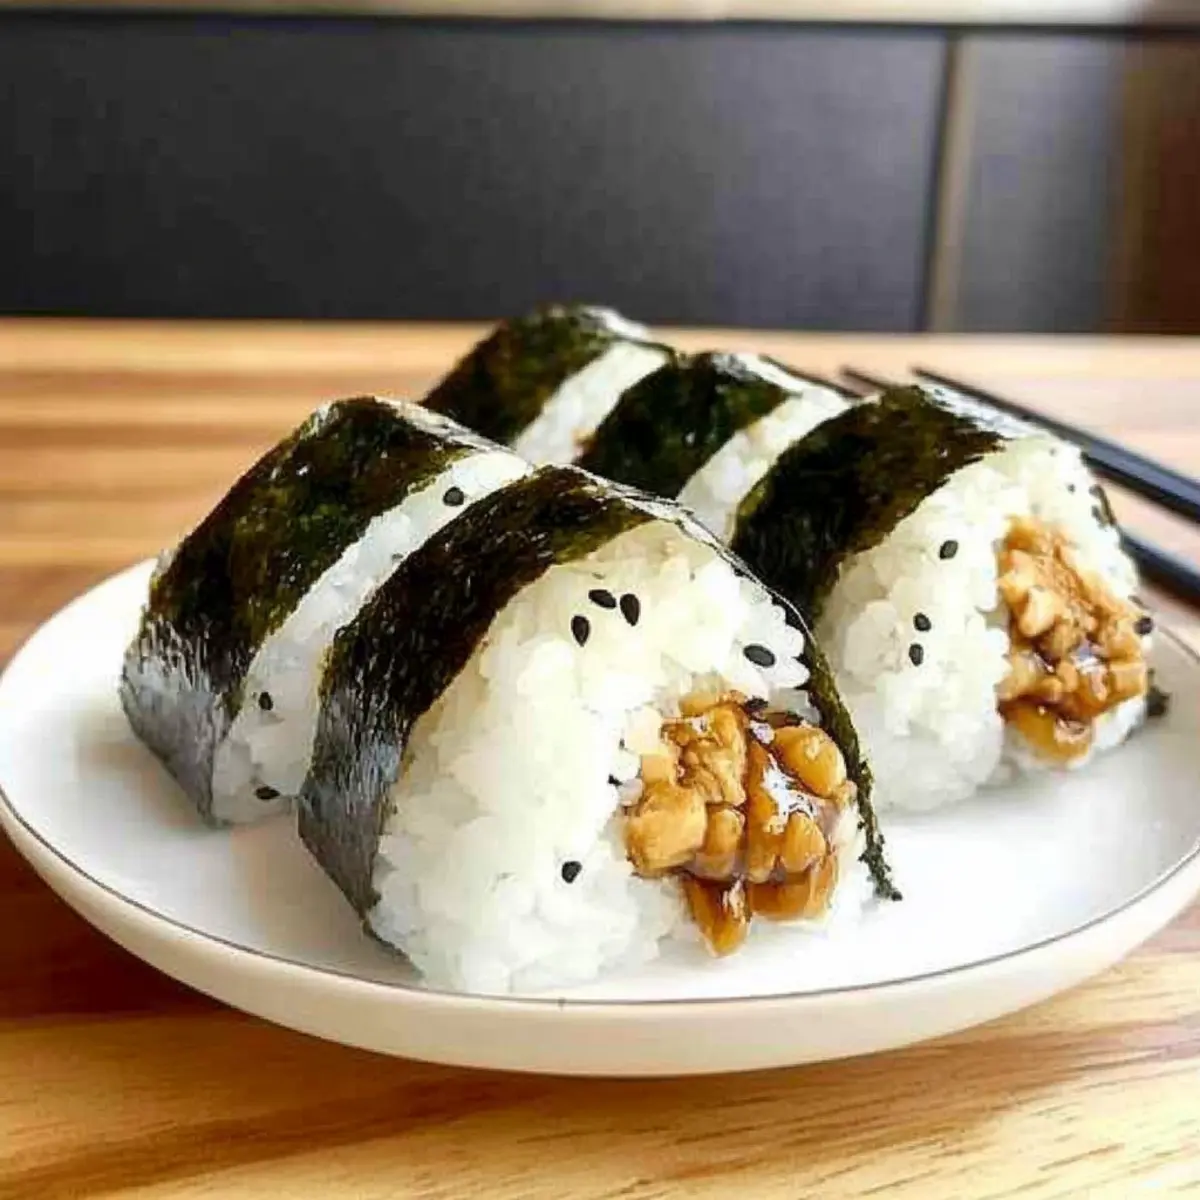
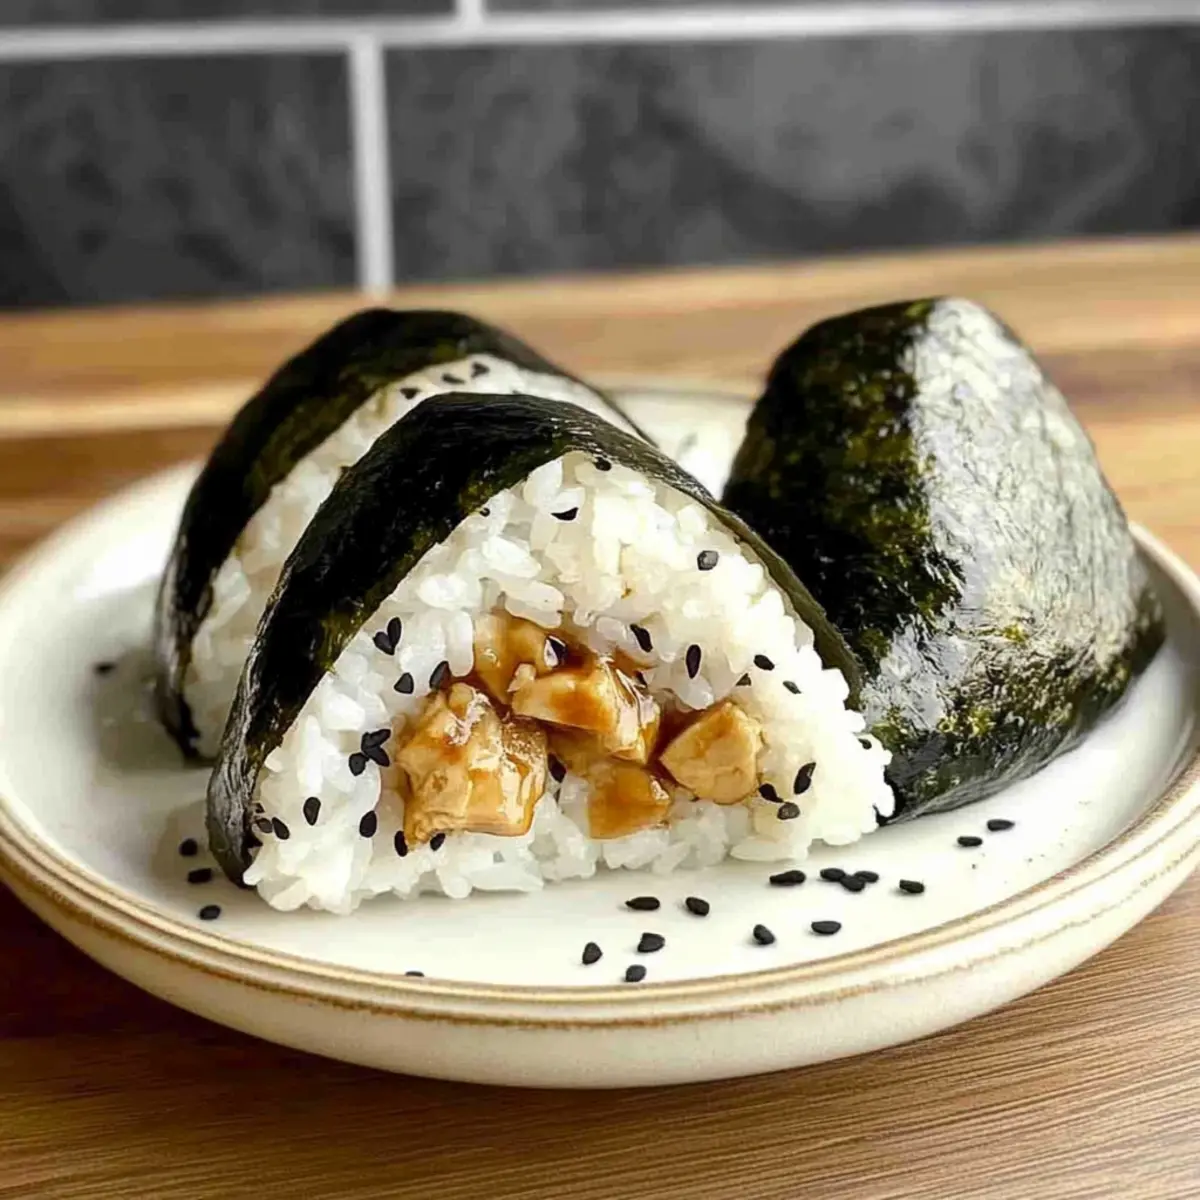
Prepare to shape your Chicken Onigiri by wetting your hands to prevent sticking. Take a handful of the seasoned rice and mold it into your palm, creating a small well in the center. Fill the well with the cooked teriyaki chicken, then carefully fold the rice over to form a triangle. Compress gently but firmly to ensure it holds its shape, making sure the chicken is completely encased.
Step 6: Wrap with Nori
Once your onigiri are shaped, cut a sheet of nori into small rectangles. Take each formed onigiri and wrap the nori around one edge, using moisture to help it stick. This adds flavor and makes it easy to hold. Repeat the process until all the rice and chicken are used, ensuring your Chicken Onigiri is ready to be enjoyed!
Expert Tips for Chicken Onigiri
-
Rice Quality Matters: Use short-grain sushi rice for the perfect sticky texture. Avoid long-grain varieties that won't hold together properly.
-
Marinate Well: Don’t skip the marinating step for the chicken; it infuses essential flavors that ensure your Chicken Onigiri is deliciously savory.
-
Wet Hands for Shaping: Always wet your hands before shaping the onigiri; this prevents the rice from sticking and makes forming triangles much easier.
-
Cook Chicken Thoroughly: Ensure that the chicken is fully cooked before adding the teriyaki sauce to achieve the best integration of flavors.
-
Experiment with Fillings: Feel free to mix in different ingredients with chicken, like veggies or herbs; this not only elevates flavor but also adds nutritional value.
-
Store Wisely: If you're not enjoying the onigiri right away, wrap them tightly in plastic to keep them fresh in the fridge for up to three days.
Chicken Onigiri Variations & Substitutions
Feel free to make these delightful Chicken Onigiri your own with these fun and tasty twists!
- Dairy-Free: Swap any ingredients containing dairy, especially sauces, with coconut aminos for a similar umami flavor.
- Vegetarian: Use firm tofu instead of chicken, marinating and cooking it the same way for a plant-based version. The texture will be delightful, and you won’t miss the meat!
- Spicy Kick: Substitute the teriyaki sauce with spicy mayo or add a teaspoon of sriracha to your chicken marinade for some heat. Bring on the spice for an exciting flavor experience!
- Veggie Delight: Mix in finely chopped vegetables like bell peppers or spinach into the rice filling for added crunch and nutrition. This enhances the texture and flavor profile wonderfully.
- Gluten-Free: Ensure to use gluten-free soy sauce. This option makes it accessible for those with gluten sensitivities while retaining that beloved savory taste.
- Sushi Style: Instead of shaping into triangles, roll the rice and chicken filling into cylindrical shapes, resembling sushi rolls. This playful presentation will bring joy to your table!
- Add More Umami: Incorporate a touch of kimchi inside or on the side for an extra explosion of flavor. The spicy, fermented notes play beautifully with the savory chicken!
- Smoky Twist: Use smoked paprika in the chicken marinade for a depth of flavor that adds an unexpected yet delightful smokiness to your onigiri. Pair it with a side of Honey Garlic Chicken for a complementary dish.
With so many variations to consider, you can savor a unique take on Chicken Onigiri every time you prepare them!
Make Ahead Options
These Chicken Onigiri are perfect for meal prep enthusiasts! You can marinate the chicken and cook it up to 24 hours in advance. Simply cut the chicken, toss it in the marinade, and store it in the fridge, allowing those flavors to deepen. The sushi rice can also be prepared and refrigerated for up to 3 days; just make sure to keep it tightly covered to maintain moisture. When you’re ready to serve, simply reheat the chicken briefly on the stove, then follow the shaping instructions to create your onigiri. This way, you’ll have delicious, fresh Chicken Onigiri ready in no time—an amazing time-saver for busy weeknights!
What to Serve with Savory Chicken Onigiri?
Elevate your Japanese snacking experience by complementing these delightful onigiri with tasty sides and drinks!
-
Miso Soup: A warm bowl of miso soup pairs perfectly, providing a savory contrast to the sweet teriyaki glaze of the onigiri. The comforting richness of the broth enhances the overall dining experience.
-
Pickled Vegetables: Crunchy, vinegar-drenched pickles add a refreshing zing that complements the savory flavors of the chicken. Their brightness balances the richness of the rice and chicken, creating a delightful harmony on your palate.
-
Edamame: These lightly salted green beans offer a satisfying bite, adding fun and texture to your meal. Perfect as a side snack or appetizer, their simplicity allows the onigiri to shine.
-
Sesame Cucumber Salad: Thinly sliced cucumbers tossed in sesame oil and rice vinegar provide a crisp, refreshing contrast that brightens each bite. This light side adds a touch of health and flavor to your plate.
-
Sake or Green Tea: Sip on a chilled sake to complement the Japanese theme and enhance the umami notes in your dish. Alternatively, a warm cup of green tea cleanses the palate beautifully, making every mouthful enjoyable.
-
Fruit Skewers: A colorful assortment of seasonal fruits adds a sweet finish to your meal. Their natural sweetness and juiciness create a delightful contrast to the savory layers of the onigiri, leaving you refreshed and satisfied.
Storage Tips for Chicken Onigiri
Room Temperature: Chicken onigiri are best enjoyed fresh, but if needed, they can be kept at room temperature for up to 2 hours.
Fridge: Wrap onigiri tightly in plastic wrap and store in the fridge for up to 3 days. Enjoy them chilled or reheat gently before serving.
Freezer: For longer storage, freeze onigiri in airtight containers for up to 1 month. Thaw in the fridge overnight before consuming.
Reheating: To reheat, steam or microwave the onigiri wrapped in a damp paper towel for about 30 seconds. This keeps the rice moist and delicious!
Chicken Onigiri Recipe FAQs
How do I choose the right chicken for my onigiri?
Absolutely! For the best flavor and texture, I recommend using boneless skinless chicken drumsticks. They remain juicy and tender, but you can also use thighs or ground chicken if you prefer. Just ensure whatever cut you choose is fresh and free of any dark spots, which indicate over-ripeness.
How should I store leftover chicken onigiri?
To maintain their deliciousness, wrap your chicken onigiri tightly in plastic wrap and store them in the fridge. They will stay fresh for up to 3 days; beyond that, the rice might dry out. Remember, they're best enjoyed chilled or gently reheated.
Can I freeze chicken onigiri for later?
Yes! To freeze, place your shaped onigiri in an airtight container, separating layers with parchment paper to prevent sticking. They can be frozen for up to 1 month. To enjoy them, simply thaw in the fridge overnight and reheat gently—try steaming them for about 30 seconds with a damp paper towel to keep the rice moist.
Why is my rice falling apart while shaping the onigiri?
Very! This typically happens when the rice is either too dry or not sticky enough. Ensure you're using short-grain sushi rice and that it's cooked properly. After cooking, mix in the salt and any optional furikake while it's warm. If needed, you can always add a touch of water to the rice mix to help it stick together better.
Are chicken onigiri safe for kids or those with allergies?
Certainly! These onigiri can be a safe snack for kids, but be cautious if your child has food allergies. Using gluten-free soy sauce ensures this recipe is accessible for those with gluten sensitivities. Just be mindful of any other potential allergens based on the fillings you choose to incorporate. Always check labels for any ingredients that might pose a risk.
Savory Chicken Onigiri: Your New Favorite Snack Adventure
Ingredients
Equipment
Method
- Rinse sushi rice under cold water until water runs clear. Cook according to rice cooker instructions (about 20 minutes). Transfer to a bowl, add salt and furikake, and cool to room temperature.
- Cut chicken into small pieces. In a bowl, mix soy sauce, sake, baking soda, and cornstarch. Add chicken, coat well, cover, and refrigerate for 30 minutes.
- In a small bowl, whisk soy sauce, mirin, and brown sugar until dissolved to create teriyaki sauce. Set aside.
- Heat oil in a skillet over medium-high heat. Add marinated chicken and cook for 2-3 minutes until golden brown. Stir frequently. Add minced garlic in the last 30 seconds, then pour in teriyaki sauce and stir until thickened (about 1-2 minutes).
- Wet hands and mold rice into a small triangle, creating a well in the center. Fill with cooked chicken, fold rice over, and compress gently to seal.
- Wrap nori around one edge of each onigiri and repeat with remaining ingredients.

Leave a Reply