
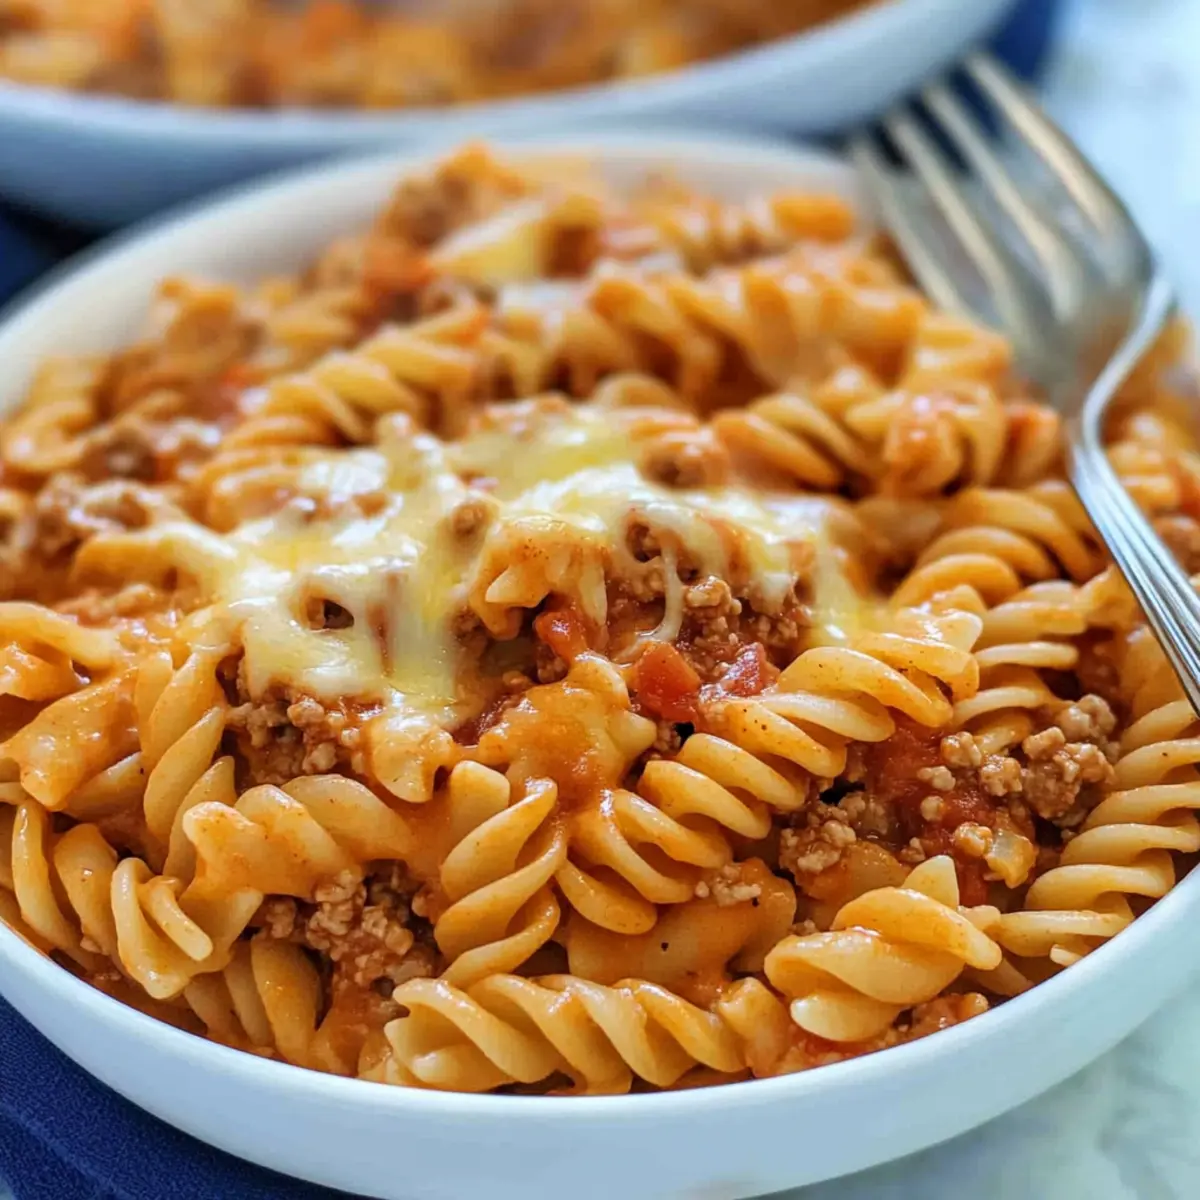
It’s the kind of evening where everyone’s tired, and takeout just won't cut it. That’s when I whip up my Cheesy Taco Pasta, a delightful dish that transforms five simple ingredients into a family-approved feast in under 30 minutes. Combining the warm spices of taco seasoning and the gooey bliss of melting cheese over tender rotini, this recipe is a lifesaver on those busy weeknights. Not only does it deliver a comforting, crowd-pleasing meal, but it also keeps the stress of dinner prep at bay. Who doesn’t want a quick and easy dinner that brings smiles all around the table? Curious how this one-pot wonder comes together? Let’s dive into the cheesy goodness!
Why is Cheesy Taco Pasta a Family Favorite?
Quick and Easy: In just 30 minutes, you can create a delicious dish, perfect for busy weeknights. Minimal Ingredients: With only five simple ingredients, it's budget-friendly and perfect for those stressed-out evenings. Crowd-Pleasing Flavor: This recipe is a hit with both kids and adults, making mealtime enjoyable for everyone. Versatile Options: Don't hesitate to switch up the proteins or add extra veggies; it fits your family's tastes! Check out my Taco Bell Crunchwrap for another easy option!
Cheesy Taco Pasta Ingredients
• Note: Gather these five essential ingredients to whip up a delicious Cheesy Taco Pasta in no time!
For the Pasta
- Rotini – provides a fun, twisty base that holds onto the sauce perfectly.
For the Protein
- Ground Beef – hearty and filling; substitute with ground turkey or chicken for a lighter dish if desired.
For the Sauce
- Water – necessary for dissolving the taco seasoning, creating a velvety sauce; adjust for thickness.
- Taco Seasoning – delivers that classic taco flavor; consider a homemade blend for personalized seasoning control.
For the Moisture & Flavor
- Salsa – enhances taste and adds moisture; opt for your preferred spice level (mild to spicy) to suit your family's palate.
For the Creamy Finish
- Shredded Mexican Cheese – adds delicious creaminess; mix it up with Monterey Jack or Cheddar for delightful variations.
Step‑by‑Step Instructions for Cheesy Taco Pasta
Step 1: Cook Pasta
Begin by bringing a large pot of salted water to a boil. Add the rotini and cook according to the package directions until al dente, usually around 8–10 minutes. Once cooked, drain the pasta in a colander and set it aside, allowing any remaining water to drip off while you prepare the next steps for the Cheesy Taco Pasta.
Step 2: Prepare Meat
In the same large pot, over medium heat, add the ground beef. Cook and crumble the meat for about 6–8 minutes, or until it is fully browned with no pink remaining. As it cooks, stir occasionally to ensure even browning. Once cooked, drain the excess fat to keep your dish light and flavorful.
Step 3: Season Meat
Sprinkle the taco seasoning over the browned meat, then pour in 1 cup of water. Mix thoroughly to combine, ensuring the seasoning evenly coats the meat. Increase the heat slightly, allowing it to simmer for 3–5 minutes until the sauce thickens and most of the water evaporates, creating a deliciously seasoned base for your Cheesy Taco Pasta.
Step 4: Combine Ingredients
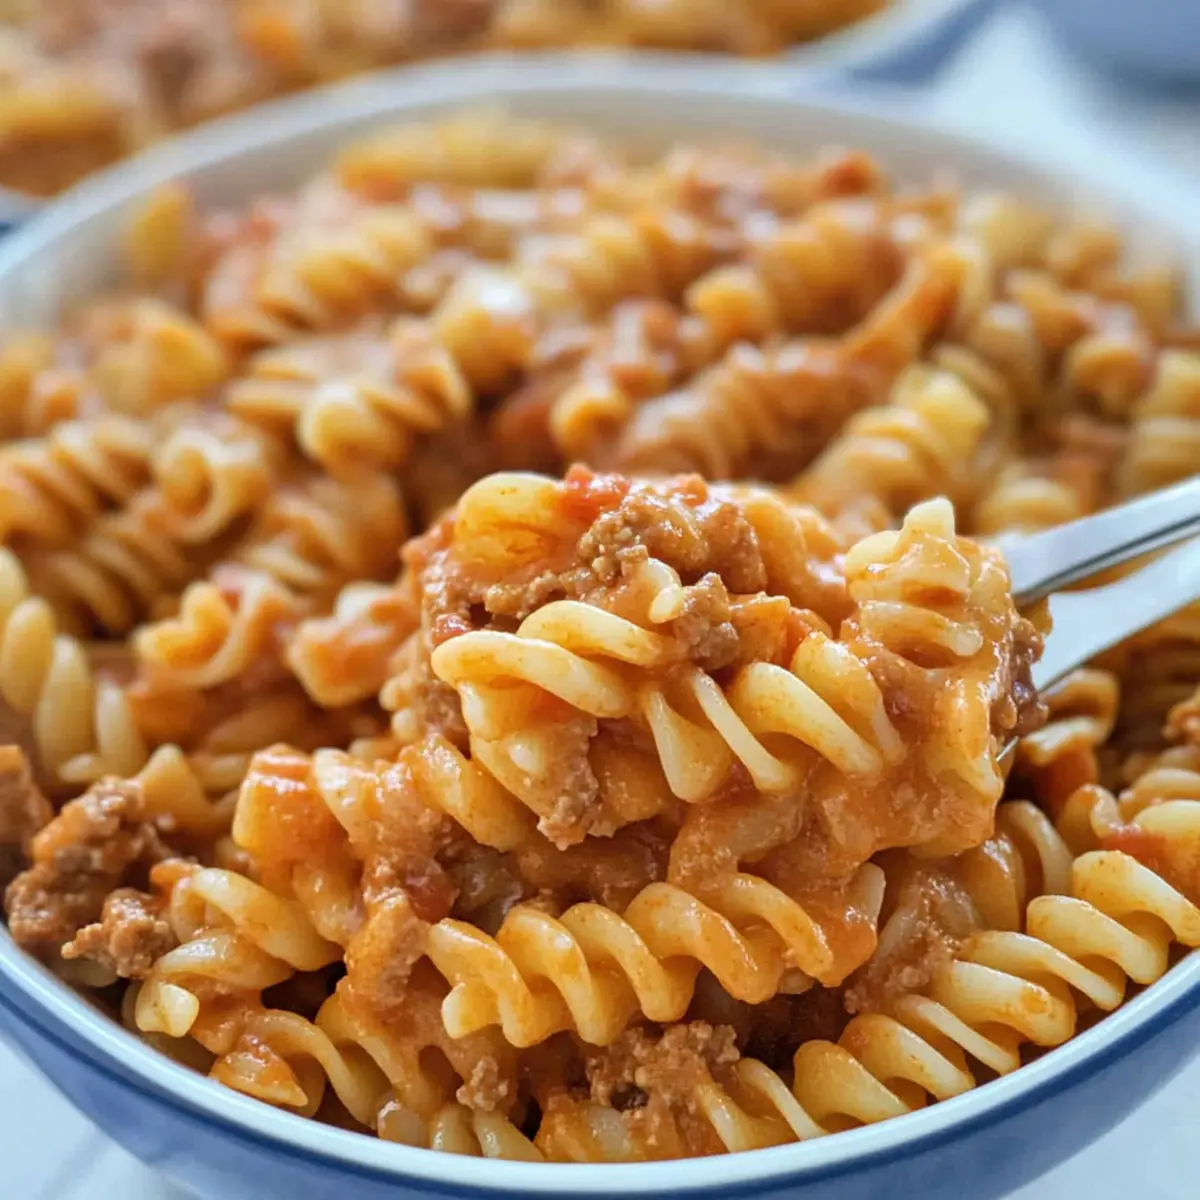
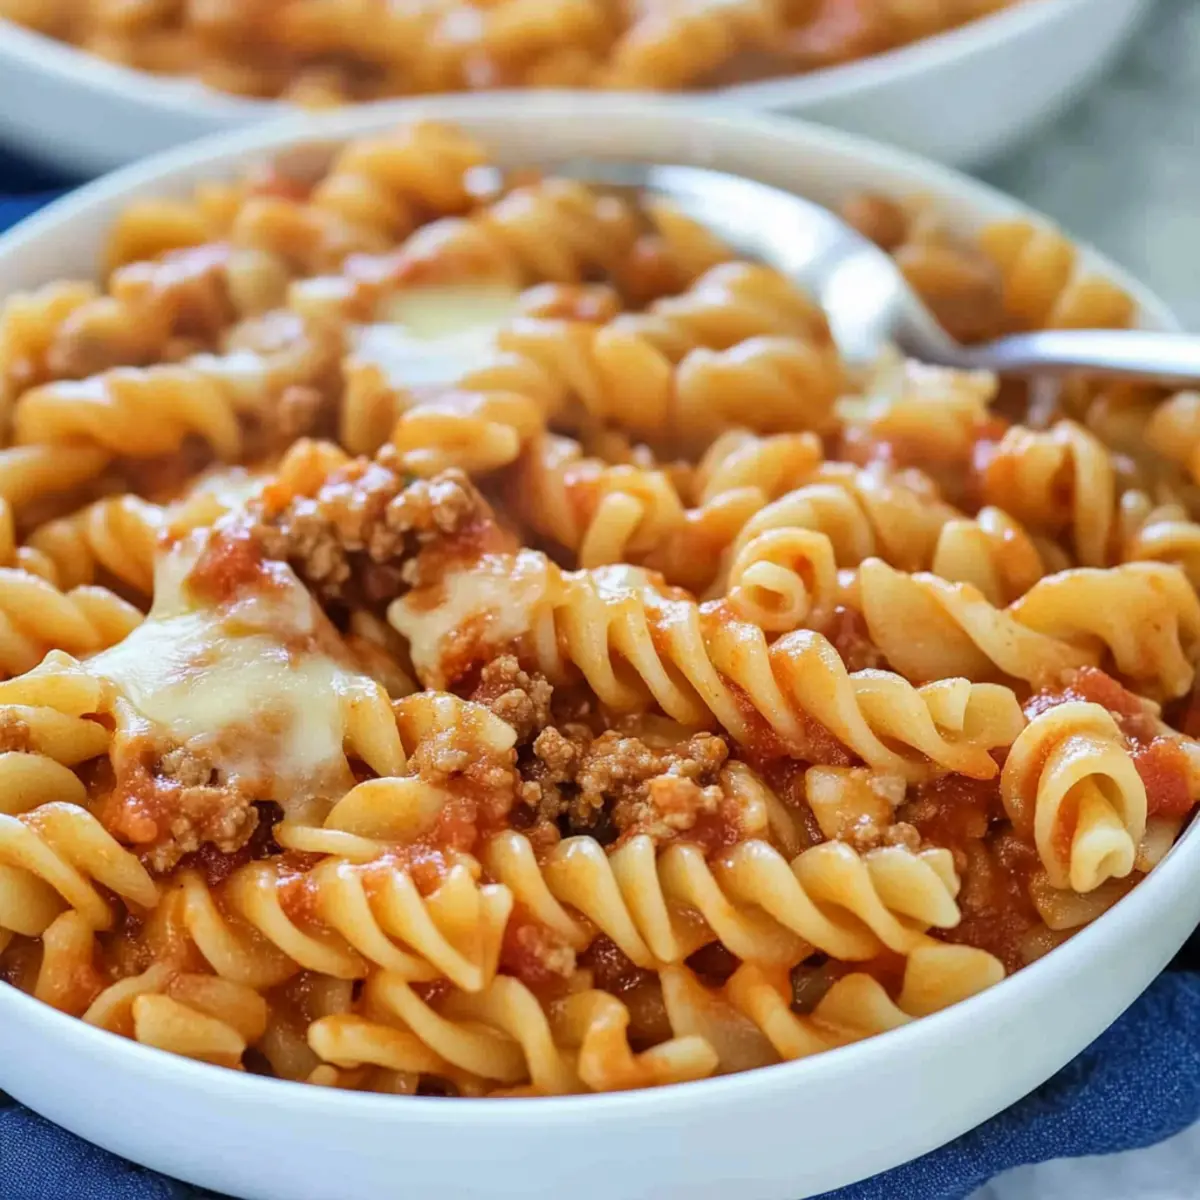
Reduce the heat to low and stir in the cooked rotini and salsa into the seasoned beef mixture. Gently fold everything together for about 2–3 minutes, ensuring that the pasta is well-coated with the taco flavors and the salsa adds moisture and a fresh kick. The delicious aroma will fill your kitchen.
Step 5: Melt Cheese
Sprinkle 1.5 cups of shredded Mexican cheese evenly over the pasta mixture in the pot. Stir gently until the cheese melts and combines into a creamy coating, which should take about 2 minutes. Once melted, remove the pot from heat, add the remaining cheese on top, cover, and let sit for an additional 2 minutes to melt completely before serving your comforting Cheesy Taco Pasta.
Make Ahead Options
These Cheesy Taco Pasta components are perfect for meal prep enthusiasts! You can cook the rotini and ground beef up to 3 days in advance and store them separately in airtight containers in the refrigerator. This allows for quick assembly on busy nights. When you’re ready to enjoy your meal, simply reheat the beef mixture in a pot, add the salsa, and fold in the pre-cooked rotini, followed by the cheese to make it creamy and indulgent once again. For the best quality, ensure the sauce remains moist by adding a splash of water if needed while reheating. You'll have a warm, comforting dinner just like the fresh version, with minimal effort!
Cheesy Taco Pasta: Variations & Substitutions
Feel free to tweak this recipe and make it your own with these delightful variations!
- Vegetarian: Swap out the ground beef for lentils or black beans for a hearty plant-based option. The flavors still shine brightly with taco seasoning!
- Spicy Twist: Incorporate chopped jalapeños or crushed red pepper for an extra kick that spice lovers will adore. This fiery addition brings an exciting intensity to the dish!
- Cheese Blend: Experiment with different cheese combinations like Pepper Jack for a zesty layer or Gouda for a smoky aroma. Enjoy a creamy masterpiece with a unique flavor profile!
- Add Veggies: Toss in cooked corn, diced bell peppers, or spinach for additional color and nutrition, making this a wholesome family meal. Who says you can't sneak in some greens?
- Different Pasta: Use shells, penne, or even zoodles as a fun twist on the pasta base. Each type of pasta offers a different texture and experience to your Cheesy Taco Pasta.
- Dairy-Free: Substitute the cheese with a dairy-free blend and almond milk to keep it creamy without the dairy. Enjoy a comforting dish that everyone can savor!
- Salsa Choice: Change up the salsa type for new flavor profiles—try mango salsa for sweetness or a smoky chipotle salsa for a twist. Your taste buds will thank you for this flavorful innovation!
For more inspiration, explore my tasty Skillet Pasta with Sun-Dried Tomatoes or venture into my delightful Cauliflower Pasta for even more mouthwatering ideas!
How to Store and Freeze Cheesy Taco Pasta
Fridge: Keep the Cheesy Taco Pasta in an airtight container for up to 5–7 days. This will preserve its flavor and texture while making it easy to reheat.
Freezer: For long-term storage, freeze the pasta in freezer-safe containers for up to 3 months. To avoid freezer burn, make sure to remove as much air as possible before sealing.
Reheating: When ready to enjoy, thaw overnight in the fridge, then reheat in the microwave or on the stovetop. Add a splash of water or milk to keep it creamy.
Leftover Tips: Be sure to stir well while reheating to evenly distribute the cheese sauce throughout the Cheesy Taco Pasta for luscious bites every time.
Expert Tips for Cheesy Taco Pasta
- Perfect Pasta: Use rotini for the best sauce adhesion, but feel free to swap with any pasta you have available, like penne or fusilli.
- Lean Meat: Always drain excess fat from the ground beef; this keeps your Cheesy Taco Pasta light and flavorful, avoiding greasiness.
- Season to Taste: Don’t hesitate to adjust the taco seasoning based on your family’s spice preferences; a little customization can make a big difference!
- Melt Magic: Allow the cheese to sit off the heat a moment before serving for the best creamy texture; rushing can lead to clumpy, unsatisfying cheese.
- Storing Leftovers: Keep leftovers in an airtight container for up to a week; add a splash of water when reheating to maintain creaminess.
What to Serve with Cheesy Taco Pasta
Imagine a vibrant family dinner table filled with colors and flavors that excite everyone!
- Garlic Bread: Perfectly toasted with a buttery, garlicky crunch, it complements the creamy pasta and allows for delightful sauce-dipping.
- Fresh Garden Salad: Crisp greens with a zesty vinaigrette add a refreshing contrast to the rich flavors, making each bite truly satisfying.
- Corn on the Cob: Grilled or boiled, the sweetness of corn complements the savory taco spices, creating a burst of flavor harmony in every mouthful.
- Sour Cream: A dollop adds a creamy coolness that balances the spices in the pasta, enhancing the experience with its velvety texture.
- Mexican Street Corn Salad: This tangy, creamy side with lime and cheese enhances the taco flavor theme and provides a fun twist!
- Fruit Salsa: A fruity blend of mango or pineapple with cilantro keeps things light and fresh, offering a delightful palate cleanse between bites.
- Margaritas: A chilled, zesty cocktail perfectly complements the meal and brings a fiesta vibe to your family dinner.
- Chocolate Chip Cookies: End your evening on a sweet note; soft, gooey cookies bring a smile and a slice of homey comfort to the table!

Cheesy Taco Pasta Recipe FAQs
How do I choose the right rotini for the Cheesy Taco Pasta?
Absolutely! Look for rotini that is firm and free from any cracks. Ideally, it should have a bright color and be free of any dark spots. If rotini isn't on hand, feel free to substitute it with any short pasta shape like penne or fusilli, which will also hold the sauce beautifully.
What is the best way to store leftovers of Cheesy Taco Pasta?
Very simple! Store your Cheesy Taco Pasta in an airtight container in the fridge for up to 5-7 days. Make sure it has cooled down to room temperature before sealing. When you're ready to enjoy, simply reheat in the microwave or on the stovetop, adding a splash of water to keep it creamy.
Can I freeze Cheesy Taco Pasta?
You bet! To freeze, portion the Cheesy Taco Pasta into freezer-safe containers, making sure to remove as much air as possible to prevent freezer burn. It can be stored for up to 3 months. When you're ready to eat it, thaw it overnight in the fridge, then gently reheat, adding a little water or milk as needed to maintain that creamy sauce.
What if my cheese doesn’t melt smoothly?
Ah, this can happen! If your cheese isn’t melting smoothly, it may be due to cooking it too quickly or not letting it rest after removing from heat. To achieve that velvety texture, make sure to sprinkle the cheese evenly and give it adequate time off heat to melt. Stir gently until it's fully incorporated, and don’t rush this step!
Is there a way to make this dish allergen-friendly?
Certainly! For a gluten-free version, use gluten-free pasta and ensure your taco seasoning and salsa are gluten-free as well. If you're avoiding dairy, try using plant-based cheese alternatives. Be sure to check ingredient labels for any potential allergens according to your family’s needs.
Can I add vegetables to my Cheesy Taco Pasta?
The more the merrier! You can easily elevate the nutritional value of your Cheesy Taco Pasta by adding in veggies like bell peppers, corn, or spinach. Just sauté them in the pot before you add the ground beef to ensure they’re cooked through and flavorful. This addition not only enhances the dish but adds vibrant colors too!
Cheesy Taco Pasta: A 30-Minute Family Dinner Delight
Ingredients
Equipment
Method
- Bring a large pot of salted water to a boil. Add the rotini and cook according to the package directions until al dente, around 8-10 minutes. Drain and set aside.
- In the same pot, add ground beef over medium heat. Cook and crumble for about 6-8 minutes until browned. Drain excess fat.
- Sprinkle taco seasoning over the meat and pour in water. Mix to combine and simmer for 3-5 minutes until the sauce thickens.
- Reduce heat to low and stir in cooked rotini and salsa. Fold everything together for 2-3 minutes.
- Sprinkle shredded cheese over the mixture and stir until melted. Remove from heat, add remaining cheese on top, cover, and let sit for 2 minutes.


Leave a Reply