
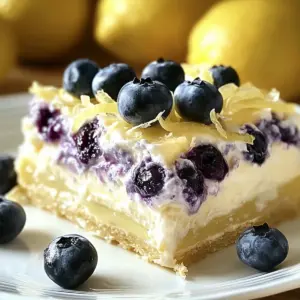
The first time I tasted a Boston Cream Pie, I was transported to dessert heaven—it's the perfect harmony of rich flavors. Now, imagine taking that beloved classic and transforming it into a decadent Boston Cream Pie Cheesecake! This creation blends the lusciousness of cheesecake with the nostalgic taste of chocolate and vanilla cream. Not only is it a delightful treat for special occasions, but with simple steps and a few readily available ingredients, even novice bakers can create a stunning masterpiece. Plus, there’s a gluten-free option for those who need it! Ready to impress your friends and family with a dessert that combines comfort and elegance? Let’s dive into the delicious world of Boston Cream Pie Cheesecake together!
Why is this cheesecake a must-try?
Unmatched Flavor: The delectable fusion of rich chocolate and creamy vanilla will have everyone swooning at first bite.
Versatile Delight: Perfect for every occasion, whether it's a birthday bash or a cozy family dinner.
Easy to Make: Even if you're a novice baker, this recipe is designed to be user-friendly with straightforward steps.
Gluten-Free Friendly: With a simple swap, you can enjoy this heavenly treat while catering to dietary needs.
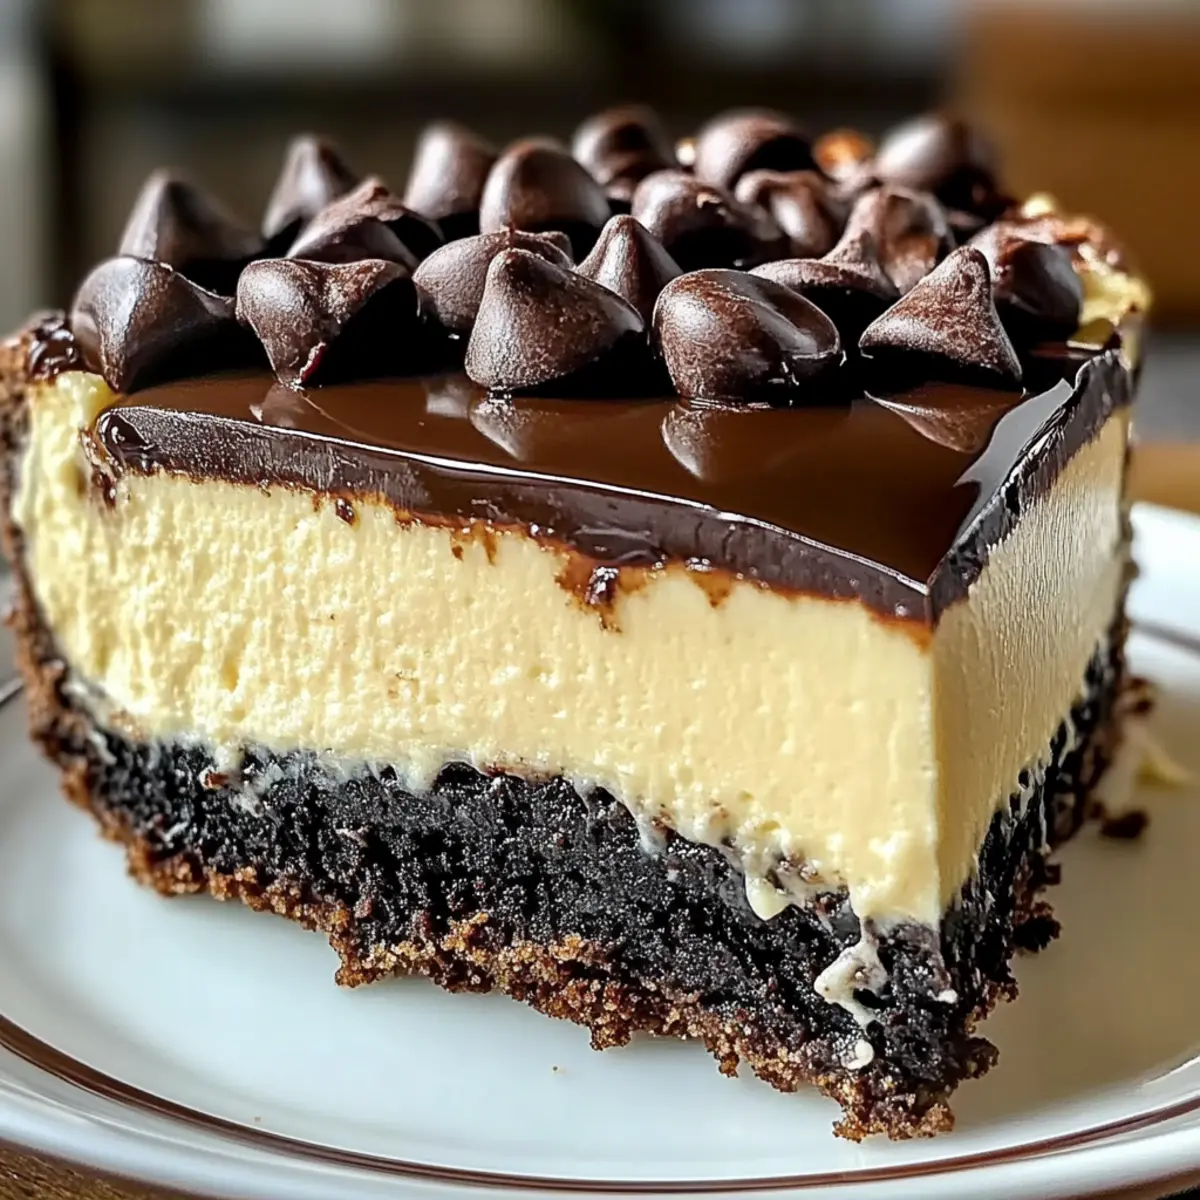
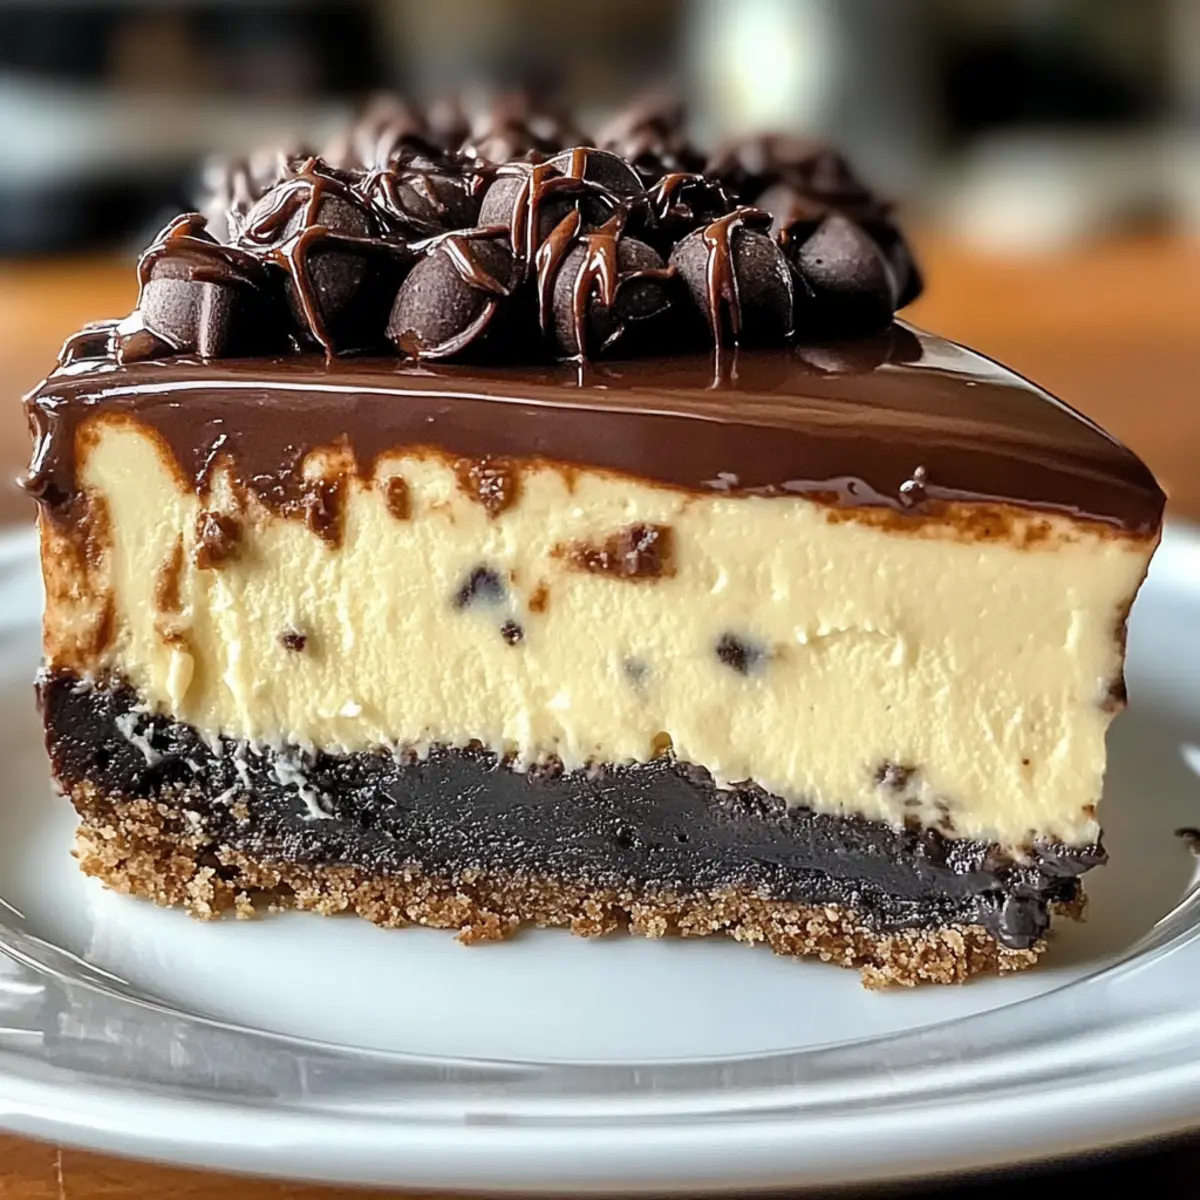
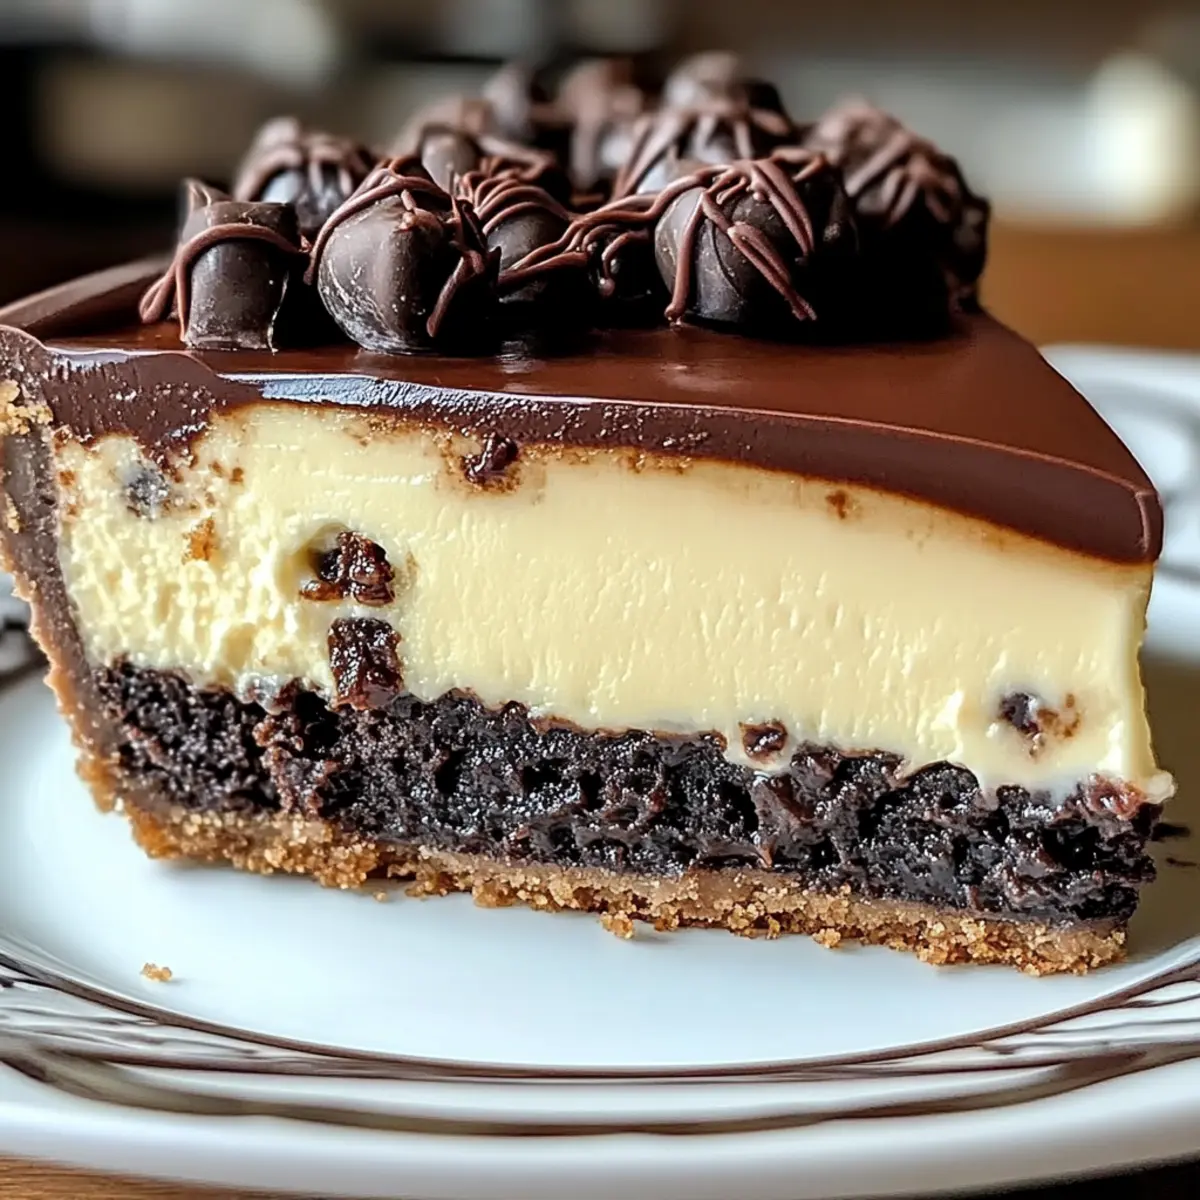
Eye-Catching Presentation: The glossy ganache adds an elegance that’s sure to impress, making each slice a showstopper. Pair it with fresh fruit or a dollop of whipped cream for an extra special touch!
Boston Cream Pie Cheesecake Ingredients
For the Crust
• Crushed Chocolate Cookies – Provides the crunchy base. Can substitute with gluten-free cookies for a gluten-free option.
• Melted Unsalted Butter – Binds the crust together. Use coconut oil for a dairy-free version.
For the Cheesecake Filling
• Cream Cheese (24 oz) – Main ingredient for the cheesecake filling, adding creaminess. Low-fat cream cheese can be used, although it may alter texture.
• Granulated Sugar (1 cup) – Sweetens the filling. Adjust to taste if using alternative sweeteners.
• Vanilla Powder (1 ½ tsp) – Enhances flavor. Use pure vanilla extract as a substitute.
• Large Eggs (3) – Provide structure and stability to the cheesecake.
• Sour Cream (½ cup) – Adds tang and creaminess. Replace with Greek yogurt for a healthier twist.
• Bittersweet Chocolate (4 oz, melted) – Adds depth of flavor to the filling. Can swap with dark chocolate.
For the Ganache
• Heavy Cream (½ cup) – Essential for the ganache. Use full-fat coconut cream as a non-dairy alternative.
• Semi-Sweet Chocolate Chips (1 cup) – Main component of the ganache; can substitute with any preferred chocolate chips.
Enjoy crafting your delightful Boston Cream Pie Cheesecake, bursting with flavor!
Step‑by‑Step Instructions for Boston Cream Pie Cheesecake
Step 1: Preheat the Oven
Preheat your oven to 325°F (163°C). While the oven warms up, prepare a 9-inch springform pan by greasing it lightly with butter or cooking spray. This step ensures that your Boston Cream Pie Cheesecake will release smoothly once baked, allowing for a beautiful presentation.
Step 2: Prepare the Crust
In a mixing bowl, combine crushed chocolate cookies with melted unsalted butter. Stir until the mixture resembles wet sand, then press it firmly into the bottom of the prepared springform pan, creating an even layer. Bake this crust in the preheated oven for about 10 minutes or until set, which helps to hold the cheesecake filling perfectly.
Step 3: Make the Cheesecake Filling
In a large mixing bowl, beat the softened cream cheese with granulated sugar and vanilla powder until smooth and creamy. Add the eggs, one at a time, mixing well after each addition to ensure a lovely consistency. Next, incorporate the sour cream and melted bittersweet chocolate, which will give your cheesecake filling that rich, decadent flavor we love in this Boston Cream Pie Cheesecake.
Step 4: Bake the Cheesecake
Pour the luscious cheesecake filling over the baked chocolate cookie crust, smoothing it out evenly. Place the cheesecake in the oven and bake for 50-60 minutes, or until the edges are set but the center still jiggles slightly. This gentle baking ensures a creamy, smooth texture for your cheesecake.
Step 5: Cool the Cheesecake
Once baked, turn off the oven and leave the door ajar. Allow the cheesecake to cool in the oven for about 1 hour; this gradual cooling helps prevent cracking. Afterward, transfer the cheesecake to the refrigerator and chill for at least 6 hours, or preferably overnight, to achieve that perfect firmness.
Step 6: Prepare the Ganache
While the cheesecake is chilling, make the chocolate ganache. In a saucepan, heat the heavy cream over medium heat until it begins to simmer. Pour the hot cream over the semi-sweet chocolate chips in a bowl and let it sit for a minute, then stir until smooth and glossy. This velvety ganache will top your cheesecake beautifully.
Step 7: Assemble and Serve
Once the cheesecake is fully chilled, remove it from the springform pan. Pour the silky ganache over the top, letting it flow elegantly down the sides. For an added touch, sprinkle some extra chocolate chips on top. Chill the cheesecake briefly to set the ganache, and then slice and serve your impressive Boston Cream Pie Cheesecake to thrilled family and friends.
Boston Cream Pie Cheesecake Variations
Feel free to put your personal spin on this delicious cheesecake and create a dessert that's uniquely yours!
- Gluten-Free: Swap out the crushed chocolate cookies for gluten-free cookies, making it a treat for everyone. It's so easy, yet everyone will appreciate the gesture!
- Dairy-Free: Use coconut oil instead of butter and full-fat coconut cream in place of heavy cream for a delightful dairy-free version. This alternative keeps the richness while accommodating different dietary needs.
- Dark Chocolate Twist: For a bolder flavor, replace bittersweet chocolate with dark chocolate in the filling and ganache. The deeper chocolate notes will have every chocolate lover begging for more.
- Fruit Infusion: Layer fresh strawberries or raspberries on top of the cheesecake before adding the ganache; the fruit adds a bright, fresh flavor that complements the richness beautifully. It's like a mini fruit farm celebration with every bite!
- Flavor Extracts: Try incorporating flavored extracts like almond or lemon instead of vanilla for a unique twist. These subtle changes can transport your taste buds to a whole new level of deliciousness, combining familiar flavors with a surprise.
- Mini Cheesecakes: Convert the recipe into mini cheesecakes using a muffin tin. You'll have delightful little treats that are perfect for parties or lunches. These bite-sized delights are fun to share and savor!
- Chocolate Chip Ganache: Mix semi-sweet chocolate chips into the ganache for added texture and little bursts of chocolate in every slice. They're tiny morsels of happiness that elevate each bite!
- Whipped Topping: Top your cheesecake with a generous swirl of homemade whipped cream before serving for an extra touch of indulgence. It's a simple but effective way to enhance both the look and taste of the cheesecake.
Each of these variations allows you to experiment while keeping the spirit of the Boston Cream Pie Cheesecake intact. It’s all about finding that perfect blend of comfort and creativity, just like you might with a delightful batch of Peaches Cream Cookies or a hearty Tamale Pie. Enjoy!
Expert Tips for Boston Cream Pie Cheesecake
- Soften Cream Cheese: Ensure that the cream cheese is at room temperature to avoid lumps, achieving that smooth, creamy texture essential for a decadent Boston Cream Pie Cheesecake.
- Mind the Bake Time: Overbaking can cause unsightly cracks in the surface; look for a slight jiggle in the center before taking it out of the oven.
- Cooling Method: Gradually cooling the cheesecake in the oven prevents thermal shock, which helps reduce the chances of cracks forming.
- Water Bath Option: For perfect results, consider baking in a water bath. This gentle heat helps maintain an even temperature throughout the cheesecake, providing a luxuriously smooth texture.
- Chill Thoroughly: Allow the cheesecake to chill for at least 6 hours or overnight for the best flavor and firmness—patience pays off with this rich dessert!
How to Store and Freeze Boston Cream Pie Cheesecake
Fridge: Keep your cheesecake covered in the refrigerator for up to 5 days. This helps maintain its creamy texture and rich flavors, ensuring it's just as delightful on the last slice as the first!
Freezer: For longer storage, freeze your Boston Cream Pie Cheesecake for up to 2 months. Wrap it tightly in plastic wrap and aluminum foil to prevent freezer burn, ensuring it’s ready for any sweet cravings.
Reheating: When you’re ready to enjoy a frozen slice, thaw it in the fridge overnight. Serve it chilled for the best taste, or let it sit at room temperature for about 30 minutes before indulging.
Leftover Ganache: If you have leftover ganache, store it in an airtight container in the fridge for up to a week. You can reheat gently in the microwave or on the stovetop for a delicious drizzle later!
Make Ahead Options
These Boston Cream Pie Cheesecake preparations are a dream for busy home cooks looking to save time! You can prepare the crust up to 24 hours in advance by storing it tightly wrapped in the refrigerator to maintain its crunchiness. Additionally, the cheesecake filling can be mixed and kept in an airtight container in the fridge for up to 3 days, however, it's best added to the crust fresh to keep the texture perfect. When you're ready to bake, simply pour the chilled filling into the pre-baked crust and proceed with the baking instructions. Lastly, the ganache can be made ahead and stored in the refrigerator for up to 5 days—just gently reheat it before pouring over the cheesecake. Following these steps ensures that your Boston Cream Pie Cheesecake remains just as delicious, giving you a head start on dessert!
What to Serve with Boston Cream Pie Cheesecake
Elevate your dessert experience by pairing this luscious cheesecake with delightful side dishes and drinks that enhance its rich flavor.
-
Fresh Berries: The tartness of strawberries or raspberries cuts through the sweetness, providing a refreshing counterpoint.
-
Whipped Cream: A dollop of fluffy whipped cream adds extra creaminess and a light touch, perfect for balancing the dense cheesecake.
-
Chocolate-Covered Almonds: These crunchy bites bring an added texture and deep chocolate flavor that complements the cheesecake beautifully.
-
Espresso or Coffee: A robust cup of coffee contrasts the sweet cheesecake, allowing each bite to shine while providing a warm, inviting experience.
-
Vanilla Ice Cream: The smooth, creamy ice cream melts deliciously over the cheesecake, enhancing its flavors while adding a pleasing temperature contrast.
-
Mint Garnish: Fresh mint leaves not only brighten the plate but also add a refreshing burst of flavor that lifts the dessert.
-
Sparkling Wine: A chilled glass of sparkling wine pairs well, as its bubbles cleanse the palate, making each bite even more enjoyable.
These thoughtfully selected pairings will create a memorable dining experience, allowing each element to shine alongside your Boston Cream Pie Cheesecake!
Boston Cream Pie Cheesecake Recipe FAQs
How do I select the best chocolate cookies for the crust?
Absolutely! Look for chocolate cookies that are crisp and crunchy, as they create the perfect base for the cheesecake. If you're using gluten-free cookies, ensure they are also crispy to maintain the crust's structure after baking. Brands vary, but I recommend using classic chocolate wafer cookies or Oreos (gluten-free options available) for the best flavor.
What are the best storage methods for leftover cheesecake?
Very! Keep your Boston Cream Pie Cheesecake covered in the refrigerator for up to 5 days. Wrapping it tightly in plastic wrap or storing it in an airtight container helps maintain its creamy texture and rich flavor. If you want to keep it longer, freezing is a great option—just remember to wrap it tightly and label it for easy identification!
Can I freeze the Boston Cream Pie Cheesecake?
Absolutely! To freeze your cheesecake, let it cool completely and then wrap it tightly in plastic wrap, followed by aluminum foil to prevent freezer burn. This will keep it fresh for up to 2 months. When ready to enjoy, thaw it in the fridge overnight before serving—this will help retain its delicious flavor and texture.
Why is my cheesecake cracking, and how can I prevent it?
Very! Cheesecake cracks can occur due to a few reasons, primarily related to baking and cooling. Keep an eye on your baking time—removing the cheesecake while the center still has a slight jiggle helps to prevent overbaking. I also recommend using a water bath: place your springform pan in a larger pan filled with water during baking. This gentle, even heat creates a creamy texture and minimizes the chance of cracks forming.
Can I make this cheesecake dairy-free or suitable for lactose intolerance?
Absolutely! For a dairy-free version, substitute the cream cheese with a vegan cream cheese alternative and use coconut oil in place of melted butter. You'll also want to use a non-dairy heavy cream for the ganache, such as full-fat coconut cream. Always check labels to ensure they're lactose-free, especially on other ingredients like chocolate chips.
Is this recipe suitable for pets?
No! It's important to note that cheesecake contains ingredients that may not be safe for pets, particularly cream cheese, eggs, and chocolate. Always keep desserts like Boston Cream Pie Cheesecake out of reach of your furry friends to ensure their safety.

Leave a Reply