
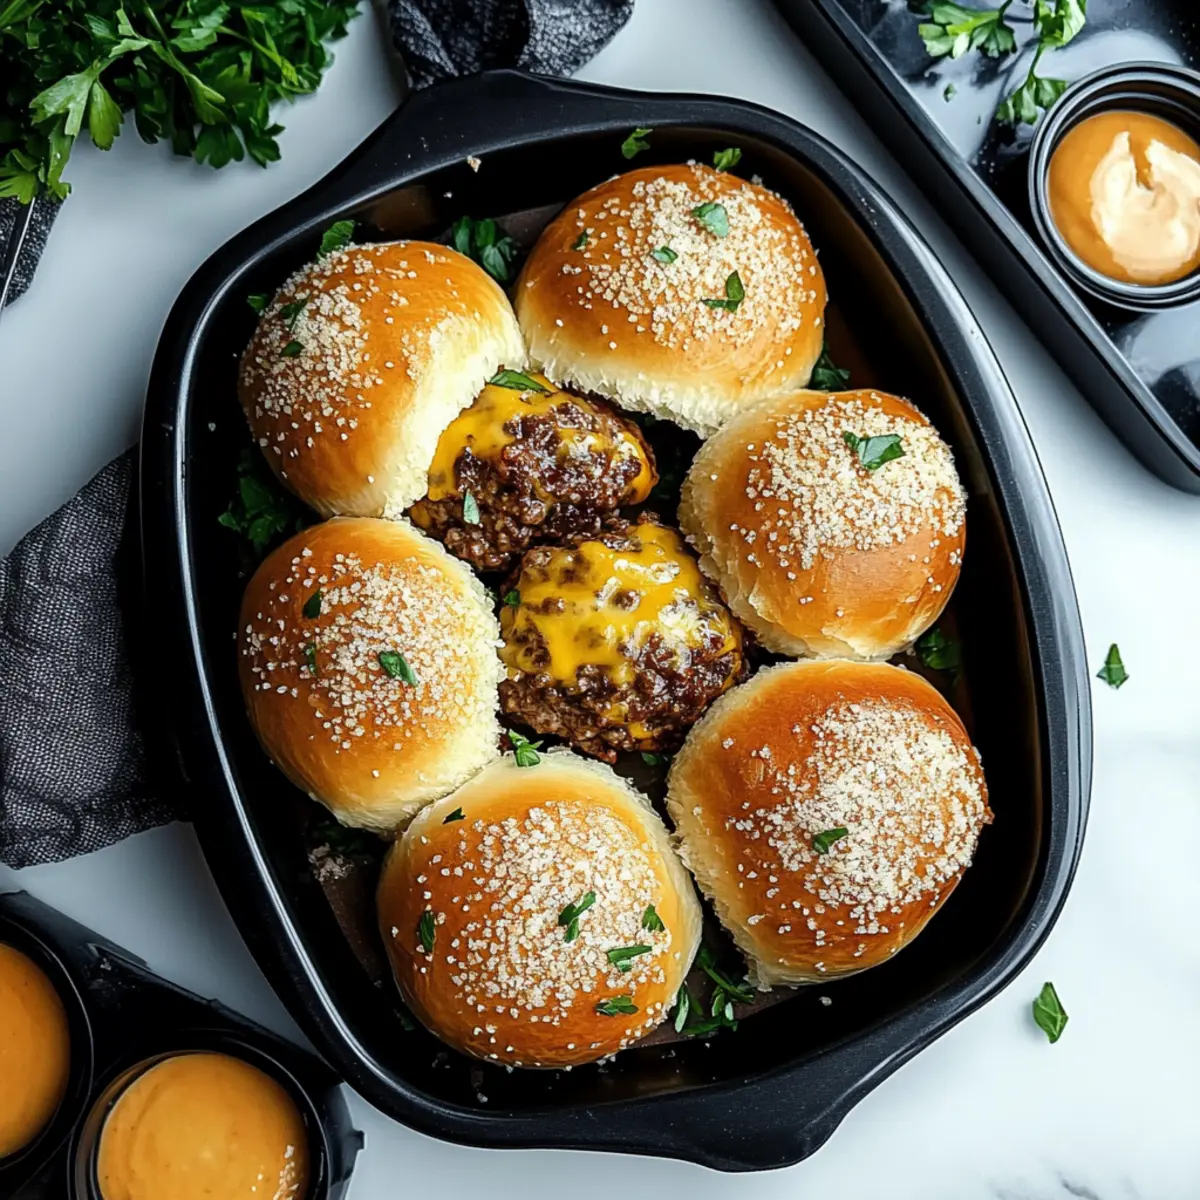
As I took a bite of these Garlic Parmesan Cheeseburger Bombs, the delightful combination of savory beef and melty cheese enveloped in fluffy biscuit dough made me feel like I was indulging in the ultimate comfort food. Perfect for game nights or casual gatherings, these little gems come together in a snap, utilizing easy-to-find ingredients that will have your friends and family raving for more. And if you're looking for versatility, swap ground beef for turkey or even a plant-based alternative to cater to different preferences. Imagine serving a warm, gooey treat that’s not just satisfying but also a crowd-pleaser! Ready to impress your guests (or yourself) with this irresistible appetizer? Let's dive into the recipe!
Why Are These Bombs So Irresistible?
Quick and Easy Preparation: These Garlic Parmesan Cheeseburger Bombs can be made in under 30 minutes, perfect for any busy schedule.
Savory Flavor Explosion: Each bite offers a burst of cheesy, garlicky goodness that will have everyone asking for seconds.
Endless Customization: Feel free to swap the ground beef for turkey or a plant-based option, ensuring everyone can join in on the fun.
Crowd-Pleasing Treat: Ideal for game nights or casual gatherings, these bombs are sure to be the highlight of your table, much like my Honey Garlic Chicken.
Perfect for Dipping: Pair them with your favorite sauces like ranch or BBQ to elevate that flavor experience!
With their delightful texture and rich flavors, these cheeseburger bombs are not just an appetizer—they're a guaranteed hit!
Garlic Parmesan Cheeseburger Bombs Ingredients
For the Filling
- Ground Beef – Provides the juicy, meaty foundation; can be substituted with ground turkey, ground chicken, or plant-based meat alternatives.
- Salt – Enhances flavor; adjust to taste for your perfect bite.
- Black Pepper – Adds subtle heat to the mixture.
- Garlic Powder – Infuses a rich garlic flavor; fresh garlic can be substituted for an even more robust taste.
- Onion Powder – Offers a mellow onion undertone to balance the flavors.
- Worcestershire Sauce – Introduces umami richness; soy sauce can effectively replace it for similar depth.
- Shredded Cheddar Cheese – Creates gooey, cheesy pockets; you can also use mozzarella for different flavors.
For the Dough
- Refrigerated Biscuit Dough – Serves as the pastry shell; simplifies preparation compared to making dough from scratch.
For the Topping
- Butter – Adds richness and is brushed on top for a golden finish.
- Minced Garlic – Freshly adds strong, aromatic flavor to the butter topping; a must for that garlic kick!
- Grated Parmesan Cheese – Sprinkled on top for a crisp, nutty crust that complements the bombs perfectly.
- Chopped Fresh Parsley – Adds color and a fresh herbaceous note for an appealing garnish.
These Garlic Parmesan Cheeseburger Bombs are bound to be the star of your next gathering with their delightful combination of flavors and textures!
Step‑by‑Step Instructions for Garlic Parmesan Cheeseburger Bombs
Step 1: Preheat Your Oven
Begin by preheating your oven to 375°F (190°C). While the oven warms up, take a baking sheet and line it with parchment paper to prevent sticking. This prep step is essential for ensuring your Garlic Parmesan Cheeseburger Bombs bake evenly and come out with a perfectly golden crust.
Step 2: Cook the Beef
In a large skillet over medium heat, add the ground beef. Cook it for about 5–7 minutes, breaking it apart with a spatula until it's browned and no longer pink. Once fully cooked, drain any excess fat to keep your bombs flavorful yet not greasy.
Step 3: Season the Meat
Now it's time to infuse your beef with flavor! Add salt, pepper, garlic powder, onion powder, and Worcestershire sauce to the skillet. Stir these seasonings into the beef mixture for about 2 minutes until well combined. Finally, fold in the shredded cheddar cheese, allowing it to melt and create a gooey filling for your bombs.
Step 4: Prepare the Biscuit Dough
Open the refrigerated biscuit dough and separate the biscuits. On a lightly floured surface, roll each biscuit into approximately 1/4 inch thick circles; this thinness helps create a perfectly crisp shell. Once rolled, it’s time to load them with filling.
Step 5: Fill the Biscuits
Scoop about 2 tablespoons of the beef mixture into the center of each rolled biscuit. Gather the edges of the biscuit dough and fold them over the filling. Pinch the edges securely to seal each bomb tightly, ensuring no filling leaks out during baking. Place each sealed bomb seam-side down on your prepared baking sheet.
Step 6: Brush with Garlic Butter
In a small bowl, melt some butter and mix in the minced garlic. Brush this fragrant garlic butter mixture generously over the tops of your unbaked bombs, which will add flavor and help them achieve a beautiful golden finish in the oven.
Step 7: Add the Parmesan Topping
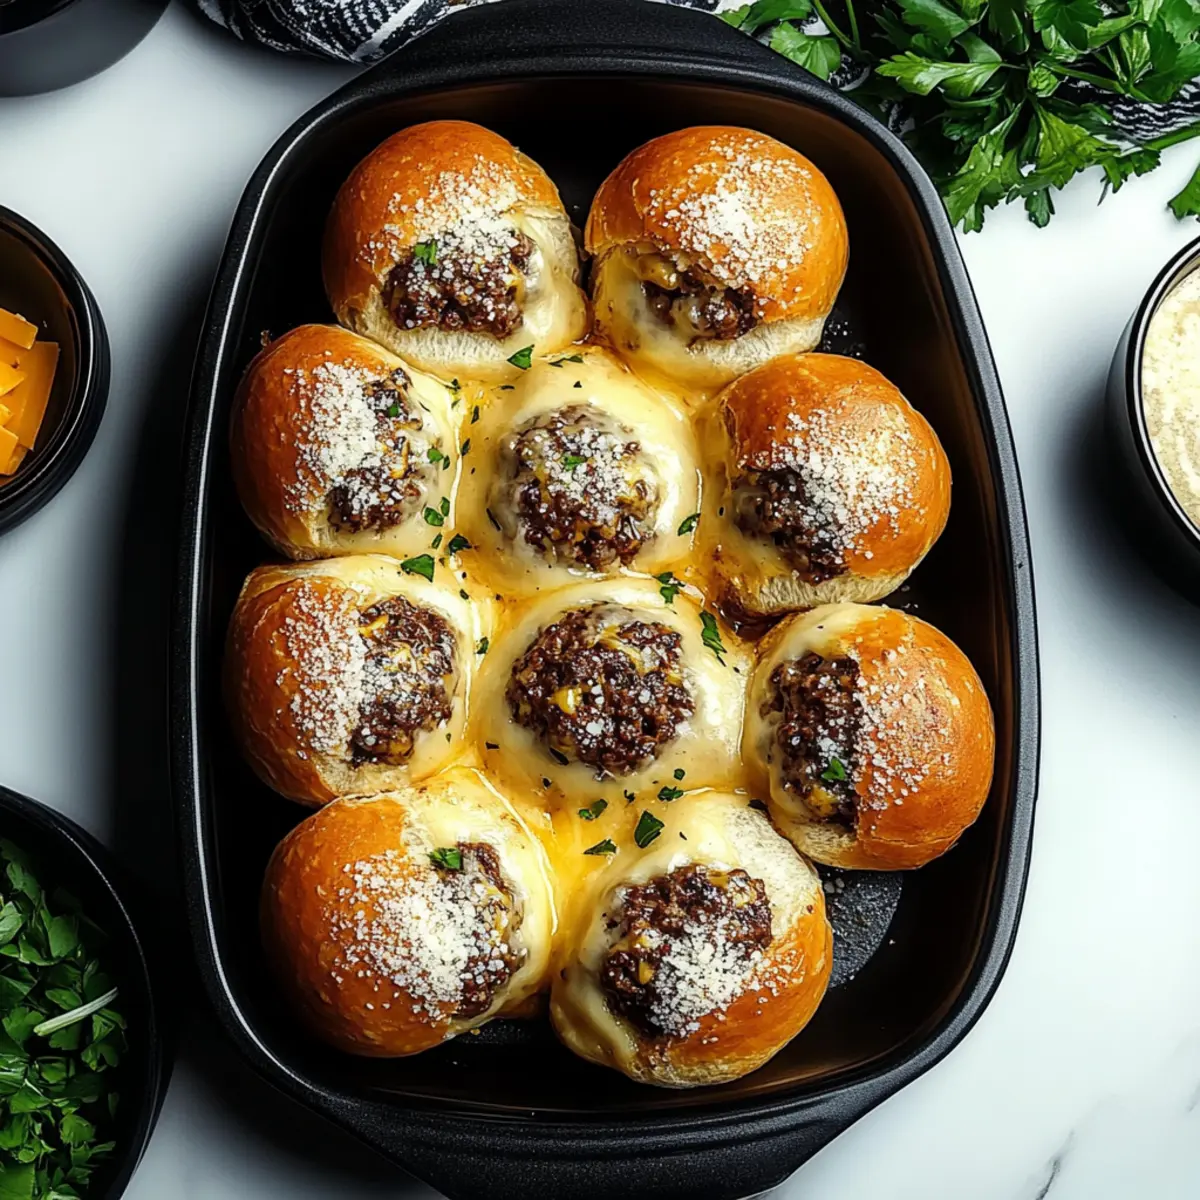
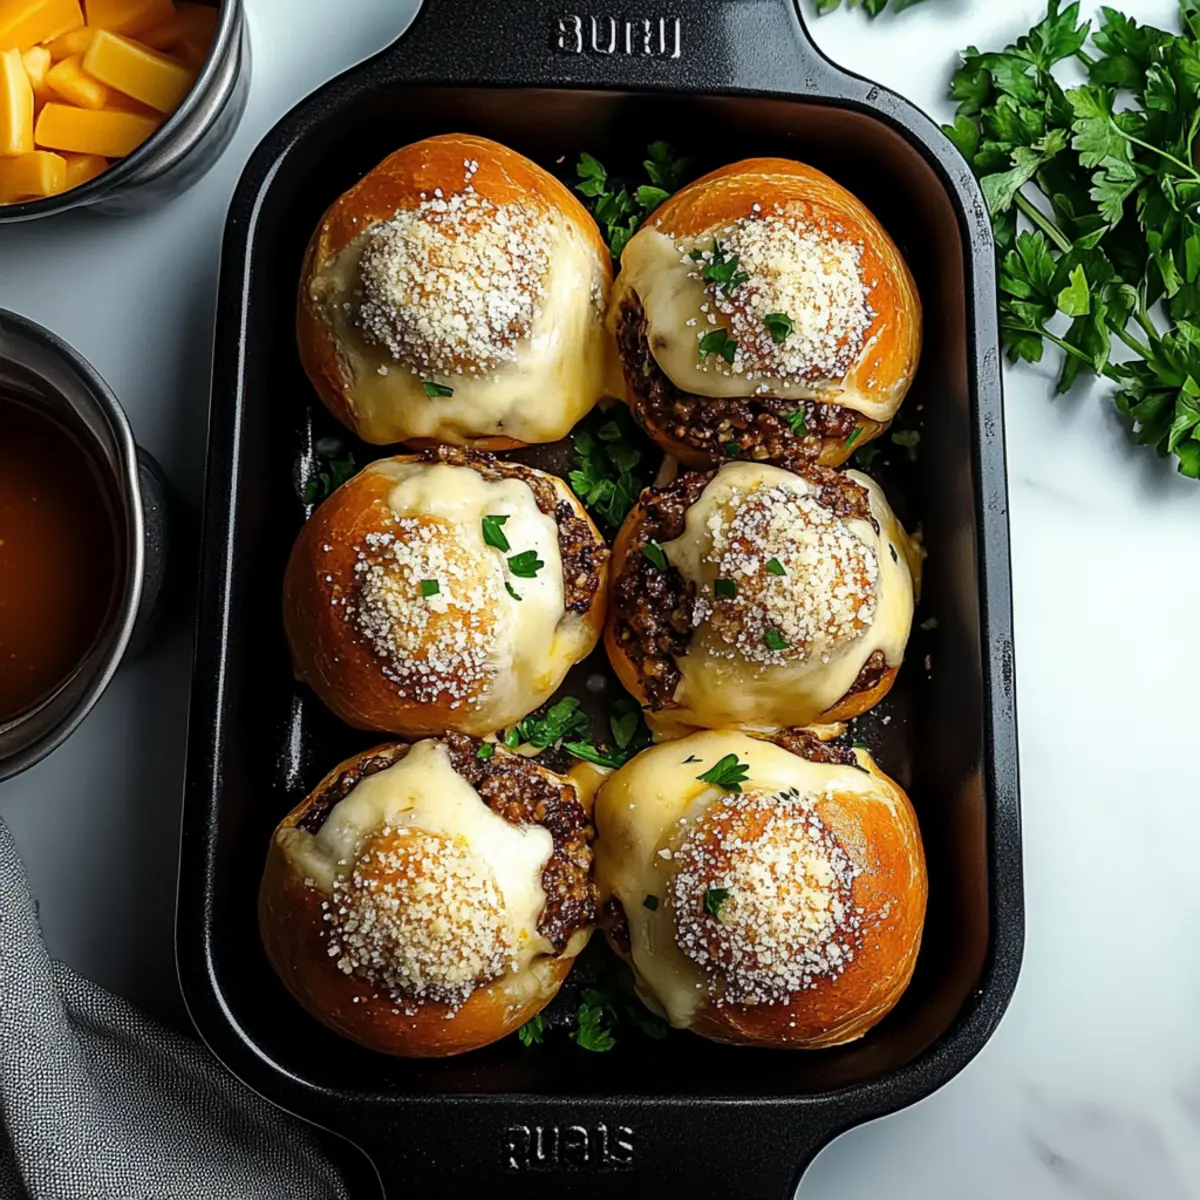
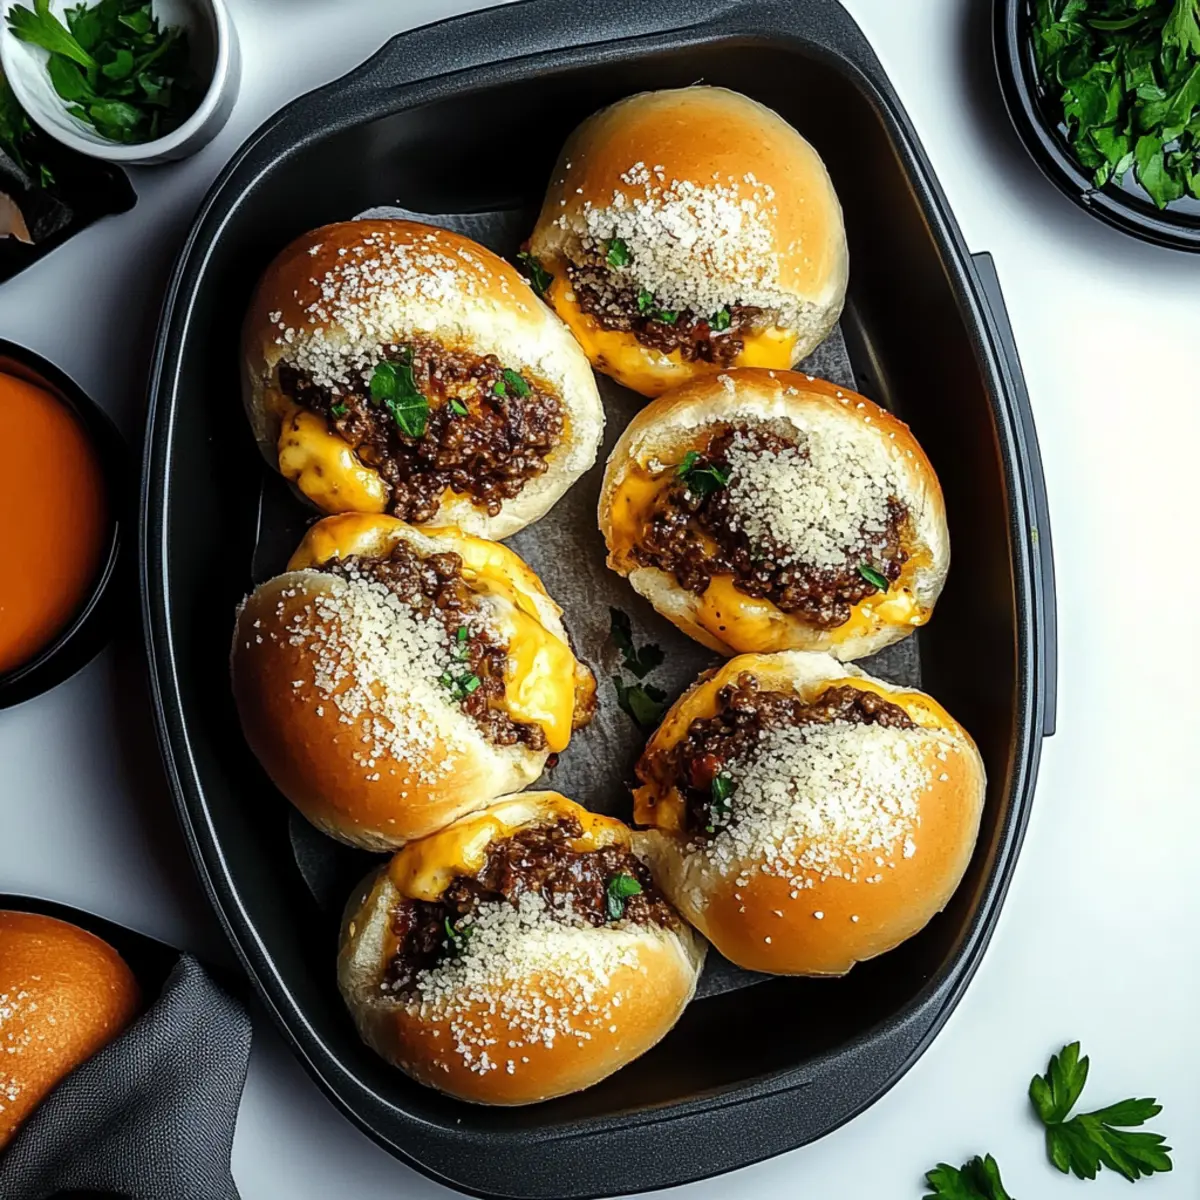
Next, sprinkle a generous amount of grated Parmesan cheese over each garlic butter-brushed bomb. This crispy, nutty topping will not only enhance the flavor but also add a delightful crunch when baked.
Step 8: Bake to Perfection
Place your baking sheet in the preheated oven and bake the Garlic Parmesan Cheeseburger Bombs for 12–15 minutes. Keep an eye on them until they turn a lovely golden brown and are cooked through. The smell will fill your kitchen, enticing everyone to gather around!
Step 9: Garnish and Serve
Once baked, remove the bombs from the oven and allow them to cool slightly. For a fresh touch, garnish with chopped parsley before serving. These delicious Garlic Parmesan Cheeseburger Bombs are now ready to impress your family and friends!
Garlic Parmesan Cheeseburger Bombs Variations
Let your creativity shine with these easy variations that elevate your Garlic Parmesan Cheeseburger Bombs to new heights of flavor and fun!
-
Turkey Twist: Swap ground beef for ground turkey for a lighter, leaner option that's just as delicious.
-
Plant-Based Power: Use a plant-based ground meat substitute for a vegetarian or vegan-friendly version that everyone can enjoy. Trust me, it tastes fantastic!
-
Cheese Swap: Experiment with different cheeses like pepper jack for a touch of heat, or crumbled feta for a unique flavor twist. The options are endless!
-
Veggie Delight: Stir in some finely chopped cooked vegetables, like bell peppers or spinach, into the beef mixture for added nutrition and flavor. You’ll be surprised how good they taste!
-
Spicy Kick: Add a splash of hot sauce to the beef mixture to give your bombs a fiery kick. For those who crave heat, this is a must-try!
-
Gluten-Free Option: Use gluten-free biscuit dough to make these bombs suitable for those with gluten sensitivities, so everyone can join in on the fun.
-
Herb Infusion: Mix fresh herbs such as thyme or basil into the beef for added freshness and complexity in every bite. They’ll have your guests coming back for more!
-
Dipping Sauce Variations: Pair these bombs with different dipping sauces like ranch, spicy sriracha mayo, or even a sweet chili sauce for a delicious flavor contrast. Just imagine the tantalizing combinations!
With these variations, your Garlic Parmesan Cheeseburger Bombs can be even more irresistible, much like my Crispy Parmesan Artichoke Hearts and Cheesy Garlic Bread. Enjoy the adventure!
Expert Tips for Garlic Parmesan Cheeseburger Bombs
-
Drain Excess Grease: Make sure to drain the ground beef well after cooking to prevent greasy bombs that can lose their fluffy texture.
-
Seal Them Tight: Properly pinch the biscuit edges to prevent any filling from leaking out, ensuring every bite is packed with flavor.
-
Uniform Thickness: Roll the biscuit dough to an even thickness of about 1/4 inch to ensure consistent baking; uneven dough can lead to some bombs being undercooked.
-
Customize Your Fillings: Feel free to experiment with different meat options or add cooked veggies to the beef mixture to cater to various dietary preferences while still enjoying delicious Garlic Parmesan Cheeseburger Bombs.
-
Watch the Baking Time: Keep an eye on the bombs as they bake to avoid overcooking; they should be golden brown and cooked through but not dry.
What to Serve with Garlic Parmesan Cheeseburger Bombs
Elevate your dining experience by bringing together complementary flavors and textures that will have everyone coming back for more.
- Creamy Coleslaw: A tangy, crunchy side that balances the savory flavors of the bombs, providing a refreshing contrast in every bite.
- Sweet Potato Fries: Their natural sweetness complements the rich cheeseburger bombs, adding a delightful crunch that everyone will love.
- Classic Potato Salad: Creamy and comforting, this dish brings a familiar touch, making it the perfect accompaniment for your gathering.
- Garlic Herb Parmesan Breadsticks: These soft, garlicky breadsticks echo the flavors of the bombs, enhancing the meal's overall theme while offering a delightful texture.
- Spicy Sriracha Mayo: For those who enjoy a kick, this creamy sauce pairs wonderfully with the bombs, adding an exciting dimension to every bite.
- Refreshing Cucumber Salad: With a lemony dressing, this salad brightens the meal, offering a light and crisp contrast to the rich cheeseburger bombs.
- Craft Beer: A hoppy brew can amplify flavors, cutting through the richness and adding depth to this delightful appetizer.
- Chocolate Chip Cookies: End on a sweet note with these classic cookies, providing a nostalgic finish that rounds out the meal beautifully.
Create a meal that tantalizes your taste buds and warms your heart, inviting others to join in the fun!
Storage Tips for Garlic Parmesan Cheeseburger Bombs
Fridge: Store any leftovers in an airtight container in the fridge for up to 3-4 days to maintain freshness and flavor.
Freezer: For longer storage, individually wrap each bomb in plastic wrap, then place them in a freezer-safe bag. They can last in the freezer for up to 2-3 months.
Reheating: To reheat, bake frozen Garlic Parmesan Cheeseburger Bombs at 350°F (175°C) for about 15-20 minutes until heated through and crispy.
Make-Ahead: You can assemble and refrigerate the bombs a day before baking. Just pop them in the oven when you're ready to enjoy!
Make Ahead Options
These Garlic Parmesan Cheeseburger Bombs are perfect for meal prep, saving you time on busy weeknights! You can assemble the bombs and refrigerate them for up to 24 hours before baking, which will keep them just as delicious when cooked. Alternatively, you can freeze them right after assembly: wrap each bomb individually in plastic wrap and store them in a freezer-safe bag for up to 3 months. When you're ready to enjoy, bake the frozen bombs straight from the freezer, adding an extra 3-5 minutes to the baking time. This clever prep method ensures your savory treats are ready to impress with minimal stress!
Garlic Parmesan Cheeseburger Bombs Recipe FAQs
What kind of meat can I use for the filling?
Absolutely! While this recipe calls for ground beef, you can also use ground turkey, ground chicken, or plant-based meat alternatives. Each variation brings a unique flavor profile, catering to different dietary preferences. I often experiment with these options depending on what's in my fridge that day!
How should I store my Garlic Parmesan Cheeseburger Bombs?
After you've indulged, store any leftovers in an airtight container in the fridge for up to 3-4 days. This way, you can enjoy that cheesy goodness again without losing any flavor!
Can I freeze these bombs for later?
Yes, you can! Individually wrap each Garlic Parmesan Cheeseburger Bomb in plastic wrap and place them in a freezer-safe bag. They will last for up to 2-3 months. When you're ready to enjoy one, bake it straight from the freezer at 350°F (175°C) for about 15-20 minutes until heated through and crispy.
What should I do if the biscuit dough tears while filling?
No worries! If your biscuit dough tears, simply patch it up by pinching the edges together gently. You can also use a small bit of extra dough from another biscuit to cover any holes. Just ensure that the filling is securely sealed to prevent any leakage during baking.
Are these bombs suitable for people with gluten allergies?
To make the Garlic Parmesan Cheeseburger Bombs gluten-free, use a gluten-free biscuit dough that you can find at most grocery stores. This way, everyone can enjoy this delightful snack without worry!
Can I prepare these bombs the day before?
Absolutely! You can assemble the bombs and refrigerate them up to a day in advance. Just remember to cover them tightly with plastic wrap to avoid drying out. When you're ready to bake, pop them in the oven to enjoy fresh, hot bombs straight from the oven!
Ultimate Garlic Parmesan Cheeseburger Bombs for a Flavor Blast
Ingredients
Equipment
Method
- Preheat your oven to 375°F (190°C) and line a baking sheet with parchment paper.
- In a large skillet over medium heat, cook the ground beef for about 5-7 minutes until browned and no longer pink. Drain excess fat.
- Add salt, pepper, garlic powder, onion powder, and Worcestershire sauce to the beef, stirring for about 2 minutes. Fold in the shredded cheddar cheese until melted.
- Open the refrigerated biscuit dough and roll each biscuit into approximately 1/4 inch thick circles.
- Scoop about 2 tablespoons of beef mixture into each biscuit, gather the edges, and pinch to seal tightly.
- Melt butter and mix with minced garlic, then brush over the tops of the unbaked bombs.
- Sprinkle grated Parmesan cheese over each bomb.
- Bake for 12-15 minutes until golden brown.
- Allow to cool slightly and garnish with chopped parsley before serving.


Leave a Reply