
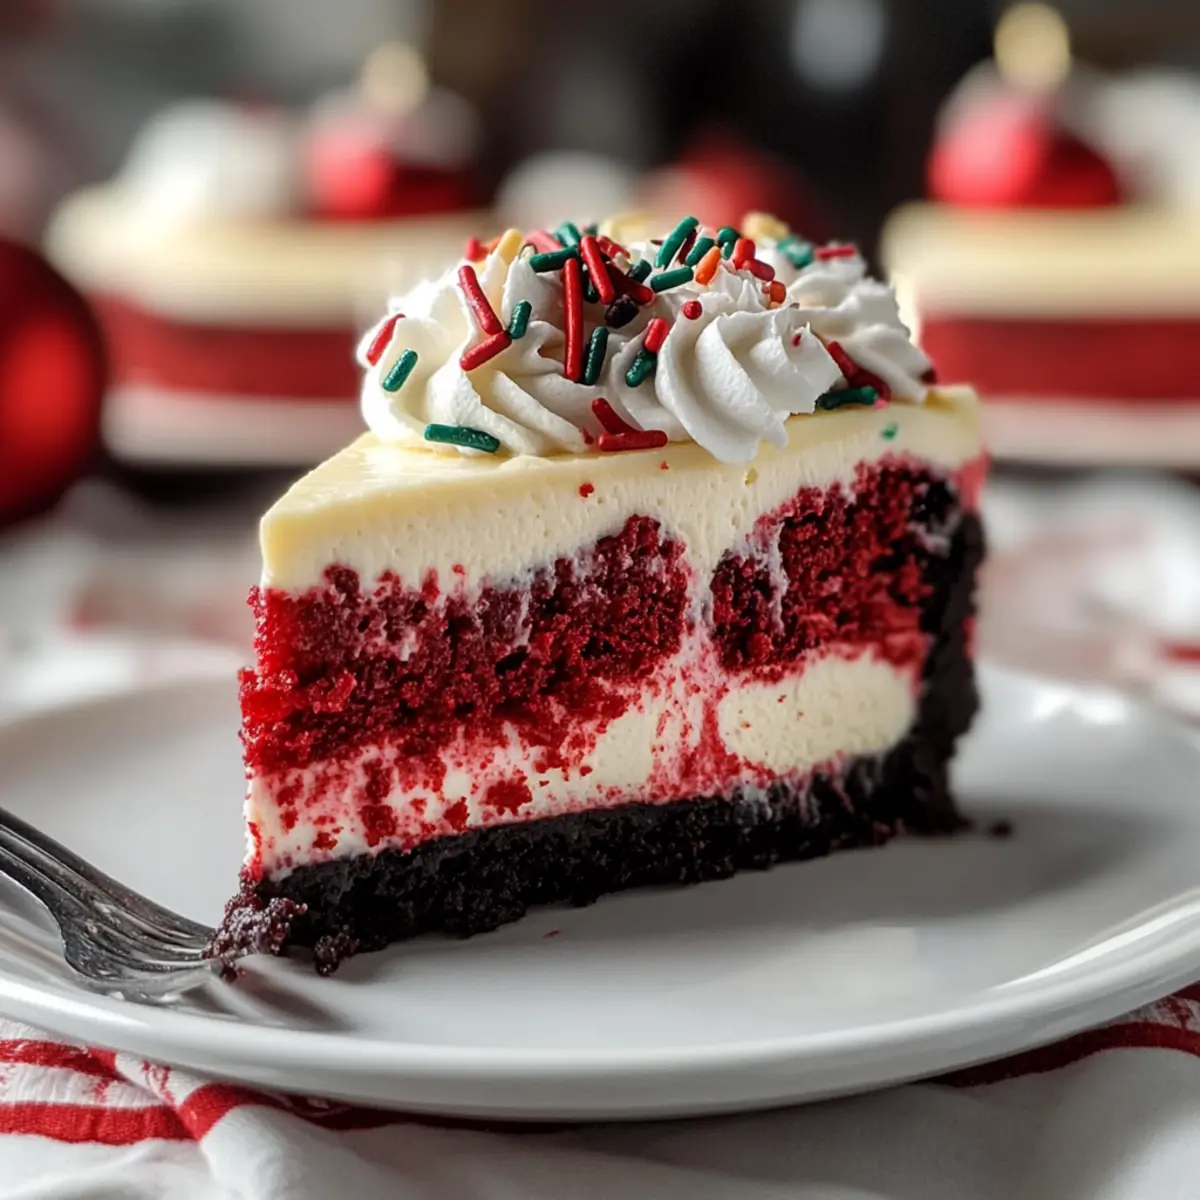
As the aroma of cinnamon and gingerbread wafts through the air, I often think of the magical moments that surround holiday desserts. This year, I'm inviting you to elevate your festive gatherings with a stunning Christmas Red Velvet Cheesecake. Combining the beloved essence of rich red velvet cake with the creamy luxury of cheesecake, every slice of this indulgent dessert is bound to leave your friends and family in awe. Not only does it make for an eye-catching centerpiece, but it's also surprisingly easy to prepare, allowing you to spend less time in the kitchen and more time making memories. So, are you ready to impress your guests and add some cheer to your holiday table? Let’s dive into this luscious recipe that promises to become a seasonal favorite!
Why You’ll Love This Cheesecake?
Festive Delight: This Christmas Red Velvet Cheesecake is a show-stopping dessert that will steal the spotlight at your holiday gatherings.
Irresistible Creaminess: The luscious combination of cream cheese and heavy whipping cream makes each slice a delightful experience.
Visually Stunning: Its bright red hue and beautiful toppings create an eye-catching centerpiece perfect for your table.
Simple to Make: With easy-to-follow steps, you can whip this up quickly, leaving more time for holiday festivities!
Crowd-Pleasing Flavor: Its balanced blend of rich flavors and textures will leave your friends and family clamoring for seconds—a dessert that resonates with everyone!
Ready to impress? Check out our tips for serving with a rich coffee or pairing with dessert wine for the perfect finish!
Christmas Red Velvet Cheesecake Ingredients
For the Crust
- 24 Oreo cookies – A delightful base that adds rich chocolate flavor. Feel free to substitute with graham crackers for a simpler crust.
- ⅓ cup butter, melted – This helps bind the crust together for a perfect texture. No substitutes are recommended for this key ingredient.
For the Cheesecake Filling
- 4 (8-ounce) blocks cream cheese – Delivers the creamy, velvety texture essential for cheesecake. Make sure your cream cheese is at room temperature for easy mixing.
- ½ cup white sugar – Sweetens the cheesecake to perfection. You can use granulated sugar alternatives if you prefer.
- 2 cups heavy whipping cream – Whipped to add lightness and fluffiness to the filling. Non-dairy alternatives can be used for lactose intolerance.
- 1 teaspoon vanilla extract – Enhances the cheesecake’s flavor profile. Feel free to skip if you're watching your sugar intake.
- 2 tablespoons cocoa powder – Infuses a subtle chocolate flavor that complements the red velvet. Unsweetened cocoa is preferred for the best results.
- Red food coloring – Achieves that iconic vibrant red color for the cheesecake. Consider using natural coloring for a healthier choice.
- ¼ cup Christmas sprinkles – Adds a festive touch within the filling. Optional if you're making a non-holiday variation.
For the Toppings
- Whipped cream – Light and fluffy topping that adds a beautiful finish. Alternatively, use a light dusting of powdered sugar for a simple garnish.
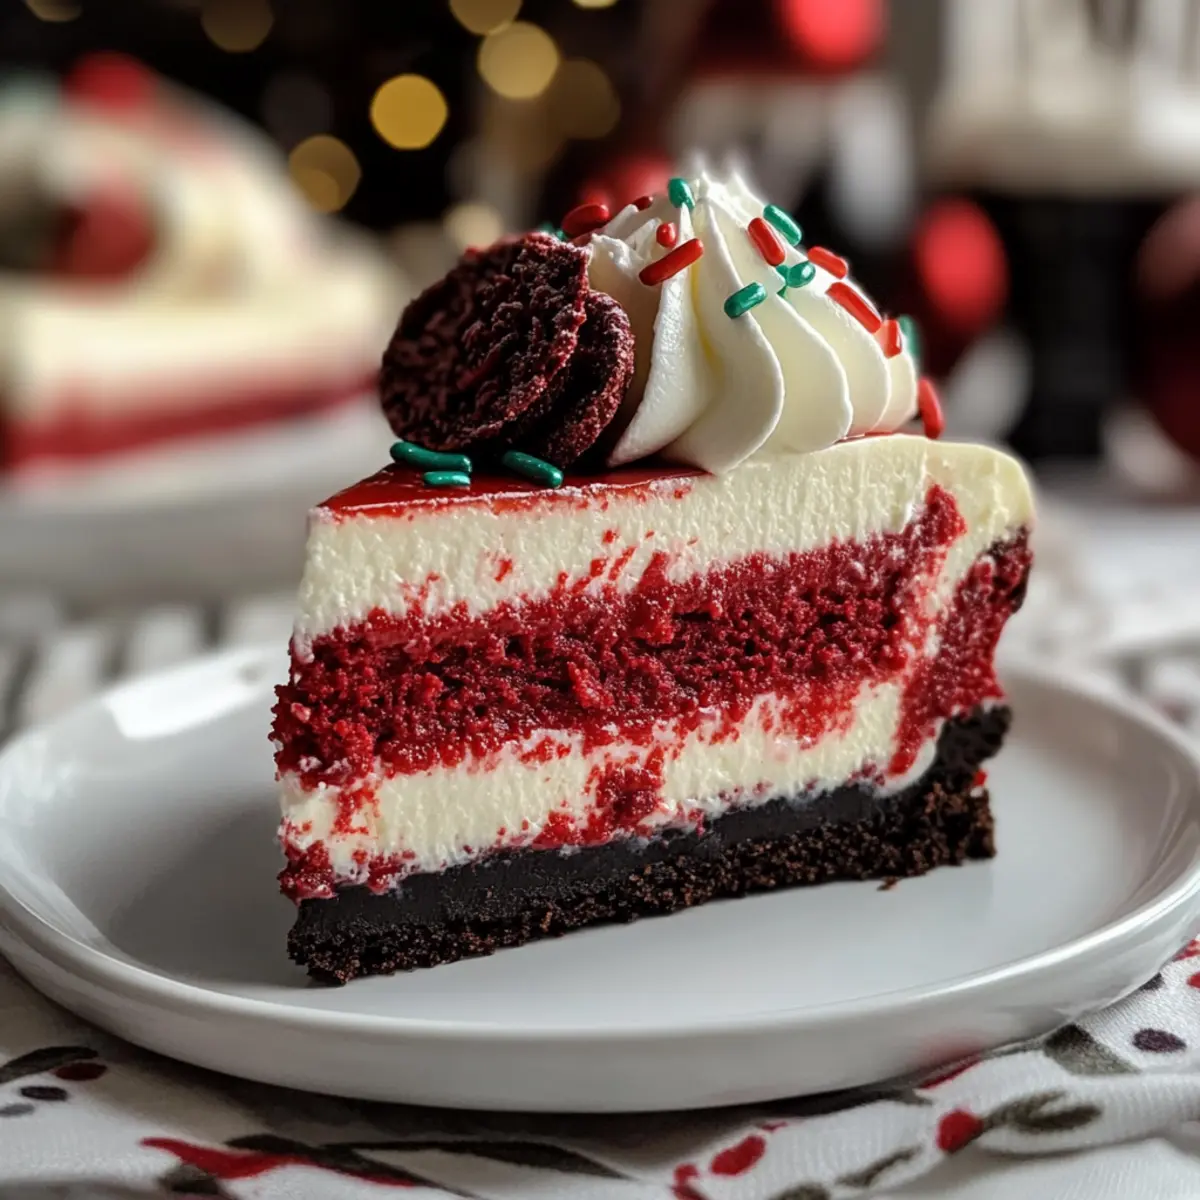
- Mini Oreos – Cute and tasty garnishes that add a fun element to the presentation. Any seasonal cookie or chocolate can be used for variety.
- Extra Christmas sprinkles – For a festive garnish that adds a pop of color. Optional based on personal preference.
Step‑by‑Step Instructions for Christmas Red Velvet Cheesecake
Step 1: Prep the Pan
Begin by preheating your oven to 350°F (175°C). While the oven heats, wrap a 9-inch springform pan tightly with aluminum foil to prevent any water from seeping in during the baking process. This preparation is crucial for achieving the perfect texture in your Christmas Red Velvet Cheesecake.
Step 2: Make the Crust
Take 24 Oreo cookies and crush them into fine crumbs using a food processor or a rolling pin. In a mixing bowl, combine the cookie crumbs with ⅓ cup of melted butter until well blended. Press this mixture firmly into the bottom of your springform pan. Bake the crust for 8-10 minutes until it's slightly set, and then allow it to cool completely.
Step 3: Prepare Filling
In a large mixing bowl, beat four blocks of room temperature cream cheese using an electric mixer until smooth and creamy. Gradually add ½ cup of white sugar while continuing to mix. Incorporate 1 teaspoon of vanilla extract, 2 tablespoons of cocoa powder, and several drops of red food coloring until you achieve the desired color, ensuring the mixture is well-combined.
Step 4: Fold in Whipped Cream
In another bowl, whip 2 cups of heavy whipping cream until stiff peaks form. Gently fold the whipped cream into the cream cheese mixture until fully combined. This step adds lightness to your Christmas Red Velvet Cheesecake. If desired, you can also fold in ¼ cup of Christmas sprinkles for added festive flair before pouring the filling into the cooled crust.
Step 5: Bake Cheesecake
Lower the oven temperature to 325°F (160°C). Place the foil-wrapped springform pan into a larger roasting pan. Carefully pour hot water into the roasting pan until it reaches halfway up the sides of your springform pan to create a water bath. Bake for 1 to 1.25 hours, until the edges are set but the center is still slightly jiggly for a perfect cheesecake consistency.
Step 6: Cool & Chill
Once baked, turn off the oven and leave the cheesecake inside with the door ajar for about 1 hour. This gradual cooling prevents cracks. Afterward, remove the cheesecake and let it cool on a wire rack for 2-3 hours before transferring it to the refrigerator. Chill for at least 6-8 hours, or overnight for best flavor and texture.
Step 7: Decorate & Serve
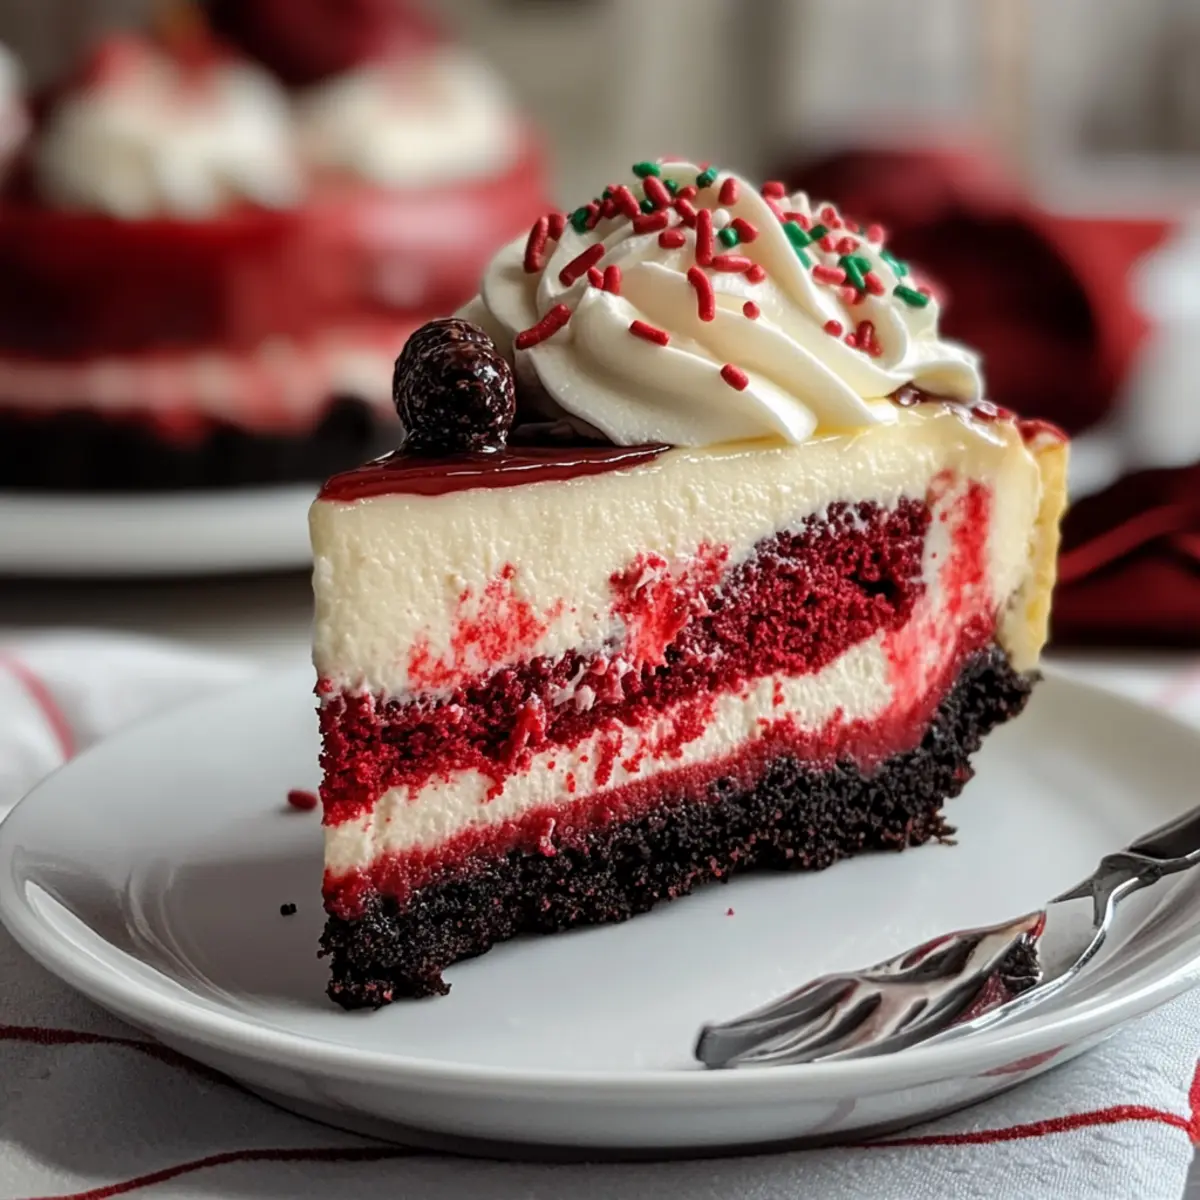
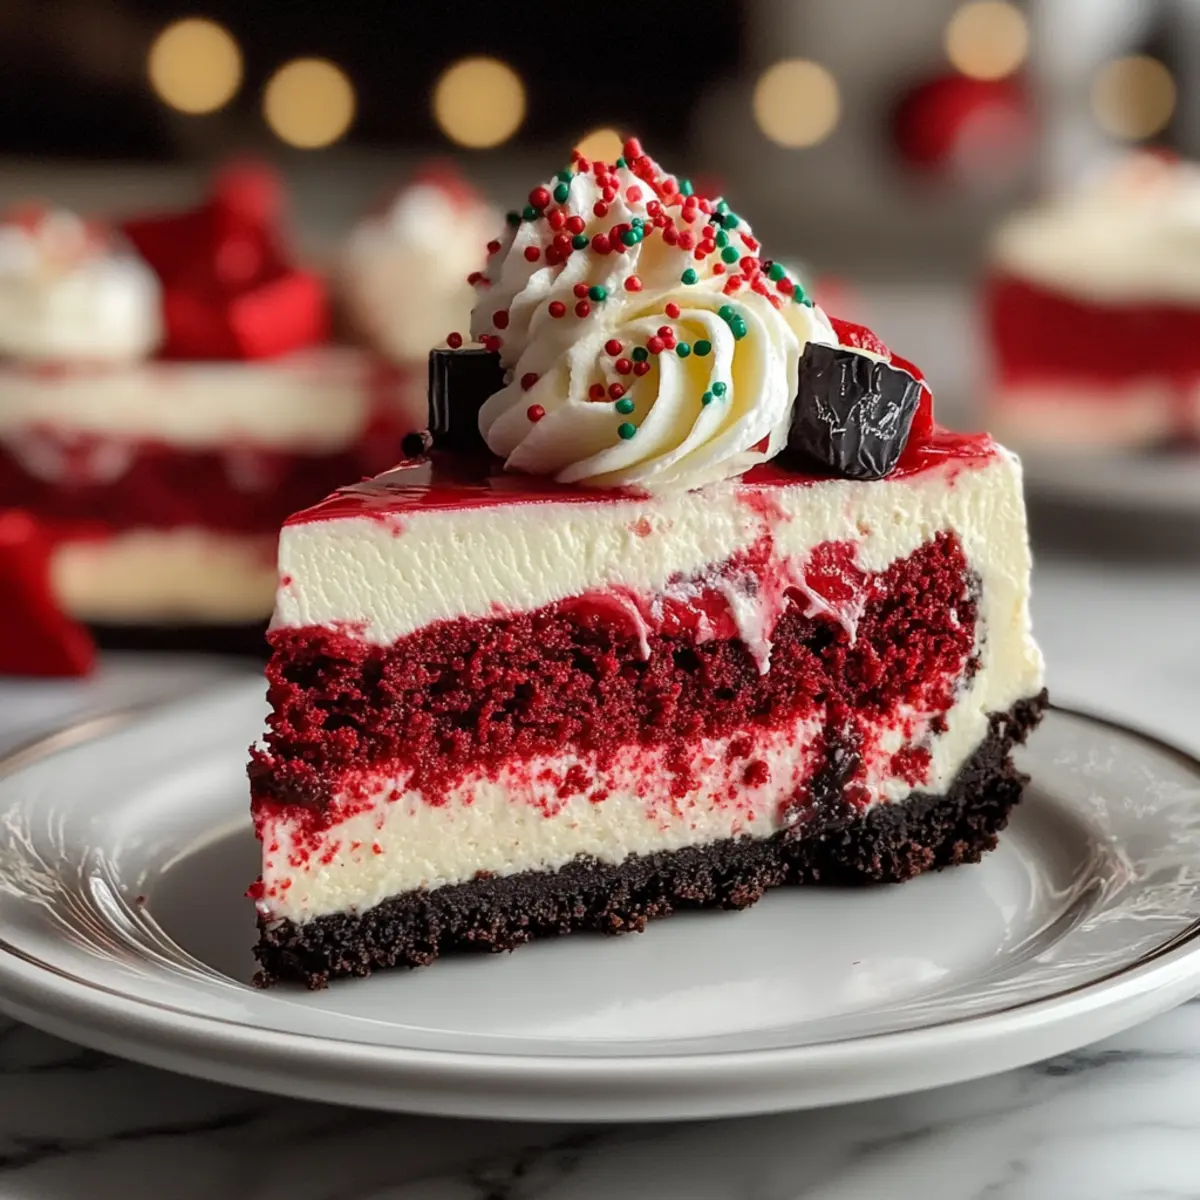
After chilling, carefully remove the sides of the springform pan. Top your beautiful Christmas Red Velvet Cheesecake with freshly whipped cream, garnishing with mini Oreos and festive sprinkles. To serve, use a sharp knife warmed in hot water to slice the cheesecake cleanly, showcasing its stunning layers.
Expert Tips for Christmas Red Velvet Cheesecake
Use a Water Bath: A water bath helps cook the cheesecake evenly and minimizes the chance of cracks, ensuring it looks as good as it tastes.
Cool Gradually: Allow the cheesecake to cool in the oven with the door ajar for an hour. This helps prevent temperature shock that can lead to cracks.
Soften Cream Cheese: Always start with room temperature cream cheese for a smooth filling. Cold cream cheese can lead to lumps, affecting the creamy texture of your Christmas Red Velvet Cheesecake.
Choose Quality Ingredients: Using high-quality cocoa powder and food coloring will enhance the overall flavor and color of your cheesecake.
Don’t Overmix: When folding in whipped cream, be gentle to retain airiness, which gives the cheesecake its light, fluffy texture.
What to Serve with Christmas Red Velvet Cheesecake?
Elevate your dessert experience with delightful pairings that enhance the rich flavors of your cheesecake.
- Rich Coffee: The bold flavors of a freshly brewed cup complements the creaminess, creating a harmonious blend. Enjoy your cheesecake in the morning with a decadent coffee.
- Hot Chocolate: Creamy and indulgent, hot chocolate pairs beautifully with the luxurious texture of the cheesecake—perfect for cozy gatherings!
- Ice Cream: A scoop of vanilla or peppermint ice cream adds a cool, creamy contrast, making each bite even more satisfying.
- Red Wine: A light-bodied red wine such as Pinot Noir enhances the flavors of both the red velvet cake and the creamy filling, offering a delightful pairing experience.
- Fruit Compote: Fresh berries or a berry compote bring a tart brightness that balances the rich sweetness of the cheesecake, making it feel lighter.
- Gingerbread Cookies: Serve alongside gingerbread cookies for a festive touch. Their spiced flavor pairs wonderfully with the cheesecake's sweetness, creating a holiday classic.
- Festive Spritzers: A sparkling drink with cranberry juice and club soda adds a refreshing twist that cuts through the richness, enhancing the festive spirit.
- Chocolate-Covered Strawberries: These delightful treats add a touch of elegance while their sweetness complements the cheesecake beautifully.
- Mini Cupcakes: Pair with holiday-themed mini cupcakes for a playful dessert table—it creates a delightful variety of festive flavors!
Make Ahead Options
These Christmas Red Velvet Cheesecake are perfect for busy holiday planners looking to save time! You can prepare the crust by crushing the Oreo cookies and mixing with melted butter up to 24 hours in advance. It can be stored in the refrigerator in an airtight container. Additionally, the cheesecake filling can be mixed together and kept in the fridge for up to 3 days before pouring it over the crust. Just remember to re-whip the heavy cream before folding it into the filling to maintain its fluffy texture. When you’re ready to bake, simply pour the filling over the prepped crust, bake, cool, and chill overnight for a stunning dessert that’s just as delicious as if freshly made!
How to Store and Freeze Christmas Red Velvet Cheesecake
Fridge: Store leftover slices of Christmas Red Velvet Cheesecake in an airtight container in the refrigerator for up to 4 days to maintain freshness and flavor.
Freezer: You can freeze the cheesecake for up to 2 months. Wrap it tightly in plastic wrap, then in aluminum foil for maximum protection against freezer burn.
Thawing: To enjoy frozen cheesecake, transfer it to the fridge a day before serving and allow it to thaw slowly. This keeps the texture creamy and delightful.
Reheating: While serving cold is ideal, if desired, you can gently warm individual slices in the microwave for about 10 seconds to enhance the flavor and richness.
Christmas Red Velvet Cheesecake Variations
Feel free to unleash your creativity and customize this delightful cheesecake to suit your tastes!
-
Ginger Snap Crust: Swap the Oreo crust for crushed ginger snap cookies, adding a spicy twist to the dessert.
-
Non-Dairy Delight: Use a non-dairy cream cheese and coconut cream to make this cheesecake lactose-free without sacrificing flavor.
-
Citrus Zest Twist: Incorporate a teaspoon of orange or lemon zest into the filling for a refreshing burst of flavor that perfectly balances the richness.
-
Mini Cheesecakes: Create adorable mini versions by baking the cheesecake in muffin tins or ramekins, perfect for portion control and serving!
-
Chocolate Ganache Topping: Drizzle a rich chocolate ganache over the top for an added layer of indulgence that chocolate lovers will adore.
-
Nutty Touch: Fold in finely chopped nuts like walnuts or pecans into the filling for a delightful texture contrast that adds a nice crunch.
-
Extra Festive Sprinkles: Instead of Christmas sprinkles, use themed sprinkles such as snowflakes or stars, transforming this dessert into a whimsical treat for your holiday gatherings.
-
Heat It Up: For a bit of warmth, add a pinch of cayenne pepper to the filling. It’s a surprising touch that enhances the flavors without being overly spicy.
Each variation presents an exciting opportunity to elevate this creamy delight. Remember, if you’re curious about pairing this cheesecake with a nice beverage, a rich coffee or dessert wine could certainly enhance the flavor experience!
Christmas Red Velvet Cheesecake Recipe FAQs
How do I know when the cream cheese is at the right temperature?
Make sure your cream cheese is at room temperature, which typically takes about 30 minutes after removing it from the fridge. It should feel soft and spreadable, making it easier to blend smoothly into the cheesecake filling without any lumps.
How should I store my leftover Christmas Red Velvet Cheesecake?
Store leftover slices in an airtight container in the refrigerator for up to 4 days. To maintain their deliciousness, make sure they are well-covered to prevent drying out. Adding a layer of plastic wrap before sealing in a container can boost freshness!
Can I freeze the Christmas Red Velvet Cheesecake?
Absolutely! You can freeze the cheesecake for up to 2 months. First, let it cool completely, then wrap it tightly in plastic wrap followed by aluminum foil to protect against freezer burn.
What if my cheesecake cracks during baking?
If your cheesecake cracks, don’t worry—this can happen! Ensure that you use a water bath for even cooking and avoid overmixing the filling. If it does crack, cover it up with whipped cream or sprinkles for a festive touch.
Are there any dietary concerns with this cheesecake recipe?
Yes, if you have any allergies, be mindful of the cream cheese and whipped cream, which contain dairy. For a lactose-free option, substitute with dairy-free alternatives. Also, ensure that all ingredients, especially food coloring and cocoa powder, are allergy-safe if needed. Always check labels to be certain!
Can I make this cheesecake in advance?
Definitely! This Christmas Red Velvet Cheesecake can be made a day in advance, allowing the flavors to meld beautifully overnight in the fridge. Just ensure that you store it properly in an airtight container for maximum freshness.
Irresistible Christmas Red Velvet Cheesecake for Your Holiday Feast
Ingredients
Equipment
Method
- Preheat your oven to 350°F (175°C). Wrap a 9-inch springform pan tightly with aluminum foil to prevent water from seeping in during baking.
- Crush 24 Oreo cookies into fine crumbs. Combine with ⅓ cup melted butter and press into the bottom of the springform pan. Bake for 8-10 minutes and cool completely.
- Beat 4 blocks of room temperature cream cheese until smooth. Gradually add ½ cup white sugar, 1 teaspoon vanilla extract, 2 tablespoons cocoa powder, and red food coloring until desired color is achieved.
- Whip 2 cups of heavy whipping cream until stiff peaks form. Gently fold into the cream cheese mixture, adding ¼ cup Christmas sprinkles if desired.
- Lower oven temperature to 325°F (160°C). Place the foil-wrapped springform pan in a larger roasting pan, pour hot water to halfway up the sides. Bake for 1 to 1.25 hours.
- Turn off the oven and leave the cheesecake inside with the door ajar for 1 hour. Cool on a wire rack for 2-3 hours, then chill in the refrigerator for at least 6-8 hours.
- Remove the springform pan sides, top with whipped cream, mini Oreos, and festive sprinkles. Slice with a warmed knife.


Leave a Reply