
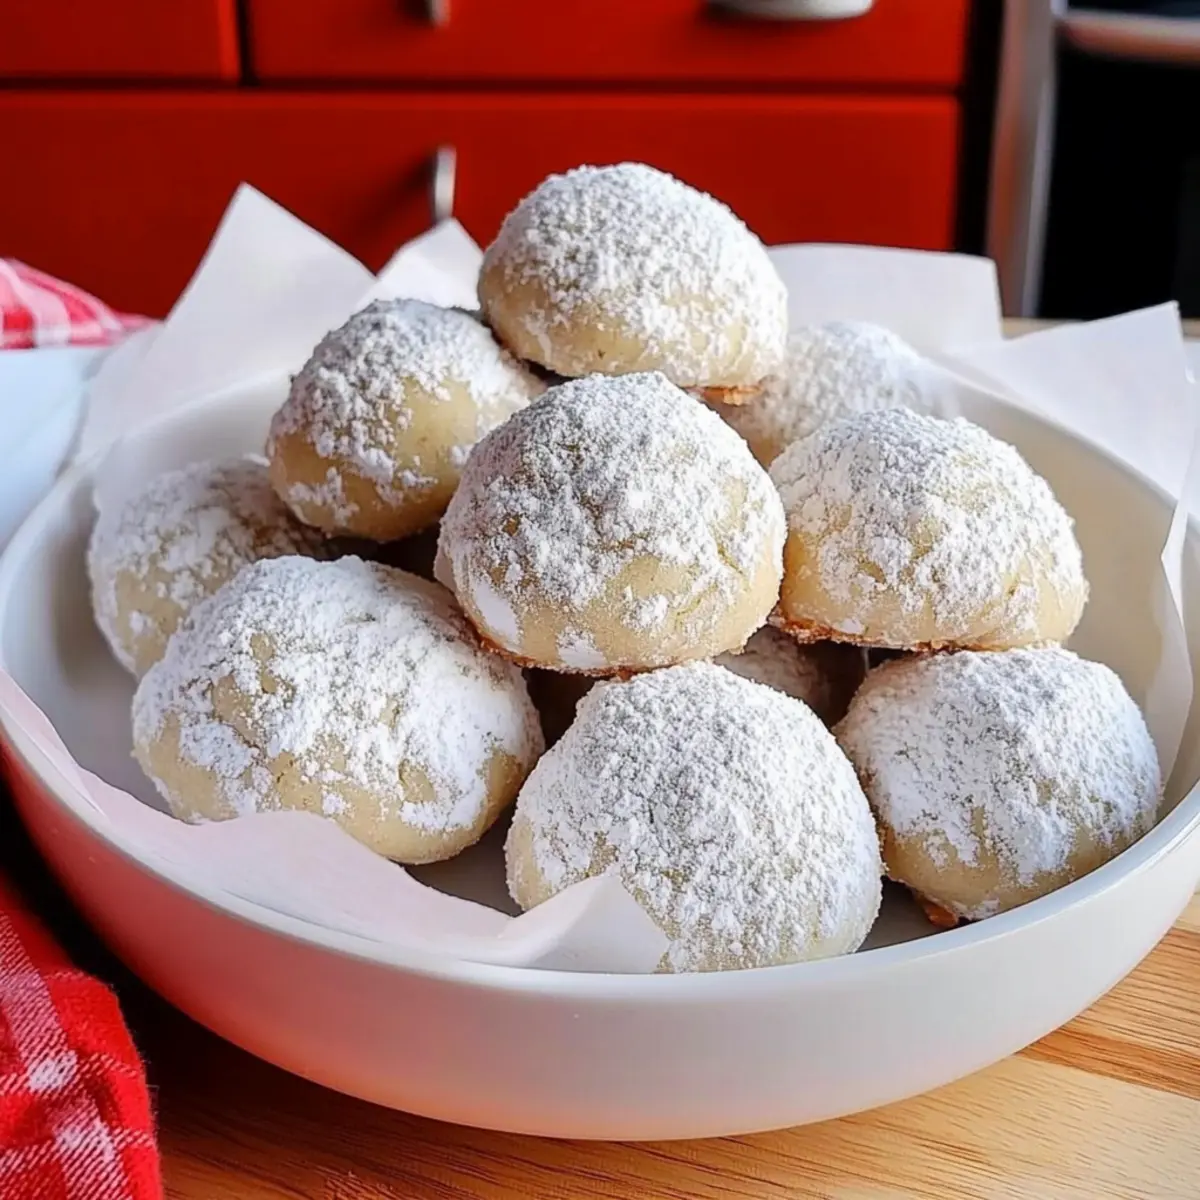
As I stood in my kitchen, the aroma of warm butter and sugar wafting through the air, a wave of nostalgia hit me, transporting me back to childhood holidays spent baking with loved ones. There’s something truly magical about Snowball Cookies—those delightful morsels that melt in your mouth and bring a touch of sweetness to any festive gathering. This easy holiday recipe requires just four simple ingredients, making it a perfect choice for both seasoned bakers and those new to the kitchen alike. Whether you prefer classic flavors or are curious about fun variations like Vegan Snowball Cookies or Chocolate Snowball Cookies, this treat accommodates everyone. Plus, they make for an ideal make-ahead dessert, so you can savor the joy of baking without the last-minute rush. Ready to create a batch of these irresistible delights? Let’s get started!
Why are Snowball Cookies a Must-Bake?
Melt-in-your-Mouth Texture: Experience the joy of biting into a buttery, soft cookie that practically dissolves on your tongue—a truly delightful treat.
Simple Ingredients: With just four basic components, this recipe is incredibly easy to follow, making it perfect for both novice and experienced bakers.
Versatile Variations: From Vegan Snowball Cookies to Chocolate Snowball Cookies, you can customize this recipe to suit your taste and dietary needs. Whether you're in the mood for something classic or adventurous, there’s a snowball for everyone!
Crowd-Pleasing Delight: These cookies are a favorite at holiday gatherings and are sure to impress your guests. They'll be asking for seconds!
Make-Ahead Convenience: You can prepare the dough ahead of time, saving valuable time during busy holiday moments. Pop them in the oven just before your gathering for freshly baked goodness.
Get creative and serve an array of options alongside these classics, like Thumbprint Cookies Melt or consider adding a splash of lemon zest for a fresh twist!
Snowball Cookies Ingredients
For the Cookie Dough
- Flour – Provides structure; you can use white, whole wheat pastry, spelt, or gluten-free flour for a different texture.
- Nuts (Walnuts, Almonds, or Pecans) – Adds crunch and flavor; feel free to omit for nut-free cookies or swap with your preferred nut.
- Butter or Coconut Oil – Adds richness and moisture; ensure all ingredients are at room temperature if using coconut oil to prevent hardening.
- Powdered Sugar – Sweetens the cookies and gives that signature coating; substitute with sugar-free powdered sugar for a healthier twist.
For Rolling
- Additional Powdered Sugar – Use for rolling the baked cookies to create that classic snowy appearance, enhancing the sweetness of these snowball cookies.
Step‑by‑Step Instructions for Snowball Cookies
Step 1: Preheat the Oven
Begin your snowball cookies adventure by preheating your oven to 325°F (163°C). This ensures that the heat is just right for baking these delightful treats. As the oven warms up, gather your ingredients and equipment, including a mixing bowl and a baking sheet lined with parchment paper to make cleanup easy.
Step 2: Cream the Butter and Sugar
In a medium bowl or using a stand mixer, add your softened butter and powdered sugar. Beat them together on medium speed until the mixture is light, creamy, and fluffy—around 2-3 minutes. This step is crucial in creating a melt-in-your-mouth texture for your snowball cookies, so take your time to achieve the perfect consistency.
Step 3: Combine Dry Ingredients
In a separate bowl, whisk together the flour and finely chopped nuts. Make sure to mix them thoroughly so that the nuts are evenly dispersed throughout the flour. This combination not only adds delicious flavor but also provides structure to your snowball cookies, setting the stage for their delightful crunchiness.
Step 4: Mix Wet and Dry Ingredients
Slowly incorporate the dry mixture into your creamed butter and sugar, stirring gently with a spatula until a smooth cookie dough forms. Keep mixing until there are no dry flour patches visible. This should take about 2 minutes. The dough should feel soft and slightly sticky, creating the perfect base for your snowball cookies.
Step 5: Shape the Cookies
Using your hands, pinch off small amounts of dough and roll them into balls, about 1 inch in diameter. Place these balls onto your prepared baking sheet, leaving some space between them as they will spread slightly while baking. You should be able to fit about 12 cookies per sheet, ensuring they have room to bake evenly.
Step 6: Bake the Cookies
Slide the baking sheet into your preheated oven and bake the snowball cookies for 20-25 minutes. Keep an eye on them; they should be lightly browned but not overly dark. Once baking time is up, you’ll know they’re ready when they feel set but still soft to the touch—this will ensure a melt-in-your-mouth texture.
Step 7: Roll in Powdered Sugar
Once out of the oven, give your warm cookies a moment to cool for about 5 minutes on the baking sheet. Then, while still warm, roll each snowball cookie in additional powdered sugar—this creates the signature snowy coating. Allow them to cool completely on a wire rack for additional texture before serving or storing.
Step 8: Serve and Enjoy
Your delightful snowball cookies are now ready to share! These treats are perfect for any holiday gathering, offering a sweet touch to your festive celebrations. Remember that they also store well, so feel free to make a batch ahead of time and enjoy the joy of homemade cookies at any occasion.
Make Ahead Options
These Snowball Cookies are perfect for meal prep, allowing you to enjoy homemade holiday treats without the last-minute rush! You can prepare the dough up to 3 days in advance by mixing all the ingredients and then covering it tightly in plastic wrap or storing it in an airtight container. When you're ready to bake, simply shape the dough into balls and follow the usual baking instructions. Alternatively, you can freeze the shaped cookie balls for up to 2 months; just place them on a baking sheet, freeze until solid, then transfer to a freezer bag. Baking straight from frozen may require an additional 2-3 minutes in the oven. This way, you can whip up fresh, melt-in-your-mouth Snowball Cookies with minimal effort!
Expert Tips for Snowball Cookies
-
Cool Before Handling: Allow your snowball cookies to cool on the baking sheet for about 5 minutes before moving them. This prevents breakage as they firm up.
-
Use Room Temperature Butter: Ensure your butter is softened to room temperature for a creamy texture, avoiding any graininess in your dough.
-
Choose Your Nuts Wisely: When selecting nuts like walnuts or pecans, make sure they are finely chopped for an even distribution in your snowball cookies, enhancing their flavor.
-
Monitor Baking Time: Bake until lightly browned; over-baking can lead to a dry texture. Remember, they should feel soft when you take them out!
-
Customize Your Coating: For added flair, consider rolling your cookies in different coatings, like chopped nuts or shredded coconut, alongside the powdered sugar for variety.
Snowball Cookies Variations & Substitutions
Get creative with these delightful snowball cookies and make them your own!
-
Vegan: Substitute butter with coconut oil or vegan butter to enjoy a plant-based version without losing the classic flavor.
Experimenting with vegan options not only fits dietary needs but also retains that melt-in-your-mouth goodness. -
Chocolate Lovers: Add 2 tablespoons of unsweetened cocoa powder for rich Chocolate Snowball Cookies.
The chocolatey twist adds a decadent layer of flavor, perfect for those who crave a touch of indulgence. -
Citrus Zing: Incorporate the zest of a lemon or orange for a fresh, zesty twist that adds brightness to each bite.
The vibrant citrus notes complement the buttery texture beautifully, making them a refreshing festive treat. -
Nut-Free: Omit the nuts completely or substitute with sunflower seeds for a nut-free option that's still delightful.
This allows everyone to enjoy a piece of the holiday spirit without worrying about allergies. -
Pink Snowball Cookies: A few drops of red food coloring or finely ground freeze-dried strawberries will create stunning pink snowball cookies.
These visually appealing treats add a playful touch to your cookie platter—perfect for special occasions! -
Herbal Infusion: Try adding a teaspoon of finely chopped fresh rosemary or thyme for a unique savory twist.
This unexpected flavor pairing elevates your cookies and intrigues friends and family at gatherings. -
Spiced Up: Add a pinch of cinnamon or nutmeg to the dough for a warm, inviting spice that complements the sweetness.
It’s a delightful reminder of cozy holidays and adds depth to your classic cookie recipe.
For a delicious array, consider pairing your snowball cookies with Thumbprint Cookies Melt or adding a hint of nutmeg for that extra holiday warmth!
What to Serve with Easy Holiday Snowball Cookies
Imagine delighting your guests with an array of treats that perfectly complements the sweetness of these melt-in-your-mouth wonders.
-
Creamy Hot Chocolate: Rich and velvety, this warm drink adds a cozy element that pairs beautifully with the buttery texture of snowball cookies.
-
Fresh Berries: A burst of juicy sweetness from strawberries or raspberries provides a refreshing contrast to the sugary cookie, brightening up your dessert table.
-
Coffee or Espresso: The robust flavors of coffee balance the sweetness of the cookies, making each bite even more delightful while adding a comforting vibe to your gathering.
-
Citrus Salad: A mix of tangy oranges and grapefruits drizzled with honey offers a zesty twist that cuts through the richness of the cookies—perfect for a light, refreshing side.
-
Ice Cream: Serve these cookies alongside a scoop of vanilla or chocolate ice cream, creating a deliciously creamy experience that’s hard to resist!
-
Nutty Granola: A sprinkle of nutty granola on the side adds a satisfying crunch, harmonizing with the cookies' textures and enhancing their flavor profile.
Adding these scrumptious pairings will not only elevate your snowball cookies but also create a wonderful atmosphere that everyone will enjoy!
How to Store and Freeze Snowball Cookies
Fridge: Store snowball cookies in an airtight container in the refrigerator for up to 7 days. This helps maintain their melt-in-your-mouth texture while adding a bit of freshness.
Freezer: For longer storage, freeze the cookies in a single layer on a baking sheet before transferring them to a freezer bag. They can last for up to 3 months without losing their delicious taste.
Dough: You can refrigerate the cookie dough for up to 5 days or freeze it for 2-3 months. When ready to bake, simply thaw in the fridge overnight before shaping and baking.
Reheating: To enjoy a taste of fresh-baked snowball cookies, reheat them in a 350°F (175°C) oven for about 5-10 minutes, or until warmed through, ensuring that they remain soft and delightful.
Snowball Cookies Recipe FAQs
What type of flour should I use for snowball cookies?
You can use white flour, whole wheat pastry flour, spelt flour, or even gluten-free flour for these snowball cookies. Different flours will slightly alter the texture, so feel free to experiment and find your favorite combination!
How should I store snowball cookies?
Store your snowball cookies in an airtight container in the refrigerator for up to 7 days. This will help maintain their delightful melt-in-your-mouth texture while also keeping them fresh and enjoyable. For longer storage, consider freezing them.
Can I freeze snowball cookies?
Absolutely! To freeze snowball cookies, place them in a single layer on a baking sheet until frozen, then transfer them to a freezer bag. They can last for up to 3 months in the freezer. When you're ready to enjoy them, just thaw in the fridge overnight, or warm them in the oven for a freshly-baked experience.
What if my cookie dough is too sticky?
If your cookie dough feels too sticky, try chilling it in the refrigerator for about 30 minutes. This will make it easier to handle and shape into balls. Additionally, ensure you're measuring your flour accurately, as too little flour can result in a sticky dough.
Are snowball cookies safe for those with nut allergies?
Yes! You can easily adapt snowball cookies to be nut-free by omitting the nuts entirely. If you'd like to maintain some texture, consider adding a bit of shredded coconut or using seeds like sunflower or pumpkin seeds as a substitute.
How can I make snowball cookies vegan?
To make vegan snowball cookies, simply substitute the butter with coconut oil or a vegan butter alternative. Make sure to use powdered sugar that doesn’t contain any bone char in the processing. The cookies will still be wonderfully soft and delicious!
Melt-in-Your-Mouth Snowball Cookies: A Sweet Holiday Treat
Ingredients
Equipment
Method
- Preheat your oven to 325°F (163°C). Gather ingredients and equipment.
- In a medium bowl, cream together butter and powdered sugar until light and fluffy, about 2-3 minutes.
- In a separate bowl, whisk together the flour and chopped nuts.
- Gradually mix dry ingredients into creamed butter and sugar until a smooth dough forms.
- Shape the dough into 1-inch balls and place them on a baking sheet.
- Bake for 20-25 minutes, until lightly browned. Cookies should feel set but soft.
- Let the cookies cool for 5 minutes, then roll in additional powdered sugar.
- Allow them to cool completely on a wire rack before serving or storing.


Leave a Reply