
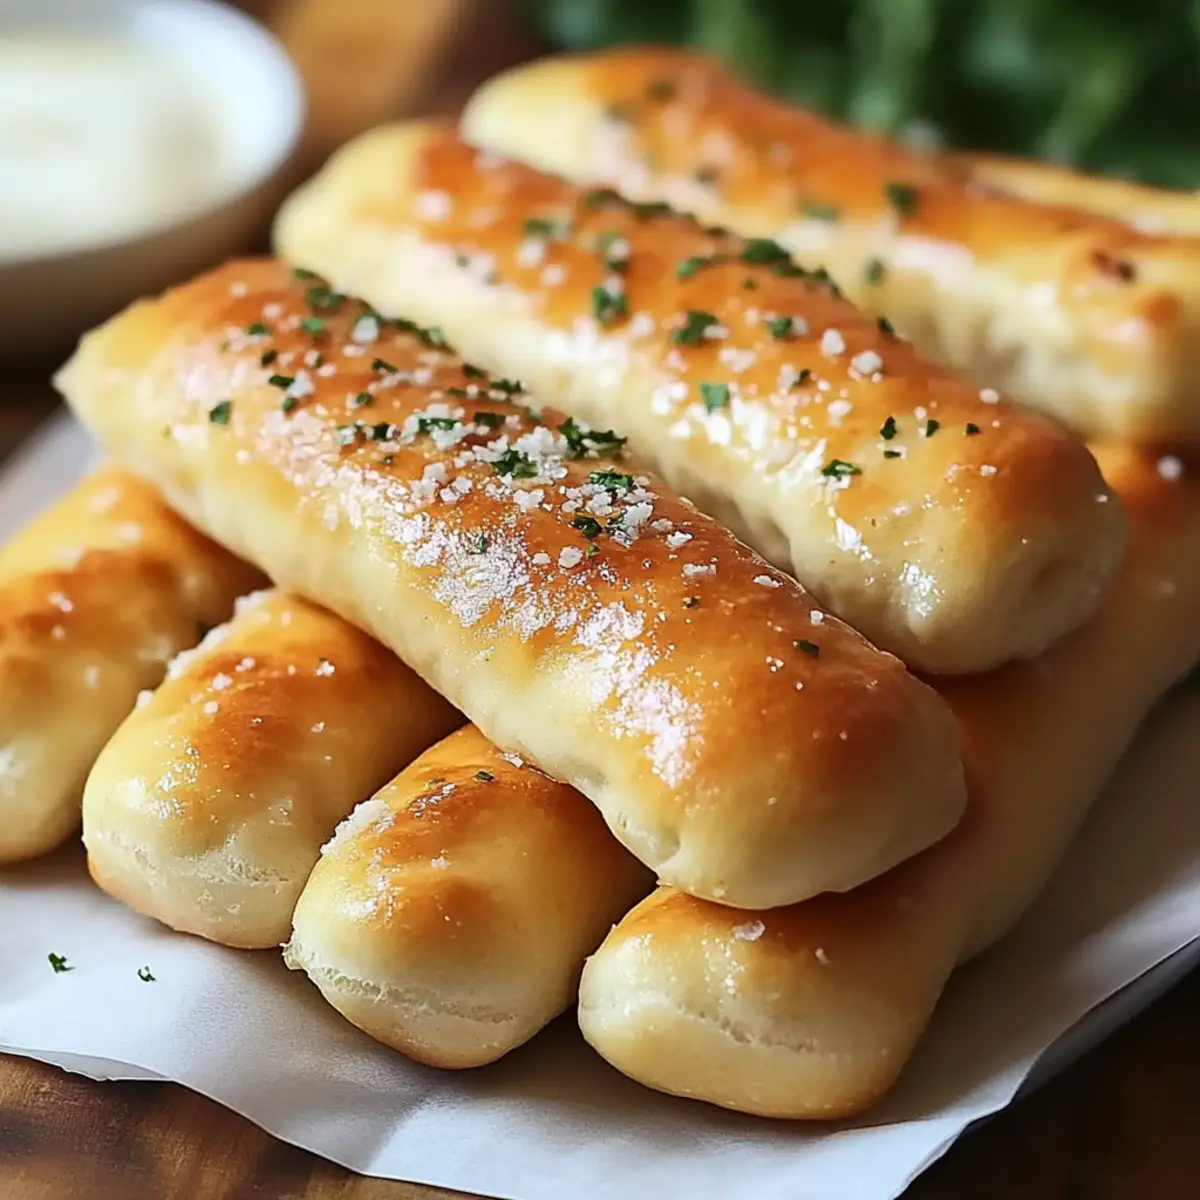
As I stood in my kitchen, the warm aroma of freshly baked bread enveloped me like a comforting hug. There’s something magical about the process of making Soft and Buttery Olive Garden Breadsticks—the gentle kneading, the rise of the dough, and the anticipation of that first bite. This Olive Garden Breadsticks Recipe is your ticket to creating those pillowy, garlic-flavored delights that pair perfectly with Italian dishes or stand alone as a delightful snack. Not only is it incredibly simple to whip up, but these breadsticks also bring a unique touch to your family dinners that they'll rave about. Whether you're serving them alongside a hearty pasta or enjoying them with a warm bowl of soup, these steamy, golden bites are bound to become a beloved staple in your home. Ready to transform your cooking routine with a dash of nostalgia? Let’s dive into this delightful journey together!
Why Make Olive Garden Breadsticks at Home?
Comforting, Nostalgic Flavors: These breadsticks capture the beloved taste of Olive Garden, allowing you to recreate cherished memories in your kitchen.
Simple Technique: With just a few basic ingredients and easy steps, anyone can master this recipe. Perfect for both beginners and seasoned chefs looking for a delightful challenge!
Versatile Pairing: Enjoy them alongside your favorite pasta dishes or soups; they elevate any meal and are perfect for family gatherings.
Crowd-Pleasing Appeal: Impress guests with homemade breadsticks that are soft, buttery, and simply irresistible—guaranteed to disappear quickly!
Make-Ahead Option: You can prep these ahead of time, letting your dough rise overnight for an even more convenient mealtime solution. Consider pairing them with a comforting bowl of Chicken Adobo Again or a zesty marinara sauce for dipping.
Olive Garden Breadsticks Recipe Ingredients
For the Dough
- Warm Water (1 1/2 cups) – Activates the yeast; use lukewarm water for the best results.
- Active Dry Yeast (2 1/4 tsp) – Essential for leavening; ensure it is fresh for proper rising.
- Granulated Sugar (2 tbsp) – Feeds the yeast and adds slight sweetness; replace with brown sugar for a deeper flavor.
- All-Purpose Flour (4 cups) – Provides structure and texture; bread flour can be used for chewier breadsticks.
- Unsalted Butter (2 tbsp, softened) – Adds richness to the dough; can be swapped with margarine if preferred.
- Salt (1 tbsp) – Enhances flavor and regulates yeast activity; sea salt works well as a substitute.
For the Topping
- Melted Unsalted Butter (1/4 cup) – Gives a buttery finish; consider using olive oil for a healthier option.
- Garlic Powder (1 tsp) – Infuses classic garlic flavor into the breadsticks; fresh minced garlic can provide a more robust taste.
- Salt (1/2 tsp) – Balances the garlic flavor; adjust according to your taste preference.
These Olive Garden Breadsticks Recipe ingredients will help you create soft, buttery delights that are perfect for any Italian dish or enjoyed on their own!
Step‑by‑Step Instructions for Olive Garden Breadsticks Recipe
Step 1: Activate the Yeast
In a small bowl, combine 1 1/2 cups of warm water, 2 1/4 teaspoons of active dry yeast, and 2 tablespoons of granulated sugar. Stir gently to mix, then allow the mixture to sit for 5-10 minutes until it becomes frothy, indicating that the yeast is activated and ready to create the perfect rise for your Olive Garden Breadsticks.
Step 2: Prepare the Dough
In a large mixing bowl, whisk together 4 cups of all-purpose flour, 2 tablespoons of softened unsalted butter, and 1 tablespoon of salt until well combined. Pour in the activated yeast mixture and mix by hand or using a stand mixer on medium speed for 8-10 minutes. Knead until the dough is smooth and elastic, forming the base for your soft breadsticks.
Step 3: First Rise
Grease a large bowl with a little oil or melted butter, and transfer the kneaded dough into it, turning to coat. Cover the bowl with a kitchen towel or plastic wrap and place it in a warm area. Let it rise for about 1 hour, or until it has doubled in size. This step is crucial for achieving the airy texture of your Olive Garden Breadsticks.
Step 4: Shape the Breadsticks
After the dough has risen, gently punch it down to release the air. Divide the dough into 12-14 equal pieces and roll each piece into a 6-7 inch long rope, creating the classic breadstick shape. Arrange the shaped dough on a greased or parchment-lined baking sheet, ensuring there is space between each to allow for further rising.
Step 5: Second Rise
Cover the shaped breadsticks with a kitchen towel and let them rise again for 20-30 minutes in a warm spot. They should become puffy and nearly double in size during this time, ensuring they are light and fluffy when baked. This second rise is essential for that melt-in-your-mouth quality characteristic of Olive Garden Breadsticks.
Step 6: Preheat Oven
While the breadsticks are rising, preheat your oven to 400°F (200°C). This temperature will create the perfect environment for baking, allowing your breadsticks to become golden brown on the outside while remaining soft and buttery within, making them a delightful addition to any meal.
Step 7: Bake the Breadsticks
Once the oven is preheated, bake the breadsticks for 12-15 minutes, or until they are golden brown and slightly crispy on the outside. Keep a watchful eye, as the baking time may vary. The aroma of freshly baked Olive Garden Breadsticks will fill your kitchen and create an irresistible anticipation for the final product.
Step 8: Prepare Topping
As your breadsticks are baking, melt 1/4 cup of unsalted butter in a small saucepan or microwave. Mix in 1 teaspoon of garlic powder and 1/2 teaspoon of salt. This lovely buttery mixture will enhance the flavor of your warm breadsticks, giving them the characteristic taste that makes them so beloved.
Step 9: Finish
Once the breadsticks are done baking, remove them from the oven and immediately brush them generously with the melted butter mixture. Ensure every breadstick is coated to absorb the delicious flavors. Serve them warm alongside your favorite Italian dishes or enjoy them on their own—these Olive Garden Breadsticks are sure to become a cherished favorite!

Storage Tips for Olive Garden Breadsticks Recipe
- Room Temperature: Keep leftover breadsticks in an airtight container at room temperature for up to 2 days. This preserves their soft texture and buttery flavor.
- Fridge: If you prefer to store them longer, you can refrigerate for up to a week in an airtight container. Just be aware they may lose some of their original softness.
- Freezer: For longer storage, freeze the breadsticks in a single layer in a freezer-safe bag for up to 3 months. Reheat directly from frozen for fresh-like results.
- Reheating: To reheat, bake at 350°F (175°C) for about 10 minutes or until warmed through. Brush with melted butter before serving to restore their delightful flavors!
Expert Tips for Olive Garden Breadsticks
-
Yeast Activation: Ensure the yeast is frothy; this vital step confirms it's alive and will help your breadsticks rise beautifully.
-
Kneading Technique: Knead the dough until smooth and elastic, but be gentle during shaping to maintain air bubbles for a light texture.
-
Perfect Baking Time: Keep a close watch while baking. You're looking for a golden-brown color; overbaking can lead to dryness in your Olive Garden Breadsticks.
-
Flavor Variations: Consider swapping garlic powder for fresh minced garlic or adding herbs for a personal touch to your breadsticks.
-
Storing Leftovers: Store in an airtight container for up to 2 days or freeze for later enjoyment, ensuring you never miss out on these delightful treats!
Make Ahead Options
These Olive Garden Breadsticks are perfect for meal prep enthusiasts! You can prepare the dough and shape it into breadsticks up to 24 hours in advance. Simply follow the dough-making steps and then refrigerate the shaped breadsticks covered tightly with plastic wrap. This will keep them fresh and allow them to rise slowly, enhancing the flavor. When you're ready to serve, just take them out of the fridge for a quick 20-30 minute second rise at room temperature before baking at 400°F (200°C) for 12-15 minutes. This way, you'll enjoy soft, buttery breadsticks with minimal effort on busy weeknights!
What to Serve with Olive Garden Breadsticks Recipe
Bring the ultimate dining experience to your table with perfect side dishes that harmonize with warm, buttery breadsticks.
-
Creamy Alfredo Pasta: The rich, velvety sauce clings beautifully to your favorite pasta, creating an indulgent pairing with the breadsticks for an Italian feast.
-
Zesty Marinara Sauce: This classic dipping sauce not only complements the savory garlic flavor but also adds a deliciously tangy contrast that enhances the breadsticks.
-
Garden Salad: A crisp, refreshing salad filled with vibrant vegetables provides a light and healthy balance, brightening your meal while the breadsticks deliver the comfort.
-
Roasted Vegetables: Caramelized, seasoned veggies introduce a wonderful depth of flavor and texture, making for a colorful and nutritious addition to your dining experience.
-
Italian Wedding Soup: The warm broth, packed with tender meatballs and green veggies, is a cozy companion that turns mealtime into a heartwarming gathering.
-
Bruschetta: With its fresh tomatoes and basil on crispy bread, bruschetta brings a bright note that pairs delightfully with the soft texture of the breadsticks, ideal for appetizer lovers.
-
Red Wine: A glass of rich red wine completes the experience, its bold flavors accentuating both the breadsticks and your Italian entrées beautifully.
-
Tiramisu: For dessert, this luscious coffee-flavored treat offers a sweet ending that contrasts perfectly with the savory breadsticks, leaving a lasting impression on your taste buds.
Olive Garden Breadsticks Recipe Variations
Feel free to explore these exciting variations that will elevate your Olive Garden breadsticks with fresh flavors and textures!
-
Garlic Swaps: Swap garlic powder for fresh minced garlic for a more intense flavor. You’ll love the aromatic boost that fresh ingredients provide.
-
Herbal Infusion: Add dried herbs like oregano or rosemary to the dough for a flavorful twist. This adds a delightful depth that complements the garlic beautifully.
-
Cheesy Delight: Sprinkle grated Parmesan or mozzarella cheese on top before baking for a cheesy, golden crust that will make your breadsticks even more irresistible.
-
Dairy-Free: Substitute unsalted butter with vegan margarine or coconut oil to create a dairy-free version. Your bread will remain deliciously soft and flavorful!
-
Spicy Kick: Mix in red pepper flakes or a drizzle of hot oil to add a warming heat. This variation will add a surprising zing to your meal.
-
Seeded Crunch: Try adding sesame or poppy seeds on top before baking for a crunchy texture and added visual appeal. It offers a unique take on this classic.
-
Garlic Herb Butter: Blend fresh herbs and garlic into the melted butter before brushing it on the breadsticks after baking. The aroma will be heavenly and deeply satisfying!
-
Homemade Dipping Sauce: Pair these breadsticks with a homemade marinara sauce for a flavorful dip. It not only enhances the experience but also makes for a perfect appetizer. Consider trying it with a comforting bowl of Chicken Adobo Again for a complete meal.
Enjoy customizing your Olive Garden breadsticks with these simple substitutions and variations—a perfect way to make them your own!
Olive Garden Breadsticks Recipe FAQs
What is the best way to select ripe ingredients for this recipe?
Absolutely! When choosing your ingredients, opt for fresh active dry yeast; it should be within the expiration date and ideally foamy when activated. The flour should be finely milled and free from lumps for the best texture. For the butter, use unsalted to control the saltiness; it should be softened but not melted. And when it comes to garlic powder, look for a fragrant option to infuse a luscious flavor into your breadsticks.
How should I store leftover Olive Garden breadsticks?
I recommend storing leftover breadsticks in an airtight container at room temperature for up to 2 days. If you want to keep them longer, you can refrigerate them in an airtight container for up to a week, but be aware that they may lose some moisture. For optimal freshness, consider freezing them—just place them in a single layer in a freezer-safe bag for up to 3 months!
Can I freeze the Olive Garden breadsticks? How?
Absolutely, freezing is a fantastic option! Once your breadsticks are completely cooled, wrap them individually in plastic wrap or aluminum foil, then place them in a freezer-safe bag. This way, they’ll retain their delightful softness. When you're ready to enjoy them, simply reheat from frozen by baking at 350°F (175°C) for about 10 minutes, brushing them with melted butter for that fresh-out-of-the-oven flavor!
What if my dough doesn’t rise?
Very! If your dough isn’t rising, it’s most likely due to inactive yeast. Make sure your water temperature is around 110°F (43°C)—too hot can kill the yeast, and too cold won’t activate it. If after 10 minutes your yeast mixture doesn’t look frothy, try again with fresh yeast. Additionally, ensure your dough is rising in a warm area—if it’s too cool, it won’t rise well. You might also be motivated by the cozy scent of fresh bread to find a warm spot for rising!
Are these breadsticks suitable for people with dietary restrictions?
Definitely! For those following a dairy-free diet, you can easily replace the unsalted butter with margarine or a dairy-free butter alternative. If gluten is a concern, you can use gluten-free all-purpose flour for a delightful twist, though the texture may vary. Always check labels for any potential allergens, especially if serving to guests or family members with allergies. And remember, when it comes to sharing delicious homemade food, the more the merrier!
Can I make these breadsticks ahead of time?
Yes! I often prepare the dough ahead of time, letting it rise overnight in the refrigerator. After shaping the breadsticks, cover them and let them rise in the fridge for 8-12 hours. When you’re ready to bake, simply allow them to sit at room temperature for about 30 minutes before preheating your oven. This method not only saves time but also deepens the flavors—it’s a win-win!
Melt-in-Your-Mouth Olive Garden Breadsticks Recipe at Home
Ingredients
Equipment
Method
- Activate the yeast: In a small bowl, combine warm water, active dry yeast, and granulated sugar. Stir gently and let sit for 5-10 minutes until frothy.
- Prepare the dough: In a large bowl, whisk together flour, softened butter, and salt. Pour in the activated yeast mixture and mix for 8-10 minutes until smooth and elastic.
- First rise: Grease a large bowl, transfer the dough, cover, and let rise in a warm area for about 1 hour or until doubled in size.
- Shape the breadsticks: Punch down the dough, divide into 12-14 equal pieces, and roll into 6-7 inch long ropes. Arrange on a greased baking sheet.
- Second rise: Cover shaped breadsticks and let rise for 20-30 minutes until puffy.
- Preheat oven: While rising, preheat your oven to 400°F (200°C).
- Bake the breadsticks: Bake for 12-15 minutes, or until golden brown.
- Prepare topping: Melt unsalted butter and mix in garlic powder and salt.
- Finish: Brush the baked breadsticks generously with the melted butter mixture.


Leave a Reply