
As I stood in my kitchen, the sweet scent of freshly mixed ingredients engulfed me, reminding me of childhood desserts. The day’s mission? To create the perfect milk mochi recipe—a Japanese delight that seamlessly blends simplicity with deliciousness. This recipe promises a soft, chewy texture and a rich, creamy flavor that will make any dessert lover swoon. Not only is it quick to whip up, but it’s also a fun activity to share with friends and family, bringing everyone together to relish a taste of Japan. Plus, with easy tips to make this treat dairy-free, you can delight both your traditional and modern culinary friends. Ready to dive into this delightful dessert adventure? Let’s embark on this journey together, and I can’t wait to hear how yours turns out!
Why is Milk Mochi So Special?
Simplicity at Its Best: This milk mochi recipe requires minimal ingredients and straightforward steps, making it perfect for home cooks of any level.
Chewy Perfection: The unique texture of milk mochi offers a delightful chewiness that will wow dessert lovers everywhere.
Rich, Creamy Flavor: Incorporating whole milk adds a luscious taste that sets it apart from other desserts.
Dairy-Free Option: Easily adaptable with almond or oat milk, this recipe accommodates different dietary preferences without sacrificing flavor.
Fun to Make: It's an enjoyable activity to create with friends or family, bringing everyone together to experience a bit of Japanese cuisine.
Versatile Coatings: Roll your mochi in roasted soybean flour, coconut, or nuts for a personal touch—it's all about your taste! So why not explore this milk mochi recipe today?
Milk Mochi Recipe Ingredients
For the Mochi
- Glutinous Rice Flour – This ingredient is essential for the traditional chewy texture of milk mochi.
- Cornstarch – It aids in smoothness and prevents stickiness; feel free to substitute with more glutinous rice flour if needed.
- Sugar – This sweetens the mochi; you can adjust the amount based on your sweetness preference.
- Corn Oil – Adds moisture and richness; a neutral oil can easily replace it if preferred.
- Whole Milk – Provides creaminess and flavor, but you can use dairy-free alternatives like almond or oat milk for a different twist.
For Coating
- Roasted Soybean Flour – This adds a nutty flavor and texture that complements the creamy milk mochi beautifully.
- Shredded Coconut – If you're feeling adventurous, this can add a delicious tropical twist.
- Crushed Nuts – A crunchy coating option that enhances the mochi, making each bite interesting.
Enjoy creating this Milk Mochi recipe that's bound to become a household favorite!
Step‑by‑Step Instructions for Milk Mochi Recipe
Step 1: Combine Ingredients
In a large mixing bowl, combine 1 cup of glutinous rice flour, 2 tablespoons of cornstarch, and ¼ cup of sugar. Pour in 1 cup of whole milk and 1 tablespoon of corn oil, then whisk until the mixture is smooth and free of lumps. This mixture should be creamy and slightly thick—set aside as you prepare to cook it.
Step 2: Optional Strain for Smoothness
For an ultra-smooth texture, consider straining the combined mixture through a fine sieve into another bowl. This step helps remove any tiny lumps, ensuring your milk mochi has the perfect velvety consistency. A well-strained mixture will feel luxurious as it pours; this is a key step in creating a delightful dessert experience.
Step 3: Cook the Mixture
Pour the smooth milk mochi mixture into a non-stick pan over low heat. Stir gently and continuously with a spatula for about 8-10 minutes, until the mixture thickens and becomes a cohesive mass. It should start to pull away from the sides of the pan and resemble a thick, sticky dough. Visual cues include a shiny surface and a stretchy texture.
Step 4: Cool and Knead the Dough
Once fully cooked, remove the pan from heat and allow the mixture to cool for a few minutes. When it's still warm but manageable, wear gloves and knead the dough for about 5 minutes. This kneading step enhances elasticity, making the milk mochi pleasingly chewy. Your dough should be soft, smooth, and slightly sticky to the touch.
Step 5: Shape the Mochi
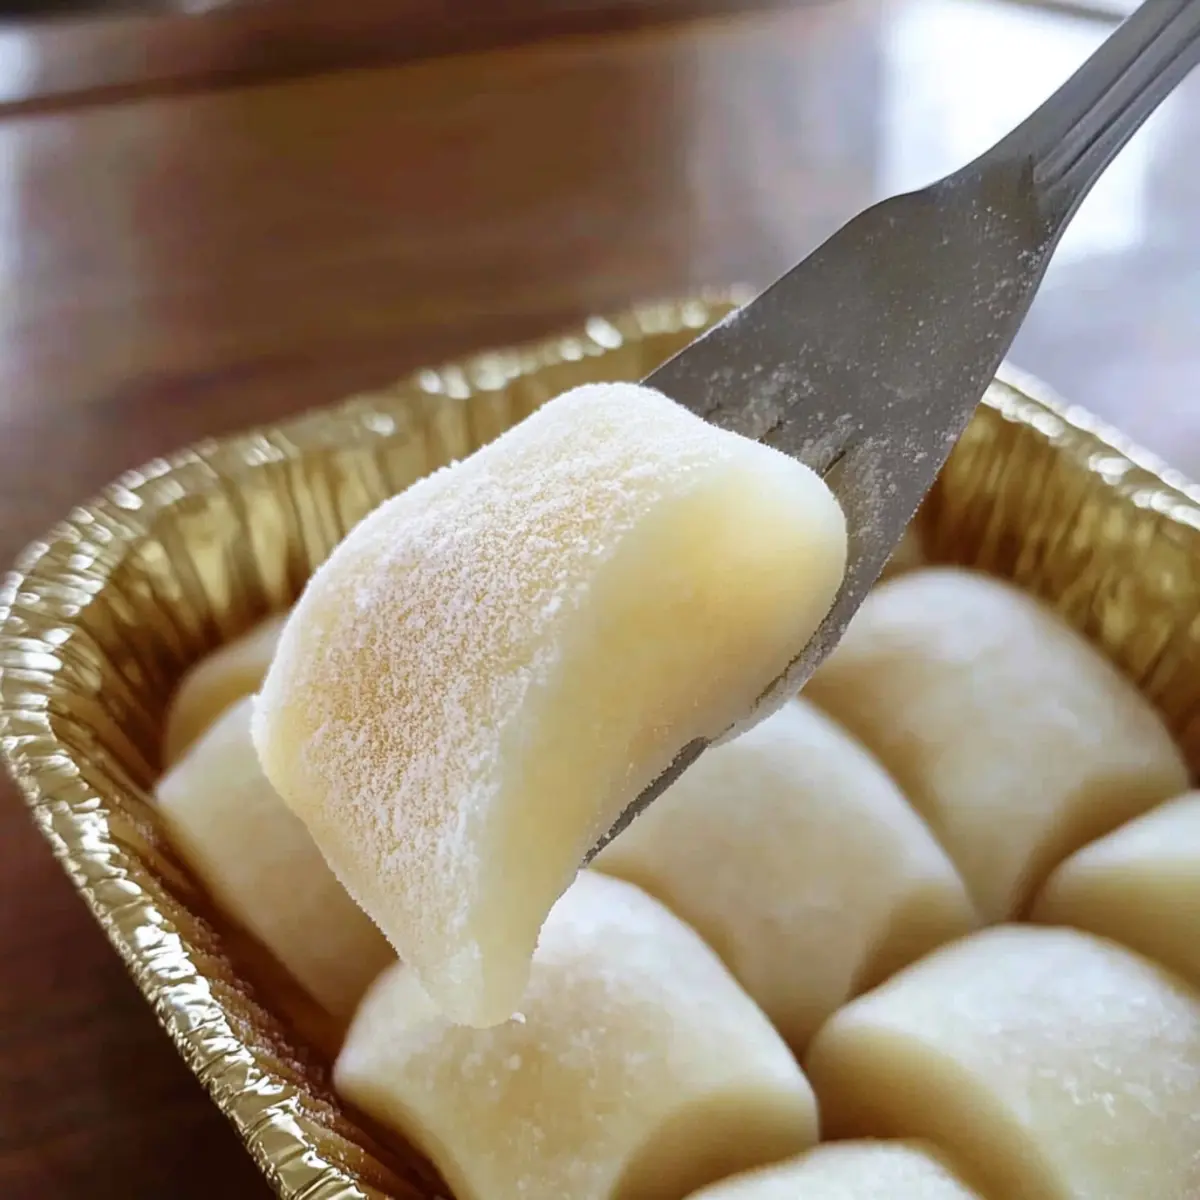
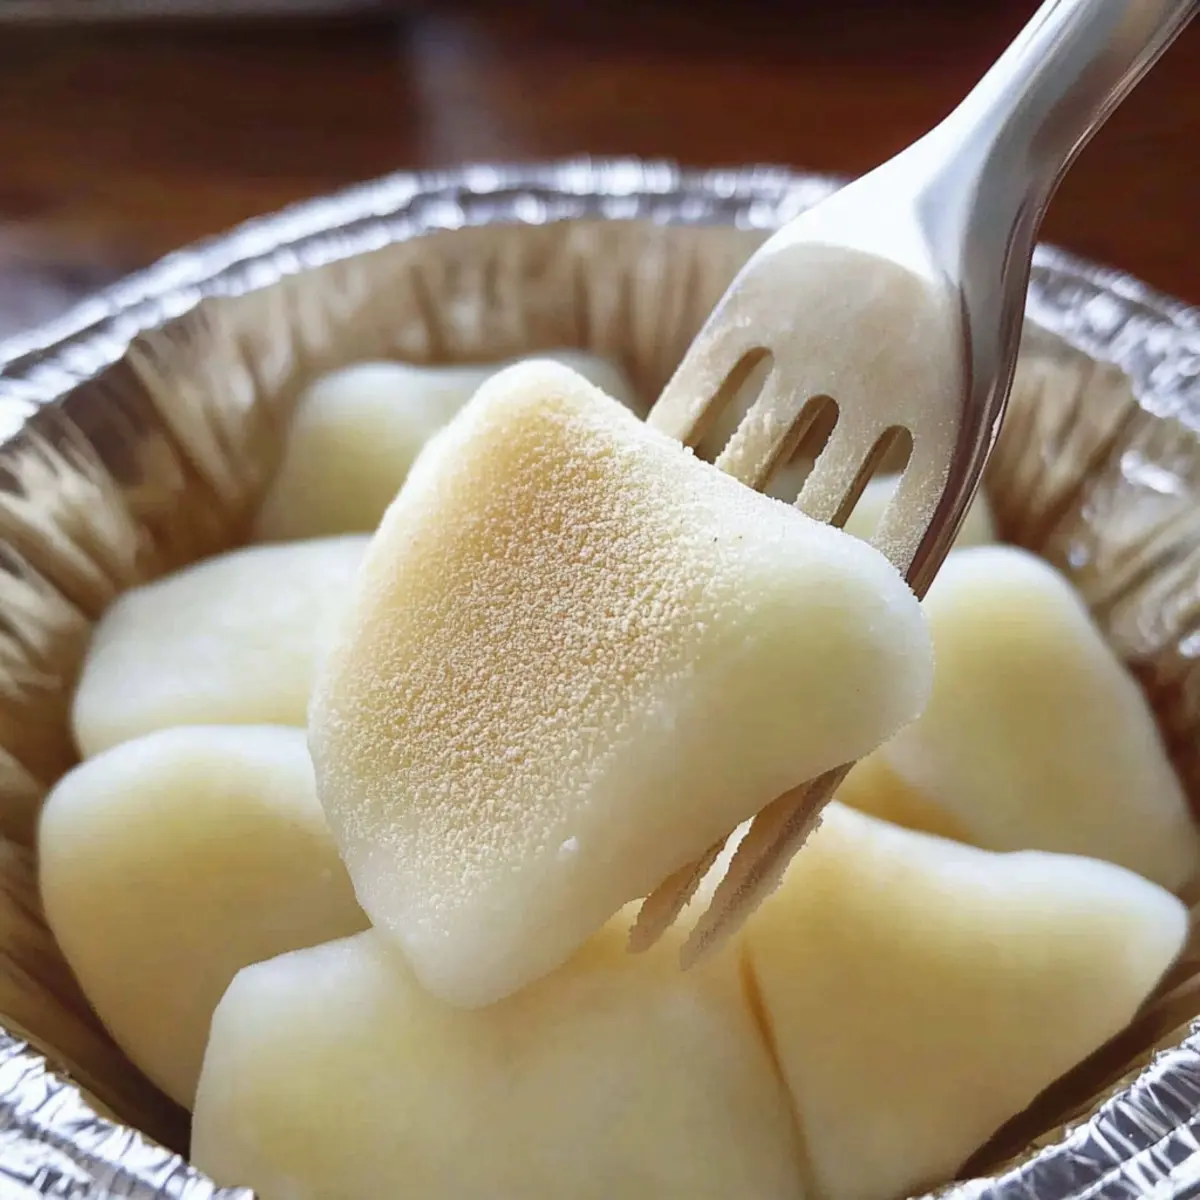
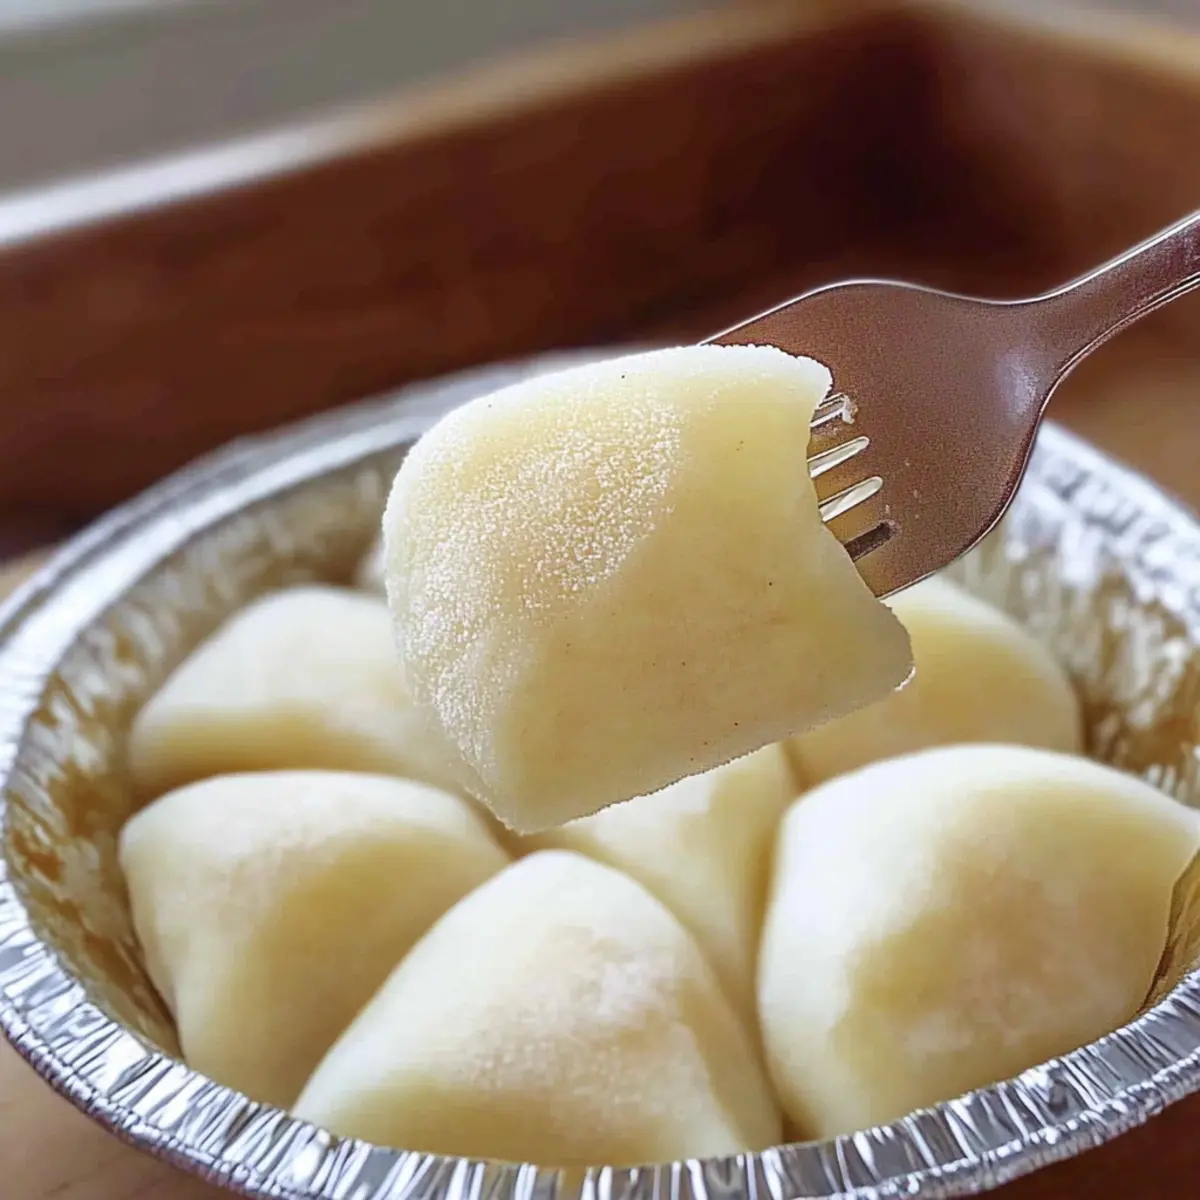
Dust a clean surface lightly with cooked glutinous rice flour to prevent sticking. Roll the kneaded dough into a long strip, approximately 1 inch in diameter. Use a sharp knife to cut the dough into bite-sized pieces, about 1-2 inches long. As you shape the pieces, keep them dusted with flour to avoid any stickiness during handling.
Step 6: Add the Finishing Touch
For a delightful finish, roll each piece of milk mochi in roasted soybean flour to coat them evenly. This step adds a nutty flavor and a unique texture, elevating your dessert. You can also experiment with coatings like shredded coconut or crushed nuts for additional delicious variations, perfect for your version of the milk mochi recipe.
Make Ahead Options
These milk mochi treats are perfect for busy cooks looking to save time during the week! You can prepare the mochi dough up to 24 hours in advance. Simply follow the initial steps, then let the dough cool completely before wrapping it tightly in plastic wrap and refrigerating. When you're ready to serve, take the dough out, knead it again for a couple of minutes to regain its texture, and then shape it as directed. Another great option is to cut the shaped mochi pieces and coat them before storing; just make sure to refrigerate them in an airtight container for up to 3 days to maintain their freshness and chewiness. Enjoy delicious homemade milk mochi with minimal effort whenever you're craving a comforting dessert!
What to Serve with Easy Milk Mochi?
Treat your senses to a delightful meal by balancing flavors and textures with these perfect pairings!
-
Creamy Matcha Ice Cream: The rich, earthy taste of matcha ice cream offers a delightful contrast to the sweet and chewy mochi. It’s a cooling treat that pairs beautifully with warm tea after dinner.
-
Fresh Mango Slices: These juicy slices bring a burst of tropical sweetness that complements the subtle flavors of milk mochi. Enjoy the contrast of textures with each bite.
-
Chilled Green Tea: A refreshing beverage that cleanses the palate, enhancing the creamy richness of the mochi. This light drink is perfect for any season and adds a cultural flair to the experience.
-
Red Bean Paste: For an added layer of sweetness, consider serving your milk mochi with a dollop of smooth red bean paste. This traditional Japanese treat brings a lovely contrast in texture while enhancing the mochi's rich flavor.
-
Coconut Milk Sauce: Drizzle a sweet coconut milk sauce over the milk mochi for a tropical twist. The creamy elements harmonize wonderfully, making each bite even more luxurious.
-
Crunchy Almonds: A side of crushed almonds adds a delightful crunch, enhancing the mochi with a nutty richness and providing an interesting textural combination.
-
Black Sesame Seeds: These sprinkle beautifully over the milk mochi, providing a distinctive nutty flavor and a striking visual element to your dessert presentation.
Explore these pairings to transform your milk mochi into a memorable feast for the senses!
Milk Mochi Recipe Variations
Feel free to get creative with this milk mochi recipe! Each twist adds a new layer of flavor and excitement.
- Dairy-Free: Substitute whole milk with almond or oat milk for a creamy yet dairy-free version. Enjoy the same delightful texture without the dairy!
- Matcha Magic: Add 2 tablespoons of matcha powder to the dry ingredients for a vibrant green tea flavor. This not only tastes wonderful but also looks stunning!
- Sweet Red Bean Paste: Fill the mochi with sweet red bean paste before rolling for an authentic Japanese experience. The bean's sweetness perfectly complements the creamy texture.
- Coconut Crunch: Roll the mochi pieces in shredded coconut instead of roasted soybean flour. This tropical twist adds delightful sweetness and a chewier texture.
- Nutty Surprise: Coating the mochi in crushed nuts, such as almonds or pistachios, introduces an added crunch and nuttiness that perfectly contrasts the soft chewiness.
- Fruity Fusion: Incorporate fruit puree, like mango or strawberry, into the milk mixture for a burst of fruity flavor. It’s a refreshing touch that makes every bite feel special.
- Spicy Sweetness: For those who enjoy a kick, add a pinch of cayenne or chili powder to the sugar. It creates a surprising and delicious balance of sweet and spicy!
- Flavor Infusion: Consider infusing the milk with a few drops of vanilla extract or almond extract before mixing. This simple addition elevates the flavor profile beautifully.
Don’t forget to check out variations like Spatchcock Chicken or Chicken Adobo Again for more culinary inspiration. Let your imagination run wild and enjoy the process of making this delightful milk mochi!
How to Store and Freeze Milk Mochi
Room Temperature: Store milk mochi in an airtight container for up to 3 days; keep away from direct sunlight to maintain flavor and texture.
Fridge: If you want to extend freshness, refrigerate for up to 5 days. Ensure they're in an airtight container to prevent drying out.
Freezer: For longer storage, freeze pieces wrapped in plastic wrap, then placed in a zip-top bag for up to 2 months. Thaw in the fridge before serving.
Reheating: Reheat gently in the microwave for about 15-20 seconds when enjoying leftovers; this restores their delightful chewy texture and rich flavor.
Expert Tips for Milk Mochi Recipe
-
Cook Thoroughly: Ensure you cook the mixture until it's thick and pulls away from pan sides; undercooking can lead to an undesirable texture in your milk mochi.
-
Use Gloves: When kneading the warm dough, gloves make handling easier and prevent burns, allowing you to achieve the perfect chewy texture.
-
Dust Generously: Always sprinkle cooked glutinous rice flour while shaping to prevent sticking; skipping this can lead to a messy experience with your milk mochi.
-
Experiment with Flavors: Don’t hesitate to play with coatings and fillings, like matcha or sweet red bean paste, to personalize your milk mochi recipe to your taste!
-
Cooling Time: Allow the mochi to cool enough to handle before kneading; this will improve the elasticity and final texture.
-
Storage Matters: Store leftover milk mochi in an airtight container; they stay fresh for a few days at room temperature or longer in the fridge.

Milk Mochi Recipe FAQs
What type of glutinous rice flour should I use?
For the best results, make sure you're using sweet glutinous rice flour or mochi flour, which gives milk mochi its chewy texture. Avoid using regular rice flour, as it won't provide the same consistency. You can find this flour in Asian markets or online.
How long does milk mochi stay fresh?
Store milk mochi in an airtight container at room temperature for up to 3 days. To keep it fresh for longer, refrigerate it for about 5 days. Remember that the longer it stays, the more it may lose its delightful texture, so it's best to enjoy it while it's at its freshest!
Can I freeze milk mochi? How do I do it?
Absolutely! For freezing, wrap individual pieces of milk mochi tightly in plastic wrap, then place them in a zip-top freezer bag. This method avoids freezer burn and keeps them fresh for up to 2 months. When you're ready to enjoy, simply thaw them in the fridge overnight. You can reheat them in the microwave for 15-20 seconds for that chewy texture you love!
What can I do if my mochi mixture turns out too sticky?
If your milk mochi is too sticky during preparation, it’s likely due to undercooking or not enough cornstarch. Make sure to cook it thoroughly until it pulls away from the pan’s sides, and consider adding a bit more cornstarch to the mixture for better structure. If it’s too late and it’s already sticky, dusting with cooked glutinous rice flour can help during shaping.
Is there a dairy-free alternative for this recipe?
Yes! You can easily substitute whole milk with almond milk, oat milk, or any other non-dairy milk. Just ensure that the alternative is unsweetened and unflavored to maintain the recipe's integrity. This way, you can cater to both dairy lovers and those with dietary restrictions!
Can I add flavors or fillings to my milk mochi?
The more the merrier! You can definitely add flavors like matcha powder for a green tea taste or fill your mochi with sweet red bean paste for added sweetness. Experiment with different coatings like shredded coconut or crushed nuts to get creative with your milk mochi recipe!
Creamy Milk Mochi Recipe: Chewy Delight Made Easy
Ingredients
Equipment
Method
- In a large mixing bowl, combine glutinous rice flour, cornstarch, and sugar. Pour in whole milk and corn oil, then whisk until smooth.
- Optionally strain the mixture through a fine sieve into another bowl for a smooth texture.
- Pour the mixture into a non-stick pan over low heat. Stir continuously for about 8-10 minutes until thickened.
- Remove from heat, let cool slightly, then knead the warm dough for about 5 minutes.
- Dust with rice flour, roll the dough into a strip, and cut into bite-sized pieces.
- Roll each piece in roasted soybean flour to coat evenly.


Leave a Reply