
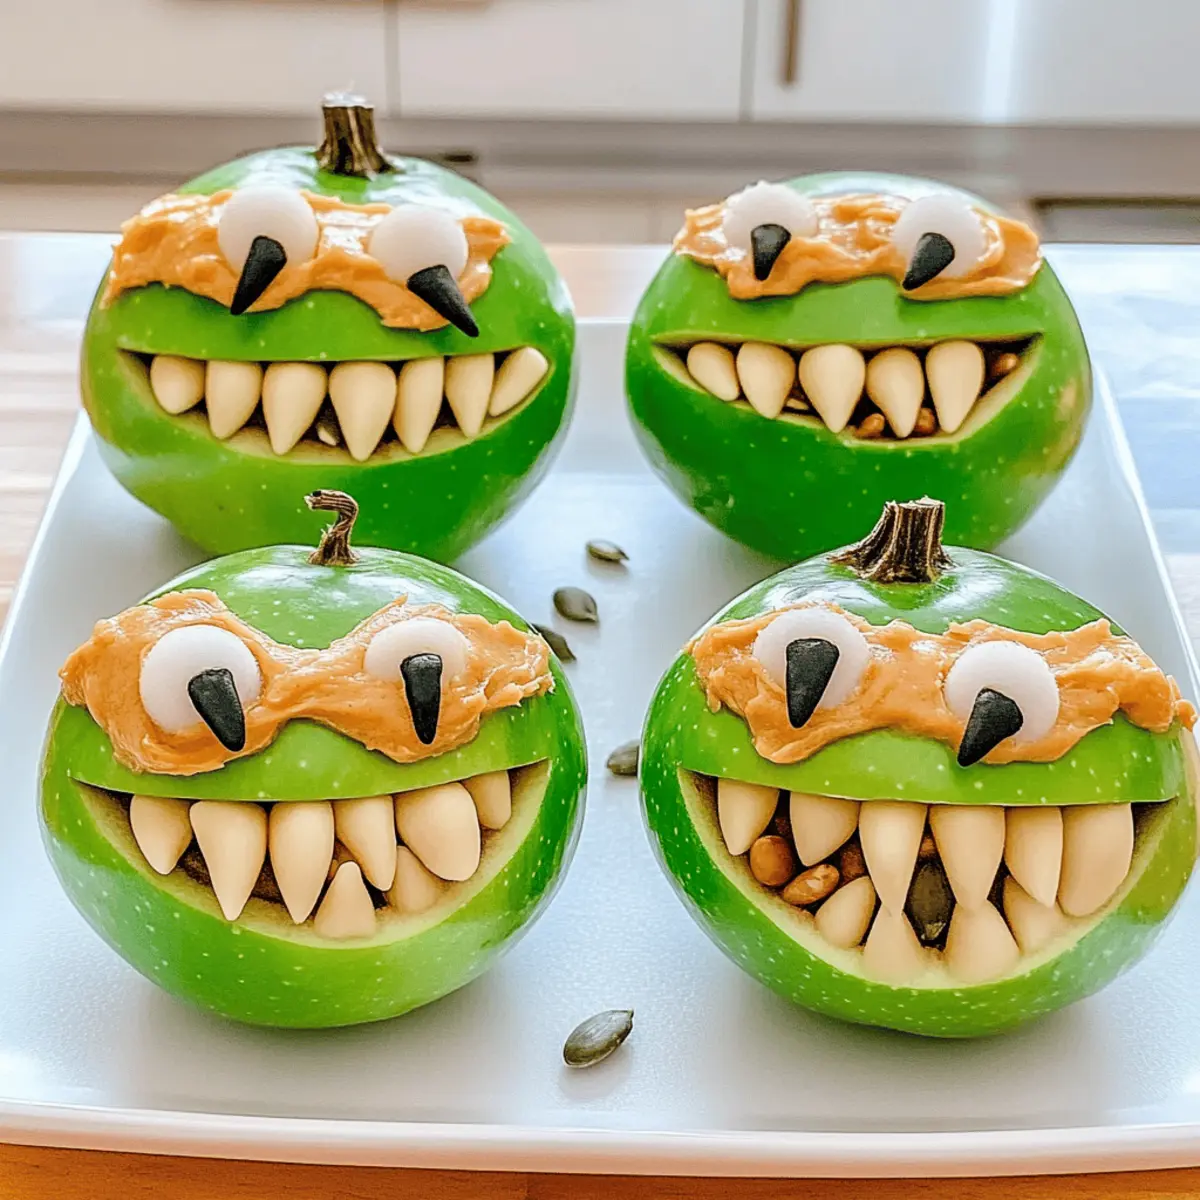
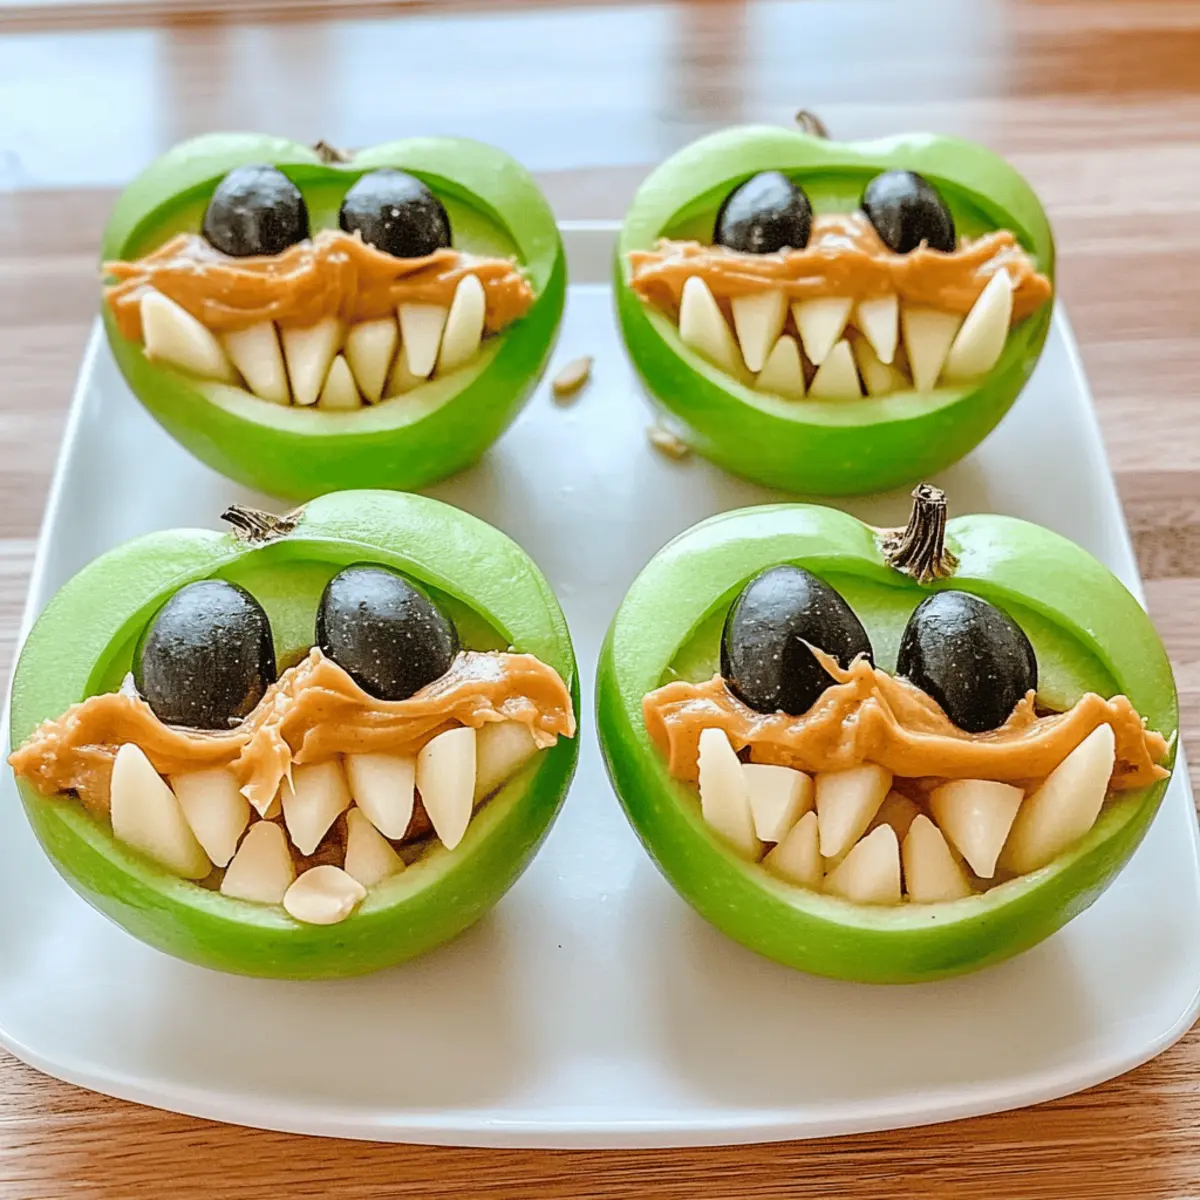
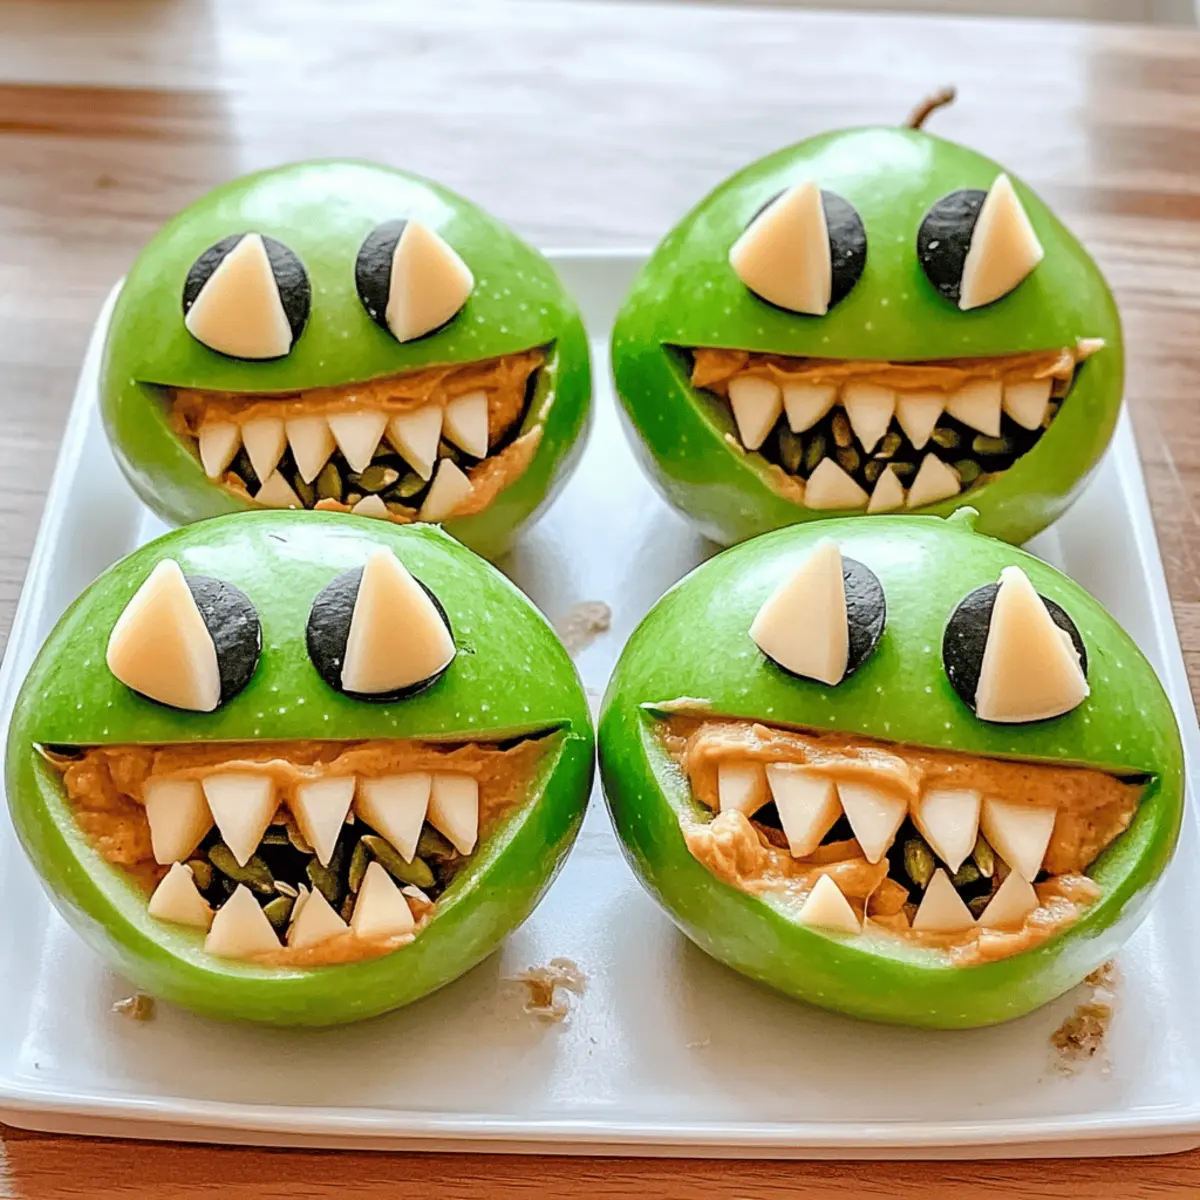
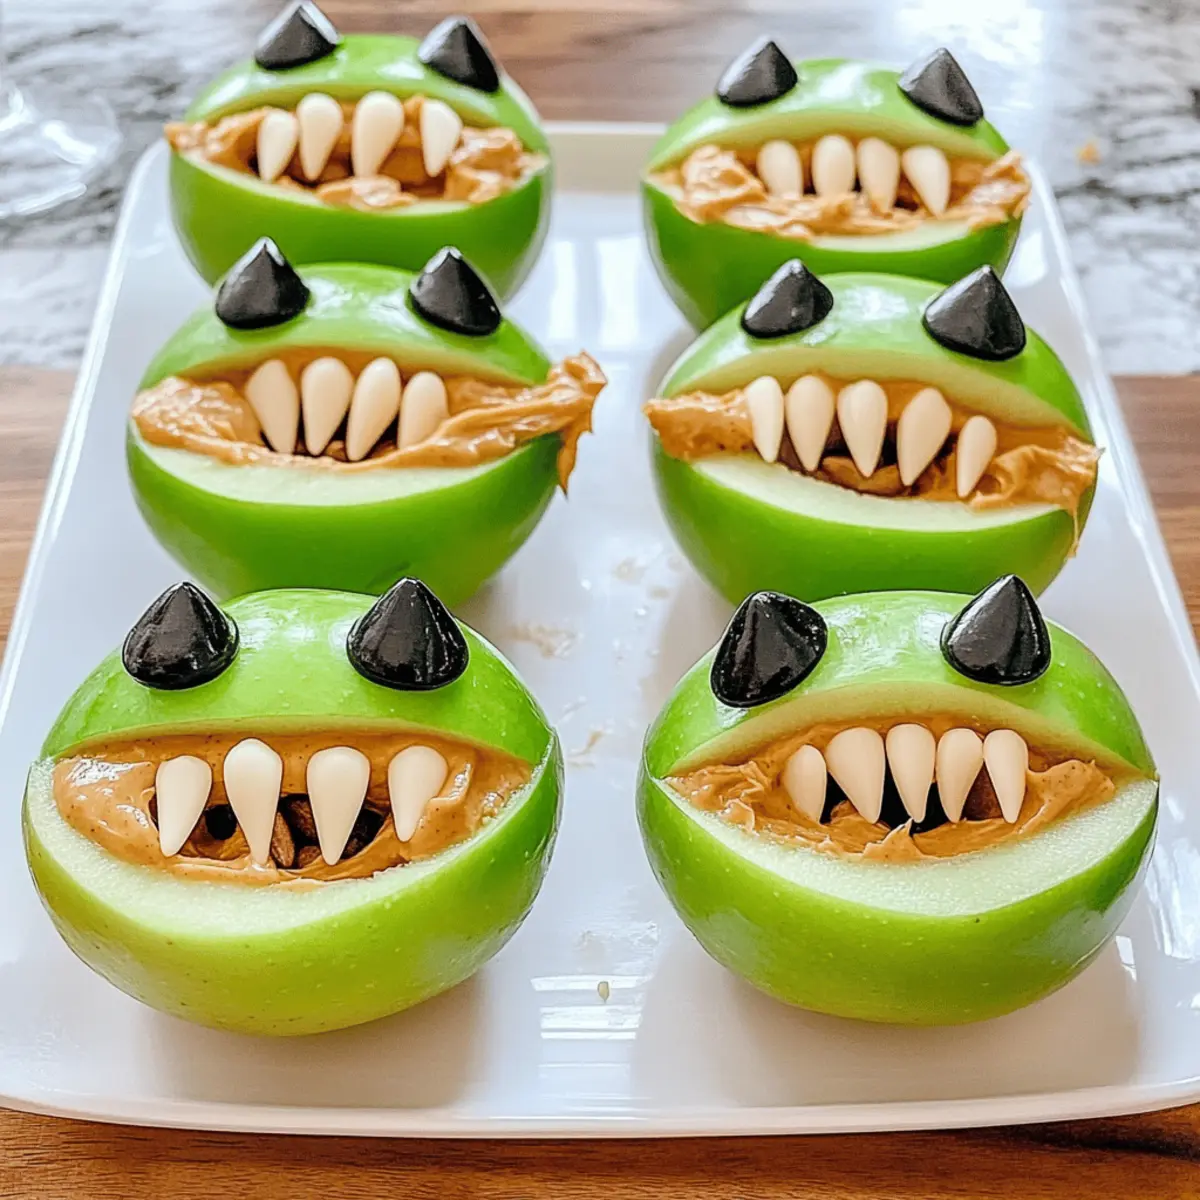
Tucked away in the corner of my kitchen during Halloween season, a delicious idea took shape: Green Apple Monsters. These whimsical snacks are not just fun to create; they effortlessly blend health with creativity, making them an ideal choice for the little ones. Picture this—crunchy green apples with creamy peanut butter, transformed into goofy monster mouths that are perfect for parties or after-school celebrations. The best part? They come together in just 20 minutes, so you can avoid any last-minute chaos as the kids come clamoring for something tasty and nutritious. With nut-free options and versatile ingredient swaps available, these delightful Green Apple Monsters are the kind of treat that everyone can enjoy. Ready to unleash your culinary creativity this Halloween? Let’s dive in and bring these adorable monsters to life!
Why Make Green Apple Monsters?
Crisp, Crunchy Goodness: These Green Apple Monsters offer a refreshing and healthy snack that kids will love, ensuring no more sugary chaos.
Quick Prep Time: With only 20 minutes needed to whip these up, they are perfect for busy parents or last-minute party planners.
Nut-Free Options: Easily adaptable for school and parties, substitutes like sunflower seed butter ensure everyone can enjoy these without any worries.
Creative Fun: Let your kids join the fun in assembling their own monsters! Experiment with various fruits and toppings for a unique twist, just like my Coconutty Beans Greens recipe or my Chicken Salad Apples for more delicious ideas.
Playful Presentation: These whimsical treats are not only delicious but also make for an eye-catching centerpiece at any Halloween gathering, guaranteed to be a hit among both kids and adults alike!
Green Apple Monsters Ingredients
For the Apples
• Green Apples – Choose firm varieties for the best texture and a juicy crunch.
For the Filling
• Creamy Peanut Butter – This adds a rich, nutty flavor; opt for almond or sunflower seed butter for nut-free versions.
For the Teeth
• Pumpkin or Sunflower Seeds – Perfect for "monster teeth"; you can substitute with other seeds if desired.
For the Savory Elements
• Cheddar or Colby Jack Cheese – Adds a savory kick; mozzarella or gouda can offer a creamier taste.
For the Monster Eyes
• Candy Eyes – These playful additions bring your monsters to life; chocolate chips can create a different look for a sweet twist.
Step‑by‑Step Instructions for Green Apple Monsters
Step 1: Prepare the Apples
Start by washing 2 to 4 green apples thoroughly under cold water, ensuring all dirt is removed. Then, carefully quarter each apple and remove the core using a knife or apple corer. Cut a V-shape in the flesh of each quarter to create the playful monster mouth. Set the apple quarters aside, ready for delicious fillings.
Step 2: Add Peanut Butter
Using a butter knife, generously spread creamy peanut butter into the V-shaped cavity of each apple quarter. Ensure the peanut butter fills the entire area where the teeth will go to hold them firmly in place. This will create a tasty base for your Green Apple Monsters, combining that luscious nutty flavor with the fresh crunch of the apples.
Step 3: Insert the Teeth
Press pumpkin or sunflower seeds into the peanut butter along the mouth’s edge to form the monster’s teeth. Aim for at least three to four seeds on each apple quarter for a fun and spooky effect. The seeds should stand upright, giving your creations a delightful and playful appearance that’ll enchant both kids and adults.
Step 4: Add Cheese
Now, cut small triangles of cheddar or Colby Jack cheese to suit the size of the apple mouths. Gently insert these cheese pieces behind the seeds to give the appearance of a bouncy monster tongue. The combination of savory cheese with the sweet apple and creamy peanut butter enhances the overall flavor of your Green Apple Monsters.
Step 5: Attach the Eyes
Using a small amount of leftover peanut butter, glue candy eyes onto the top of each monster face. Feel free to adjust their placement for a silly or spooky look—let your creativity shine! This final touch turns your apple quarters into whimsical little monsters, making them even more appealing for your Halloween gatherings.
Step 6: Serve Immediately
Serve your delightful Green Apple Monsters right away to keep their crunchiness intact. Place them on a colorful platter alongside crunchy vegetable sticks or a yogurt dip for added fun. If you have leftovers, store them in an airtight container in the refrigerator for up to three days, but be sure to keep separate components to maintain freshness.
Storage Tips for Green Apple Monsters
Fridge: Keep leftover Green Apple Monsters in an airtight container for up to 3 days to maintain their freshness and crunch.
Components: Store apple halves and fillings separately—this prevents the apples from browning and keeps the peanut butter from becoming soggy.
Assemble Fresh: For the best texture, assemble the components just before serving. This helps preserve the crispness of the apples.
Prevent Browning: If you prepare apples in advance, squirt lemon juice on the cut surfaces to maintain their vibrant color and prevent browning.
Green Apple Monsters Variations
Feel free to unleash your creativity and customize these playful snacks to suit your taste and dietary needs.
-
Nut-Free: Substitute peanut butter with sunflower seed butter for a school-friendly option. Enjoy all the creamy goodness without the worry of allergens.
-
Fruits: Use ripe pears instead of apples for a sweeter and softer bite. This twist creates delightful alternatives that cater to different fruit lovers.
-
Creative Teeth: Try mini marshmallows or dried fruit for unique “teeth.” The added sweetness from marshmallows will have kids giggling with delight!
-
Chocolate Option: Swap peanut butter for a chocolate spread for a dessert version. This decadent twist turns your monsters into a sweet treat that everyone will adore.
-
Mini Monsters: Use cookie cutters to create bite-sized apple shapes for fun portions perfect for parties. It’s like having a monster army ready to tackle any gathering!
-
Flavor Boost: Add a sprinkle of cinnamon to the peanut butter for an extra layer of flavor. This cozy spice can turn your snack into a nostalgic taste experience.
-
Veggie Delight: Replace cheese with thin slices of cucumber for a refreshing twist. This keeps things light and adds a satisfying crunch alongside the apple.
-
Spicy Kick: Introduce a dash of cayenne pepper or chili powder to your peanut butter for an exciting heat level. Your monsters will have a thrilling surprise that adventurous eaters will love!
These variations will keep your Green Apple Monsters lively and different with each batch you make. For even more delicious and healthy ideas, don't forget to check out my Coconutty Beans Greens and Chicken Salad Apples recipes!
What to Serve with Green Apple Monsters?
Elevate your festive gatherings with these delightful pairings that complement the playful energy of your Green Apple Monsters.
-
Crunchy Vegetable Sticks: Pair these vibrant snacks with a colorful assortment of carrots, cucumbers, and bell peppers for a refreshing crunch. The mix of flavors and textures balances the sweetness of the apples perfectly.
-
Creamy Yogurt Dip: A smooth, tangy yogurt dip adds a delightful creaminess that contrasts beautifully with the crunchy apple. You can flavor it up with honey or cinnamon to enhance the festive spirit.
-
Colorful Fruit Salad: Add a rainbow of sliced fruits to the table for a refreshing and healthy option. This light and fruity addition enhances the spirit of the season while keeping things nutritious and fun.
-
Cheese and Crackers Board: Create a small cheese board with assorted cheeses and whole-grain crackers. The savory profiles of the cheeses amplify the sweetness of the apples—it's a celebration of flavors!
-
Mini Marshmallow Treats: Whip up some mini marshmallow treats on the side for an extra dose of fun. Their soft, chewy texture provides a candy-like sweetness that complements the playful theme of your Green Apple Monsters.
-
Sparkling Apple Cider: Serve up chilled sparkling apple cider to keep the fun flowing. The bubbly nature of this drink elevates the festive atmosphere, making it a refreshing counterpart to your spooky snacks.
These sides and accompaniments beautifully elevate your gatherings, making every bite a moment of joy during the Halloween season!
Expert Tips for Green Apple Monsters
Choose the Right Apples: Use firm, blemish-free green apples for the best texture and crunch, ensuring your Green Apple Monsters hold their shape.
Prevent Browning: Squirt a little lemon juice on the cut apple surfaces to keep them looking fresh and lovely during serving.
Assemble Just Before Serving: To maintain the apples' crispness, prepare the components in advance, but assemble each monster right before serving.
Storage Secrets: Keep leftover pieces in a sealed container in the fridge for up to 3 days, but store the fillings separately to maximize freshness.
Get Creative: Encourage kids to personalize their monsters with various toppings, like mini marshmallows or dried fruit, for a unique twist on this fun treat!
Make Ahead Options
These Green Apple Monsters are ideal for meal prep! You can wash, quarter, and core your apples up to 24 hours in advance to save time when assembling your spooky snacks. To maintain their freshness and prevent browning, squeeze a little lemon juice on the cut surfaces before storing them in an airtight container in the refrigerator. You can also prepare the filling components—like the peanut butter, cheese, and seeds—and store them separately for up to 3 days. When you’re ready to serve, simply fill the apple mouths with peanut butter, add the seeds and cheese, and stick on those fun candy eyes. With these make-ahead tips, you’ll create delicious and delightful treats in no time!
Green Apple Monsters Recipe FAQs
How do I select the best green apples?
Absolutely! When choosing green apples, opt for firm, blemish-free varieties like Granny Smith. Look for ones with a shiny skin and a crisp feel; this guarantees a juicy crunch and a vibrant flavor that makes your Green Apple Monsters truly delightful!
What is the best way to store leftover Green Apple Monsters?
To keep those tasty treats fresh, store leftovers in an airtight container in the refrigerator for up to 3 days. However, I recommend storing components separately; place apple halves in one container and fillings in another. This prevents browning and maintains that crispness we all love!
Can I freeze Green Apple Monsters?
It's best to avoid freezing the assembled Green Apple Monsters, as they may lose their delightful crunch. Instead, freeze unused components separately! For best results, spread peanut butter on apple slices and layer in an airtight container, placing parchment paper between layers. This way, they’ll be ready for a quick assembly whenever the craving strikes.
What if my apples turn brown before serving?
If you notice browning, don’t worry! To prevent this, squirt a little lemon juice on the cut surfaces of the apples before assembly. This simple step keeps them looking and tasting fresh, adding a zesty flavor without changing the fun!
Are Green Apple Monsters suitable for children with nut allergies?
Very! These fun treats can easily cater to nut allergies by simply swapping out creamy peanut butter for sunflower seed butter or almond butter. This not only makes them school-friendly but still provides that delightful and creamy texture without compromising on taste.
Can I add other creative fillings to my Green Apple Monsters?
Absolutely! Let your culinary creativity flow. For a sweet twist, you could use chocolate spread instead of peanut butter. Or, for a fruity variation, try soft cream cheese mixed with small bits of dried fruits. The more flavors, the merrier!
Green Apple Monsters: Fun and Crunchy Halloween Snacks
Ingredients
Equipment
Method
- Wash 2 to 4 green apples and quarter them. Remove the core and cut a V-shape to create monster mouths.
- Spread creamy peanut butter into the V-shaped cavity of each apple quarter.
- Press pumpkin or sunflower seeds into the peanut butter to form monster teeth.
- Cut small triangles of cheese and insert behind the seeds for monster tongues.
- Use peanut butter to attach candy eyes on top of each monster face.
- Serve immediately on a colorful platter alongside vegetable sticks or yogurt dip.


Leave a Reply