
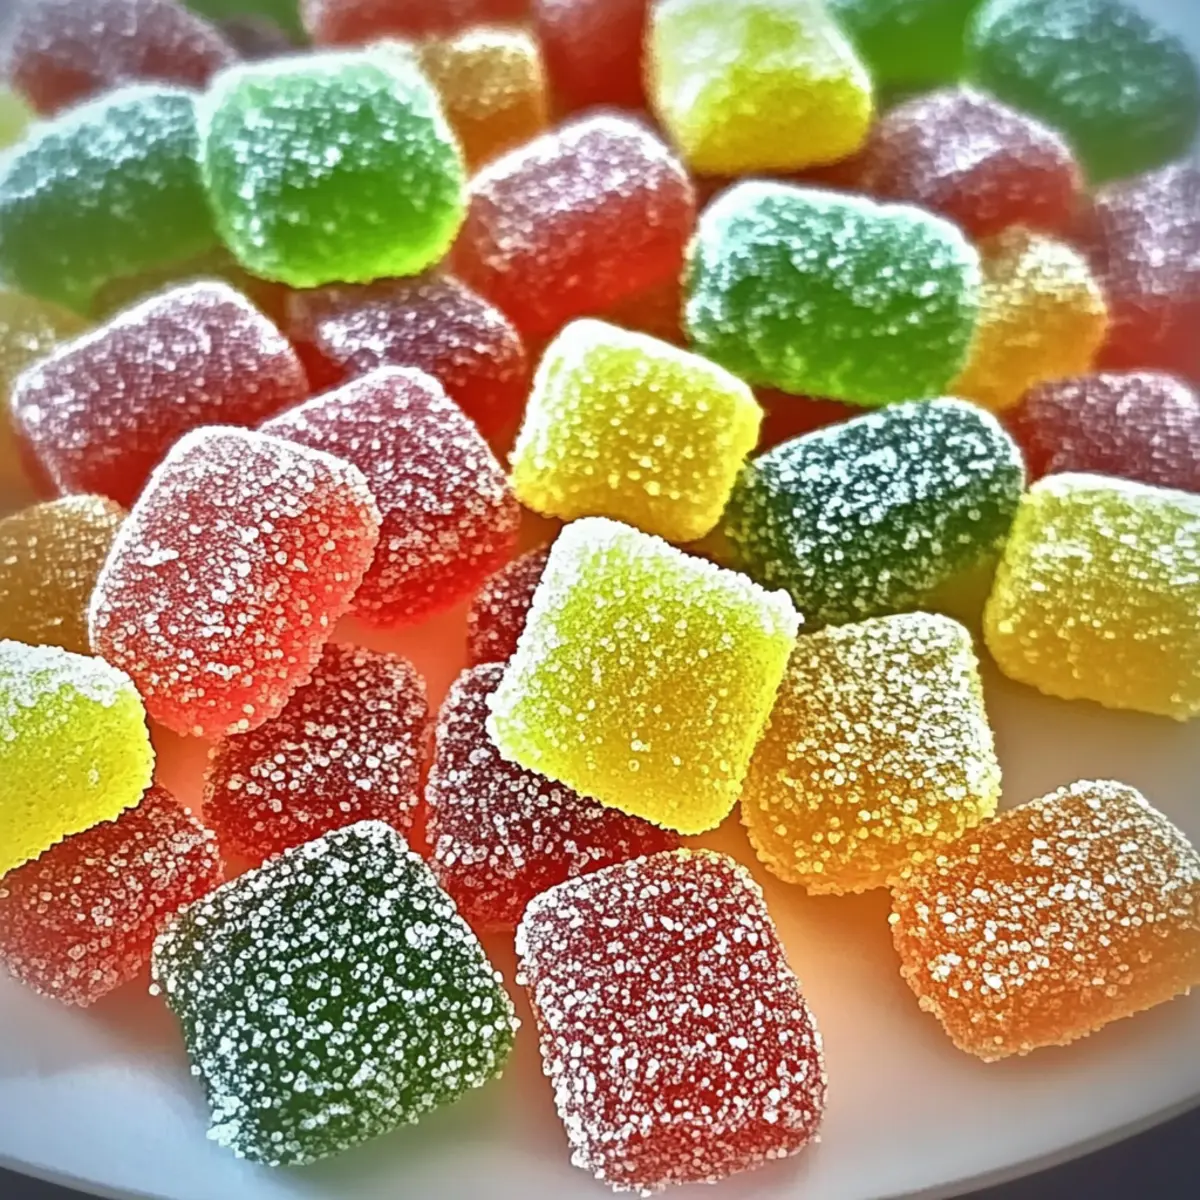
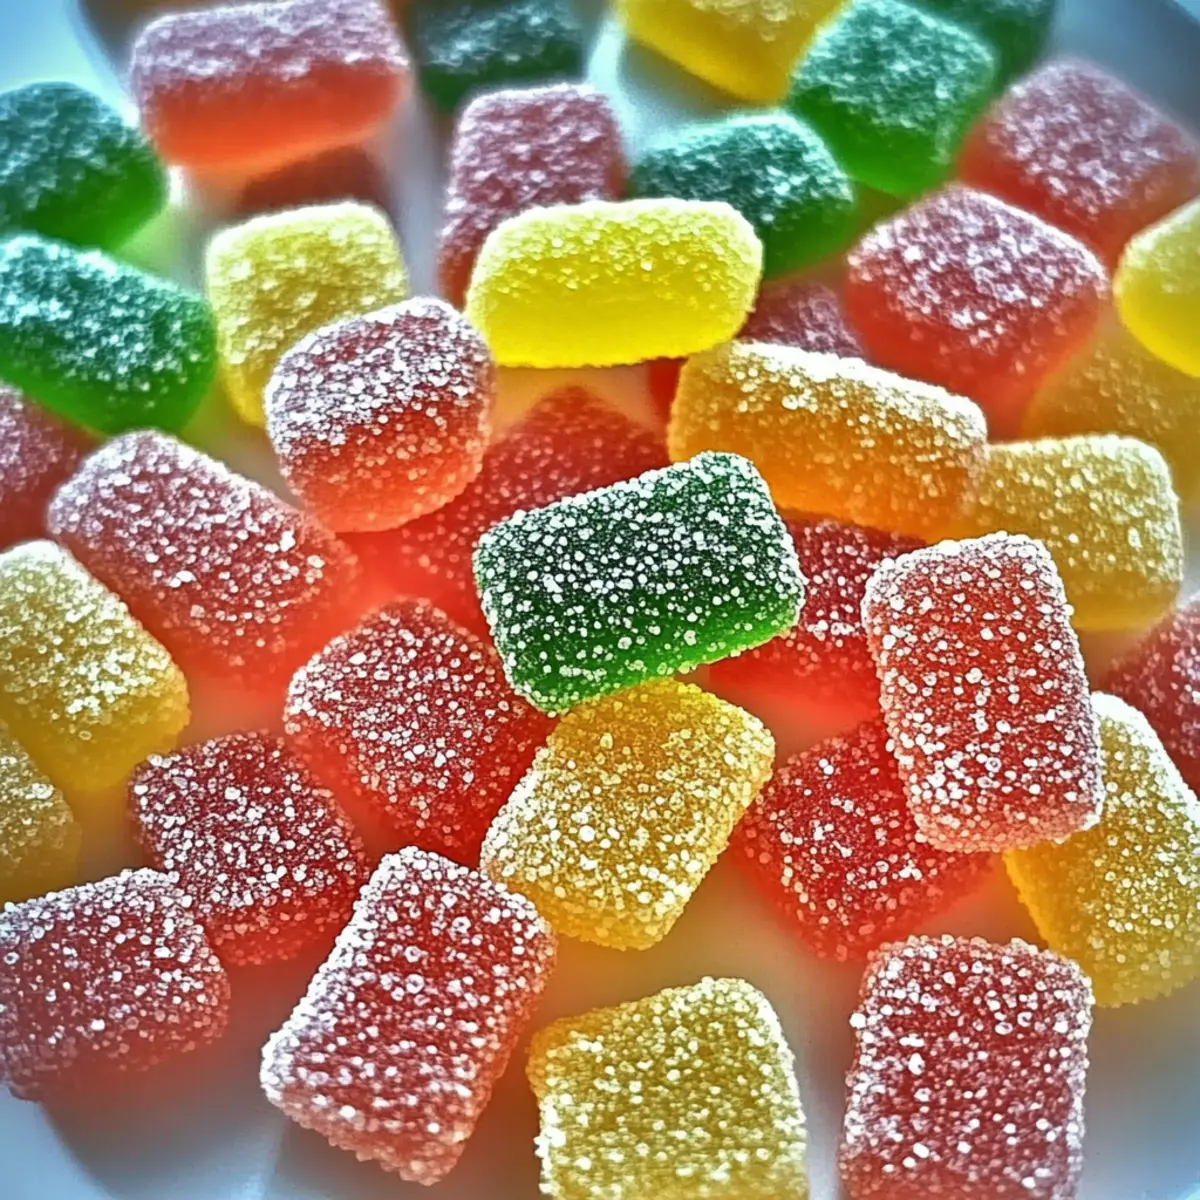
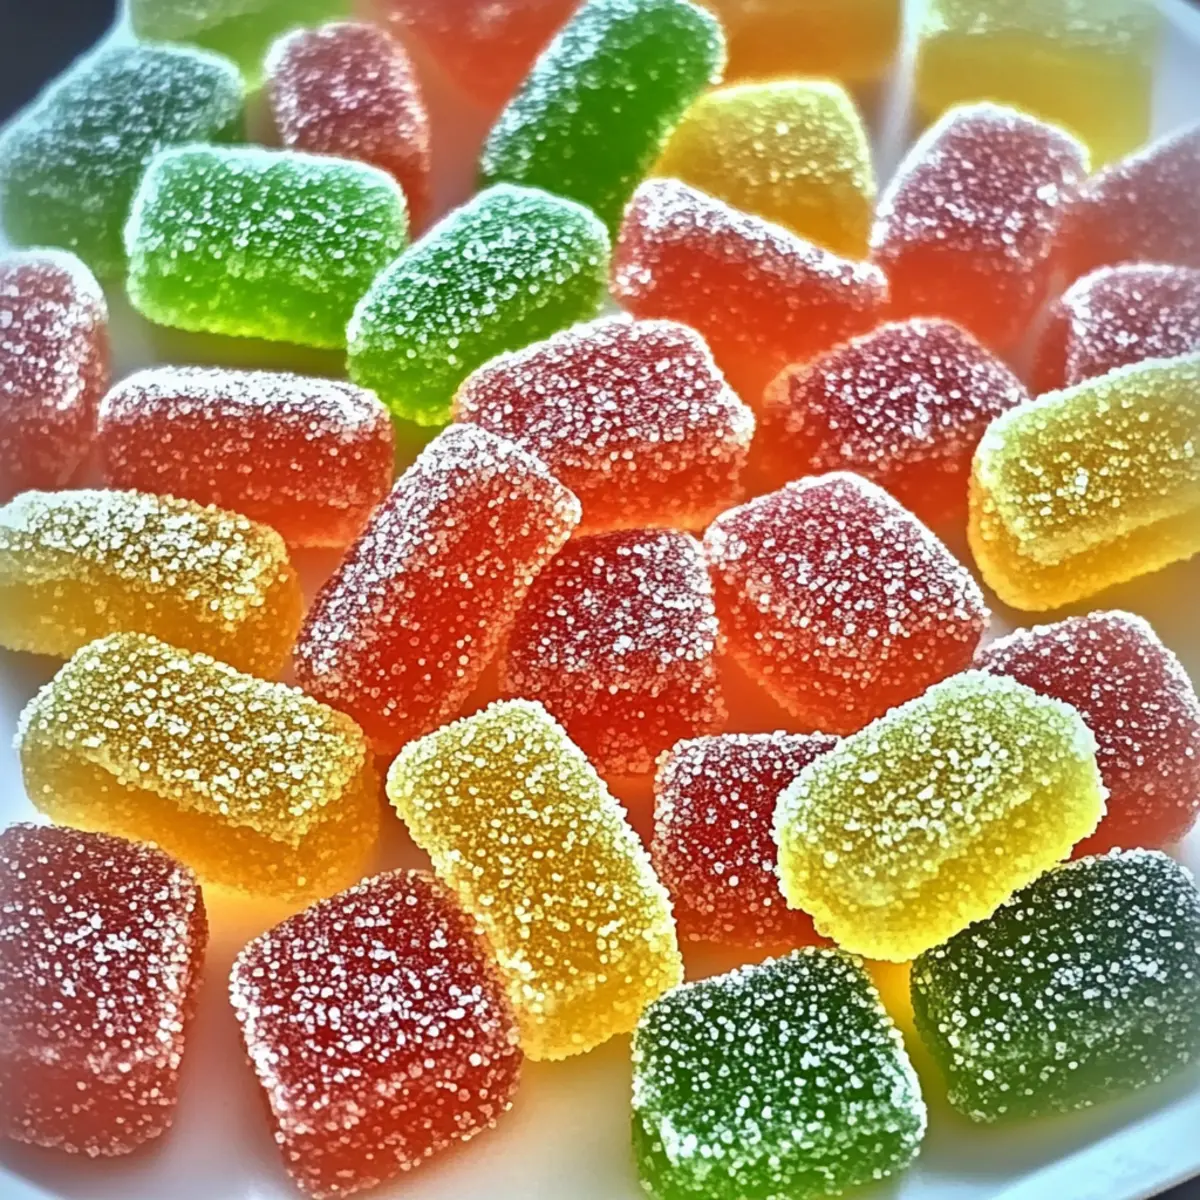
I recently stumbled upon a delightful surprise while experimenting in the kitchen: Homemade Sour Patch Kids! These fruity, chewy candies are a game-changer for anyone tired of artificial flavors and preservatives. With just a few simple ingredients, I transformed fresh fruit juice into vibrant treats that capture the joy of childhood without any guilt. This recipe is not only quick to whip up, but it also allows you to customize each batch with your favorite flavors—imagine a rainbow of tastes for parties or a cozy movie night! Plus, you'll love that they’re made with natural ingredients, making them a wholesome alternative to store-bought candy. Curious to find out how to make your own personalized Sour Patch Kids? Let’s dive in!
Why Make Homemade Sour Patch Kids?
Customization at Your Fingertips: Create these candies with your favorite fresh fruit juices, allowing everyone to enjoy their preferred flavors.
Natural Ingredients Only: Ditch artificial additives and indulge in treats made from wholesome ingredients—you’ll feel good about sharing them!
Quick to Prepare: With straightforward steps and minimal time needed, you’ll be enjoying your homemade delicacies in no time—perfect for movie nights!
Versatile Shapes: Use fun molds for different looks—great for parties or gifting. Pair them with a cheese platter or even a fruit salad for a balanced snack, just like with Homemade Hot Chocolate or Shakshuka Savor Bold.
Crowd Pleaser: These treats are sure to be a hit, whether for kids or adults, making them a sweet addition to any gathering!
Homemade Sour Patch Kids Ingredients
For the Candy Mixture
- Fresh Fruit Juice – Use ripe, freshly squeezed juice for the best flavor and vibrant color.
- Pectin – This gelling agent ensures that your homemade Sour Patch Kids have a delightful chewy texture; be precise while measuring.
- Sugar – Essential for sweetness that balances the sour; feel free to adjust the amount to suit your taste preferences.
- Citric Acid – Adds the signature tang that makes these candies irresistibly sour; adjust to your desired sourness.
For the Coating
- Cornstarch – Prevents candies from sticking together after they set; can be replaced with powdered sugar if you prefer.
- Additional Sugar – Used in the rolling process with citric acid for that perfect sweet-sour finish; essential for that signature crunch.
Step‑by‑Step Instructions for Homemade Sour Patch Kids
Step 1: Prepare Molds
Start by lightly greasing your candy molds with a small amount of vegetable oil or cooking spray. This will help ensure that your Homemade Sour Patch Kids easily release once they’ve set. Set the molds aside, and make sure your workspace is tidy and ready for the fun to begin!
Step 2: Mix Ingredients
In a medium saucepan, combine your freshly squeezed fruit juice, pectin, and sugar. Stir the mixture well over medium heat until the sugar and pectin fully dissolve, about 3-5 minutes. Look for a smooth consistency without any lumps, ensuring that your candy will have a delightful chewy texture.
Step 3: Cook Mixture
Continue heating the mixture until it reaches a gentle boil; keep an eye on it for about 5-7 minutes. Stir continuously during this process to prevent scorching, and watch for bubbling that indicates the pectin has activated. Your mixture should visibly thicken as it cooks.
Step 4: Pour into Molds
Once the mixture has thickened, carefully pour it into your prepared molds. Fill them evenly, making sure to leave room for any potential expansion. Allow the mixture to set at room temperature for about 1 hour, keeping an eye on it as it cools and begins to solidify.
Step 5: Coat with Citric Acid
After the candies have set in the molds, gently remove them and place them on a cooling rack. In a separate bowl, mix sugar with citric acid to create a sweet and sour coating. Roll each piece in this mixture to coat evenly, giving your Homemade Sour Patch Kids their signature flavor kick.
Step 6: Allow to Set
To achieve a firmer chew, place the coated candies uncovered in the refrigerator overnight. This will help them reach their optimal texture, allowing the flavors to intensify. Ensure there's enough space around them for air circulation, so they don’t become soggy.

Expert Tips for Homemade Sour Patch Kids
- Use Fresh Juice: Start with freshly squeezed fruit juice for the best flavor and color; avoid store-bought juices that may contain additives.
- Accurate Measurements: Make sure to measure pectin and sugar accurately; inconsistent amounts can lead to a gummy or overly soft texture.
- Watch the Heat: Keep the cooking temperature controlled to prevent scorching; stirring constantly helps maintain the perfect consistency for your Homemade Sour Patch Kids.
- Setting Time Matters: Allow candies to set uncovered overnight in the fridge for optimal firmness; this step is crucial for achieving that delightful chewy texture.
- Avoid Airtight Containers: Store candies uncovered until they are fully set. Keeping them loosely covered helps maintain their chewiness and prevents sogginess.
How to Store and Freeze Homemade Sour Patch Kids
Fridge: Store your Homemade Sour Patch Kids uncovered in the fridge for up to 5 days to maintain their chewy texture and prevent sogginess.
Freezer: For longer storage, freeze candies in a single layer on a baking sheet, then transfer to an airtight container after they're frozen. Enjoy them within 3 months.
Thawing: When ready to enjoy, simply let the candies thaw at room temperature for about 30 minutes before serving. This ensures they’ll be soft and delicious!
Coating Reminder: Make sure candies are fully coated in cornstarch or powdered sugar before freezing to prevent sticking.
Make Ahead Options
These Homemade Sour Patch Kids are a fantastic treat to prepare in advance, saving you time and hassle when you're ready to indulge! You can make the candy mixture and pour it into the molds up to 24 hours ahead of serving. Just let it set at room temperature for about an hour, and then refrigerate uncovered overnight to achieve that perfect chewy texture. To keep your candies fresh, store them uncovered in the fridge, allowing them to breathe and avoid sogginess. When you're ready to enjoy, simply coat them in the sugar and citric acid mixture, and you'll have delightful, homemade treats just waiting to amaze your friends and family!
Homemade Sour Patch Kids Variations
Get ready to explore delectable possibilities that allow your creativity to shine in every fruity bite!
-
Flavor Combinations: Switch up your fruit juices! Try mixing watermelon and lime for a refreshing summer treat.
-
Candy Shapes: Use fun cookie cutters to create unique shapes that can bring a smile to anyone's face and lift your snack game.
-
Adjust Sweetness: Feel free to reduce the sugar for a slightly tangy version, letting the fruit flavors shine through even more.
-
Spicy Twist: Add a pinch of cayenne pepper for a surprising kick! The heat complements the sweetness beautifully, making it a new favorite.
-
Dye-free Colors: Rely on colorful fruit juices like beet or carrot juice to naturally color your candies, making them vibrant without any additives!
-
Coat Variations: Instead of traditional sugar, use coconut sugar or even sprinkles for a fun, textured finish that adds a delightful crunch.
-
Using Alternative Sweeteners: Try honey, agave, or maple syrup instead of sugar for a unique twist. Each option brings its own flavor profile to the candies.
For those cozy nights, pair your Homemade Sour Patch Kids with a warm mug of Homemade Hot Chocolate or share them alongside a savory dish like Spatchcock Chicken Flavor to balance out your taste experience. The world of homemade candy is truly endless!
What to Serve with Homemade Sour Patch Kids?
Creating a fun and memorable tasting experience is easy with the perfect accompaniment to your fruity, chewy treats!
-
Fresh Fruit Salad:
A vibrant medley of seasonal fruits brings a refreshing balance to the tangy sweetness of your candies. This colorful combination is not only healthy but also visually appealing—perfect for sharing at parties! -
Cheese Platter:
Pairing your Homemade Sour Patch Kids with a selection of mild cheeses creates a delightful contrast. The creaminess of the cheese beautifully offsets the sourness of the candies, offering a unique flavor journey. -
Air-Popped Popcorn:
Light, airy popcorn serves as a delightful contrast to the chewy texture of the candies. Drizzle with a little melted chocolate for added sweetness, turning your snack into a sweet-and-salty adventure! -
Veggie Sticks with Dip:
Crisp veggie sticks dipped in hummus or ranch provide a fresh crunch that complements the chewy sour candies. This pairing balances health and indulgence, creating a guilt-free feast for any gathering. -
Chocolate-Covered Pretzels:
Sweet and salty chocolate-covered pretzels amplify your candy experience, creating a harmonious blend of flavors. Their satisfying crunch contrasts perfectly with the gummy texture of your Sour Patch Kids! -
Mini Cupcakes:
Fluffy mini cupcakes can bring a dose of sweetness to your candy experience. These easily customizable treats can match the fruit flavors of your candies for a cohesive dessert spread. -
Sparkling Water or Lemonade:
Refreshing drinks like sparkling water or tart lemonade enhance the sweet-and-sour flavors of your candies. Serve them in fun glasses for a festive touch during birthdays or movie nights! -
Fruit Smoothies:
Whip up a fruity smoothie to pair with the Sour Patch Kids for a fun, indulgent treat. The creamy texture balances the candy's chewiness and adds another layer of flavor to your snack table!
Homemade Sour Patch Kids Recipe FAQs
How do I choose the best fruit juice for my Homemade Sour Patch Kids?
Absolutely! For the best flavor, always opt for ripe, freshly squeezed juices. Look for juices from fruits that are in-season, as they will provide the richest taste. Avoid bottled juices that may contain added sugars or preservatives, which can dilute the freshness of your candies.
What is the best way to store Homemade Sour Patch Kids?
Store your Homemade Sour Patch Kids uncovered in the fridge for up to 5 days. This prevents them from becoming soggy and maintains their delightful chewiness. Placing them in an airtight container too soon can trap moisture, so be patient and let them cool completely before storage!
Can I freeze my Homemade Sour Patch Kids?
Certainly! For long-term storage, freeze the candies in a single layer on a baking sheet for 1-2 hours until firm. Afterward, transfer them to an airtight container or freezer-safe bag. They can be enjoyed within 3 months. Just remember to coat them in cornstarch or powdered sugar before freezing to avoid sticking.
What should I do if my candy mixture is too watery?
If you find that the mixture is thinner than expected, it may be due to inaccurate measurements or not enough cooking time. You can fix this by simmering it on low heat for a few extra minutes while stirring continuously. Keep an eye on it, and it should start to thicken. If it remains too thin, consider adding a bit more pectin, following the manufacturer’s instructions.
Are Homemade Sour Patch Kids safe for my pets?
Definitely not! These candies should not be shared with pets, especially because of the sugar and citric acid content, which can upset their stomachs. Always keep your candy creations out of reach, and enjoy them as a fun treat for humans only.
Can I substitute any ingredients for allergies?
Yes! If you have dietary restrictions or allergies, you can modify the recipe. Consider using alternative sweeteners with a similar texture to sugar, or look for pectin derived from different sources if you’re watching for food sensitivities. Just remember, some substitutions might alter the final texture or taste, so it may require some experimentation.
Delicious Homemade Sour Patch Kids with Fresh Fruit Flavors
Ingredients
Equipment
Method
- Lightly grease your candy molds with vegetable oil or cooking spray.
- In a medium saucepan, combine fruit juice, pectin, and sugar. Stir over medium heat until dissolved, about 3-5 minutes.
- Heat the mixture until it boils gently, stirring continuously for 5-7 minutes until it thickens.
- Pour the thickened mixture into prepared molds, leaving room for expansion. Let it set for 1 hour.
- Remove candies from molds and roll in a mixture of sugar and citric acid for coating.
- Place coated candies uncovered in the refrigerator overnight for optimal firmness.


Leave a Reply