
The warm aroma of freshly baked cookies can turn any day around. When I’m looking for a snack that gives me that cozy feeling without an elaborate fuss, I turn to these 4-Ingredient Crispy Chocolate Oat Cookies. The balance of crunchy oats and rich cocoa makes them a delightful treat that reaches beyond just flavor. With a preparation time of less than 30 minutes, they’re perfect for busy days or spontaneous cravings, all while being gluten-free. Imagine bringing a batch to a gathering, and watching everyone devour them in delight! Are you ready to satisfy your sweet tooth and elevate your snacking game? Let’s get baking!
Why are these cookies a must-try?
Simplicity at its finest: With just four ingredients, you’ll whip these cookies up in no time! Perfect for busy evenings or those moments when the sweet tooth strikes.
Irresistible crunch: Each bite delivers a delightful crunch that contrasts beautifully with the smoothness of nut butter.
Gluten-free option: Tailor this recipe to suit any dietary need by easily substituting with gluten-free oats.
Versatile variations: Customize your cookies by adding dried fruits or nuts, turning each batch into a unique flavor experience!
Crowd-pleaser delight: Share these with friends at gatherings or enjoy them solo – they’re bound to impress! So, for an easy treat, explore other delicious recipes like No-Bake Strawberry Cheesecake Bars.
4-Ingredient Crispy Chocolate Oat Cookies
Ingredients:
For the Cookies
- Oats – Provides structure and chewiness; gluten-free oats can be used for a gluten-free version.
- Cocoa Powder – Adds rich chocolate flavor and color; Dutch-process cocoa can substitute for a milder taste.
- Nut Butter (e.g., almond or peanut) – Acts as a binding agent and provides creaminess; any nut or seed butter can work as a substitute.
- Sweetener (e.g., honey, maple syrup) – Adds sweetness and moisture; adjust quantity based on desired sweetness.
Optional Add-ins
- Chocolate Chips – Boosts indulgence with more chocolate flavor; for a heartier texture, consider using dark chocolate chips.
- Dried Fruits (e.g., raisins or cranberries) – Adds sweetness and chewy texture; great for a fruity twist and extra nutrients.
Topping Suggestions
- Melted Chocolate Drizzle – For an extra chocolatey finish; melted dark or white chocolate pairs perfectly.
- Chopped Nuts – Increases crunchiness and adds healthy fats; consider walnuts or pecans for richer flavor.
Ready to enjoy these crispy chocolate oat cookies, perfect for satisfying sweet cravings? Don't forget to explore your options!
Step‑by‑Step Instructions for 4-Ingredient Crispy Chocolate Oat Cookies
Step 1: Preheat and Prepare
Begin by preheating your oven to 350°F (175°C). While it’s heating, line a baking sheet with parchment paper for easy cookie removal later. This step ensures that your cookies don't stick and helps them bake evenly for that perfect crispy texture.
Step 2: Mix Dry Ingredients
In a medium mixing bowl, combine your oats and cocoa powder. Stir them together until well blended, creating a rich, chocolatey base. This is crucial for ensuring the flavor will be evenly distributed throughout each cookie, making your 4-Ingredient Crispy Chocolate Oat Cookies absolutely delicious!
Step 3: Add Nut Butter
Next, add your choice of nut butter to the dry mixture. Using a spatula or wooden spoon, mix until the ingredients come together into a thick, cohesive dough. This step is important as the nut butter acts as a binding agent, giving structure to your cookies while enhancing their creamy, rich flavor.
Step 4: Incorporate Sweetener
Now, stir in your selected sweetener, whether it's honey or maple syrup. Mix until fully integrated and the dough is moist yet manageable. This will help balance the richness of the cocoa and nut butter, creating a harmonious sweetness in your cookies.
Step 5: Shape the Cookies
Scoop tablespoon-sized dollops of dough onto the prepared baking sheet, spaced evenly apart. Use your hands to gently flatten each dollop into a round shape. This formation will ensure even cooking and promote that desired crispness as they bake in the oven.
Step 6: Bake to Perfection
Place the baking sheet in your preheated oven and bake for 10-12 minutes. Keep an eye on them; the edges should turn golden-brown while the centers remain slightly soft. This contrast between crunch and chewiness is what makes these 4-Ingredient Crispy Chocolate Oat Cookies so delightful!
Step 7: Cool and Enjoy
Once baked, remove the cookies from the oven and allow them to cool for a few minutes on the baking sheet. Transfer them to a wire rack to cool completely. This cooling step is key for achieving the perfect texture, ready for you to savor with your favorite drink!
Expert Tips for 4-Ingredient Crispy Chocolate Oat Cookies
-
Choose Your Oats: Using old-fashioned rolled oats provides the best texture. Instant oats might turn mushy, affecting your cookie's crunch.
-
Perfect Baking Time: Keep a close watch while baking; it's better to underbake slightly than overbake. Cookies should feel soft in the center but crispy on the edges.
-
Measure Carefully: Precision in measuring ingredients is key. Slight deviations can lead to unexpected cookie texture; avoid eyeballing ingredients for the best outcome.
-
Nut Butter Options: Experiment with different nut butters like cashew or sunflower seed butter, which can affect flavor and creaminess in your crispy chocolate oat cookies.
-
Storing Tips: For best results, store your cookies in an airtight container at room temperature for up to a week. Refrigeration can change the texture, so avoid it unless necessary.
Make Ahead Options
These 4-Ingredient Crispy Chocolate Oat Cookies are perfect for meal prep, allowing you to savor delightful snacks throughout the week! You can prepare the dough up to 24 hours in advance; simply mix all the ingredients and refrigerate the uncooked dough in an airtight container to maintain freshness. This not only saves you time on busy days but also ensures the cookies stay just as delicious when you bake them. When you're ready to indulge, scoop and shape the dough onto your baking sheet and bake directly from the fridge or let it sit at room temperature for a few minutes before baking. You'll have warm, crispy cookies in no time!
No-Bake Strawberry Cheesecake Bars Variations
Feel free to tailor these cookies to your liking and create your ideal treat with just a few simple swaps!
-
Crispy Texture: Add crushed rice cereal for an extra crunch that elevates the cookie experience. It introduces a light, airy texture, making each bite delightful and surprising!
-
Chewy Delight: Use quick oats instead of rolled oats for a chewier texture, perfect for those who prefer a softer cookie. These cookies will offer a wonderful contrast with that rich nut butter.
-
Healthy Twist: Replace sweetener with mashed bananas or applesauce for a healthier cookie option. This swap infuses natural sweetness, adding moisture while lowering calories.
-
Chocolate Lovers: Add chocolate chips or chunks to the dough for an indulgent bite bursting with extra chocolate flavor. Each cookie will become a little morsel of bliss!
-
Nut-Free: Swap nut butter for sunflower seed butter or a blend of coconut oil and almond flour, ensuring a safe and delicious nut-free option without losing creaminess.
-
Add Spice: Mix in a pinch of cinnamon or a dash of vanilla extract for a warm flavor boost that complements the chocolate beautifully. This little touch invites a cozy aroma while baking and adds depth to the flavor!
-
Extreme Chocolate: For the ultimate chocolate fan, consider using dark cocoa powder or even chocolate protein powder for richer chocolate cookies. The intense flavor will elevate your experience!
For more delightful recipe ideas, make sure to check out No-Bake Strawberry Cheesecake Bars for a scrumptious dessert option that pairs perfectly with your cookie treats!
What to Serve with 4-Ingredient Crispy Chocolate Oat Cookies
Imagine the cozy feeling of warmth and comfort that these delectable treats bring, perfectly paired with delightful accompaniments.
-
Fruity Yogurt Parfait: Layer creamy yogurt with fresh berries to add a refreshing tang that beautifully balances the rich cookies. The contrast in textures will surprise and please your palate!
-
Glass of Cold Milk: A classic pairing that never fails—cold milk enhances the chocolate flavor, inviting a delightful dunking experience for your crispy cookies.
-
Nutty Granola: Sprinkle some homemade granola alongside for an added crunch. The combination of oats and nuts complements the cookies while providing a wholesome boost.
-
Dark Chocolate Drizzle: Elevate your cookies by drizzling them with melted dark chocolate. It creates an indulgent layer of flavor that chocolate lovers will surely appreciate.
-
Iced Coffee: Sipping on a refreshing iced coffee while enjoying your cookies can provide an energizing complement and balance the sweetness.
-
Coconut Whipped Cream: A dollop of light and airy coconut whipped cream adds a tropical touch, enhancing the cookies' chocolate notes with a joyful hint of sweetness.
Remember, these cookies are versatile—feel free to mix and match these suggestions to create your own delicious snacking experience!
How to Store and Freeze 4-Ingredient Crispy Chocolate Oat Cookies
Room Temperature: Store cookies in an airtight container for up to 1 week to maintain their delightful crunch and freshness.
Fridge: If you'd like to extend freshness, you can keep them in the refrigerator, but be aware that the texture may become slightly chewy.
Freezer: For longer storage, freeze cookies in a single layer between sheets of parchment paper in an airtight container for up to 3 months. Thaw at room temperature before serving.
Reheating: If you prefer your cookies warm, reheat them in the oven at 300°F (150°C) for about 5 minutes until just warmed through, enhancing that irresistible texture!
4-Ingredient Crispy Chocolate Oat Cookies Recipe FAQs
Are gluten-free oats necessary for this recipe?
Absolutely! If you need a gluten-free version, make sure to choose certified gluten-free oats. They’ll ensure a safe and delicious treat for everyone, without compromising on that chewy texture!
How should I store these cookies for maximum freshness?
The best way to keep your cookies fresh is by storing them in an airtight container at room temperature for up to 1 week. If you find your cookies getting a bit soft, popping them in the refrigerator can help, but they might lose their signature crunch!
Can I freeze these cookies, and how?
Yes, you can! For freezing, place the cookies in a single layer between sheets of parchment paper in an airtight container. This prevents them from sticking together. They’ll stay fresh for up to 3 months. When you’re ready to enjoy them, just thaw them at room temperature for a delightful snack!
What if my cookies turn out too chewy?
If your cookies end up chewier than expected, it might be due to either using quick oats instead of old-fashioned rolled oats or overmixing the dough. For a firmer texture, ensure to use rolled oats and mix just until combined. Also, keep an eye on the baking time; slightly underbaking is better for crunch.
Are there any allergies I should consider with this recipe?
Definitely! This recipe includes nut butter, which can trigger nut allergies. You might substitute it with sunbutter or another seed butter for a nut-free option. Always double-check with friends and family about ingredient sensitivities!
What sweeteners can I use besides honey or maple syrup?
You can use agave syrup or coconut sugar for a different flavor profile. If you're feeling adventurous, even stevia or monk fruit can be suitable, just adjust the amount to taste since they can be sweeter than traditional sweeteners. Enjoy experimenting!
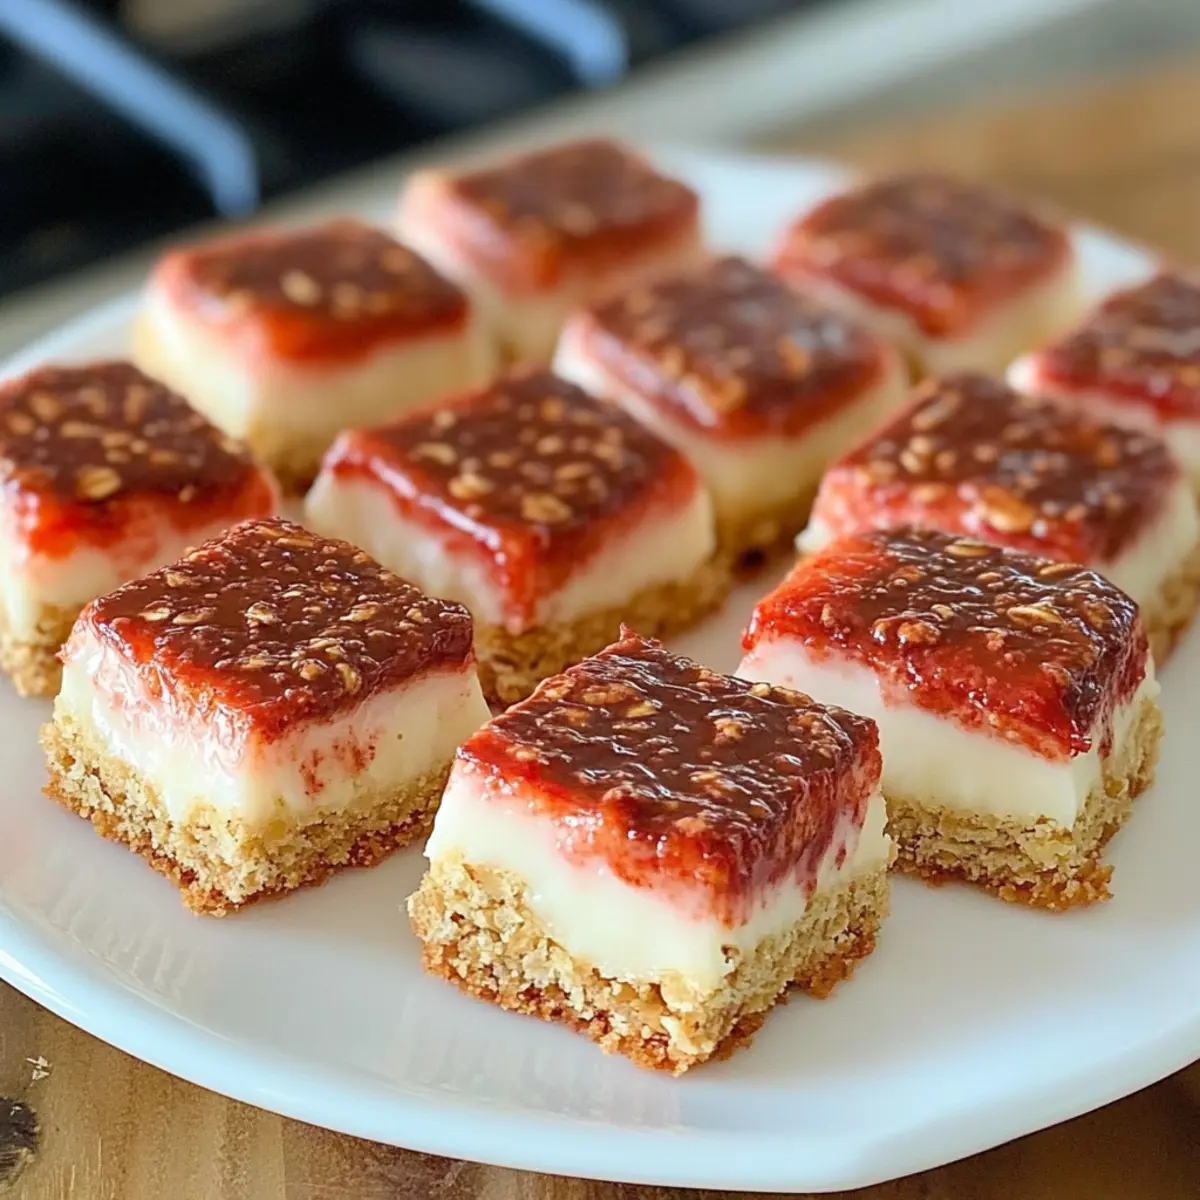
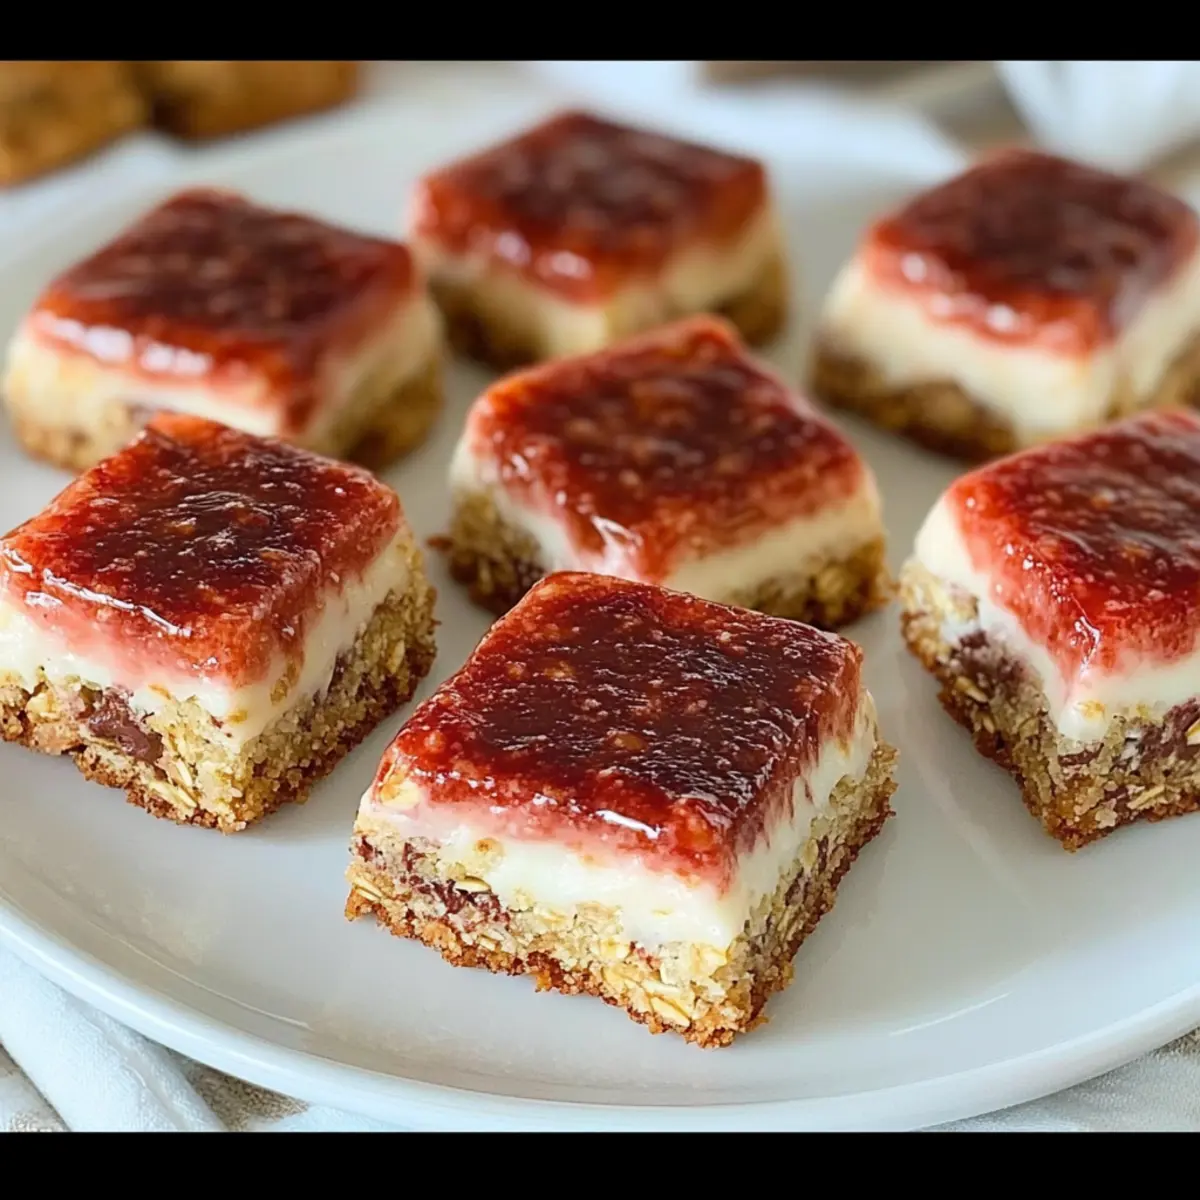
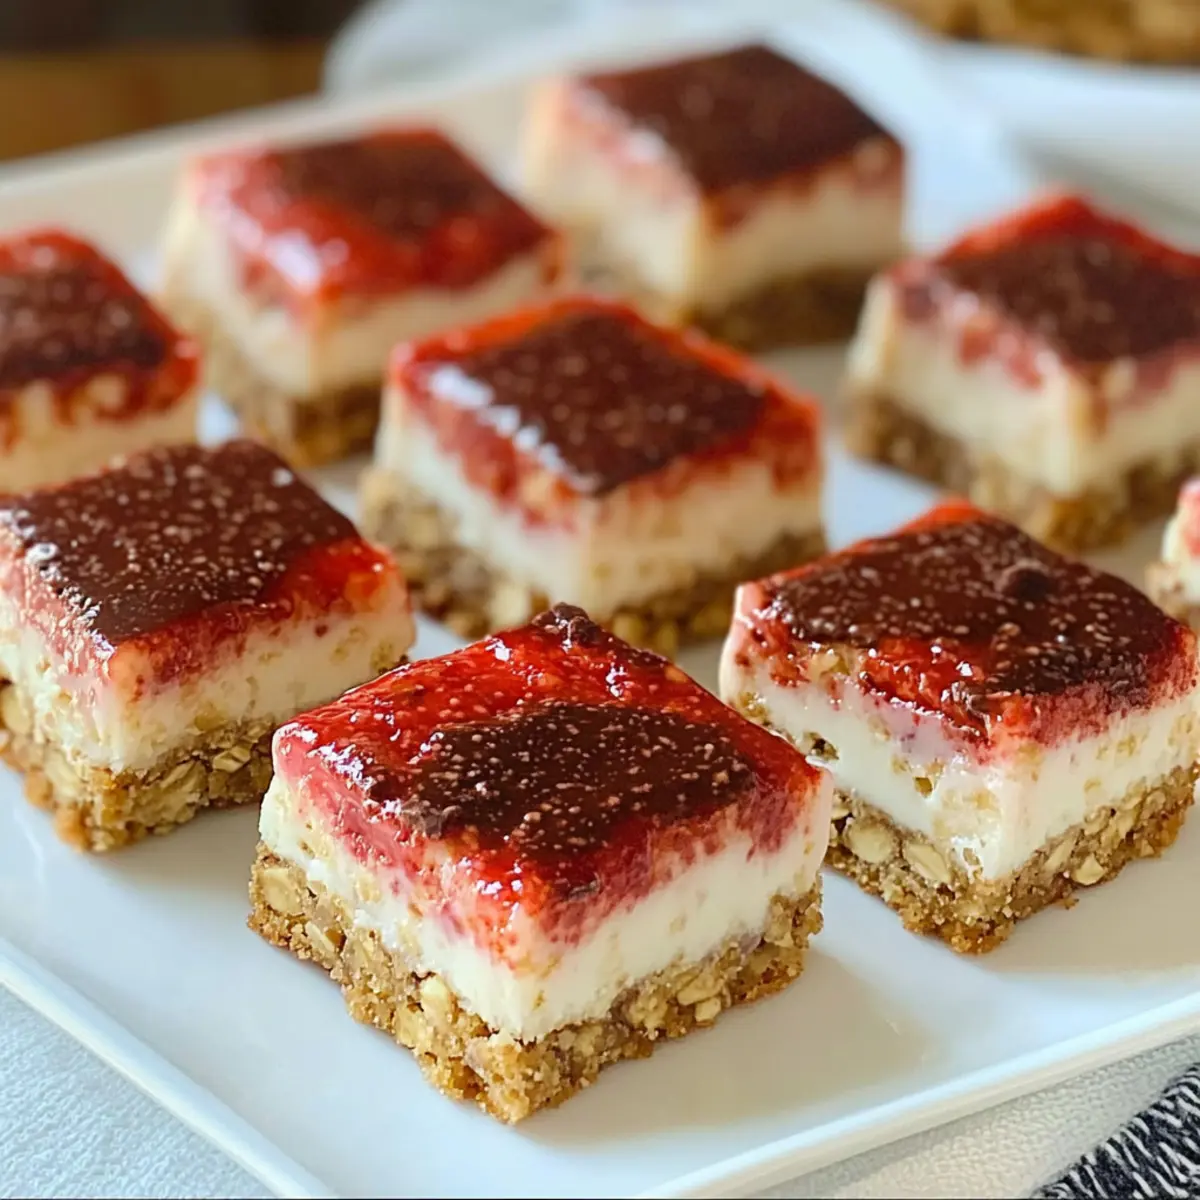
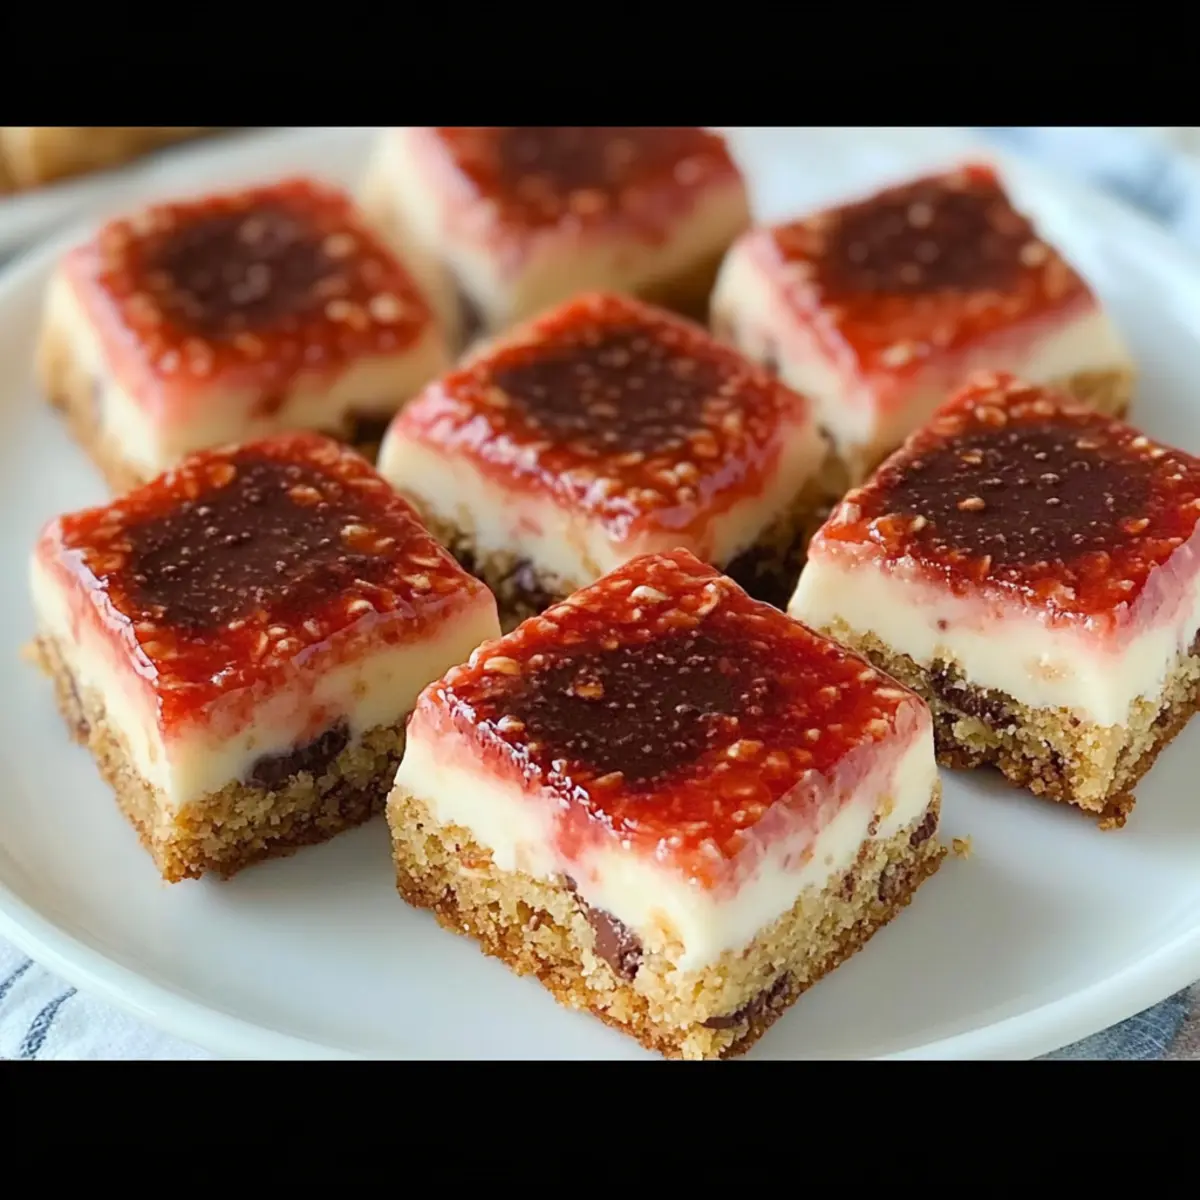
No-Bake Strawberry Cheesecake Bars You'll Crave Year-Round
Ingredients
Equipment
Method
- In a mixing bowl, combine the graham cracker crumbs, sugar, and melted butter. Mix until well combined.
- Press the crust mixture into the bottom of a baking dish to form an even layer.
- In another bowl, beat the cream cheese and sugar until smooth and creamy.
- Fold in the whipped cream and pureed strawberries until well combined.
- Pour the filling over the crust and spread evenly.
- Refrigerate for at least 2 hours until set.
- Once set, cut into bars, and top with sliced strawberries and mint leaves before serving.


Leave a Reply