
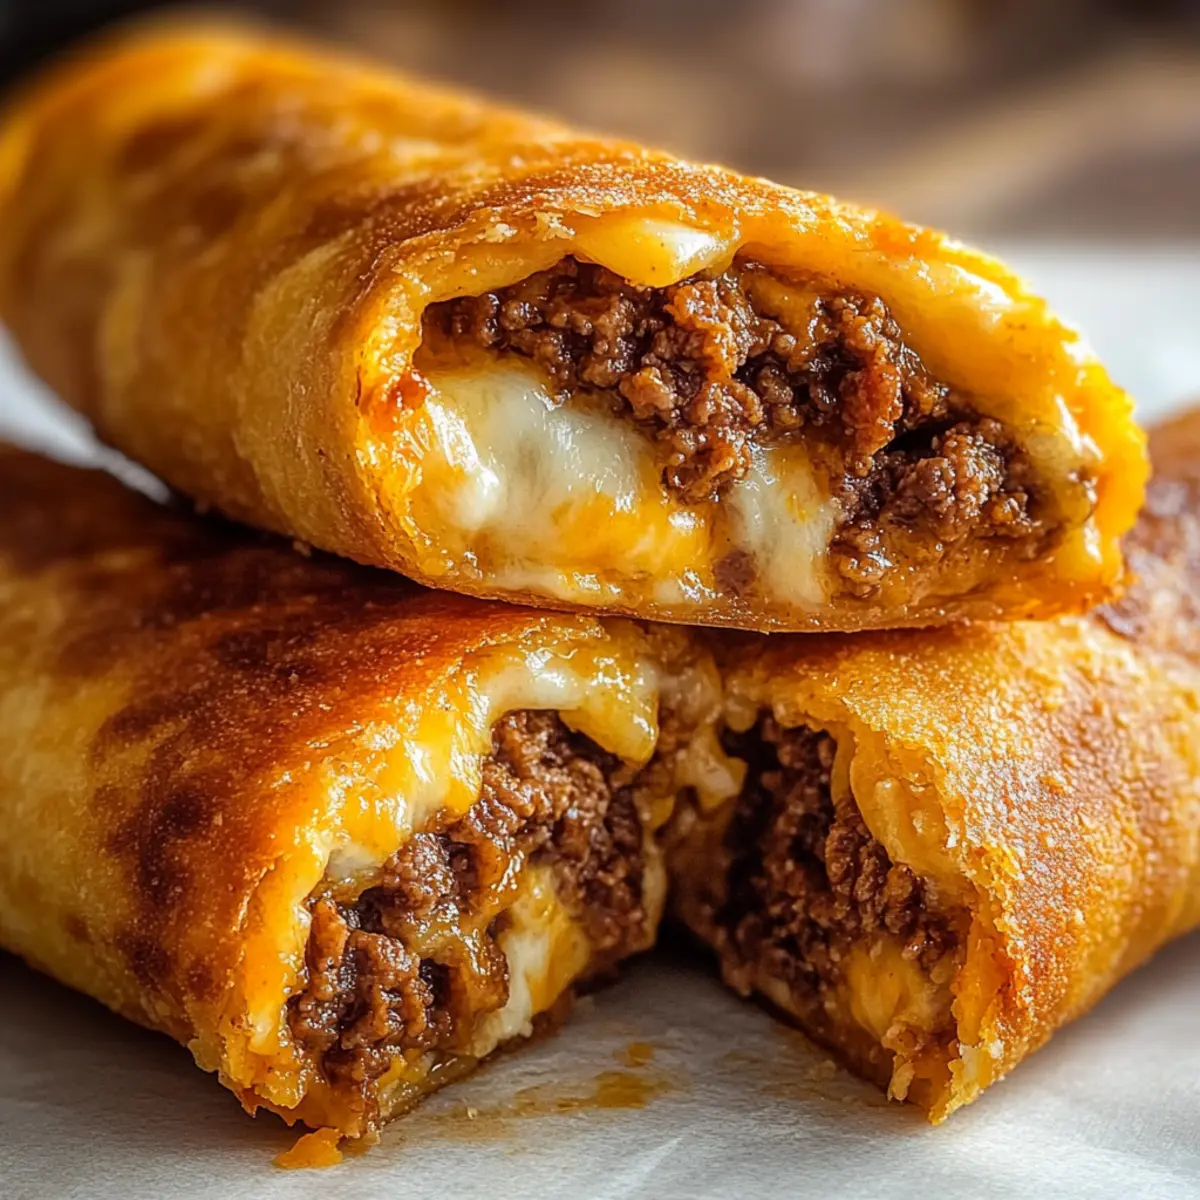
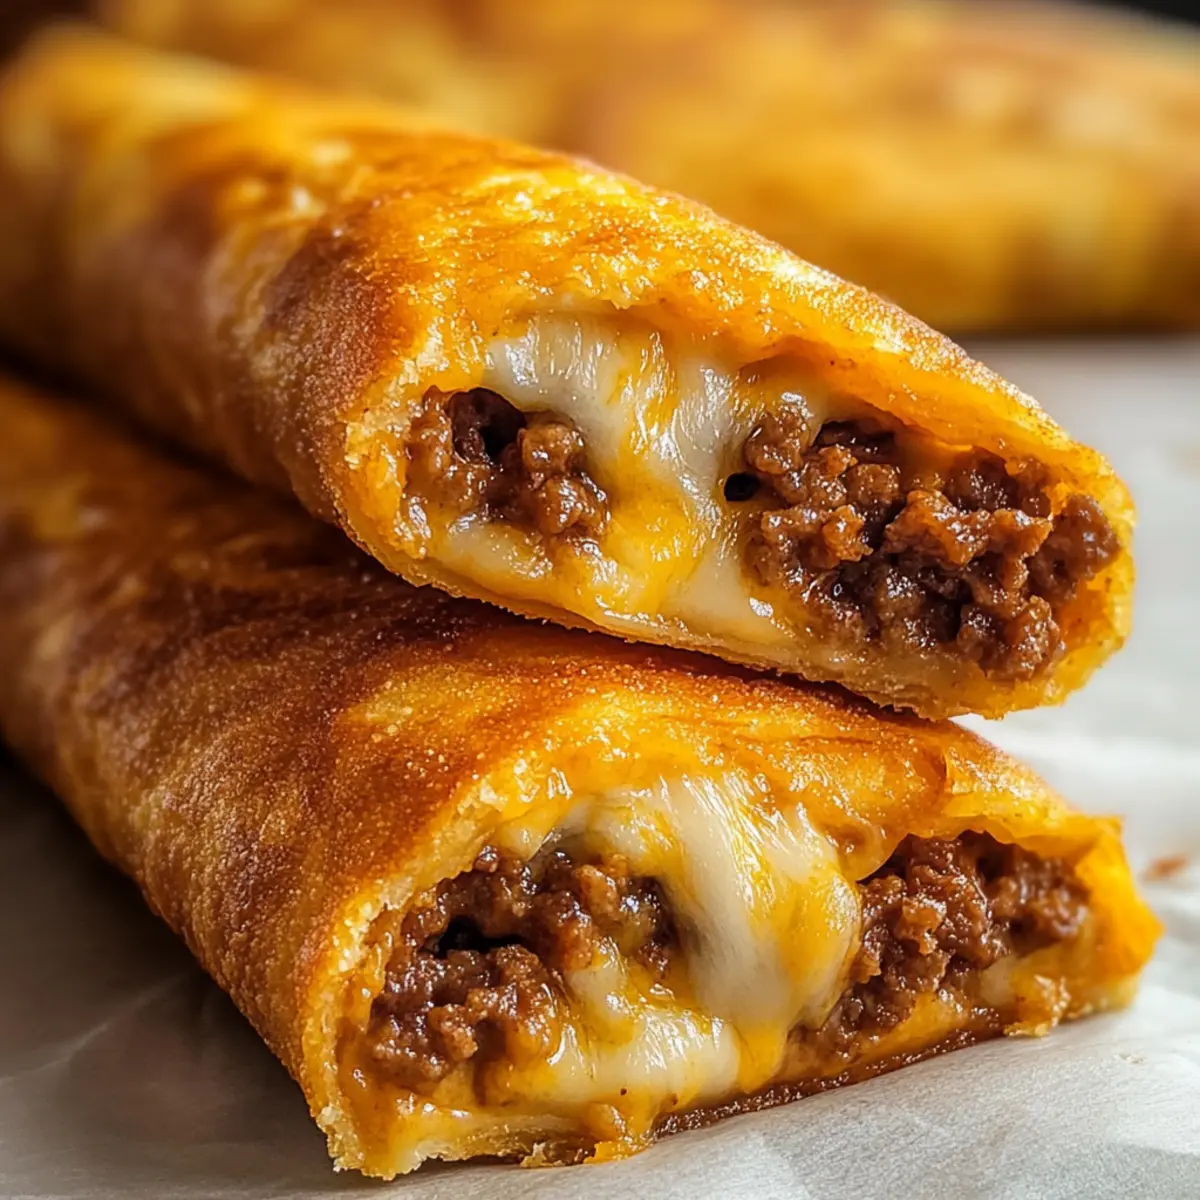
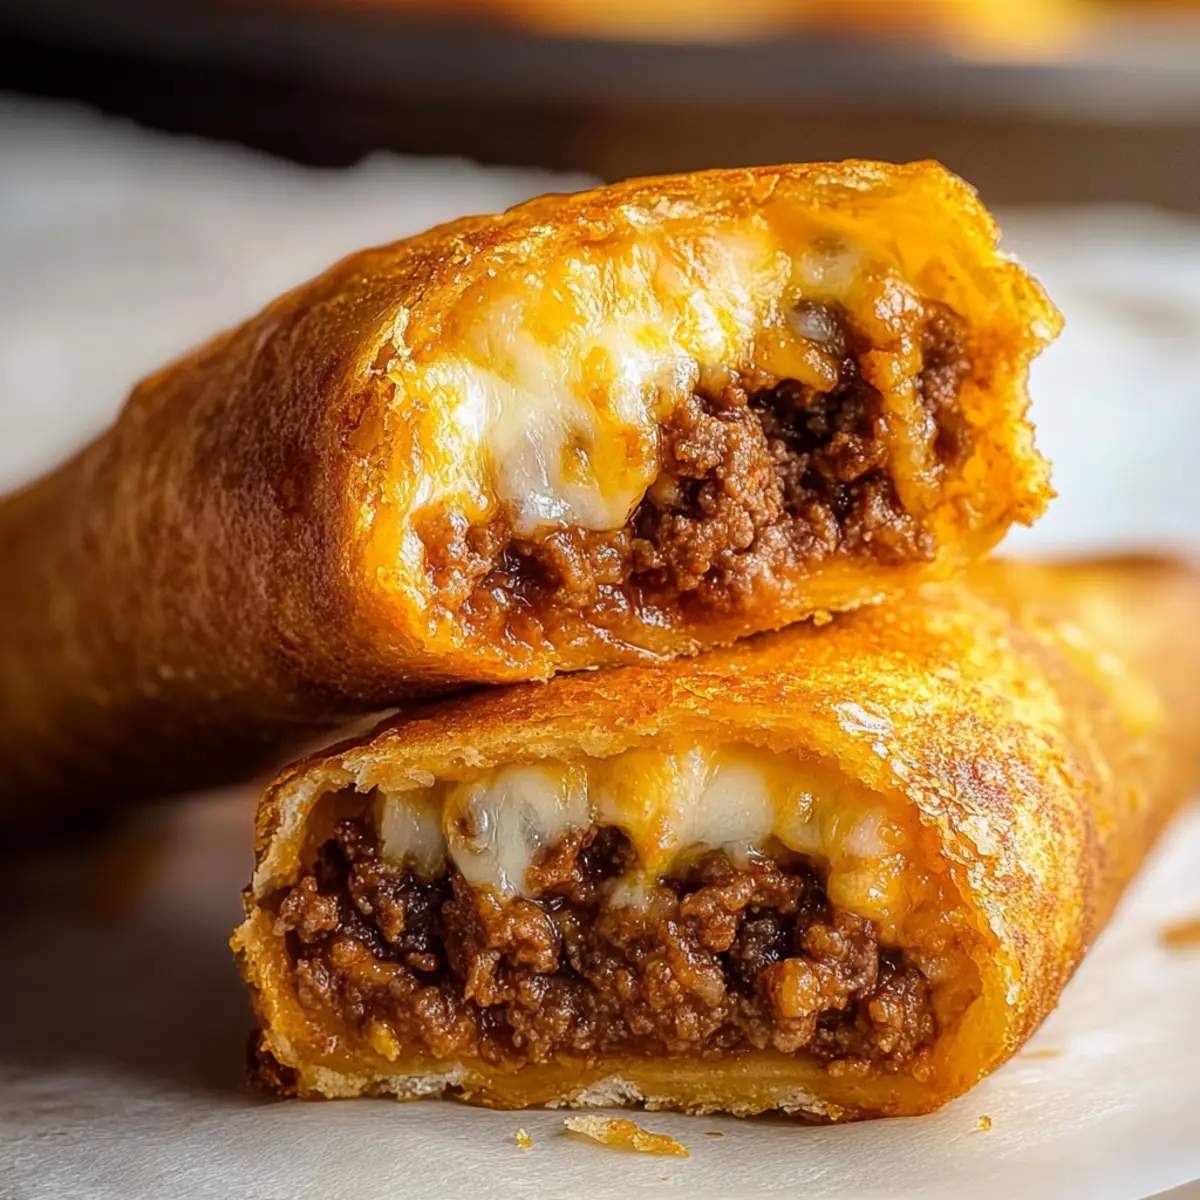
Transforming an ordinary taco night into something extraordinary is easier than you might think! With Baked Cheesy Taco Sticks, you can create a fun and family-friendly dish that’s ready in a snap. These cheesy delights combine seasoned beef and gooey mozzarella wrapped in warm, baked dough, allowing you to indulge without the hassle of frying. Perfect for busy weeknights or game-day gatherings, this recipe is not just quick to prepare but also totally customizable. Swap in your favorite fillings—like spicy jalapeños for a kick, or keep it lighter with a vegetarian option. Don't you just love meals that marry comfort with creativity? Let’s dive into the simple yet satisfying world of Cheesy Taco Sticks!
Why Are Cheesy Taco Sticks a Must-Try?
Simplicity: This recipe is incredibly easy to make, requiring minimal ingredients and basic cooking skills.
Customizable Delight: Whether you prefer spicy, vegetarian, or mini versions, you can tailor these Cheesy Taco Sticks to your family’s tastes, making them a versatile option for any occasion.
Family Appeal: Quick to prepare and packed with cheesy goodness, they make an ideal choice for a cozy family dinner or a fun snack during game day.
Golden Crispiness: Baked to perfection, these sticks offer a satisfying crunch while keeping the filling warm and gooey, creating that perfect contrast of textures.
Time-Saving: With a total prep and cook time of about 30 minutes, these taco sticks fit seamlessly into your busy schedule, ensuring you never have to resort to fast food again.
Elevate your next taco night or surprise your guests with these delightful Cheesy Corn Fritters as a side!
Cheesy Taco Sticks Ingredients
Explore the simple yet flavorful ingredients that make these Cheesy Taco Sticks a family favorite!
For the Filling
• Ground Beef – This main protein adds rich flavor; substitute with ground turkey or chicken for a lighter option.
• Onion – Adds sweetness and texture; must be finely diced for even cooking.
• Garlic – Freshly minced enhances depth; don’t skip this essential flavor booster!
• Olive Oil – Used for sautéing onion and garlic; can substitute with any cooking oil you have handy.
• Chili Powder – Provides spice and warmth; adjust quantity based on your heat preference.
• Ground Cumin – Delivers an earthy flavor essential for that classic taco taste.
• Smoked Paprika – Introduces a smoky note; feel free to omit if you're out.
• Salt & Black Pepper – Essential seasonings; don't forget to adjust to your taste.
• Water – Helps moisten the filling; beef broth can be a richer alternative.
For the Dough
• Refrigerated Pizza Dough – The main wrapper; choose crescent dough for a flakier variant.
For the Cheese
• Shredded Mozzarella Cheese – Melts beautifully for a gooey filling; mix with other cheeses if desired.
• Shredded Cheddar Cheese – Adds classic taco flavor; substitute with Monterey Jack for a twist.
For the Finish
• Melted Butter – Brushed on top for added richness; mixing it with garlic powder elevates the flavor.
• Optional Toppings – Sesame seeds, everything bagel seasoning, or taco seasoning can add extra texture and flavor!
Get ready to whip up a batch of Cheesy Taco Sticks that not only satisfy but also offer a delicious twist to your usual meal routine!
Step‑by‑Step Instructions for Cheesy Taco Sticks
Step 1: Prepare the Filling
In a large skillet, heat 1 tablespoon of olive oil over medium heat. Add 1 finely diced onion and sauté for about 3–4 minutes until softened and translucent. Stir in 2 cloves of freshly minced garlic, cooking for another 30 seconds until fragrant. This aromatic base sets the stage for delicious Cheesy Taco Sticks.
Step 2: Brown the Beef
Next, add 1 pound of ground beef to the skillet, breaking it apart with a spatula. Cook for approximately 5–7 minutes until the beef is browned and no longer pink. Drain any excess fat from the skillet to keep the filling lean and flavorful, ensuring your Cheesy Taco Sticks are scrumptious without being greasy.
Step 3: Season the Mixture
Sprinkle in 1 tablespoon of chili powder, 1 teaspoon of ground cumin, and 1 teaspoon of smoked paprika, along with salt and black pepper to taste. Pour in ¼ cup of water, stirring well to combine. Let the filling simmer for around 3–5 minutes until thickened, allowing the flavors to meld together beautifully for your Cheesy Taco Sticks.
Step 4: Prepare the Dough
While the filling simmers, preheat your oven to 400°F (200°C) and lightly grease a baking sheet or line it with parchment paper. Roll out a tube of refrigerated pizza dough on a floured surface into a rectangle, about ¼ inch thick. Cut the dough into strips approximately 2 inches wide, which will wrap around your flavorful filling to create the Cheesy Taco Sticks.
Step 5: Assemble the Sticks
Spoon a generous amount of the beef filling onto one end of each dough strip, adding a mix of shredded mozzarella and cheddar cheese on top. Fold the dough over the filling and pinch the edges firmly to seal, ensuring the delicious contents stay inside. This careful assembly will ensure your Cheesy Taco Sticks hold together during baking.
Step 6: Brush & Bake
Arrange the stuffed dough sticks on the prepared baking sheet, ensuring they have some space in between. Brush the tops lightly with melted butter, and if desired, sprinkle with sesame seeds or everything bagel seasoning for added flavor. Bake in the preheated oven for 12–15 minutes until golden brown and puffy, creating a delightful crust for your Cheesy Taco Sticks.
Step 7: Cool & Serve
Once baked, remove the Cheesy Taco Sticks from the oven and let them cool for a few minutes on the baking sheet. This cooling time allows the cheese to set slightly, making them easier to handle. Serve warm with your favorite dipping sauces like salsa or guacamole for a delightful snack or dinner option!

Expert Tips for Cheesy Taco Sticks
Lean Protein Choice: Use lean ground beef to prevent greasiness in your filling, ensuring a lighter and flavorful Cheesy Taco Sticks experience.
Don’t Overstuff: Avoid the temptation to fill the dough too generously; overstuffing can lead to leaks during baking, making a mess.
Cheese Thickness: Ensure your cheese mixture isn't too runny. A thick filling helps keep everything inside when baking and enhances flavor.
Perfectly Sealed: Pinch the edges of the dough securely to seal, preventing any delicious filling from escaping as it bakes to golden perfection.
Cool Slightly: Allow the Cheesy Taco Sticks to cool for a few minutes post-baking. This setting time ensures that the gooey cheese holds together better and is easier to eat.
Cheesy Taco Sticks Variations & Substitutions
Feel free to mix it up with these delicious options to customize your Cheesy Taco Sticks just the way you like them!
-
Spicy Version: Add diced jalapeños or a splash of hot sauce to the filling for a fiery kick! Spice lovers will rejoice in the delightful heat blending seamlessly with the cheesy mixture.
-
Chicken Taco Sticks: Swap ground beef for shredded or ground chicken for a lighter version that’s equally tasty. This swap allows you to enjoy a classic flavor with a healthier twist.
-
Vegetarian Delight: Replace meat with seasoned black beans, lentils, or even grilled veggies for a hearty vegetarian alternative. You won't miss the meat with all these vibrant flavors!
-
Breakfast Taco Sticks: Incorporate scrambled eggs and crumbled breakfast sausage for a delightful breakfast treat. These make for a wonderful family brunch option that can be enjoyed anytime.
-
Mini Taco Sticks: Cut the dough into smaller pieces for bite-sized snacks perfect for gatherings. These also make for great party appetizers that are sure to please the crowd!
-
Dairy-Free Swap: Use vegan cheese or skip the cheese altogether for a dairy-free version. There are many flavorful non-dairy options available that melt beautifully, making it easier for everyone to join in on the fun!
-
Flavor Boost: Mix in your favorite spices, such as taco seasoning or smoked paprika, to enhance the filling further. This simple adjustment can elevate the overall taste and make every bite memorable.
-
Zucchini Addition: Grate zucchini and sneak it into the filling for added nutrients and moisture. This is a clever way to incorporate more veggies while keeping the delicious taco flavor intact.
Just as you can personalize these Cheesy Taco Sticks, you might also enjoy creating a fabulous accompaniment with some homemade Cheesy Garlic Bread or pairing them with savory Cheesy Corn Fritters for a delightful meal!
Make Ahead Options
These Cheesy Taco Sticks are perfect for meal prep enthusiasts looking to save time during busy weeknights! You can prepare the filling (ground beef, onions, garlic, and seasonings) up to 3 days in advance and refrigerate it in an airtight container. Additionally, you can assemble the sticks completely and keep them wrapped in plastic, storing them in the fridge for up to 24 hours before baking. To maintain the quality, ensure you don’t brush the dough with butter until you’re ready to bake. When it’s time to serve, simply preheat the oven, brush with melted butter, and bake the Cheesy Taco Sticks as directed. You'll have a delicious meal ready with minimal effort!
How to Store and Freeze Cheesy Taco Sticks
Room Temperature: Allow Cheesy Taco Sticks to cool completely before storing at room temperature in an airtight container to maintain freshness for up to 2 days.
Fridge: Store in the refrigerator in a sealed container for up to 4 days. Reheat in the oven or microwave before serving for optimal texture.
Freezer: For longer storage, freeze Cheesy Taco Sticks individually wrapped in plastic wrap, then place them in a freezer-safe bag. They can last up to 2 months.
Reheating: Reheat frozen sticks directly from the freezer in a preheated oven at 375°F (190°C) for about 15-20 minutes until heated through. This keeps them crispy.
What to Serve with Cheesy Taco Sticks
When it comes to crafting a meal around these flavorful delights, think vibrant flavors and satisfying textures to awaken your taste buds.
- Salsa Verde: This bright and tangy sauce adds a refreshing kick that complements the cheesy goodness of the sticks beautifully.
- Guacamole: Silky avocado creaminess creates a delightful contrast, enhancing flavors while keeping things fresh.
- Pico de Gallo: Freshness in every bite, this tomato, onion, and cilantro mix adds crunch and zest that perfectly balances the rich filling.
- Mexican Street Corn Salad: This creamy, tangy side brings a pop of sweetness and smokiness, making every bite of taco stick even more exciting.
Pair your Cheesy Taco Sticks with a fun beverage like a Margarita or a Sparkling Water with Lime for a refreshing twist. These drinks not only elevate the meal but also add a celebratory flair to your dining experience.
- Cheesy Mexican Rice: This comforting side dish not only plays nicely with the cheesy taco sticks but also soaks up all those wonderful flavors.
- Chips and Queso: The crunch and warmth of tortilla chips dipped in melted cheese sauce is a classic pairing that is always a hit at gatherings.
- Mini Taco Cups: For added excitement, serve these mini delights filled with traditional taco toppings as an irresistible appetizer that echoes the main course.
Cheesy Taco Sticks Recipe FAQs
How do I choose the best ripe ingredients for the filling?
Absolutely! When selecting ingredients, aim for fresh, high-quality produce. For onions, choose those that are firm with smooth skin, avoiding any that have dark spots or soft spots. Garlic should be plump and firm. If using ground beef, opt for lean cuts for less grease and better flavor.
What’s the best way to store leftover Cheesy Taco Sticks?
You can store your Cheesy Taco Sticks in the refrigerator in an airtight container for up to 4 days. Allow them to cool completely before sealing to maintain their texture. Reheating them in an oven is ideal to preserve their crispy exterior!
Can I freeze Cheesy Taco Sticks for later use?
Yes, indeed! To freeze, let the Cheesy Taco Sticks cool completely, then individually wrap each stick in plastic wrap. Place them in a freezer-safe bag or container, and they will last up to 2 months. When you're ready to enjoy them, reheat directly from the freezer for about 15–20 minutes in a 375°F (190°C) oven until they're hot and crispy again.
What should I do if the cheese leaks out during baking?
No worries! This can happen if the filling is too runny or the dough is overstuffed. To avoid this, make sure the filling is thick enough by letting it simmer until it reduces, and always pinch the dough securely to seal. If it does leak, simply enjoy the cheesy goodness that oozes out—after all, who doesn’t love a bit of extra flavor?
Are Cheesy Taco Sticks suitable for special dietary needs?
Very! You can easily make them gluten-free by using gluten-free pizza dough or tortillas. For dairy-free options, use dairy-free cheese alternatives. If you have allergies, make sure to read labels carefully and adjust the ingredients as needed. Remember, Cheesy Taco Sticks are all about customization to fit your family’s needs!
Cheesy Taco Sticks: The Ultimate Family-Friendly Snack
Ingredients
Equipment
Method
- Heat olive oil in a skillet over medium heat. Sauté onion for 3-4 minutes until softened. Add garlic and cook for another 30 seconds.
- Add ground beef to the skillet and cook for 5-7 minutes until browned. Drain excess fat.
- Stir in chili powder, cumin, smoked paprika, salt, and pepper. Add water and simmer for 3-5 minutes until thickened.
- Preheat oven to 400°F (200°C). Roll out pizza dough and cut into strips about 2 inches wide.
- Place beef filling on one end of each dough strip, top with cheese, fold the dough, and pinch the edges to seal.
- Arrange sticks on a baking sheet, brush with melted butter, and sprinkle toppings. Bake for 12-15 minutes until golden brown.
- Let them cool for a few minutes and serve with dipping sauces.


Leave a Reply