
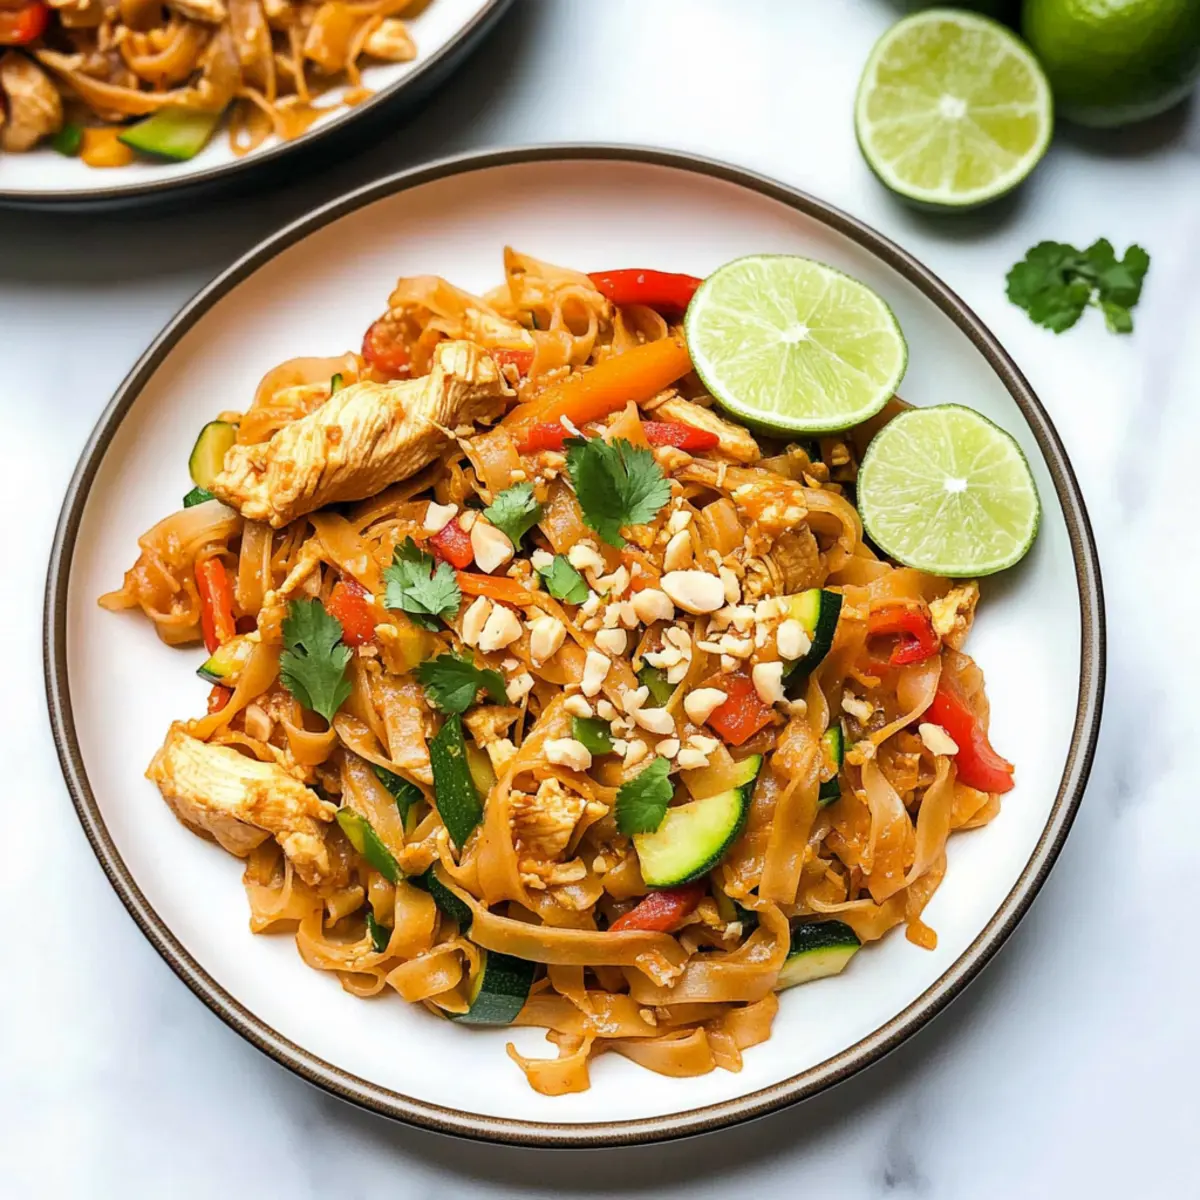
As I stirred the colorful mix of ingredients in my Instant Pot, the heavenly scent of sweet and savory sauce wafted through my kitchen, instantly transporting me to the bustling streets of Thailand. This Instant Pot Chicken Pad Thai is my go-to solution for those busy weeknights when I'm craving something quick yet homemade and packed with flavor. With its delightful blend of tender chicken, vibrant veggies, and chewy rice noodles, it’s not just a meal; it's a comforting escape from takeout. Plus, you'll love how effortlessly it comes together in your Instant Pot, making it a perfect choice for both family dinners and a cozy night in. Curious about how to create your own delicious twist on this classic dish? Let’s dive in!
Why Make Instant Pot Chicken Pad Thai?
Quick and Easy: This recipe is perfect for busy weeknights, allowing you to whip up a delicious meal in no time!
Flavors You’ll Crave: Each bite combines sweet, savory, and spicy notes that rival your favorite takeout.
Customizable Goodness: Feel free to swap in your favorite proteins or veggies—shrimp or tofu work beautifully!
Healthier Alternative: Enjoy a homemade version packed with fresh ingredients and less sodium than restaurant options.
One-Pot Wonder: With everything cooked in your Instant Pot, cleanup is a breeze—more time to relax and enjoy!
Dive into this delightful dish, and if you love quick meals, be sure to check out my recipes for Crock Pot Chicken or Honey Garlic Chicken, too!
Instant Pot Chicken Pad Thai Ingredients
For the Sauce
• Brown Sugar – Sweetens and balances the sauce; coconut sugar is a great low-glycemic substitute.
• Chicken Broth or Water – Adds depth of flavor; vegetable broth works well for a vegetarian version.
• Rice Vinegar – Provides necessary acidity; white wine vinegar or lime juice are suitable alternatives.
• Low-Sodium Soy Sauce/Tamari – Adds saltiness and depth; coconut aminos offer a gluten-free option.
• Fish Sauce – Enhances umami flavor; omit for a vegetarian version or replace it with soy sauce.
• Natural Peanut Butter – Contributes creaminess and nuttiness; almond butter is a good alternative for allergies.
• Garlic – Aromatic flavor base; minced garlic offers the best taste.
• Sesame Oil – Brings warmth and nuttiness; olive oil can be used for different flavor notes.
• Sriracha – Adds heat to the dish; adjust to taste or leave out for a milder version.
For the Dish
• Chicken Breast – The main protein, diced for quick cooking; substitute with shrimp or tofu but adjust cooking times accordingly.
• Matchstick Carrots – Adds crunch and sweetness; shredded carrots can be used if preferred.
• Diced Green Onion – Offers freshness and color; save the dark green tops for garnish.
• Rice Noodles – The primary carbohydrate that absorbs the sauce; thin pasta can be swapped in if desired.
• Zucchini – Adds freshness; bell pepper or snap peas can be used instead.
• Bean Sprouts – Contributes crunch and freshness; feel free to omit if not available.
• Red Bell Pepper – Brings sweetness and vibrant color; any other bell pepper can substitute.
For Garnishing
• Cilantro, Green Onion (for garnish), Lime Wedges, Chopped Peanuts – Fresh garnishes to enhance flavor and presentation, optional to suit your taste!
Now that you have all the essential ingredients for your Instant Pot Chicken Pad Thai, get ready to savor a dish that combines convenience with delightful flavors. Enjoy your cooking adventure!
Step‑by‑Step Instructions for Instant Pot Chicken Pad Thai
Step 1: Make the Sauce
In a medium bowl, whisk together ¼ cup of brown sugar, 1 cup of chicken broth, 2 tablespoons of rice vinegar, ¼ cup of low-sodium soy sauce, 1 tablespoon of fish sauce, ¼ cup of natural peanut butter, 3 minced garlic cloves, 1 tablespoon of sesame oil, and 1 tablespoon of Sriracha. This mixture will create a flavorful base for your Instant Pot Chicken Pad Thai.
Step 2: Prepare Chicken
Place 1 pound of diced chicken breast into the Instant Pot, ensuring it's evenly distributed. Pour the prepared sauce over the chicken, making sure to coat the pieces well. Top with 1 cup of matchstick carrots and ½ cup of diced green onions. This layering will infuse the chicken with the rich flavors while cooking.
Step 3: Pressure Cook
Secure the lid on the Instant Pot and set it to Manual High Pressure for 4 minutes. Once the timer goes off, let the pot sit for 5 minutes on Natural Pressure Release (NPR) to allow the juices to settle. After 5 minutes, perform a quick release to vent any remaining steam, ensuring safety while opening the lid.
Step 4: Cook Noodles
While the chicken is cooking in the Instant Pot, bring a pot of water to a boil on the stovetop. Add 8 ounces of rice noodles and cook according to package directions, usually about 4-6 minutes. Once cooked, drain the noodles and set them aside, ready to be incorporated later for the perfect texture.
Step 5: Steam Vegetables
After releasing the pressure, carefully remove the lid from the Instant Pot. Stir in 1 cup of sliced zucchini, 1 cup of bean sprouts, and 1 red bell pepper—sliced thin. Cover the pot again and let them steam in the residual heat for about 3 minutes. This will help maintain the vibrant colors and crunch of the vegetables.
Step 6: Combine
Gently add the drained rice noodles to the Instant Pot, tossing everything together until the noodles are well-coated in the delicious sauce. Allow the dish to sit for a minute to warm through. Ensure every ingredient, from the tender chicken to the fresh vegetables, is evenly mixed throughout for a satisfying bite in your Instant Pot Chicken Pad Thai.
How to Store and Freeze Instant Pot Chicken Pad Thai
Fridge: Store leftovers in an airtight container for up to 4 days. This helps maintain freshness without drying out the flavors of your Instant Pot Chicken Pad Thai.
Freezer: Freeze in a well-sealed container for up to 3 months. To prevent freezer burn, consider dividing it into smaller portions before freezing.
Reheating: When it’s time to enjoy again, reheat in the microwave or on the stovetop with a splash of water. This helps revitalize the noodles and sauces for a satisfying meal.
Portioning: If you plan to serve smaller portions, divide your Pad Thai into individual containers. This makes for easy grab-and-go meals that keep well in the fridge or freezer!
Expert Tips for Instant Pot Chicken Pad Thai
• Thaw First: Make sure the chicken is completely thawed to ensure even cooking; frozen chicken will need additional time.
• Sauce Thickness: For a thicker sauce, add a cornstarch slurry before mixing in the noodles to achieve that luscious consistency.
• Veggie Crunch: Avoid using the steam function for vegetables; they can become mushy. Steam them using residual heat for the best texture.
• Taste Test: Always taste and adjust the sauce before serving; a touch more sugar or vinegar can elevate the dish to your liking.
• Time Savers: Prep your veggies ahead of time. Having everything ready to go makes the cooking process seamless and quick.
Enjoy making your Instant Pot Chicken Pad Thai and savor the delightful flavors!
What to Serve with Instant Pot Chicken Pad Thai
As you savor each comforting bite of this delightful dish, imagine pairing it with complementary sides and flavors that will elevate your dinner experience.
- Crispy Spring Rolls: These add delightful crunch and a burst of flavor, perfect for dipping in sweet chili sauce.
- Fresh Thai Salad: A mix of herbs, cucumbers, and a tangy lime dressing refreshes your palate, balancing the meal beautifully.
- Steamed Broccoli: The bright green florets provide a nutritious crunch and complement the Pad Thai’s rich flavors without overpowering them.
- Coconut Rice: Creamy and subtly sweet, this dish acts as a lovely backdrop, allowing the Pad Thai’s flavors to shine even brighter.
For a complete experience, consider enjoying a Thai Iced Tea. The creamy, sweet beverage brings a comforting contrast to the dish’s savory notes. And don’t forget to finish your meal with Mango Sticky Rice; the sweetness of ripe mangoes paired with glutinous rice is an indulgent yet satisfying way to end your culinary journey!
Instant Pot Chicken Pad Thai Variations
Make your Instant Pot Chicken Pad Thai your own by trying these exciting twists and substitutions!
- Shrimp Swap: Replace chicken with shrimp for a quick seafood option. Just 3 minutes on high pressure is all you need!
- Veggie Delight: Add or substitute colorful vegetables like broccoli or snow peas for an extra crunch. They’ll balance out the sweetness of the sauce beautifully.
- Gluten-Free: Use thin rice noodles or zoodles for a gluten-free, low-carb alternative. Your dish will still have that classic Pad Thai flavor!
- Nut-Free: Swap peanut butter with sunflower seed butter or tahini to keep the creaminess without the nuts. It's a fantastic option for those with allergies.
- Spicy Kick: If you love heat, add fresh sliced chili or more Sriracha to turn up the spice level. Each bite will be a fiery explosion of flavor!
- Citrus Twist: Squeeze fresh lime juice into the sauce for a zesty punch that brightens up the entire dish. It adds a refreshing twist that balances the sweetness.
- Creamy Coconut: Stir in some coconut milk with your sauce for a richer, creamier texture that will elevate your Pad Thai experience.
Feel free to mix and match these ideas to create a personalized version of your Instant Pot Chicken Pad Thai. If you're looking for more delightful recipes, you might also want to check out my Crock Pot Chicken or Chipotle Lime Chicken and Rice for new flavors!
Make Ahead Options
These Instant Pot Chicken Pad Thai components are perfect for meal prep, saving you valuable time on busy weeknights! You can prepare the sauce by whisking together all the sauce ingredients (brown sugar, chicken broth, rice vinegar, soy sauce, fish sauce, peanut butter, garlic, sesame oil, and Sriracha) up to 24 hours in advance. Store it in an airtight container in the fridge to maintain freshness. Additionally, you can chop the chicken and vegetables (carrots, zucchini, and bell pepper) up to 3 days ahead. When you're ready to cook, simply add the marinated chicken and sauce to the Instant Pot, pressure cook as directed, and finish by incorporating the cooked noodles and steaming the veggies. This way, you'll have a delicious home-cooked meal with minimal effort!
Instant Pot Chicken Pad Thai Recipe FAQs
How do I select ripe chicken for my Instant Pot Chicken Pad Thai?
Absolutely! When choosing chicken breast, look for meat that is pink, moist, and has a firm texture. Avoid any chicken with dark spots or an off smell. Fresh chicken is key to ensuring a flavorful dish, so opt for organic if possible for added flavor!
What’s the best way to store leftovers of Instant Pot Chicken Pad Thai?
You can store your leftover Pad Thai in an airtight container in the refrigerator for up to 4 days. To keep the flavors from drying out, make sure to cover it well. When you're ready to reheat, a splash of water in the microwave or on the stovetop will help revive the noodles!
Can I freeze my Instant Pot Chicken Pad Thai?
Yes, you can freeze it! Place the cooled Pad Thai in a well-sealed container or freezer-safe bag, keeping air out to prevent freezer burn. I recommend dividing it into smaller portions for convenient meals. It can last up to 3 months in the freezer. Just remember to thaw it overnight in the fridge before reheating!
What if my Instant Pot Chicken Pad Thai turns out too watery?
Very good question! If your dish is too watery, try creating a cornstarch slurry. Mix 1 tablespoon of cornstarch with 2 tablespoons of cold water until smooth. Stir this mixture into your Pad Thai while it’s on the stovetop and heat until it thickens. This should give your dish that desired texture!
Are there any dietary considerations I should keep in mind for this recipe?
Absolutely! This Instant Pot Chicken Pad Thai can be adjusted for various dietary needs. If you have a peanut allergy, substitute the peanut butter with almond butter or tahini. For a gluten-free option, use gluten-free soy sauce or coconut aminos instead. You can also swap out the chicken for tofu or shrimp for a vegetarian or pescatarian alternative!
How can I ensure my vegetables stay crisp while making Instant Pot Chicken Pad Thai?
To keep your vegetables crisp, avoid using the steam function on your Instant Pot; instead, rely on the residual heat after cooking to steam them. Add the vegetables towards the end of the cooking process, and letting them sit covered for about 3 minutes will help lock in their vibrant color and crunch!
Instant Pot Chicken Pad Thai: Quick, Flavorful Weeknight Delight
Ingredients
Equipment
Method
- In a medium bowl, whisk together the sauce ingredients.
- Place the chicken breast in the Instant Pot, pour the sauce over, and top with carrots and green onions.
- Secure the lid and set to Manual High Pressure for 4 minutes. Allow a Natural Pressure Release for 5 minutes.
- Cook the rice noodles according to package instructions, usually about 4-6 minutes.
- Stir in zucchini, bean sprouts, and red bell pepper into the Instant Pot and steam for about 3 minutes.
- Toss the drained noodles with the mixture in the Instant Pot until well coated.


Leave a Reply