
As I stood in the kitchen, craving something sweet yet wholesome, the idea of Oreo Protein Balls popped into my mind like a burst of chocolatey inspiration. These no-bake delights blend the nostalgic flavors of classic Oreos with a creamy, protein-packed center, making them the perfect quick snack for any time of day. In just 10 minutes, you can whip up a batch that’s not only gluten-free but also fits seamlessly into your busy lifestyle, whether you need a post-workout boost or a satisfying treat between meals. Ready to indulge your sweet tooth guilt-free? Let’s dive into this simple recipe that promises to elevate your snacking game!

Why are Oreo Protein Balls a Must-Try?
Effortless to Make: In just 10 minutes, you can whip these up without any baking. Perfect for those busy days when you crave something sweet!
Decadent Flavor: The rich taste of Oreos pairs perfectly with a creamy protein center, satisfying your dessert cravings without the guilt.
Nutritious Treat: With about 5g of protein per ball, these snacks provide a delicious way to fuel your day while keeping sugar in check.
Versatile Enjoyment: Great for any time—post-workout, a mid-afternoon pick-me-up, or a guilt-free sweet at parties! Pair these with some Lemon Ricotta Protein pancakes for a balanced start to your day!
Convenient Storage: Make these in advance and store in the fridge or freezer for an on-the-go snack option that’s always ready when you need it!
Oreo Protein Balls Ingredients
For the Dough
• Vanilla Protein Powder – Adds a protein punch essential for recovery; swap for chocolate protein powder for a rich twist.
• Coconut Flour – Provides structure and natural sweetness; almond flour is a softer alternative.
• Monk Fruit Sweetener (or other sugar) – Gives sweetness without added calories; you can leave it out for a less sweet treat.
• Cream Cheese – Ensures a creamy, rich mouthfeel; opt for low-fat or vegan cream cheese for a lighter option.
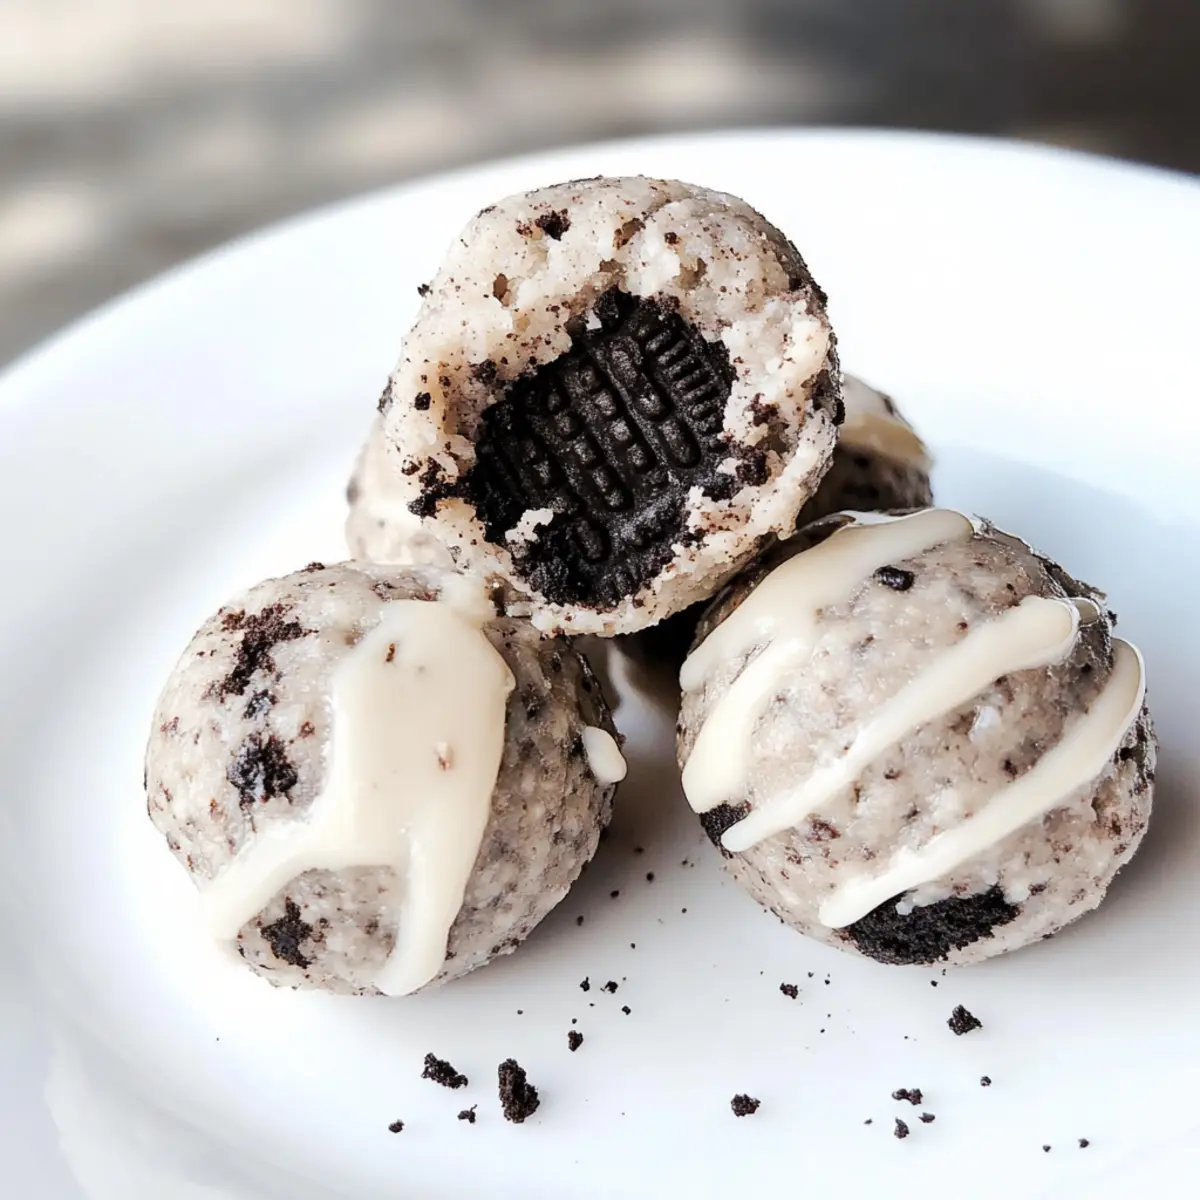
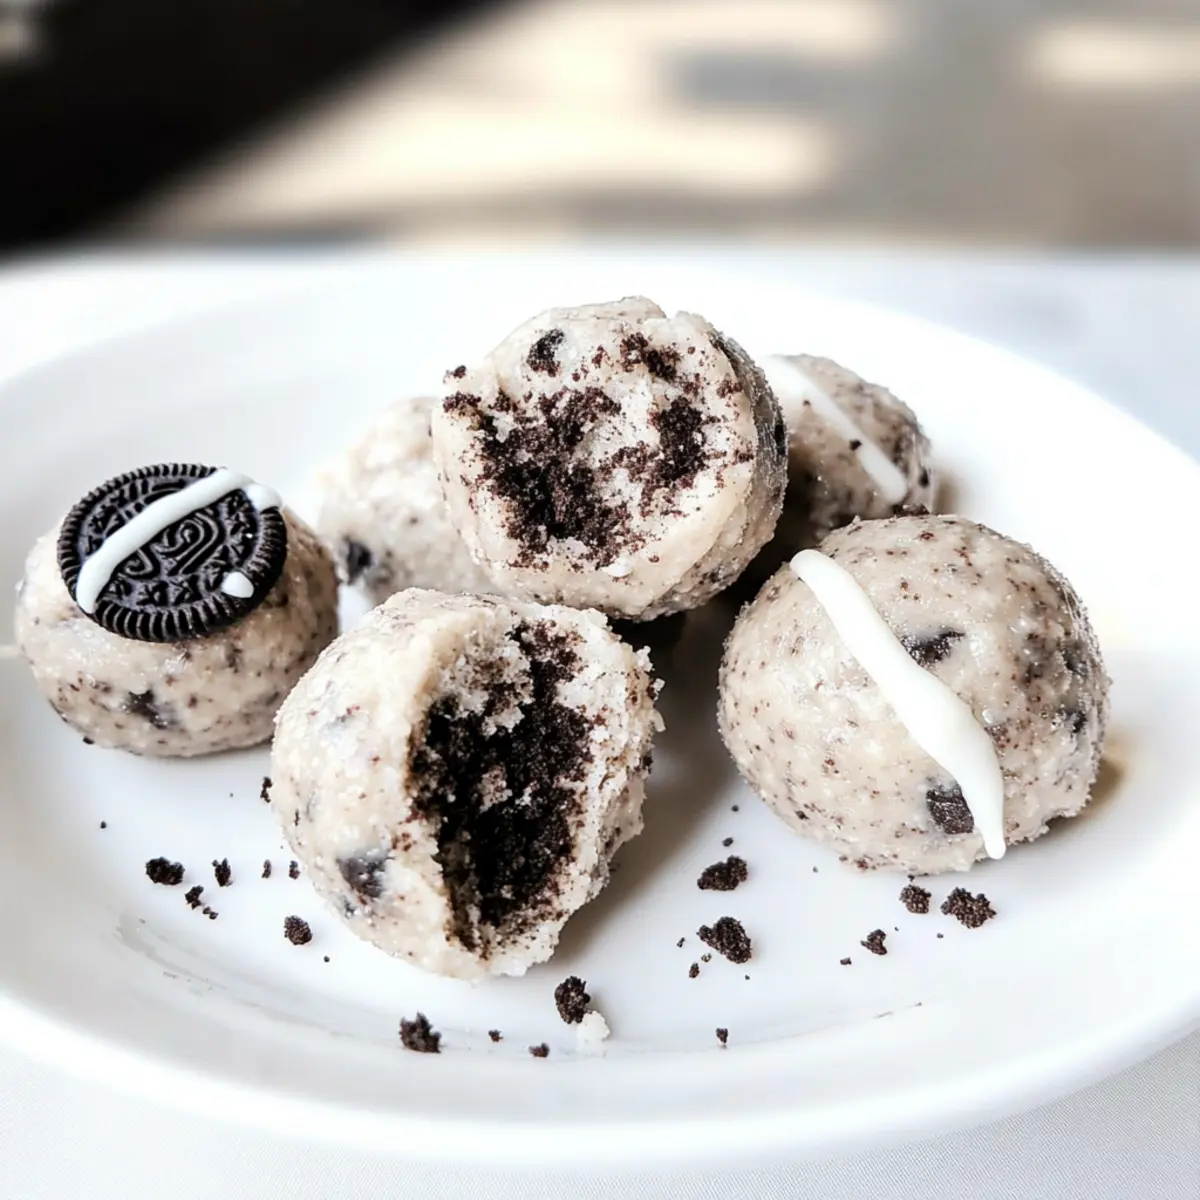
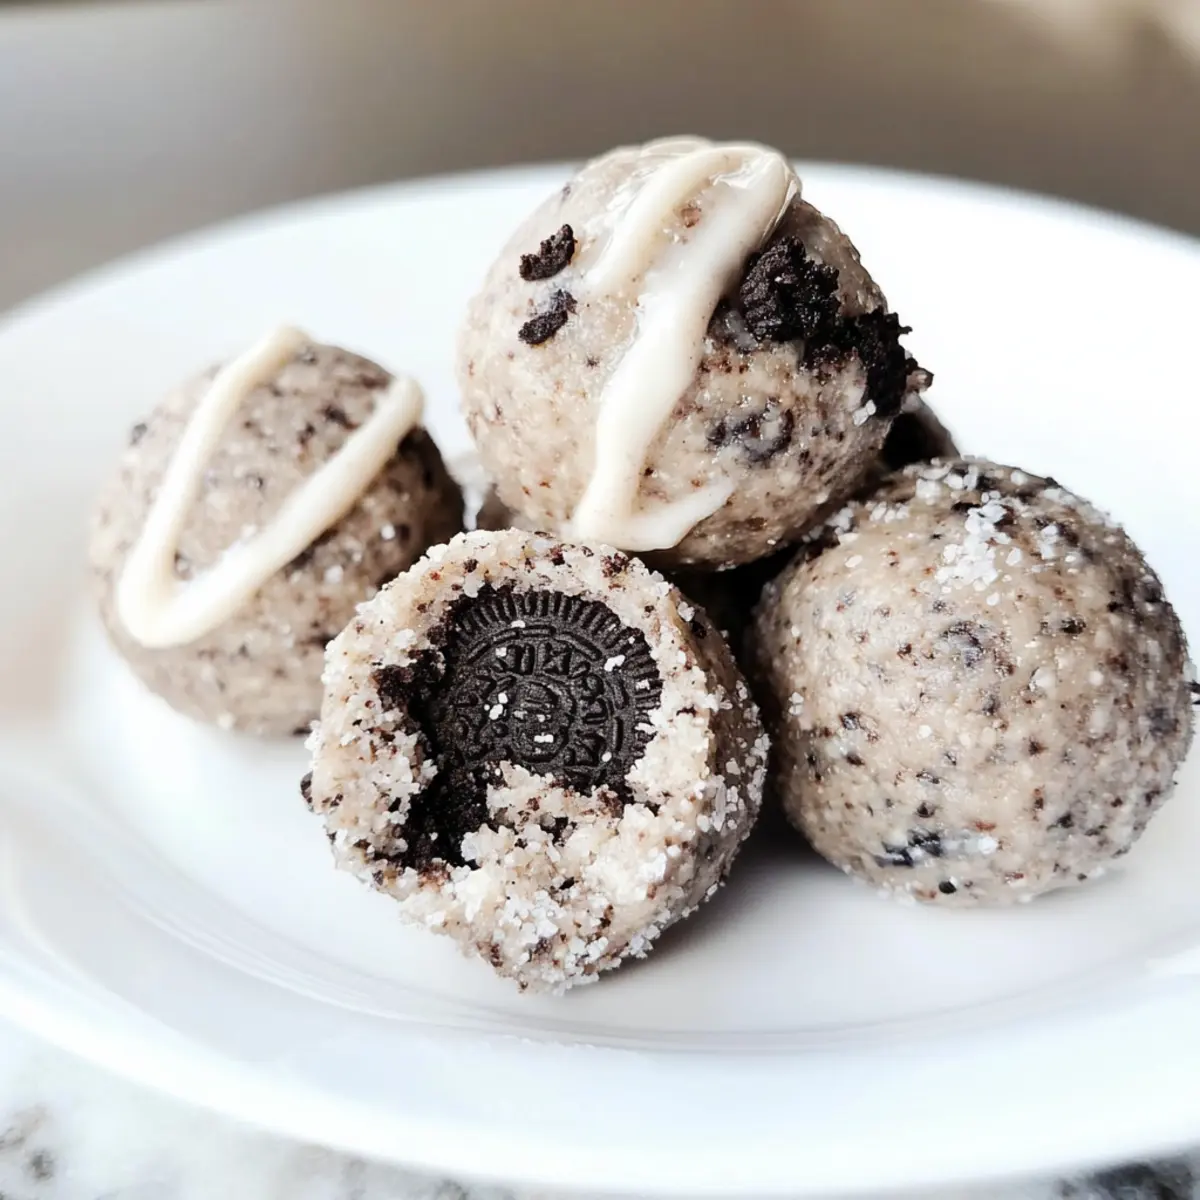
• Oreo Cookies – The star of the show, delivering that iconic Oreo flavor; use gluten-free Oreos to keep it gluten-free.
For the Optional Drizzle
• White Chocolate Chips – Adds a delightful sweet finish when melted and drizzled; dark chocolate is a fantastic substitute or simply omit if preferred.
These Oreo Protein Balls are not just a quick snack; they’re a delicious blend of flavors designed to satisfy your sweet cravings guilt-free!
Step‑by‑Step Instructions for Oreo Protein Balls
Step 1: Prep Ingredients
Start by finely chopping the Oreo cookies into crumbs, aiming for a texture that's not too chunky, as this ensures even flavor distribution. In a mixing bowl, combine the cookie crumbs with vanilla protein powder and coconut flour. This step will provide the backbone of your Oreo Protein Balls, so mix well to evenly incorporate all dry ingredients before moving on.
Step 2: Mix Dough
Next, add the softened cream cheese to the dry mixture. Use a spatula or your hands to blend everything together until it forms a cohesive dough. If the mixture feels too thick, gradually adjust the consistency with 1-2 tablespoons of almond milk or, if too soft, add a little more coconut flour. You want a dough that holds its shape but is still pliable.
Step 3: Form Balls
Once your dough is ready, take small portions and roll them into tablespoon-sized balls, ensuring they are uniform in size for even chilling. Place each ball on a lined baking sheet or plate as you work. The iconic flavors of the Oreo Protein Balls will begin to take shape, and you’ll enjoy the satisfying process of forming these delightful snacks.
Step 4: Chill
To let the flavors meld and the protein balls firm up, refrigerate them for at least 15 minutes. This chilling step will give your Oreo Protein Balls a nice bite and enhance the overall texture, making them even more enjoyable. Keep an eye on the clock so you don’t skip this crucial step!
Step 5: Drizzle Optional Topping
If you’d like to add an extra touch of sweetness, melt your choice of white chocolate chips in a microwave-safe bowl, using short 20-second bursts to avoid burning. Once melted, drizzle the chocolate over the chilled Oreo Protein Balls using a spoon or fork. This final step not only adds flavor but makes for a beautiful presentation!
Oreo Protein Balls Variations & Substitutions
Ready to make these Oreo Protein Balls uniquely yours? Let your creativity soar and explore these delightful twists!
-
Flavorful Twist: Swap out Oreos for Mint Cookies to introduce a refreshing minty flavor that will tantalize your taste buds.
-
Protein Power: Use Chocolate Protein Powder instead of vanilla for a rich, indulgent chocolate experience, enhancing the dessert-like quality.
-
Nut Allergy-Friendly: Replace Cream Cheese with Silken Tofu for a nut-free creaminess, perfect for those with dietary restrictions. Blend until smooth!
-
Nutty Addition: Add Chopped Nuts for extra crunch; almonds or walnuts complement the chocolate perfectly, creating a delightful texture contrast.
-
Sugar-Free Swap: Use Stevia as a sweetener instead of monk fruit for a zero-calorie version, allowing you to indulge guilt-free!
-
Texture Variation: Substitute Coconut Flour with Oat Flour for a heartier texture; this change alters the flavor slightly but enhances the nutritional profile.
-
Fruit Fusion: Incorporate Dried Fruit or even Fresh Berries into the mixture for a burst of natural sweetness and a fruity twist to your protein balls.
-
Guilt-Free Drizzle: For a healthier drizzle, try Dark Chocolate Chips; they add a rich flavor and are loaded with antioxidants compared to white chocolate.
Feel free to experiment with these suggestions, and if you need a balanced boost, pair these with some delicious Lemon Ricotta Protein pancakes for a satisfying breakfast or snack! Enjoy crafting your personal version of these tasty treats!
Make Ahead Options
These Oreo Protein Balls are a fantastic choice for meal prep enthusiasts looking to save time during hectic weeks! You can prepare the dough up to 24 hours in advance; simply mix the dry ingredients and cream cheese, then roll the mixture into balls. Store them in an airtight container in the refrigerator to keep them fresh. When you're ready to enjoy your guilt-free snack, just chill them again for about 15 minutes to firm up before drizzling with melted white chocolate (if using). By prepping ahead, you'll always have a delicious, protein-packed pick-me-up on hand, making your snacking both easy and satisfying!
Expert Tips for Oreo Protein Balls
-
Chop Oreos Finely: Aim for a fine crumb rather than large chunks to ensure even distribution of flavor in your Oreo Protein Balls.
-
Adjust Consistency: Don’t be afraid to tweak the wet and dry ingredients during mixing to achieve your desired dough texture—thicker is generally better for rolling!
-
Storage Matters: Keep your Oreo Protein Balls in an airtight container in the fridge for up to 7 days, or freeze them for longer freshness.
-
Experiment with Flavors: Try swapping out the Oreo cookies for your favorite sandwich cookies, or use flavored protein powder to create unique variations!
-
Mind the Drizzle: If drizzling chocolate, use short bursts in the microwave to melt without burning—your patience will pay off with a beautiful finish!
What to Serve with Oreo Protein Balls
Create a delightful experience by complementing these creamy, protein-packed treasures with a selection of treats that enhance their sweetness and nutrition.
-
Fresh Berries: Juicy strawberries or tangy raspberries brighten up your snack time, providing a refreshing contrast to the richness of the protein balls.
-
Greek Yogurt Dip: A dollop of creamy Greek yogurt can add a tangy element, making each bite even more indulgent while adding extra protein.
-
Nutty Trail Mix: A mix of almonds, walnuts, and pumpkin seeds offers a satisfying crunch and healthy fats, making your snack both balanced and enticing. This combination supports energy levels and adds a variety of textures to your plate.
-
Dark Chocolate Bark: Pairing these protein balls with dark chocolate bark gives an extra layer of decadence without overwhelming sweetness. The bitterness of the dark chocolate beautifully contrasts with the creamy delights of the Oreo Protein Balls.
-
Chilled Almond Milk: A glass of chilled almond milk refreshes and complements the flavors, making for a perfect pairing during those warm afternoons.
-
Fruit Smoothie: Blend up a berry or banana smoothie for a fruity companion that adds vitamins and delights the palate, turning your snack into a wholesome meal replacement.
-
Frozen Grapes: For a cool treat that mirrors the texture of the protein balls, frozen grapes offer a naturally sweet and refreshing burst in every bite.
-
Coffee or Tea: A cup of rich coffee or herbal tea can provide a comforting finish to your snack time, creating a warm atmosphere for enjoying these treats.
Each of these pairings enhances the enjoyment of your Oreo Protein Balls while ensuring a well-rounded snack experience you can savor.
How to Store and Freeze Oreo Protein Balls
Fridge: Keep your Oreo Protein Balls in an airtight container in the fridge for up to 7 days to maintain freshness. Perfect for a quick, nutritious snack on-the-go!
Freezer: For longer storage, freeze the protein balls in a single layer on a baking sheet before transferring to a freezer bag. They can last up to 3 months in the freezer.
Thawing: To enjoy frozen Oreo Protein Balls, simply transfer them to the fridge overnight to defrost, or leave them at room temperature for about 30 minutes before eating.
Reheating: There's no need for reheating, as these delicious snacks are best enjoyed cold or at room temperature, preserving their creamy texture and flavor.
Oreo Protein Balls Recipe FAQs
How do I choose the right ripeness for my ingredients?
Absolutely! When it comes to cream cheese, ensure it's soft but not overly melty—room temperature is best for easy mixing. For the vanilla protein powder, any reputable brand will do, but avoid those with added sugars to keep your Oreo Protein Balls healthy!
What’s the best way to store Oreo Protein Balls?
Very! Keep your Oreo Protein Balls in an airtight container in the fridge for up to 7 days to maintain their deliciousness. For longer preservation, they can be frozen; just make sure they’re in a single layer first before transferring them to a freezer-safe bag.
Can I freeze Oreo Protein Balls?
Definitely! To freeze, place the protein balls on a baking sheet in a single layer and freeze until solid, then transfer them to a freezer bag. They can last up to 3 months in the freezer. When you’re ready to enjoy, simply thaw them in the fridge overnight or let them sit at room temperature for about 30 minutes.
What if my dough is too sticky or too dry?
Ah, the dreaded consistency check! If your dough is too sticky, just add a little more coconut flour, one tablespoon at a time, until you reach a manageable texture. Conversely, if it’s too dry, incorporate almond milk, one tablespoon at a time, until it's pliable yet holds its shape well.
Are these Oreo Protein Balls safe for pets or people with allergies?
I recommend caution! While the ingredients alone aren’t harmful to pets, cream cheese and sugar can upset their stomachs. If you have allergies, be mindful of any specific ingredients, particularly with standard Oreo cookies, which may contain traces of nuts or gluten. Always opt for gluten-free Oreos if necessary!
Oreo Protein Balls: Your Guilt-Free Sweet Snack Fix
Ingredients
Equipment
Method
- Start by finely chopping the Oreo cookies into crumbs and combine with protein powder and coconut flour in a mixing bowl.
- Add softened cream cheese to the mixture and blend until it forms a cohesive dough, adjusting with almond milk or coconut flour as needed.
- Roll the dough into tablespoon-sized balls and place on a lined baking sheet.
- Refrigerate the balls for at least 15 minutes to firm up the texture.
- Melt the white chocolate chips and drizzle over the refrigerated balls for added sweetness.


Leave a Reply