
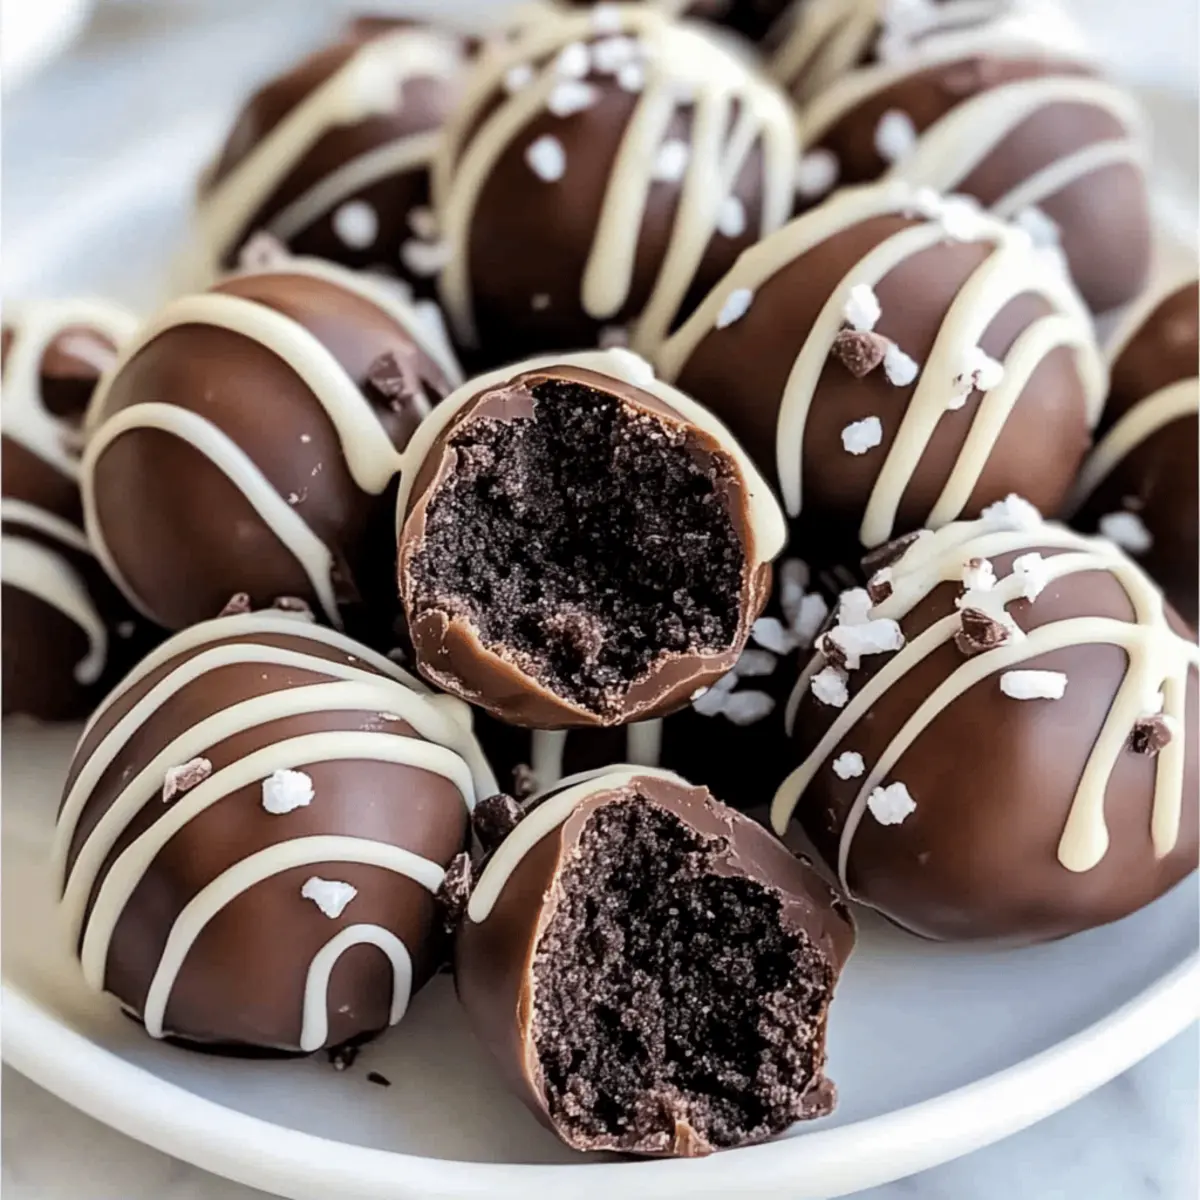
Just the other day, my kitchen turned into a mini sweet shop as I whipped up a batch of 3-Ingredient Oreo Balls. With just a few simple ingredients, these delightful no-bake treats transformed into creamy, chocolaty bites of joy, perfect for any occasion. What I love most is their versatility; you can jazz them up with toppings or even create flavor variations like Peanut Butter or Minty Chocolate Oreo Balls! Not only are they easy to make and kid-friendly, but they also cater to those of us who crave a homemade dessert without spending hours in the kitchen. Whether you’re hosting a party, looking for a fun family activity, or want to impress your friends with minimal effort, these Oreo Balls are the answer. So why not dive into the world of sweet creativity and discover how you can personalize these irresistible treats? What flavor combination will you try first?
Why Are These Oreo Balls a Must-Try?
Simplicity makes these treats a breeze to whip up in no time! Versatile in nature, you can easily customize them with various toppings or flavor profiles like Peanut Butter or Espresso. Kid-Friendly and fun, they make for an engaging kitchen activity with the little ones. Rich and Decadent, these Oreo Balls pack a creamy punch with every bite, satisfying any sweet tooth. Plus, they’re a great way to impress guests without the stress—just put them out on a tray, and let the compliments roll in!
3-Ingredient Oreo Balls Ingredients
For the Oreo Mixture
• Oreo Cookies – The base of your 3-Ingredient Oreo Balls, providing rich flavor and structure.
• Cream Cheese – Adds the perfect creaminess to bind everything together; use softened for easy mixing.
For the Chocolate Coating
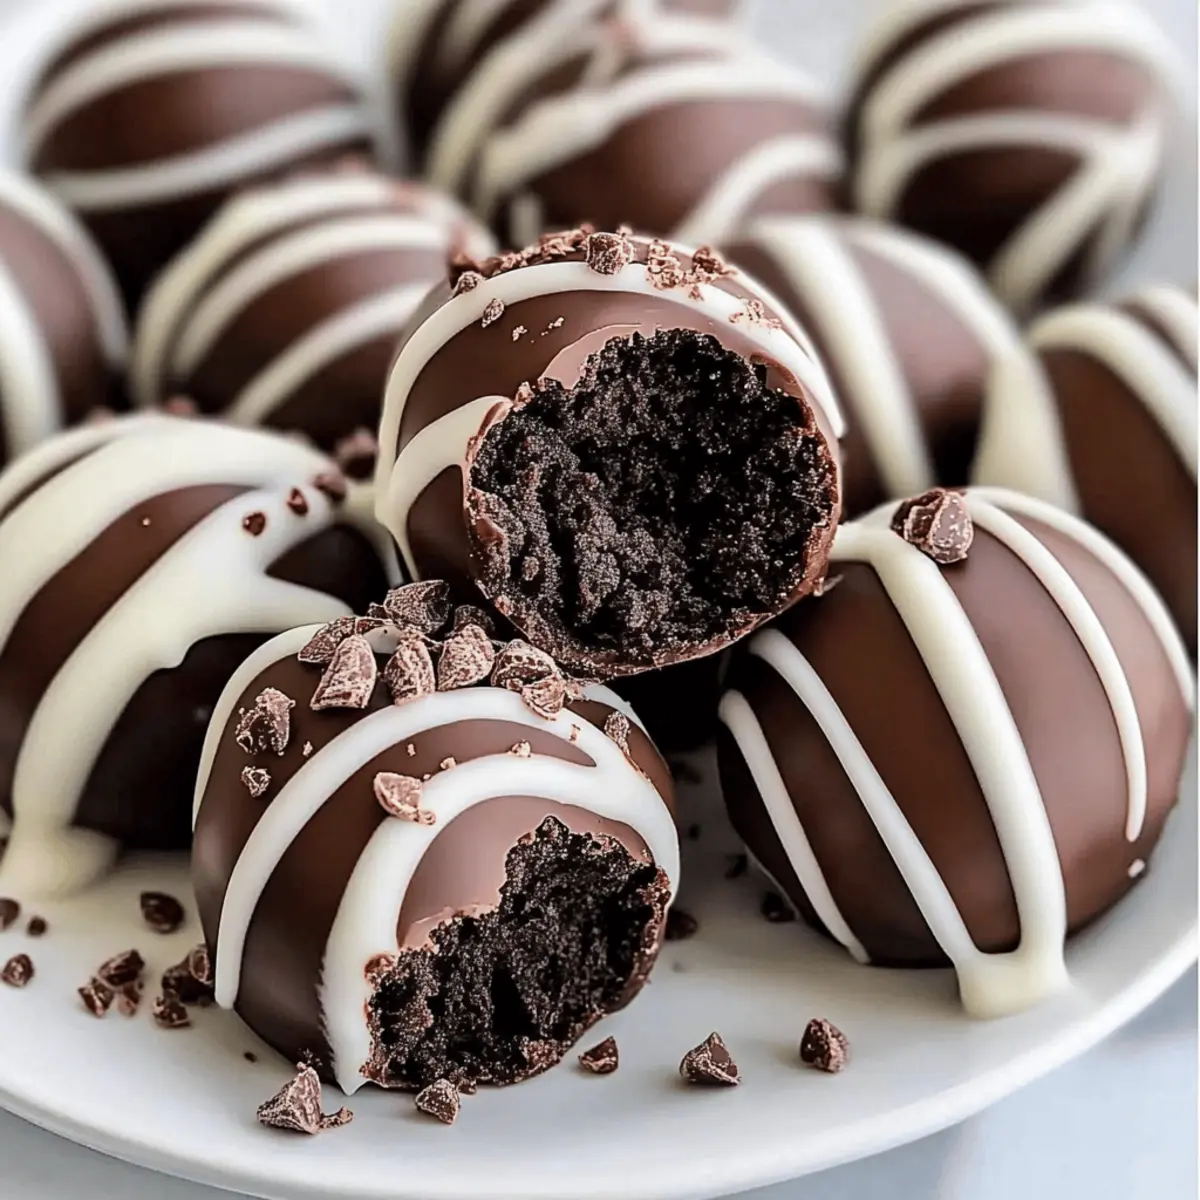
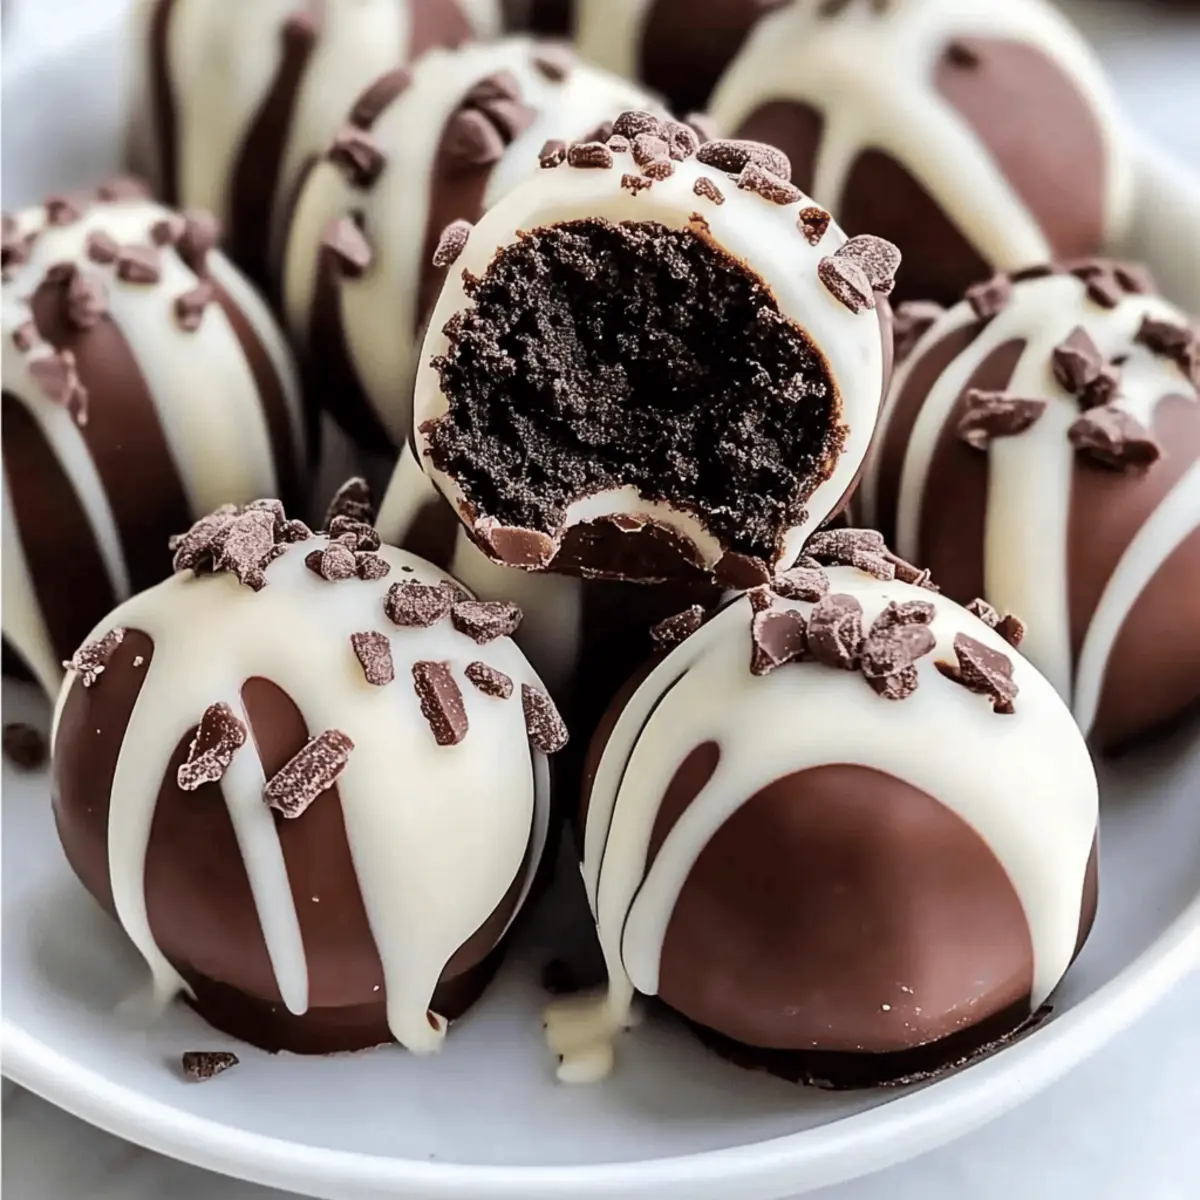
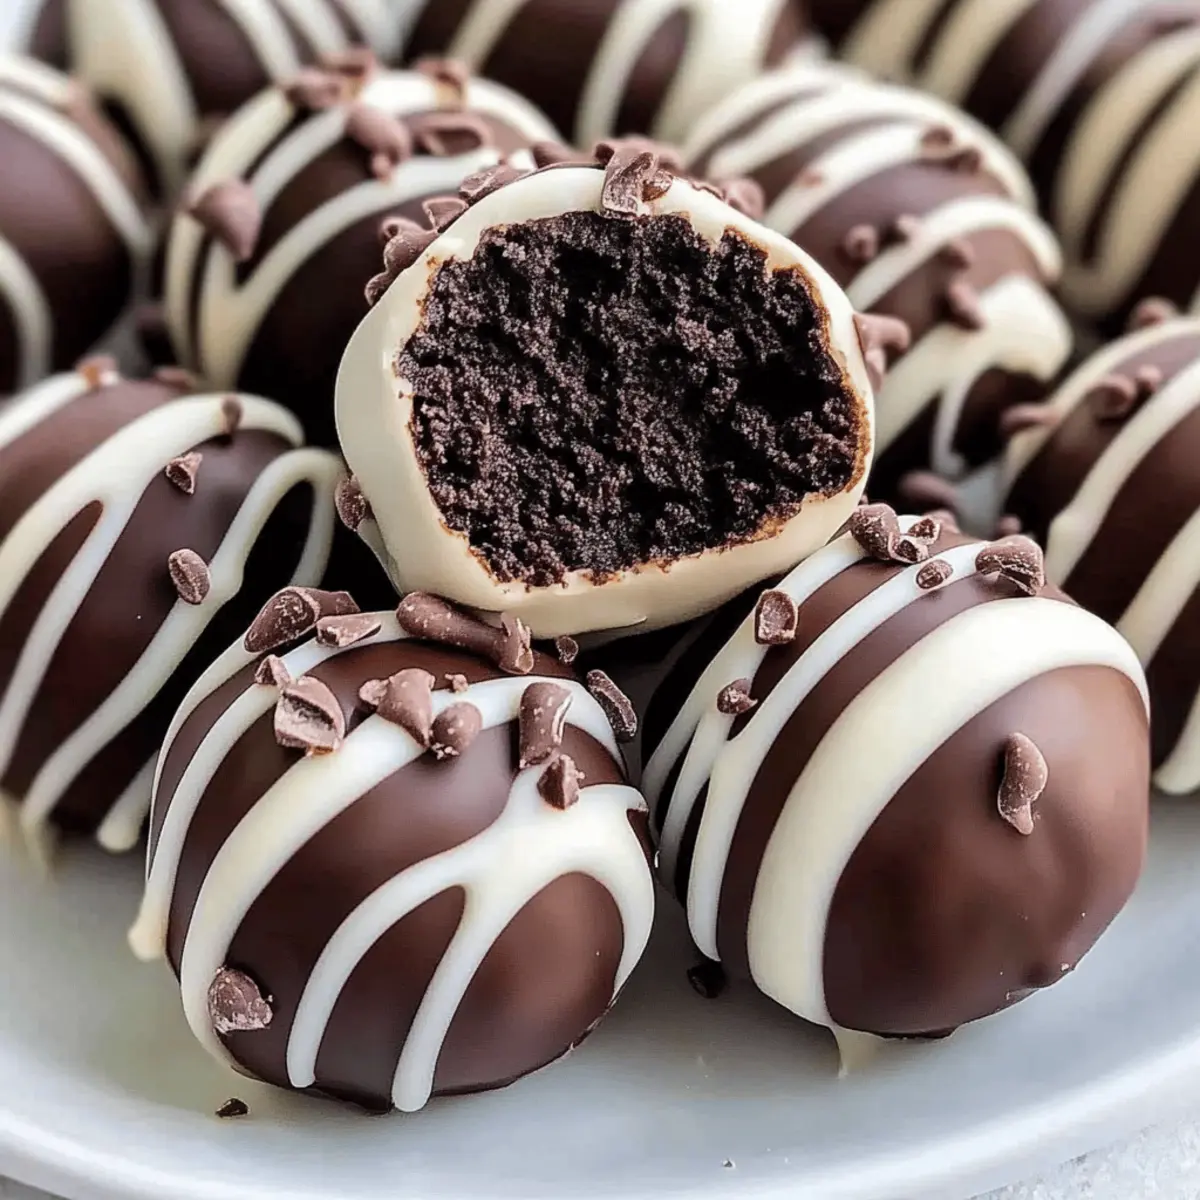
• Chocolate (Milk, Dark, or White) – Coats the balls for a luscious finish; experiment with smoked dark chocolate for depth!
For Optional Toppings
• Rainbow Sprinkles – Add a pop of color on top for a festive look.
• Shredded Coconut – Roll your coated balls in this to achieve a tropical twist.
• Chopped Nuts – For a crunchy contrast that complements the creamy texture.
These simple yet delicious ingredients make your 3-Ingredient Oreo Balls customizable for any occasion!
Step‑by‑Step Instructions for 3-Ingredient Oreo Balls
Step 1: Crush the Oreos
Start by placing your Oreo cookies in a food processor. Pulse them until they are finely crumbled, resembling sand, which should take about 30 seconds. If you don’t have a food processor, you can place the cookies in a zip-top bag and crush them with a rolling pin. The finer the crumbs, the smoother your 3-Ingredient Oreo Balls will be!
Step 2: Mix the Ingredients
In a large mixing bowl, combine the crushed Oreos with softened cream cheese. Using a spatula or your hands, mix thoroughly until the mixture is well-blended and smooth, about 2-3 minutes. You’ll know it’s ready when there are no visible cream cheese lumps, and the mixture holds together well. This creamy base is what makes the Oreo Balls simply irresistible!
Step 3: Form the Balls
Take about a tablespoon of the Oreo mixture and roll it into a ball about 1-inch in diameter. Place each ball on a parchment-lined baking sheet to prevent sticking. Continue this process until you’ve rolled all the mixture, feeling free to adjust sizes for your preference. The uniformity of the balls will ensure even coating later!
Step 4: Chill to Set
Once formed, place the baking sheet in the refrigerator and chill the Oreo Balls for at least 30 minutes. This step is crucial as it helps the balls firm up, making them easier to coat in chocolate later. You’ll know they’re ready when they feel solid to the touch.
Step 5: Melt the Chocolate
While the Oreo Balls chill, melt your chocolate in a microwave-safe bowl. Microwave it in 30-second intervals, stirring in between until completely smooth and melted—this should take about 1-2 minutes total. Be sure to keep an eye on the chocolate to avoid burning; the right consistency will be glossy and flowing.
Step 6: Coat the Balls
After the Oreo Balls have chilled, remove them from the refrigerator. Dip each ball into the melted chocolate, ensuring it’s completely coated. Let the excess chocolate drip off before returning the coated balls to the parchment-lined baking sheet. You can also use a fork for a neat finish, making sure they are perfectly covered!
Step 7: Add Toppings
Before the chocolate sets, sprinkle your desired toppings, such as rainbow sprinkles, chopped nuts, or shredded coconut, onto the wet chocolate coating. This step adds a lovely decorative touch to your 3-Ingredient Oreo Balls. Be creative—each topping adds a burst of flavor and color!
Step 8: Final Chill
Once all the Oreo Balls are coated and topped, return the baking sheet to the refrigerator for another 15-20 minutes. This allows the chocolate coating to fully harden. You’ll know they’re ready when the chocolate feels firm to the touch, giving your treats that satisfying outer crunch!
How to Store and Freeze 3-Ingredient Oreo Balls
Fridge: Store your 3-Ingredient Oreo Balls in an airtight container in the refrigerator for up to one week. This keeps them fresh and delicious while preserving their creamy texture.
Freezer: For longer storage, you can freeze these treats for up to three months. Place them in a single layer on a baking sheet until frozen, then transfer to an airtight container.
Thawing: To enjoy your frozen Oreo Balls, simply transfer them to the fridge for several hours before serving. This ensures they retain their delightful consistency.
Reheating: These no-bake treats are best enjoyed cold, so there's no need to reheat—just take them out, serve, and watch everyone enjoy!
3-Ingredient Oreo Balls Variations
Feel free to get creative and make these delicious Oreo Balls your own with some fun twists and substitutions!
-
Peanut Butter Twist: Mix in ½ cup of creamy peanut butter for a rich, nutty flavor. The creaminess of the peanut butter combines beautifully with the original ingredients, creating a decadent variation everyone will adore.
-
Minty Delight: Swap regular Oreos for mint-flavored ones and add a few drops of mint extract for a refreshing kick. This variation adds an exciting green glow and evokes a classic mint chocolate experience that's especially delightful around the holidays.
-
Coconut Coating: After dipping in chocolate, roll the balls in shredded coconut for an island-inspired treat. The chewy coconut adds texture while complementing the chocolate and creamy interior luxuriantly.
-
Espresso Flavor: Stir in a teaspoon of instant espresso to the Oreo mixture for a delightful coffee twist. This not only enhances the flavor but also gives a subtle caffeine boost that pairs well with dessert!
-
Rainbow Sprinkles: Top your chocolate-coated balls with rainbow sprinkles for a whimsical finish. Kids, in particular, will love this colorful touch that brings joy to any occasion, making them perfect for birthday parties or celebrations.
-
Choco-Nut Crunch: Sprinkle chopped nuts onto the wet chocolate coating for a satisfying crunch. Almonds or hazelnuts work wonders here; the added texture elevates the experience!
-
Spicy Heat: Add a pinch of cayenne pepper or chili powder to the chocolate coating for unexpected warmth. This sweet-spicy combination will surprise and delight adventurous eaters!
-
Fruit Flavored: Incorporate crushed freeze-dried strawberries or raspberries into the Oreo mixture for a fruity twist. The berries add a touch of natural sweetness and color that enhances the overall flavor profile.
With these variations, you're sure to find the perfect combination that resonates with your taste buds and makes your 3-Ingredient Oreo Balls even more special! If you get inspired by any of these variations, be sure to share your creations too—there's always room for a little extra sweetness!
What to Serve with 3-Ingredient Oreo Balls
Imagine a dessert spread bursting with color and flavor, inviting family and friends to indulge in sweet delights.
- Creamy Vanilla Ice Cream: A scoop of vanilla ice cream balances the rich chocolate and creamy texture of the Oreo Balls, creating a delightful contrast with every bite.
- Fresh Berries: The tartness of fresh raspberries or strawberries cuts through the sweetness perfectly, adding a refreshing pop to your dessert platter.
- Coffee or Espresso: Serve these treats alongside a warm cup of coffee or a shot of espresso for a delightful dessert experience that satisfies cravings and enhances flavors.
- Chocolate Dipped Fruit: Pairing with chocolate-covered strawberries or bananas elevates the chocolate-happiness of the Oreo Balls, creating a symphony of flavors.
- Nutty Trail Mix: A handful of nutty trail mix adds an unexpected crunch that complements the smoothness of the Oreo Balls, introducing pleasing textures.
- Whipped Cream: A dollop of homemade whipped cream is perfect for dipping the Oreo Balls, giving them a light, airy touch while enhancing their richness.
- Mint Tea: Herbal mint tea offers a soothing beverage choice that refreshes the palate after indulging in the chocolaty richness of your Oreo Balls.
- Mini Cheesecake Cups: Serve mini cheesecake cups on the side for a decadent duo—a creamy dessert experience that harmonizes beautifully with the Oreo Balls.
- Dark Chocolate Ganache: Drizzle or serve a side of ganache for a luxe touch; the semi-sweet chocolate enhances the flavor, turning your dessert into an indulgent event.
Expert Tips for 3-Ingredient Oreo Balls
-
Chocolate Check: Ensure your chocolate is smooth and not too thick. If it's too thick, it'll be hard to coat the balls evenly.
-
Cream Cheese Temp: Always use softened cream cheese. Cold cream cheese will result in a lumpy mixture, making it difficult to blend with the Oreos.
-
Consistent Sizes: Use a cookie scoop to form uniform balls. This helps with even cooking and makes for a beautiful presentation in your 3-Ingredient Oreo Balls.
-
Chill Time Matters: Don’t skip the chilling steps. This helps the Oreo Balls firm up and makes coating with chocolate easier.
-
Experiment Boldly: Feel free to mix and match toppings—try adding a sprinkle of sea salt for a sweet-savory twist, or go for crushed candies for extra crunch!
Make Ahead Options
These 3-Ingredient Oreo Balls are a fantastic option for busy home cooks looking to save time without sacrificing flavor! You can prepare the Oreo mixture and roll it into balls up to 24 hours in advance—just store them in an airtight container in the refrigerator. This way, they remain firm and ready for coating. When you're ready to finish, simply melt your chocolate, coat the chilled balls, and add your desired toppings. If you want to get even more organized, you can coat the balls and refrigerate them for an additional up to 3 days before serving—ensuring that they stay just as delicious and satisfying!
3-Ingredient Oreo Balls Recipe FAQs
What type of Oreos should I use for the best results?
Absolutely, for the best flavor and texture, I recommend using original Oreo cookies. If you’re looking for a gluten-free option, you can substitute them with gluten-free chocolate sandwich cookies; they work beautifully in this recipe!
How long can I store these Oreo Balls?
You can keep your 3-Ingredient Oreo Balls fresh by storing them in an airtight container in the refrigerator for up to one week. This keeps them deliciously creamy!
Can I freeze 3-Ingredient Oreo Balls, and if so, how?
Yes, you can freeze your Oreo Balls for up to three months! To do this, place them in a single layer on a baking sheet until they’re solid. After freezing, transfer them to an airtight container or zip-top bag, separated by layers of parchment paper to prevent sticking.
What if my mixture is too crumbly or too wet?
If you find your Oreo mixture is too crumbly, try adding more softened cream cheese, a tablespoon at a time, until it comes together. On the flip side, if it’s too wet, you might need to add a little more crushed Oreo cookie to balance it out. Mix and adjust as needed to achieve a smooth, moldable consistency!
Are these Oreo Balls suitable for kids and those with allergies?
Absolutely! These 3-Ingredient Oreo Balls are kid-friendly and a great way to involve the little ones in baking. However, be mindful of any allergies—such as gluten or dairy. You can easily adapt them by using gluten-free Oreos and dairy-free cream cheese alternatives if needed.
What toppings can I use to customize my Oreo Balls?
The more the merrier! You can choose from a variety of toppings like rainbow sprinkles, shredded coconut, or crushed nuts. The sky's the limit—get creative and have fun mixing different flavors and textures for a unique twist!
Sweet and Easy 3-Ingredient Oreo Balls Everyone Will Love
Ingredients
Equipment
Method
- Start by placing your Oreo cookies in a food processor. Pulse them until finely crumbled, resembling sand, about 30 seconds.
- In a large mixing bowl, combine the crushed Oreos with softened cream cheese. Mix until well-blended and smooth, about 2-3 minutes.
- Roll about a tablespoon of the mixture into balls, about 1 inch in diameter, and place on a parchment-lined baking sheet.
- Refrigerate the baking sheet with the balls for at least 30 minutes to help them firm up.
- Melt the chocolate in a microwave-safe bowl in 30-second intervals, stirring until smooth, about 1-2 minutes.
- Dip each ball into the melted chocolate, ensuring it's completely coated, and let excess drip off before placing back on the sheet.
- Sprinkle desired toppings onto the wet chocolate coating before it sets.
- Return the baking sheet to the refrigerator for another 15-20 minutes for the chocolate to harden.


Leave a Reply