
As I whipped up my latest Halloween creation, I couldn’t help but grin at the ridiculousness of it all—how often do you get to say you're frosting cupcakes to look like brains? These Zombie Brain Cupcakes, with their rich chocolate base and vibrant green frosting, are a spooktacularly fun twist on a classic treat that is sure to enchant your guests. Perfect for gatherings or a festive family night, they come together quickly and provide an opportunity for some creative decorating fun. Whether you unleash your inner artist with the frosting or keep it simple, these cupcakes promise to be a delicious highlight of your Halloween festivities. Ready to turn your kitchen into a creepy confectionery? Let’s get baking!
Why Are Zombie Brain Cupcakes So Fun?
Unique cupcake design: These treats not only taste great but also look delightfully creepy, making them the star of any Halloween gathering.
Easy to customize: With simple substitutions, you can tailor the flavors and colors to fit your party theme or personal taste.
Crowd-pleaser: Both kids and adults will love the playful presentation, ensuring they capture everyone's attention at your festive celebrations.
Quick to make: The baking process is straightforward, allowing you to whip up a batch in no time, giving you more moments to enjoy the festivities.
Moist and flavorful: The combination of chocolate cupcakes and rich frosting creates a decadent dessert that will have everyone reaching for seconds!
Zombie Brain Cupcake Ingredients
For the Cupcakes
- All-Purpose Flour – Provides structure for the cupcakes; substitute with gluten-free flour for a gluten-free version.
- Granulated Sugar – Adds sweetness; can be reduced for a less sweet cupcake.
- Unsweetened Cocoa Powder – Enhances the chocolate flavor; use Dutch-process for a richer taste.
- Baking Powder – Leavening agent for achieving a light and fluffy texture.
- Baking Soda – Works with the acidity of buttermilk to create lift.
- Kosher Salt – Balances sweetness and enhances flavors.
- Buttermilk or Whole Milk – Adds moisture and tenderness; swap with plant-based milk for dairy-free cupcakes.
- Neutral Oil – Keeps the cupcakes moist; can be substituted with melted butter for added flavor.
- Large Egg – Binds the ingredients together and contributes to the lift; for egg-free, use applesauce or flaxseed meal.
- Pure Vanilla Extract – Provides depth of flavor; ensure it’s pure for the best taste.
- Boiling Water – Enhances the cocoa flavor and moistens the batter.
For the Frosting
- Powdered Sugar – Sweetener for frosting, giving it a light and fluffy texture.
- Unsalted Butter – Base for frosting; room temperature ensures smooth mixing.
- Neon Green Liquid Food Coloring – For decorating, adds a whimsical and spooky touch; adjust amount for brighter hues.
For Decoration
- Red Decorating Gel – For drizzling to mimic blood, enhancing the Halloween theme.
These Zombie Brain Cupcakes are sure to be a hit this Halloween, tantalizing both the eyes and the taste buds!
Step‑by‑Step Instructions for Zombie Brain Cupcakes
Step 1: Prepare the Cupcake Batter
In a large mixing bowl, combine 1 and ¾ cups of all-purpose flour, 1 and ½ cups of granulated sugar, ¾ cup of unsweetened cocoa powder, 1 and ½ teaspoons of baking powder, 1 teaspoon of baking soda, and ½ teaspoon of kosher salt. In another bowl, whisk together 1 cup of buttermilk, ½ cup of neutral oil, 1 large egg, and 2 teaspoons of pure vanilla extract. Gradually mix the wet ingredients into the dry, then add 1 cup of boiling water, stirring until the batter is smooth.
Step 2: Bake Cupcakes
Preheat your oven to 350°F (175°C) and line a cupcake pan with liners. Fill each liner about two-thirds full with the cupcake batter, using a measuring cup or ice cream scoop for uniformity. Bake in the preheated oven for 20-25 minutes, or until a toothpick inserted into the center comes out clean. Once baked, let the cupcakes cool in the pan for 5 minutes before transferring them to a wire rack to cool completely.
Step 3: Make the Frosting
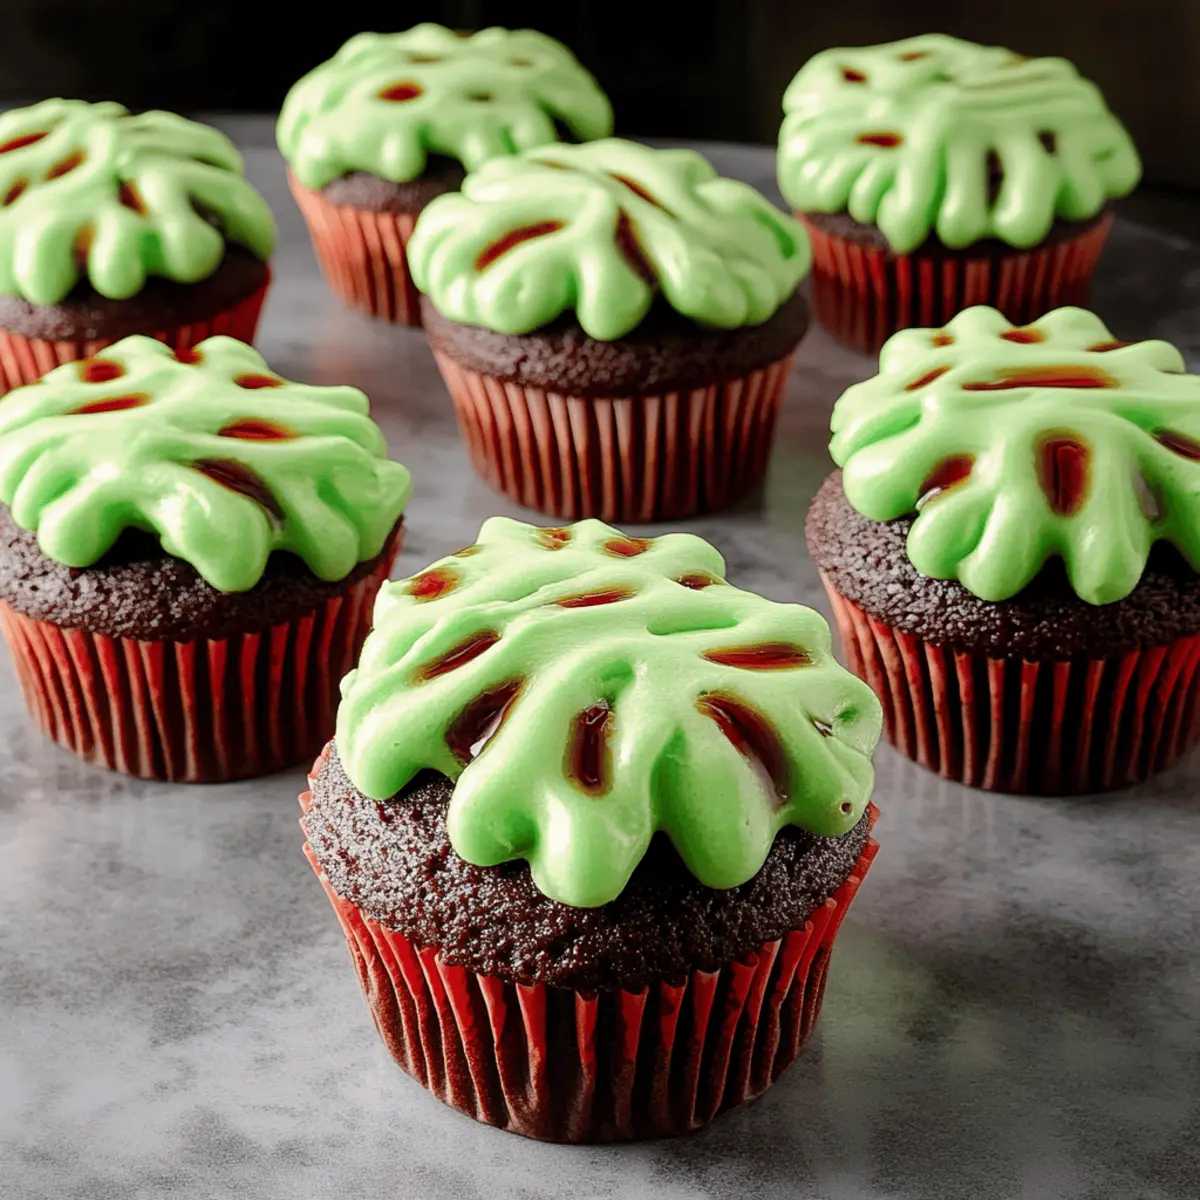
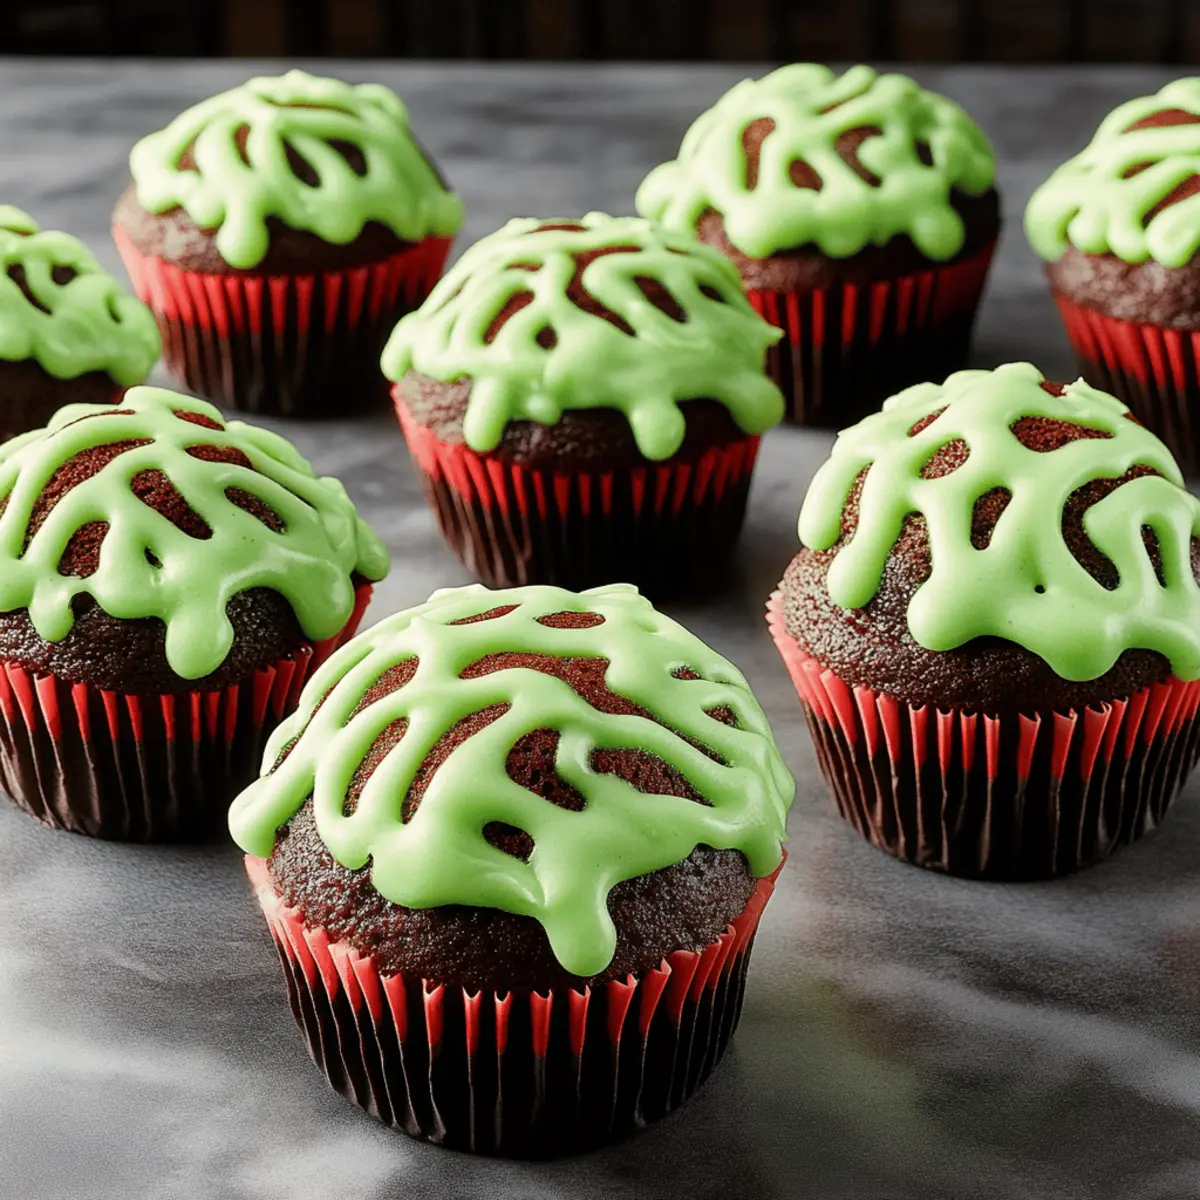
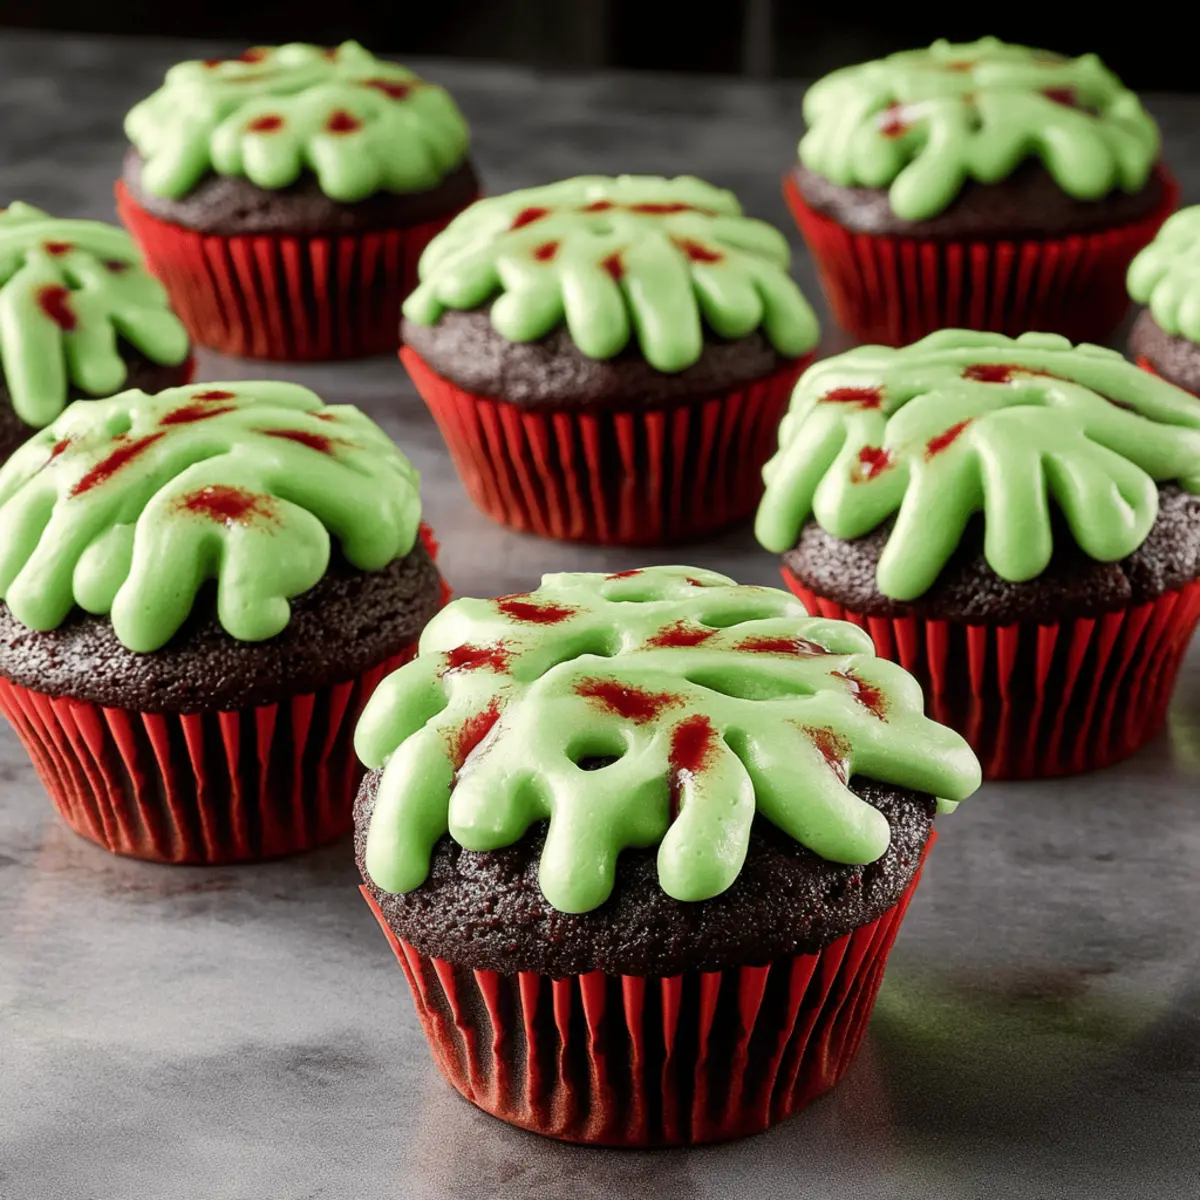
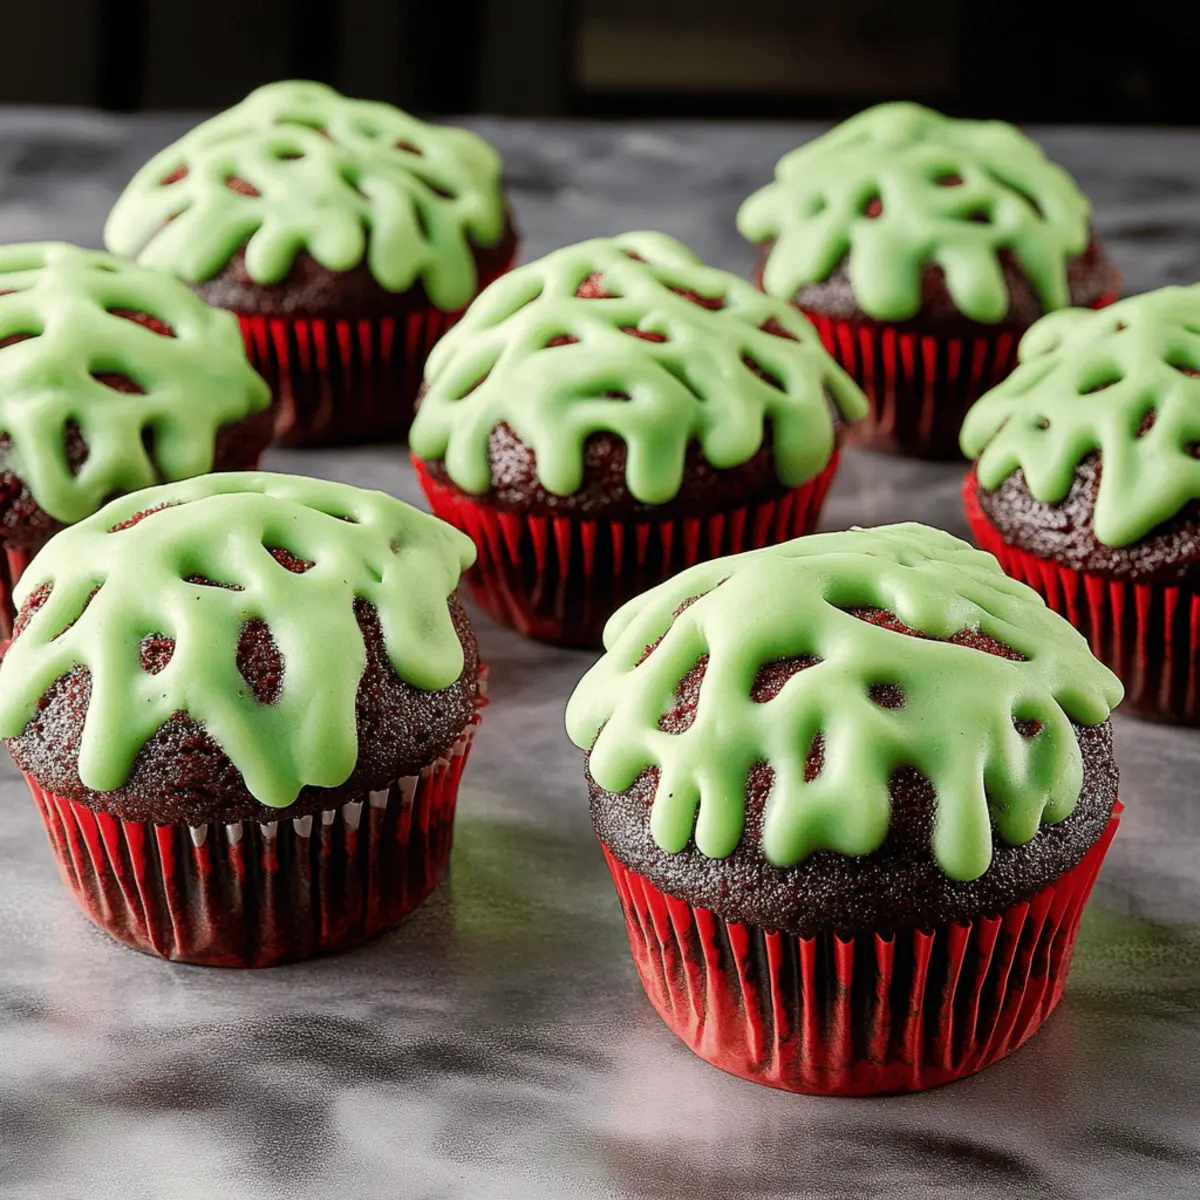
While the cupcakes are cooling, prepare the creamy frosting. In a large bowl, beat ½ cup of softened unsalted butter with an electric mixer on medium speed until creamy. Gradually add 4 cups of powdered sugar and 2-3 tablespoons of milk, mixing until fluffy and spreadable. Add in 3-4 drops of neon green food coloring, mixing well until you achieve your desired brain-like hue that pops out for the Zombie Brain Cupcakes.
Step 4: Decorate
Once the cupcakes are completely cool, it's time to unleash your artistic side! Using a piping bag fitted with a round tip, pipe the vibrant green frosting onto the tops of each cupcake to create a brain-like appearance. Finally, take red decorating gel and drizzle it over the frosting, mimicking blood for that spooky Halloween effect. Allow the decorations to set before serving.
Zombie Brain Cupcakes Variations & Substitutions
Feel free to let your creativity shine as you customize these ghoulishly delightful cupcakes to suit your taste and dietary needs!
- Gluten-Free: Substitute all-purpose flour with a 1:1 gluten-free baking mix for a deliciously different cupcake that's gluten-free.
- Dairy-Free: Replace buttermilk with almond or oat milk and use dairy-free butter for a vegan-friendly version everyone can enjoy.
- Sugar Reduction: Reduce sugar by 25% for a less sweet cupcake; balance flavors with a touch of vanilla extract.
- Flavor Twist: Try adding 1 teaspoon of espresso powder to the cocoa mixture to enhance the chocolate flavor with a rich undertone.
- Frosting Alternatives: Mix in peanut butter to the frosting for a nutty flavor, creating a delightful twist on the classic taste.
Let your imagination run wild! For a Halloween party in style, consider pairing your creations with other spooky treats like Halloween Spiced Cookies or a vibrant Pumpkin Patch Punch. Create a fun, thematic spread for everyone to enjoy!
Storage Tips for Zombie Brain Cupcakes
- Room Temperature: Store cupcakes in an airtight container at room temperature for up to 2-3 days to maintain their moistness and flavor.
- Fridge: For extended freshness, refrigerate in an airtight container for up to 1 week, but note that they may lose some fluffiness.
- Freezer: Freeze Zombie Brain Cupcakes by wrapping them individually in plastic wrap and placing them in a freezer-safe bag for up to 3 months. Allow to thaw completely before decorating.
- Reheating: If desired, reheat refrigerated cupcakes in a microwave for about 10-15 seconds to enjoy a warm, gooey treat.
What to Serve with Zombie Brain Cupcakes
As you prepare for a frightfully fun Halloween gathering, complement these eerie treats with delicious accompaniments that enhance the festive spirit.
-
Spooky Punch: A refreshing drink mixed with fruit juices and soda, it draws attention with its bubbling, eerie appearance, perfectly matching the Halloween theme.
-
Cheesy Spider Dip: This warm and gooey cheese dip topped with olive spiders offers a savory balance to the sweet cupcakes. Pair it with crispy tortilla chips for delightful texture contrasts.
-
Witch’s Brew Soup: A smooth and warming green soup made from pureed vegetables like peas or spinach fits right in with the spooky theme and adds a nutritious touch to your spread.
-
Gruesome Veggie Platter: Arrange fresh veggies in a creepy layout and serve with a creamy dip. The crunchiness of the veggies complements the soft texture of the cupcakes beautifully.
-
Chocolate Mousse Shots: Light and rich, these mousse cups echo the chocolate flavor of the cupcakes while providing a sophisticated dessert option that wow your guests.
-
Gory Gummies: Serve gummy worms or severed finger candies for a fun and playful surprise, keeping the festive atmosphere alive and encouraging guests to indulge in the treats.
Pairing these items with your Zombie Brain Cupcakes creates a memorable, immersive experience, delighting all ages at your Halloween party!
Expert Tips for Zombie Brain Cupcakes
- Cooling Time: Allow the cupcakes to cool completely before frosting. This prevents the frosting from melting and maintains the spooky brain effect.
- Color Gradation: When using neon food coloring, start with a few drops and gradually add more for the desired intensity. Bright colors create an eye-catching presentation!
- Frosting Consistency: If the frosting feels too thick, add a splash of milk to achieve a fluffy and spreadable texture ideal for piping.
- Creative Decorating: Don’t be afraid to get creative with decorations! Use various shades of food coloring for a unique look that can make your Zombie Brain Cupcakes truly stand out.
- Storage Solutions: Keep any leftover cupcakes in an airtight container at room temperature for up to 3 days, ensuring they retain their moisture and flavor.
Make Ahead Options
These Zombie Brain Cupcakes are perfect for busy home cooks looking to save time during Halloween festivities! You can prepare the chocolate cupcake base up to 3 days in advance by baking and storing them in an airtight container at room temperature; this ensures they remain moist and delicious. Additionally, the frosting can be made ahead of time and refrigerated for up to 5 days—just remember to bring it back to room temperature and re-whip before decorating. To finish, simply frost the cooled cupcakes and add your spooky red gel drizzle right before serving, allowing you to enjoy your festive gathering without the last-minute rush!
Zombie Brain Cupcakes Recipe FAQs
How do I choose the best ripe ingredients for Zombie Brain Cupcakes?
Absolutely! When selecting your ingredients, look for flour that’s fresh with no clumps, and for cocoa powder, a fine texture without any lumps is ideal. Ensure your eggs are fresh by checking the sell-by date, and if using milk, opt for a full-fat variety as it adds richness. For an egg-free option, ensure the applesauce is unsweetened for the best balance of flavors.
What’s the best way to store leftover Zombie Brain Cupcakes?
Very simple! If you have leftovers, store them in an airtight container at room temperature for up to 2-3 days to keep them moist. For longer storage, you can refrigerate them for 1 week. Just remember, if refrigerating, the cupcakes might lose a tiny bit of fluffiness but will still taste delightful!
Can I freeze Zombie Brain Cupcakes, and how?
Of course you can! To freeze your Zombie Brain Cupcakes, first, let them cool completely. Wrap each cupcake individually in plastic wrap and place them in a freezer-safe bag. They can be frozen for up to 3 months. When you’re ready to enjoy them, simply thaw at room temperature before frosting. If you want them warm again, a quick zap in the microwave for about 10-15 seconds works wonders!
What should I do if my frosting doesn't turn out fluffy?
If your frosting ends up too thick, no worries! Add a splash of milk—just a tablespoon at a time—mixing after each addition until you reach your desired fluffy consistency. If it’s too runny, add a bit more powdered sugar. The key is to create a texture that pipes well and holds its shape for that perfect brain design!
Are there any dietary considerations for Zombie Brain Cupcakes?
Absolutely! These cupcakes can be made gluten-free by substituting all-purpose flour with gluten-free flour. For dairy-free options, use plant-based milk and a dairy-free butter substitute for the frosting. If allergies are a concern, be sure to check for cross-contamination in the baking ingredients. Kids (and pets) should stick to enjoying the visual aspect, especially with the decorating gel, which isn't meant for animal consumption.
Can I customize the flavor of my Zombie Brain Cupcakes?
Very much so! You can switch the chocolate base for vanilla or red velvet for a spooky twist. To enhance flavor further, consider adding extracts like almond or peppermint for an unexpected flavor kick. Additionally, feel free to adjust the food coloring to suit your Halloween theme; pink, purple, or even blue can create unique brain effects!
These Zombie Brain Cupcakes are the perfect blend of fun and deliciousness, adding a unique touch to your Halloween celebrations. Enjoy your spooky baking!
Zombie Brain Cupcakes That Will Thrill Your Halloween Party
Ingredients
Equipment
Method
- In a large mixing bowl, combine the flour, sugar, cocoa powder, baking powder, baking soda, and salt. In another bowl, whisk together the buttermilk, oil, egg, and vanilla. Gradually mix the wet ingredients into the dry, then stir in the boiling water until smooth.
- Preheat the oven to 350°F (175°C). Line a cupcake pan with liners. Fill each liner about two-thirds full with batter, then bake for 20-25 minutes or until a toothpick comes out clean. Let cool for 5 minutes before transferring to a wire rack.
- To make the frosting, beat the softened butter until creamy. Gradually add the powdered sugar and milk, mixing until fluffy. Add food coloring to achieve the desired hue.
- Once the cupcakes are cool, pipe the frosting onto each cupcake to create a brain-like appearance. Drizzle red decorating gel over the frosting for a spooky effect.


Leave a Reply