
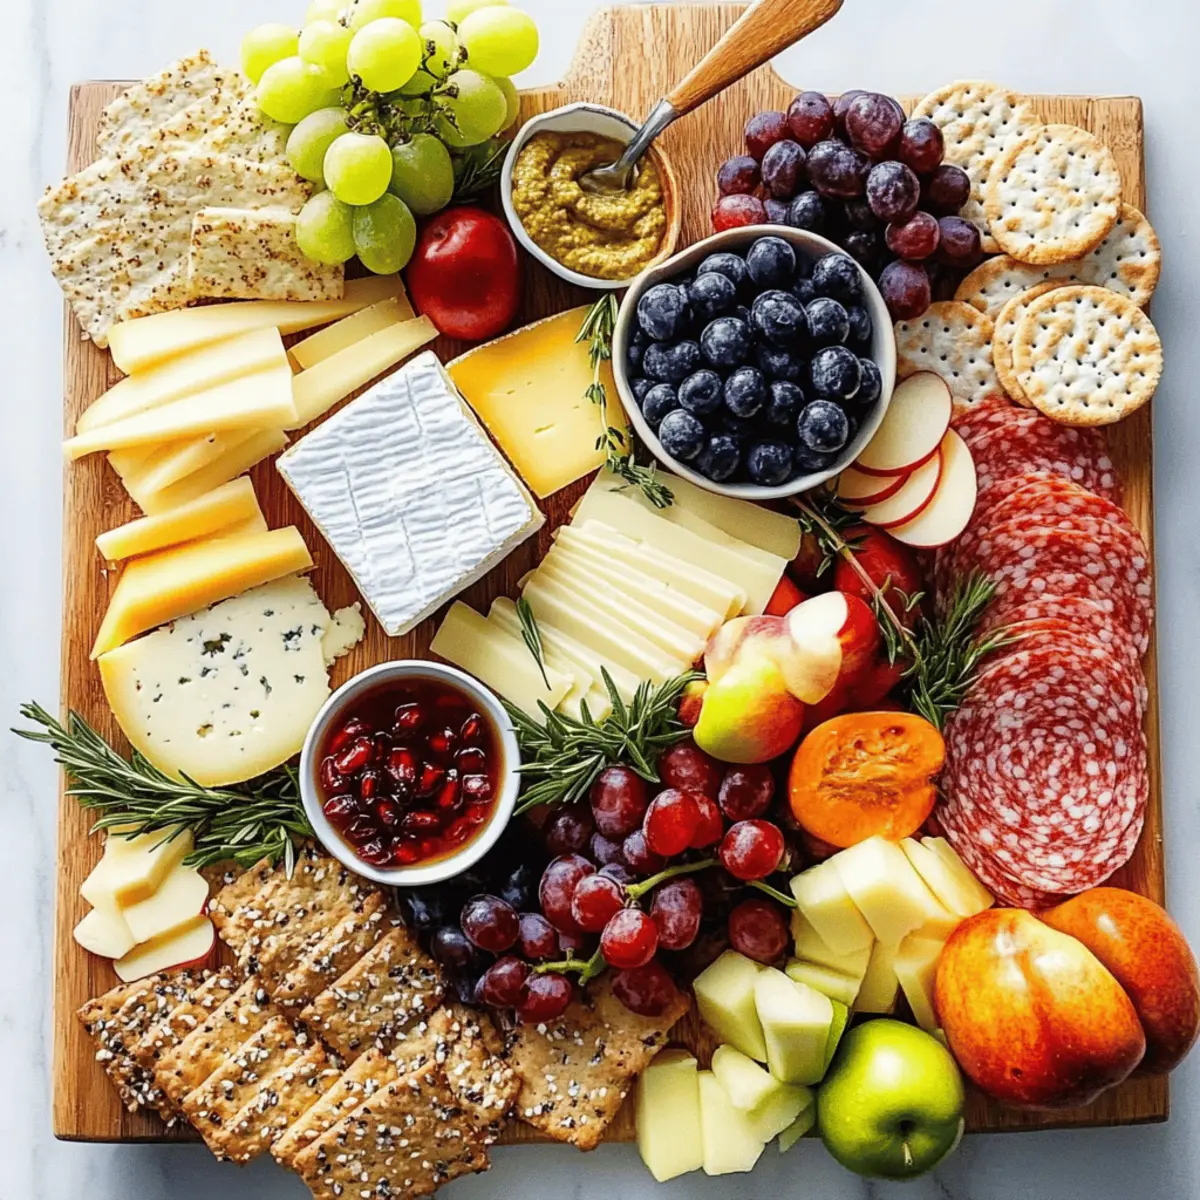
As I strolled through the bustling market, vibrant cheese wheels caught my eye, each promising a delightful journey of flavors. With the right combinations, creating the Ultimate Cheese Board can transform any gathering into a culinary masterpiece. This recipe isn't just a feast for the eyes; it’s a hassle-free way to please your guests with a variety of textures and tastes, making it perfect for both casual get-togethers and sophisticated soirées. The beauty of this cheese board lies in its flexibility—whether you require gluten-free options or want a vegetarian delight, I’ve mapped out everything you need. So, why settle for ordinary snacks when you can impress and delight with something extraordinary? Ready to dive into the art of cheese board crafting? Let’s explore!
Why is the Ultimate Cheese Board a Must-Try?
Versatility: You can customize the Ultimate Cheese Board to cater to various dietary preferences, ensuring everyone at your gathering is included.
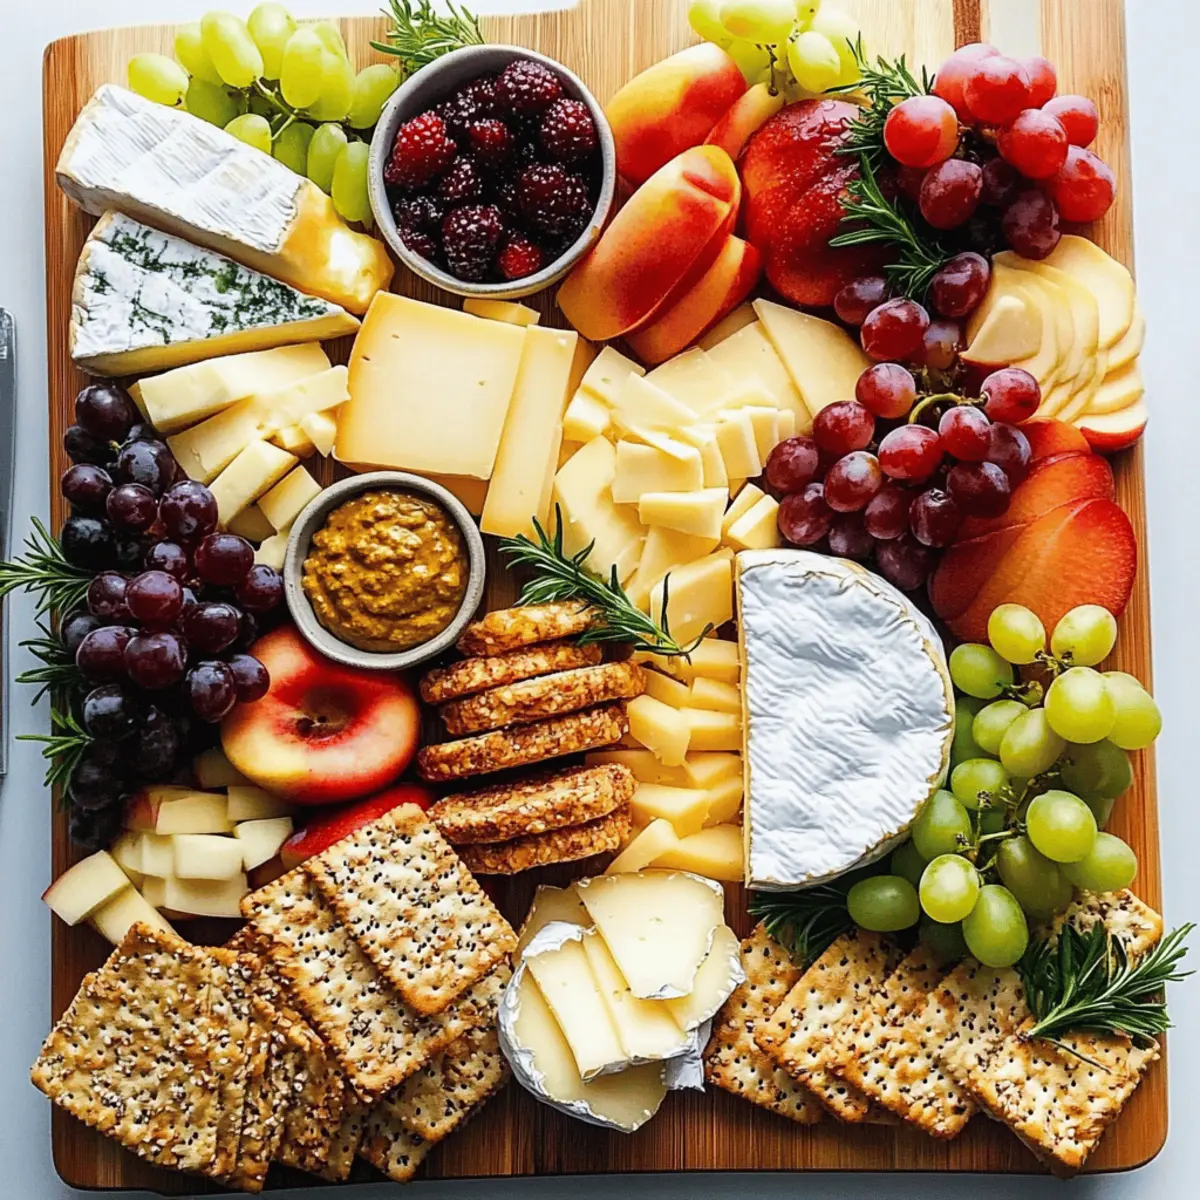
Elegant Presentation: With vibrant colors and textures, your cheese board will not only taste amazing but also look incredibly inviting, making it the centerpiece of any table.
Quick and Easy: No complicated cooking steps! Just choose your ingredients, arrange them beautifully, and you're ready to serve. It’s the perfect solution for those last-minute invitations.
Flavor Exploration: Each combination of cheese and accompaniments creates a unique tasting experience that invites guests to explore different pairings—pair with some light wines to elevate the flavor!
Crowd-Pleasing: Who doesn’t love cheese? This board is sure to be a hit, offering something for everyone; it's a guaranteed conversation starter! Explore more pairing ideas with a spicy miso casserole or an elegant potato blue cheese pizza.
Ultimate Cheese Board Ingredients
For the Cheeses
- Soft Cheese – Adds creaminess; Brie or Camembert can be substituted for a more luscious texture.
- Mild Slicing Cheese – Offers an easy-to-eat option; consider using mild cheddar or gouda for a balanced flavor.
- Aged Crumbly Cheese – Introduces depth of flavor and texture; aged manchego or blue cheese are intriguing alternatives.
- Wild Card Cheese – Choose according to what's available or your preference; goat cheese or a flavored cheese can bring variety.
For the Accompaniments
- Crostini or Crackers – Provides the crunchy base for all your delicious toppings; gluten-free crackers are ideal for gluten-free options.
- Spicy Mustard – Contributes a tangy kick; feel free to swap it for hummus if you're looking for a creamy dip alternative.
- Jellies or Preserves – Adds a touch of sweetness; fig or apricot preserves pair perfectly with cheeses.
- Fresh Fruits (grapes, apples) – Freshness that balances the rich and savory notes.
- Dried or Fresh Figs – Introduces a chewy texture along with an additional sweetness.
- Mixed Pickles and Olives – Offers a savory contrast; marinated vegetables work as a wonderful substitute.
- Salted Nuts – Provides a satisfying crunch; Marcona almonds or walnuts add a lovely flavor.
- Marinated Artichokes/Peppadews – Brings unique, tangy flavors that enhance the overall experience.
Note: With these ingredients for the Ultimate Cheese Board, you’ll ensure a delightful spread that mesmerizes your guests!
Step‑by‑Step Instructions for Ultimate Cheese Board
Step 1: Choose Your Cheeses
Start by selecting four cheeses that vary in texture and flavor for your Ultimate Cheese Board. Aim for a soft cheese like Brie, a mild slicing cheese such as gouda, an aged crumbly cheese like manchego, and a wild card cheese of your choice. Allow the cheeses to sit at room temperature for about 30 minutes prior to serving, which enhances their flavors and makes them easier to slice.
Step 2: Prepare Accompaniments
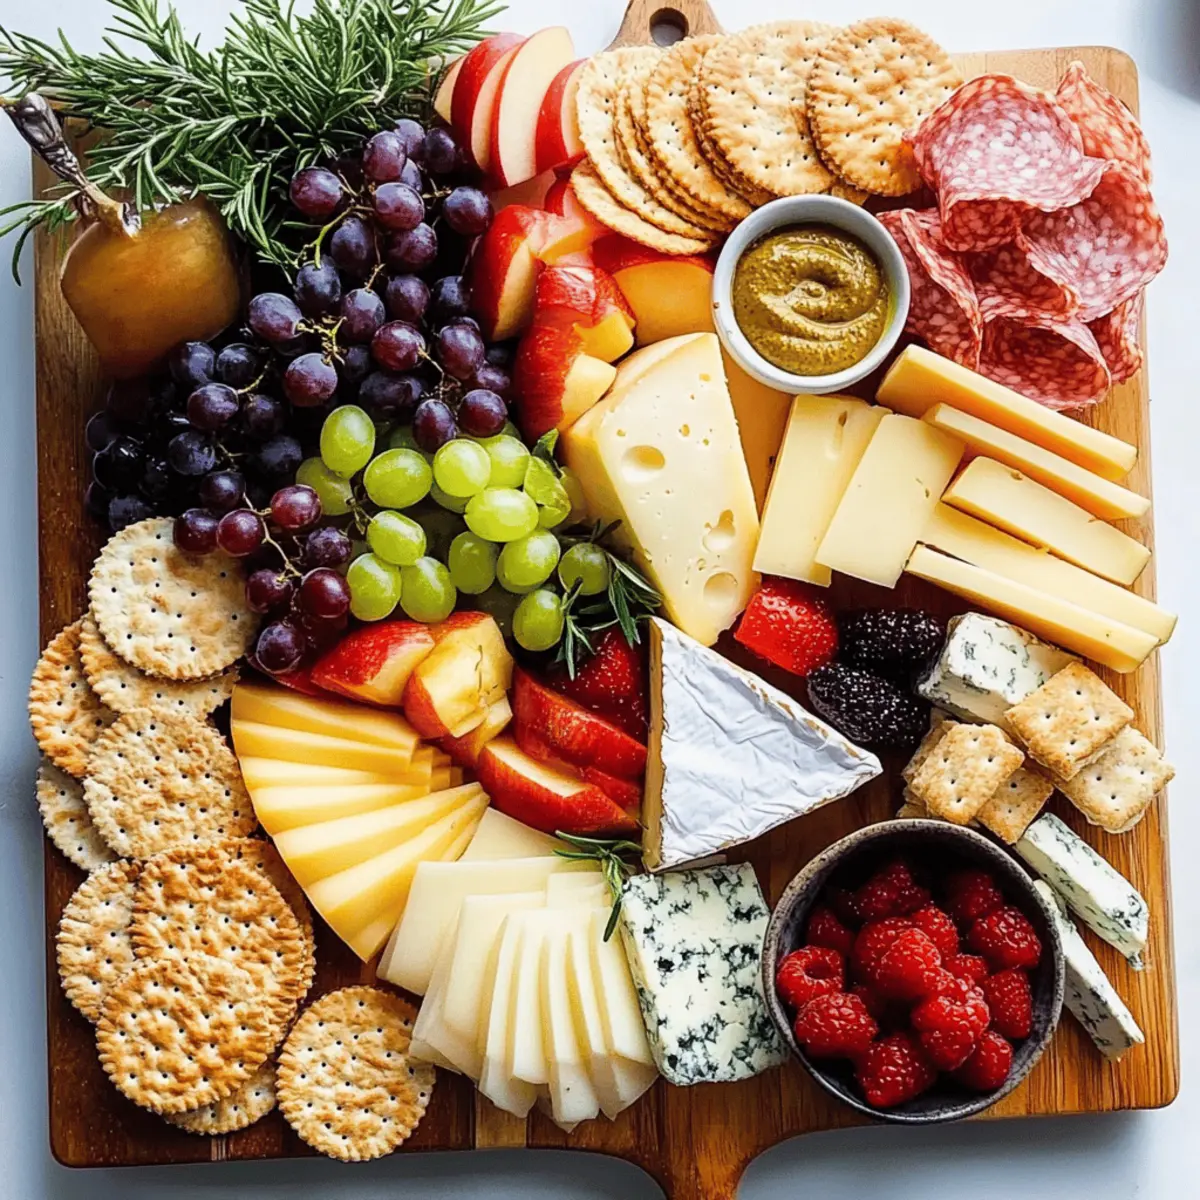
While your cheeses are warming up, prepare an assortment of accompaniments. Slice fresh fruits like apples and grapes, and arrange them on the board. Get the crostini or crackers ready, and if you choose to use spreads, place small bowls for mustard, jellies, or hummus. Aim for a colorful and diverse mix that complements the cheeses, ensuring your Ultimate Cheese Board pops visually.
Step 3: Arrange the Cheeses
Begin to assemble your Ultimate Cheese Board by positioning the cheeses on a large wooden board or platter. Space them out to avoid overcrowding, allowing guests easy access to each cheese while creating an inviting presentation. You might want to cut a few slices from each cheese to encourage sampling and showcase their enticing textures.
Step 4: Fill Gaps with Accompaniments
Next, fill the spaces around the cheeses with your choice of crackers, fruits, nuts, and spreads. This step is essential in crafting a beautiful layout as well as providing a balanced array of flavors and textures. Be playful in your arrangement—let colors and shapes guide you to create a visually stunning display that invites conversation.
Step 5: Add Finishing Touches
For the finishing touch on the Ultimate Cheese Board, sprinkle salted nuts for added crunch and include marinated artichokes or olives to introduce tangy elements. If you have fresh herbs or edible flowers, consider placing them in the center for an artistic touch. Once everything is arranged, cover the board with plastic wrap if you are preparing ahead of time, and refrigerate until ready to serve.
Step 6: Serve and Enjoy
When it's time to serve, take the board out of the refrigerator about 15 minutes beforehand. This allows the cheeses to return to room temperature for optimal flavor. Present your Ultimate Cheese Board as the centerpiece of your gathering, and don’t forget to provide cheese knives for each cheese to ensure guests can easily serve themselves without mixing flavors.
Make Ahead Options
Creating the Ultimate Cheese Board ahead of time is a fantastic way to save precious moments on the day of your gathering! You can prepare many components, such as slicing fresh fruits, arranging nuts, and portioning spreads, up to 24 hours in advance. For the best quality, keep the cheeses in their original packaging until you're ready to serve. When you’re ready to impress your guests, simply arrange the cheeses on your board and fill in with the prepped accompaniments, giving it a fresh touch as you lay everything out. Allow the board to sit at room temperature for about 15 minutes before serving to enhance the flavors. With these prep-ahead strategies, you’ll enjoy a beautiful cheese board with minimal last-minute fuss!
How to Store and Freeze Ultimate Cheese Board
Fridge: Store any leftover components of your Ultimate Cheese Board in an airtight container. Soft cheeses and cut fruits should be used within 3 days for the best taste and freshness.
Room Temperature: If serving again within an hour or so, you can leave the remaining cheeses and accompaniments out at room temperature. Just avoid direct sunlight to maintain quality.
Freezer: While it's best to avoid freezing most cheeses for texture reasons, you can freeze certain hard cheeses if necessary. Wrap them tightly in plastic wrap and foil, using within 3 months for flavor conservation.
Reheating: Refrain from reheating cheeses; it's best enjoyed at room temperature. Bring any refrigerated items out about 15 minutes prior to serving to enhance flavors.
Ultimate Cheese Board Variations
Customize your Ultimate Cheese Board with these delightful twists that elevate your appetizer game!
-
Gluten-Free Options: Use gluten-free crackers or crostini to ensure everyone can enjoy this impressive spread.
-
Spicy Kick: Add sliced jalapeños or spiced nuts to introduce some heat and an exciting flavor contrast.
-
Fruit Infusion: Mix in seasonal fruits like pears or berries for a burst of freshness. Their sweetness beautifully complements the rich cheeses.
-
Nuts Variety: Swap salted nuts for spiced or honey-roasted varieties for an extra crunch and depth of flavor.
-
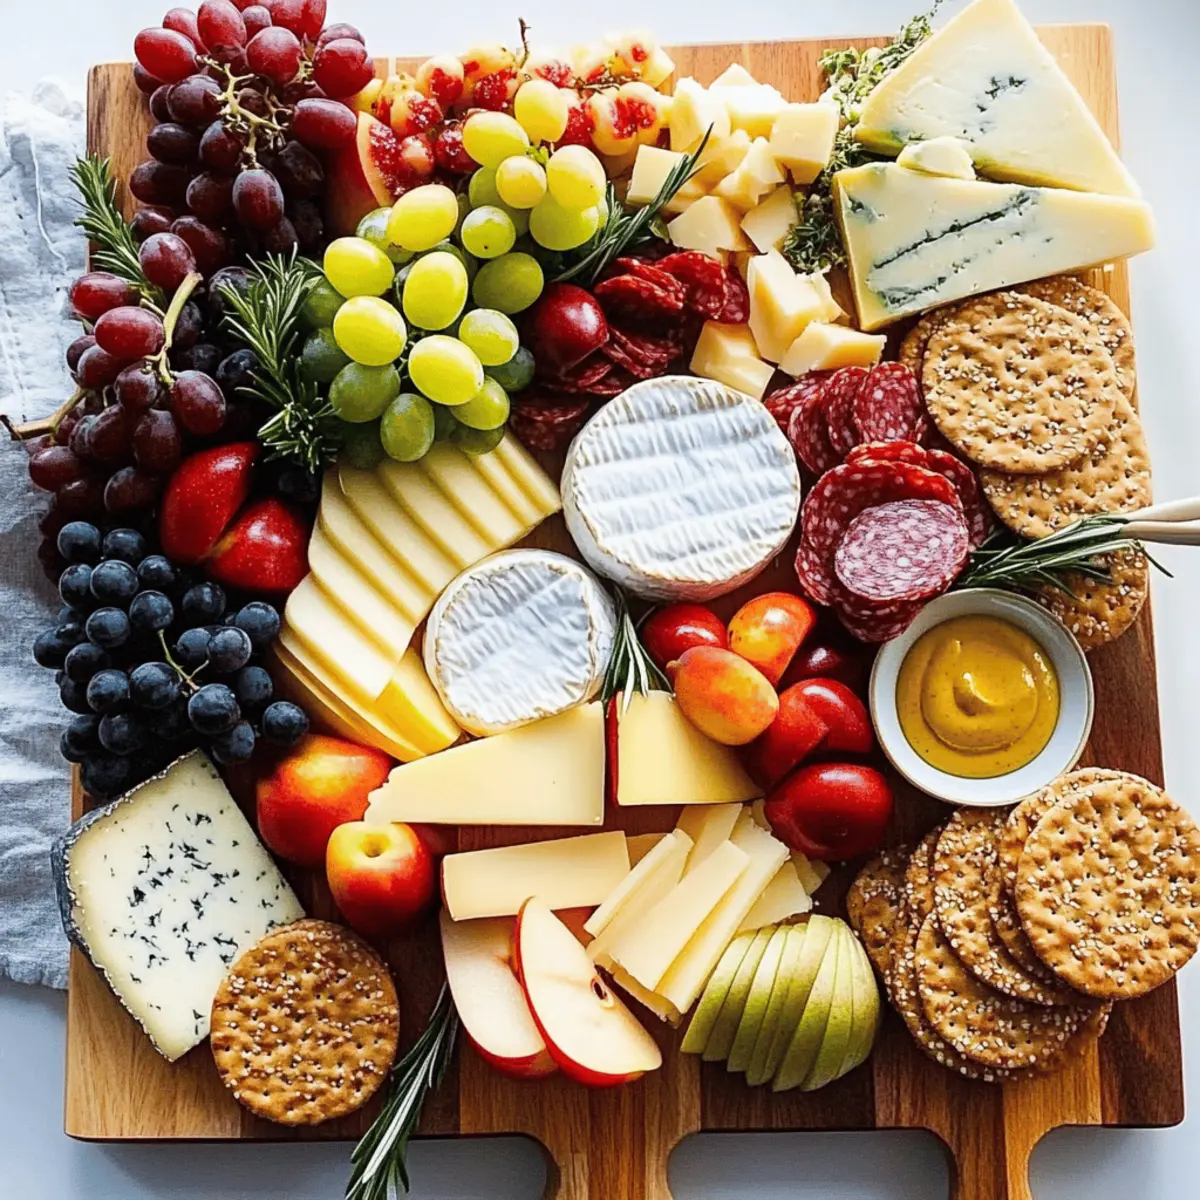
Bolder Cheeses: Choose strong-flavored cheeses such as Roquefort or aged Cheddar for a richer tasting experience. The complexity will surely impress!
-
Flavorful Spreads: Incorporate unique spreads like truffle honey or herbed olive oil to enrich your board with exciting notes. These elegant touches can leave a lasting impression.
-
Vegetarian Delight: Focus on plant-based cheeses made from nuts for a delicious dairy-free alternative. It's a wonderful way to cater to vegetarian guests.
-
Charcuterie Touch: For meat lovers, add thinly sliced cured meats such as prosciutto or salami. This addition will transform your cheese board into a charcuterie masterpiece!
Enhance your cheeseboard experience with these personalized touches and explore additional ideas like pairing with a delightful chocolate poke cake or a hearty spicy miso casserole.
Expert Tips for the Ultimate Cheese Board
-
Cheese Variety: Aim for a good mix of textures and flavors; balance creamy, crumbly, and aged cheeses for an inviting experience.
-
Presentation Matters: Invest time in the arrangement; a well-spread cheese board captivates and attracts guests. Avoid overcrowding to allow easy access.
-
Freshness is Key: Prepare items like cut fruits or toasted crackers just before serving; this ensures vibrant flavors and a delightful crunch.
-
Avoid Flavor Mixing: Provide a separate cheese knife for each cheese to keep flavors distinct and enhance the tasting experience.
-
Seasonal Touches: Incorporate seasonal fruits or local specialties; this not only adds freshness but also sparks conversation around your Ultimate Cheese Board.
-
Wine Pairing: Suggest light wines or craft beers that complement the cheeses to elevate the overall flavors and dining experience.
What to Serve with Ultimate Cheese Board
Imagine the delightful crunch of flavorful accompaniments and refreshing bites that heighten your cheese board experience.
- Fresh Baguette Slices: Perfect for piling on cheese, these crusty slices add warmth and texture, enhancing the overall experience.
- Honey Drizzle: A touch of sweet honey brings out the flavors in aged cheeses, creating a delightful contrast that elevates every bite.
- Roasted Vegetables: Add a savory element with caramelized roasted veggies; their earthiness beautifully complements the cheeses.
- Sparkling Wine: A chilled glass of bubbly enhances the cheese’s creaminess, making your gathering feel even more festive and luxurious.
- Seasonal Fruits: Incorporating fruits like figs or pears brightens the board, offering a refreshing contrast to the richness of cheese.
- Chocolate Truffles: Add a decadent touch to your pairing; the rich sweetness balances savory notes and invites indulgence.
- Olive Tapenade: Swirl this savory spread onto your crackers for a burst of Mediterranean flavors that pairs beautifully with the cheeses.
- Craft Beer: Consider pairing with a light IPA; it complements the board’s richness and refreshes the palate for another bite.
- Nuts & Dried Fruits: Crunchy nuts and chewy dried fruits present an additional textural layer, enticing guests with varied flavors.
- Herb-Infused Olive Oil: A drizzle of this aromatic oil brings a burst of freshness and enhances the flavor profile of the cheeses.
Ultimate Cheese Board Recipe FAQs
What types of cheeses should I include for the Ultimate Cheese Board?
Absolutely! Aim for a delightful mix by selecting four types of cheese. For a well-rounded experience, include a soft cheese like Brie or Camembert, a mild slicing cheese such as gouda or mild cheddar, an aged crumbly cheese like manchego or blue cheese, and a wild card cheese that fits your taste, like goat cheese or a flavored option. This variety will create engaging textures and flavors!
How should I store leftovers from my Ultimate Cheese Board?
Very good question! To keep your Ultimate Cheese Board fresh, store any leftover components in an airtight container in the fridge. Ideally, soft cheeses and cut fruits should be consumed within 3 days. When storing, it’s best to cover cheeses with plastic wrap to avoid them drying out or absorbing other odors.
Can I freeze any components of my Ultimate Cheese Board?
The more the merrier! While most cheeses don't freeze well due to texture changes, hard cheeses can be frozen if necessary. Wrap them tightly in plastic wrap and then in foil. Use these within 3 months for the best flavor. Just remember to thaw them in the refrigerator instead of at room temperature to maintain their quality.
What if I need gluten-free options for my cheese board?
No worries at all! Simply substitute crostini or regular crackers with gluten-free crackers. There are plenty of options available today that maintain delicious crunch without gluten. Additionally, you can incorporate other crunchy elements like nuts or even veggie sticks to keep it tasty and varied!
How can I elevate the flavor of my cheese board?
Absolutely, here’s how! Pair your cheeses with complementary accompaniments like fruity jams or spicy mustards to enhance the flavors. Fresh herbs, edible flowers, or a drizzle of local honey adds a gorgeous touch. Suitable wine or craft beer pairings could also enhance the experience, guiding guests on flavorful adventures as they sample each element.
What should I do if my cheese starts to sweat or get too warm?
That's a great observation! If you notice your cheeses sweating or softening too much, it may be time to move them to a cooler area. Ideally, keep the board out of direct sunlight and serve in a climate-controlled environment. If you’re hosting outside, consider placing the board on a cooling tray or surrounded by ice to keep everything chill and fresh longer.
Ultimate Cheese Board: Impress with Flavorful Combinations
Ingredients
Equipment
Method
- Choose four cheeses that vary in texture and flavor: soft cheese, mild slicing cheese, aged crumbly cheese, and wild card cheese. Allow them to sit at room temperature for 30 minutes before serving.
- Prepare an assortment of accompaniments, slicing fresh fruits and arranging them on the board. Get crostini or crackers ready, placing bowls for spreads.
- Arrange cheeses on a large wooden board or platter, spacing them to avoid overcrowding. Cut some slices to encourage sampling.
- Fill gaps with crackers, fruits, nuts, and spreads, creating a visually stunning display while ensuring a balanced array of flavors.
- Add finishing touches like salted nuts and marinated artichokes. Cover with plastic wrap if preparing ahead of time and refrigerate until serving.
- Serve after taking the board out of the refrigerator 15 minutes beforehand. Provide cheese knives for each cheese.


Leave a Reply