
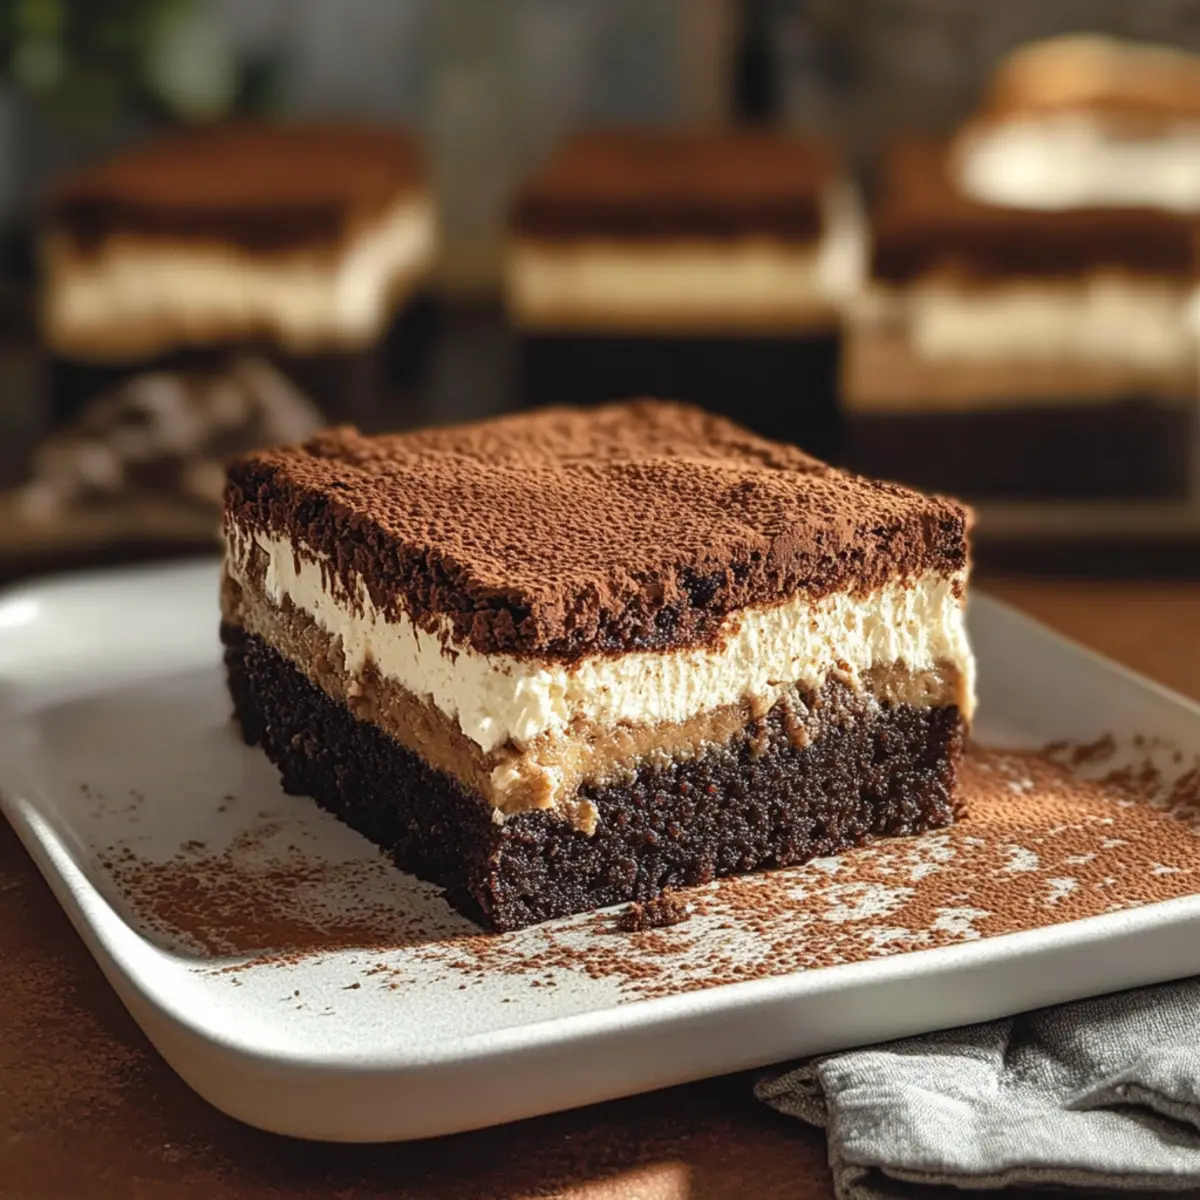
As I stood in my kitchen, the aroma of fresh-brewed espresso mingled with rich chocolate, wrapping me in a warm embrace. This is the magic moment I cherish most, especially when diving into a batch of my unforgettable tiramisu brownies. Crafted with fudgy brownie layers and topped with creamy mascarpone, these delightful treats marry the classic Italian tiramisu with the comforting texture of a brownie. Not only do these tiramisu brownies bake up quickly, but they also impress everyone they touch—making them a perfect dessert for gatherings. The combination of rich chocolate and coffee flavors will surely make your taste buds dance! Curious about how to create this indulgent treat that feels both elevated and homey? Let's get baking!
Why are Tiramisu Brownies a Must-Try?
Indulgence Awaits: These tiramisu brownies blend rich chocolate and espresso, creating a dessert that’s both decadent and delightful.
Fudgy Delight: With a perfectly moist, fudgy brownie base, every bite feels like a warm hug.
Elevated Flavor: The creamy mascarpone topping paired with coffee-soaked ladyfingers adds a unique twist to traditional brownies.
Quick to Make: This recipe is simple enough for a weekday treat but impressive enough for gatherings.
Crowd-Pleasing Comfort: Perfect for dinner parties, these brownies are sure to garner compliments—your friends won't be able to resist asking for the recipe!
Craving more delicious ideas? Why not try the Pumpkin Brownies Decadent for a seasonal twist!
Tiramisu Brownies Ingredients
For the Brownie Base
• Dark or Semi-Sweet Chocolate (100 g) – Provides a rich chocolate flavor; substitute with milk chocolate for a sweeter taste.
• Natural Cocoa Powder (50 g) – Enhances the chocolaty richness; unsweetened cocoa is best for balanced flavor.
• Unsalted Butter (230 g) – Adds moisture and richness, crucial for fudgy texture; keep at room temperature for even melting.
• Large Eggs (4) – Essential for binding and creating a light texture; ensure room temperature for better mixing.
• Granulated Sugar (150 g) – Sweetens the brownies; can replace half with brown sugar for added moisture.
• Brown Sugar (100 g) – Adds depth of flavor and moisture; you can substitute with additional granulated sugar if necessary.
• All-Purpose Flour (100 g) – Provides structure to the brownies; avoid overmixing to prevent tough texture.
For the Mascarpone Topping
• Mascarpone Cheese (250 g) – Key ingredient for the creamy layer; available at most grocery stores; can be replaced with cream cheese for a tangy twist.
• Whipping Cream (200 g) – Lightens the mascarpone; for a richer texture, use heavy cream.
• Powdered Sugar (50 g) – Sweetens the mascarpone cream for balance; avoid substituting, as it dissolves better than granulated sugar.
• Vanilla Extract (½ teaspoon) – Adds aroma and flavor; vanilla bean paste or imitation vanilla works as alternatives.
For the Espresso Soak
• Espresso Powder (2 teaspoons) – Intensifies the coffee flavor; instant coffee can be used if espresso is unavailable.
• Hot Water (150 g) – Dissolves espresso powder for soaking ladyfingers.
• Coffee Liqueur or Dark Rum (1 tablespoon, optional) – Enhances flavor richness; skip for a non-alcoholic version.
• Ladyfingers (12) – Framework for the tiramisu layer; finger biscuits are a direct substitute but skip if gluten-free is required.
For Dusting
• Cocoa Powder for Dusting (1 tablespoon) – Final touch for presentation and flavor; essential for that classic tiramisu look.
Get ready to experience the magic of tiramisu brownies that blend the best of both worlds!
Step‑by‑Step Instructions for Tiramisu Brownies
Step 1: Prep the Oven and Pan
Begin by preheating your oven to 350°F (175°C). While the oven warms, prepare a 9x9-inch baking pan by lining it with parchment paper, allowing for easy removal of the brownies later. Make sure the edges of the paper overhang slightly for easy lifting out.
Step 2: Combine Chocolate and Cocoa
In a medium-sized mixing bowl, combine the chopped dark or semi-sweet chocolate and natural cocoa powder. This mixture is key for your fudgy brownie base. As the oven continues to heat, set it aside to focus on the next step—a flavorful, luscious treat awaits!
Step 3: Brown the Butter
In a saucepan over medium heat, melt the butter until it begins to foam, stirring continuously. Allow it to cook until it turns golden brown, about 5-7 minutes. Pour the browned butter over the chocolate and cocoa mixture, letting it sit for a few minutes until the chocolate melts, then stir until smooth and combined.
Step 4: Mix Egg Ingredients
In a separate large bowl, whisk together the large eggs, granulated sugar, and brown sugar until smooth and slightly thickened, about 3 minutes. This step combines the sweetness with the richness of the chocolate. Gradually mix in the chocolate mixture, ensuring everything is well combined.
Step 5: Incorporate Flour
Gently fold the all-purpose flour into the chocolate mixture using a spatula. Mix just until combined, ensuring not to overmix, which keeps the brownies fudgy. The batter should look thick and glossy—a true sign of delicious tiramisu brownies ready to bake.
Step 6: Bake the Brownies
Pour the batter into your prepared baking pan, spreading it evenly into the corners. Place it in the preheated oven and bake for 28-30 minutes. You'll know they're done when a toothpick inserted comes out mostly clean, with a few moist crumbs—this is key for that fudgy texture.
Step 7: Cool the Brownies
After baking, remove the brownies from the oven and allow them to cool in the pan for about 15-20 minutes. This cooling time is essential before adding the decadent mascarpone layer, so resist the urge to dive in just yet!
Step 8: Prepare the Mascarpone Cream
In a clean mixing bowl, beat the mascarpone cheese until creamy. Gradually add the whipped cream, powdered sugar, and vanilla extract, mixing until the cream thickens and is light and airy. This will create the heavenly topping for your tiramisu brownies.
Step 9: Soak the Ladyfingers
In a shallow dish, dissolve the espresso powder in hot water, adding the coffee liqueur if desired. Quickly dip each ladyfinger into the coffee mixture—just a few seconds on each side to avoid sogginess, then place them on a plate, ready for layering.
Step 10: Layer with Ladyfingers
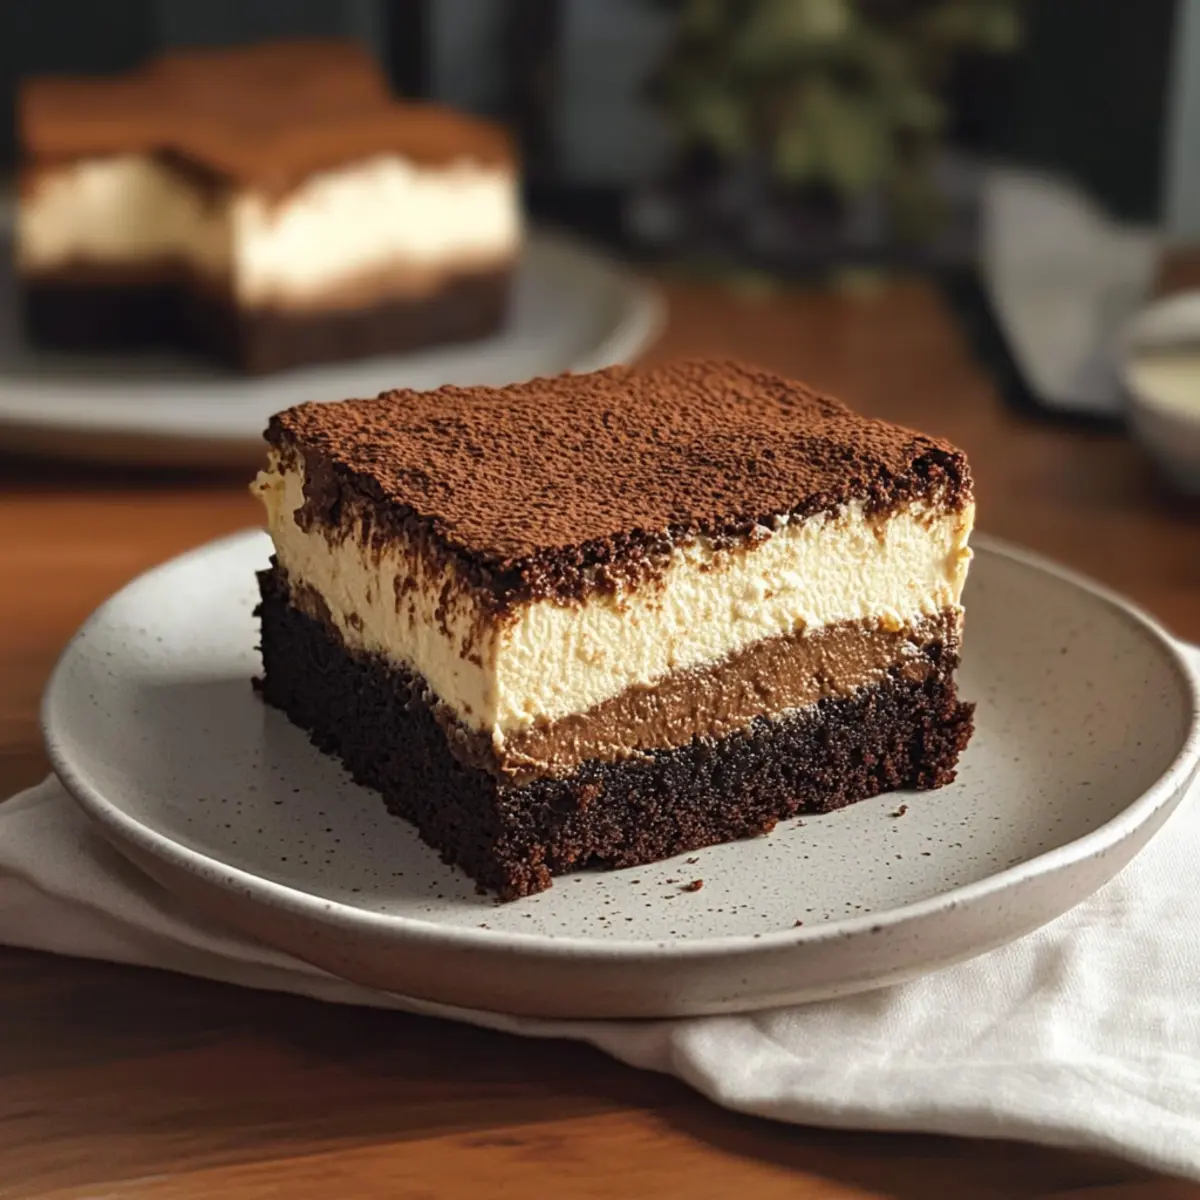
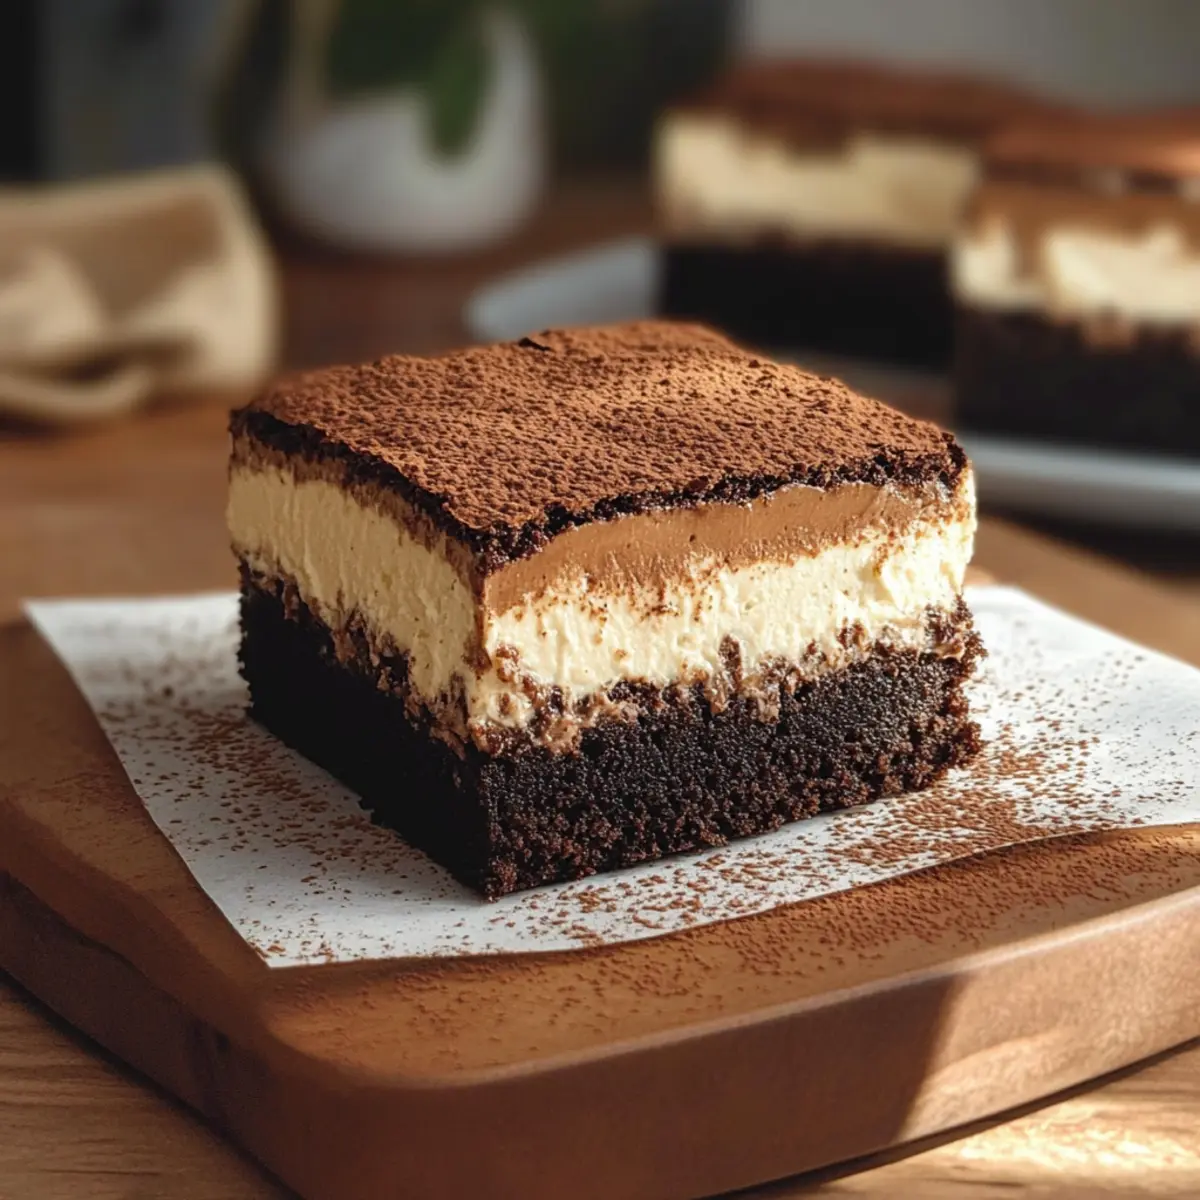
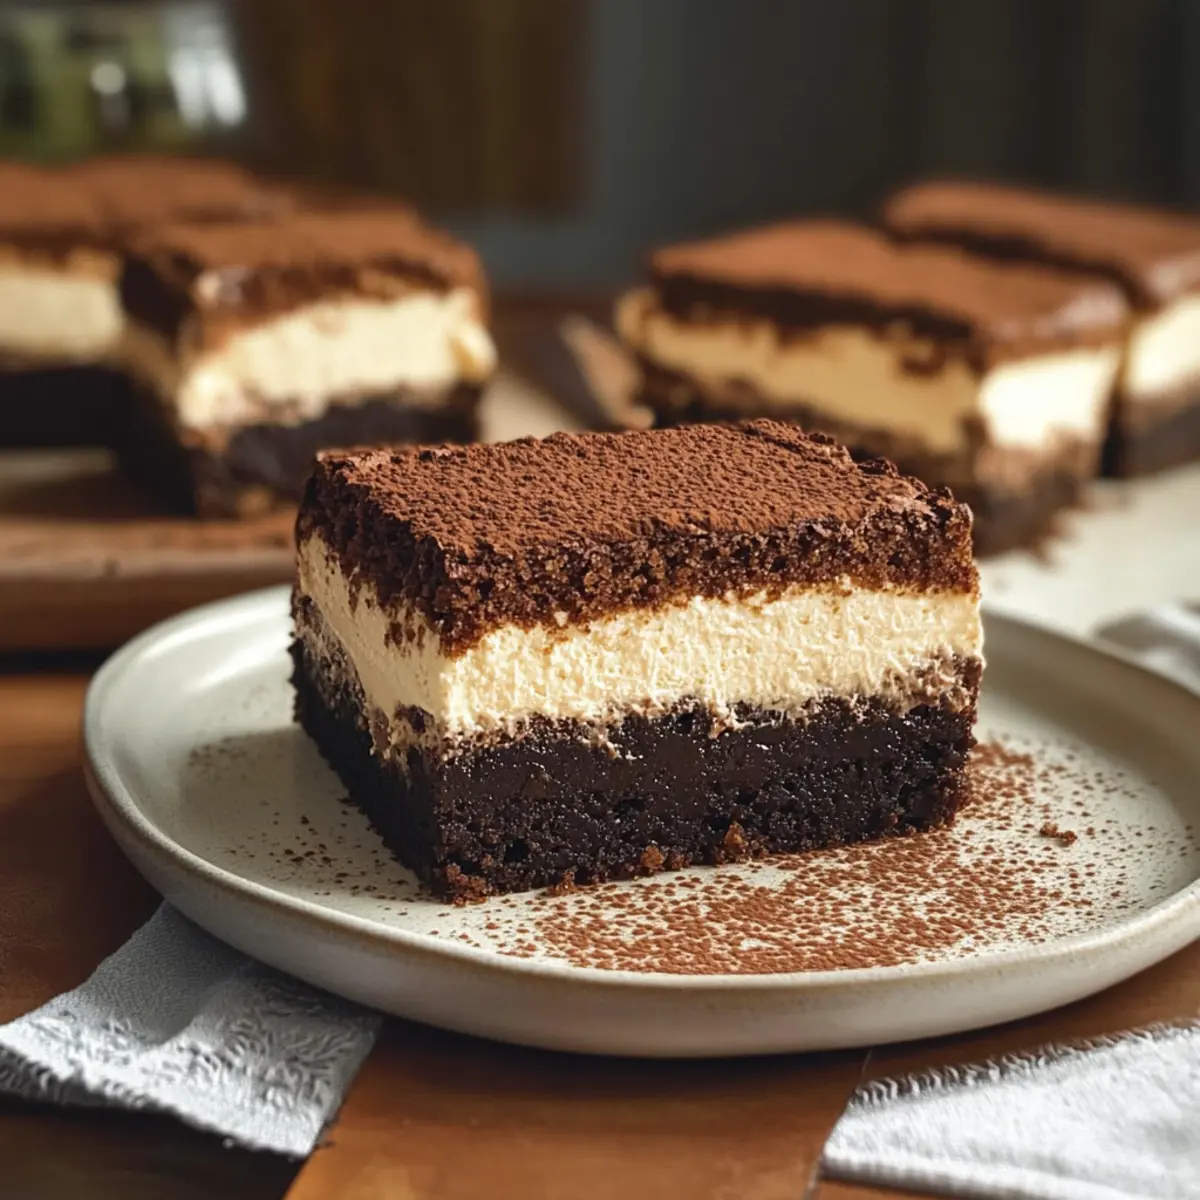
Once the brownies have cooled, carefully arrange the soaked ladyfingers over the brownie base in a single layer. This creates a beautiful contrast with the fudgy brownie underneath, enhancing the flavors of your tiramisu brownies.
Step 11: Add the Mascarpone Topping
Spread the prepared mascarpone cream evenly over the layer of ladyfingers, smoothing it out with a spatula. Take your time to ensure every corner is covered for that creamy, indulgent touch that makes tiramisu brownies irresistible.
Step 12: Chill and Serve
Refrigerate the assembled tiramisu brownies for at least 1 hour to allow the layers to set, enhancing the flavors. Before serving, dust the top with cocoa powder for a classic finish. Cut into squares and savor the delightful combination of textures and tastes in each bite!
Tiramisu Brownies Variations & Substitutions
Feeling adventurous? Personalize your tiramisu brownies with these delightful variations!
-
Gluten-Free: Substitute ladyfingers with gluten-free biscuits for an equally delicious texture. This ensures everyone can enjoy the treat without worry!
-
Nutty Twist: Add chopped hazelnuts or walnuts into the brownie batter for a delightful crunch. This unexpected twist will make your brownies a true showstopper.
-
Flavored Mascarpone: Try folding in a splash of almond extract or orange zest into the mascarpone cream for a fragrant layer of flavor. It’s an easy way to elevate your dessert!
-
Add Spice: Sprinkle in a pinch of cinnamon or nutmeg for a warm, inviting flavor that pairs beautifully with chocolate and coffee. This adds a cozy touch everyone will love.
-
Vegan Option: Use aquafaba instead of eggs and coconut cream instead of mascarpone for a plant-based-friendly dessert. You won’t miss the dairy with this luscious substitute!
-
Decadent Layering: Consider crumbling some dark chocolate or chocolate cookies on top of the mascarpone layer for added texture and indulgence. It makes each bite even more enticing!
-
Heat Things Up: Drizzle a bit of chili-infused chocolate over the top to give your brownies a surprising kick. The contrasting flavors of sweet and spice will excite anyone who tries them!
-
Fruity Finish: Top your brownies with fresh raspberries or strawberries for a burst of freshness. The tartness will beautifully balance the rich, fudgy base.
For a seasonal delight, feel free to check out the Pumpkin Brownies Decadent that bring a whole new flavor to your dessert table!
How to Store and Freeze Tiramisu Brownies
Fridge: Store tiramisu brownies in an airtight container in the refrigerator for up to 3 days. Let them come to room temperature for about 30 minutes before serving to restore their fudgy texture.
Freezer: To freeze, wrap individual brownie squares tightly in plastic wrap and place them in a freezer-safe bag. They can last up to 2 months. Thaw overnight in the fridge before enjoying.
Reheating: If you prefer a warm dessert, gently reheat thawed brownies in the microwave for about 10-15 seconds. This will revive their moist, fudgy charm.
Layering: It’s best to keep the layers intact until serving to maintain the lovely contrast between the brownie base and the mascarpone topping.
What to Serve with Tiramisu Brownies
Indulging in rich, fudgy brownies topped with creamy mascarpone and coffee flavors invites a feast of complementary delights to round out your dessert experience.
- Freshly Brewed Espresso: The bold coffee notes enhance the espresso in the brownies, creating a harmonious pairing that coffee lovers will adore.
- Vanilla Ice Cream: Creamy and cold, vanilla ice cream balances the richness of the brownies, adding a refreshing touch that mirrors classic tiramisu.
- Whipped Cream: Light and airy, a dollop of freshly whipped cream provides a contrasting texture and extra sweetness, elevating each indulgent bite.
- Chocolate Mousse: For a dessert tower, pairing with a light chocolate mousse introduces lusciousness while keeping the overall experience decadent yet airy.
- Baileys Irish Cream: This whiskey cream liqueur serves as an elegant drizzle, marrying perfectly with the coffee and chocolate flavors for an adult twist on classic flavors.
- Berries Medley: Raspberries or strawberries offer a burst of tartness, cutting through the richness of the brownies, while adding a beautiful color contrast for presentation.
- Tiramisu Inspired Milkshake: Blend some mascarpone, coffee, and chocolate ice cream for a delightful shake that mirrors the flavors of your brownies, creating a fun surprise.
- Chilled Moscato: This sweet, sparkling wine adds a fruity note that complements the rich brownie without overpowering it, making for a delightful finish to your meal.
Expert Tips for Tiramisu Brownies
- Optimal Cooling Time: Let the brownies cool completely before adding the mascarpone cream; this prevents melting and keeps the layers intact.
- Perfect Flour Measurement: Use a kitchen scale for accurate flour measurement, as overpacking can lead to dense brownies.
- Quick Ladyfinger Dip: Soak ladyfingers just long enough to absorb espresso without becoming soggy, ensuring they hold their shape.
- Rich Flavor Boost: For a deeper coffee flavor, use espresso powder. If unavailable, instant coffee is a fine substitute—just ensure it’s well-dissolved.
- Smoothing the Topping: When spreading the mascarpone topping, take your time to create an even layer, enhancing the overall aesthetic of your tiramisu brownies.
Make Ahead Options
These tiramisu brownies are perfect for meal prep enthusiasts! You can prepare the brownie base up to 24 hours in advance; just wrap it tightly in plastic wrap to keep it fresh. The mascarpone cream can also be made ahead—store it in an airtight container in the refrigerator for up to 3 days. When ready to assemble, simply soak the ladyfingers right before layering and top with the mascarpone cream. For best results, allow the finished tiramisu brownies to chill for at least 1 hour before serving, ensuring the flavors meld beautifully while keeping the fudgy texture intact. Enjoy a delightful dessert with just a bit of planning!
Tiramisu Brownies Recipe FAQs
How do I choose the best chocolate for my tiramisu brownies?
Absolutely! For the best flavor, opt for dark or semi-sweet chocolate, which provides a rich and intense chocolate taste. If you're looking for something sweeter, milk chocolate can be used as an alternative. Just ensure it’s high-quality for the best results!
How long can I store leftover tiramisu brownies?
You can keep your tiramisu brownies in an airtight container in the refrigerator for up to 3 days. To enjoy them at their best texture, let them sit at room temperature for about 30 minutes before serving.
Can I freeze tiramisu brownies?
Yes, you can absolutely freeze your tiramisu brownies! Wrap individual squares tightly in plastic wrap and place them in a freezer-safe bag. They’ll stay fresh for up to 2 months. To enjoy, simply thaw them overnight in the fridge.
What if my ladyfingers become too soggy during the espresso soak?
Very good question! To prevent sogginess, dip each ladyfinger in the espresso mixture for only a few seconds on each side. This quick dunk allows for flavor absorption without compromising their structure. If you've accidentally soaked them too long, they might break apart, but don’t fret! You can still layer them, and they’ll taste delicious!
Are there any dietary considerations for making tiramisu brownies?
Certainly! For a gluten-free version, substitute ladyfingers with gluten-free biscuits. Additionally, if anyone has dairy allergies, you can use a dairy-free cream cheese alternative for the mascarpone layer. Always check your ingredients to ensure they meet your specific dietary needs!
Can I incorporate other flavors into my tiramisu brownies?
Absolutely! While classic flavors shine in this recipe, feel free to experiment by adding flavored liqueurs like hazelnut or amaretto for a unique twist. Just be sure to skip the coffee liqueur if you'd like a non-alcoholic dessert. The more the merrier when it comes to flavor!
Irresistible Tiramisu Brownies That Will Delight Your Tastebuds
Ingredients
Equipment
Method
- Preheat your oven to 350°F (175°C) and prepare a 9x9-inch baking pan by lining it with parchment paper.
- In a bowl, combine the chopped dark or semi-sweet chocolate and cocoa powder.
- Melt the butter in a saucepan over medium heat until golden brown, then pour over the chocolate mixture and stir until smooth.
- In a large bowl, whisk together eggs, granulated sugar, and brown sugar until smooth, then mix in the chocolate mixture.
- Fold in the all-purpose flour until combined, avoiding overmixing.
- Pour the batter into the prepared pan and bake for 28-30 minutes.
- Allow the brownies to cool in the pan for 15-20 minutes before adding the mascarpone layer.
- Beat mascarpone cheese until creamy, then add whipped cream, powdered sugar, and vanilla extract until thickened.
- Dissolve espresso powder in hot water and dip each ladyfinger quickly before layering on the brownies.
- Spread the mascarpone cream evenly over the ladyfingers.
- Refrigerate for at least 1 hour before dusting with cocoa powder and serving.


Leave a Reply