
As the aroma of baking chocolate wafts through the kitchen, I can’t help but feel the excitement building for Halloween. These Spooky Spider Cakes are not only a delightful treat but also the perfect way to engage little hands in some creative baking fun! Rich and moist, these cupcakes are a hit at any Halloween party, bringing together the joy of cooking with a touch of frightful charm. Whether you’re looking for a festive dessert or a unique activity to share with the kids, these spooky delights promise to be a memorable addition to your celebrations. Ready to transform your kitchen into a mini haunted bakery? Let’s jump into the fun!
Why are Spooky Spider Cakes so special?
Kid-Friendly Fun: Bringing the whole family together to create these whimsical treats sparks joy and laughter.
Rich Chocolate Delight: Each bite delivers a moist, fluffy texture paired with a decadent chocolate flavor that kids and adults will love.
Creative Decorating: Fun spider toppings allow kids to unleash their imagination, making this not just baking but also a delightful art project.
Perfect Halloween Treat: These cupcakes are the ideal addition to Halloween parties, guaranteed to impress guests of all ages.
Make Ahead: Prepare these cakes in advance to save time on the big day, ensuring they are fresh and ready to serve—just like Ricotta Protein Pancakes for a speedy breakfast!
Engaging Activity: Perfect for teaching kids basic cooking skills and sparking a lifelong love for baking, just like with Crab Cakes Forget.
Spooky Spider Cakes Ingredients
Get ready for a fun baking adventure with these delightful treats!
For the Batter
• Butter – Provides moisture and richness; use margarine for a dairy-free option.
• Golden Caster Sugar – Adds sweetness and promotes a light texture; can substitute with regular sugar for a coarser texture.
• Self-Raising Flour – Forms the cake structure and helps it rise; all-purpose flour with extra baking powder can be a substitute.
• Eggs – Bind ingredients and contribute to the cake structure; for a vegan option, replace with flax eggs (1 tbsp ground flaxseed mixed with 3 tbsp water per egg).
• Baking Powder – Helps the cakes rise; omit if using self-raising flour, but ensure freshness for optimal results.
• Vanilla Extract – Enhances flavor depth; pure vanilla is best, though imitation will do in a pinch.
• Chocolate Chips or Chopped Chocolate – Adds a rich chocolate flavor; feel free to swap in dark or white chocolate.
For the Decoration
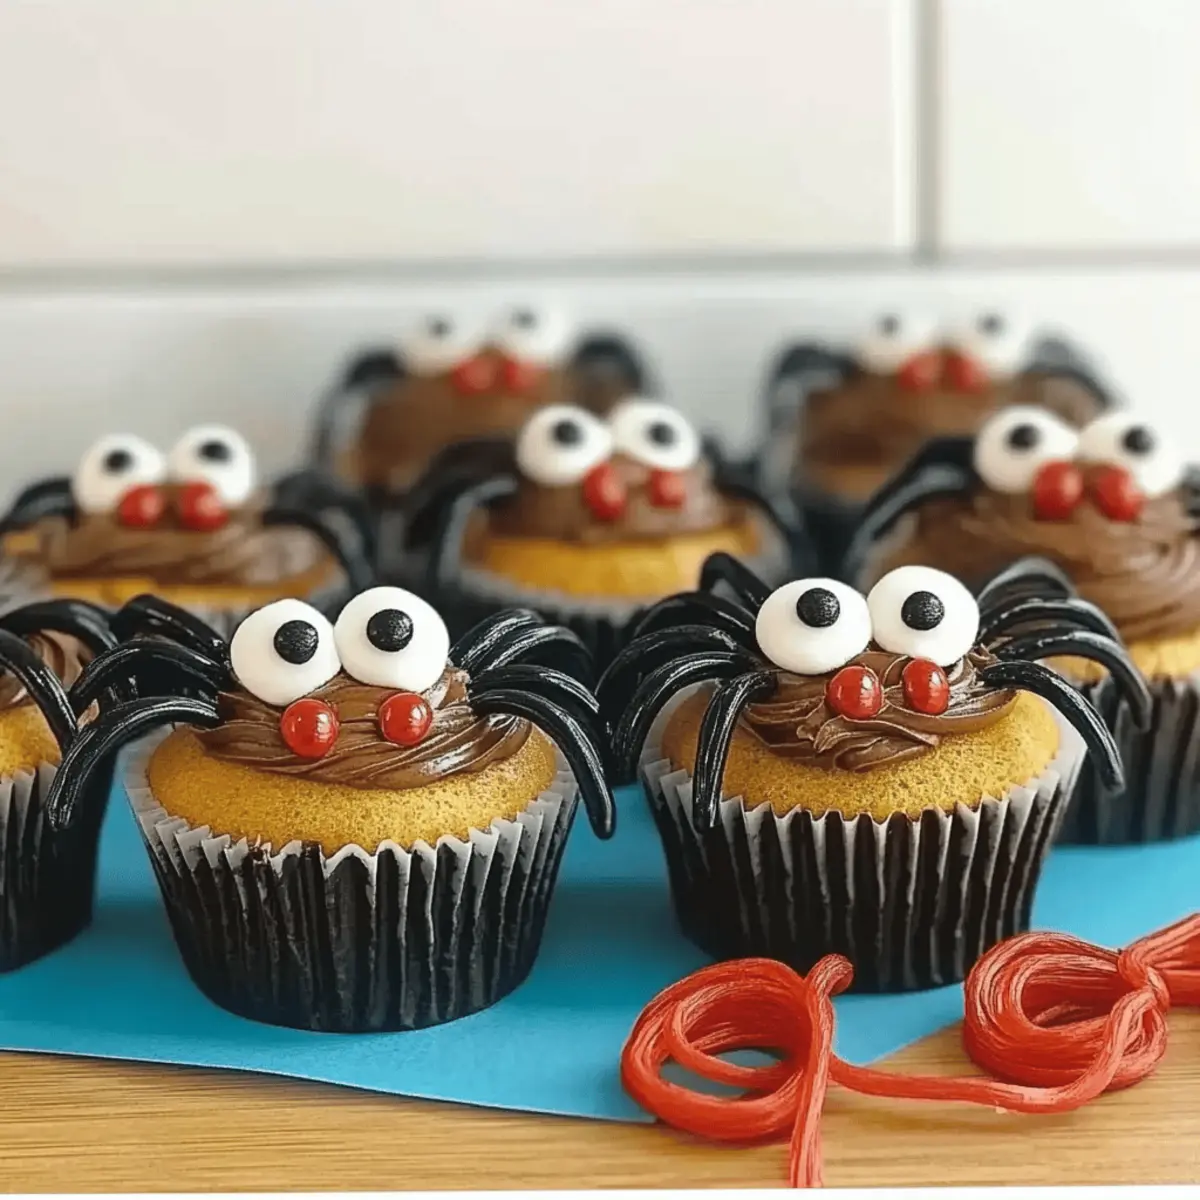
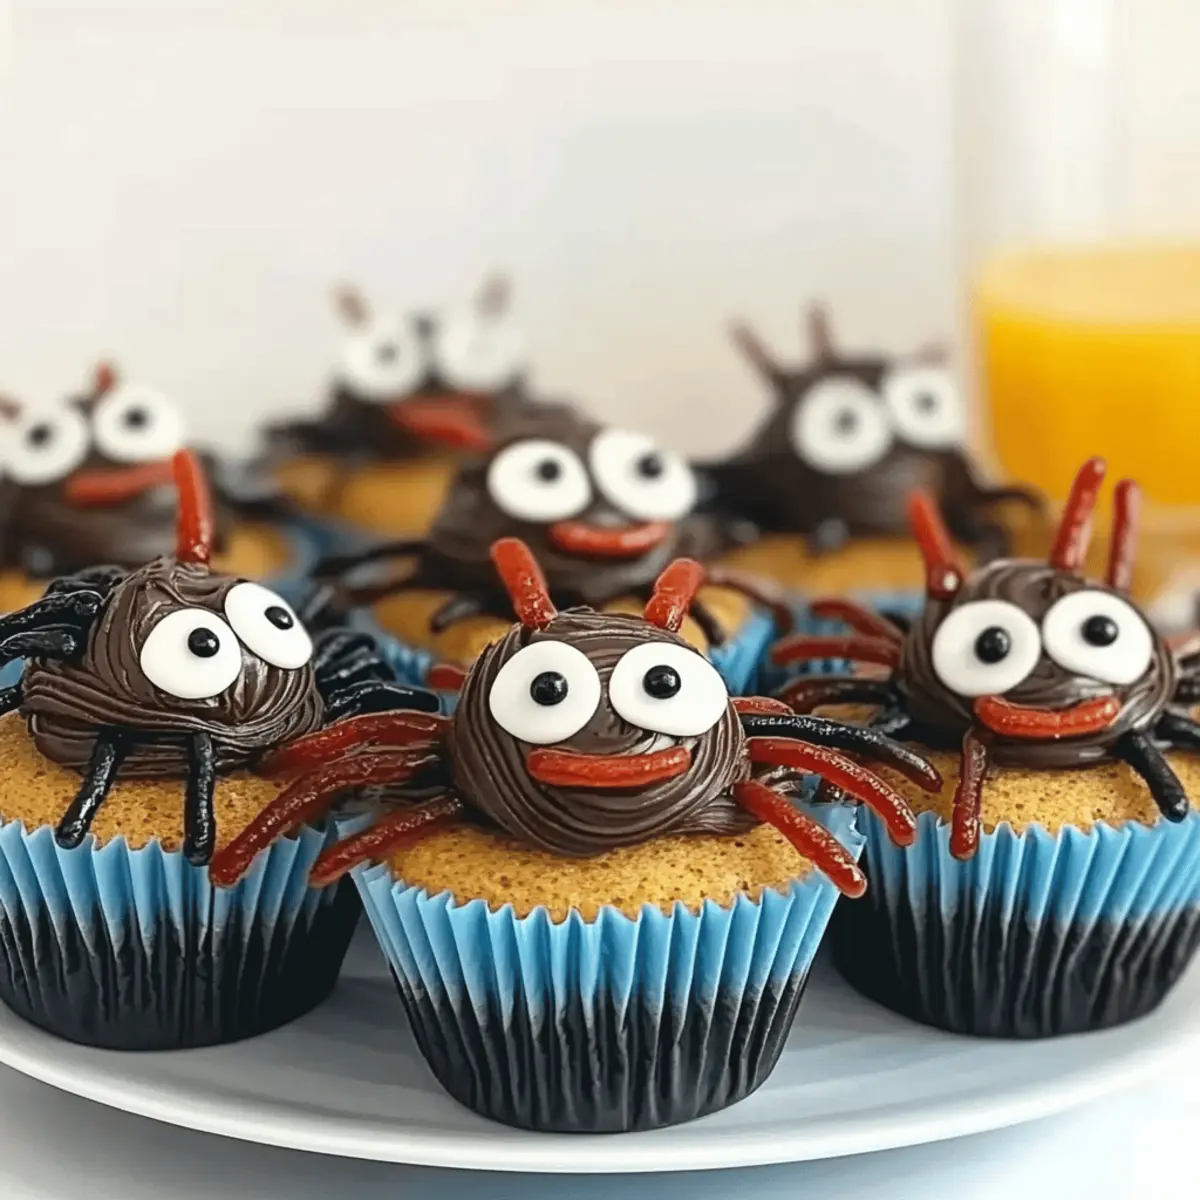
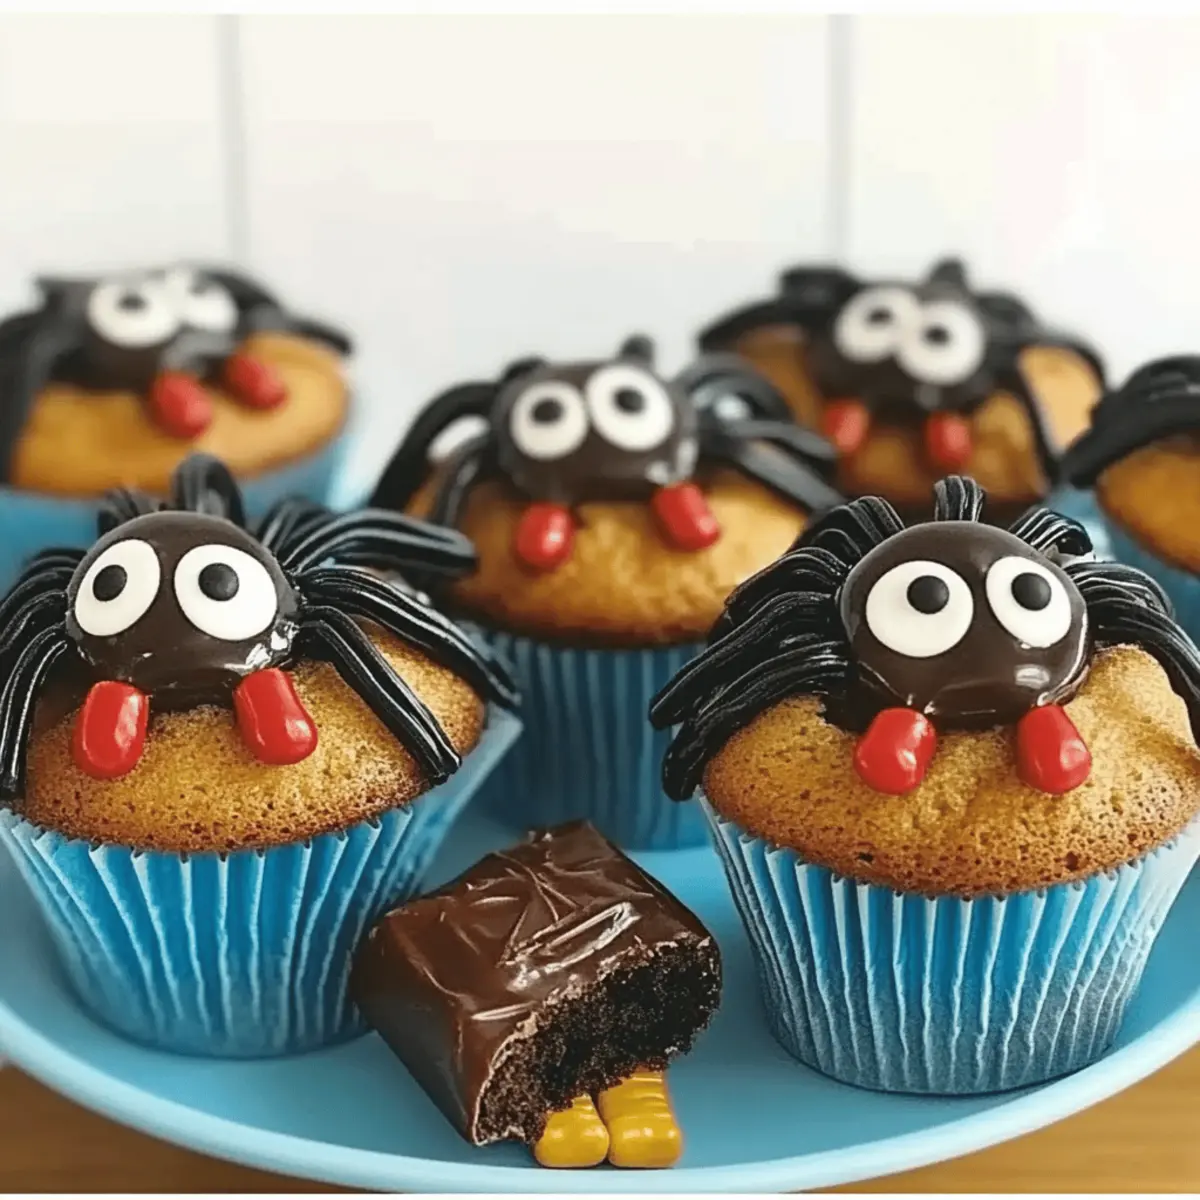
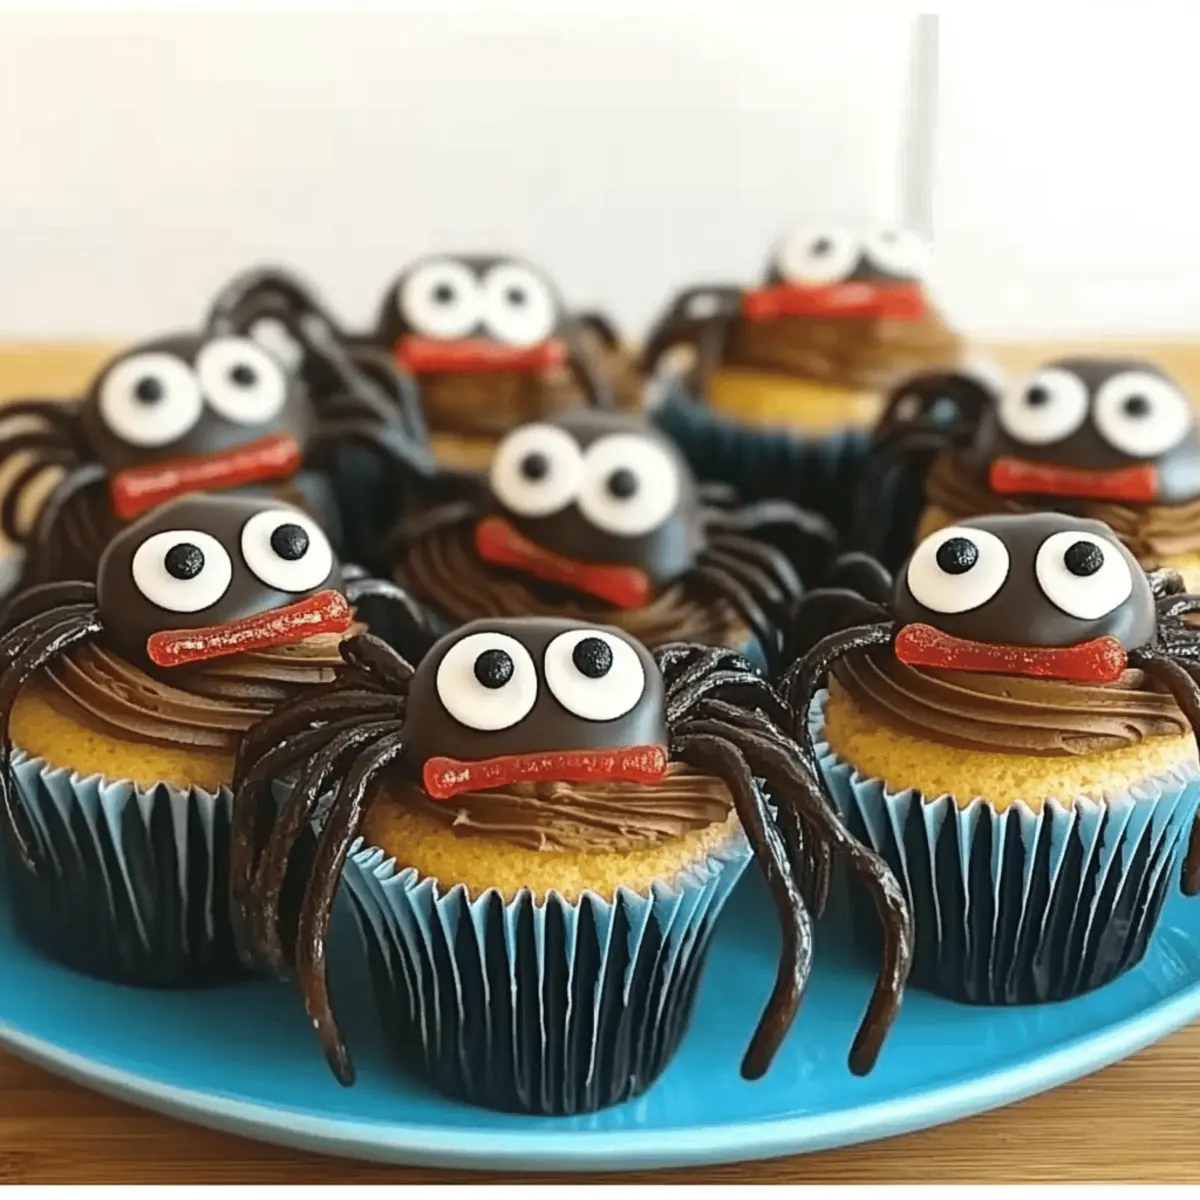
• Liquorice Catherine Wheels – Used for spider legs; substitute with black candy string or gummy worms if needed.
• Nutella or Chocolate Spread – Acts as the spider body and gives a glossy finish; try other chocolate spreads based on preference.
• Liquorice Allsorts – For spider eyes and mouth; choose any colorful candy that stands out for decoration.
• Black Writing Icing – For the spider detailing; any edible gel or icing can be a fun replacement.
• Red Bootlace Candy – Creates the spider's mouth; swap with red licorice or similar candy if desired.
Enjoy assembling your Spooky Spider Cakes with your little ones and make joyful memories in the kitchen!
Step‑by‑Step Instructions for Spooky Spider Cakes
Step 1: Preheat and Prepare
Begin by preheating your oven to 180°C (fan 160°C or gas 4). While the oven warms, line a muffin tin with 12 brown cupcake cases, ensuring they are securely placed for easy filling. This preparation sets a delightful stage for your Spooky Spider Cakes.
Step 2: Combine Dry Ingredients
In a large mixing bowl, use a spatula to combine the butter, golden caster sugar, and self-raising flour until the mixture is crumbly. This step creates a moist base. Make sure to break up any lumps of butter for a smooth texture, setting the foundation for your rich chocolate cupcakes.
Step 3: Incorporate Eggs
Crack the eggs into a separate bowl, ensuring no shell fragments make their way in. Gently add the eggs to the butter mixture and mix until well combined. The eggs will bind the ingredients together, contributing to the fluffy texture of your Spooky Spider Cakes.
Step 4: Add Baking Powder and Vanilla
Stir in the baking powder and pour in the vanilla extract, mixing with an electric hand whisk until the batter is smooth and creamy. This step should take about 2 minutes. The aroma of vanilla will start to fill your kitchen, promising delicious cakes ahead.
Step 5: Fold in Chocolate
Carefully fold in the chocolate chips or chopped chocolate to the mixture using a spatula. This gentle folding method helps maintain the airiness of the batter. You’ll want to evenly distribute the chocolate, which will melt beautifully during baking, enhancing your Spooky Spider Cakes.
Step 6: Fill Cupcake Cases
Spoon the batter evenly into each cupcake case, filling them about 2/3 full to allow for rising. Use an ice cream scoop for neatness if available. Place the muffin tin in the preheated oven and bake for 20-25 minutes, or until a cocktail stick inserted in the center comes out clean.
Step 7: Cool the Cakes
Once baked, remove the muffin tin from the oven and let the cakes cool in the tin for about 10 minutes. After that, transfer the Spooky Spider Cakes onto a wire rack to cool completely. Proper cooling is essential for a sturdy base for decoration.
Step 8: Prepare Spider Legs
Once the cupcakes are cool, take the liquorice wheels and cut them into lengths for spider legs. Insert eight pieces into the side of each cupcake, sticking them into the frosting later. This step adds to the playful spooky theme of your cakes and helps engage children in decorating.
Step 9: Add Spider Bodies
Spread a generous layer of Nutella or chocolate spread on top of each cupcake for the spider’s body, ensuring an even coating that will hold decorations well. This glossy finish contributes to the overall appeal and makes the cake irresistibly delicious.
Step 10: Create Eyes and Mouth
Using the Liquorice Allsorts, cut small pieces to create eyes, and take red bootlace candy to form the spider’s mouth. Attach these pieces onto the cupcakes, giving each spider a distinct personality. This part of making the Spooky Spider Cakes is where the fun really begins.
Step 11: Detail with Icing
Finally, use black writing icing to add details to the spiders, such as cute little legs and expressions. With each line you draw, watch your Spooky Spider Cakes come to life with unique characters! Let the icing set a bit before serving for the best presentation.
Step 12: Store and Enjoy
Store your lovely, decorated Spooky Spider Cakes in a cool, dry place, where they will stay fresh for up to 2 days. Share these delightful treats at your Halloween gathering and enjoy the smiles they bring!
Make Ahead Options
These Spooky Spider Cakes are perfect for meal prep enthusiasts looking to save time during the Halloween rush! You can bake the cupcakes up to 24 hours in advance; simply store them in an airtight container at room temperature to maintain their moisture and fluffiness. The spider decorations can be prepared ahead as well; cut your liquorice and candy pieces 1-2 days prior, storing them in a cool, dry place. When you're ready to serve, just spread the Nutella or chocolate spread on top, assemble your spider legs, eyes, and mouth, and you’ll have delightful, spooky treats that are just as delicious as when they were freshly baked!
Expert Tips for Spooky Spider Cakes
Room Temperature Butter: Ensure your butter is at room temperature for easy mixing and a smoother batter, leading to fluffier cupcakes.
Don’t Overmix: Mix the batter just until combined. Overmixing can cause dense, tough Spooky Spider Cakes—no one wants that!
Check Doneness: Use a cocktail stick to test for doneness. If it comes out clean, your cakes are perfectly baked and ready for decorating.
Even Baking: To prevent uneven baking, rotate the muffin tin halfway through the baking time. Every little tip helps create the perfect spooky treat!
Creative Decoration: Let your kids personalize the spider decorations! This teaches creativity and makes the baking experience more engaging and fun.
How to Store and Freeze Spooky Spider Cakes
Room Temperature: Store the decorated Spooky Spider Cakes in a cool, dry place for up to 2 days to maintain freshness. Make sure they are covered to keep them from drying out.
Fridge: If you want to keep them longer, place the cupcakes in an airtight container in the fridge for up to 5 days. Be mindful that refrigeration may slightly change their texture.
Freezer: You can freeze un-decorated Spooky Spider Cakes for up to 2 months. Wrap them tightly in plastic wrap and then in foil. Thaw overnight in the fridge before decorating.
Reheating: If you prefer warm treats, reheat unfrosted cupcakes in the microwave for about 10-15 seconds. Frost them after warming for a cozy, delightful experience!
Spooky Spider Cakes Variations & Substitutions
Feel free to unleash your creativity by customizing these delightful treats and making them your own!
-
Dairy-Free: Substitute butter with margarine or coconut oil for a dairy-free version without sacrificing flavor.
-
Gluten-Free: Use a gluten-free all-purpose flour blend instead of self-raising flour to cater to gluten sensitivities. Pair this with a touch of baking powder for rise.
-
Colorful Sprinkles: For added festivity, top your Spooky Spider Cakes with colorful sprinkles instead of liquorice, creating a fun craft moment for the kids.
-
Peanut Butter Delight: Swap Nutella for peanut butter—this creamy alternative gives an unexpected twist! The nutty flavor complements chocolate beautifully and adds richness.
-
Mini Chocolate Chips: Opt for mini chocolate chips instead of regular-sized ones. They spread across the batter better, offering chocolatey goodness in every bite.
-
Fruit Topping: For a fruity variation, top the cupcakes with fresh raspberries or strawberries to create spider bodies. This adds a refreshing contrast to the chocolate!
-
Vegan Option: Replace eggs with flax eggs for a vegan-friendly treat. This ensures everyone can enjoy the spooky fun, just like with various candy swaps.
-
Alternative Decor: If liquorice isn't for everyone, consider using licorice-flavored candies, gummy worms, or even edible googly eyes for a whimsical touch. These variations keep things exciting!
Encourage your family to explore these options, making baking a wonderful bonding experience. You'll be amazed at the new flavor ideas and styles that come out of your kitchen!
What to Serve with Spooky Spider Cakes
As you prepare these delightful treats, consider adding a few more goodies to create a Halloween feast that all your little ghouls will love.
-
Classic Hot Chocolate: A rich and creamy beverage that's perfect for pairing with the chocolatey cupcakes, warming hearts and tummies.
-
Ghostly Marshmallow Treats: These fun treats can be made by dipping marshmallows in white chocolate and adding chocolate chips for eyes, creating a fun, spooky snack that complements the theme.
-
Crispy Apple Slices: Lightly dusted with cinnamon, these crisp apple slices add a fresh, crunchy contrast to the moist cupcakes.
-
Spider Web Cheese Dip: Combine cream cheese and sour cream for a savory dip, then swirl some black olive tapenade to create an enticing spider web effect that perfectly ties in with your cupcake theme.
-
Pumpkin Spice Cookies: Soft and spiced, these cookies bring the essence of fall into the mix, offering warmth that pairs beautifully with the chocolatey flavors of the cakes.
-
Fizzy Apple Cider: This bubbly drink adds a festive feeling, making it a fun option to serve alongside the Halloween treats, keeping the spirits high!
Spooky Spider Cakes Recipe FAQs
How do I choose ripe ingredients for my Spooky Spider Cakes?
Absolutely! For the best flavor and texture, ensure your butter is at room temperature—this helps it blend smoothly with sugar. Additionally, use fresh eggs; if you’re substituting for vegan options, make sure your flaxseed is freshly ground for optimal binding in your Spooky Spider Cakes.
What’s the best way to store Spooky Spider Cakes?
The cakes should be stored in a cool, dry place for up to 2 days. Use an airtight container to keep them fresh. If you decide to refrigerate them, they can last up to 5 days, but be aware that chilling may slightly alter their texture.
Can I freeze Spooky Spider Cakes?
Yes! You can freeze un-decorated Spooky Spider Cakes for up to 2 months. Wrap them tightly in plastic wrap and then foil to prevent freezer burn. When you’re ready to enjoy, let them thaw overnight in the fridge. After thawing, decorate them as desired for a fun, spooky treat!
What should I do if my cupcakes come out dense?
If your Spooky Spider Cakes turn out dense, it may be due to overmixing the batter. Mix the ingredients just until combined, and make sure to use room-temperature butter for a smoother blend. Additionally, check that your baking powder is fresh, as this ensures proper rising.
Are Spooky Spider Cakes safe for children with allergies?
Always check for allergies in your ingredients. These cakes contain butter, eggs, and may include traces of nuts from chocolate or spreads. If you need to accommodate those with dietary restrictions, consider using dairy-free margarine and flax eggs, and ensure that all candies and chocolate are allergy-friendly.
Spooky Spider Cakes: Fun Treats to Thrill Kids This Halloween
Ingredients
Equipment
Method
- Preheat your oven to 180°C (fan 160°C or gas 4) and line a muffin tin with 12 brown cupcake cases.
- Combine the butter, golden caster sugar, and self-raising flour in a large mixing bowl to create a crumbly mixture.
- Crack the eggs into a separate bowl and add them to the butter mixture, mixing until well combined.
- Stir in baking powder and vanilla extract, mixing until the batter is smooth using an electric whisk.
- Fold in the chocolate chips or chopped chocolate gently using a spatula.
- Fill each cupcake case about 2/3 full with batter and bake for 20-25 minutes, or until a cocktail stick comes out clean.
- Let the cakes cool in the tin for 10 minutes, then transfer to a wire rack to cool completely.
- Cut the liquorice wheels into lengths for spider legs and insert into the side of each cupcake.
- Spread Nutella or chocolate spread on top of each cupcake for the spider's body.
- Use Liquorice Allsorts for eyes and red bootlace candy for the spider's mouth.
- Detail with black writing icing for spider legs and expressions.
- Store in a cool, dry place for up to 2 days.


Leave a Reply