
As I stood by the kitchen counter, carefully measuring ingredients with soft jazz playing in the background, I couldn't help but feel a wave of excitement for the dinner ahead—a Creamy Salmon Sushi Bake. This one-pan meal delivers all the delightful flavors of sushi without the fuss of rolling each piece, making it the perfect solution for busy weeknights or casual gatherings. With layers of seasoned sushi rice, fresh salmon, and a creamy topping that sings with spices, this dish is bound to become a family favorite. Plus, it’s packed with comforting goodness and easy to prep, so you can spend more time enjoying the company of loved ones. Are you ready to make your next meal a sushi-inspired masterpiece?
Why is Salmon Sushi Bake a must-try?
Easy, one-pan meal: This recipe requires minimal clean-up, making it perfect for weeknight dinners or entertaining guests without the hassle.
Creamy and flavorful: The combination of Kewpie mayo and cream cheese creates a luscious topping that enhances the natural richness of the salmon, making every bite a taste sensation.
Versatile options: Whether you’re craving seafood or want a vegetarian twist, this dish can be customized to suit your preferences—try shrimp or tofu for a delightful variation.
Crowd-pleasing: Perfect for gatherings, this sushi bake is sure to impress guests, just like my Cheesy Zucchini Bake that always gets rave reviews!
Quick prep time: It takes just a few minutes to assemble, so you’ll spend less time cooking and more time enjoying the evening.
Comforting textures: The warm, layered experience mimics sushi but in a cozy casserole form, combining the best of both worlds for sushi lovers.
Salmon Sushi Bake Ingredients
• Create this delightful dish with simple ingredients.
For the Sushi Base
- Sushi Rice – Rinsing removes excess starch for perfect texture.
- Water – Essential for cooking rice to the right consistency.
- Lite Seasoned Rice Vinegar – Provides acidity and flavor; substitute with regular vinegar mixed with sugar if needed.
For the Salmon Mixture
- Salmon Filet – Offers richness; ensure skin is removed and cut into small pieces.
- Imitation Crab Meat – Adds seafood flavor; can be omitted or replaced with shrimp.
- Kewpie Mayo – Adds creaminess to the mix; regular mayo works in a pinch.
- Cream Cheese – Enhances the dish’s creamy texture; use thick cream cheese for best results.
- Sriracha – Adds a spicy kick; adjust to your spice preference.
- Soy Sauce/Tamari – Delivers umami flavor; choose Tamari for a gluten-free option.
- Green Onions – Brings freshness and crunch; substitute with chives if preferred.
For the Unagi Sauce
- Soy Sauce – Serves as the base for sweetness in the sauce.
- Mirin – Sweet rice wine enhances flavors; can be replaced with equal parts sugar and water.
- Sake – Complements mirin; can be omitted if unavailable.
- White Granulated Sugar – Sweetens the unagi sauce.
For the Spicy Mayo
- Lime Juice – Adds tanginess to the spicy mayo.
- Salt – Enhances the overall flavor.
For Toppings
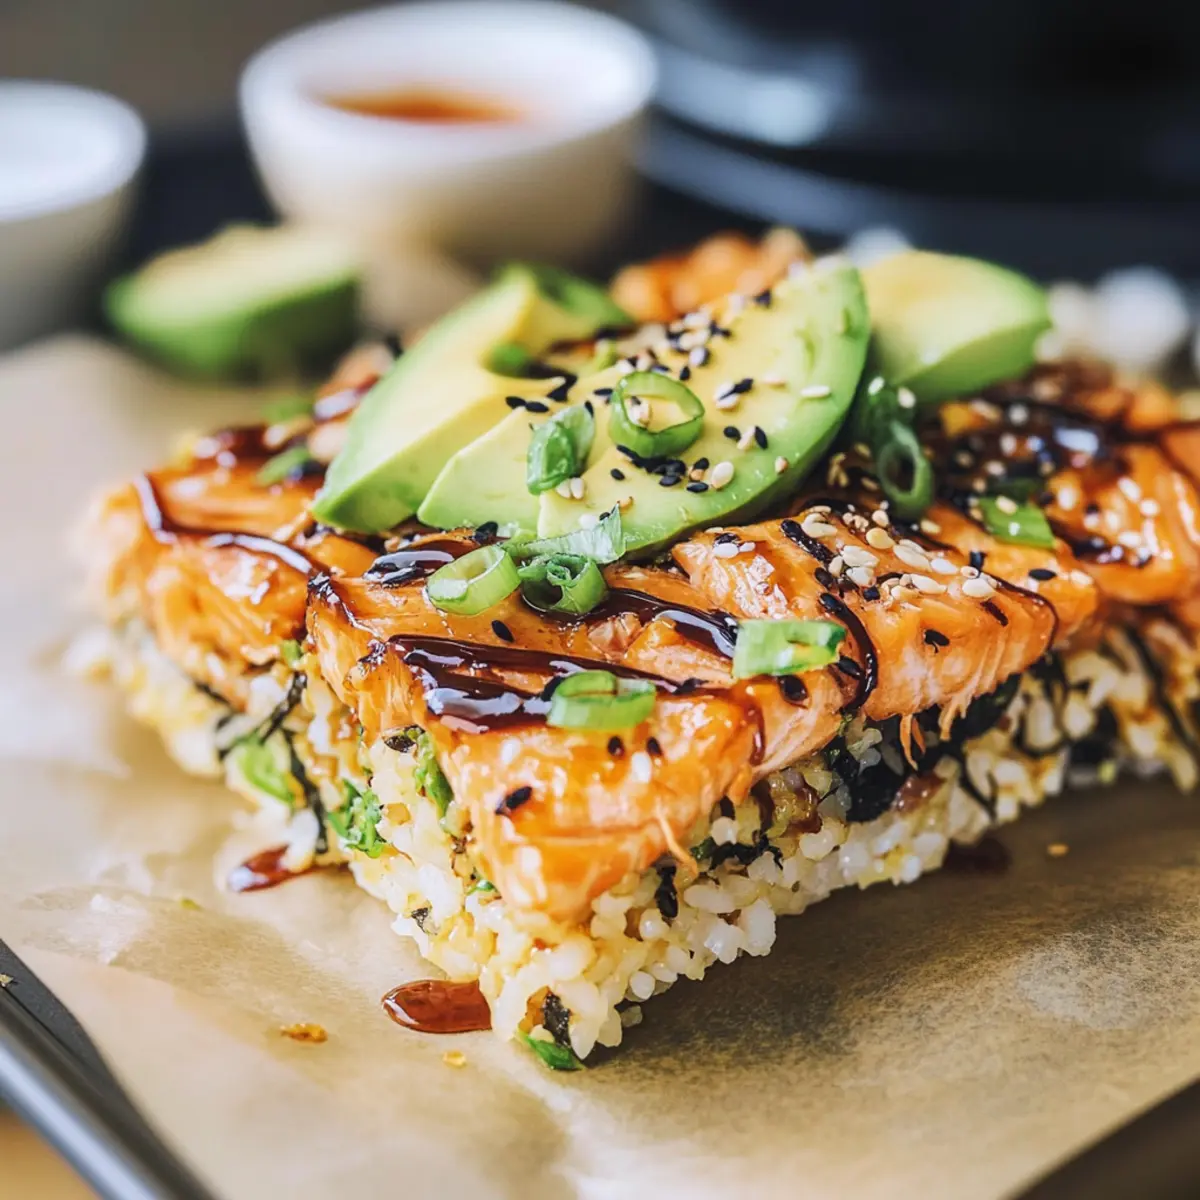
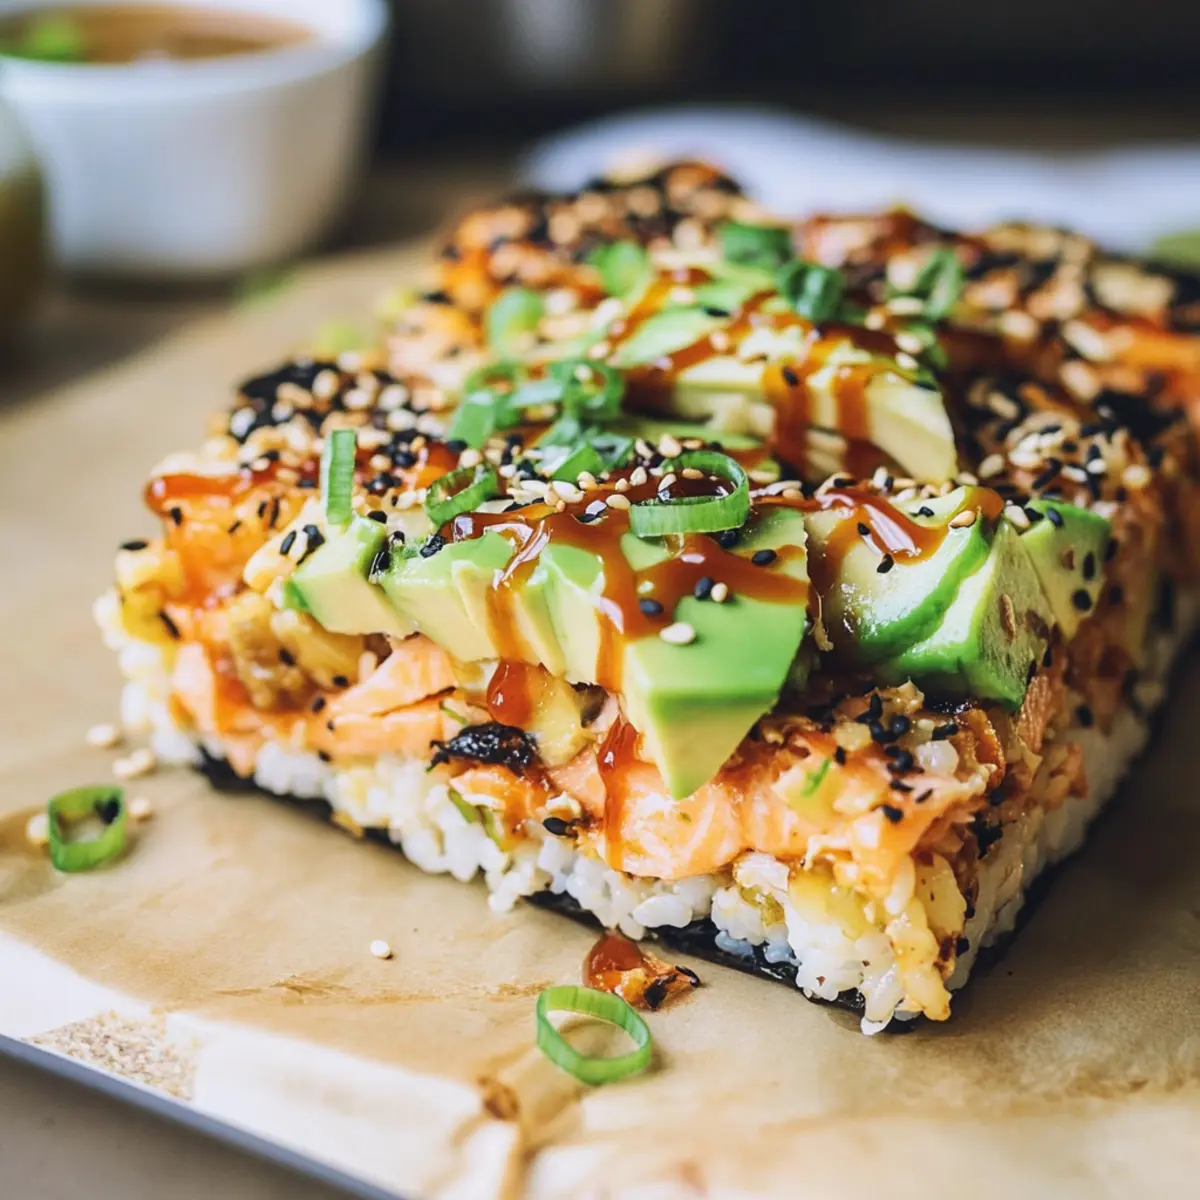
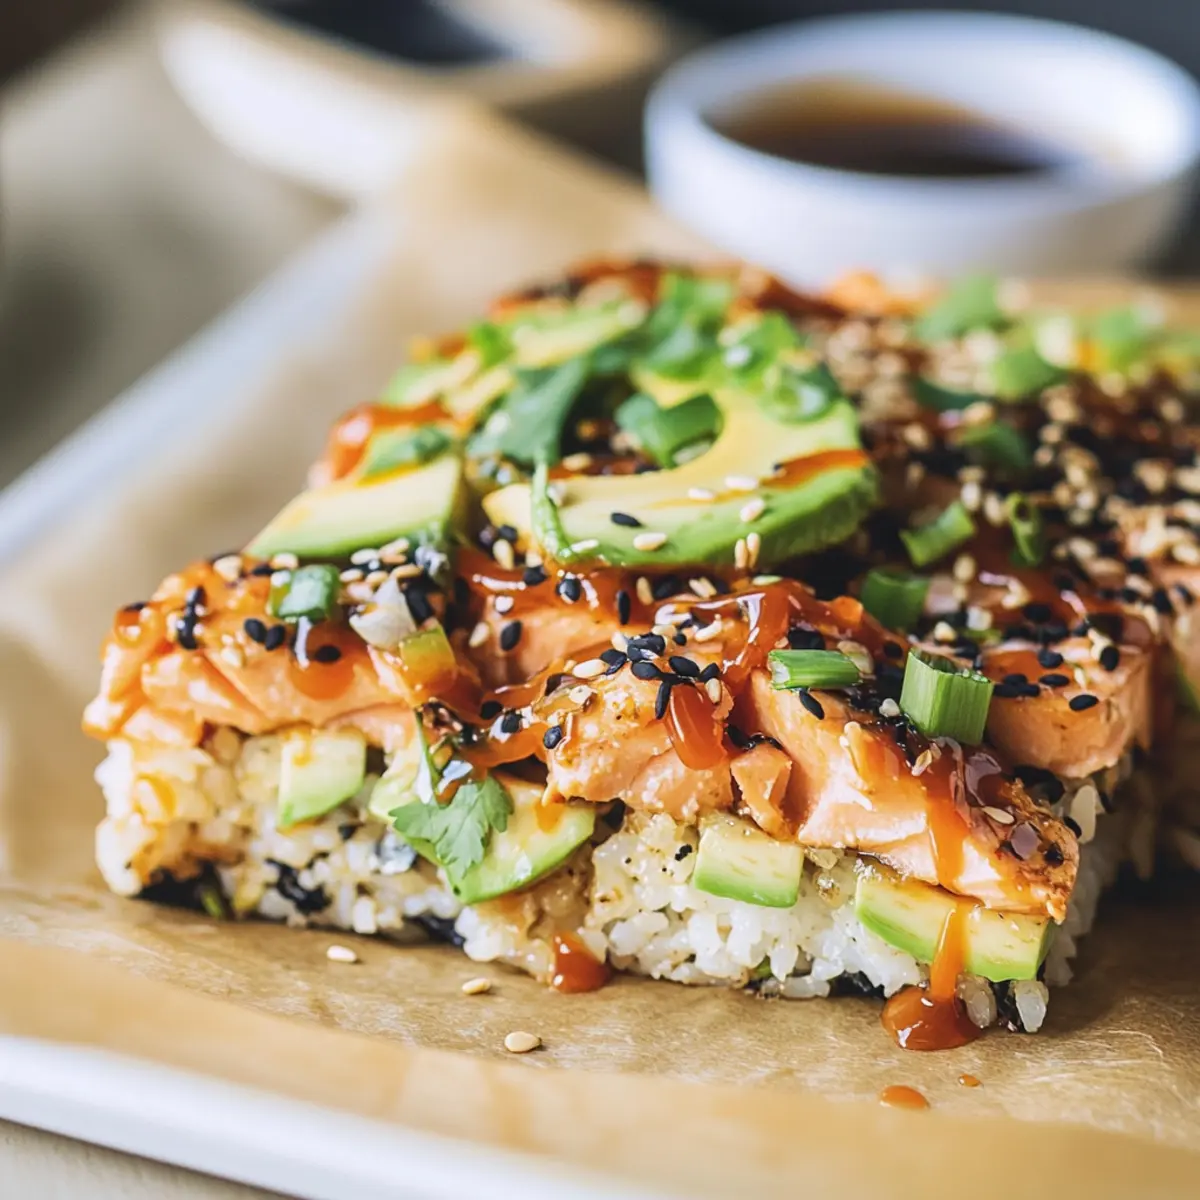
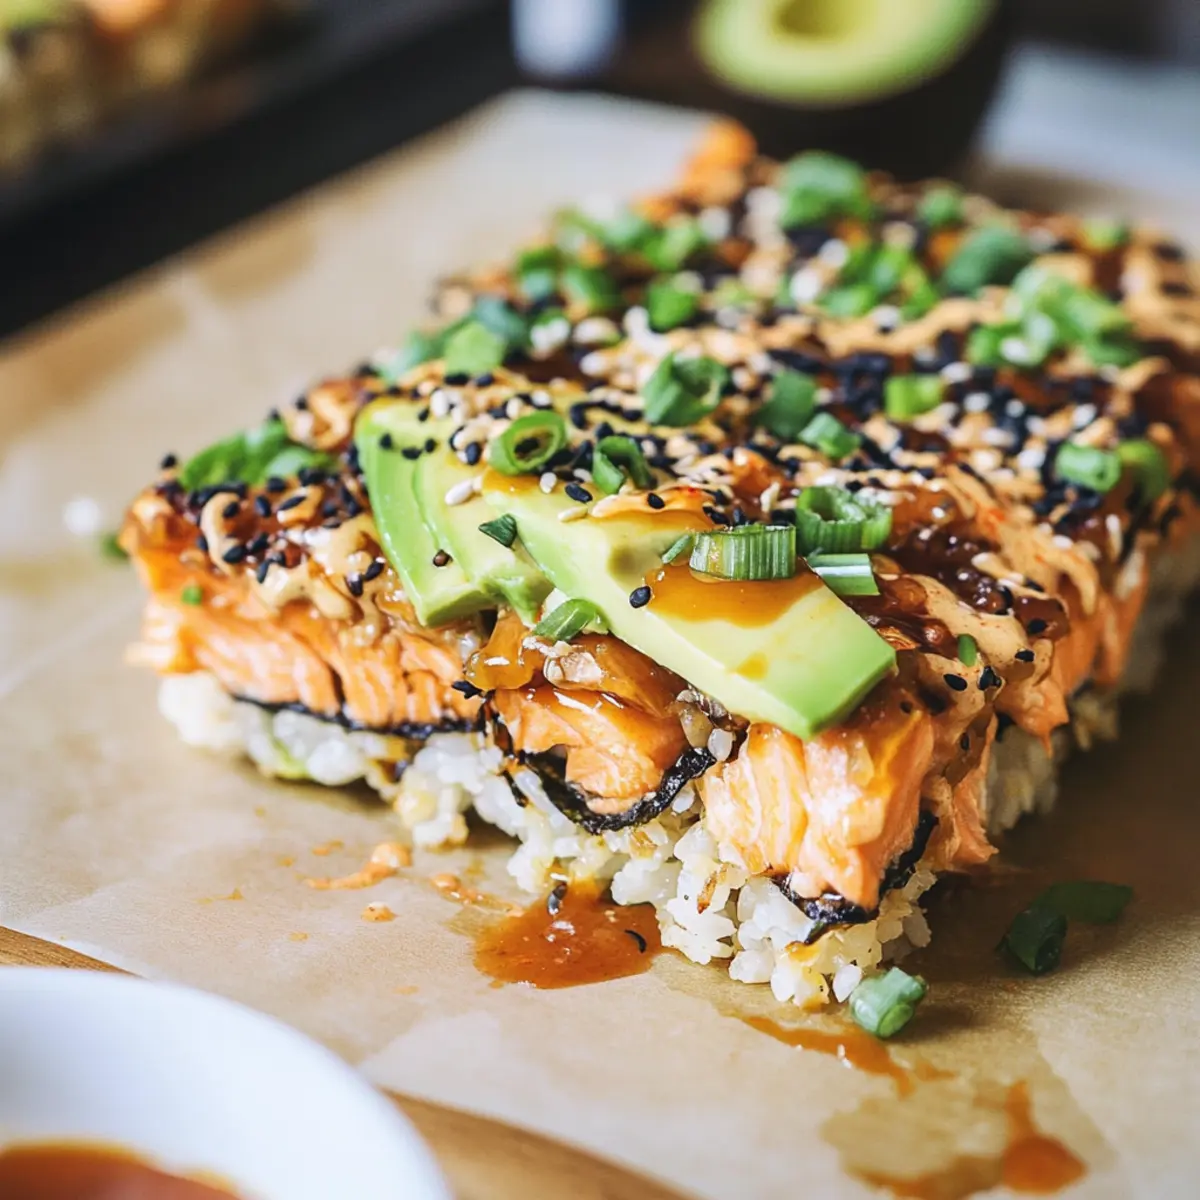
- Avocado – Adds creaminess and essential fats as a topping.
- Sesame Seeds – Provide texture; feel free to use black, white, or both.
- English Cucumber – Brings a crunchy freshness, perfect as a garnish.
- Nori Sheets – Serve alongside for wrapping bites—great for that sushi experience!
With these ingredients, your Salmon Sushi Bake will shine as a comforting and enticing dish, ready to be enjoyed!
Step‑by‑Step Instructions for Salmon Sushi Bake
Step 1: Prepare and Cook Rice
Start by rinsing 1 cup of sushi rice under cold water until the water runs clear. Combine the rinsed rice with 1¼ cups of water in a rice cooker, and cook according to the manufacturer's instructions. Once cooked, let the rice sit covered for 10 minutes to steam, then fluff with a fork and add 2 tablespoons of lite seasoned rice vinegar, mixing gently until well combined.
Step 2: Make Salmon Mixture
While the rice cools, preheat your oven to 425°F (220°C). In a medium bowl, cube 8 ounces of salmon filet into ½ inch pieces. Combine the salmon with ¼ cup of Kewpie mayo, 4 ounces of cream cheese, 1 tablespoon of sriracha, and 2 tablespoons of soy sauce, mixing well. Stir in 2 chopped green onions, and refrigerate the mixture to let the flavors meld while you prepare the unagi sauce.
Step 3: Prepare Unagi Sauce
In a small saucepan over medium heat, combine ¼ cup of soy sauce, ¼ cup of mirin, 1 tablespoon of sake (if using), and 2 tablespoons of sugar. Bring to a gentle simmer, stirring constantly, until the mixture thickens slightly, about 5 minutes. Remove the sauce from heat and allow it to cool, as it will be drizzled over your Salmon Sushi Bake later.
Step 4: Prepare Spicy Mayo
In a small bowl, whisk together ¼ cup of mayo, 1 tablespoon of sriracha, the juice of half a lime, and a pinch of salt. Adjust the spice level to your preference by adding more sriracha if desired. Place the spicy mayo in the refrigerator to chill while you assemble the dish.
Step 5: Assemble Sushi Bake
In a greased 9x13 inch baking dish, layer the seasoned sushi rice evenly at the bottom. Spread the creamy salmon mixture on top of the rice, ensuring it's evenly distributed. Use a spatula to smooth out the surface, which creates a nice, even layer for the Salmon Sushi Bake.
Step 6: Bake
Place the assembled Salmon Sushi Bake in the preheated oven and bake for 10-15 minutes. Keep an eye on it as it bakes; you want the top to be golden and slightly bubbling, achieving a deliciously warm texture. If desired, broil for an additional 2-3 minutes to caramelize the top, ensuring it doesn't burn.
Step 7: Serve
Once baked, remove the dish from the oven and allow it to cool for a few minutes. Drizzle the prepared unagi sauce on top, followed by generous dollops of spicy mayo. Garnish with sliced avocado, diced cucumber, sesame seeds, and additional green onions before serving with nori sheets for wrapping. Enjoy your comforting and flavorful Salmon Sushi Bake!
Expert Tips for Salmon Sushi Bake
-
Rinse Rice Properly: Rinsing sushi rice is crucial to achieve the perfect texture. Make sure you rinse until the water runs clear, removing excess starch.
-
Cool Before Mixing: Allow the cooked rice to cool before adding the vinegar. This helps the rice absorb the flavor more efficiently, achieving that perfect sushi bake taste.
-
Watch the Broiler: If using the broiler at the end, stay close! It can quickly go from perfectly caramelized to burnt if not monitored closely.
-
Prep Toppings in Advance: To streamline your cooking process, prepare toppings like avocado, cucumber, and sauces ahead of time. This way, assembly is quick and easy during the final moments!
-
Swap Proteins Smoothly: If seafood isn't your preference, feel free to substitute salmon with shrimp, crab, or even tofu for a delicious vegetarian salmon sushi bake that still packs a flavorful punch!
-
Layer Evenly: When assembling, ensure the salmon mixture is spread evenly over the rice. This not only looks appealing but allows for even cooking and flavor distribution.
Salmon Sushi Bake Variations
Feel free to explore these delightful twists to make your Salmon Sushi Bake even more exciting and personalized!
-
Shrimp Swap: Replace salmon with shrimp for a delightful twist that brings a sweet, briny flavor to your dish.
-
Vegan Version: Use tofu instead of fish, mixing it with Kewpie mayo and spices for a rich, creamy texture without any animal products.
-
Crispy Topping: Add tempura bits on top for an extra crunch that contrasts beautifully with the creamy layers.
-
Flavorful Furikake: Experiment with different furikake blends like spicy wasabi or bonito flakes for a flavor bomb in every bite.
-
Extra Heat: Incorporate fresh diced jalapeños into the salmon mixture or top with a drizzle of spicy eel sauce if you love a little kick.
-
Creamier Gooeyness: For a richer topping, mix in some shredded mozzarella cheese or additional cream cheese for an even creamier outcome.
-
Sweet & Savory: Try adding a hint of pineapple or mango puree in the creamy mix for a touch of sweetness that contrasts with the savory flavors.
For even more inspiration, consider checking out our recipe for Vegan Sushi Indulge or feel free to incorporate elements from my Cheesy Zucchini Bake for a delightful side! Your Salmon Sushi Bake can be as versatile as your taste buds desire!
Make Ahead Options
These creamy Salmon Sushi Bake elements can easily be prepped ahead, saving you precious time during busy weeknights! You can prepare the sushi rice and let it cool to room temperature up to 24 hours in advance; just be sure to store it in an airtight container in the refrigerator to maintain freshness. The salmon mixture can also be made up to 3 days ahead—simply combine the diced salmon, mayo, cream cheese, and spices as instructed, then refrigerate until you're ready to assemble the dish. When it's time to enjoy your Salmon Sushi Bake, layer the rice and salmon mixture in your baking dish, then bake for 10-15 minutes, adding a quick broil for that delicious golden finish. This way, you’ll have a comforting, homemade dish with minimal effort!
How to Store and Freeze Salmon Sushi Bake
Room Temperature: Allow the dish to cool completely before leaving it at room temperature for no more than 2 hours to maintain freshness.
Fridge: Store leftover Salmon Sushi Bake in an airtight container for up to 3 days. Reheat in the oven for best results to restore creaminess without drying it out.
Freezer: If you want to extend its shelf life, freeze portions in airtight containers for up to 2 months. Thaw in the fridge overnight before reheating.
Reheating: For optimal taste and texture, reheat in the oven at 350°F (175°C) until warmed through. This method helps keep the creamy topping intact and delicious.
What to Serve with Creamy Salmon Sushi Bake
Indulging in a flavorful salmon sushi bake creates an opportunity to build a wholesome meal, enhancing the dining experience with delightful accompaniments.
- Cucumber Salad: Light and refreshing, this salad balances the richness of the sushi bake with a crisp crunch—a classic pairing.
- Miso Soup: Warm and comforting, miso soup adds a soothing element to your meal, bringing deep umami flavors to the table.
- Edamame: These lightly salted soybeans add a nutritious, protein-packed side that offers a satisfying texture contrast. They also provide a joyful snacking option while you wait for the main dish to cool!
- Tempura Vegetables: The light, crispy texture of tempura makes for an exciting contrast to the creamy sushi bake, adding both crunch and flavor depth.
- Sake or Green Tea: Both beverages complement the dish beautifully; sake enhances the meal's Japanese roots, while green tea offers a refreshing, soothing finish.
- Mango Sticky Rice: For dessert, indulge in mango sticky rice; the sweet, creamy coconut flavors will perfectly round out your harmonious sushi-inspired feast, leaving everyone with a smile.
Salmon Sushi Bake Recipe FAQs
What type of salmon should I use for the Salmon Sushi Bake?
Absolutely! Fresh salmon filet is ideal for the Salmon Sushi Bake, offering the richness and flavor that really stands out. Look for wild-caught salmon when possible, and make sure it's firm and bright in color. If you're unable to find fresh salmon, you can use frozen salmon, just ensure it’s completely thawed before cooking.
How should I store leftover Salmon Sushi Bake?
Very simple! Once your Salmon Sushi Bake has cooled completely, transfer leftovers to an airtight container. Store it in the refrigerator for up to 3 days. When it’s time to enjoy again, I recommend reheating it in the oven rather than the microwave to keep that creamy topping delightful.
Can I freeze the Salmon Sushi Bake?
Yes, you can! To freeze, let the bake cool completely and then portion it into airtight containers. It will keep well frozen for up to 2 months. When you’re ready to eat, simply thaw it in the refrigerator overnight. Reheat in the oven at 350°F (175°C) until warmed through to maintain the creamy consistency.
What should I do if my rice is too sticky?
Not to worry! If your sushi rice turns out too sticky, it may be due to not rinsing it enough before cooking. For next time, thoroughly rinse your sushi rice under cold water until the water runs clear. Another tip is to let the rice cool completely before mixing in the vinegar, which helps with texture as well.
Is there a gluten-free option for the Salmon Sushi Bake?
Definitely! To make your Salmon Sushi Bake gluten-free, simply use Tamari instead of regular soy sauce, which is made without wheat. Also, confirm that your cream cheese and any other packaged ingredients are certified gluten-free. This way, everyone can enjoy this dish without worry!
Creamy Salmon Sushi Bake
Ingredients
Equipment
Method
- Rinse sushi rice under cold water until the water runs clear. Combine with water in a rice cooker and cook according to instructions. Let sit covered for 10 minutes, fluff and mix in seasoned rice vinegar.
- Preheat oven to 425°F (220°C). Cube salmon and mix with Kewpie mayo, cream cheese, sriracha, and soy sauce. Stir in chopped green onions and refrigerate.
- Combine soy sauce, mirin, sake, and sugar in a saucepan over medium heat. Simmer until slightly thickened. Remove from heat and cool.
- Whisk mayo, sriracha, lime juice, and salt in a bowl. Adjust spice level if desired. Chill in the refrigerator.
- In a greased 9x13 inch baking dish, layer seasoned sushi rice evenly, then spread salmon mixture on top.
- Bake in preheated oven for 10-15 minutes until golden. Broil for an additional 2-3 minutes if desired.
- Drizzle unagi sauce and spicy mayo over baked dish. Garnish with avocado, cucumber, sesame seeds, and extra green onions. Serve with nori sheets.


Leave a Reply