
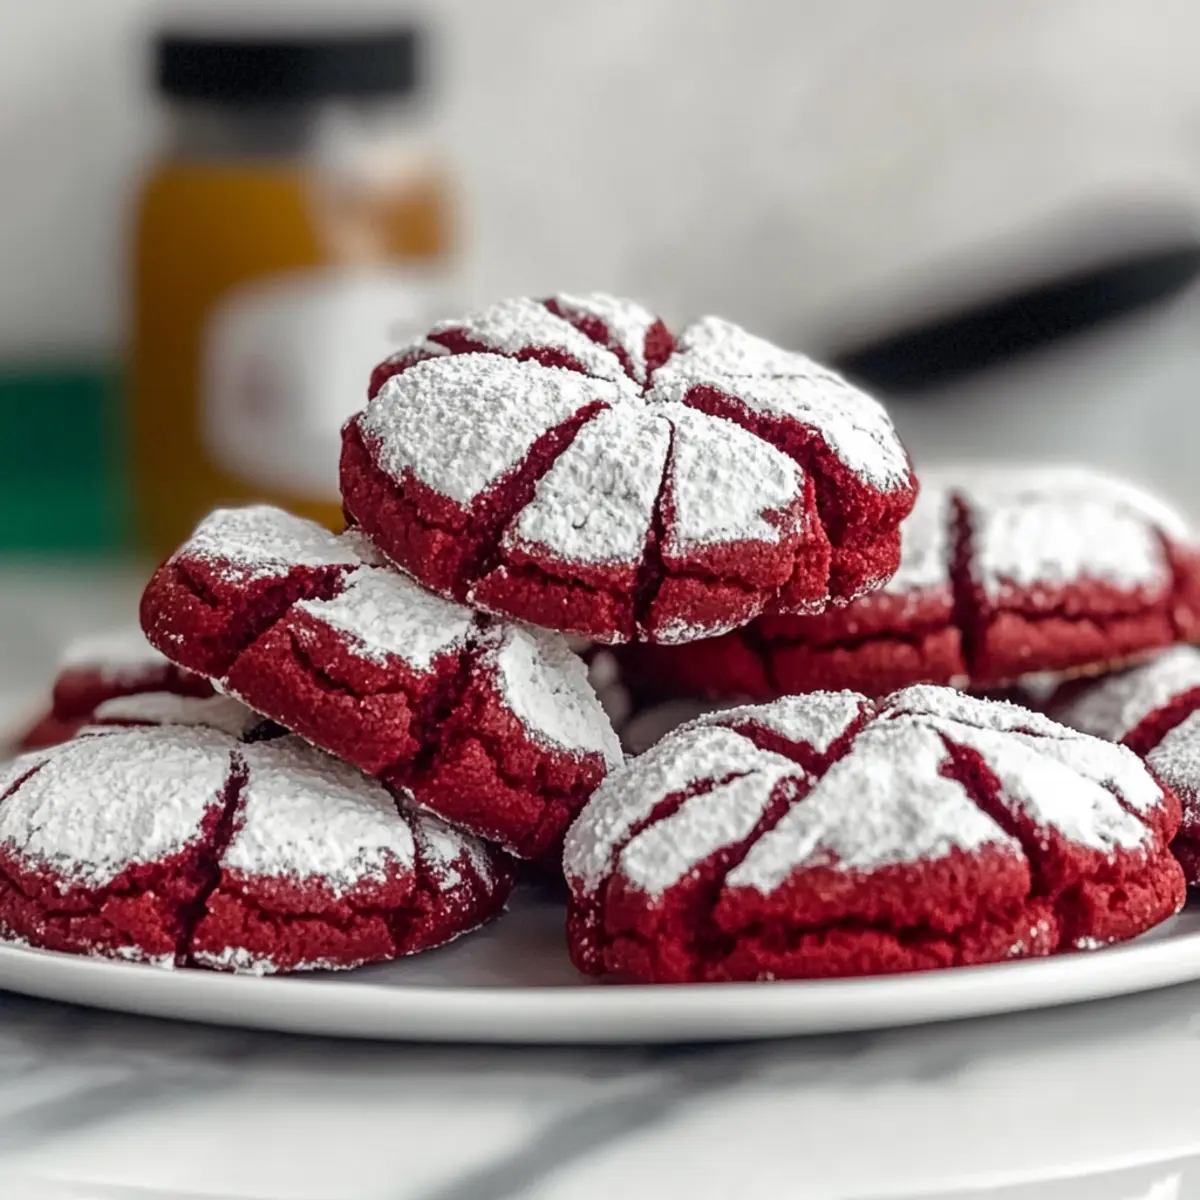
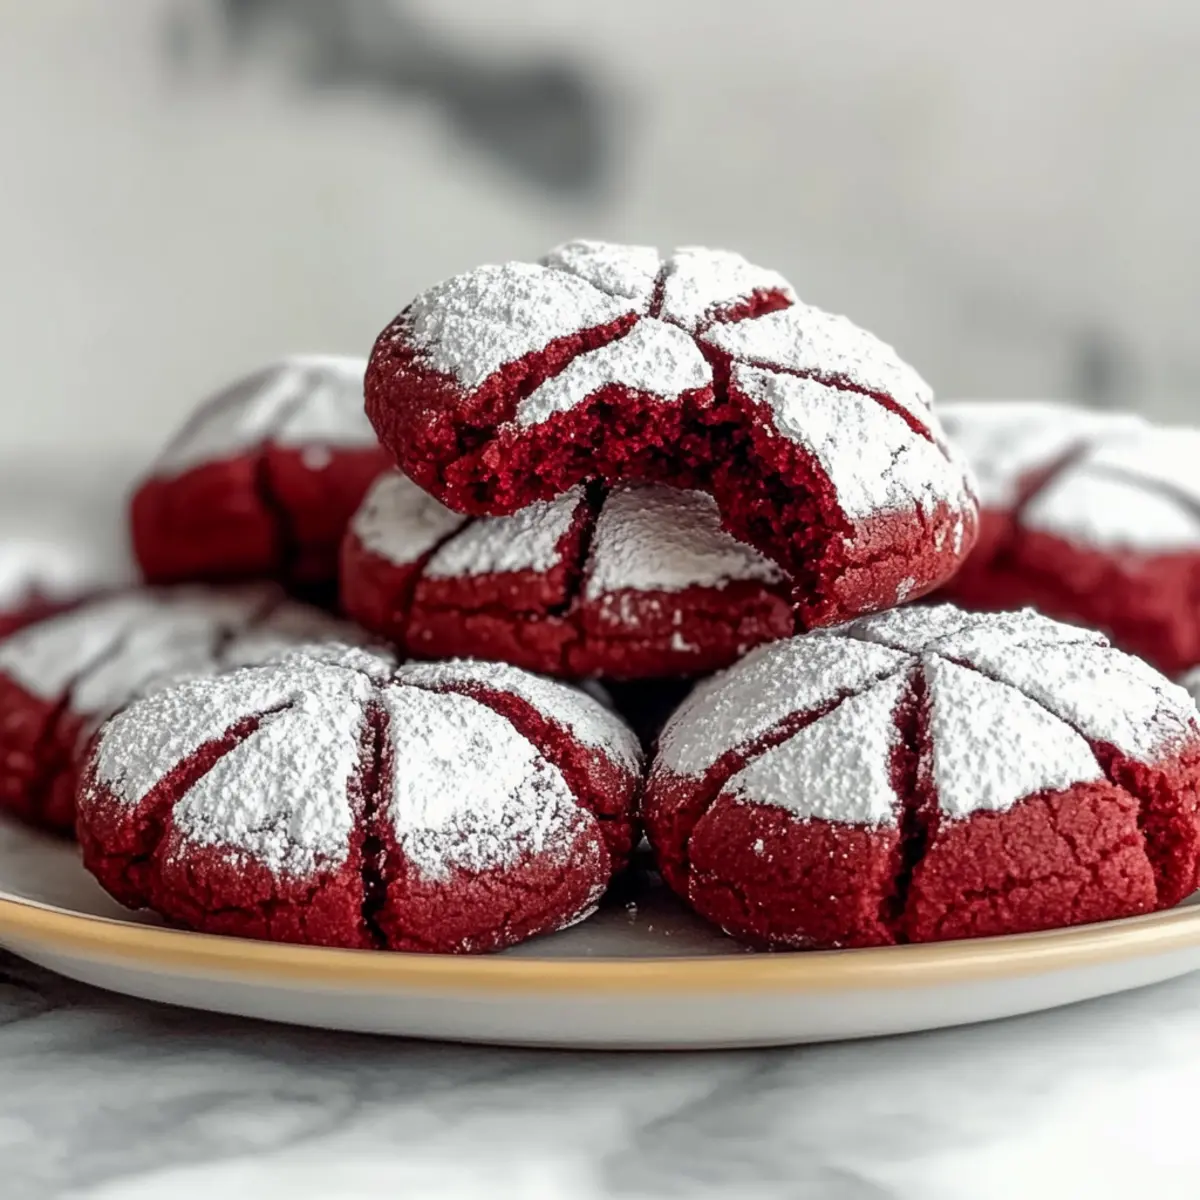
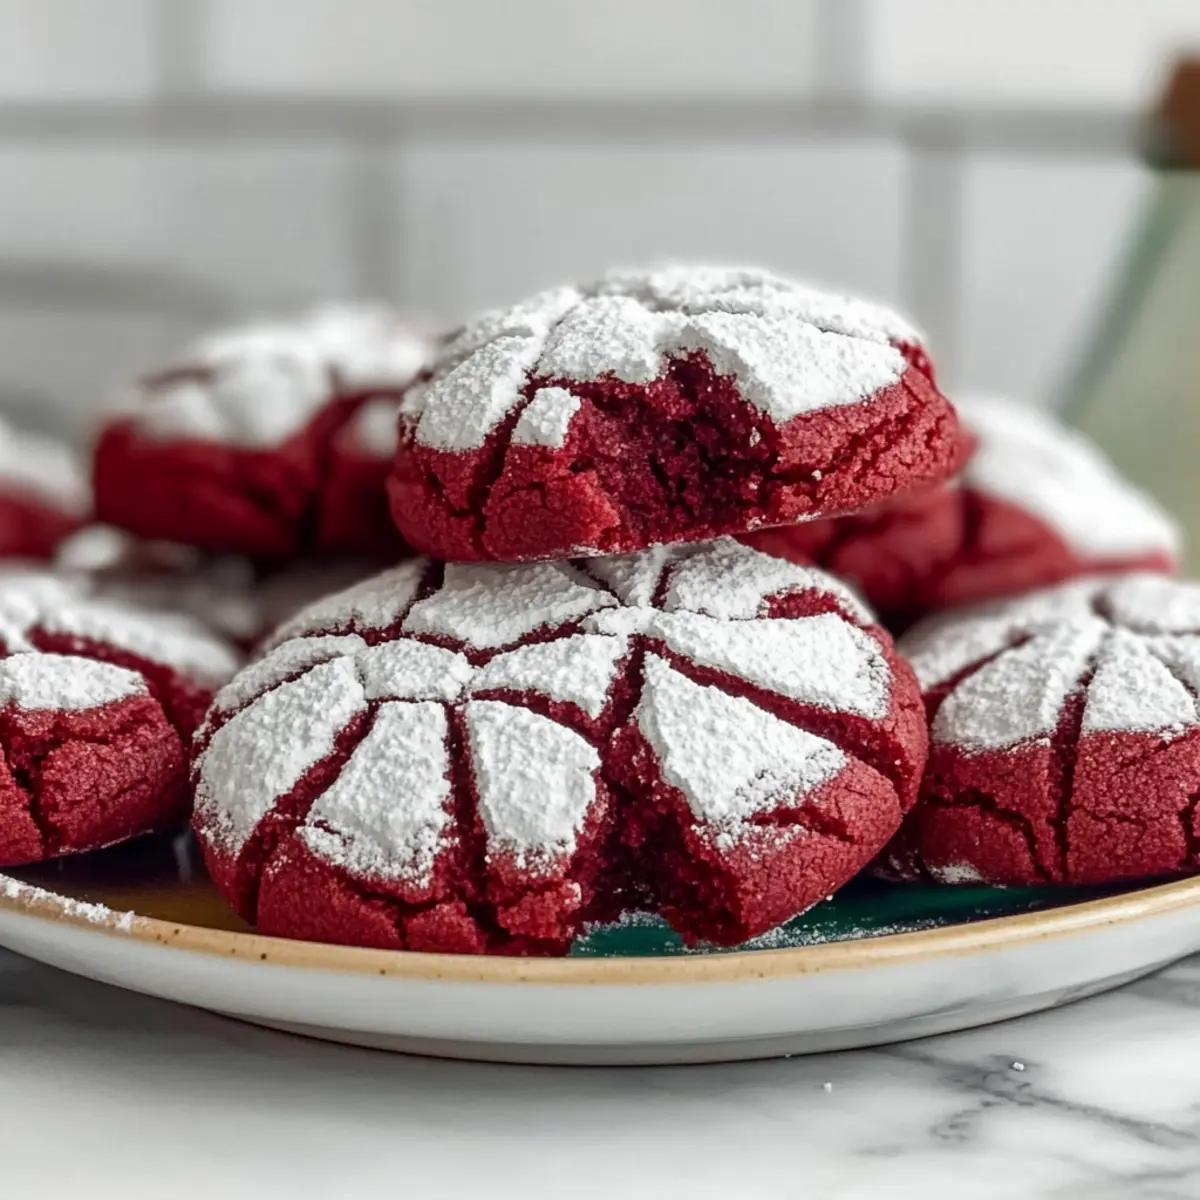
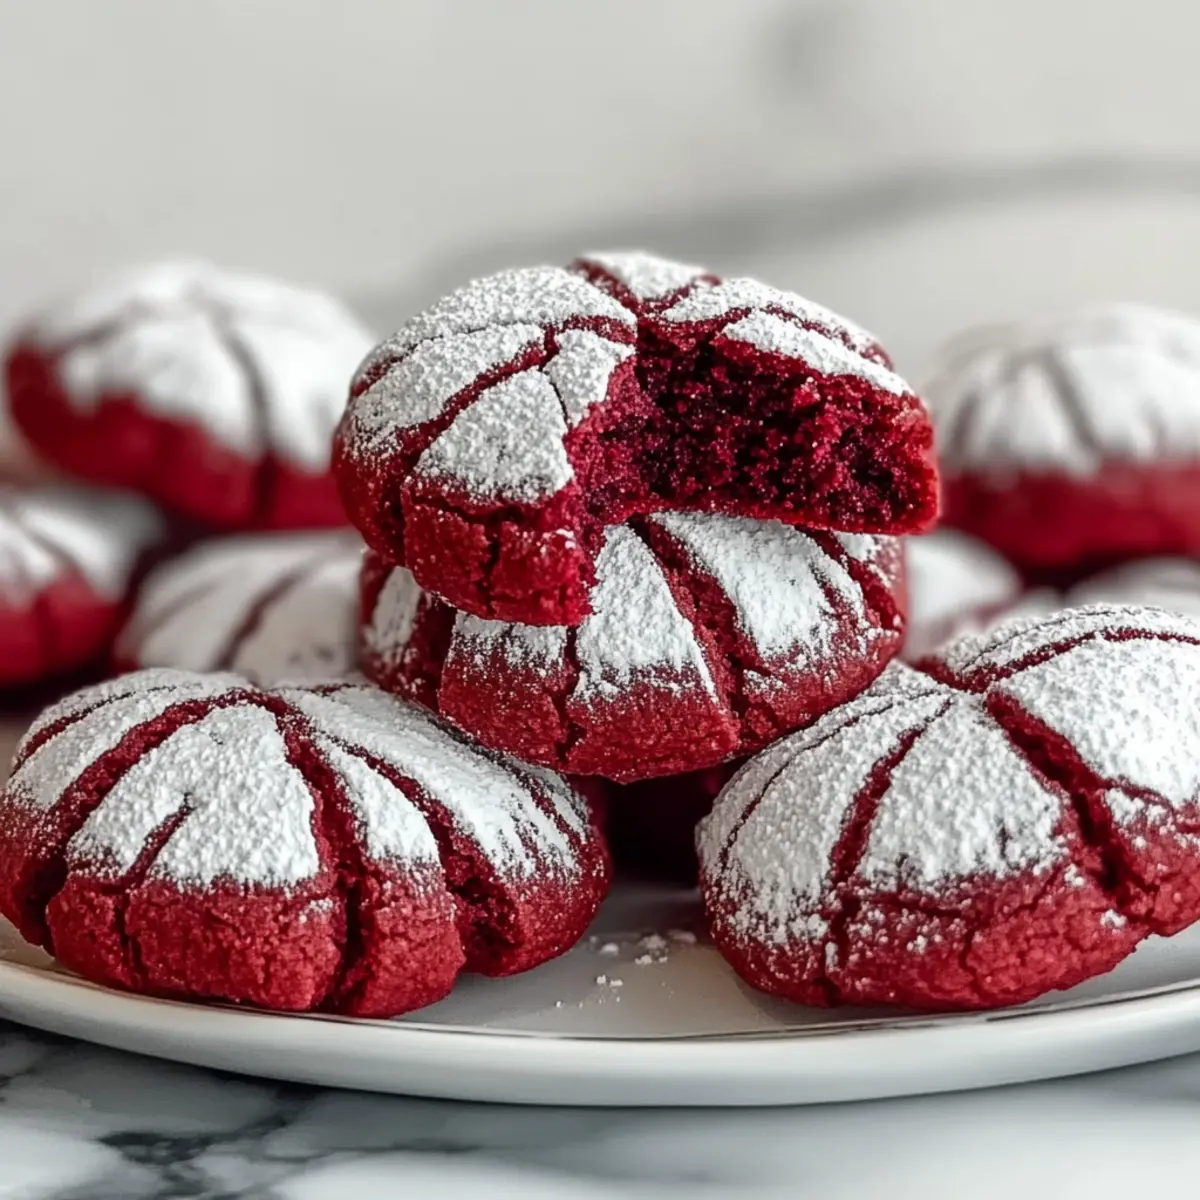
Walking into the kitchen, the rich aroma of cocoa enveloped me, ushering in the excitement of baking. Today, I'm whipping up a batch of Soft and Chewy Red Velvet Crinkle Cookies, a delight that effortlessly melds the charm of classic red velvet cake with the irresistible allure of cookies. These treats not only make for a stunning centerpiece at any gathering, but they also offer the joy of quick prep—perfect for those last-minute dessert cravings. With a fluffy, chewy texture and a striking crinkle from the powdered sugar, these cookies are a hit with friends and family alike. Curious about how to bring this festive joy into your own kitchen? Let’s dive into the recipe!
Why are Red Velvet Crinkle Cookies special?
Visual Appeal: These cookies are not just delicious; they dazzle with their vibrant red color and snowy powdered sugar crust, making them perfect for any festive occasion.
Simplicity: With straightforward ingredients and easy steps, you’ll whip up a batch in no time! Ideal for bakers of all levels seeking a showstopper.
Chewy Texture: Expect a delightful soft and chewy bite, reminiscent of your favorite brownies, thanks to the unique combination of cocoa and the careful baking process.
Versatile Fun: Want to switch things up? Try adding white chocolate chips or festive sprinkles for a personalized touch!
Perfect for Sharing: Gift these treats in a decorative box or serve on a platter, and watch them disappear! Everyone loves cookies that look as good as they taste.
Red Velvet Crinkle Cookie Ingredients
These cookies are as delightful to make as they are to eat!
For the Cookie Dough
- All-purpose flour – Provides structure to the cookie; swap with whole wheat for a heartier version.
- Unsweetened cocoa powder – Adds essential chocolate flavor; be sure to skip Dutch-processed cocoa to maintain that gorgeous red hue.
- Baking powder – A must for helping the cookies rise and achieve their crinkly texture.
- Salt – Enhances sweetness and balances flavors; don’t skip this step!
- Butter (softened) – Adds rich flavor and tenderness; ensure it's adequately softened for easy creaming.
- Granulated sugar – Sweetens and contributes to the chewy texture; essential for that classic cookie experience.
- Eggs – Provide moisture and structure; beat until pale for the best results.
- Vanilla extract – Infuses delicious warmth and aroma; a bit goes a long way!
- Red food coloring (gel) – Gives the cookies their signature bright red color; gel is more concentrated, ensuring an even hue.
For the Coating
- Powdered sugar – This is your magic ingredient for achieving the iconic crinkle effect; don’t be shy with the coating!
Step‑by‑Step Instructions for Soft and Chewy Red Velvet Crinkle Cookies
Step 1: Prepare Dry Ingredients
In a medium bowl, whisk together 2 cups of all-purpose flour, 1/4 cup of unsweetened cocoa powder, 1 teaspoon of baking powder, and 1/2 teaspoon of salt until well combined. This dry mixture forms the backbone of your Red Velvet Crinkle Cookies, ensuring they rise beautifully and maintain the right texture.
Step 2: Cream Butter and Sugar
In a large mixing bowl, use an electric mixer to beat 1/2 cup of softened butter and 1 cup of granulated sugar together on medium speed for about 3 minutes. The mixture should become light and fluffy, signaling it's ready. This step is crucial for achieving the rich, chewy texture in your cookies.
Step 3: Incorporate Eggs and Flavorings
Add 2 large eggs to your butter and sugar mixture, one at a time, mixing well between each addition. Then, stir in 1 teaspoon of vanilla extract and 1 tablespoon of red food coloring (gel) until you achieve your desired hue. The vibrant red will shine through the crinkle finish of your cookies.
Step 4: Combine Mixtures
Gradually add the dry ingredients to the wet mixture, mixing on low speed just until incorporated. Avoid overmixing to maintain the soft and chewy texture characteristic of soft and chewy Red Velvet Crinkle Cookies. The dough should be thick yet manageable.
Step 5: Chill the Dough
Cover the bowl with plastic wrap and chill the cookie dough in the refrigerator for at least 30 minutes. This essential step firms up the dough, preventing excessive spreading during baking and ensuring those lovely crinkles form perfectly on the surface.
Step 6: Shape and Coat Cookies
Preheat your oven to 350°F (175°C) and line a baking sheet with parchment paper. Scoop the chilled dough into balls, roughly 1 inch in diameter, and roll each ball generously in powdered sugar until fully coated. This snowy finish not only enhances visual appeal but also contributes to the cookies' signature texture.
Step 7: Bake
Place the coated cookie dough balls on the prepared baking sheet, spacing them about 2 inches apart. Bake in your preheated oven for approximately 12 minutes, or until the edges are set but the centers remain soft. You want them to maintain their soft, chewy center.
Step 8: Cool
Allow the cookies to cool on the baking sheet for about 5 minutes before gently transferring them to a wire rack. This step helps them firm up slightly while keeping that delightful chewiness intact. Once cooled, they are ready to be enjoyed or shared!
Make Ahead Options
These Soft and Chewy Red Velvet Crinkle Cookies are perfect for meal prep enthusiasts! You can prepare the cookie dough up to 24 hours in advance by mixing and covering it tightly in plastic wrap before refrigerating. This not only enhances the flavors but also firms up the dough to create those characteristic crinkles. If you're short on time, you can also roll the dough into balls and coat them in powdered sugar, then refrigerate for up to 3 days. When you’re ready to bake, simply place the chilled dough balls on a baking sheet and pop them in the oven—easy-peasy! Your cookies will still come out just as delicious and impressive, saving you precious time on busy days!
How to Store and Freeze Red Velvet Crinkle Cookies
Room Temperature: Store baked cookies in an airtight container at room temperature for up to 4 days to maintain their soft and chewy texture.
Freezer: For longer storage, freeze the cookies in a single layer on a baking sheet until firm, then transfer to a freezer bag. They can be kept for up to 2 months.
Unbaked Dough: Freeze unbaked dough balls by scooping them onto a parchment-lined tray and freezing until solid. Store in a bag for up to 2 months, then bake directly from the freezer when ready.
Reheating: To enjoy leftover cookies, simply warm them in the microwave for 10-15 seconds or in a preheated oven at 350°F (175°C) for a few minutes to restore their soft, chewy goodness.
Red Velvet Crinkle Cookie Variations
Feel free to get creative with the flavor and texture of these delightful cookies—your baking adventure awaits!
- Dairy-Free: Substitute vegan butter and use a plant-based egg replacer to make these cookies dairy-free without losing flavor.
- Gluten-Free: Swap all-purpose flour for a gluten-free blend to make these delectable cookies suitable for gluten-sensitive friends.
- Chocolate Chip Twist: Fold in semi-sweet chocolate chips for a decadent chocolatey burst in every bite, elevating the classic red velvet flavor.
- Cream Cheese Frosting: Top each cooled cookie with a dollop of cream cheese frosting to add a tangy sweetness reminiscent of red velvet cake.
- Nutty Crunch: Incorporate finely chopped walnuts or pecans into the dough for a delightful crunch and extra texture in each chewy bite.
- Spiced Flavor: Add a pinch of cinnamon or nutmeg to the dough for a warm spice that complements the cocoa beautifully.
- Festive Sprinkles: Roll the cookie balls in festive sprinkles along with powdered sugar for a pop of color that makes them even more appealing at celebrations.
- Mint Chocolate Variation: Add a drop of peppermint extract to the dough for a refreshing twist, and consider using mint chocolate chips for an exciting flavor burst!
Whether you decide to stick with the classic approach or embrace one of these variations, each version will surely delight your taste buds! If you’re inspired to keep the festive theme going, check out these Thumbprint Cookies Melt for another treat that’ll impress your friends and family.
What to Serve with Red Velvet Crinkle Cookies
Bring a touch of delight to your gatherings with these soft, chewy treats ready to steal the show!
-
Creamy Vanilla Ice Cream: This classic pairing complements the rich cocoa flavor and adds a cool, velvety texture that enhances the cookie's sweetness.
-
Fresh Berries: Juicy strawberries or raspberries provide a tart contrast that balances the dessert’s richness, adding a pop of color and freshness.
-
Rich Hot Chocolate: A velvety mug of hot chocolate makes for the perfect dipping companion, intensifying the delightful cocoa notes found in the cookies.
-
Whipped Cream: Light and airy, whipped cream provides a refreshing contrast to the cookie's dense texture, making each bite feel decadent without being too heavy.
-
Salted Caramel Sauce: Drizzle this sweet and salty treat over the cookies for an elevated experience, creating a beautiful blend of flavors that’s simply irresistible.
-
Nutty Coffee: Pair with a smooth cup of coffee to enhance the cocoa notes, creating a cozy moment that feels indulgent and homey.
-
Chocolate Ganache Dip: For a truly decadent experience, serve alongside a bowl of warm chocolate ganache for dipping; it's a chocolate lover’s dream!
-
Pumpkin Spice Latte: The seasonal spices beautifully complement the rich chocolate flavors, making it a perfect pairing for cozy fall gatherings.
-
Almond Biscotti: This crunchy treat offers a contrast in texture to the chewy cookie while marrying wonderfully with the red velvet's sophisticated flavors.
Expert Tips for Red Velvet Crinkle Cookies
-
Chill for Perfect Crinkles: Chilling the dough for at least 30 minutes is essential to achieving those signature crinkle tops. This helps firm up the dough and prevents spreading.
-
Monitor Baking Time: Keep a close eye on your cookies while baking. They should be set on the edges but remain soft in the center—about 12 minutes is ideal for soft and chewy Red Velvet Crinkle Cookies.
-
Powdered Sugar Coating: Don’t skimp on the powdered sugar coating before baking. A thick coat not only enhances the cookie's appearance but also contributes to that signature texture.
-
Use Gel Food Coloring: Opt for gel food coloring rather than liquid to achieve a vibrant red without compromising the cookie's texture. Gel is more concentrated and provides a consistent hue.
-
Cooling Carefully: Let the cookies cool on the baking sheet for a few minutes to firm up before transferring them to a wire rack. This prevents them from breaking apart as they cool.
Red Velvet Crinkle Cookies Recipe FAQs
How do I select ripe ingredients for my Red Velvet Crinkle Cookies?
Absolutely! When choosing ingredients, opt for fresh eggs, unsalted butter that is soft-to-the-touch for easy creaming, and ensure your cocoa powder is fresh to maintain that delightful cocoa flavor. Utilizing gel food coloring is key as it provides a vibrant red hue without adding excess moisture.
How should I store my Red Velvet Crinkle Cookies?
Very! To keep your cookies fresh, store them in an airtight container at room temperature for up to 4 days. This helps maintain their signature soft and chewy texture. If you need longer storage, simply freeze the baked cookies for up to 2 months. Just remember to place them in a single layer on a baking sheet first until firm before transferring to a freezer bag.
Can I freeze the dough for my Red Velvet Crinkle Cookies?
Absolutely! To freeze unbaked dough, scoop dough balls onto a parchment-lined tray and freeze until solid. Then, transfer them to a freezer bag and they can be stored for up to 2 months. When you’re ready to bake, there's no need to thaw; just bake them directly from the freezer, adding a minute or two to your baking time if necessary!
What should I do if my cookies spread too much during baking?
Oh no! If your cookies spread too much, it could be due to not chilling the dough long enough. Make sure to chill it for at least 30 minutes before baking. Additionally, check that your butter was softened adequately and not melted, as melted butter can lead to excessive spreading. If you face this issue, consider chilling the baked cookies before serving; they’ll still taste delicious!
Are Red Velvet Crinkle Cookies suitable for those with allergies?
Very! If you or your loved ones have dietary restrictions, make sure to keep an eye on the ingredients. These cookies contain gluten and can be made with dairy, so swapping all-purpose flour for a gluten-free blend and using dairy-free butter can create a tasty alternative. Always follow safe practices to avoid cross-contamination if baking for those with allergies.
Do I need to use gel food coloring, or can I use liquid?
Great question! I highly recommend using gel food coloring for your Red Velvet Crinkle Cookies. Gel food coloring offers a more concentrated hue, ensuring your cookies achieve that vibrant red without compromising texture. If you do use liquid, be cautious as it could alter the consistency of your dough.
Irresistibly Chewy Red Velvet Crinkle Cookies to Impress
Ingredients
Equipment
Method
- In a medium bowl, whisk together the flour, cocoa powder, baking powder, and salt until well combined.
- In a large bowl, beat the softened butter and granulated sugar together until light and fluffy.
- Add the eggs one at a time, mixing well between each addition, and then stir in vanilla extract and red food coloring.
- Gradually add the dry ingredients to the wet mixture, mixing on low speed until incorporated.
- Cover the bowl and chill the dough in the refrigerator for at least 30 minutes.
- Preheat the oven to 350°F (175°C). Scoop chilled dough into balls and roll in powdered sugar.
- Place the coated dough balls on a lined baking sheet, spaced apart, and bake for about 12 minutes.
- Allow cookies to cool on the baking sheet for 5 minutes before transferring to a wire rack.


Leave a Reply