
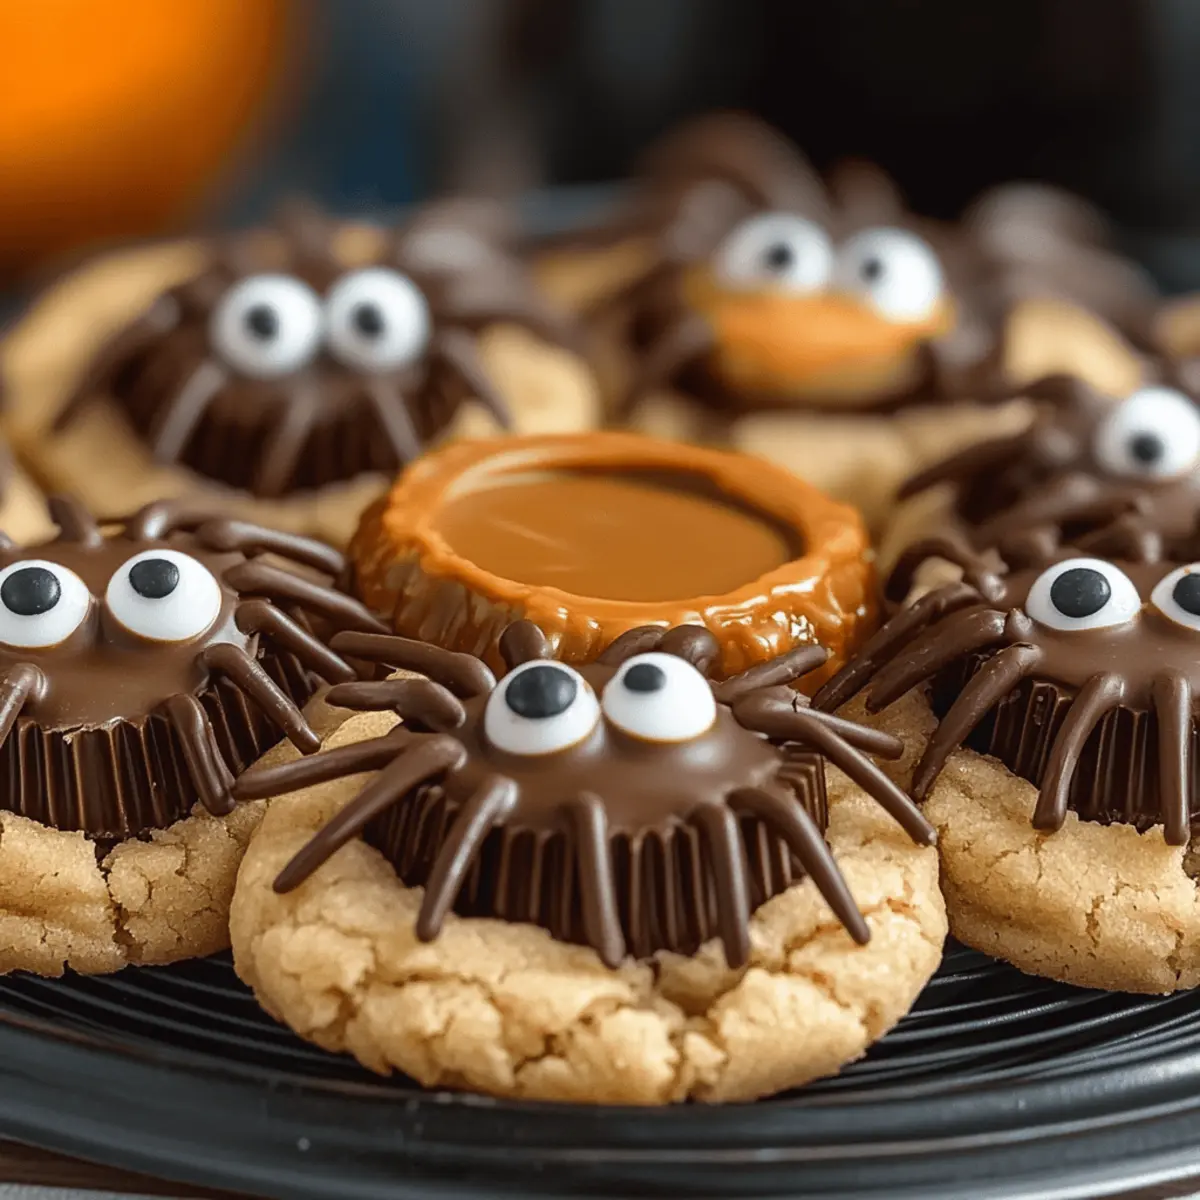
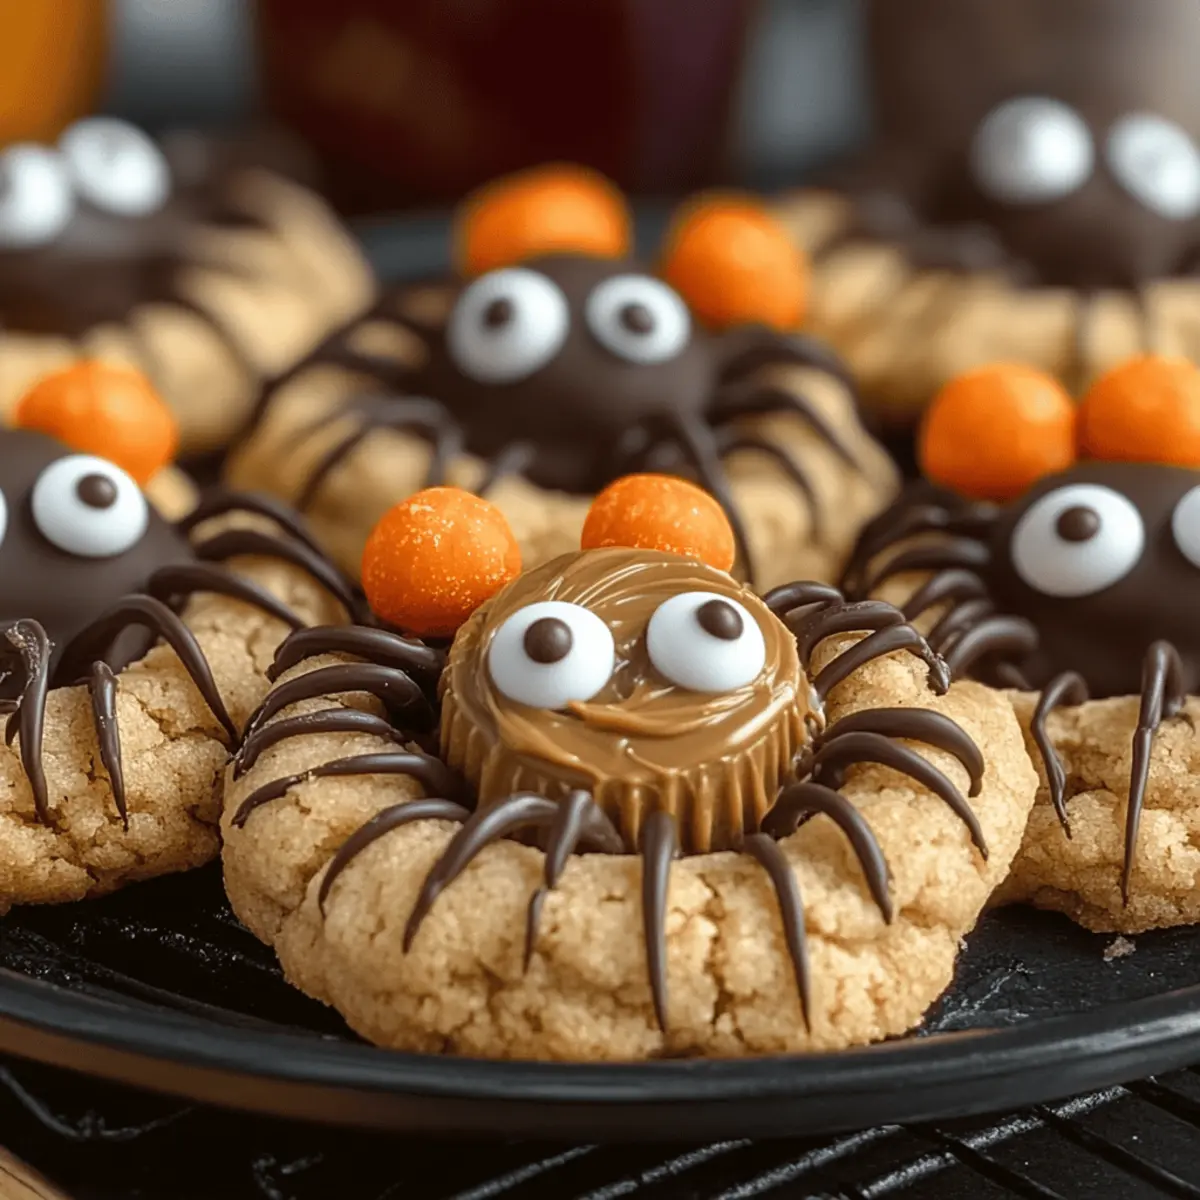
As Halloween approaches, the excitement in the air becomes almost palpable—especially when it comes to whipping up treats that delight ghouls and goblins alike. My Peanut Butter Spider Cookies are the perfect blend of fun and flavor, topped with creamy Reese's cups and adorable candy eyeballs! Not only are these cookies quick to prepare with no chilling time required, but they also make for a truly crowd-pleasing Halloween dessert. Imagine both kids and adults gathering around, marveling at these festive little delights—who wouldn’t want a bite of these spooky snacks? They are easily adaptable too, allowing you to modify them for gluten-free diets without sacrificing joy. Ready to impress your family this spooky season? Let’s dive into the recipe!

Why Are Peanut Butter Spider Cookies So Fun?
Irresistible Festive Appeal: These cookies are not just treats; they're playful creations that bring Halloween spirit to life!
No-Chill Convenience: Quickly whip up a batch without waiting around—perfect for when those sweet cravings hit!
Kid-Friendly Fun: Let the little ones get creative decorating with candy eyeballs; it's a great way to bond and make memories.
Delicious Flavor Combo: The blend of creamy peanut butter and chocolate is a match made in dessert heaven!
Easily Adaptable: Need a gluten-free option? Feel free to swap in a 1:1 gluten-free flour blend for everyone to enjoy!
You’ll love serving these Peanut Butter Spider Cookies at your Halloween gatherings, transforming them into treats that even your favorite classics like Eggnog Cookies Soft can’t compete with!
Peanut Butter Spider Cookies Ingredients
For the Cookies
• Unsalted Butter – Adds richness and moisture; make sure it's at room temperature for easier mixing.
• Brown Sugar – Provides moisture and chewiness; you can substitute with coconut sugar for deeper flavor.
• Granulated Sugar – Sweetens the cookies and helps achieve those delightful crispy edges.
• Creamy Peanut Butter – The star ingredient that gives flavor and texture; stick with conventional peanut butter for the best results.
• Large Egg – Binds the mixture together and contributes to the cookie's structure.
• Vanilla Extract – Enhances the overall flavor profile beautifully.
• All-Purpose Flour – Provides structure; a 1:1 gluten-free flour blend can be used for a gluten-free version.
• Baking Soda – Acts as a leavening agent for a slightly risen cookie.
• Baking Powder – Works alongside baking soda to ensure fluffiness.
• Salt – Balances out the cookie's sweetness.
• Granulated Sugar (for rolling) – Adds a sweet, crunchy crust.
For the Topping
• Mini Reese’s Peanut Butter Cups – Bring festive joy and flavor to your cookies, making them truly special.
• Semi-Sweet Chocolate Chips – Perfect for creating spider legs and attaching our fun candy eyes.
• Candy Eyeballs – These festive decorations make your cookies irresistibly cute and Halloween-ready!
Your festive Peanut Butter Spider Cookies are just waiting to be made, and I can guarantee they’ll be a hit with the whole family!
Step‑by‑Step Instructions for Peanut Butter Spider Cookies
Step 1: Chill the Reese’s
Begin by placing your unwrapped mini Reese's Peanut Butter Cups in the freezer for about 30 minutes. This helps them maintain their shape when baked into your Peanut Butter Spider Cookies. A quick chill ensures the delicious centers won't melt away completely, leaving you with perfectly festive treats!
Step 2: Prepare the Oven
Preheat your oven to 350°F (175°C). While the oven heats, you'll be ready to mix your cookie dough soon. Make sure to line two baking sheets with parchment paper for easy cleanup and to prevent sticking, ensuring your cookies bake evenly and come out beautifully golden.
Step 3: Mix Butter and Sugars
In a large mixing bowl, beat together ½ cup of unsalted butter, ½ cup of packed brown sugar, and ¼ cup of granulated sugar using an electric mixer. Mix until the mixture is smooth and fluffy—approximately 2-3 minutes. This creaming process helps incorporate air, giving your Peanut Butter Spider Cookies a delightful texture when baked.
Step 4: Combine the Wet Ingredients
Add ¾ cup of creamy peanut butter, one large egg, and 1 teaspoon of vanilla extract to the butter and sugars. Continue mixing until everything is well blended and creamy. This combination adds that essential nutty flavor that makes these cookies irresistible, ensuring each bite encapsulates the heart of Halloween!
Step 5: Incorporate the Dry Ingredients
Gradually mix in 1 cup of all-purpose flour, ½ teaspoon of baking soda, ½ teaspoon of baking powder, and ¼ teaspoon of salt. Stir just until combined, taking care not to overmix; the dough should be thick and slightly sticky. This step ensures your Peanut Butter Spider Cookies maintain the perfect chewiness and structure when baked.
Step 6: Shape the Cookies
Using a tablespoon, scoop out dough and form balls about the size of a golf ball. Roll each ball in granulated sugar for a sweet crust, then place them spaced 2 inches apart on your prepared baking sheets. This allows room for spreading while baking—give them a cozy but not crowded home on the tray!
Step 7: Bake the Cookies
Bake the cookies in the preheated oven for 8-11 minutes, until the edges are golden while the centers remain soft. Keep an eye on them as they bake; you want a nice golden hue without overbaking. When the timer goes off, the aroma of peanut butter will fill your kitchen—yum!
Step 8: Add the Toppings
As soon as they come out of the oven, gently press a chilled Reese’s cup into the center of each cookie while they are still warm. Allow the cookies to cool on the baking sheet for about 15-20 minutes. This helps the Reese’s melt slightly into the cookie, creating a deliciously sweet centerpiece!
Step 9: Decorate the Cookies
Melt ½ cup of semi-sweet chocolate chips in the microwave or over a double boiler until smooth. Use a squeeze bottle or a ziplock bag with a corner snipped off to create spider legs by drizzling the melted chocolate out from the Reese's. Attach candy eyeballs using some of the melted chocolate, letting everything set completely before serving. These Peanut Butter Spider Cookies will be a spooky treat that everyone will adore!

Make Ahead Options
These Peanut Butter Spider Cookies are perfect for busy home cooks looking to save time! You can prepare the cookie dough up to 24 hours in advance by mixing all the ingredients, rolling them into balls, and storing them in an airtight container in the refrigerator. For even longer storage, shape the dough balls, flash freeze them on a baking sheet, and then transfer to a ziplock bag—this allows you to bake fresh cookies later, even up to three months down the line! When you’re ready to bake, just preheat the oven, place them on a baking sheet, and bake as directed. You'll achieve those soft, chewy cookies just as delightful as when made fresh!
What to Serve with Peanut Butter Spider Cookies?
These delightful cookies will surely steal the spotlight, but pairing them with the right sides enhances your Halloween festivities.
- Milk: A classic pairing that complements the chocolate and peanut butter, providing a creamy balance to each sweet bite.
- Pumpkin Spice Latte: The warm spices from this seasonal favorite create a cozy experience, perfect for a Halloween gathering.
- Caramel Apple Slices: Crisp apple slices dipped in caramel add a refreshing crunch that contrasts beautifully with the chewy cookies.
- Ghostly Cupcakes: Whipped frosting and spooky décor on cupcakes mirror the fun spirit of your cookies, enticing everyone to indulge.
- Hot Chocolate: Rich, creamy hot chocolate drizzled with chocolate adds a luxurious touch and indulgent experience to the evening.
These pairings will not only elevate your Peanut Butter Spider Cookies but also create a memorable dessert spread for all your Halloween celebrations!
Peanut Butter Spider Cookies Variations
Feel free to get creative with your Peanut Butter Spider Cookies and make them your own!
-
Nut-Free: Swap peanut butter for sun butter to create an allergen-friendly version that still delights.
-
Gluten-Free: Use a 1:1 gluten-free flour blend for a kid-friendly treat that everyone can enjoy.
-
Flavor Boost: Add ½ teaspoon of cinnamon or pumpkin spice to the dough for a warm, autumnal flavor.
-
Chocolate Lovers: Replace mini Reese’s with chocolate-covered pretzels for an extra crunch and sweet-salty twist.
-
Mix and Match Toppings: Experiment with different candies for the spider topping; crushed Oreos or gummy worms can make fun alternatives!
-
Choco-Peanut Butter Twist: Incorporate semi-sweet chocolate chips into the dough for a rich, chocolatey experience.
-
Festive Sprinkles: Add Halloween-themed sprinkles before the cookies cool for a pop of color and celebration.
-
Chopped Candy Bars: Substitute mini Reese’s with chopped fun-sized candy bars, like Snickers or Milky Way, for mixed flavor fun.
No matter which variations you choose, your spooky cookies will be sure to charm all ghosts and goblins at your Halloween gatherings. For holiday treats that are just as delightful, consider making Thumbprint Cookies Melt or Mexican Wedding Cookies to keep the festive spirit alive!
Expert Tips for Peanut Butter Spider Cookies
-
Chill the Reese's: Ensure your Reese's cups are frozen before baking; this keeps their shape intact and prevents melting into the cookie dough.
-
Don’t Overbake: Keep an eye on the cookies; they should be golden on the edges but still soft in the center. They continue to set while cooling.
-
Sugar Coating: Rolling the cookie dough balls in granulated sugar not only adds sweetness but also creates a delightful texture contrast in the finished cookies.
-
Parchment Paper: Use parchment paper on your baking sheets to prevent sticking and to make cleanup a breeze, enhancing your cookie baking experience.
-
Creative Toppings: Don’t hesitate to get festive with decorations—feel free to use different types of candy for variety, while keeping the peanut butter cookie goodness intact!
How to Store and Freeze Peanut Butter Spider Cookies
Airtight Container: Store cookies in an airtight container at room temperature for up to 3 days to keep them fresh and chewy. If stacking, place parchment paper between layers to prevent sticking.
Freezer Friendly: For longer storage, these Peanut Butter Spider Cookies can be frozen. Wrap each cookie individually in plastic wrap, then place them in a ziplock bag for up to 2 months.
Reheating: When ready to enjoy, thaw your cookies at room temperature, or pop them in the microwave for a few seconds to regain that soft, fresh-from-the-oven texture.
Dough Storage: If you'd like, you can also freeze the cookie dough! Shape into balls, flash freeze them on a baking sheet, and then transfer to a ziplock bag. Bake directly from frozen, adding a minute or two to the baking time.
Peanut Butter Spider Cookies Recipe FAQs
How do I choose the right peanut butter for this recipe?
Absolutely! For the best results when making your Peanut Butter Spider Cookies, I recommend using conventional creamy peanut butter. This type creates the ideal texture and flavor. Natural peanut butter may not work as well, as it can be too oily or dry, affecting the consistency of your cookie dough.
What’s the best way to store Peanut Butter Spider Cookies?
To keep your cookies fresh, store them in an airtight container at room temperature for up to 3 days. If you're stacking them, place parchment paper between layers to prevent them from sticking together. They truly taste best when enjoyed fresh!
Can I freeze Peanut Butter Spider Cookies?
Very! To freeze your Peanut Butter Spider Cookies, wrap each cookie individually in plastic wrap and then place them in a ziplock bag. They can be stored in the freezer for up to 2 months. When you're ready to enjoy them, simply thaw at room temperature or warm them in the microwave for a few seconds to regain that soft, fresh-from-the-oven texture!
What if my cookie dough is too dry?
If you find that your dough seems too dry, don’t worry! Simply add a teaspoon of milk or a little more peanut butter to the mix to achieve that perfect, slightly sticky consistency. This will enhance the moisture and ensure your cookies turn out delightfully chewy.
Can I make these cookies gluten-free?
Yes, absolutely! To create a gluten-free version of Peanut Butter Spider Cookies, simply replace all-purpose flour with a 1:1 gluten-free flour blend. This modification allows everyone to enjoy these festive treats without sacrificing flavor or texture!
What can I use instead of Reese's for the topping?
If you prefer, you can substitute mini candy bars instead of Reese's to top your cookies. Feel free to get creative! Using different types of chocolate or candies can add variety and fun to your Halloween treats while still keeping that delicious peanut butter cookie base intact.
Peanut Butter Spider Cookies That Halloween Kids Will Love
Ingredients
Equipment
Method
- Chill the unwrapped mini Reese's Peanut Butter Cups in the freezer for about 30 minutes.
- Preheat your oven to 350°F (175°C) and line two baking sheets with parchment paper.
- In a large mixing bowl, beat together the butter, brown sugar, and granulated sugar until smooth and fluffy.
- Add peanut butter, egg, and vanilla extract to the mixture and mix until well blended.
- Gradually mix in flour, baking soda, baking powder, and salt until just combined.
- Scoop out dough and form golf ball-sized balls, roll in granulated sugar, and place them on prepared baking sheets.
- Bake for 8-11 minutes until edges are golden and centers are soft.
- As soon as they come out of the oven, press a chilled Reese’s cup into the center of each cookie.
- Cool on the baking sheet for about 15-20 minutes before decorating.
- Melt chocolate chips and create spider legs by drizzling from the Reese's. Attach candy eyeballs with chocolate.


Leave a Reply