
As I stepped into a bustling Lisbon bakery, the warm air was thick with the sweet scent of baked goods, and the sight of pastel de nata cooling by the window caught my eye, beckoning me closer. This classic pastel de nata recipe captures that charming experience right in your kitchen, blending flaky pastry with a silky, creamy custard that leaves your taste buds dancing. Not only are these delightful tarts an impressive homemade treat, but they also make for an irresistible crowd-pleaser, whether at brunch or a cozy evening gathering. Ready to fill your home with the enticing aroma of cinnamon and lemon zest? Let's dive into making these authentic Portuguese custard tarts that are sure to become a favorite!

Why is Pastel de Nata a Must-Try?
Delightful Experience: Savor the melt-in-your-mouth bliss of silky custard enveloped in crispy pastry that creates a fantastic contrast.
Impressive and Authentic: This recipe delivers an authentic taste of Portugal right in your kitchen, impressing friends and family alike.
Versatile Enjoyment: Perfect for any occasion, from brunch to dessert, pastel de nata is a versatile treat that everyone will adore.
Time-Saving Simplicity: Despite its gourmet look, the baking process is simple and manageable, making it accessible for home cooks of all levels.
Warm Indulgence: Serve them warm with a dusting of cinnamon, and you'll be transported to a charming Lisbon bakery. For more delightful flavors, check out my Chicken Adobo Again for another crowd-pleaser recipe!
Pastel de Nata Ingredients
For the Pastry
- Frozen Puff Pastry – Provides a flaky and airy texture; consider making homemade pastry for an extra touch of authenticity.
For the Custard
- Granulated Sugar – Adds sweetness to the custard filling; you can substitute with alternative sweeteners if preferred.
- All-Purpose Flour – Acts as a thickening agent in the custard; cornstarch can be a gluten-free substitute.
- Whole Milk – Creates a creamy base for the custard; low-fat milk can work for a lighter option.
- Cinnamon Stick – Infuses warmth into the custard; ground cinnamon is a convenient alternative if the stick isn’t on hand.
- Lemon Peel – Offers brightness and zest; orange peel can be an interesting substitute.
- Egg Yolks – Essential for richness and structure in the custard; whole eggs may be used, though texture will differ.
Get ready to whip up this delectable pastel de nata recipe, and savor every delightful bite of these tarts!
Step‑by‑Step Instructions for Pastel de Nata Recipe
Step 1: Prepare Puff Pastry
On a floured surface, roll out the thawed frozen puff pastry into a thin rectangle, ensuring it's about 1/8 inch thick. Carefully roll the pastry tightly from one short end to the other, forming a long cylinder. Once completed, slice the cylinder into 12 equal pieces, showcasing the pastry's flaky layers, and set them aside.
Step 2: Form Tart Shells
Taking each piece of pastry, place them cut-side down into a greased muffin tin. Gently press down to distribute the dough along the base and up the sides of each muffin cavity, ensuring an even thickness. Once all pieces are in place, refrigerate the tin for about 30 minutes to firm up the pastry before filling.
Step 3: Make Custard Filling
In a medium saucepan over low heat, whisk together granulated sugar, flour, and a small scout of milk to create a smooth paste. Gradually stir in the remaining whole milk while combining with the paste, then add a cinnamon stick and lemon peel. Heat the mixture, whisking constantly for about 5-7 minutes until it thickens to a custard-like consistency. Remove from heat and let steep for 10 minutes.
Step 4: Combine with Egg Yolks
In a separate bowl, vigorously whisk the egg yolks until they are a pale yellow color. Strain the cinnamon stick and lemon peel out of the warm milk mixture, and slowly pour it into the egg yolks while whisking continuously to temper them. This process ensures a smooth custard base, which you'll then strain through a fine sieve into another bowl for the perfect consistency.
Step 5: Bake Tarts
Preheat your oven to a scorching 500°F (260°C) to create that envied crispy crust. Pour the silky custard into each pastry shell, filling each about 3/4 full to allow for expansion while baking. Place the muffin tin in the oven and bake for 12-15 minutes, until the tops become puffy and develop a beautiful golden color with slight blistering.
Step 6: Cool and Serve
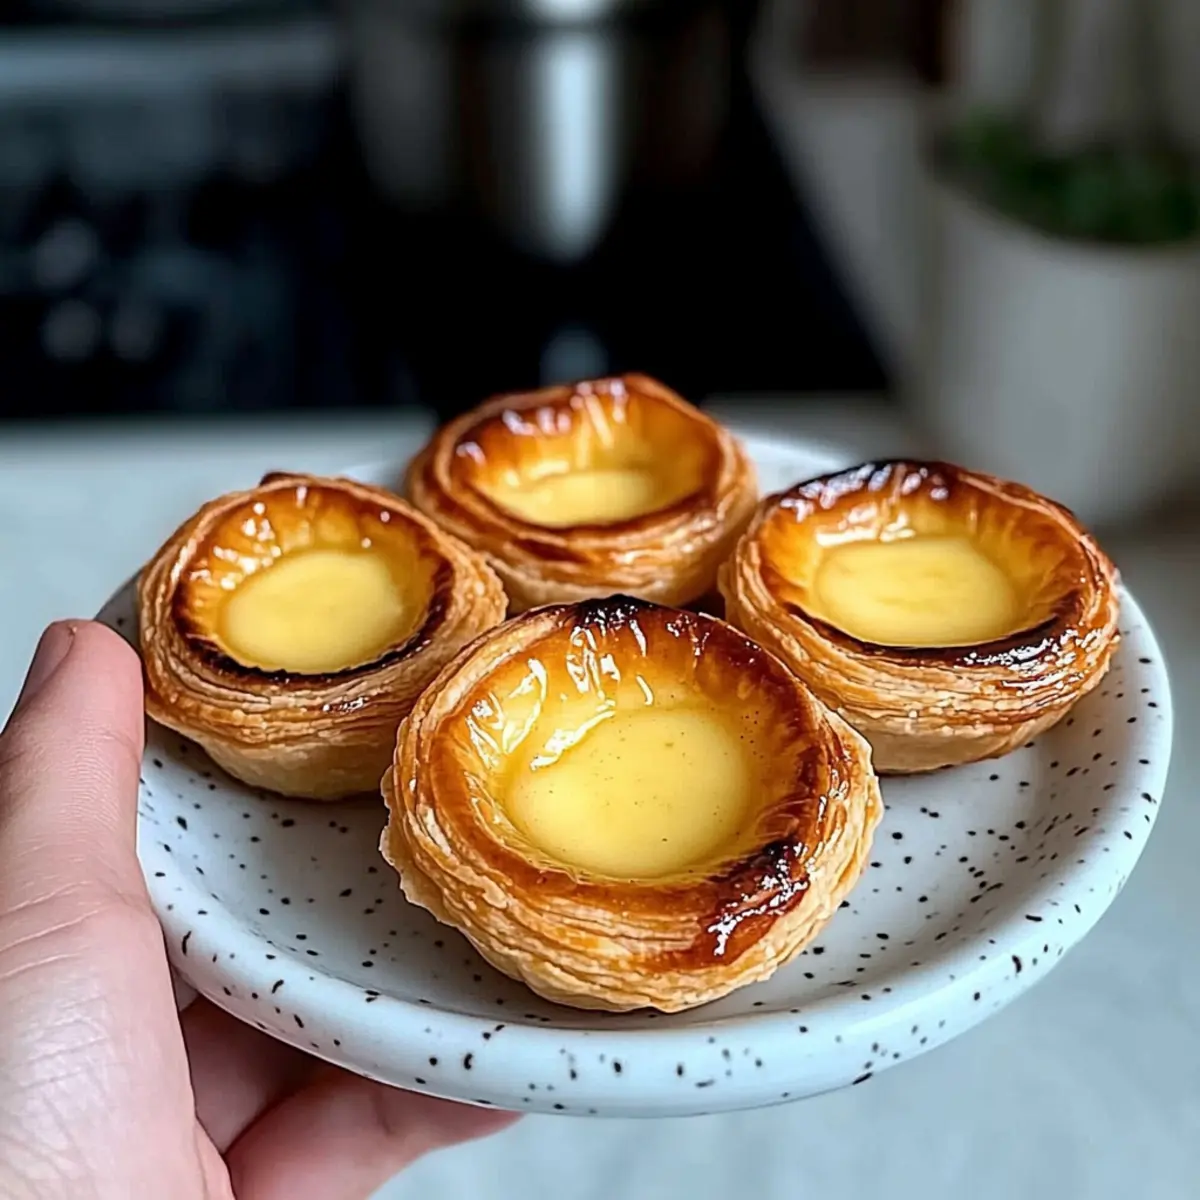
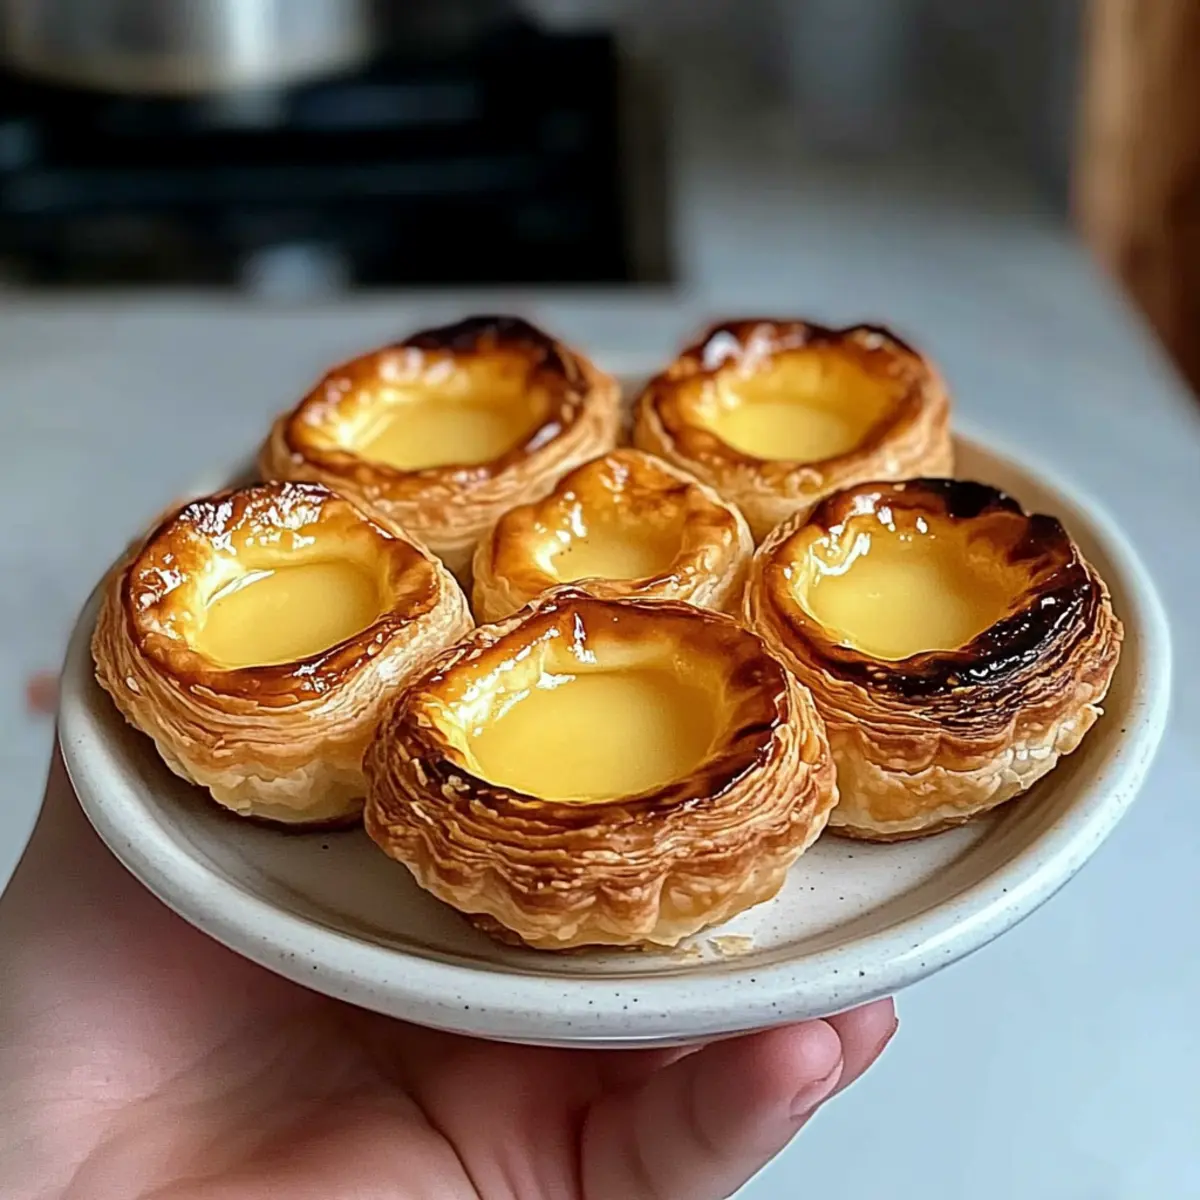
Once baked, remove the muffin tin from the oven and allow the pastel de nata to cool in the tin for about 5 minutes. This allows them to set properly before transferring onto a wire rack. For an authentic experience, serve these delightful tarts warm, optionally dusted with powdered sugar and a sprinkle of ground cinnamon.

How to Store and Freeze Pastel de Nata
Room Temperature: Enjoy your pastel de nata fresh; if left out, they can sit at room temperature for up to 2 hours before needing to be refrigerated.
Fridge: Store leftover pastel de nata in an airtight container in the fridge for up to 2-3 days. Reheat in a 350°F (175°C) oven for 5-7 minutes to restore their delightful crispness.
Freezer: For longer storage, freeze the unbaked pastry shells or filled tarts. Wrap each tart individually in plastic wrap and place in a freezer bag. They can last for up to 2 months.
Reheating: When ready to enjoy, bake frozen tarts directly from the freezer at 400°F (200°C) for about 15-20 minutes until warmed through and the pastry is crisp, making this pastel de nata recipe an easy treat to have on hand!
Pastel de Nata Recipe Variations
Feel free to let your creativity shine and personalize these delicious tarts for your own unique twist!
-
Vanilla Infusion: Add a splash of vanilla extract to the custard for a warm, aromatic flavor boost.
-
Almond Essence: Substitute almond extract for vanilla to create a nutty depth that complements the custard beautifully.
-
Coconut Cream: Fold in shredded coconut into the custard for a tropical flair that adds texture and sweetness. The creamy custard pairs wonderfully with the coconut's chewy texture, creating a delightful island-inspired treat.
-
Gluten-Free Option: Use cornstarch instead of all-purpose flour for a gluten-free custard while keeping the same delightful richness.
-
Spicy Kick: For a unique twist, add a pinch of nutmeg or cardamom to the custard for a hint of warmth and spiciness that surprises the palate.
-
Chocolate Drizzle: Drizzle melted dark chocolate over the cooled tarts for a luxurious chocolatey finish, turning these delights into an elevated dessert experience.
-
Fresh Berries: Top each tart with a mix of fresh berries for both visual appeal and a refreshing tartness, making them even more irresistible.
-
Citrus Zing: Swap lemon peel for orange or lime for a zesty brightness that perfectly complements the rich custard.
Exploring these variations makes the pastel de nata recipe even more delightful. Try pairing them with a warm cup of bica for an authentic taste of Portugal, or explore the rich flavors in my Chicken Adobo Again, perfect for a full Portuguese feast!
Tips for the Best Pastel de Nata
Chill the Pastry: Ensure to refrigerate the pastry shells for at least 30 minutes; this helps maintain their shape while baking and enhances flakiness.
Watch the Oven: Keep a close eye on the tarts as they bake; they should puff and blister without burning, so adjust your time accordingly.
Smooth Custard: Strain the custard mixture through a fine sieve to eliminate lumps and ensure a silky texture, vital for this pastel de nata recipe.
Serve Warm: Enjoy pastel de nata fresh from the oven for the best experience; reheating can help restore crispness if stored.
Experiment with Flavor: Feel free to add a dash of vanilla or almond extract to the custard for a personal twist on this beloved treat.
What to Serve with Classic Pastel de Nata?
Indulge in a delightful culinary experience by pairing these exquisite tarts with complementary dishes and beverages that elevate your dessert moments.
- Rich Coffee: The bold flavors of a robust espresso or coffee balance the sweetness of the tarts, making each bite even more enjoyable.
- Fresh Berries: Juicy strawberries or raspberries add a refreshing burst of tartness that contrasts beautifully with the creamy custard.
- Vanilla Ice Cream: A scoop of smooth vanilla ice cream provides a delightful creaminess that blends harmoniously with the warm tart.
- Zesty Fruit Salad: A bright medley of seasonal fruits sprinkled with a hint of lime juice offers a refreshing finish and a splash of color on your plate.
- Creamy Whipped Cream: A dollop of lightly sweetened whipped cream can enhance the experience, creating a luxurious fusion of textures.
- Mint Leaves: Fresh mint leaves bring an unexpected, lively freshness that cuts through the richness of the tarts and adds a vibrant touch.
- Chilled White Wine: A glass of dessert wine or a sparkling white complements the custard’s sweetness, creating a sophisticated pairing for special occasions.
- Chocolate Sauce: Drizzling a chocolate sauce over the pastel de nata introduces a rich flavor that takes the dessert to another level of indulgence.
- Decadent Chocolate Mousse: A side of airy chocolate mousse provides a rich, contrasting dessert experience, offering a nice balance with the custard tarts.
- Lemon Sorbet: A scoop of tangy lemon sorbet can cleanse the palate after enjoying the desserts, offering a refreshing and zesty finish.
Make Ahead Options
These Pastel de Nata are perfect for meal prep enthusiasts looking to save time! You can prepare the pastry shells up to 24 hours in advance; simply assemble them in the muffin tin and refrigerate. The custard mixture can be made ahead as well; refrigerate it for up to 3 days in a sealed container. When you're ready to bake, pour the chilled custard into the pastry shells and bake them at 500°F (260°C) for 12-15 minutes until golden and puffed. This way, you'll enjoy the delightful freshness of homemade custards that are just as delicious, with minimal hassle on busy weeknights!
Pastel de Nata Recipe FAQs
How do I choose ripe ingredients for my pastel de nata?
Absolutely! For the best results, make sure your whole milk is fresh and free from any sour odors. Choose large, fresh egg yolks for a richer custard; check for any discoloration or unusual textures. The flour should be fresh and free from any clumps. If you opt for zest from lemons or oranges, aim for firm, brightly colored fruit with an aromatic scent.
How should I store leftover pastel de nata?
Very well! Allow them to cool completely before transferring to an airtight container. Store in the fridge for up to 2-3 days. When you're ready to enjoy, preheat your oven to 350°F (175°C) and reheat for 5-7 minutes to refresh their delightful crispness.
Can I freeze pastel de nata?
Absolutely! For longer storage, you can freeze the unbaked pastry shells or filled tarts. Wrap each tart individually in plastic wrap, then place them in a freezer bag. They can be frozen for up to 2 months. When ready to enjoy, bake them directly from the freezer at 400°F (200°C) for about 15-20 minutes until warm and crispy.
What if my custard filling is lumpy?
If you find lumps in your custard, don’t worry! Simply strain it through a fine sieve after cooking to remove any clumps. This process ensures a silky-smooth custard, which is essential for achieving that classic pastel de nata texture. Always whisk well while cooking to prevent any curdling and keep those lumps at bay!
Are pastel de nata safe for pets or people with allergies?
Very! However, since pastel de nata contain sugar, eggs, and dairy, they are not suitable for pets, particularly dogs and cats. For those with egg or dairy allergies, consider alternatives like using egg replacers or plant-based milk to attempt a similar creamy texture, though results may vary. Always check ingredient labels and consult with your healthcare provider.
Can I make these in advance for a gathering?
Absolutely! You can prepare the pastry shells and custard filling ahead of time. Store the unbaked pastry in the fridge for up to a day, or freeze as mentioned earlier. Bake them fresh right before serving to capture that flaky crust and creamy filling—your guests will be impressed with the warmth and freshness of your pastel de nata!
Irresistible Pastel de Nata Recipe for Perfectly Creamy Tarts
Ingredients
Equipment
Method
- On a floured surface, roll out the thawed frozen puff pastry into a thin rectangle, about 1/8 inch thick. Roll tightly from one short end to the other, forming a cylinder, and slice into 12 equal pieces.
- Place each piece cut-side down into a greased muffin tin and press down to distribute along the base and up the sides. Refrigerate for 30 minutes.
- In a medium saucepan over low heat, whisk together sugar, flour, and a small scout of milk to create a smooth paste. Gradually add remaining milk, cinnamon stick, and lemon peel. Heat while whisking for 5-7 minutes until thickened, then let steep for 10 minutes.
- Whisk egg yolks until pale yellow. Strain the warm milk mixture to remove cinnamon stick and lemon peel, then slowly pour into egg yolks while whisking continuously. Strain again through a fine sieve.
- Preheat oven to 500°F (260°C). Pour custard into pastry shells, filling about 3/4 full. Bake for 12-15 minutes until tops are puffy and golden.
- Cool the tarts in the tin for 5 minutes, then transfer to a wire rack. Serve warm, optionally dusted with powdered sugar and ground cinnamon.


Leave a Reply