
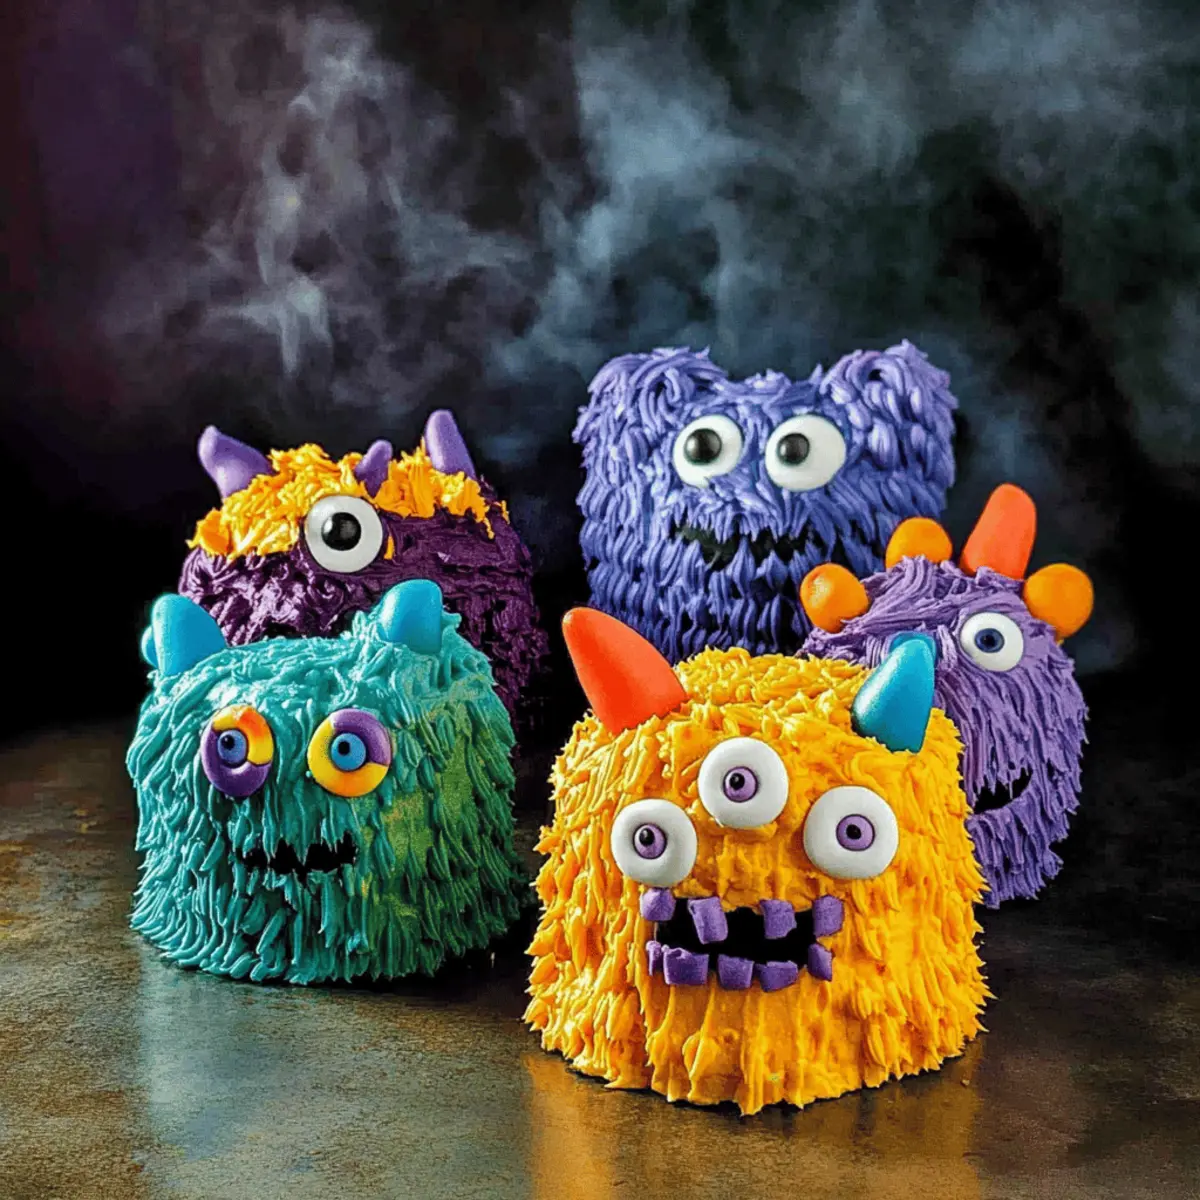
The air is filled with excitement as Halloween approaches, making it the perfect time for some spooky baking! There’s something wonderfully creative about making Mini Monster Cakes that both kids and adults will adore. These aren't just any treats; they’re dreamy bites packed with richness and moisture that elevate your Halloween celebrations. With especially vibrant colors and whimsical designs, these cakes promise to be a hit at any kids' party. Plus, the decorating techniques I'll share will invigorate your baking game and provide a delightful way to bond with loved ones. Ready to unleash your inner pastry monster? Let’s dive into the fun!
Why Are Monster Cakes So Fun?
Creativity Unleashed: Decorating Mini Monster Cakes allows you to express your playful side while involving kids in the fun!
Deliciously Fudgy: These cakes boast a moist texture that’s irresistibly rich, making them a favorite among kids and adults alike.
Vibrant Colors: With the use of gel colors, each cake can become a colorful monster masterpiece!
Easy to Personalize: Swap out designs to match different themes or preferences—think pastel monsters for a softer touch!
Memorable Moments: Baking and decorating together creates lasting memories, perfect for building family traditions.
Perfect for Any Occasion: While great for Halloween, these cakes can brighten up any celebration, just like Ricotta Protein Pancakes or delightful Crab Cakes Forget.
Monster Cakes Ingredients
For the Cake
- Unsalted Butter – Provides richness and moisture in the cake; substitute with margarine for a dairy-free version.
- Oil – Enhances moisture and tenderness; can be replaced with applesauce for a healthier option.
- White Sugar – Sweetens the cake and helps with the moist texture; brown sugar can be used for a deeper flavor.
- Eggs – Acts as a binder and adds richness; for a vegan substitute, use flax eggs (1 tbsp flaxseed meal + 2.5 tbsp water per egg).
- Milk – Adds moisture and richness to the batter; substitute with almond milk or oat milk for a dairy-free version.
- Vanilla Extract – Provides flavor depth; using pure vanilla gives the best results.
- Sea Salt – Balances sweetness and enhances flavors.
- Black Cocoa Powder – Adds color and a rich chocolate flavor; Dutch cocoa can be used with some black food coloring to achieve the desired shade.
- All-Purpose Flour – Provides structure; a gluten-free flour blend can be used for a gluten-free version.
- Baking Powder – This leavening agent ensures the cake is fluffy.
For the Frosting
- Vanilla Buttercream (made from butter, confectioner’s sugar, salt, heavy cream, and vanilla extract) – Offers sweetness and stability for decorating.
For Coloring
- Gel Colors (Orange, Yellow, Teal, Blue, Purple) – Used to color buttercream; recommended for vibrant hues without altering frosting texture.
For Decoration
- Candy Eyes, Gum Paste/Fondant – Perfect for adding whimsical monster faces and playful features.
These delightful ingredients come together to create the perfect base for your Monster Cakes, ensuring each bite is as fun to make as it is to eat!
Step‑by‑Step Instructions for Mini Monster Cakes
Step 1: Prepare the Cake
Begin by preheating your oven to 325°F (163°C). In a large mixing bowl, combine the melted unsalted butter, oil, and white sugar, mixing until well combined. Next, whisk in the eggs, milk, vanilla extract, and salt until smooth. In a separate bowl, sift together the all-purpose flour, black cocoa powder, and baking powder. Gradually mix the dry ingredients into the wet mixture, ensuring not to over-mix. Pour the batter into lined cake pans and bake for 20-30 minutes, or until springy to the touch and a toothpick inserted in the center comes out clean. Allow the cakes to cool before chilling them in the refrigerator.
Step 2: Cut and Shape Cakes
Once your Mini Monster Cakes have cooled, use a pastry cutter to slice the cakes into rounds. This step is crucial for creating your monster shapes. Gather any leftover cake scraps and crush them to form dough for cake pops. Use the cake pop dough to mold half-spheres that will add extra character to your monster creations later. Ensure the shapes are uniform for a polished look.
Step 3: Make and Color Buttercream
Next, whip the softened butter in a clean bowl until it's fluffy and light. Gradually add the confectioner’s sugar, mixing well, then pour in the heavy cream and vanilla extract, blending until smooth. Once the buttercream is ready, divide the frosting into separate bowls, adding gel colors such as orange, yellow, teal, blue, and purple to create vibrant shades. Mix thoroughly to achieve the desired hues, preparing for the fun decorating process ahead.
Step 4: Assemble and Decorate Cakes
Start assembling your Mini Monster Cakes by stacking the layers with a layer of buttercream in between each. After stacking, apply a crumb coat of frosting around the outside to seal in any crumbs, then chill the cakes for about 15 minutes to set the layers. Once chilled, use the colored buttercream to decorate your cakes. Employ various piping techniques to create monster features like fur, scales, or spikes, bringing your monster designs to life. Finally, use candy eyes and gum paste or fondant to add whimsical faces, ensuring every Mini Monster Cake looks unique and fun.
Make Ahead Options
These Mini Monster Cakes are perfect for busy home cooks looking to save time and stress during Halloween festivities! You can bake the cakes up to 2 days in advance and store them in an airtight container in the refrigerator to maintain their moist, fudgy texture. Additionally, you can prepare the colored buttercream and refrigerate it for an overnight chill, ensuring easy assembling when you’re ready to decorate. To finish, simply allow the cake layers to come to room temperature, apply a crumb coat, and then decorate with the buttercream and fun monster features. This way, you’ll delight your little ones with delightful cakes that are just as fresh and fun as if made the same day!
Expert Tips for Mini Monster Cakes
-
Room Temperature Buttercream: Ensure your buttercream is at room temperature for easy mixing and smooth piping. Cold frosting is harder to work with and can lead to decorating frustrations.
-
Use Gel Food Colors: Stick to gel colors rather than liquid food coloring; they provide vibrant hues without altering the texture of your frosting, making your Monster Cakes pop visually.
-
Chill After Crumb Coating: After applying the crumb coat, chill the cakes for 15 minutes before finishing decoration. This helps set the design and prevents smudging during the decorating process.
-
Involve the Kids: Get kids involved in decorating their own Mini Monster Cakes; it's a wonderful way to bond and give them a sense of creativity in the kitchen.
-
Experiment with Texture: Don't hesitate to mix different cake textures! For instance, combine the fudgy Mini Monster Cakes with lighter whipped toppings or fluffy decorations for an exciting mouthfeel.
-
Customizable Designs: Personalize each monster to reflect different personalities! Swap decorations and colors to match the theme or preferences of your party, making each Monster Cake unique and fun.
What to Serve with Mini Monster Cakes
The spooky season beckons moments of laughter and joy as you whip up these vibrant treats, making every bite feel like a celebration.
- Witch’s Brew Punch: A fizzy, fruity concoction that adds a fun twist, enhancing the playful spirit of Halloween parties.
- Spooky Fruit Skewers: Fresh apple and banana slices adorned with eyes bring a healthy touch while maintaining a festive theme.
- Goblins’ Green Salad: Crisp romaine lettuce topped with a tangy dressing and fun toppings brings a refreshing crunch to the sweet treats.
- Ghostly Vanilla Ice Cream: A scoop of creamy vanilla complements the fudgy texture, perfectly celebrating the sweet and spooky combination.
- Pumpkin Spice Cookies: Share the flavors of fall with soft, spiced cookies to balance the richness of your monster cakes.
- Candy Corn Cupcakes: Adorable mini cupcakes with candy corn sprinkles echo the sweet fun, ensuring all festive vibes are captured.
- Candy Apple Bar: Let guests create their own loaded candy apples, combining fun textures and colors alongside the adorable monster cakes.
- Chilling Hot Chocolate: Warm drinks with a hint of cinnamon create a cozy pairing, perfect for satisfying sweet cravings on chilly nights.
- Caramel Flavored Popcorn: Old-fashioned popcorn drizzled with caramel brings a crunchy bite that plays beautifully with the cake's soft texture.
- Mummy Dogs: Fun, savory treats wrapped in crescent rolls that add a savory contrast, making the perfect addition to any kids' Halloween feast.
Monster Cakes Variations & Substitutions
Get ready to unleash your creativity with these fun adaptations that will elevate your Mini Monster Cakes and delight everyone around the table!
- Vegan Option: Use flax eggs and substitute milk with almond or oat milk for a delicious vegan-friendly version. These tweaks keep the monster magic alive without the animal products!
- Gluten-Free: Swap all-purpose flour for a gluten-free flour blend to cater to gluten-sensitive friends. You won’t lose any of the fudginess or flavor with this easy adaptation!
- Flavor Infusions: Try adding a tablespoon of coffee or espresso powder to the batter for an unexpected layer of flavor. The subtle coffee notes work beautifully with chocolate – a real treat for adults!
- Decorative Themes: Customize the colors and designs according to holidays or themes! Imagine vibrant pastel monsters for springtime or classic black and orange for Halloween.
- Sprinkles Galore: Add a fun twist by mixing in colorful sprinkles to the batter before baking for a confetti-effect cake that packs even more visual delight.
- Different Toppings: Instead of candy eyes, use mini marshmallows, chocolate chips, or fruit to create unique monster expressions. This keeps the decorating playful and gives kids a chance to let their imaginations run wild!
- Texture Variations: For a delightful crunch, sprinkle toasted nuts or crushed cookies in between the cake layers. This creates an exciting texture that contrasts beautifully with the moist cake.
- Heat It Up: Add a dash of cayenne pepper or chili powder to the batter for a spicy kick that will keep your guests guessing and intrigued!
By incorporating some of these variations, you can create an array of delectable Monster Cakes that cater to every palate. So, round up your little helpers and dive into this creative baking adventure!
Storage Tips for Monster Cakes
- Room Temperature: Monster Cakes can be kept at room temperature for up to 1 day. Make sure they are covered with plastic wrap or in a cake dome to retain moisture and freshness.
- Fridge: For longer storage, place the cakes in an airtight container in the refrigerator for up to 3 days. This helps maintain their fudgy texture and flavor.
- Freezer: To freeze Monster Cakes, wrap individual pieces tightly in plastic wrap, then place them in a freezer-safe bag. They can be frozen for up to 2 months. Allow to thaw in the fridge before decorating or serving.
- Reheating: If desired, you can lightly warm the cakes in the microwave for about 10-15 seconds for a freshly baked taste. Enjoy your delicious Monster Cakes any time!
Mini Monster Cakes Recipe FAQs
How do I choose the right ripeness of ingredients for my Mini Monster Cakes?
Absolutely! When selecting ingredients, ensure that your eggs are fresh—check for a clean shell and no cracks. For the butter, it should be softened but not melted, which helps achieve that creamy texture in your batter. As for your milk, using it at room temperature will blend better with the rest of the ingredients, ensuring a smooth cake batter.
How should I store my Mini Monster Cakes?
Very! You can keep your Mini Monster Cakes covered at room temperature for one day. If you're planning to enjoy them later, place them in an airtight container in the fridge for up to 3 days. This way, the moist, fudgy center remains intact! Just remember to bring them back to room temperature before serving for the best flavor.
Can I freeze Mini Monster Cakes, and if so, how?
Of course! Freezing is a great way to save your delicious creations. To freeze them, first wrap individual cakes tightly in plastic wrap to prevent freezer burn. Next, place each wrapped cake in a freezer-safe bag. They can be frozen for up to 2 months. When you're ready to enjoy them, simply thaw in the fridge overnight before decorating or serving.
What if my Mini Monster Cakes don't rise properly?
Oh no! If your cakes don't rise, it could be due to old baking powder. Make sure your baking powder is fresh and stored in a cool, dry place. Also, don’t over-mix your batter; it can lead to dense cakes. For best results, combine wet and dry ingredients until just mixed; it’s okay if there are a few lumps—these will bake out perfectly!
Are Mini Monster Cakes suitable for kids with allergies?
Absolutely! These cakes can be made accommodating by using substitutes. For example, you can replace the dairy with non-dairy milk (like almond or oat milk) and use flax eggs for an egg-free version. Always double-check the specific brands of ingredients, particularly for allergen information, to ensure they meet dietary restrictions.
Can I use different colors or decorating techniques for my Monster Cakes?
The more the merrier! Customize your Monster Cakes using a variety of gel colors for the buttercream and explore different piping techniques. From fur to scales, let your imagination run wild! You can also experiment with sprinkles and edible glitter to make them even more festive and fun for your Halloween gatherings.
Monster Cakes: Irresistibly Fun Treats to Wow Kids
Ingredients
Equipment
Method
- Preheat your oven to 325°F (163°C). In a bowl, mix melted butter, oil, and sugar. Whisk in eggs, milk, vanilla, and salt. In another bowl, sift flour, cocoa, and baking powder. Gradually mix dry ingredients into wet. Pour into cake pans and bake for 20-30 minutes.
- Once cooled, slice cakes into rounds. Use scraps to form dough for cake pops, molding half-spheres for character.
- Whip softened butter until fluffy. Gradually add confectioner’s sugar, then cream and vanilla until smooth. Divide frosting and mix with gel colors.
- Stack layers with buttercream between, apply a crumb coat, and chill for 15 minutes. Decorate with colored buttercream and add candy eyes for unique monster features.


Leave a Reply