
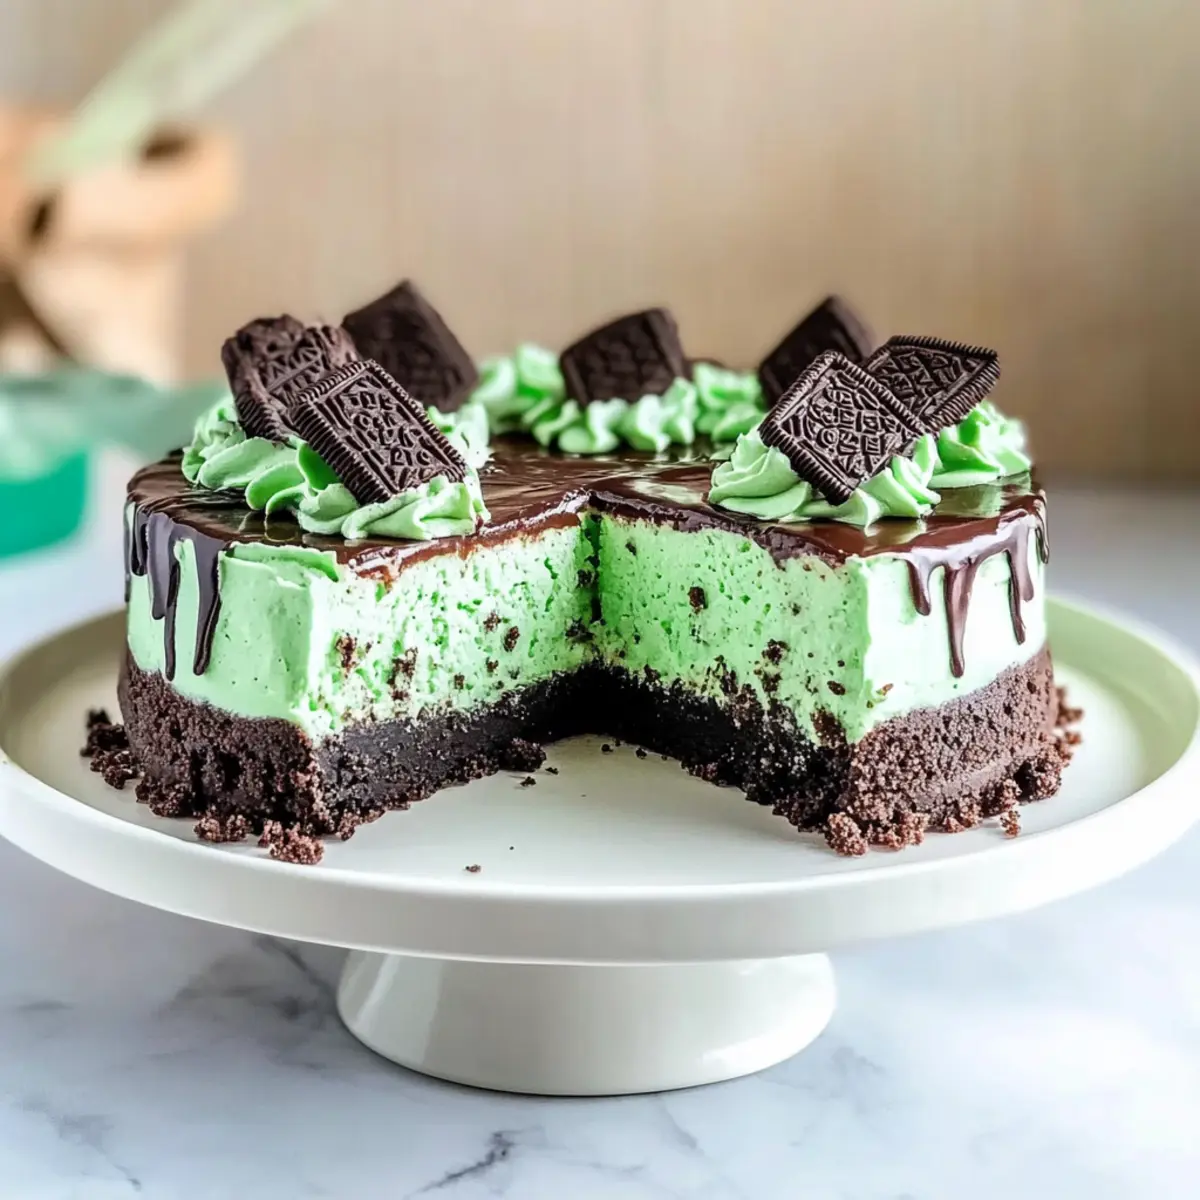
As the aroma of freshly baked cookies wafts through my kitchen, I can't help but feel a rush of joy. Today, I'm diving into the comforting world of a Mint Chocolate Cheesecake that’s not only a feast for your taste buds but also a visual delight for your gatherings. With its crunchy Oreo crust and a velvety mint-infused filling, this cake marries the rich decadence of chocolate with a refreshing burst of mint. Perfect for celebrations or a cozy night in, it’s easy to whip up ahead of time, leaving you with more moments to savor with loved ones. Plus, it’s a gluten-free option that everyone can enjoy! Are you ready to elevate your dessert game? Let’s get mixing!
Why is Mint Chocolate Cheesecake so loved?
Irresistible Flavor: The delightful blend of mint and chocolate offers a refreshing take on traditional desserts, making it perfect for parties or family gatherings.
Easily Customizable: You can swap out regular Oreos for mint-flavored ones or add a splash of Irish cream to the ganache for a boozy twist!
Make-Ahead Marvel: This cheesecake can be prepped in advance and stored, allowing you to focus on enjoying your time with guests.
Crowd Pleaser: With its stunning appearance and creamy texture, this dessert is sure to impress everyone at any event—perfect for St. Patrick’s Day or any celebration!
Gluten-Free Option: Simply use gluten-free Oreos, ensuring everyone can indulge in this delicious treat without worries. You can also check out my Homemade Hot Chocolate for a warm drink pairing!
Mint Chocolate Cheesecake Ingredients
• Perfect for that creamy dessert!
For the Crust
- 30 Oreo cookies – Provides the base crust; substitute with gluten-free Oreos for a gluten-free version.
- 1/4 cup unsalted butter, melted – Binds the cookie crust together beautifully.
For the Cheesecake Filling
- 32 ounces cream cheese – The main filling that gives the cheesecake its rich texture; ensure it’s at room temperature for smooth mixing.
- 1 cup granulated sugar – Adds just the right amount of sweetness.
- 2/3 cup sour cream – Contributes creaminess and tangy balance; bring to room temperature for better blending.
- 2 teaspoons vanilla extract – Enhances the overall flavor profile.
- 1 1/2 teaspoons mint or peppermint extract – Provides a refreshing mint flavor; use mint extract for a traditional taste.
- 1/4 teaspoon salt – Balances the sweetness and deepens the flavors.
- 4 large eggs – Provides structure; be sure they’re at room temperature for even mixing.
- Several drops of green food coloring – Optional for visual appeal; adjust according to your desired shade.
- 1 cup finely chopped Andes mints – Adds a delightful texture and extra minty flavor.
For the Ganache
- 1 cup chocolate chips – The rich base for the ganache, giving that deep chocolate flavor.
- 3/4 cup heavy cream – Creates a smooth ganache; can replace with Irish cream for an added twist.
- Pinch of salt – Enhances the chocolate flavor beautifully.
For the Whipped Cream Topping
- 3/4 cup heavy cream – Whipped until stiff peaks form for a fluffy topping.
- 2 tablespoons confectioners' sugar – Sweetens the whipped cream perfectly.
- 1/4 teaspoon mint or peppermint extract – Enhances the minty flavor in the topping.
- 2 to 3 drops green food coloring – Optional for a fun aesthetic appeal.
For Garnish
- Andes Chocolate Mints or Oreos – Optional, for a beautiful visual enhancement on top!
This Mint Chocolate Cheesecake promises to be a star at your next gathering!
Step‑by‑Step Instructions for Mint Chocolate Cheesecake
Step 1: Make the crust
Preheat your oven to 350°F (175°C). Crush the 30 Oreo cookies into fine crumbs using a food processor or a rolling pin. Combine the crumbs with 1/4 cup melted unsalted butter until well blended. Press this mixture firmly into the bottom of a 9-inch springform pan to form an even crust. Bake for 10 minutes, then reduce the temperature to 325°F (163°C) to prepare for the cheesecake filling.
Step 2: Prepare cheesecake filling
In a large mixing bowl, beat 32 ounces of room-temperature cream cheese and 1 cup granulated sugar with an electric mixer until smooth and creamy. Gradually mix in 2/3 cup sour cream, 2 teaspoons vanilla extract, 1 1/2 teaspoons mint extract, and 1/4 teaspoon salt. Incorporate 4 large eggs one at a time, ensuring each is fully blended before adding the next to create a silky mint chocolate cheesecake batter.
Step 3: Fold in additional ingredients
Gently fold in several drops of green food coloring to achieve your desired shade of mint and add 1 cup finely chopped Andes mints for a delightful crunch. Take your time to ensure the mixture remains light and airy by avoiding over-mixing. This step is crucial for maintaining the cheesecake's creamy texture while still incorporating those delectable mint bits.
Step 4: Prepare the pan
To prevent water from seeping into the cheesecake during baking, wrap the springform pan tightly in aluminum foil. If you prefer to use a water bath, place a larger roasting pan in your oven to hold hot water. This method helps create a gentle baking environment, ensuring your mint chocolate cheesecake bakes evenly—so your cheesecake comes out perfectly smooth and luscious.
Step 5: Bake cheesecake
Pour the filling into the prepared crust and carefully place the springform pan inside the larger roasting pan. Fill the outer pan with hot water until it's about halfway up the sides of the springform pan. Bake in the oven for 70 minutes, until the edges are set but the center still slightly jiggles. Turn off the oven and leave the cheesecake inside for 30 minutes to cool gradually, then refrigerate for at least 4 hours or overnight.
Step 6: Make ganache
In a small saucepan over medium heat, combine 1 cup chocolate chips and 3/4 cup heavy cream, stirring until melted and smooth. Once your mint chocolate cheesecake has cooled completely, pour the ganache over the top, spreading it evenly. Let the ganache set in the refrigerator for about 30 minutes, which will give it a luxurious finish while enhancing the dessert’s rich chocolate flavor.
Step 7: Make and add whipped cream
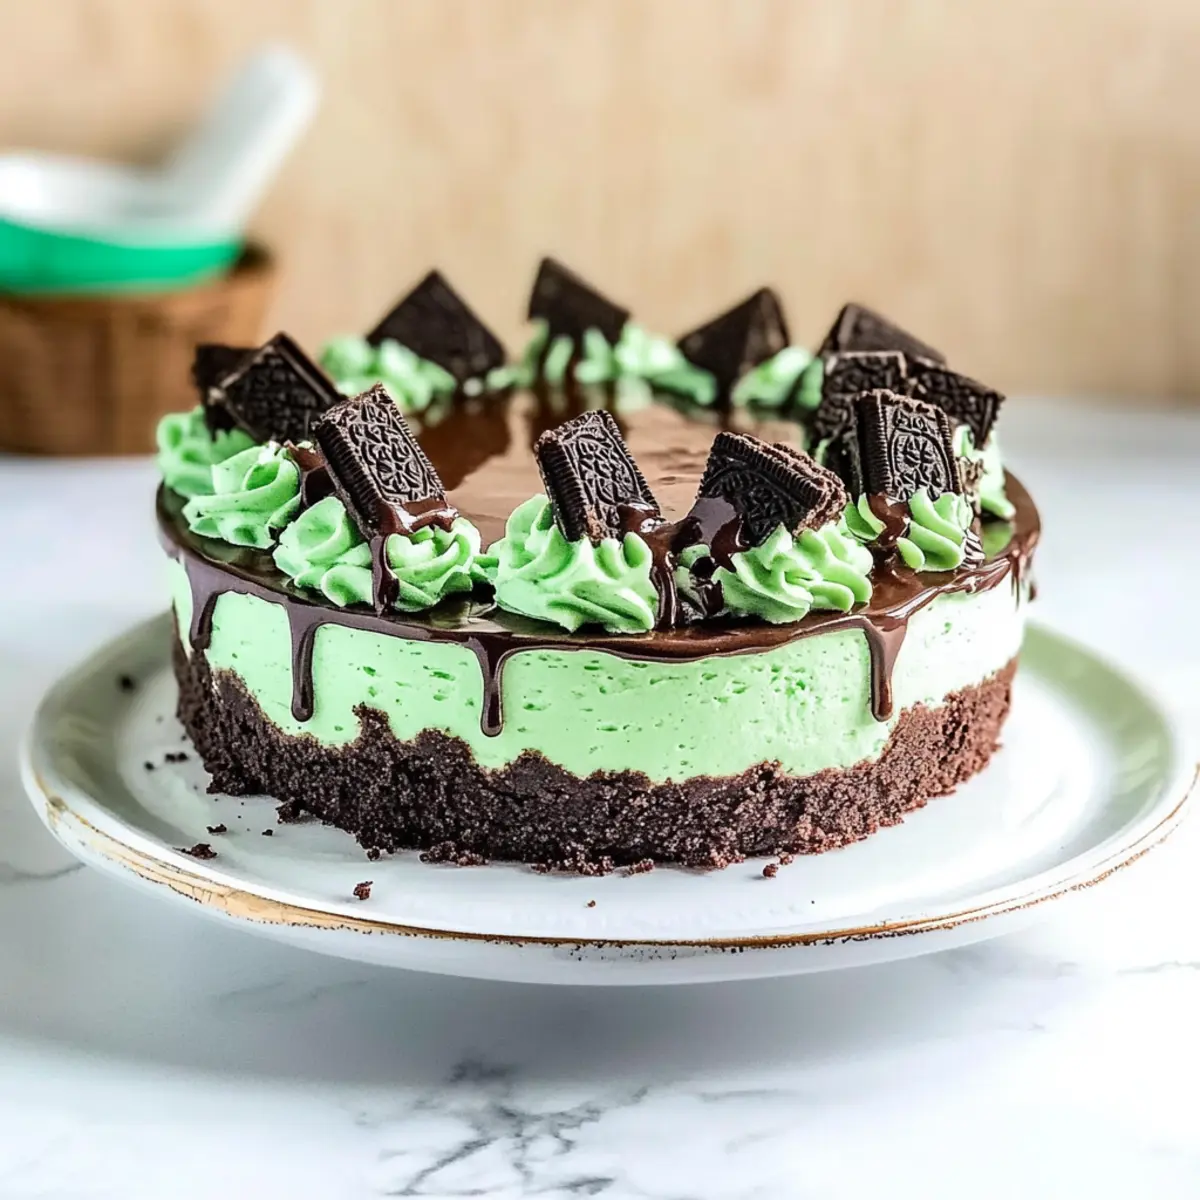
In a mixing bowl, whip 3/4 cup of heavy cream with 2 tablespoons of confectioners’ sugar and 1/4 teaspoon of mint extract until stiff peaks form. Once the cheesecake is chilled and the ganache has set, pipe or spread the whipped cream generously over the top. Feel free to decorate with additional chopped Andes mints or Oreo pieces for a beautiful and festive finishing touch on your Mint Chocolate Cheesecake.
Make Ahead Options
These Mint Chocolate Cheesecakes are perfect for meal prep enthusiasts! You can make the crust by combining crushed Oreos with melted butter and pressing it into the springform pan up to 24 hours in advance—just keep it covered to prevent drying out. The cheesecake filling can also be prepared and poured into the crust up to 3 days ahead of baking; simply refrigerate it tightly wrapped. When ready to serve, bake the cheesecake, chill overnight, and then finish with the ganache and whipped cream. This makes for a stunning dessert that’s just as delicious as if you made it all at once, allowing you to enjoy more time with your loved ones!
Expert Tips for Mint Chocolate Cheesecake
-
Room Temperature Matters: Ensure all dairy ingredients, especially cream cheese and sour cream, are at room temperature for a smooth, lump-free batter.
-
Gentle Mixing: Avoid overmixing after adding the eggs. This helps prevent cracks in your mint chocolate cheesecake, ensuring a beautifully smooth surface.
-
Chill Time: Don't rush the chilling process! Allow your cheesecake to cool in the oven for 30 minutes and refrigerate for at least 4 hours or overnight for the best texture.
-
Bain-Marie Technique: If using a water bath, ensure the foil is tightly wrapped around the springform pan to prevent water from leaking in, keeping your cheesecake safe and intact.
-
Flavor Variations: Experiment by adding crushed mint candies directly into the cheesecake for extra texture, or use flavored Oreos for a delightful twist on the traditional crust.
-
Avoid Condensation: During chilling, gently blot any moisture on the surface to prevent condensation from forming, which can ruin the presentation of your mint chocolate cheesecake.
What to Serve with Mint Chocolate Cheesecake
When it comes to enjoying your slice of mint chocolate bliss, pairing it with the right dishes will elevate your dessert experience!
-
Fresh Berries: The tartness of strawberries or raspberries beautifully cuts through the richness of the cheesecake while adding a vibrant splash of color to your plate.
-
Whipped Cream: A dollop of lightly sweetened whipped cream enhances the indulgence of the cheesecake, creating a creamy harmony.
-
Chocolate Sauce: Drizzling warm chocolate sauce over each slice adds an extra layer of decadence that complements the minty and chocolatey flavors perfectly.
-
Espresso or Coffee: The bold notes of espresso pair beautifully with the mint chocolate, providing a delightful contrast that complements the dessert’s sweetness.
-
Mint Tea: For a refreshing beverage option, serve steaming mint tea alongside, which brightens up the flavors and adds a cozy finish to your meal.
-
Chocolate Mint Cookies: Treat your guests to some homemade chocolate mint cookies as a fun accompaniment that echoes the flavors of the cheesecake in a delightful way.
-
Minty Mojito: For a celebratory twist, a minty mojito makes for a refreshing cocktail option that mirrors the minty freshness of the cheesecake while offering a light and bubbly touch.
Each of these pairings invites flavors to dance on your palate, making every bite of your Mint Chocolate Cheesecake an unforgettable experience!
How to Store and Freeze Mint Chocolate Cheesecake
Fridge: Store your Mint Chocolate Cheesecake in an airtight container in the refrigerator for up to 5 days, ensuring its creamy texture and flavors stay intact.
Freezer: If you need to keep it longer, you can freeze it without the whipped cream topping for up to 3 months. Wrap it tightly in plastic wrap and then aluminum foil for best results.
Reheating: To enjoy, thaw the cheesecake overnight in the fridge and then serve it chilled. The flavors will remain divine, ready to impress your guests once again!
Make-Ahead Marvel: This cheesecake can be made ahead of time, allowing you to plan your celebrations stress-free while still serving an indulgent dessert everyone will love.
Mint Chocolate Cheesecake Variations
Feel free to let your creativity shine as you customize this delightful dessert with these tasty twists!
-
Mint-Flavored Oreos: Swap regular Oreos for mint-flavored ones to enhance the minty goodness throughout the crust.
-
Irish Cream Delight: Replace heavy cream in the ganache and whipped topping with Irish cream for a luscious, boozy flavor twist. Your guests will love this unexpected variation!
-
Crushed Mint Candies: Fold in crushed mint candies into the cheesecake batter for added texture and a delightful crunch. The added layers of flavor make each bite a surprise.
-
Dark Chocolate Chips: Use dark chocolate chips in the ganache for a richer, deeper chocolate flavor that's perfect for chocolate lovers.
-
Fruit Burst: Add fresh raspberries or strawberries on top of the whipped cream for a pop of color and a sweet, fruity contrast which beautifully complements the chocolate-mint combo.
-
Nutty Crunch: Sprinkle crushed nuts, like walnuts or pecans, on top before serving to add a delightful crunch and nutty flavor that elevates the cheesecake experience.
-
Spicy Heat: Add a pinch of cayenne pepper or chili powder to the ganache for a surprising touch of heat that pairs interestingly with the chocolate and mint.
-
Cold Chocolate Mint Frappe: Pair slices with a glass of my Homemade Hot Chocolate for a warming drink that complements the cheesecake's cool mintiness.
These variations not only give you new ways to enjoy the Mint Chocolate Cheesecake but also make for exciting conversation starters at your next gathering!

Mint Chocolate Cheesecake Recipe FAQs
What types of Oreos should I use for the crust?
You can absolutely use classic Oreo cookies for your crust. If you're aiming for a gluten-free version, opt for gluten-free Oreos instead. For an extra minty flavor, try using mint-flavored Oreos!
How should I store my Mint Chocolate Cheesecake?
To keep your cheesecake fresh, store it in an airtight container in the refrigerator for up to 5 days. This way, the creamy texture and flavors will remain delightful for your next indulgence.
Can I freeze Mint Chocolate Cheesecake?
Yes! You can freeze your cheesecake for up to 3 months. Make sure to wrap it tightly in plastic wrap, followed by aluminum foil to prevent freezer burn. When ready to enjoy, thaw it in the refrigerator overnight for best results.
What if my cheesecake cracks while baking?
Don’t worry! Cracks can happen, but they can be minimized by gently mixing your batter and avoiding overmixing the eggs. Also, using the bain-marie (water bath) technique can help create the moist baking environment your cheesecake craves, keeping its surface smooth and beautiful.
Can I make this cheesecake without using eggs?
Absolutely! You can try incorporating a combination of silken tofu or flaxseed meal with water as an egg replacement. For optimal results, it’s key to adjust your baking duration and watch the texture closely.
Is Mint Chocolate Cheesecake safe for pets?
It’s important to note that chocolate is toxic to pets, so keep this delicious dessert safely out of their reach. Always be cautious about sharing human food with furry friends!

Mint Chocolate Cheesecake That Will Wow Your Guests
Ingredients
Equipment
Method
- Preheat your oven to 350°F (175°C). Crush the Oreo cookies into fine crumbs. Combine the crumbs with melted unsalted butter and press into the bottom of a springform pan. Bake for 10 minutes, then reduce temperature to 325°F (163°C).
- In a large mixing bowl, beat room-temperature cream cheese and granulated sugar until smooth. Gradually mix in sour cream, vanilla extract, mint extract, and salt. Incorporate eggs one at a time, mixing until well combined.
- Gently fold in green food coloring and chopped Andes mints. Ensure you don't over-mix to maintain a light and airy texture.
- Wrap the springform pan tightly in aluminum foil and place in a roasting pan for a water bath. Bake for 70 minutes until edges are set but the center jiggles slightly. Turn off oven, leave cheesecake inside for 30 minutes, then refrigerate for at least 4 hours.
- In a saucepan, combine chocolate chips and heavy cream over medium heat until melted and smooth. Pour ganache over chilled cheesecake and let set for 30 minutes in the refrigerator.
- Whip heavy cream with confectioners' sugar and mint extract until stiff peaks form. Spread or pipe whipped cream over the cheesecake. Optionally, decorate with additional Andes mints or Oreo pieces.


Leave a Reply