
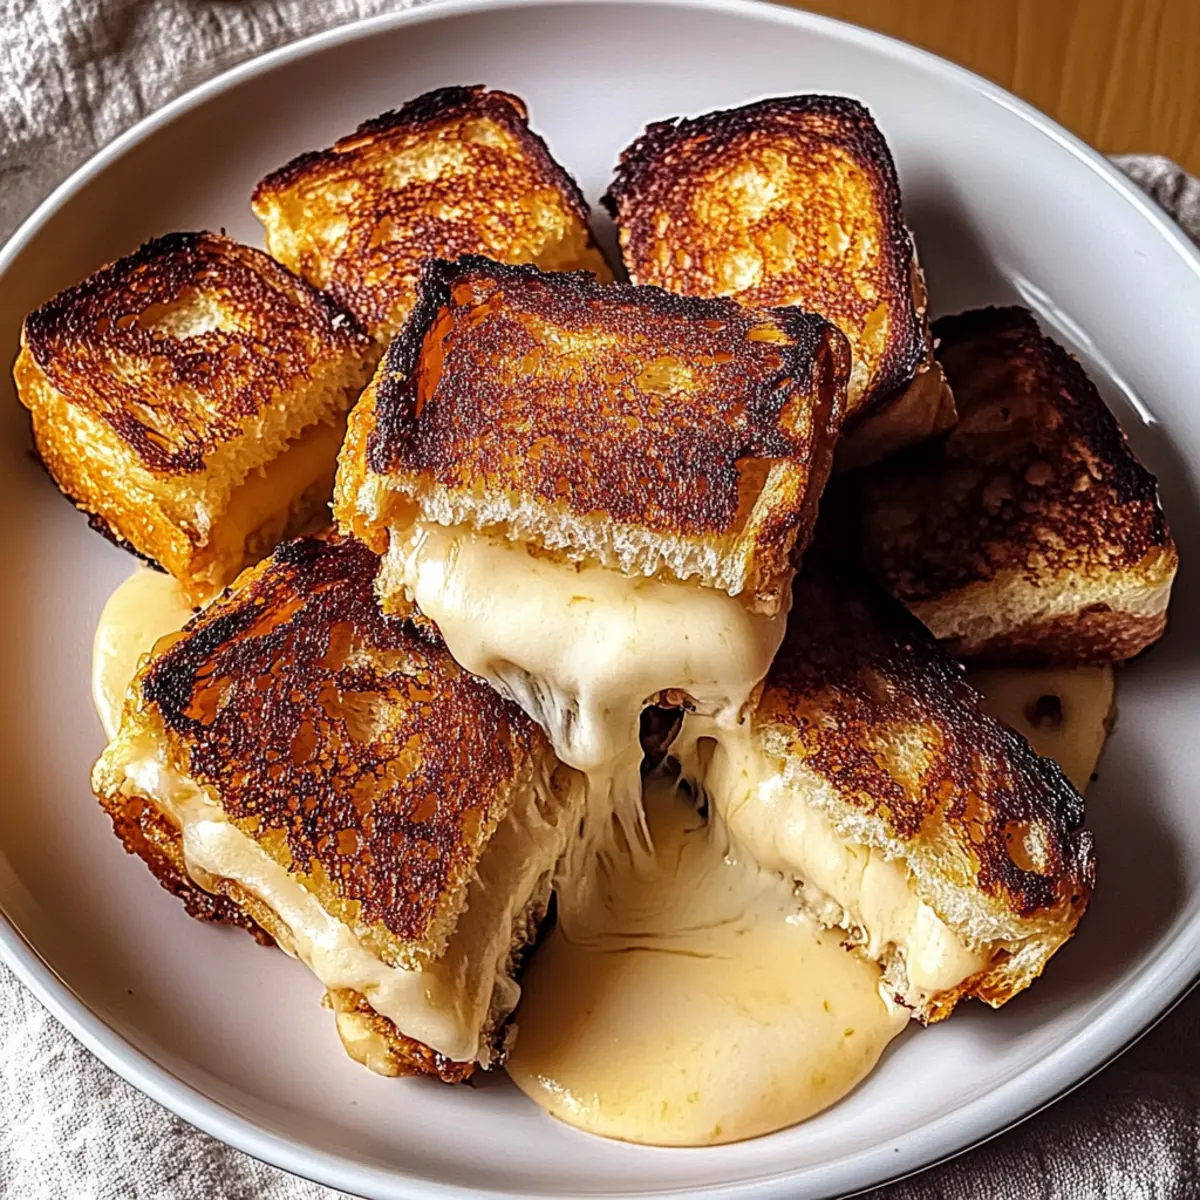
As I stood in my kitchen, a sudden craving for something cheesy and comforting struck me. That’s when I decided to whip up a Hawaiian Roll Grilled Cheese, a recipe that transforms ordinary moments into extraordinary bites. With sweet, fluffy Hawaiian rolls cradling oozing cheese, this dish balances deliciously crispy exteriors with melty interiors, making it the ultimate comfort food. What I love most is its versatility—customize it to your taste for a unique twist each time; whether you’re in the mood for a spicy pepper jack kick or a classic cheddar melt, it never disappoints! Plus, it's quick enough to prepare for those casual gatherings or lazy nights at home. What delicious combinations will you explore with this delightful grilled cheese?
Why is this grilled cheese irresistible?
Uniqueness: The Hawaiian roll adds a delightful sweetness that pairs remarkably with savory cheese, elevating a classic recipe to new heights.
Customizable: Feel free to tailor this dish to your taste buds! Experiment with various cheeses or toppings like jalapeños or avocado for a twist that keeps every meal exciting.
Easy to Make: With just a few simple steps, you’ll have a delectable grilled cheese ready in no time, ideal for those who crave comfort without the fuss.
Crowd-Pleaser: This dish is perfect for gatherings, working as a talking point that delights both friends and family, making it a memorable addition to any meal.
Pair it with a light salad or tomato soup for a hearty feast that everyone will love!
Hawaiian Roll Grilled Cheese Ingredients
For the Sandwich
• Hawaiian Rolls – These sweet and fluffy rolls are the backbone of the sandwich, providing a delightful contrast to the savory cheese. Substitution: Brioche or sourdough can also work wonderfully for different flavor profiles.
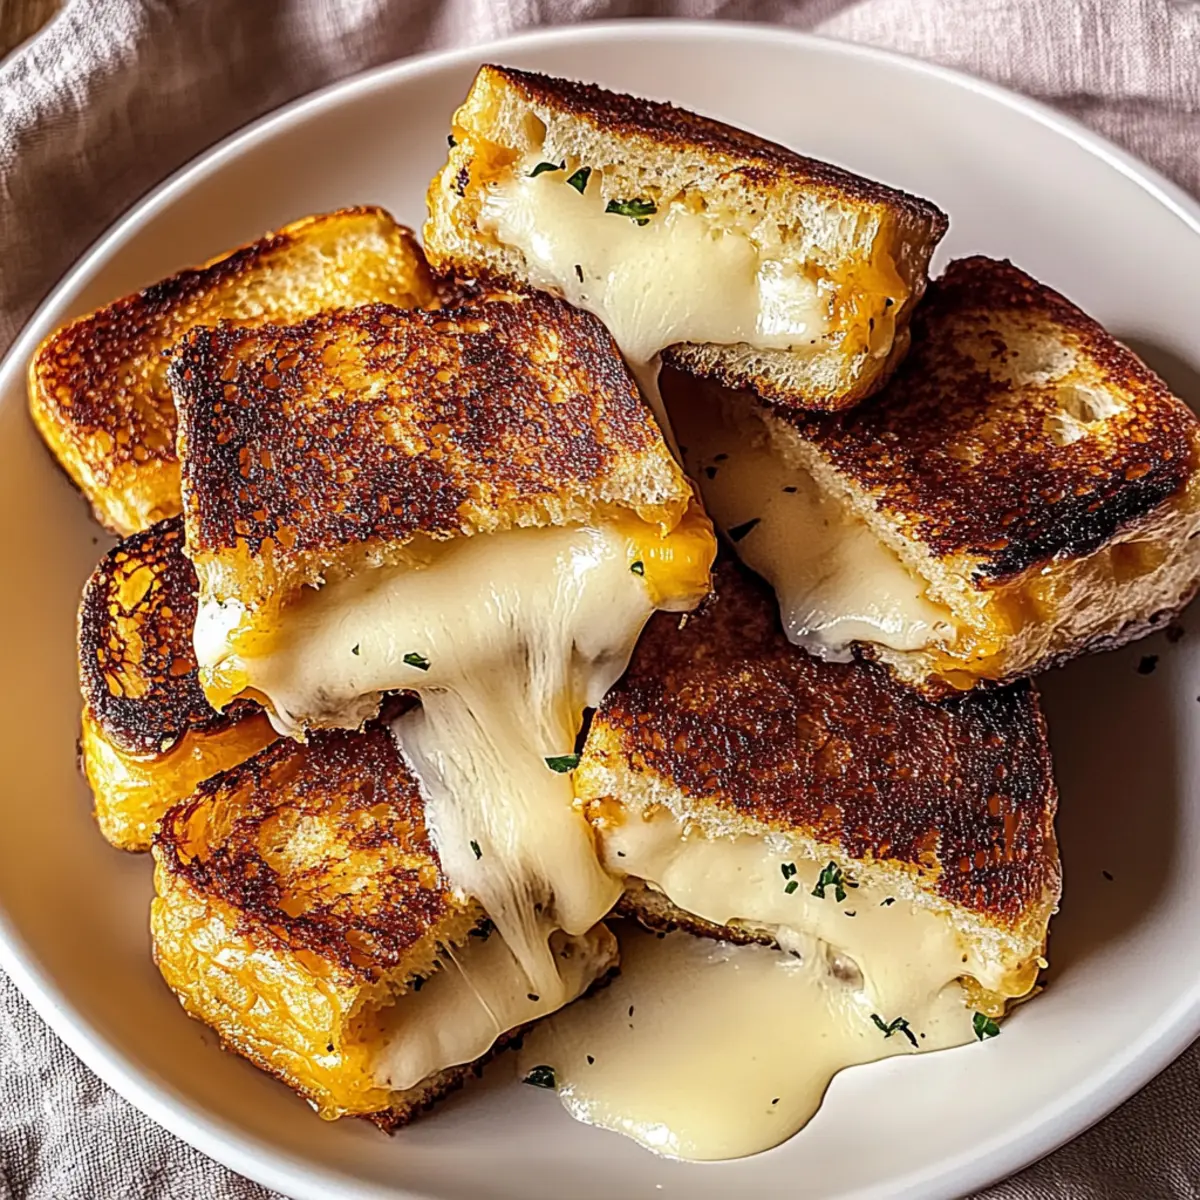
• Cheese of Choice – Use your favorite cheese to add creaminess and depth; cheddar or pepper jack can enhance the flavor. Notes: Don’t hesitate to mix and match cheeses for a customized Hawaiian Roll Grilled Cheese experience.
Optional Add-Ons
• Caramelized Onions – They add a sweet and savory twist that'll elevate your sandwich to gourmet status.
• Jalapeños – For a spicy kick, sliced jalapeños make a great addition to your melty creation.
• Avocado – Creamy slices of avocado provide freshness and richness, balancing the flavors beautifully.
With these ingredients, you’re just a few steps away from creating a tropical twist on comfort food!
Step‑by‑Step Instructions for Hawaiian Roll Grilled Cheese
Step 1: Prepare Ingredients
Begin by gathering your Hawaiian rolls and cheese of choice, ensuring you have everything ready for assembly. Carefully slice each roll in half, being cautious not to cut all the way through, as you'll create a pocket for the deliciously gooey cheese. This step is essential for achieving that perfect melt when crafting your Hawaiian Roll Grilled Cheese.
Step 2: Heat Pan
Next, preheat a non-stick skillet over medium heat. While the skillet warms up, generously butter the insides of each roll to ensure a crisp, golden exterior. The butter will not only add flavor but also help create that beautiful crunch that complements the rich, melted cheese.
Step 3: Assemble Sandwiches
Once your skillet is ready, lay one half of each buttered Hawaiian roll directly in the pan. Pile on your chosen cheese, allowing it to ooze slightly over the sides for an enticing look. Top each sandwich with the other roll half, perfectly encasing the cheese to form your Hawaiian Roll Grilled Cheese masterpiece.
Step 4: Grill Contents
Cook the sandwiches on one side for about 3-4 minutes, or until they turn a lovely golden brown. Keep an eye on them to ensure they don’t burn, and then carefully flip each sandwich using a spatula. Cook the other side for an additional 3-4 minutes until it reaches that same delicious, crispy color.
Step 5: Melt Cheese
If you notice the cheese isn’t melting quite as well, grab a lid to cover the skillet briefly. This simple trick helps trap heat and steam, encouraging the cheese to soften and become ooey-gooey. Check the sandwiches frequently to make sure they’re not overcooking.
Step 6: Slice and Serve
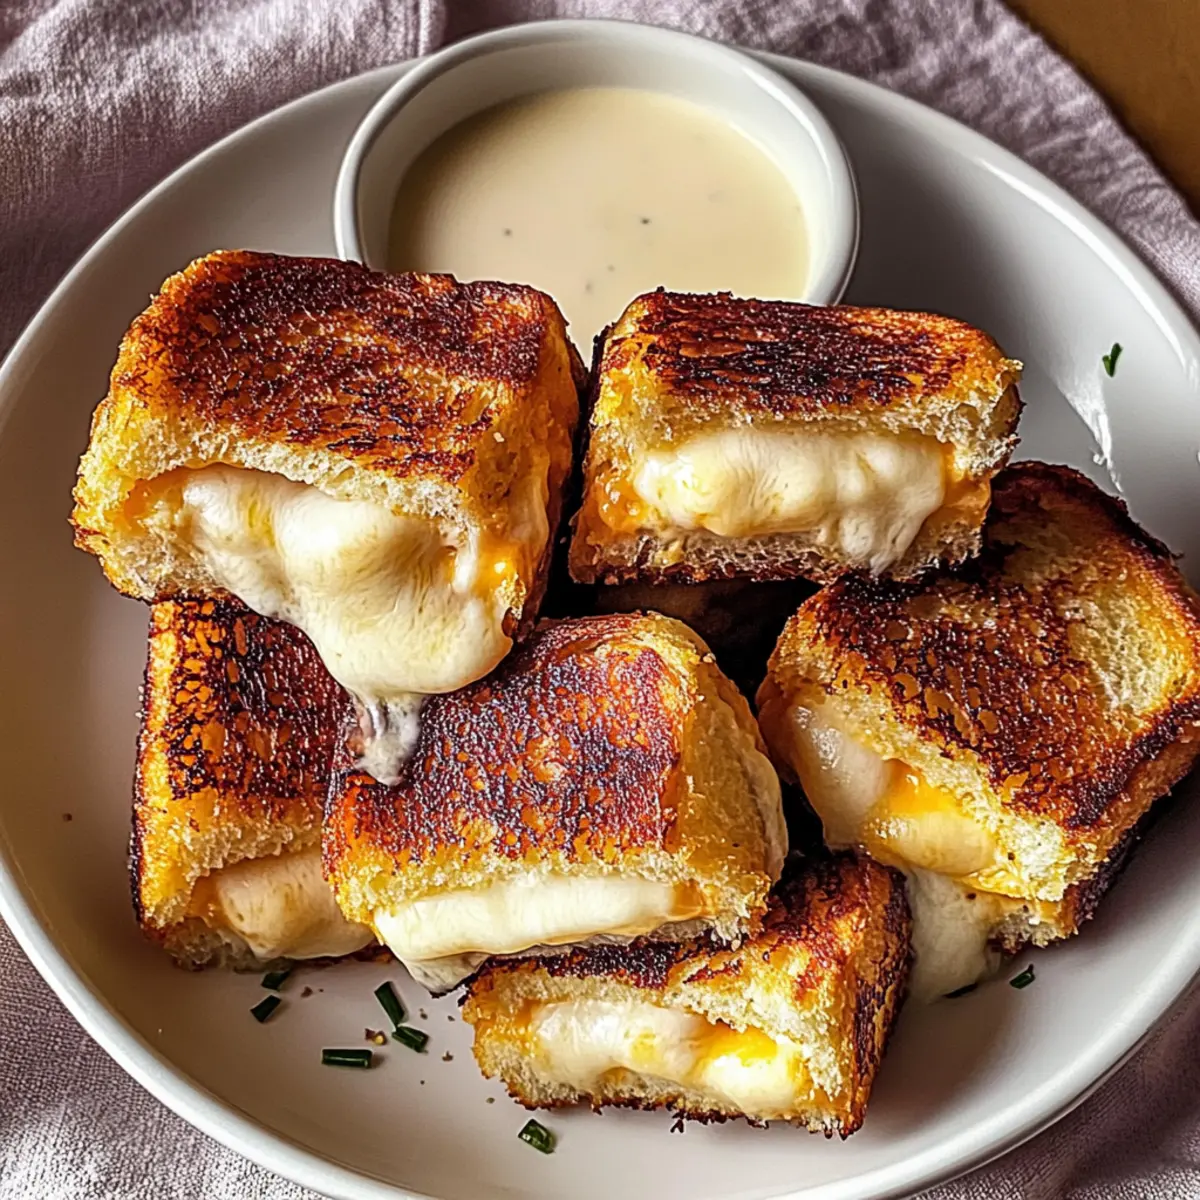
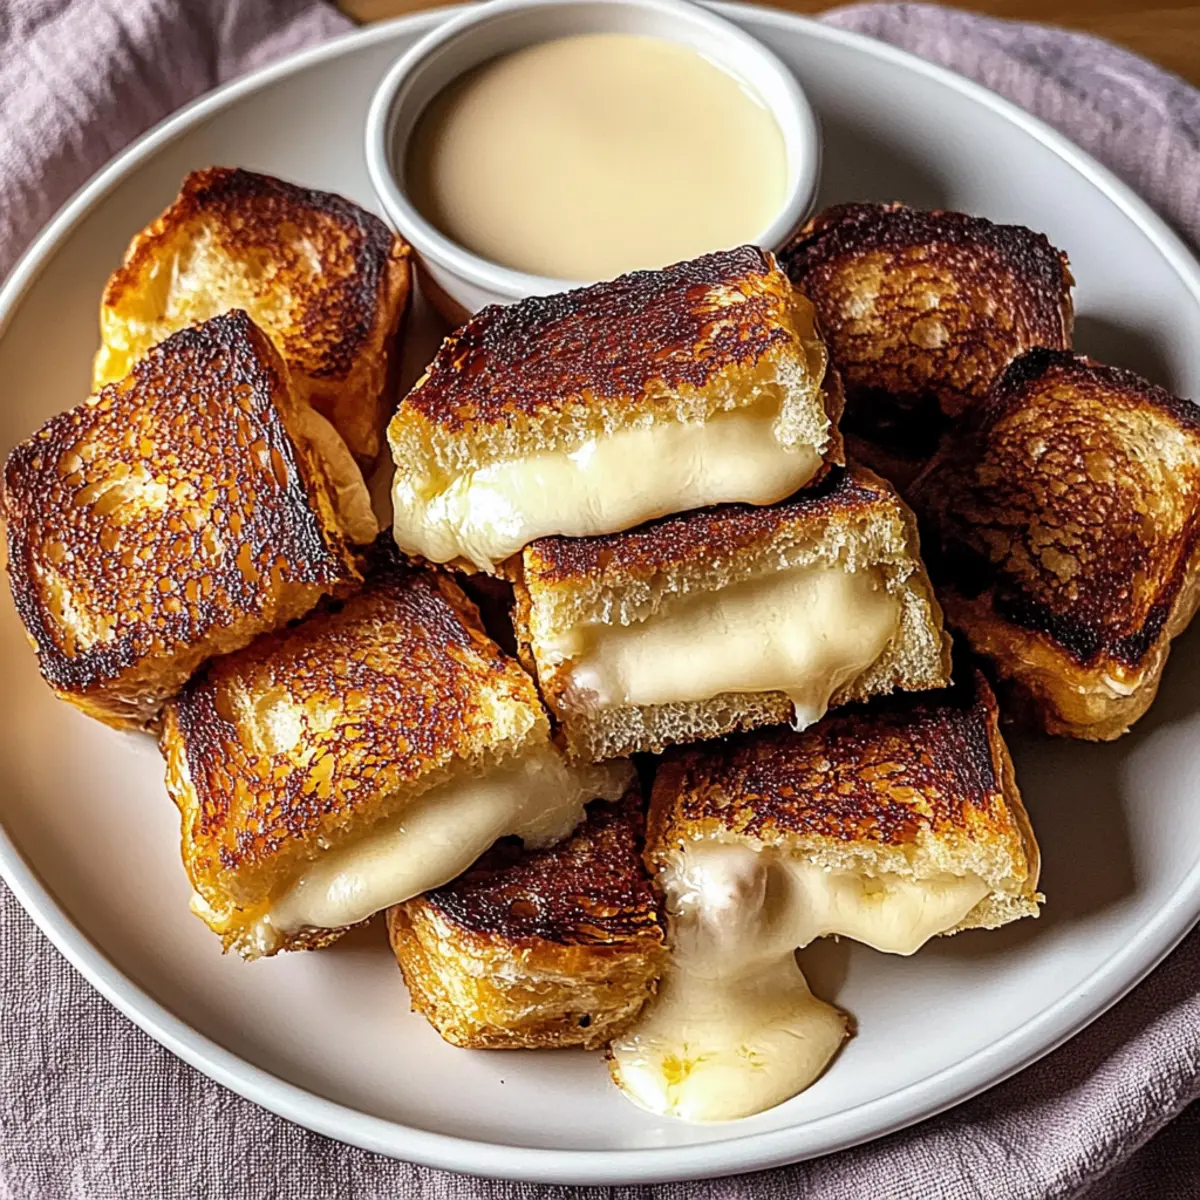
Once both sides are perfectly golden and crispy, remove the Hawaiian Roll Grilled Cheese from the skillet. Let them cool for a minute, then slice each sandwich in half to reveal the melty, gooey cheese inside. Now you’re ready to serve your delightful creation hot, perhaps with a fun dipping sauce for an extra treat!
How to Store and Freeze Hawaiian Roll Grilled Cheese
Fridge: Store leftover Hawaiian Roll Grilled Cheese in an airtight container for up to 2 days to keep them fresh and delicious.
Freezer: For longer storage, wrap individual sandwiches tightly in plastic wrap and store them in a freezer-safe bag for up to 1 month.
Reheating: When ready to enjoy, thaw in the fridge overnight, then reheat in a skillet over low heat for a perfectly melty result. Avoid microwaving, as it may make the bread soggy.
Room Temperature: Serve freshly made sandwiches immediately for the best taste and texture, as they are best enjoyed warm and gooey!
Hawaiian Roll Grilled Cheese Variations
Feel free to get creative with your Hawaiian Roll Grilled Cheese, adding your special twist to this delicious comfort classic!
-
Cheese Options: Switch up the cheese with gouda, mozzarella, or pepper jack for different flavor profiles. Each cheese brings a unique melting quality that enhances this dish beautifully.
-
Herb Infusion: Add fresh herbs like basil or cilantro to the inside for a refreshing twist. The fragrant herbs elevate the taste and make each bite more vibrant.
-
Heat Level: Incorporate spicy toppings like jalapeños or crushed red pepper flakes for a fiery kick. If you love heat, these additions will add a delightful zing and keep your taste buds dancing.
-
Savory Additions: Consider sautéed mushrooms or spinach for a heartier sandwich. The earthy mushrooms add depth, while spinach brings a lovely color and nutrition boost.
-
Sweet and Savory: Try adding a layer of fig jam or sliced apples for a sweet contrast to the savory cheese. The added sweetness perfectly complements the creamy melted cheese, creating an indulgent treat.
-
Nuts and Crunch: Toss in some chopped walnuts or pecans for an unexpected crunch. They'll provide a contrasting texture that elevates the grilled cheese experience.
Pair your grilled cheese with a light salad or tomato soup for a satisfying meal that everyone will enjoy!
Expert Tips for Hawaiian Roll Grilled Cheese
• Perfect Heat: Keep it medium-low: Cooking on too high of a heat will burn the rolls before the cheese melts.
• Experiment Wisely: Try combinations: Mix different cheeses like gouda and mozzarella for a unique Hawaiian Roll Grilled Cheese every time.
• Avoid Sogginess: Butter generously: Ensuring even butter coverage on the rolls creates a crispy exterior and prevents sogginess during cooking.
• Keep it Fresh: Reheat carefully: To maintain the melty goodness, reheat leftovers in a skillet over low heat instead of using the microwave.
• Customize Flavor: Add toppings: Elevate your sandwich with caramelized onions or fresh herbs to enhance the flavor of your Hawaiian Roll Grilled Cheese.
Make Ahead Options
These Hawaiian Roll Grilled Cheese sandwiches are perfect for meal prep enthusiasts! You can assemble the sandwiches without grilling them and then refrigerate them for up to 24 hours. To keep them fresh, wrap each sandwich tightly in plastic wrap or store them in an airtight container. When you’re ready to enjoy, simply heat a non-stick skillet over medium heat, grill the sandwiches for about 3-4 minutes on each side until golden brown and crispy, covering them briefly with a lid to ensure the cheese melts beautifully. This method allows you to savor the same deliciousness with minimal effort, making weeknight dinners a breeze!
What to Serve with Hawaiian Roll Grilled Cheese
Elevate your meal experience with comforting sides and delightful pairings that complement this tropical twist on a classic favorite.
-
Tomato Soup: The acidity and warmth of tomato soup perfectly balance the richness of the cheese, creating a deliciously nostalgic combo.
-
Crispy Kale Salad: This fresh salad with a zesty dressing adds crunch and fiber, making it a light counterpoint to the gooey sandwich. The flavors will awaken your palate!
-
Sweet Potato Fries: Their natural sweetness and crispy texture provide a delightful contrast to the savory, melted goodness of the grilled cheese.
-
Pickles or Pickled Vegetables: Adding a tangy crunch, pickles cut through the richness and enhance the overall flavor profile of your meal.
-
Fruit Salad: A refreshing medley of fruits adds a seasonal touch, enhancing the sweetness found in the Hawaiian rolls.
-
Sparkling Water: For a refreshing drink option, sparkling water's effervescence cleanses the palate after each bite of the melty sandwich.
-
Chocolate Chip Cookies: End your meal on a sweet note; warm cookies offer a comforting dessert that pairs beautifully with a glass of milk.
Make your Hawaiian Roll Grilled Cheese experience even more memorable by choosing the perfect accompaniments!
Hawaiian Roll Grilled Cheese Recipe FAQs
What is the best way to choose ripe Hawaiian rolls?
Absolutely! When selecting Hawaiian rolls, look for ones that are soft and lightly golden without any dark spots or signs of dryness. Freshness is key, so purchasing from a bakery or well-stocked grocery store will ensure the best quality. If possible, check the expiration date to pick the freshest rolls available.
How should I store leftover Hawaiian Roll Grilled Cheese?
Very! To store leftovers, place the Hawaiian Roll Grilled Cheese in an airtight container in the refrigerator. They will remain fresh for up to 2 days. When you’re ready to enjoy them again, I recommend reheating them in a skillet over low heat for the best results, as this keeps the exterior crisp and the cheese melty!
Can I freeze Hawaiian Roll Grilled Cheese?
Certainly! If you're looking to save some for later, wrap individual sandwiches tightly in plastic wrap and place them in a freezer-safe bag. They can be frozen for up to 1 month. When you’re ready to eat, thaw them in the fridge overnight, then reheat them in a skillet over low heat for a deliciously gooey outcome.
What do I do if the cheese isn’t melting properly?
Don't worry! If you find that your cheese isn’t melting as you’d like, try covering the skillet with a lid for a minute or two while cooking. This helps trap heat and steam inside, promoting a lovely melt. Keep an eye on the sandwiches to ensure they don’t burn while the cheese reaches that perfect gooey consistency.
Are there any dietary considerations for Hawaiian Roll Grilled Cheese?
Absolutely! If you or someone you’re serving has dietary restrictions, there are plenty of options. For a vegetarian-friendly dish, simply use your favorite cheese without meat add-ons. If gluten is a concern, you can substitute Hawaiian rolls with gluten-free bread. Always check ingredient labels for allergens, especially if using pre-packaged cheeses or toppings!
Hawaiian Roll Grilled Cheese: A Tropical Twist on Comfort Food
Ingredients
Equipment
Method
- Begin by gathering your Hawaiian rolls and cheese of choice, ensuring you have everything ready for assembly. Carefully slice each roll in half, creating a pocket for the cheese.
- Preheat a non-stick skillet over medium heat. Generously butter the insides of each roll to ensure a crisp, golden exterior.
- Lay one half of each buttered Hawaiian roll directly in the pan, pile on your chosen cheese, and top with the other roll half.
- Cook the sandwiches on one side for about 3-4 minutes, until golden brown. Flip and cook the other side for an additional 3-4 minutes.
- If the cheese isn’t melting well, cover the skillet briefly to trap heat and steam.
- Remove the sandwiches from the skillet once golden and crispy, let cool for a minute, then slice in half to reveal the melted cheese.


Leave a Reply