
As I stood in my kitchen, the scent of crushed Oreos filled the air, instantly transporting me back to my childhood Halloween parties. This magical time of year calls for delightful treats, and that's where these Halloween Oreo Balls come in! These adorable, no-bake goodies are not just a fun project for the family; they are versatile and can be transformed into spooky ghosts, cheerful pumpkins, or mischievous mummies. With just a few ingredients and minimal prep time, you’ll have delicious, kid-friendly treats perfect for gatherings or simply to enjoy at home. What could be more satisfying than wielding a spatula, decorating with sprinkles, and bonding over creativity? Get ready to impress friends and family with these charming bites—because let's be honest, who wouldn’t want to indulge in these sweet, festive delights? What spooky design will you create first?
Why Make Halloween Oreo Balls?
Fun to Create: These treats are perfect for involving the whole family in the kitchen, making memories while decorating together.
No-Bake Delight: Forget turning on the oven! With just a few simple steps, you’ll have festive goodies ready in no time.
Endless Customization: Let your creativity shine! From mummies to pumpkins, there’s no limit to the designs you can whip up.
Crowd-Pleasing Flavor: The mesmerizing mix of Oreo and cream cheese is a nostalgic favorite for both kids and adults, ensuring your treats disappear fast!
Quick Cleanup: Minimal mess means more time to enjoy these tasty bites and less time stressing over dishes. Check out our easy serving suggestions to make your Halloween festivities even more delightful!
Halloween Oreo Balls Ingredients
Get ready to create these delightful Halloween Oreo Balls!
For the Mixture
- Oreo cookies – A classic treat that provides the structure and sweetness. Consider using Halloween-themed Oreos for extra fun!
- Cream cheese – Adds creaminess and binds the mixture together; full-fat is recommended for the best flavor.
For the Coating
- Candy melts/white chocolate chips – These add flavor and a festive touch; choose vibrant colors like orange, black, or white for Halloween themes!
For Decorating
- Candy eyes, sprinkles, or mini chocolate chips – Essential for adding those whimsical finishing touches; let your creativity run wild!
- Gel food coloring (optional) – Tint your coating to match your spooky designs.
Other Essentials
- Parchment paper – A must-have to prevent sticking while your treats cool and set.
Gather these ingredients and get ready to whip up your gorgeous Halloween Oreo Balls!
Step‑by‑Step Instructions for Halloween Oreo Balls
Step 1: Crush Oreos
Begin by crushing the Oreo cookies to form fine crumbs. You can either use a food processor for a quick blend or place the Oreos in a sealed plastic bag and crush them with a rolling pin or your hands until uniform. Aim for a texture similar to sand to ensure easy mixing later.
Step 2: Combine Ingredients
In a large mixing bowl, combine the crushed Oreos with softened cream cheese. Use a spatula or your hands to blend the mixture until fully incorporated and a smooth dough forms. This step is crucial as it helps bind the Halloween Oreo Balls, allowing for easy rolling later on.
Step 3: Form Balls
Scoop out a tablespoon of the Oreo mixture and roll it into a neat ball, about 1 inch in diameter. Place each ball on a baking sheet lined with parchment paper to prevent sticking. This process should go quickly; aim to form and place all the balls before moving on to the next step.
Step 4: Chill
Refrigerate the formed Oreo balls for at least 20 minutes. This chilling time allows them to firm up, making them easier to dip in chocolate later. You can also speed up the process by placing them in the freezer for about 10 minutes—just don’t forget to keep an eye on them!
Step 5: Melt Chocolate
In a microwave-safe bowl, combine the candy melts or white chocolate chips. Microwave the mixture in 30-second intervals, stirring between each to ensure it melts evenly without burning. The result should be a smooth, pourable chocolate—perfect for coating your Halloween Oreo Balls.
Step 6: Dip Balls
Using a fork or toothpick, dip each chilled Oreo ball into the melted chocolate, making sure to coat it thoroughly. Allow excess chocolate to drip off before placing the coated ball back onto the parchment paper. Repeat this process until all the balls are beautifully coated in chocolate.
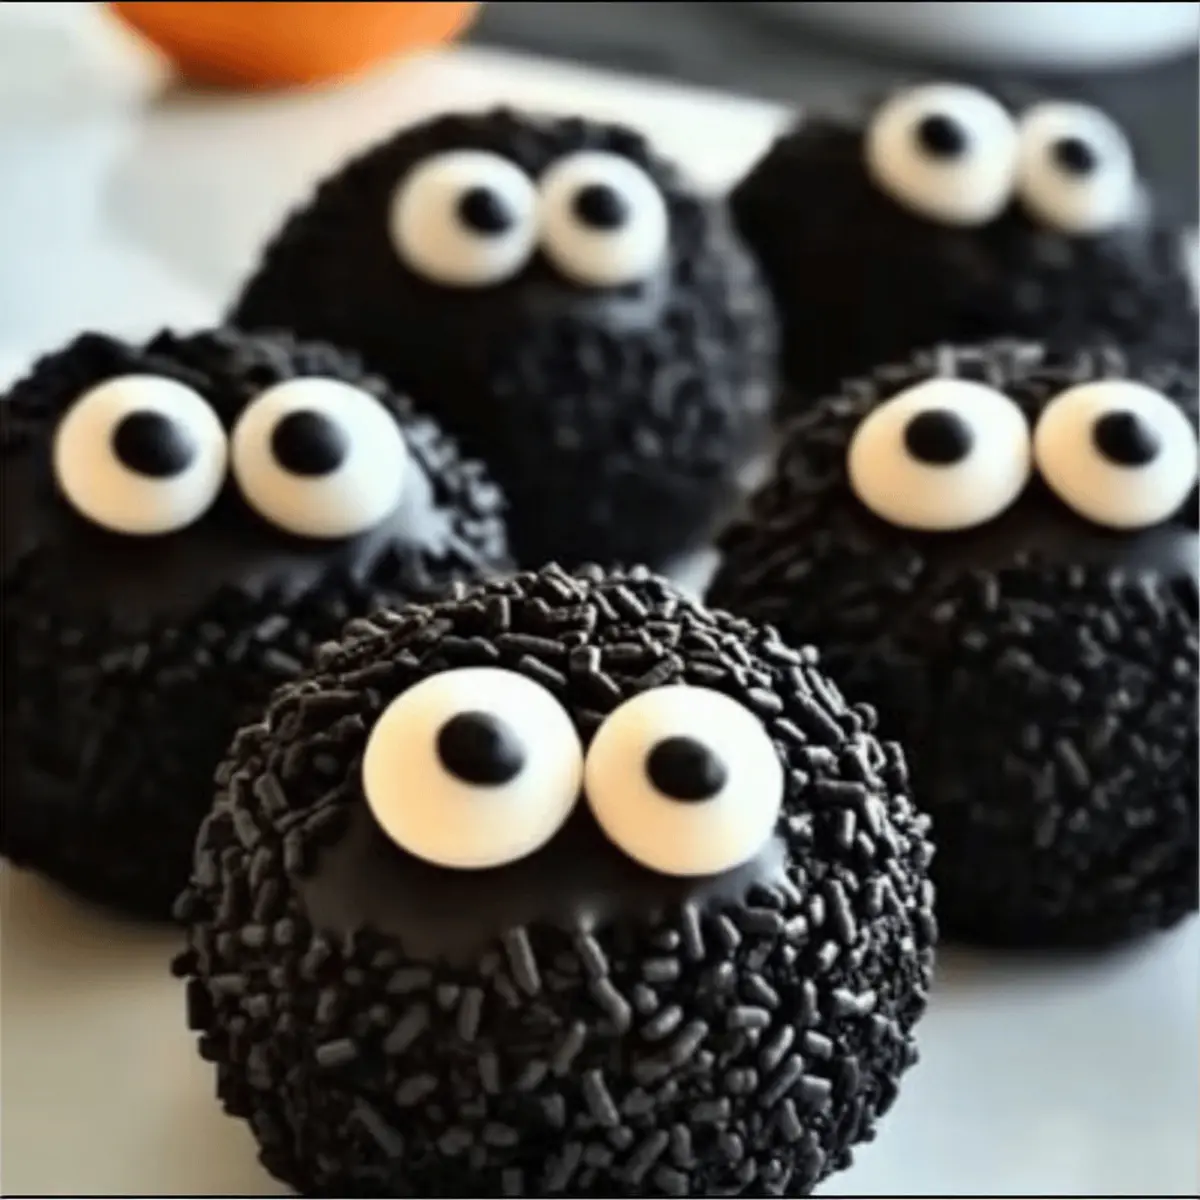
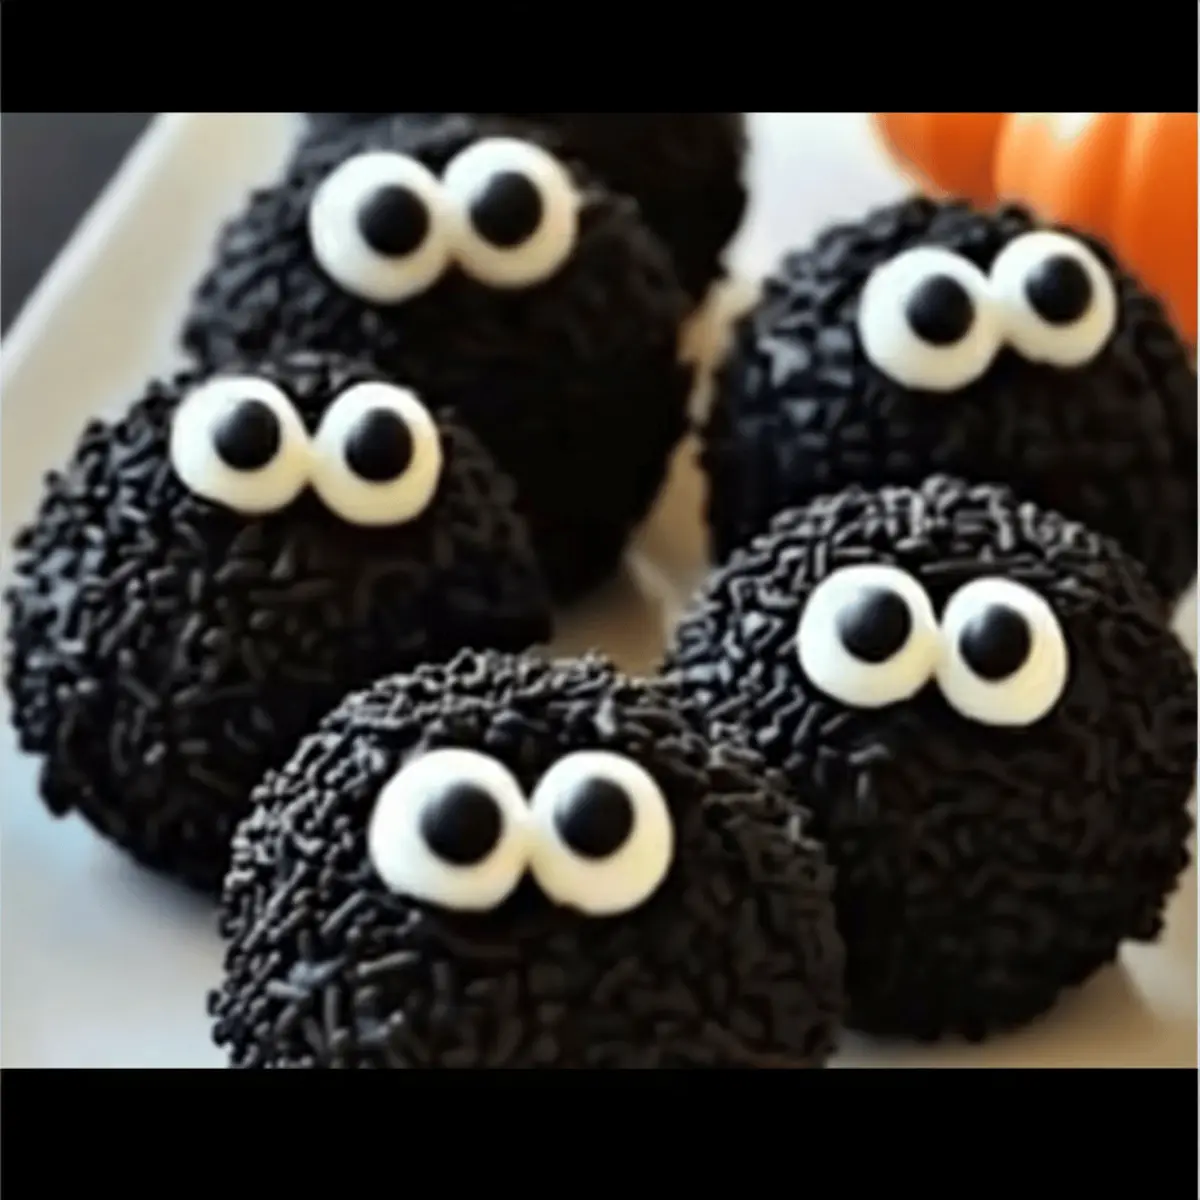
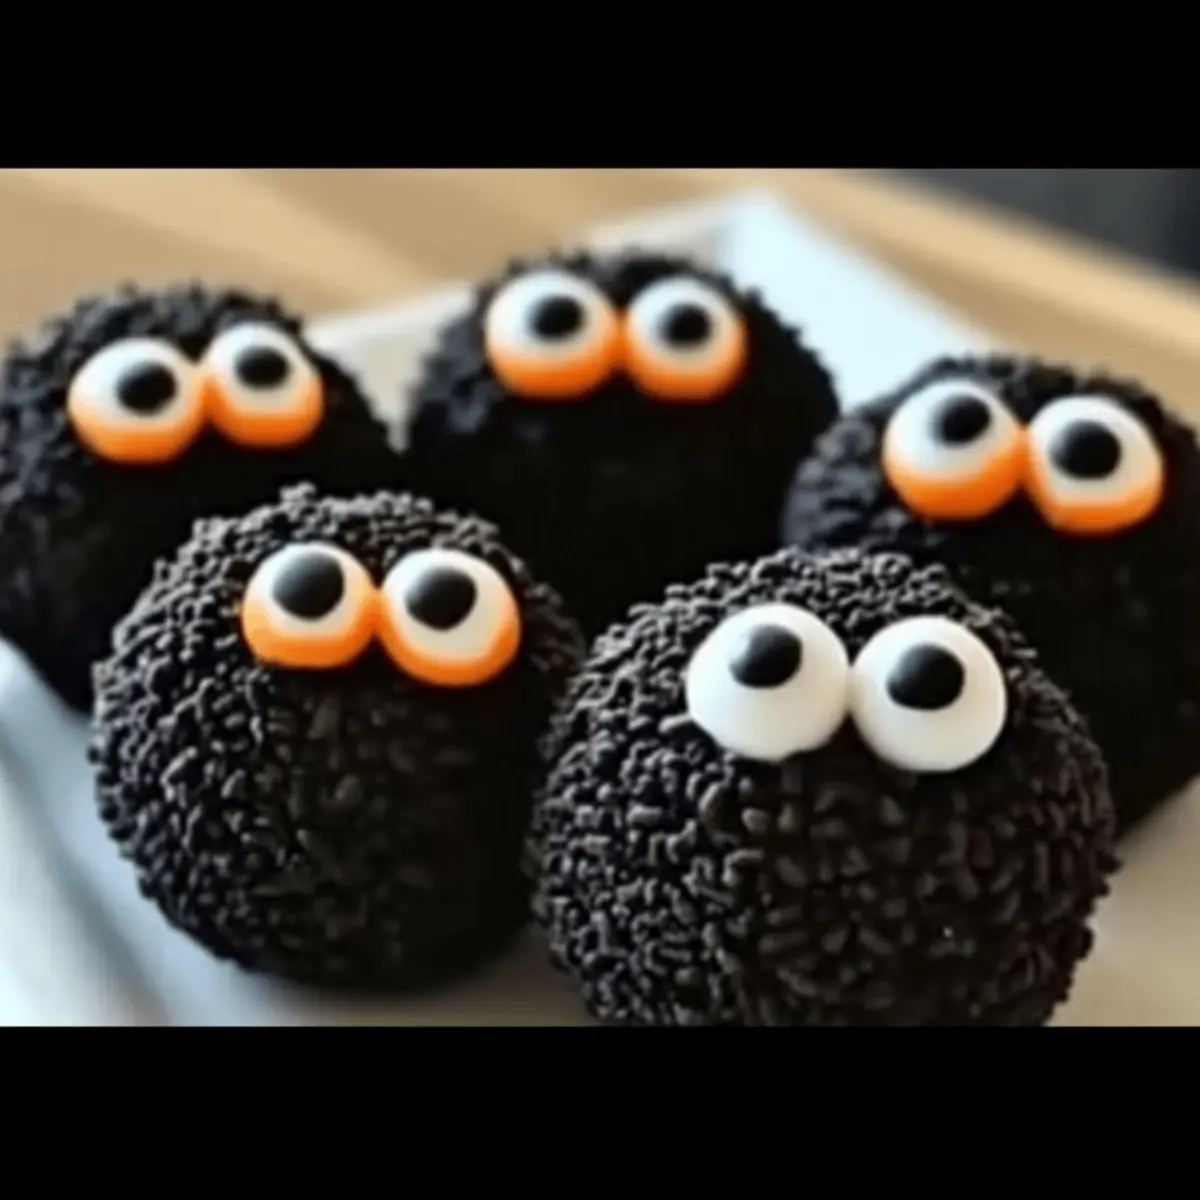
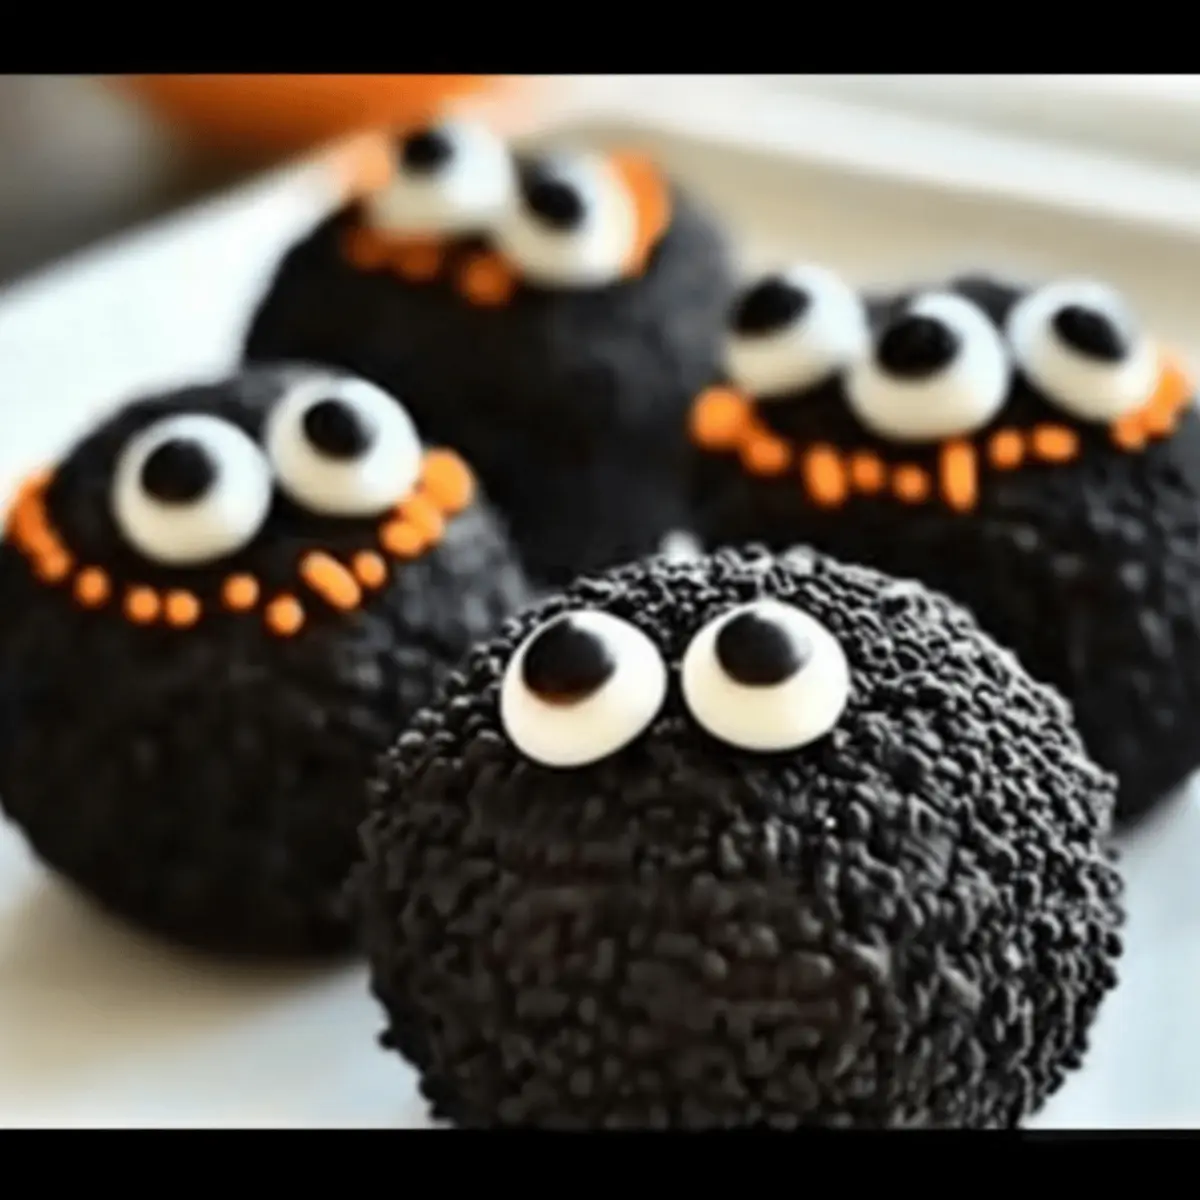
Step 7: Decorate
While the melted chocolate is still wet, add your favorite decorations like candy eyes, sprinkles, or mini chocolate chips to each ball. This is where your creativity can shine—transform them into spooky ghosts or cheerful pumpkins right before serving.
Step 8: Set
Allow the chocolate coating to harden at room temperature. If you’re in a hurry, you can place the decorated balls back in the refrigerator for about 10-15 minutes to speed up the setting process. Once the coating has set, your festive Halloween Oreo Balls are ready to serve!
Halloween Oreo Balls Variations
Get ready to unlock your creativity with these delightful twists on Halloween Oreo Balls!
-
Peanut Butter Swap: Replace standard Oreos with peanut butter Oreos for a nutty richness that adds a new layer of flavor to your treats.
-
Chocolate Coating: Ditch the traditional white chocolate and use dark or milk chocolate instead. This will bring a richer and bolder chocolatey taste to every bite.
-
Flavor Boost: Enhance the cream cheese mixture with a splash of vanilla or peppermint extract. The added flavor will surprise and delight your taste buds!
-
No-Bake Pumpkin Spice: Add pumpkin puree and a sprinkle of pumpkin spice to the mixture for a seasonal twist that embodies the essence of fall. It's a cozy and festive flavor!
-
Customization with Colors: Use colored candy melts to match your themed party décor, such as vibrant yellows or spooky greens, making your treats even more visually striking.
-
Texture Addition: Stir in crushed nuts or cookie bits for an extra crunch that elevates the texture and adds a delightful contrast to the creamy filling.
-
Ghostly Designs: Use melted black chocolate to create spooky ghosts. Simply add black chocolate coats and then attach candy eyes for an adorable Halloween look.
-
Chili Heat: For the adventurous, mix a pinch of chili powder into the chocolate coating for a playful, sweet-and-spicy experience that surprises the palate.
Get inspired, gather your ingredients, and transform these Halloween Oreo Balls into unique creations that will impress your family and friends! For even more ideas and festive fun, explore our tips on easy serving suggestions or how to store and freeze your treats. Happy decorating!
Make Ahead Options
These Halloween Oreo Balls are perfect for busy home cooks looking to streamline their meal prep! You can prepare the Oreo and cream cheese mixture up to 24 hours in advance—just form the balls and store them in an airtight container in the refrigerator. Additionally, you can dip and decorate the balls up to 3 days before serving; simply refrigerate them once set to maintain their delightful crunch. When you're ready to impress your guests, allow the treats to come to room temperature for about 15 minutes before serving, ensuring their creamy inside and crispy shell are just as delicious as freshly made.
What to Serve with Halloween Oreo Balls
As the magic of Halloween fills the air, complement these delightful treats with dishes that enhance your festive celebration.
- Spooky Fruit Salad: A medley of seasonal fruits like oranges and grapes creates a vibrant, refreshing side that balances the sweetness of the Oreo Balls.
- Ghostly Cheese Platter: Include an assortment of cheeses and crackers, along with some veggie sticks, to provide a savory contrast to the sweet treats.
- Pumpkin Spice Cupcakes: These fluffy, spiced cupcakes echo the Halloween spirit while offering an additional sweet touch that everyone will love.
- Chocolate Milkshakes: Creamy milkshakes topped with whipped cream and chocolate drizzle make a fun, indulgent drink to accompany your Oreo Balls.
- Candy Corn Trail Mix: Mix candy corn with nuts and pretzels for a crunchy, salty-sweet treat that will delight and surprise your guests.
- Pumpkin Soup: A warm, velvety pumpkin soup can serve as a cozy appetizer that beautifully aligns with the fall flavors of Halloween.
- Witch's Brew Punch: A vibrant punch made with lemonade and green food coloring, garnished with floating fruit, adds a festive spirit to your gathering.
- Ginger Snap Cookies: Spicy and crisp, these cookies are a wonderful textural complement that will keep your guests coming back for more throughout the party!
Expert Tips for Halloween Oreo Balls
-
Keep It Chilled: Refrigerate the formed mixture while you work to prevent the Oreo balls from becoming too soft during dipping.
-
Dip with Care: Use a fork for dipping to help shake off excess chocolate, ensuring a smooth and even coating on your Halloween Oreo Balls.
-
Quick Decorating: Work quickly after dipping to add your toppings; otherwise, the chocolate may set, making it harder for decorations to stick.
-
Play with Flavor: Don’t hesitate to add different extracts to your cream cheese mixture for a surprise twist that complements the classic Oreo taste.
-
Storage Savvy: Store any leftovers in an airtight container in the fridge for up to a week, so you can enjoy these festive treats longer!
How to Store and Freeze Halloween Oreo Balls
Fridge: Store your Halloween Oreo Balls in an airtight container in the refrigerator for up to one week; they’ll stay fresh and delicious, ready to enjoy any time!
Freezer: If you want to extend their life, freeze undipped Oreo balls for up to two months. When you're ready to indulge, simply thaw them and dip in chocolate before serving.
Reheating: There’s no need to reheat these delights! Enjoy them chilled or at room temperature—each bite delivers a satisfying treat just as they are.
Wrapping: If you freeze your Halloween Oreo Balls, be sure to wrap them tightly before placing them in a freezer bag or container to prevent freezer burn—keeping them in perfect condition for a spooky surprise!
Halloween Oreo Balls Recipe FAQs
How do I know if my Oreos are fresh enough to use?
Absolutely! Look for Oreos that are intact and free from any broken pieces. Ideally, the packaging should be sealed, and the expiration date should be checked. Fresh Oreos will have a crisp snap when you break them, while older ones may feel soft or stale.
What’s the best way to store Halloween Oreo Balls?
You can store your Halloween Oreo Balls in an airtight container in the refrigerator for up to one week. This method keeps them fresh and ready for snacking! If you want to save some for later, follow the freezing instructions below to enjoy them at a later date.
Can I freeze Halloween Oreo Balls?
The more the merrier when it comes to saving treats! To freeze undipped Oreo balls, place them on a baking sheet and freeze until firm. Once solid, transfer the balls to an airtight container or freezer bag, where they can be stored for up to two months. When you're ready to enjoy, simply thaw them in the fridge before dipping them in chocolate.
What if my chocolate isn’t melting smoothly?
No worries! If your chocolate isn’t melting well, it may be too hot or have been in the microwave for too long. Try microwaving in shorter intervals of 15 seconds, stirring in between to keep the temperature even and prevent seizing. If it seizes up, you can add a small amount of vegetable oil or coconut oil to help it smooth out again.
Are Halloween Oreo Balls suitable for people with allergies?
Very! While they are loved for their tasty goodness, it's important to remember they contain dairy due to cream cheese. If you're preparing them for someone with specific allergies, check that the Oreos do not contain allergens like nuts or gluten, as some varieties might. Instead, consider using allergen-free versions of each ingredient to make them safe for all!
Can I make these without cream cheese?
Absolutely! If you're looking for a dairy-free option, consider substituting cream cheese with a dairy-free cream cheese or even nut butters, which can give a different flavor profile while still binding the mixture well. Just make sure it’s softened to blend properly.
Halloween Oreo Balls: Easy No-Bake Treats for Festive Fun
Ingredients
Equipment
Method
- Crush the Oreo cookies to form fine crumbs using a food processor or by placing them in a plastic bag and crushing them.
- Combine the crushed Oreos with softened cream cheese in a large mixing bowl and blend until fully incorporated.
- Scoop a tablespoon of the mixture and roll it into a ball, placing each on a baking sheet lined with parchment paper.
- Chill the formed Oreo balls in the refrigerator for at least 20 minutes to firm them up.
- Melt the candy melts or white chocolate chips in a microwave-safe bowl, stirring every 30 seconds until smooth.
- Dip each chilled Oreo ball into the melted chocolate using a fork, allowing excess chocolate to drip off.
- Add decorations while the chocolate is still wet, using candy eyes, sprinkles, or mini chocolate chips.
- Allow the chocolate coating to harden at room temperature or refrigerate for 10-15 minutes to speed up the process.


Leave a Reply