
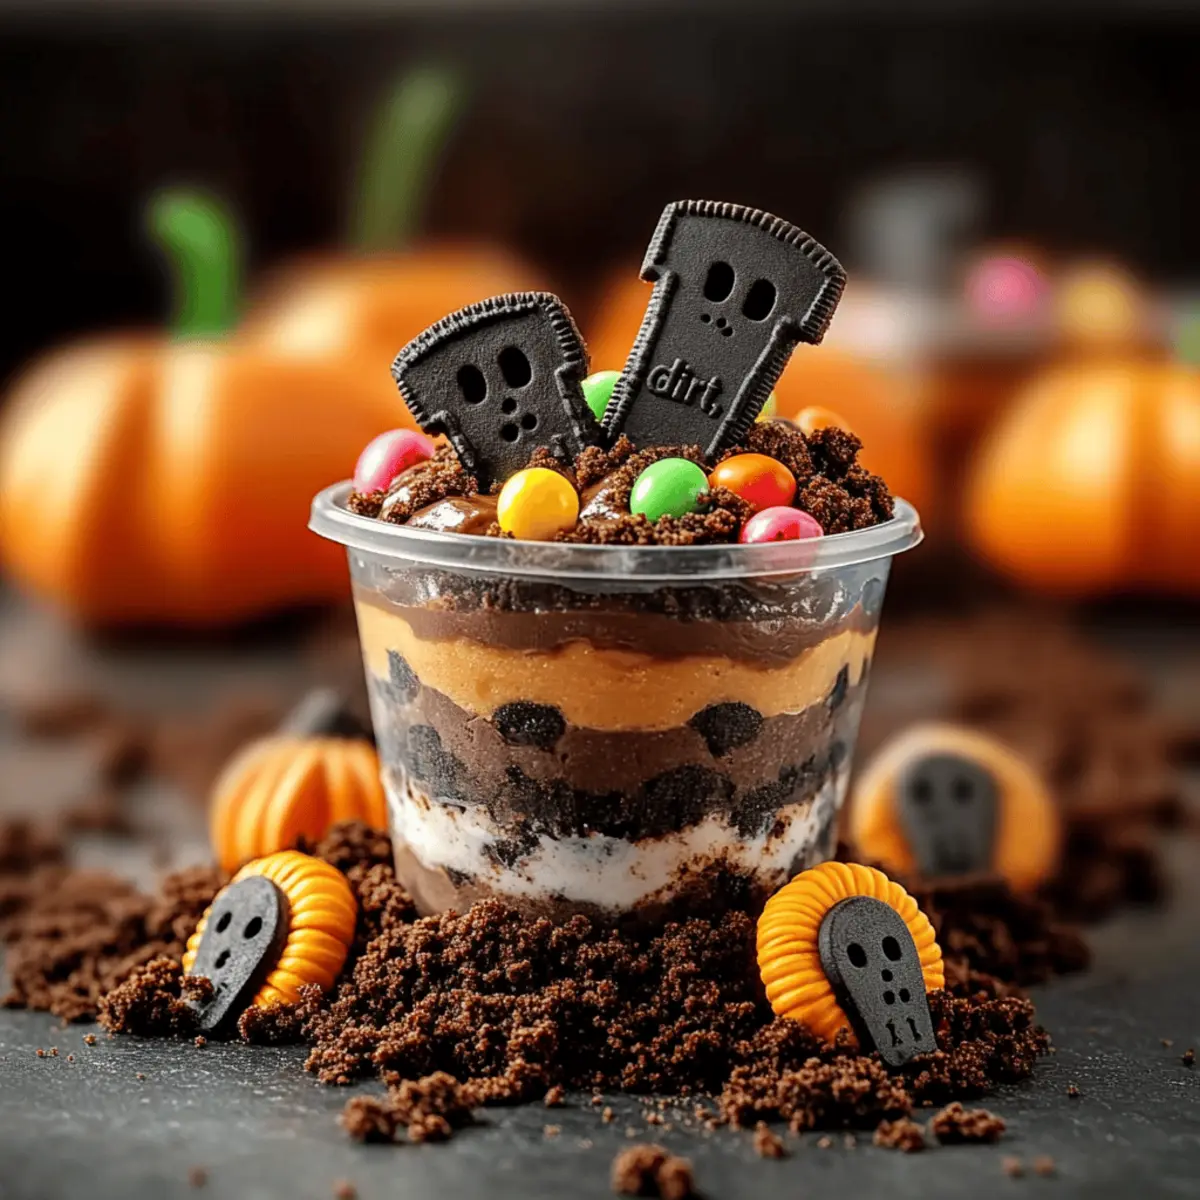
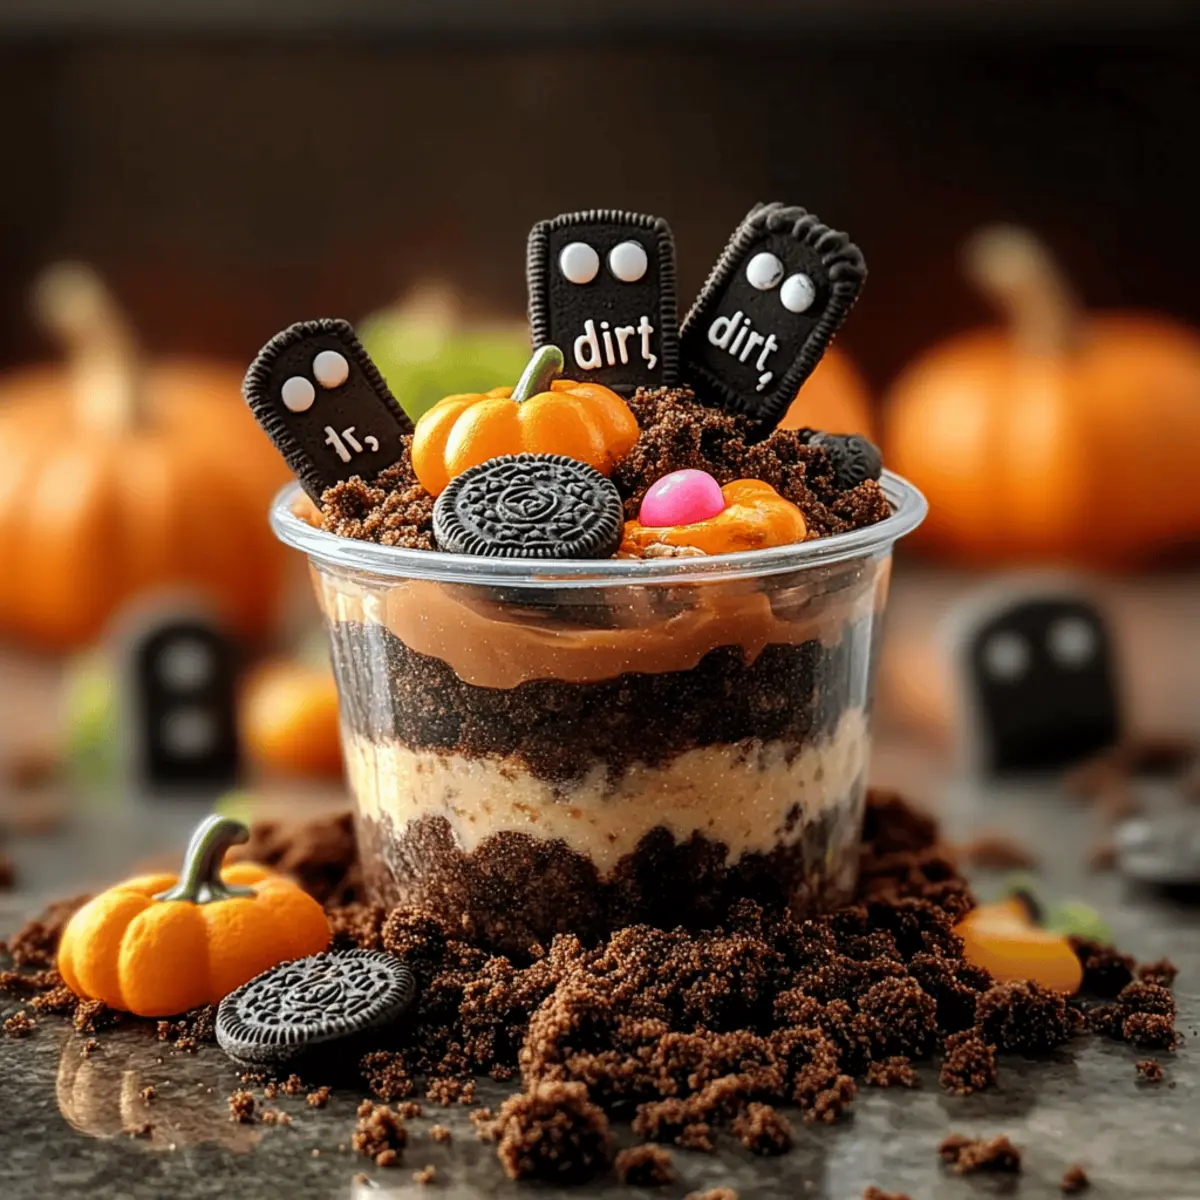
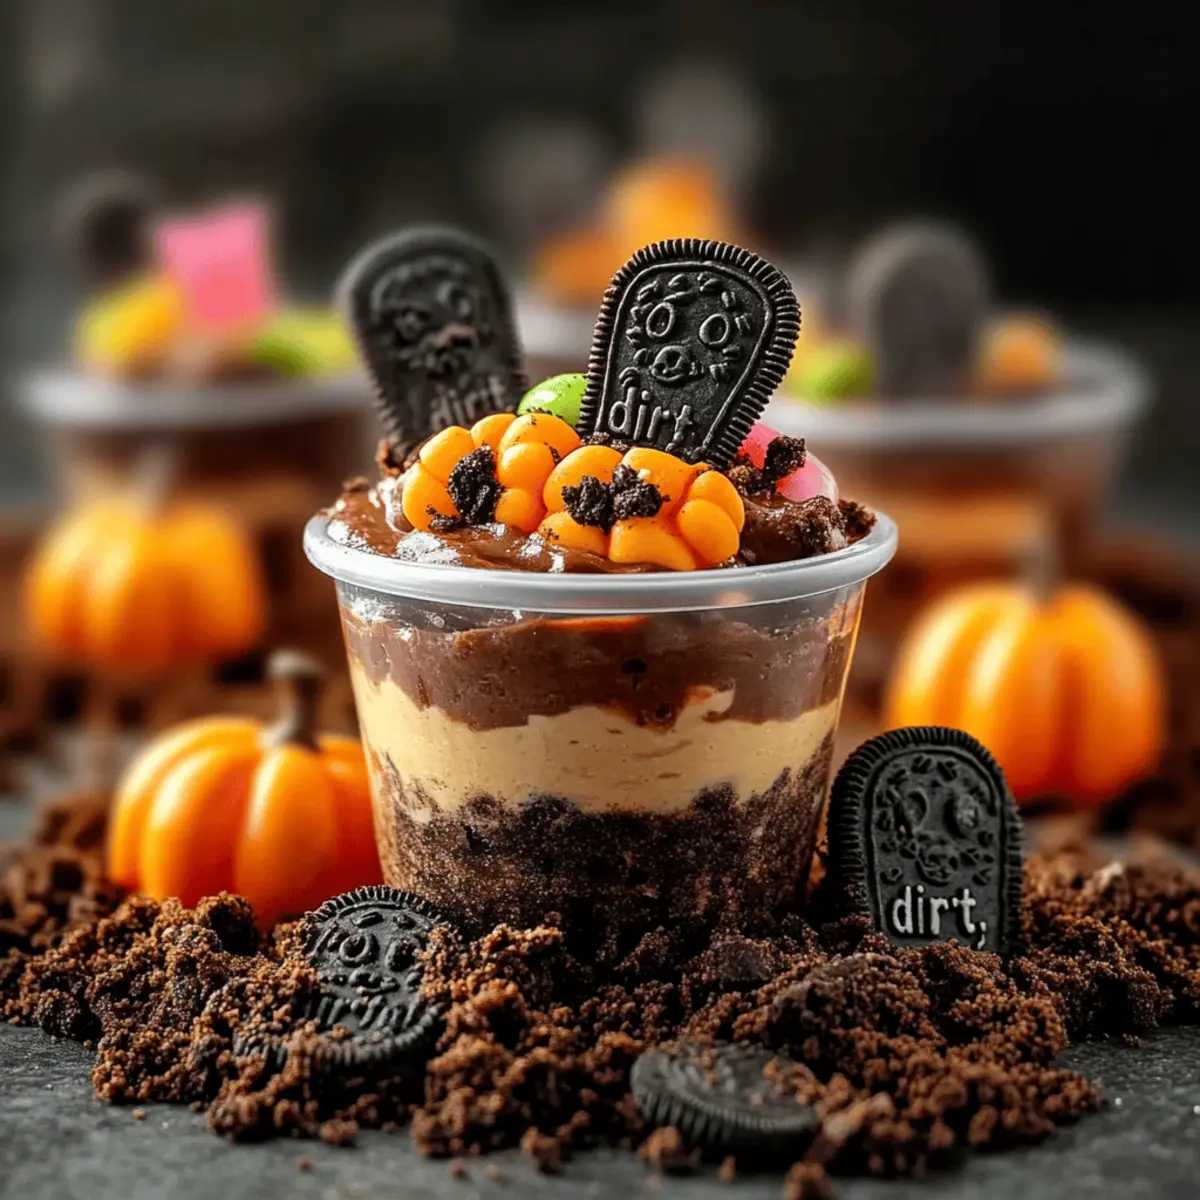
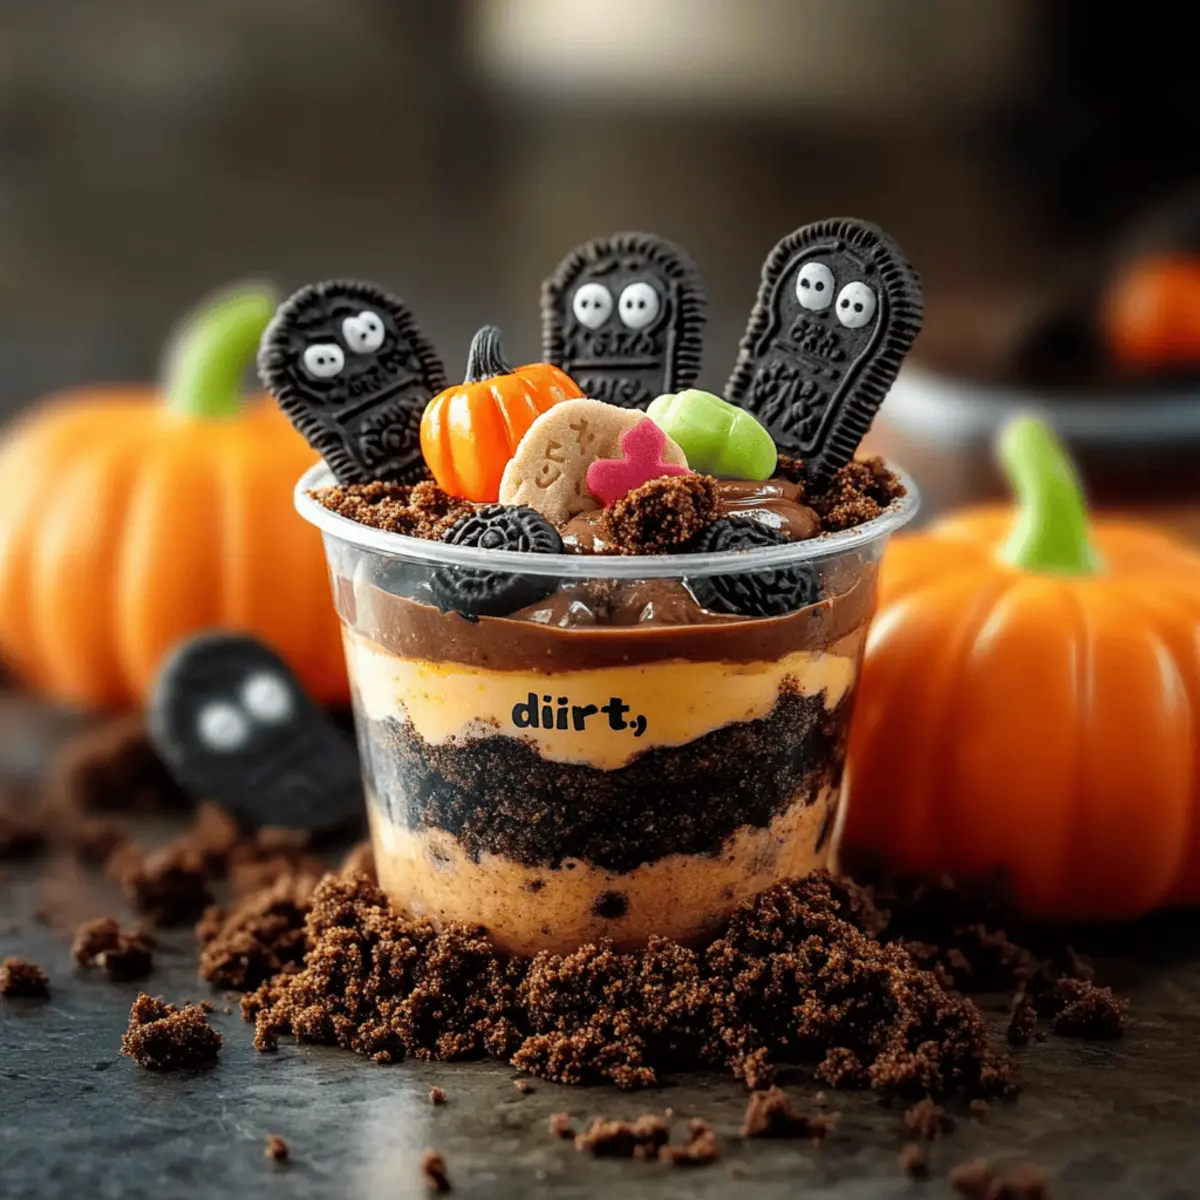
The Halloween air is thick with anticipation, and I can feel the excitement bubbling as little goblins and witches prepare for the festivities. This Spooky Graveyard Pudding Cookie Cups recipe is just the treat to awaken your inner child! These delightful layers of creamy chocolate pudding and crushed Oreo “dirt” are topped with adorable candy pumpkins and cookie tombstones—perfect for igniting laughter around the table. Not only is this dessert a breeze to whip up with no baking required, but it's also a fantastic way to get the kids involved in the kitchen. Trust me, the giggles that emerge while decorating these spooky cups will create memorable moments. Have you ever made a dessert that looks so fun yet is so simple? You're going to be amazed at how quickly they disappear!
Why Are These Cookie Cups So Fun?
Easy Assembly: These Spooky Graveyard Pudding Cookie Cups require no baking, making them incredibly simple for anyone to whip up. Kid-Friendly: They’re a hit with kids, providing a wonderful opportunity for family bonding in the kitchen as you assemble and decorate together. Visually Entertaining: With layers of creamy pudding and crunchy Oreo “dirt,” they wow guests with their impressive looks. Versatile Toppings: Feel free to get creative! Swap in different cookies or toppings like gummy worms for a unique twist. For more fun, serve them alongside treats like Witch Hat Cookies to complete your Halloween spread!
Graveyard Pudding Cookie Cups Ingredients
For the Pudding Base
• Chocolate Instant Pudding Mix – Provides creamy texture and rich chocolate flavor; homemade chocolate pudding can be used as a tasty alternative.
• Milk – Hydrates pudding mix to achieve a thick consistency; no substitutions required.
• Cool Whip – Adds lightness and fluffiness to the pudding; whipped cream can also serve this purpose.
For the "Dirt" Layer
• Oreo Cookies – Crushed to create a dirt-like layer for texture and flavor; gluten-free cookies can be used for dietary needs.
For Decoration
• Milano Double Chocolate Cookies – Used as tombstones; chocolate wafers could be a fun alternative.
• Black Frosting/Edible Marker – Perfect for writing "RIP" on tombstones; white chocolate can be a contrasting option.
• Candy Pumpkins – Adds a festive touch and color; consider substituting with candy corn or Halloween-themed gummies.
• Googly Eyes (edible) – For a playful look; these can be omitted for a cleaner presentation.
• Gummy Worms – Optional spooky decoration to enhance the theme.
Step‑by‑Step Instructions for Graveyard Pudding Cookie Cups
Step 1: Prepare the Tombstones
Start by writing “RIP” on each Milano Double Chocolate cookie using black frosting or an edible marker. This adds a spooky touch to your Graveyard Pudding Cookie Cups! Once finished, set the tombstones aside on a plate, allowing the frosting to set while you move on to the pudding layers.
Step 2: Mix the Pudding
In a mixing bowl, combine the chocolate instant pudding mix with 2 cups of cold milk. Whisk vigorously for 2–3 minutes until the mixture thickens, achieving a smooth and creamy consistency. Next, gently fold in 1 cup of Cool Whip until well blended. This will create the delicious, fluffy pudding base for your dessert.
Step 3: Crush the Oreos
Take about 15 Oreo cookies and place them in a resealable plastic bag. Use a rolling pin to crush them into fine crumbs, resembling dirt. This will form the layered “dirt” for your Graveyard Pudding Cookie Cups. Set aside the crushed Oreos in a bowl, making sure they’re ready for assembly.
Step 4: Layer the Ingredients
Grab clear cups to showcase the delightful layers of your Graveyard Pudding Cookie Cups. Begin by spooning about a quarter of the crushed Oreo crumbs into the bottom of each cup. Then, gently press some edible googly eyes against the sides of the cups for a fun effect, before adding a generous layer of the pudding mix on top.
Step 5: Repeat the Layers
Continue layering by adding more Oreo crumbs, followed by more pudding mixture. Aim for at least two to three layers to create a visually striking dessert. Remember to keep the crushed Oreos for the final topping! This process will add texture and enhance the fun of your spooky graveyard cups.
Step 6: Add Final Touches
Top each cup with a generous layer of the remaining crushed Oreo crumbs to resemble dirt. Carefully insert a Milano cookie tombstone into the center of each cup, then place a candy pumpkin on top for added festivity. If desired, embellish with gummy worms or additional decorations to enhance your spooky presentation.
Step 7: Chill Before Serving
Once assembled, cover the cups with plastic wrap and refrigerate for at least 30 minutes. This allows the flavors of the Graveyard Pudding Cookie Cups to meld beautifully while the pudding firms up slightly. The chilling not only enhances the textures but also makes for a refreshing treat on a Halloween night!
Step 8: Serve and Enjoy
When ready to serve, remove the cups from the refrigerator and uncover. Present these playful Graveyard Pudding Cookie Cups at your Halloween gathering, and watch as they become the star of the dessert table. Delight in the laughter as everyone enjoys this fun and easy-to-make treat!
Make Ahead Options
These Spooky Graveyard Pudding Cookie Cups are perfect for meal prep enthusiasts looking to save time during Halloween festivities! You can prepare the pudding mixture and crush the Oreos up to 24 hours in advance, storing them separately in the refrigerator. This helps maintain the creamy texture of the pudding and prevents the Oreos from becoming soggy. When you're ready to serve, simply layer the prepped pudding and Oreos in clear cups, add your cookie tombstones and candy pumpkins, and refrigerate for another 30 minutes to allow flavors to meld. With this make-ahead approach, you'll have a fun, festive dessert ready to wow guests with minimal last-minute effort!
What to Serve with Graveyard Pudding Cookie Cups?
These spooky delights bring a playful essence to any Halloween gathering, making it easy to create a whimsical and delicious feast.
-
Witch Hat Cookies: These adorable cookies, shaped like hats, enhance the festive theme and provide a chocolaty crunch to accompany the pudding cups.
-
Halloween Fruit Skewers: Fresh fruit skewers featuring orange and green fruits add a refreshing twist and a pop of color to balance the richness of the dessert.
-
Pumpkin Spice Hot Chocolate: A warm, creamy drink that captures the essence of fall, complementing the creamy layers of the pudding cups perfectly.
-
Ghostly Marshmallow Pops: Dipped marshmallows adorned with ghostly designs provide a sweet and chewy contrast to the crunchy Oreo layers in the dessert.
-
Spooky Cheese Platter: A mix of sharp and creamy cheeses served with spooky-themed crackers gives a variety of flavors that perfectly offset the sweetness of your dessert.
-
Eerie Eyeball Punch: This colorful punch, made with fruit juices and floating “eyeballs” (gumballs or frozen fruit), creates an exciting drink option for all ages, adding a touch of fun to your Halloween spread.
For an unforgettable Halloween celebration, consider serving these alongside your Graveyard Pudding Cookie Cups for a delightful mix of flavors and fun!
Expert Tips for Graveyard Pudding Cookie Cups
-
Chill Properly: Allow your cups to refrigerate for at least 30 minutes to ensure the pudding firms up and flavors meld seamlessly.
-
Layer Wisely: When assembling, aim for at least two distinct layers of pudding and Oreo crumbs. This adds to the visual appeal and texture of your Graveyard Pudding Cookie Cups.
-
Decorative Details: Get creative! Use edible markers to add funny phrases or spooky designs on additional cookies for a personal touch.
-
Freshness Matters: Assemble your cookie cups shortly before serving. This keeps the Oreo “dirt” crunchy and helps maintain the dessert's delightful texture.
-
Involve the Kids: Let your children help with the decorating! It’s a fantastic way to create memories and inspire their creativity while making these magical Halloween treats.
Graveyard Pudding Cookie Cups Variations
Feel free to get creative with these delightful Graveyard Pudding Cookie Cups and customize them to your taste!
-
Gluten-Free: Substitute Oreos with gluten-free cookies to enjoy this spooky treat without worry. Everyone deserves a ghoulish dessert, no matter their dietary needs!
-
Dairy-Free: Use almond milk and coconut whipped cream instead of regular milk and Cool Whip for a dairy-free delight. The flavors will still shine through beautifully!
-
Vegan-Friendly: Swap chocolate pudding mix for a vegan option, and use plant-based cool whip for a dessert that everyone can enjoy together. It's a fantastic way to celebrate inclusivity!
-
Flavor Twist: Try using butterscotch or vanilla pudding for a different flavor profile that still resonates with the Halloween spirit. These variations bring unique and delightful surprises to every bite.
-
Add Crunch: Incorporate crushed nuts or candy corn between the layers for added texture and sweetness. The crunch will contrast nicely with the creamy pudding!
-
Mini Versions: Use mini cups to create bite-sized servings, perfect for little hands at parties. These can be fun for kids and adults alike—no one can resist these cute spooky treats!
-
Customized Toppings: Sprinkle edible glitter or add candy bones for a creative flair. It adds a magical touch that makes each cup uniquely yours!
-
Layered Surprises: Consider layering in some whipped cream or even a fruit layer between the cookies and pudding. The fruity burst can enhance the overall experience!
And while you're at it, if you're looking for more fun treats to accompany your spooky dessert, check out my delicious Witch Hat Cookies or perhaps some delightful Peaches Cream Cookies. Happy crafting!
Storage Tips for Graveyard Pudding Cookie Cups
-
Fridge: Store assembled cups covered in the refrigerator for up to 24 hours. This will keep the pudding chilled and delicious until you're ready to serve.
-
Freezer: For longer storage, assemble the cups minus the toppings and freeze for up to 1 month. Thaw in the fridge overnight and add decorations before serving.
-
Toppings: Assemble cookie tombstones and candy decorations just before serving to maintain their integrity and visual appeal on your Graveyard Pudding Cookie Cups.
-
Reheating: No reheating needed! Simply enjoy chilled as a refreshing Halloween treat.
Graveyard Pudding Cookie Cups Recipe FAQs
How do I pick the right chocolate pudding mix?
Absolutely! For the best results, choose a high-quality chocolate instant pudding mix that is rich in flavor. Look for brands that list cocoa as one of the first ingredients and don’t be afraid to try a homemade version for an extra decadent treat!
How should I store the cookie cups after making them?
You can easily store your assembled Graveyard Pudding Cookie Cups by covering them with plastic wrap or placing them in an airtight container. They can be kept in the refrigerator for up to 24 hours, ensuring they remain fresh and creamy until you're ready to serve!
Can I freeze these pudding cups for later?
Yes, you can! To freeze, assemble the cups without the toppings (like cookies and candy) and place them in an airtight container in the freezer for up to 1 month. When you're ready to enjoy them, simply thaw them in the fridge overnight and add your fun decorations before serving.
What if my pudding doesn’t thicken properly?
If your pudding mixture doesn’t thicken, check that you’ve whisked it vigorously for the full 2-3 minutes as suggested. If it's still not thickening, try adding a tad more pudding mix or allowing it to sit for a few additional minutes. This can help to achieve that lovely creamy texture you're looking for!
Are there any allergy considerations with the ingredients?
Very! Always check the packaging of your ingredients for potential allergens. If you're dealing with nut allergies, opt for nut-free cookies and ensure the pudding mix doesn’t contain any traces of nuts. For gluten-free options, be sure to use gluten-free Oreo cookies and any other necessary substitutions.
What are some fun variations I can try with these cookie cups?
The more the merrier! Get creative by swapping out Oreo cookies for other flavors, adding unique toppings like gummy worms, or even incorporating a layer of whipped cream on top for added fluffiness. You could also experiment with different cookie shapes for tombstones—mini graham crackers or chocolate wafers could work wonderfully!
Graveyard Pudding Cookie Cups: A Fun Halloween Delight
Ingredients
Equipment
Method
- Start by writing “RIP” on each Milano Double Chocolate cookie using black frosting or an edible marker. Set the tombstones aside while you prepare the pudding layers.
- In a mixing bowl, combine the chocolate instant pudding mix with 2 cups of cold milk. Whisk vigorously for 2-3 minutes until the mixture thickens.
- Gently fold in 1 cup of Cool Whip until well blended to create the fluffy pudding base.
- Crush about 15 Oreo cookies in a resealable plastic bag with a rolling pin into fine crumbs for the layered 'dirt'.
- In clear cups, layer about a quarter of the crushed Oreo crumbs, then add a layer of the pudding mix, pressing in some edible googly eyes on the sides of the cups.
- Continue layering with more Oreo crumbs, followed by more pudding mixture, aiming for 2-3 layers, keeping crushed Oreos for the final topping.
- Top each cup with remaining crushed Oreo crumbs, insert a Milano cookie tombstone, and place a candy pumpkin on top. Add gummy worms if desired.
- Cover with plastic wrap and refrigerate for at least 30 minutes before serving.
- Serve the cups chilled at your Halloween gathering, and enjoy!


Leave a Reply