
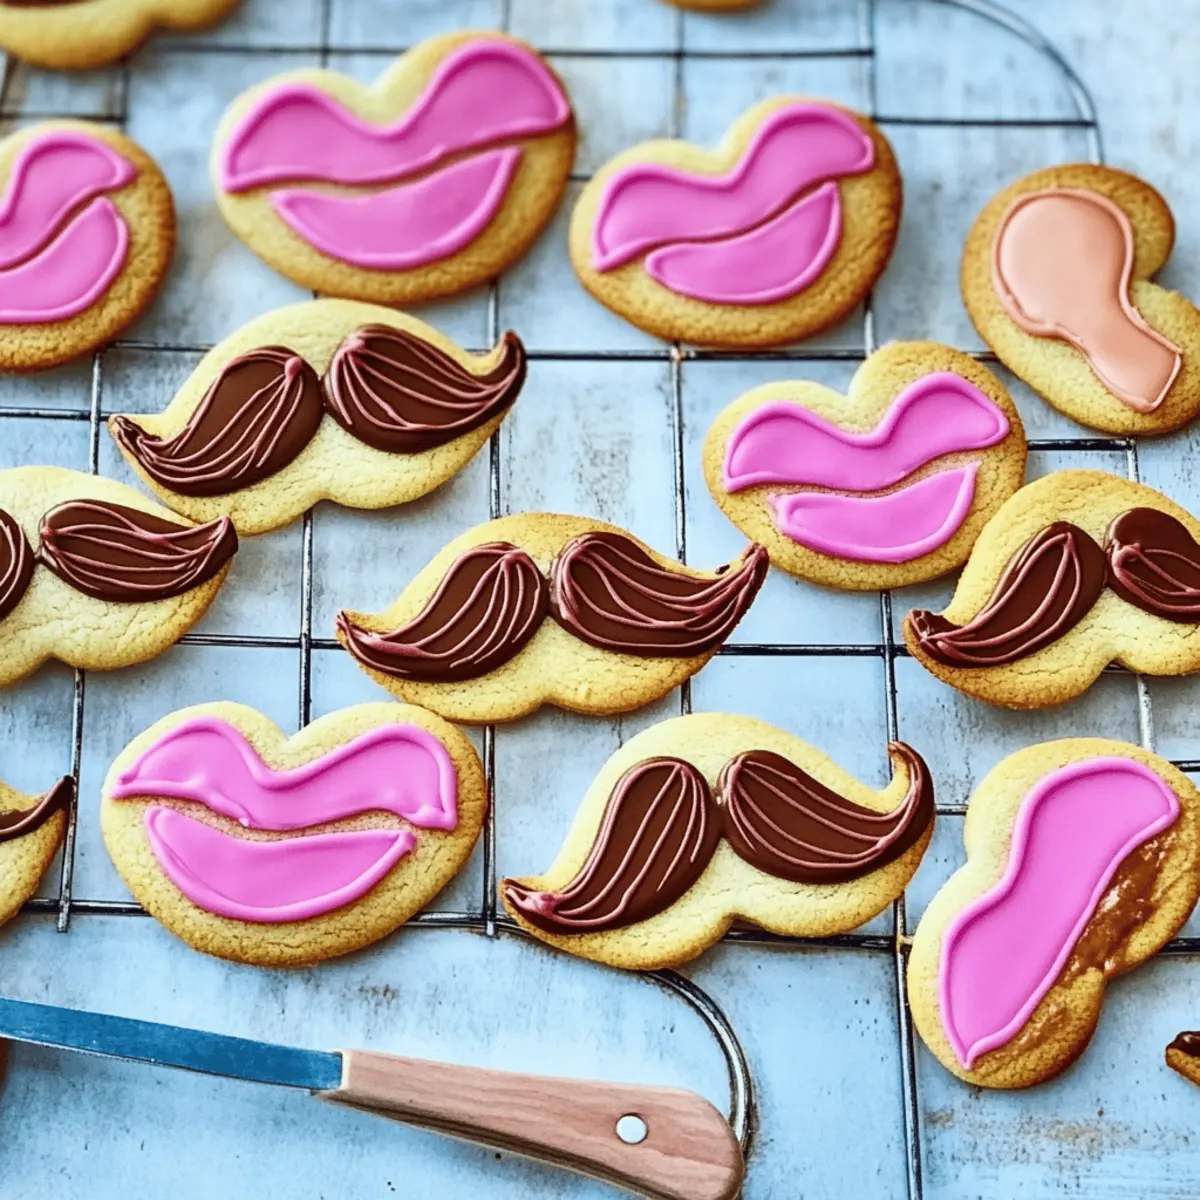
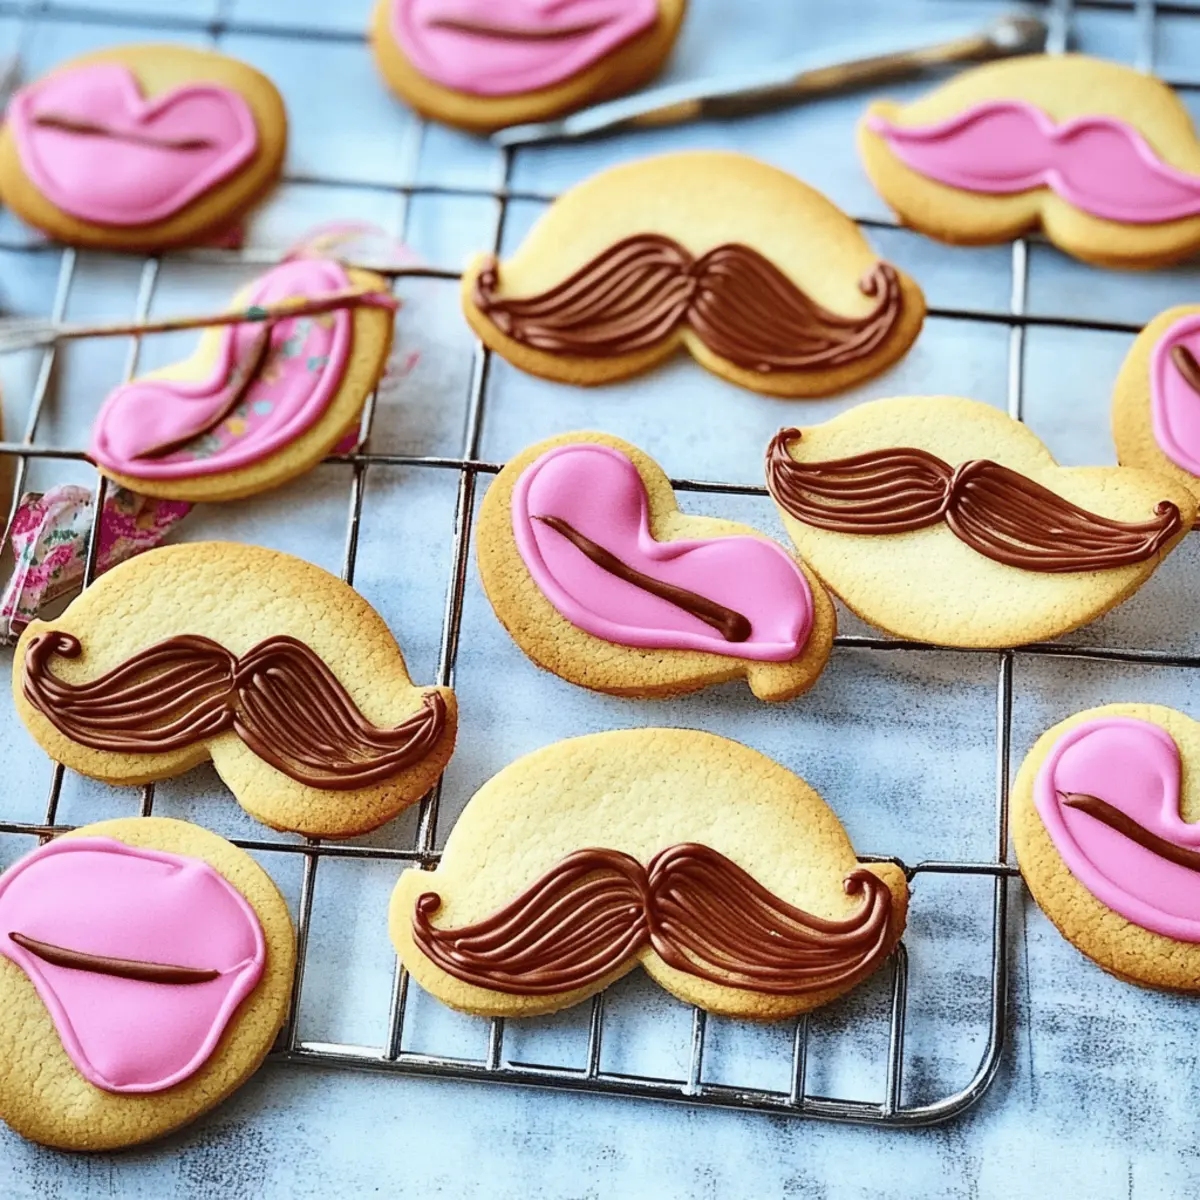
As I sifted through my pantry, a wave of nostalgia washed over me, reminding me of childhood days spent crafting the most whimsical treats. Enter Funny Face Cookies, adorned with quirky moustaches and retro lips—these delights bring a sense of joy and creativity to any occasion. Perfect for parties, these iced cookies are not only a visual feast but also a crowd-pleaser that draws smiles from guests of all ages. Making them is a fun-filled activity that turns the kitchen into a vibrant arena of imagination, leaving you with scrumptious cookies and cherished memories. So, are you ready to dive into the playful world of cookie decorating? Let's turn baking into an art!
Why Are Funny Face Cookies a Must-Bake?
Playful Creativity: These cookies aren’t just treats—they're a canvas for your artistic flair! Imagine the smiles as guests discover their quirky designs.
Sweet Appeal: The blend of flavors and textures—from the buttery base to the vibrant icing—makes each bite a delightful surprise.
Versatile Fun: Perfect for weddings, children's parties, or just a cozy gathering, these cookies adapt to any occasion effortlessly.
Easy to Customize: Feel free to switch up the designs for seasonal events, like adding pumpkin shapes for Halloween or experimenting with flavors.
Memorable Moments: Making Funny Face Cookies turns baking into a fun family activity, leaving you with delicious treats and heartwarming memories to cherish.
Funny Face Cookies Ingredients
Get ready to whip up these whimsical delights!
For the Cookie Dough
- Soft Butter – Essential for tenderness; make sure it’s at room temperature for easy mixing.
- Golden Caster Sugar – Provides sweetness and a lovely texture; can be substituted with regular caster sugar if needed.
- Egg Yolk – Adds richness and moisture; can be replaced with applesauce for a vegan alternative.
- Vanilla Extract – Enhances flavor; opt for imitation vanilla if you’re keeping an eye on the budget.
- Lemon Zest – Infuses a bright aroma; orange zest can work as a delightful substitute.
- Plain Flour – Forms the backbone of your cookies; all-purpose flour works just as well.
- Salt – Balances sweetness; feel free to omit for low-sodium diets.
For the Icing
- Icing Sugar – Sweet base for your icing; swap with powdered monk fruit sweetener for a low-sugar version.
- Egg White – Helps create a glossy finish for your icing; aquafaba is a great vegan alternative.
- Pink and Brown Food Colouring Pastes – Bring life to your designs; consider using natural dyes for a healthier option.
- Edible Glitter – Adds a sparkle! It’s optional, so you can skip it if you prefer a simpler look.
For Support
- Cake Pops or Lolly Sticks – Provide stability for the cookies; make sure to choose sturdy options to avoid breakage.
Now that you have the ingredients for these Funny Face Cookies, let’s bring a smile to everyone’s face with your wonderful creations!
Step‑by‑Step Instructions for Funny Face Cookies
Step 1: Dough Preparation
Begin by creaming together softened butter and golden caster sugar in a mixing bowl until the mixture appears light and fluffy, about 3-4 minutes. Incorporate the egg yolk, vanilla extract, and lemon zest, mixing until well combined. Gradually sift in the plain flour and salt, stirring gently until a soft dough forms. Once your dough is ready, wrap it in plastic wrap and chill it in the refrigerator for 30 minutes to firm up.
Step 2: Cookie Shaping
Preheat your oven to 180°C (350°F) while rolling out the chilled cookie dough on a lightly floured surface to a thickness of about 5mm. Using an 8cm round cookie cutter, cut out the dough, and then creatively shape each round into whimsical lips and moustaches. After shaping, place the cookies on a lined baking sheet and chill them for an additional 10 minutes to help them maintain their designs during baking.
Step 3: Stick Insertion
Once the cookies are well-chilled, carefully insert a cake pop or lolly stick into the base of each cookie shape, ensuring that they stand upright and are properly supported. This step is vital for creating sturdy Funny Face Cookies, so take your time to ensure they're inserted securely.
Step 4: Baking
Bake the cookies in your preheated oven for approximately 12 minutes, or until they turn a pale golden color. Keep an eye on them towards the end of the baking time to prevent overbaking. Once done, remove the cookies from the oven and transfer them to a wire rack to cool completely, allowing them to firm up and develop that perfect crispy edge.
Step 5: Icing Preparation
While the cookies cool, prepare the icing. In a clean bowl, whisk together the egg white and icing sugar until the mixture reaches a thick but smooth consistency. Divide the icing into separate bowls for coloring, adding pink and brown food coloring pastes to achieve your desired shades. Mix until the colors are vibrant, ready for piping.
Step 6: Decorating the Cookies
Using a piping bag fitted with a fine nozzle, outline the edges of each Funny Face Cookie with your colored icing. After outlining, fill in the centers with additional icing to create bold and vibrant designs. For added flair, consider sprinkling them with edible glitter while the icing is still wet. Allow these delightful cookies to dry briefly before moving on to the next decorating step.
Step 7: Finishing Touches
Once the initial icing is set, use darker icing to add intricate details to each Funny Face Cookie, like eyes and moustache curls. If you desire an extra touch of sparkle, sprinkle on more edible glitter. Finally, let the icing set completely before serving; this ensures a clean and beautiful finish to your scrumptious treats.

How to Store and Freeze Funny Face Cookies
Airtight Container: Store your decorated Funny Face Cookies in an airtight container at room temperature for up to 7 days to keep them fresh and flavorful.
Fridge: If you want to extend their shelf life, feel free to refrigerate them. Just be aware that moisture in the fridge can affect the icing if not stored properly.
Freezer: For longer storage, freeze your cookies without icing in a single layer on a baking sheet. Once frozen, transfer them to a freezer-safe bag or container for up to 3 months.
Reheating: If you'd like to enjoy them warm again, simply pop them in the oven at a low temperature (around 150°C / 300°F) for a few minutes until just warmed through.
Funny Face Cookies Variations & Substitutions
Feel free to let your creativity run wild with these delightful cookie options and swaps!
- Dairy-Free: Replace butter with a vegan substitute like coconut oil or dairy-free margarine for a delicious non-dairy option.
- Flavor Twist: Mix in almond extract for a nutty flavor that pairs wonderfully with the sweetness of the icing.
- Sugar-Free: Use a sugar substitute like erythritol instead of caster sugar to create a healthier version for those watching their sugar intake.
- Seasonal Shapes: Get festive by shaping cookies into seasonal themes, such as pumpkins for Halloween or hearts for Valentine’s Day.
- Nutty Crunch: Add finely chopped nuts, such as walnuts or pecans, into the dough for added texture and flavor—just remember to adjust the egg content a bit for binding!
- Colorful Decor: Experiment with vibrant natural food dyes made from beet juice or spinach powder to give your icing a more health-conscious twist.
- Fruit Zest Variants: Switch out lemon zest for orange or lime zest to introduce a different citrus element that brightens the flavors beautifully.
- Chocolate Icing: For a delicious chocolate twist, mix cocoa powder into your icing sugar for a rich, chocolatey finish that will have everyone reaching for seconds!
Don't forget, these whimsical treats can also be enjoyed alongside other sweet goodies. Try serving them with our delightful Peaches Cream Cookies or ring in the holiday spirit with gorgeous Eggnog Cookies Soft while you’re at it! Happy baking!
Make Ahead Options
These Funny Face Cookies are a delight to make ahead, making them perfect for busy schedules! You can prepare the cookie dough and refrigerate it for up to 3 days; just be sure to wrap it tightly in plastic wrap to prevent drying out. Additionally, once the cookies are baked and cooled, they can be decorated and stored in an airtight container for up to a week—keeping their vibrant designs intact. When you’re ready to serve, you can add any final touches or extra icing immediately before enjoyment, ensuring your treats are just as charming and delicious as fresh-baked! By prepping these cookies ahead of time, you'll save yourself the stress of last-minute baking, allowing for a more relaxed celebration.
What to Serve with Funny Face Cookies
These whimsical treats add a dash of joy to any gathering, complemented perfectly by playful side dishes and delightful drinks.
-
Milkshake Magic: A classic vanilla or chocolate milkshake pairs beautifully, bringing a nostalgic touch that enhances the cookie experience. The creamy texture and sweet flavor are irresistibly indulgent.
-
Fruit Skewers: Fresh fruit skewers offer a refreshing contrast to the sweetness of the cookies. Their vibrant colors and juicy bites add a nutritious aspect to the spread, appealing to guests of all ages.
-
Ice Cream Sundae Bar: Set up a DIY sundae station with a variety of toppings. The combination of warm cookies with cold ice cream creates a delightful temperature contrast, making every bite memorable!
-
Chocolate Dipped Pretzels: These provide a crunchy, salty balance to your sweet cookies. The combination of sweet and salty flavors is irresistible, bringing delight to your taste buds.
-
Themed Cupcakes: Whimsically decorated cupcakes that match the cookie designs create a cohesive and festive dessert table. Their soft texture perfectly complements the crispy edge of the Funny Face Cookies.
-
Lemonade Spritzers: Serve bubbly lemonade with fresh mint for a refreshing drink option. This zesty beverage brightens the palate and serves as a delightful counterpoint to the rich sweetness of the cookies.
-
Chocolate Fondue: A fun and interactive dessert where guests can dip their cookies into warm, melted chocolate. The rich chocolate and playful cookies create a perfect harmony of flavors.
-
Frozen Yogurt Parfaits: Layered parfaits with granola, yogurt, and berries create a textural contrast and freshness that complements the cookies. They offer a healthier dessert option that's still enticing.
-
Fruit Sorbet: A light sorbet provides a refreshing finish to the meal. The fruity flavors cleanse the palate after enjoying the sweet cookies, leaving everyone feeling satisfied.
Expert Tips for Funny Face Cookies
- Butter Temperature: Ensure your butter is at room temperature for smooth mixing. Cold butter can lead to a crumbly dough, affecting the cookie's texture.
- Dough Chilling: Don’t skip chilling the dough! It helps the cookies maintain their whimsical shapes while baking, preventing them from spreading too much.
- Icing Consistency: Adjust the icing thickness with a few drops of water if needed. Too runny of icing can create a messy look, while too thick may be hard to pipe.
- Piping Practice: If you're new to piping, practice on parchment paper first. This can help you get the hang of creating clean designs on your Funny Face Cookies.
- Storage Method: Once decorated, store your cookies flat in an airtight container. This keeps the icing intact and prevents smudging or sticking.
Funny Face Cookies Recipe FAQs
How do I select the right butter for my Funny Face Cookies?
Absolutely! Use unsalted butter that’s been softened to room temperature. This allows for easy mixing and a tender texture. Look for butter that feels soft but isn’t melted, ensuring it will incorporate smoothly into your dough.
How should I store my decorated Funny Face Cookies?
It's best to keep your iced cookies in an airtight container at room temperature for up to 7 days. This helps retain their texture and flavor. If you've got a batch for later, consider refrigerating them, though watch out for moisture that might affect the icing. For long-term storage, freeze them without icing wrapped in plastic wrap.
Can I freeze Funny Face Cookies? How?
Yes, you can! After shaping the cookies but before baking, place them in a single layer on a baking sheet and freeze until solid. Once frozen, transfer them to a freezer-safe bag or container. They can be stored for up to 3 months. When you're ready to bake, just preheat your oven and bake them straight from the freezer; no need to thaw!
What should I do if my icing isn't the right consistency?
If your icing is too thick, simply add a few drops of water and mix until you reach the desired smoothness. Conversely, if it’s too runny, you can add more icing sugar until thickened. Make sure to mix thoroughly between adjustments. A good consistency will help you pipe clean designs on your Funny Face Cookies!
Are there any dietary considerations I should keep in mind when making these cookies?
Definitely! For those with allergies or dietary restrictions, you can substitute the egg yolk with applesauce for a vegan option and use aquafaba instead of egg whites in the icing. Additionally, choose gluten-free flour blends if you're catering to gluten sensitivities. Always double-check ingredient labels for allergens.
How long do the flavors last in these cookies after baking?
After baking, Funny Face Cookies will maintain their delightful flavors for up to a week, when stored properly! To enjoy them at their freshest, consume them within the first few days. Over time, flavors may mellow, but they will still be delicious.

Funny Face Cookies: Fun Designs for Sweet Celebrations
Ingredients
Equipment
Method
- Cream together softened butter and golden caster sugar in a mixing bowl until light and fluffy, about 3-4 minutes. Incorporate egg yolk, vanilla extract, and lemon zest until well combined. Gradually sift in plain flour and salt, stirring gently until a soft dough forms. Wrap in plastic wrap and chill in the refrigerator for 30 minutes.
- Preheat your oven to 180°C (350°F). Roll out chilled cookie dough to 5mm thickness. Cut with an 8cm round cookie cutter, then shape each into whimsical lips and moustaches. Place on a lined baking sheet and chill for an additional 10 minutes.
- Insert a cake pop or lolly stick into the base of each cookie shape, ensuring they stand upright and are properly supported.
- Bake cookies in preheated oven for approximately 12 minutes until pale golden. Monitor to prevent overbaking. Transfer to a wire rack to cool completely.
- In a clean bowl, whisk together egg white and icing sugar until thick and smooth. Divide for coloring, adding pink and brown food coloring to achieve desired shades.
- Outline cookie edges with colored icing using a piping bag fitted with a fine nozzle. Fill centers with additional icing and sprinkle with edible glitter while wet.
- Use darker icing to add intricate details such as eyes and moustache curls. For extra sparkle, sprinkle on additional edible glitter. Allow icing to set completely before serving.


Leave a Reply