
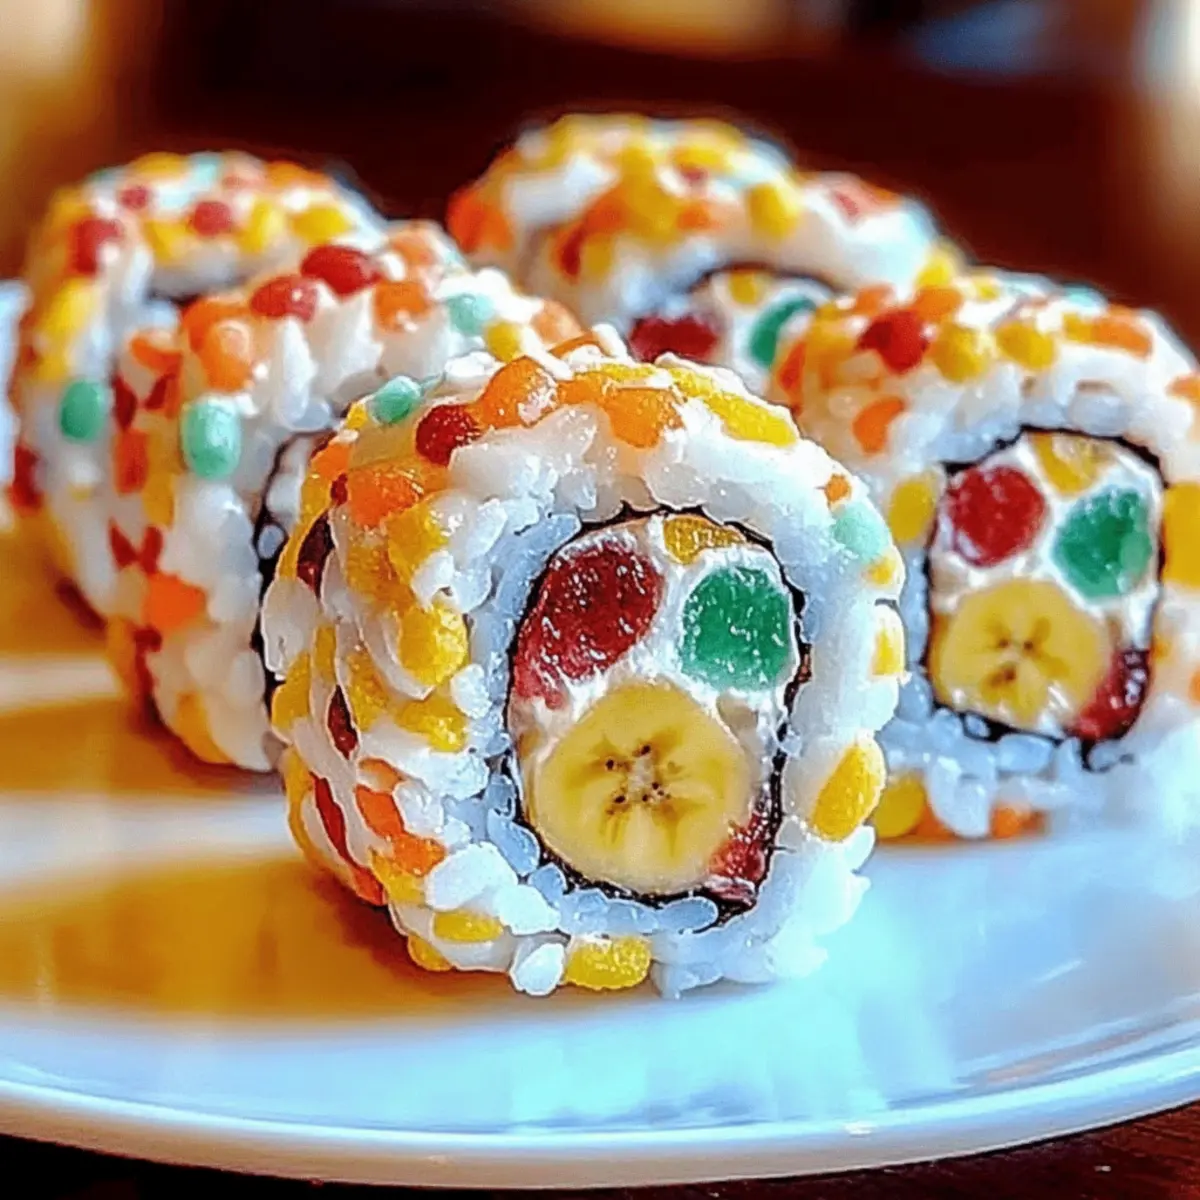
As I rummaged through my pantry the other day, a shocking realization hit me: the colorful box of Fruity Pebbles was calling my name! That delightful nostalgia swept over me, sparking the idea of creating a whimsical treat that would bring my sweet childhood memories right into the present. Enter Fruity Pebbles Sushi—a fun and easy dessert that’s perfect for both kids and adults alike. With its playful combination of crunchy cereal and soft bananas, this gluten-free delight is not only a fantastic way to engage young chefs but also a guilt-free way to satisfy those sweet cravings. Ready to roll up some smiles and bring a burst of color to your kitchen? Let’s dive in!
Why is Fruity Pebbles Sushi Irresistible?
Nostalgic Flavors: Every bite of this colorful delight brings you back to carefree childhood days. It’s the perfect way to indulge in sweet memories while treating your taste buds.
Kid-Friendly Fun: Get the little ones involved! This simple recipe is not only easy to prepare but also a creative kitchen project that will keep them engaged.
Customizable Options: Switch up the fillings and cereals for a unique twist every time. Whether you use strawberries instead of bananas or mix in different cereals, the possibilities are endless!
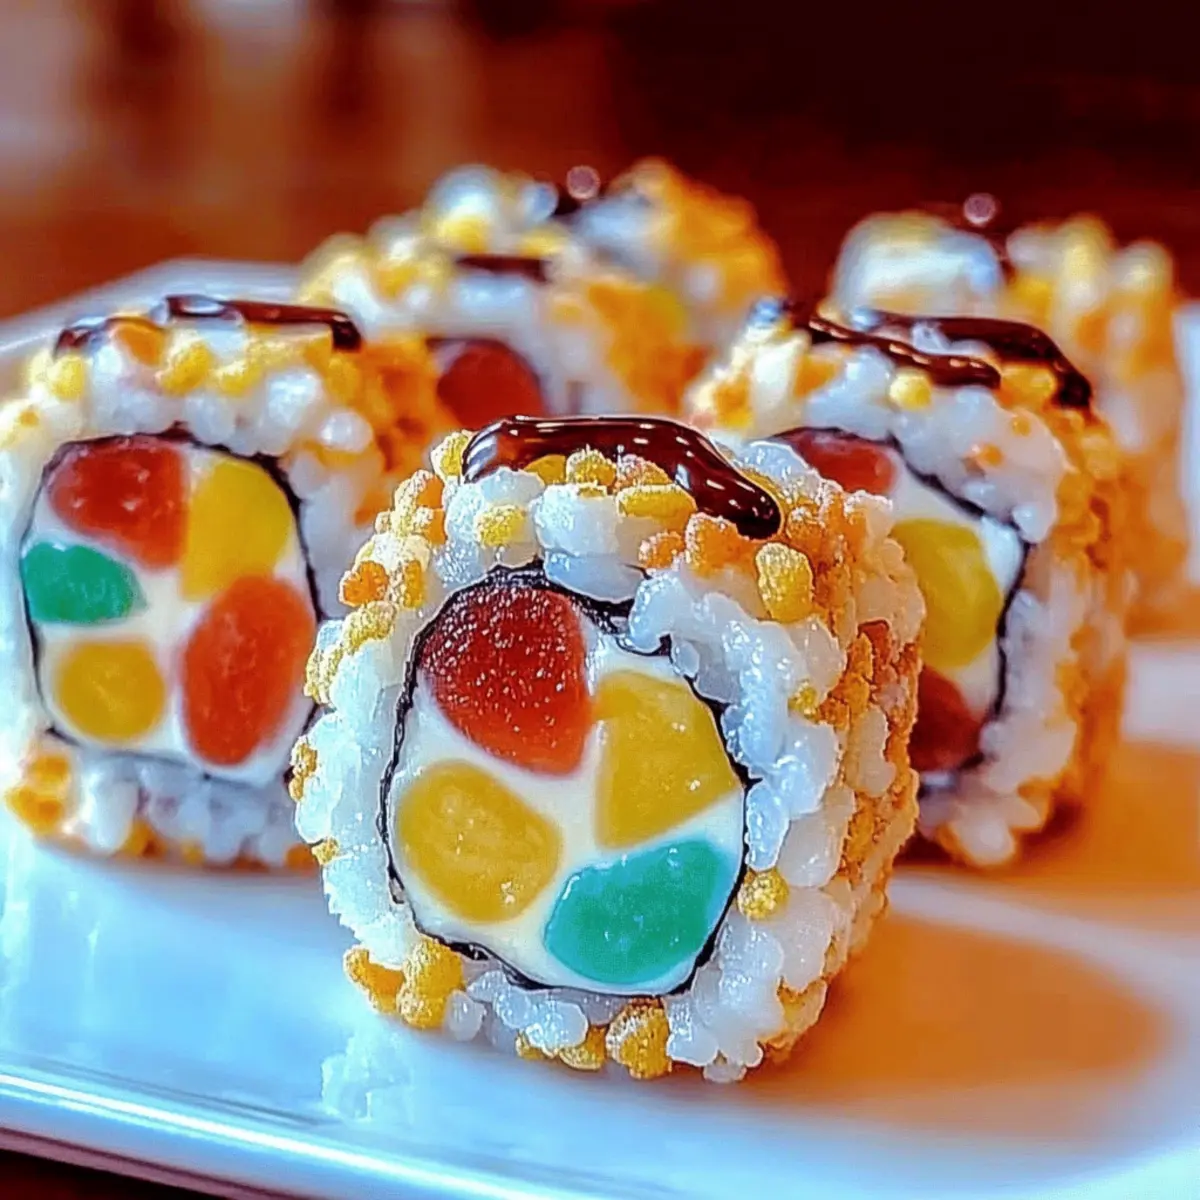
Eye-Catching Presentation: Wow your friends and family at gatherings with this Instagram-worthy dessert. Its vibrant colors are sure to impress at any party or movie night.
Quick and Easy: You’ll love how fast this recipe comes together—great for spontaneous cravings or last-minute events. For more fun treat ideas, check out our Vegan Sushi Indulge for a delicious variation!
Fruity Pebbles Sushi Ingredients
For the Sushi Mix
- Fruity Pebbles Cereal – The star of this dessert, providing crunch and vibrant color; feel free to mix in other colorful cereals for fun!
- Mini Marshmallows – These gooey bites act as a delicious binder; they help hold everything together in delightful sweetness.
- Unsalted Butter – Essential for melting the marshmallows, creating a creamy texture; coconut oil is a great dairy-free substitute.
For the Sushi Wrap
- Fruit Roll-Ups – These fruity sheets wrap up your sushi rolls; use any favorite fruit leather for a unique twist!
For the Filling
- Medium Bananas – A classic filling that adds natural sweetness and creaminess; swap in strawberries or kiwi for a fresh change!
For Serving
- Chocolate Syrup (Optional) – Drizzle on top for an extra layer of flavor and irresistible sweetness; a lovely touch to brighten up the Fruity Pebbles Sushi!
Feel free to get creative with this Fruity Pebbles Sushi recipe and enjoy every colorful bite!
Step‑by‑Step Instructions for Fruity Pebbles Sushi
Step 1: Melt the Butter
In a medium saucepan, melt 2 tablespoons of unsalted butter over medium heat, stirring frequently for about 2-3 minutes until fully melted. The butter should be a clear liquid without any browning. This creamy base will help transform your mini marshmallows into a gooey binding agent for your Fruity Pebbles Sushi.
Step 2: Incorporate the Marshmallows
Add 4 cups of mini marshmallows to the melted butter in the saucepan. Stir continuously for about 4-5 minutes until the marshmallows are entirely melted and the mixture is smooth and glossy. The heat helps blend the flavors perfectly, setting the stage for your colorful cereal treat.
Step 3: Mix in the Fruity Pebbles
Remove the saucepan from the heat and quickly mix in 5 cups of Fruity Pebbles cereal, stirring until everything is well combined and evenly coated with the marshmallow mixture. This should take about 1-2 minutes. The vibrant colors will pop, creating a delightful base for your Fruity Pebbles Sushi.
Step 4: Form the Cereal Mixture
Prepare a parchment-lined baking sheet by spreading the marshmallow-cereal mixture onto it. Use a spatula to flatten it into a rectangle about half an inch thick, ensuring an even layer. Allow it to cool for roughly 10-15 minutes until it’s firm enough to handle but still slightly warm to the touch.
Step 5: Prepare the Fruit Roll-Ups
While the mixture cools, lay out your fruit roll-ups flat on a clean surface. You’ll want enough room to work with each roll-up as you’ll be molding the Fruity Pebbles mixture to create the sushi. The fruity wraps will add a fun, chewy exterior to your delightful dessert.
Step 6: Assemble the Sushi Rolls
Once the cereal mixture has cooled slightly, take a portion and mold it into a rectangle shape at one end of the fruit roll-up. Place a medium banana lengthwise at the edge of the rectangle and carefully roll it up, enclosing the banana within the fruity mixture. Repeat this with the remaining rolls and bananas.
Step 7: Slice and Drizzle
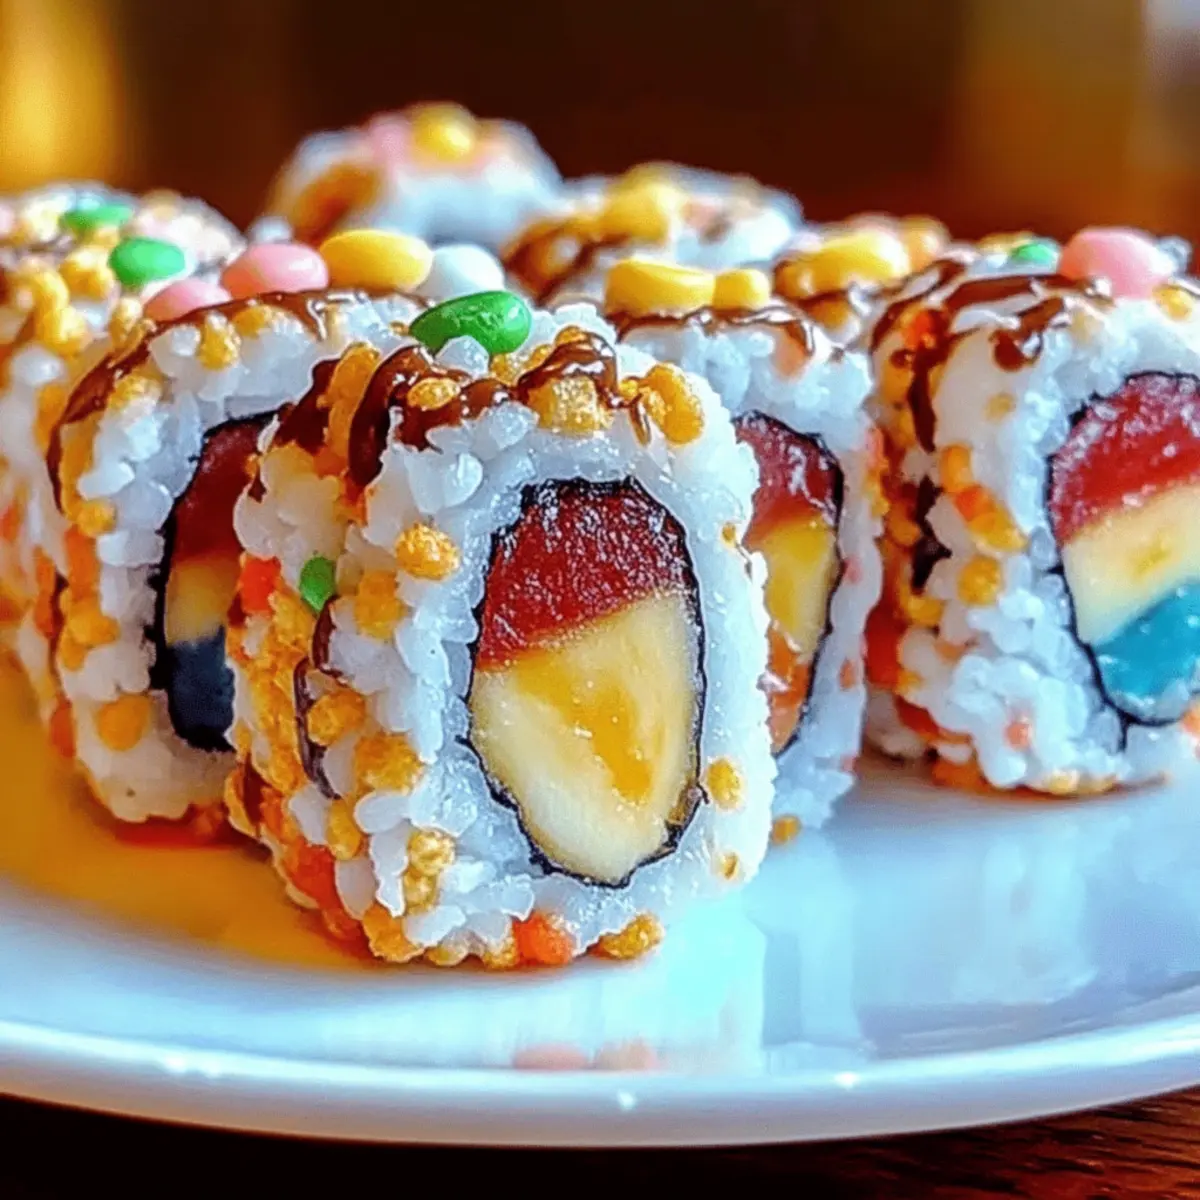
Using a sharp knife, slice each sushi roll into bite-sized pieces—about 1-2 inches thick. Arrange the slices on a serving platter, and if desired, drizzle with chocolate syrup for extra sweetness. The contrasting colors and textures will make your Fruity Pebbles Sushi a feast for the eyes!
What to Serve with Fruity Pebbles Sushi
Bring a world of color and flavor to your dessert table with delightful pairings that complement every colorful bite!
-
Fresh Fruit Salad: A vibrant mix of seasonal fruits brings a refreshing contrast to the sweetness of sushi rolls, enhancing every mouthful.
-
Chocolate Dipping Sauce: Drizzling a rich chocolate sauce on top adds decadent sweetness and depth, making each bite even more indulgent.
-
Whipped Cream: Light and airy, whipped cream provides a creamy texture that balances the chewy delight of the Fruity Pebbles Sushi.
-
Coconut Ice Cream: Creamy and tropical, coconut ice cream offers a refreshing finish that complements the fruity flavors beautifully.
-
Sparkling Citrus Punch: This fizzy drink adds a bubbly brightness to your meal, cleansing the palate between bites of the sweet sushi.
-
Birthday Cake Pop: A fun, nostalgic treat that mirrors the celebratory vibe of Fruity Pebbles Sushi, making any occasion more festive.
Imagine savoring these pairings alongside your colorful sushi rolls, transforming dessert time into an unforgettable feast!
How to Store and Freeze Fruity Pebbles Sushi
-
Room Temperature: Keep leftovers in an airtight container for up to 2 days to maintain freshness. Enjoy them as a quick snack or treat during this time!
-
Fridge: Store the sushi in a sealed container for up to 5 days. The texture may firm up, but they’ll remain tasty; just warm slightly in your hands before serving!
-
Freezer: Wrap individual sushi rolls tightly in plastic wrap and then place them in a freezer-safe bag for up to 1 month. Thaw in the refrigerator before indulging in your colorful dessert.
-
Reheating: If you prefer a softer texture, briefly heat in the microwave (10-15 seconds) before enjoying your Fruity Pebbles Sushi again!
Make Ahead Options
Fruity Pebbles Sushi is an absolute game-changer for busy home cooks looking to simplify dessert prep! You can prepare the marshmallow and Fruity Pebbles mixture up to 24 hours in advance; simply store it in an airtight container at room temperature to keep it fresh. The fruit roll-ups should be kept separate until you're ready to assemble the sushi rolls to avoid any sogginess. You can also slice the bananas and wrap them in film or place them in a resealable bag to maintain their freshness for up to 3 days. When you’re ready to serve, just roll everything together, slice, and drizzle with chocolate syrup for that ultimate fun treat without the last-minute rush! Enjoy the whimsical flavors just as if they were made fresh!
Expert Tips for Fruity Pebbles Sushi
-
Grease Your Hands: Use greased hands to handle the sticky marshmallow mixture easily without it sticking to your fingers.
-
Adjust Consistency: If the cereal mixture feels too firm, gently warm it on the stove again to soften. This will make forming rolls much easier.
-
Choose Sturdy Fruits: Ensure the bananas or other fruits are firm enough to withstand rolling; avoid overly ripe fruits that might squish in the sushi.
-
Mix and Match Cereals: Feel free to substitute Fruity Pebbles with other colorful cereals for a fun, unique flavor in each batch.
-
Enjoy Right Away: For the best texture and taste, serve the Fruity Pebbles Sushi soon after making. Leftovers can firm up but still make a tasty snack!
Fruity Pebbles Sushi: Creative Twists Await
Get ready to have some fun in the kitchen! Tailoring your Fruity Pebbles Sushi allows you to explore delightful flavors and textures with every bite.
- Dairy-Free: Substitute unsalted butter with coconut oil for a creamy, plant-based alternative that still binds your ingredients beautifully.
- Berry Blast: Swap out bananas for fresh strawberries or sliced kiwi. This juicy twist adds a tart contrast to the sweetness of marshmallows!
- Crunchy Variations: Try using Rainbow Cheerios or Trix cereal instead of Fruity Pebbles for different flavors and textures in your sushi rolls. Each cereal brings its own magic!
- Sprinkle Surprise: Garnish with colorful sprinkles before serving. Not only do they look fabulous, but they also add a fun crunch that kids will adore.
- Nutty Twist: Sprinkle some crushed nuts or sunflower seeds into the marshmallow mixture for added texture and a nutty flavor. It’s a great option if you want some extra crunch!
- Zesty Citrus: Add a light zest of lime to the cereal mixture before rolling; the citrusy pop will elevate your sushi with a refreshing tang that pairs beautifully with sweet marshmallows.
- Chocolate Heaven: Drizzle with melted chocolate instead of syrup for a rich, indulgent experience that’s sure to satisfy any chocolate lover in the house. You can never go wrong with chocolate!
- Fun Shapes: Use cookie cutters to create fun shapes from the sushi rolls, making them even more exciting for a kids’ party or as a creative snack option. Shapes like stars or hearts will make them enchanting!
By exploring these variations, you’ll create Fruity Pebbles Sushi that’s uniquely yours. If you’re looking for more inspiration, you might love trying out some Vegan Sushi Indulge for even more creative cooking. Happy rolling!
Fruity Pebbles Sushi Recipe FAQs
What types of cereal work best for this recipe?
Absolutely! While Fruity Pebbles are the star of this dessert for their vibrant colors, other colorful cereals like Trix or Rainbow Cheerios can also be used for variations in flavor and texture, adding their own fun twist!
How should I store leftover Fruity Pebbles Sushi?
You can keep leftovers in an airtight container at room temperature for up to 2 days to maintain their crunchiness. For longer storage, refrigerate them for up to 5 days, but note that they may firm up in texture. Just warm them in your hands or briefly in the microwave before serving for a softer bite!
Can I freeze Fruity Pebbles Sushi?
Yes, you can! Wrap each sushi roll tightly in plastic wrap and then place them into a freezer-safe bag for up to 1 month. When you're ready to enjoy them, simply thaw in the refrigerator overnight before indulging in this fun treat!
Are there any dietary considerations with this recipe?
Very! This recipe is gluten-free, but always check the cereal and other product labels to ensure they're safe for your dietary needs if you have allergies. Additionally, if you're looking for a dairy-free option, simply swap the unsalted butter for coconut oil.
What should I do if the marshmallow mixture is too sticky to handle?
If you find it challenging to work with the sticky mixture, I recommend greasing your hands with a little butter or oil. This greatly helps in shaping the sushi logs without the mixture sticking everywhere! If it's too firm, you can gently warm it over low heat to soften it before forming.

Fruity Pebbles Sushi: A Colorful Twist on Easy Snacks
Ingredients
Equipment
Method
- In a medium saucepan, melt the butter over medium heat for about 2-3 minutes.
- Add the mini marshmallows to the melted butter and stir continuously until smooth.
- Mix in the Fruity Pebbles cereal until well combined.
- Spread the mixture onto a parchment-lined baking sheet and flatten into a rectangle.
- Lay out the fruit roll-ups flat on a clean surface.
- Mold the cereal mixture into a rectangle on the fruit roll-up, add a banana, and roll it up.
- Slice each roll into bite-sized pieces and drizzle with chocolate syrup if desired.


Leave a Reply