
In a moment that felt like a scene straight out of a family comedy, my kitchen exploded with laughter as my kids eagerly flung cookie dough in every direction. That's when we decided to whip up some Bear Paw Cookies—a delightful recipe that not only satisfies sweet cravings but also brings the family together for some playful baking fun. These easy cookies are ready in just 30 minutes, making them a perfect match for busy schedules. Each soft and chewy treat, decorated with chocolate, is not only a sweet masterpiece but also a great way to ignite your little ones' creativity. Curious how to transform simple ingredients into these adorable paw-shaped goodies? Let’s dive in!
Why Are Bear Paw Cookies So Adorable?
Playful Design: Each cookie resembles a whimsical bear paw, making baking fun for the kids.
Quick Prep Time: Ready in just 30 minutes, perfect for busy families or spontaneous baking sessions!
Soft & Chewy Texture: Every bite offers a delightful mix of chewy cookie and melty chocolate, sure to satisfy sweet tooth cravings.
Creative Decorating: Involve your little ones in the decorating process, allowing them to express their creativity with chocolate “claws.”
Versatility in Variations: Experiment with different chocolate types or add nuts to customize these treats—just like our yummy Thumbprint Cookies Melt!
Bear Paw Cookies Ingredients
For the Cookie Dough
• Unsalted Butter – Provides richness and moisture; for a twist, use salted butter and reduce added salt slightly.
• Sugar – Adds sweetness and structure; consider substituting with brown sugar for a deeper flavor profile.
• Egg – Acts as a binder, adding moisture; no substitutions are necessary.
• Vanilla Extract – Enhances flavor; you can swap it with almond extract for a unique twist.
• All-Purpose Flour – The backbone of the cookie; use a gluten-free flour blend for a gluten-free version.
• Baking Powder – Acts as a leavening agent, ensuring a soft texture; no substitutions needed.
• Baking Soda – Collaborates with the acid in the recipe for that perfect rise; no alternatives are necessary.
• Salt – Balances sweetness; it can be omitted if you’re using salted butter.
For the Decoration
• Ghirardelli Dark Chocolate Melting Wafers – Used for the center of the paw decoration; feel free to use any melting chocolate you love.
• Semi-Sweet Chocolate Chips – Add visual appeal as "claws"; swap with milk chocolate chips for a sweeter touch.
With these simple yet delightful Bear Paw Cookies ingredients, you’re one step closer to making this charming treat with your family!
Step‑by‑Step Instructions for Bear Paw Cookies
Step 1: Preheat the Oven
Begin by preheating your oven to 350°F (175°C). This ensures that your Bear Paw Cookies will have the perfect baking environment, leading to a beautifully soft and chewy texture. While the oven warms up, gather your ingredients and equipment, including a mixing bowl, stand mixer, and a lined baking sheet.
Step 2: Prepare the Baking Sheet
While the oven preheats, line a cookie sheet with parchment paper. This step prevents sticking and makes cleanup a breeze. With your baking sheet prepared, you’re ready to move on to mixing the ingredients, ensuring your Bear Paw Cookies will bake evenly and come out perfectly.
Step 3: Cream Butter and Sugar
In your stand mixer, combine the softened unsalted butter and sugar. Beat them together on medium speed for about 2-3 minutes until the mixture becomes light and fluffy, creating a creamy texture that will serve as the base for your cookie dough. This step is crucial for ensuring that your cookies rise beautifully in the oven.
Step 4: Incorporate Egg and Vanilla
Next, add one egg and vanilla extract to the butter-sugar mixture. Mix until fully combined, which should take about 1-2 minutes. The egg acts as a binder, and the vanilla enhances the flavor of your Bear Paw Cookies, ensuring each cookie is as delicious as it looks.
Step 5: Combine Dry Ingredients
Gradually add the baking soda, baking powder, salt, and all-purpose flour to the wet mixture. Mix on low speed just until a soft dough forms, taking care not to overmix. You’ll know the dough is ready when it pulls away from the sides of the bowl and forms a cohesive ball, leaving you with a delightful base for your tasty cookies.
Step 6: Portion the Dough
Using a small ice cream scoop, form balls of cookie dough and, if desired, roll them in extra sugar for a sweet touch. Each ball should be about 1-1.5 inches in diameter. This step not only shapes your Bear Paw Cookies but also adds a lovely sweetness when baked, setting them apart from regular sugar cookies.
Step 7: Arrange on the Baking Sheet
Place the cookie balls on the prepared baking sheet, ensuring they are spaced about 2 inches apart. This spacing allows for even spreading while baking. Bake in the preheated oven for 9-12 minutes or until the edges turn golden and the centers look slightly soft, promising a deliciously chewy texture.
Step 8: Decorate the Cookies
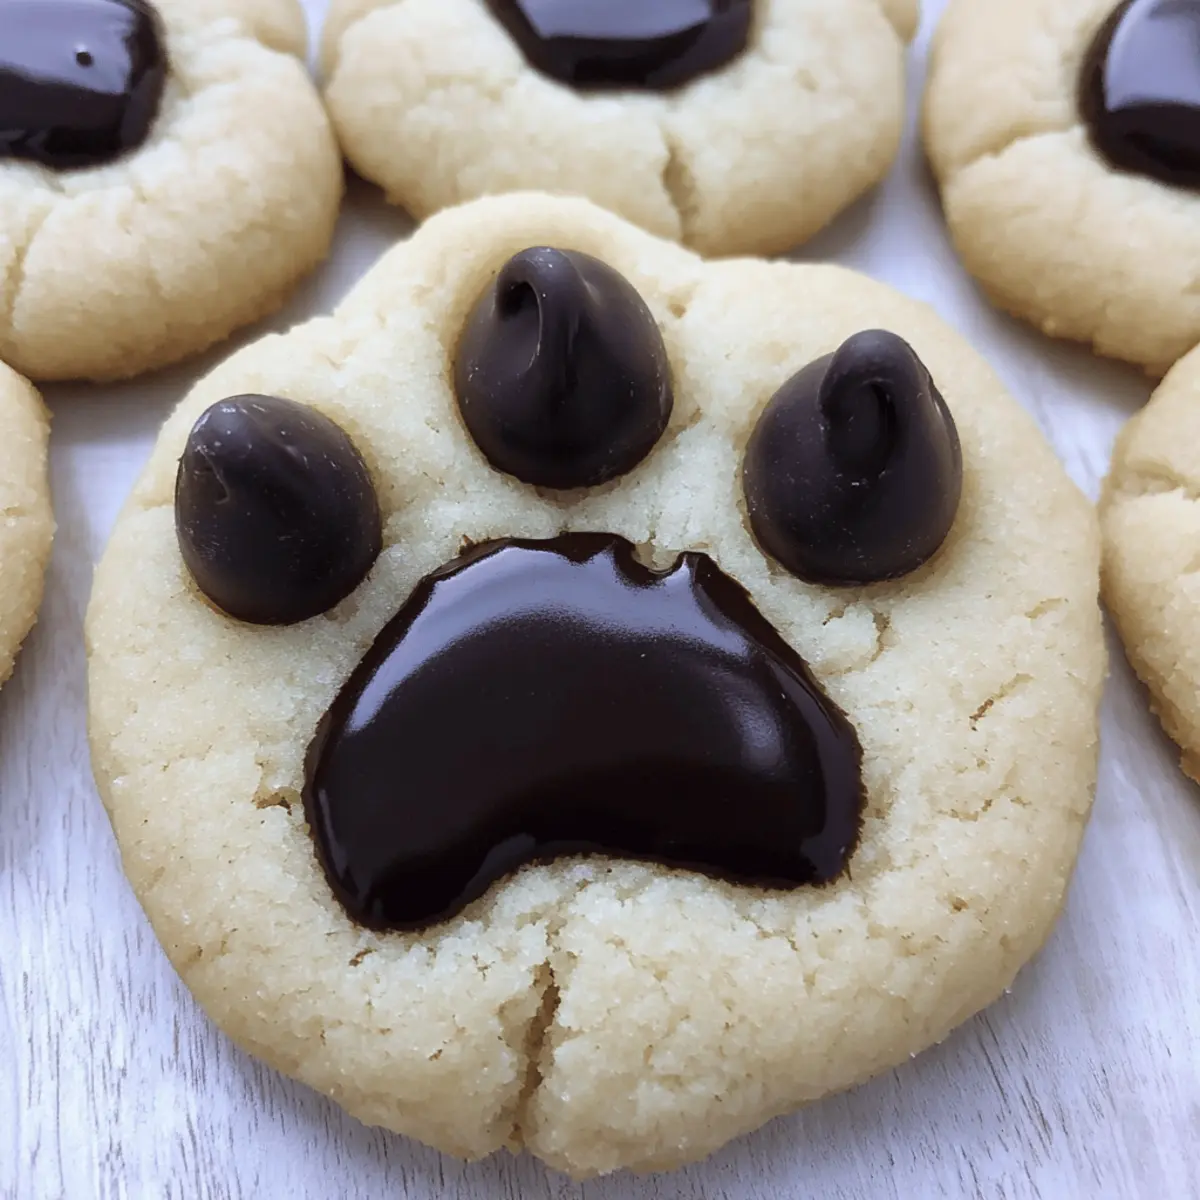
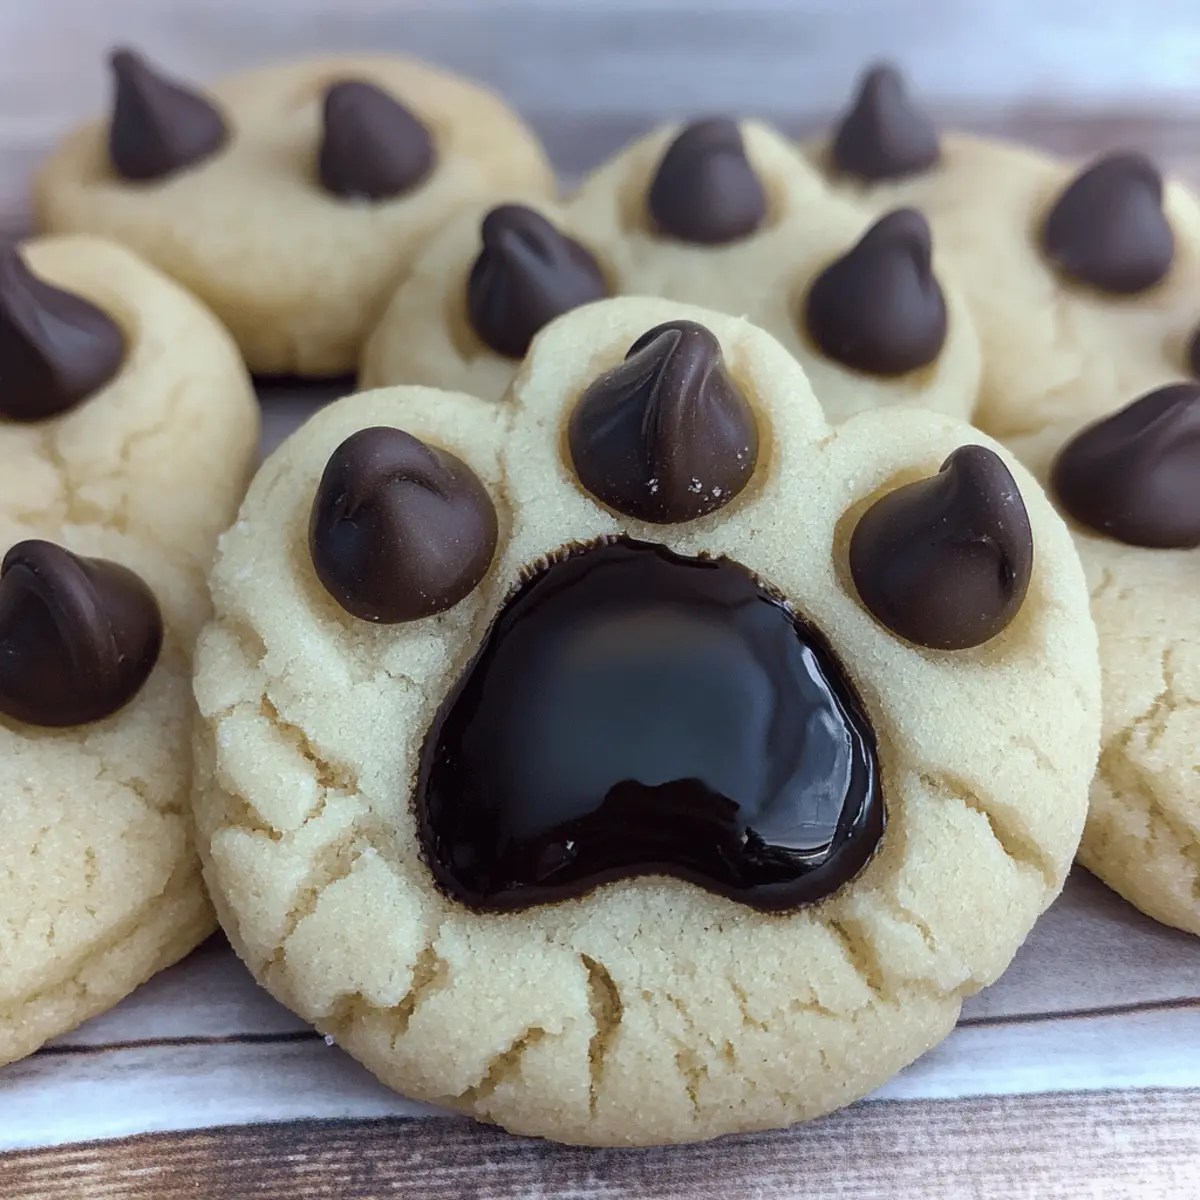
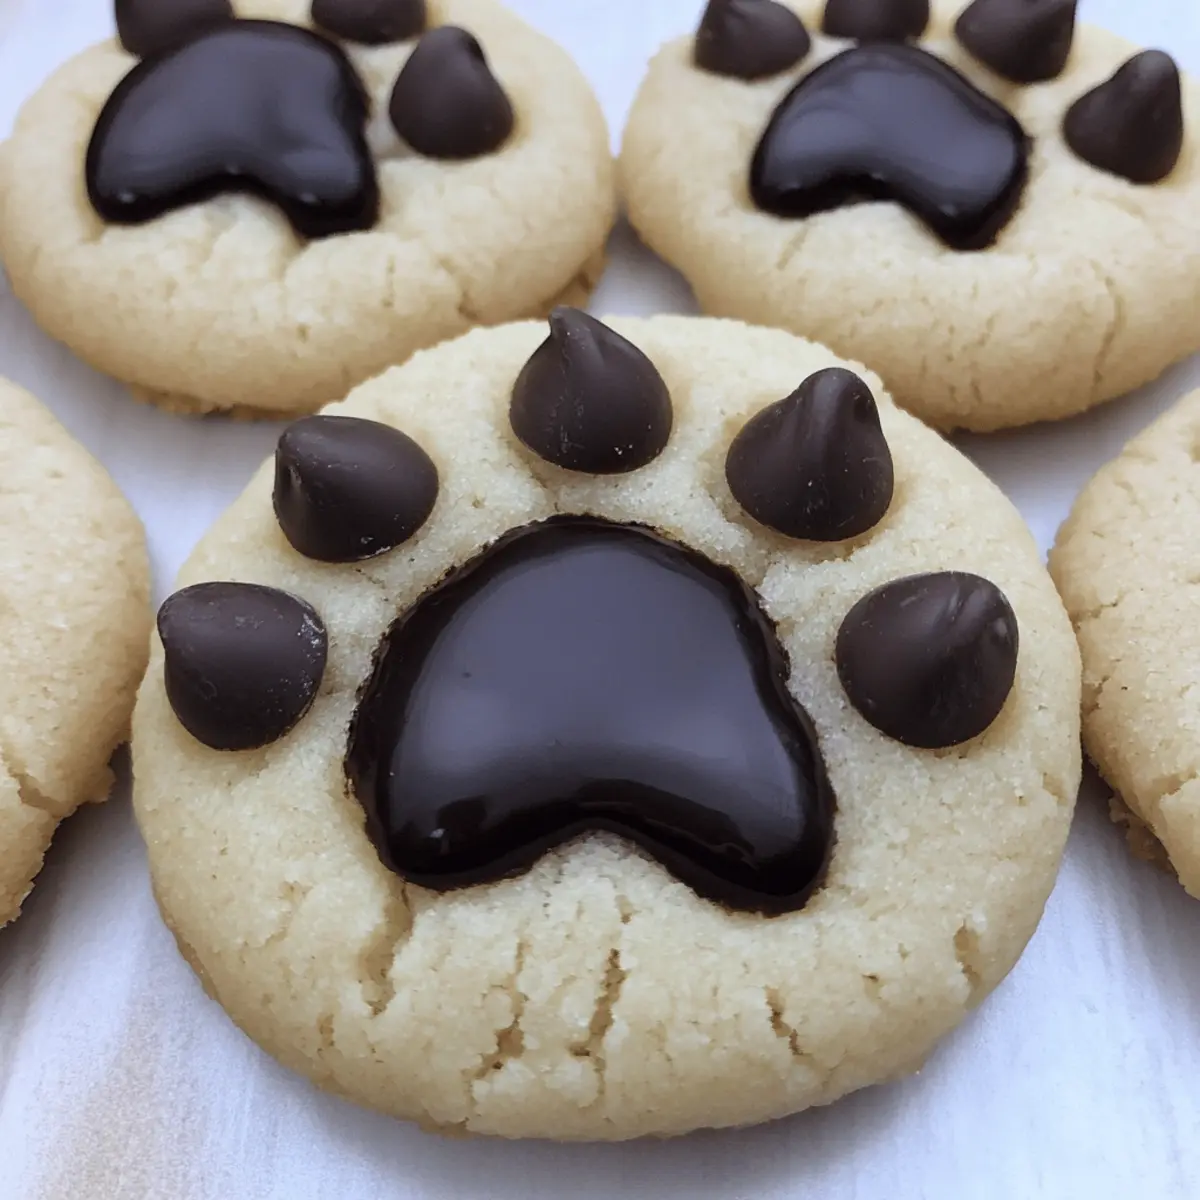
Once removed from the oven, immediately press a Ghirardelli dark chocolate wafer into the center of each warm cookie to create the paw pad. Then, place three semi-sweet chocolate chips above as "claws." This decorating step allows your Bear Paw Cookies to take on their whimsical appearance right before your eyes!
Step 9: Cool and Enjoy
Let the cookies cool on the baking sheet for about 30 minutes. This cooling time is essential as it allows the chocolate to set and the cookies to firm up slightly. Once cooled, your delightful Bear Paw Cookies are ready to be enjoyed—perfect for sharing with family or indulging in during a sweet moment!
Bear Paw Cookies Variations & Substitutions
Feel free to explore these fun twists and alternatives, adding your personal touch to the delightful Bear Paw Cookies.
- Colorful Melts: Swap dark chocolate wafers for brightly colored chocolate melts to make festive cookies for holidays or parties.
- Nutty Boost: Incorporate chopped nuts like pecans or almonds into the dough for added crunch and a nutty flavor. This twist enhances the texture, making every bite more exciting.
- Stuffed Surprises: Create a stuffed version by adding a dollop of peanut butter or Nutella in the center of the paw. This surprise adds richness and a creamy delight in every mouthful.
- Spiced Delight: Add a dash of cinnamon or nutmeg to the dough for a warm spice twist that complements the sweetness beautifully. It’s a surprising flavor that features a homey scent while baking.
- Fruit Flavors: Mix in dried fruits like cranberries or cherries for a delightful contrast in flavor and chewy texture. The fruit pairs wonderfully with chocolate, elevating the cookie experience!
- Oatmeal Variation: Incorporate quick oats in the dough for a heartier cookie, adding both texture and flavor. The oats create a delightful chew that balances perfectly with the sweetness.
- Lower Sugar: Reduce the sugar content slightly or use a sugar alternative to cater to dietary needs while still enjoying the sweet treat. You might be pleasantly surprised by how tasty they are!
- Zesty Twist: Add a teaspoon of orange or lemon zest to the dough for a refreshing citrus burst that brightens up the cookie's flavor profile. This zest elevates the cookies, adding a lovely aromatic quality.
With these variations, your Bear Paw Cookies will become even more delightful and tailored to your family’s taste preferences. If you're up for more delicious baking, you might also enjoy making Eggnog Cookies Soft or Mexican Wedding Cookies for a festive flair!
Make Ahead Options
These Bear Paw Cookies are a fantastic choice for meal prep, allowing you to save time in your busy schedule! You can prepare the cookie dough up to 24 hours in advance; simply wrap it in plastic wrap and refrigerate until you're ready to bake. If you'd like, you can also portion the cookie balls and freeze them for up to 3 months—just make sure to place them on a baking sheet first to freeze individually before transferring them to a freezer bag. When you're ready to enjoy these adorable treats, bake directly from frozen, adding a couple of extra minutes to the bake time. This way, you’ll have fresh, warm Bear Paw Cookies at your fingertips with minimal effort!
What to Serve with Bear Paw Cookies
Indulging in cookies is even sweeter when complemented with the perfect pairings that elevate your baking experience.
- Glass of Milk: A classic pairing, the creamy texture of milk enhances the cookies' flavors, making every bite delightful.
- Fresh Fruit Salad: The natural sweetness of fresh fruit balances the rich chocolate, providing a refreshing contrast to the cookies.
- Chocolate Milkshake: For chocolate lovers, a thick milkshake offers a decadent treat that mirrors the cocoa in the cookies.
- Warm Cup of Cocoa: Cozy up with hot chocolate on chilly days, as it amplifies the sweetness of Bear Paw Cookies—perfect for family movie nights.
- Vanilla Ice Cream: A scoop of vanilla ice cream pairs beautifully, lending a rich, creamy texture that complements the chewy cookies.
- Nutty Trail Mix: The crunch of nuts and dried fruit adds a contrasting texture, giving a wholesome twist to your sweet cookie experience.
- Chai Tea: Spiced chai tea introduces warm aromas and flavors that harmonize beautifully with the sweetness of the cookies.
- Peanut Butter Dip: A creamy peanut butter dip adds a savory note that contrasts wonderfully with the cookie's sweetness, making it fun for dipping.
Storage Tips for Bear Paw Cookies
-
Room Temperature: Store cookies in an airtight container at room temperature for up to 1 week to maintain their soft and chewy texture.
-
Refrigeration: For extended freshness, refrigerate them for up to 2 weeks. Just be sure to bring them back to room temperature before enjoying.
-
Freezer: Freeze Bear Paw Cookies in an airtight container or freezer bag for up to 3 months. Lay parchment paper between layers to prevent sticking.
-
Reheating: When ready to indulge, heat them in the microwave for 10-15 seconds or briefly in the oven at 350°F (175°C) to revive their delightful texture.
Tips for the Best Bear Paw Cookies
-
Room Temperature Butter: Ensure your butter is softened to room temperature for easy creaming; cold butter can lead to dense cookies.
-
Chill Dough: If your dough is spreading too much during baking, chill it in the fridge for 10-15 minutes before scooping to achieve the perfect shape.
-
Mixing Time: Use a stand mixer for better texture; avoid over-mixing the dough after adding flour to keep the cookies tender and soft.
-
Decorating Fun: Get the kids involved in decorating! Allow them to place chocolate “claws” to enhance creativity with these Bear Paw Cookies.
-
Storage Tips: Store your cookies in an airtight container at room temperature for up to one week, keeping them soft and chewy for longer.

Bear Paw Cookies Recipe FAQs
What type of sugar should I use for Bear Paw Cookies?
You can use granulated sugar for this recipe, which will give you classic sweetness and structure. If you prefer a richer flavor, substitute with brown sugar. It’s essential to follow the measurements as both types of sugar serve a purpose in texture and taste!
How should I store Bear Paw Cookies to keep them fresh?
Absolutely! Keep your cookies in an airtight container at room temperature for up to one week. If you want to extend their shelf life, you can refrigerate them for up to two weeks. Remember to bring them back to room temperature before you enjoy them for the best experience!
Can I freeze Bear Paw Cookies?
Very! You can freeze these delightful treats for up to 3 months. To do this, arrange the cookies in a single layer in an airtight container or freezer bag and place parchment paper between layers to prevent sticking. When you’re ready to enjoy them, simply thaw at room temperature or warm them up slightly in the microwave.
What should I do if my cookie dough is too sticky to work with?
If your dough feels overly sticky, don't fret! You can sprinkle a little extra flour on your hands or the work surface while shaping the cookie balls. Additionally, chilling the dough in the fridge for about 10-15 minutes helps firm it up, making it much easier to handle.
Are Bear Paw Cookies safe for kids with allergies?
It's essential to check the ingredient list for any allergies that might be present. This recipe contains eggs and all-purpose flour, which can be allergens for some children. For a gluten-free version, use a suitable gluten-free flour blend and ensure that all other ingredients are free from allergens. Always consult the packaging for any nut-related allergen concerns, especially if you're using chocolate chips.
What’s the best way to decorate Bear Paw Cookies with chocolate?
To achieve the best results when decorating, work with the cookies while they're still warm. After removing them from the oven, press a Ghirardelli dark chocolate wafer into the center of each cookie to form the paw pad and arrange three semi-sweet chocolate chips above it for the claws. Doing this while the cookies are warm will allow the chocolate to melt slightly and adhere better, enhancing the visual appeal of your Bear Paw Cookies!
Delightful Bear Paw Cookies Your Kids Will Love to Make
Ingredients
Equipment
Method
- Preheat your oven to 350°F (175°C).
- Line a cookie sheet with parchment paper.
- In your stand mixer, cream together the unsalted butter and sugar for 2-3 minutes until light and fluffy.
- Add the egg and vanilla extract to the mixture and mix until fully combined for about 1-2 minutes.
- Gradually mix in baking soda, baking powder, salt, and all-purpose flour until a soft dough forms.
- Scoop balls of dough using a small ice cream scoop; each should be about 1-1.5 inches in diameter.
- Arrange cookie balls on the prepared baking sheet, spaced about 2 inches apart, and bake for 9-12 minutes.
- Immediately press a Ghirardelli dark chocolate wafer into the center of each cookie and place three chocolate chips above as 'claws.'
- Let the cookies cool on the baking sheet for about 30 minutes.


Leave a Reply