
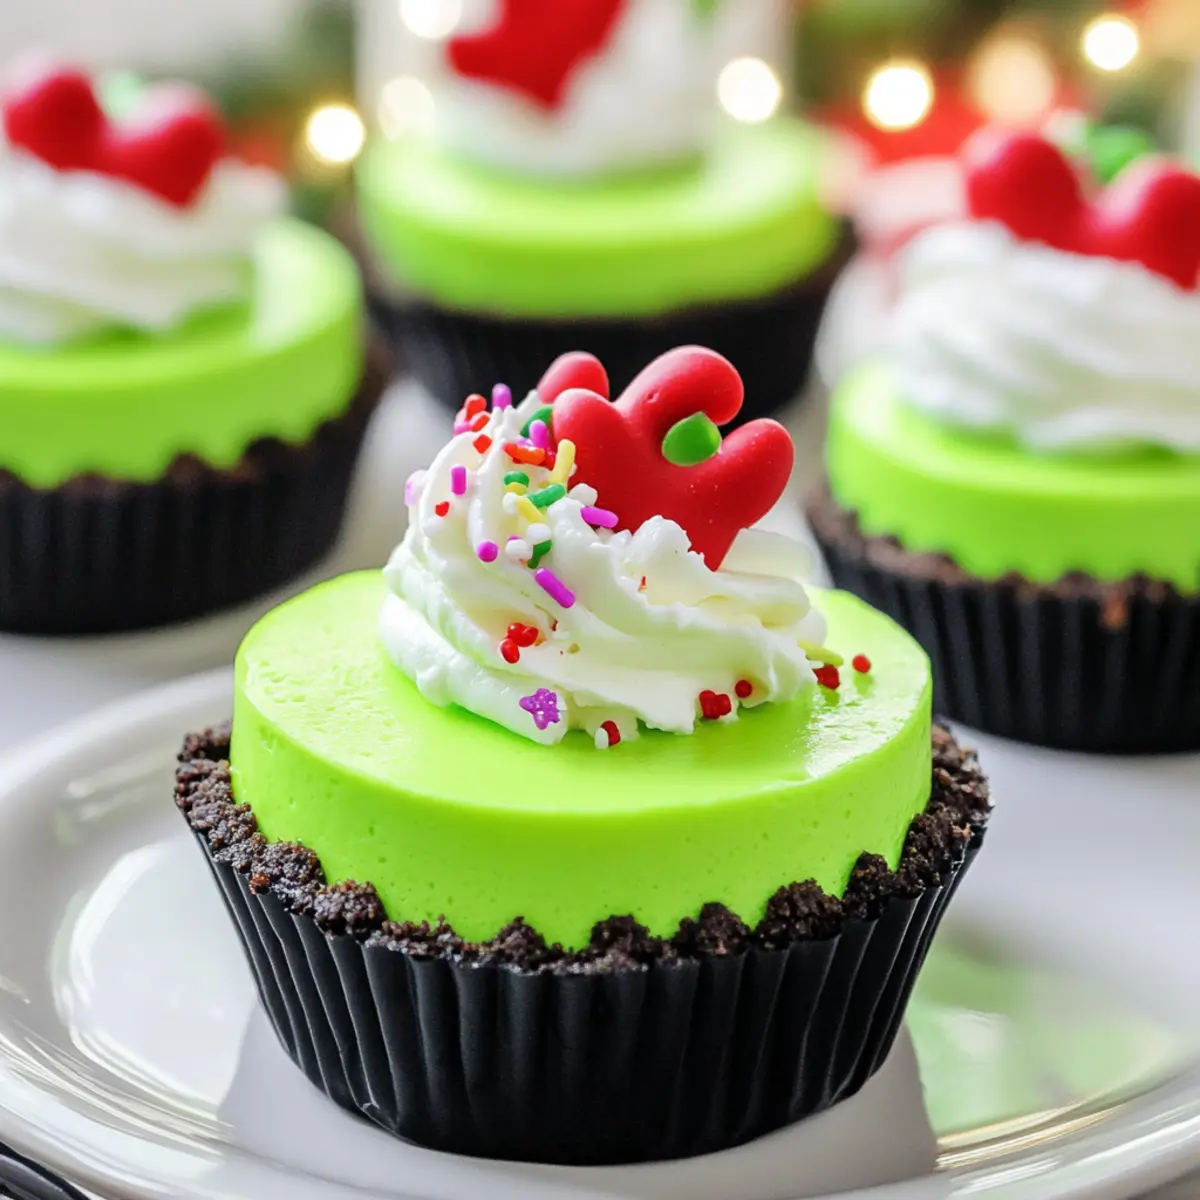
In the bustling kitchen of the holiday season, the laughter of children often blends with the aromas of baking delights. That’s precisely how I stumbled upon these Grinch Mini Cheesecakes—a whimsical nod to our favorite green mischief-maker. They’re not just adorable with their vibrant, neon green hue; they bring joy to every festive gathering. Perfectly nestled on a crunchy Oreo crust, these vegetarian Christmas desserts are quick to prepare and guaranteed to be a crowd-pleaser. Whether you’re hosting a holiday party or simply want to add a little cheer to your evening, these delightful mini cheesecakes will leave everyone smiling. So, are you ready to bring a sprinkle of holiday magic to your table? Let’s get started!
Why are these Grinch Mini Cheesecakes special?
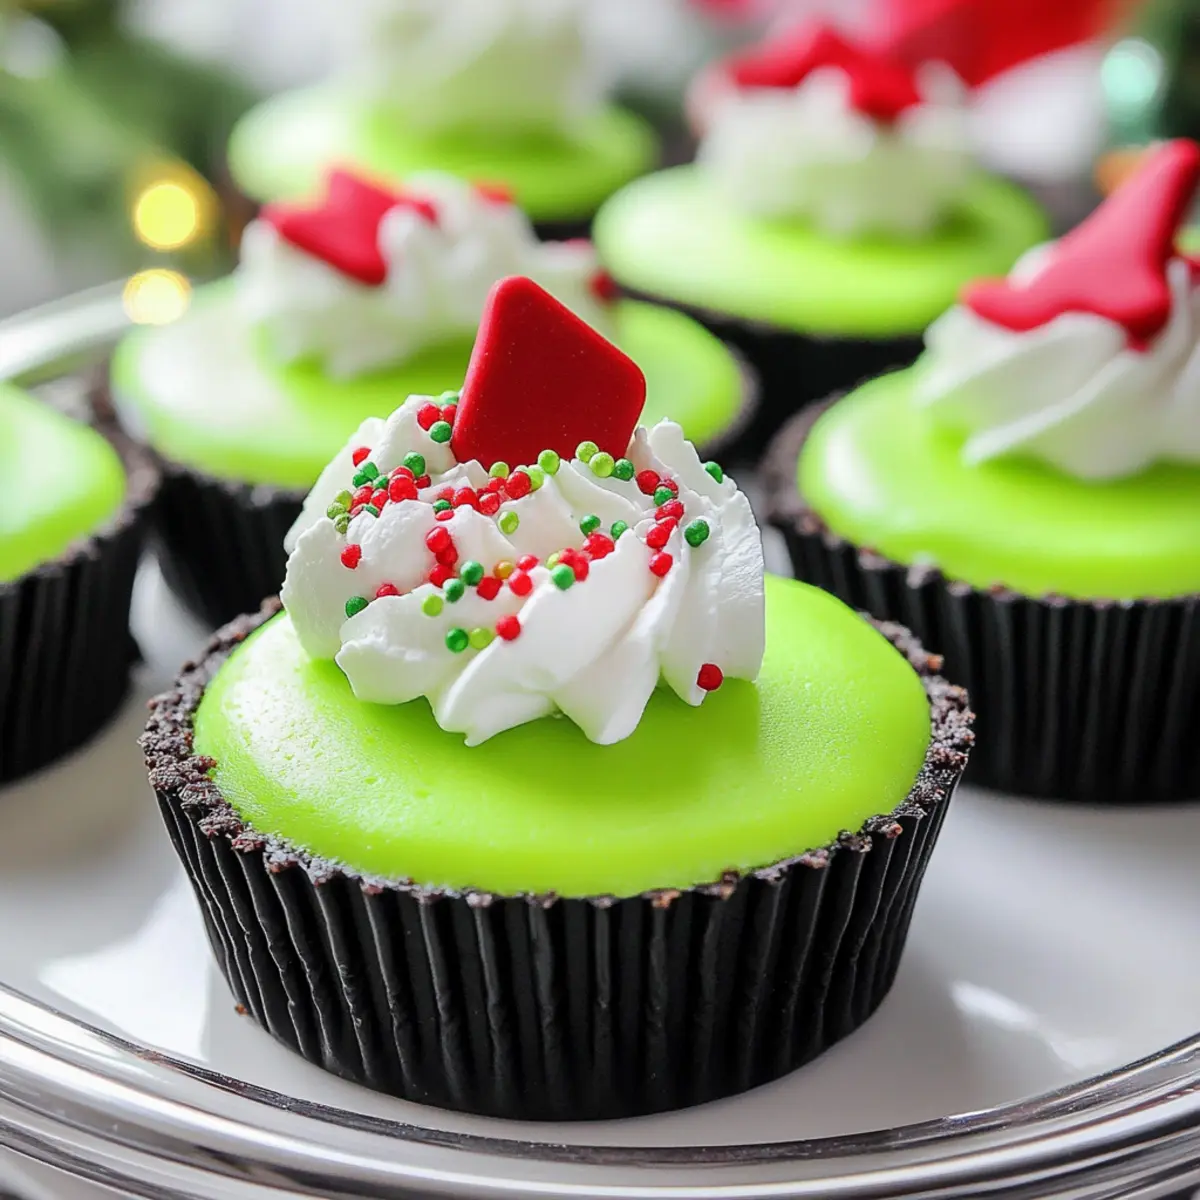
Unforgettable visual appeal: The vibrant neon green color of these cheesecakes instantly brings festive cheer to any table.
Quick and easy: With simple ingredients and straightforward steps, even beginner bakers can create these delightful treats.
Rich, creamy texture: The creamy filling, paired with a crunchy Oreo crust, offers a delectable bite that everyone will love.
Versatile options: You can easily customize these mini cheesecakes—try topping them with crushed candy canes for an extra festive touch.
Crowd-pleasing delight: They’re perfect for holiday gatherings, entertaining guests of all ages, especially children! If you’re looking for more holiday treats, check out my Mini Tropical Pavlovas for another fun dessert option.
Grinch Mini Cheesecake Ingredients
• Delight in the festive flavors!
For the Crust
- Oreo Crumbs – Provides a sweet, crunchy crust; you can swap with Graham cracker crumbs for a fun twist.
- Butter, Melted – Binds the Oreo crumbs together; for a vegan option, try using coconut oil instead.
For the Filling
- Cream Cheese, Softened (2 × 8 oz) – Gives the cheesecake its rich, creamy texture; ensure it's at room temperature for easy mixing.
- Sugar (1/2 cup) – Sweetens the filling; a sugar alternative can be used for a lower-calorie option.
- Eggs (2) – Adds structure and richness; for a vegan alternative, substitute with flax eggs (1 tablespoon flaxseed meal + 2.5 tablespoons water per egg).
- Vanilla (1 tsp) – Enhances the flavor; opt for pure vanilla extract for the best taste.
- Neon Green Food Coloring – Gives the festive Grinch-like color; this is optional but adds a pop of vibrancy.
These delicious Grinch Mini Cheesecakes are perfect for your holiday spread and embody the true spirit of festive treats!
Step‑by‑Step Instructions for Grinch Mini Cheesecakes
Step 1: Preheat and Prepare
Start by preheating your oven to 350°F (175°C) and lining a cupcake pan with festive cupcake liners. This setup ensures that your Grinch Mini Cheesecakes bake evenly and look delightful for any holiday gathering. While you prepare the crust and filling, it’s important to have the oven ready to create that perfect, creamy texture.
Step 2: Make the Crust
In a food processor, pulse about 10-11 Oreos until they form fine crumbs. Melt some butter and add it to the Oreo crumbs, mixing them together until they resemble wet sand. This combination creates a deliciously crunchy crust that adds depth to your Grinch Mini Cheesecakes. Once mixed, move on to the next step.
Step 3: Fill the Cupcake Liners
Evenly distribute the crumb mixture into the lined cupcake cups, using your fingers or the back of a spoon to press it down firmly. Aim for a compact layer that will hold up perfectly against the creamy filling. The contrast between the crunchy crust and smooth filling will make these festive treats irresistible.
Step 4: Prepare the Cheesecake Filling
In a medium bowl, add the softened cream cheese and sugar, mixing them together with an electric mixer until the mixture is smooth and free of lumps. This step is crucial for achieving the creamy texture that makes Grinch Mini Cheesecakes so delightful. Incorporate the eggs one at a time along with the vanilla extract, ensuring everything is blended well.
Step 5: Add a Pop of Color
Now, it’s time to bring your Grinch Mini Cheesecakes to life! Slowly mix in a few drops of neon green food coloring until you achieve your desired vibrant hue. This step not only makes them visually appealing but also captures the whimsical spirit of the holidays. Once combined, you're ready to fill the cupcake liners.
Step 6: Fill Each Cup
Spoon approximately 1/4 cup of the cheesecake batter into each cupcake liner, filling them to about three-quarters full. Ensure a smooth and even top using a small spatula or the back of a spoon. This step is crucial as it ensures that each mini cheesecake bakes evenly and develops that delightful creamy center.
Step 7: Bake to Perfection
Place the filled cupcake pan in the preheated oven and bake for 15-17 minutes. You'll know they’re done when the centers are slightly jiggly, which is key for that creamy texture in your Grinch Mini Cheesecakes. Be sure to keep an eye on them to prevent overbaking—this can dry out the delicious filling.
Step 8: Cool and Chill
Once baked, remove the pan from the oven and allow the cheesecakes to cool completely in the pan. This step helps them set perfectly without creating condensation on the liners. After they’ve cooled to room temperature, transfer them to the refrigerator and let them chill for at least 2 hours, or until firm.
Step 9: Serve and Enjoy
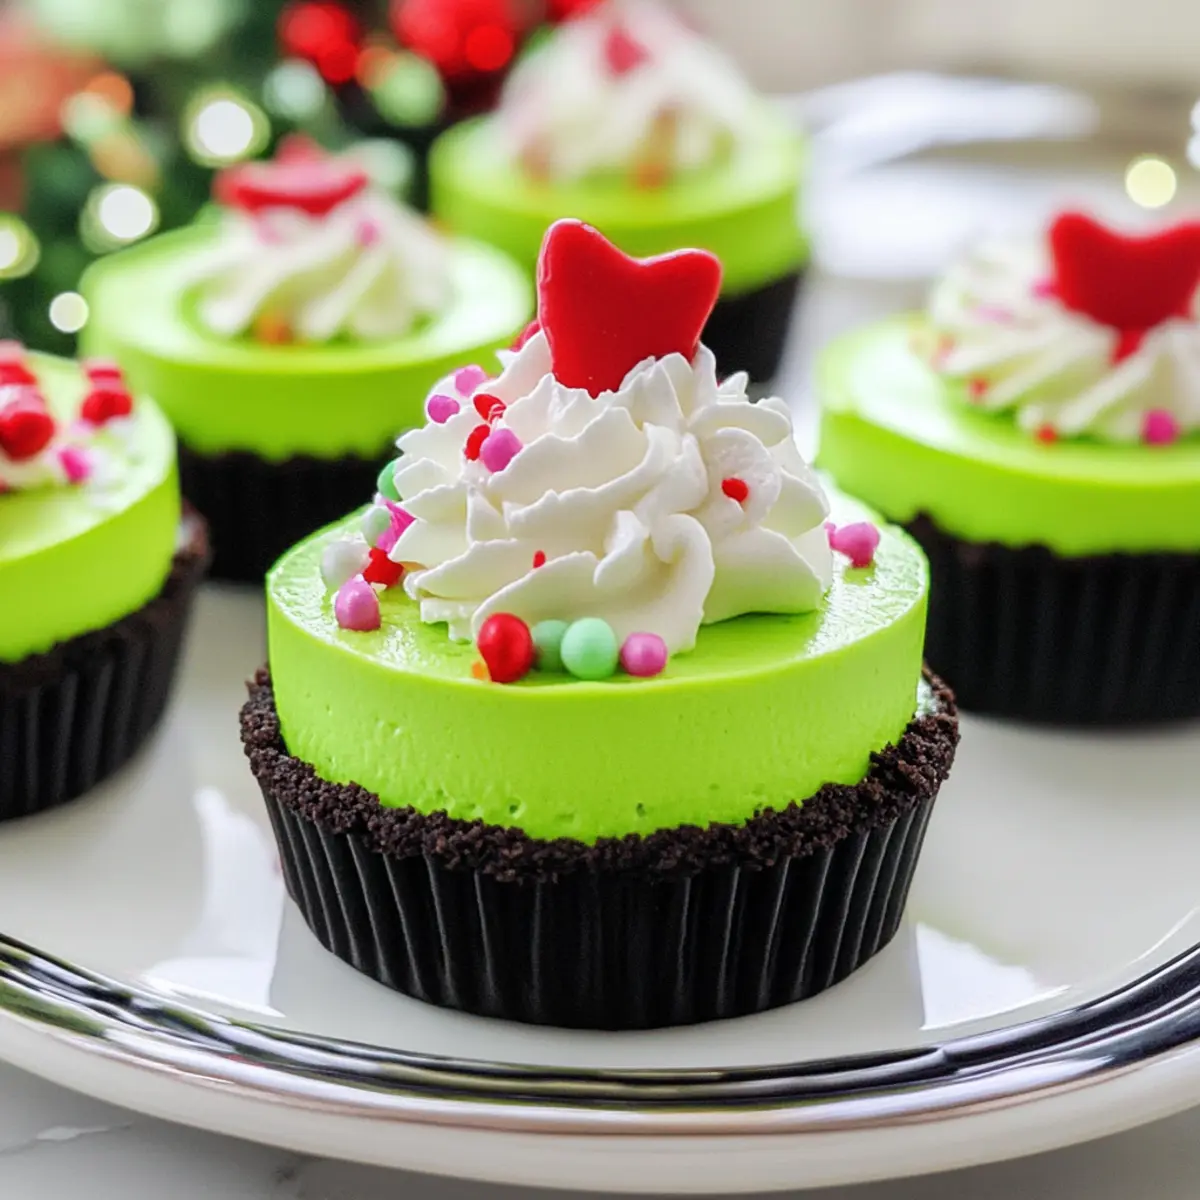
When ready to serve, consider topping your Grinch Mini Cheesecakes with whipped cream and festive sprinkles for that extra holiday charm. Present these delightful treats chilled, and watch as they bring smiles to everyone at your festive gathering. Their vibrant color and creamy texture truly embody the spirit of the season!
Expert Tips for Grinch Mini Cheesecakes
-
Room Temperature Cream Cheese: Ensure your cream cheese is at room temperature before mixing. This helps avoid lumps in your creamy filling and ensures smooth blending.
-
Don’t Overbake: Keep an eye on the baking time. The centers should remain slightly jiggly for that perfect, creamy texture in your Grinch Mini Cheesecakes.
-
Cool Gradually: Allow the mini cheesecakes to cool to room temperature in the pan before refrigerating. This prevents condensation from forming on the liners, keeping your treats looking pristine.
-
Creative Toppings: Experiment with festive toppings like crushed candy canes or holiday sprinkles. Not only does this enhance the visual appeal, but it also adds delightful textures and flavors.
-
Storage Tips: Store your Grinch Mini Cheesecakes in an airtight container in the refrigerator for up to 5 days or freeze un-topped for up to 2 months. Just remember to thaw before serving!
Grinch Mini Cheesecakes Variations & Substitutions
Feel free to tailor these delightful treats with a few personal twists that will bring extra joy to your gatherings.
- Festive Toppings: Add crushed candy canes or holiday-themed sprinkles for a colorful, crunchy finish. These toppings not only enhance the visual appeal but provide a delightful contrast to the creamy filling.
- Vegan Cream Cheese: Substitute standard cream cheese with your favorite vegan cream cheese to make these mini cheesecakes dairy-free. This way, everyone can indulge in the fun, festive flavors without a second thought!
- Sugar Swap: Use coconut sugar or a sugar alternative to sweeten the filling, perfect for those looking for lower-calorie options. It will give your cheesecakes a unique flavor while still keeping that delightful sweetness intact.
- Graham Cracker Crust: Switch the Oreo crumbs for Graham cracker crumbs for a slightly different flavor profile. It adds a touch of nostalgia and works wonderfully with the cheesecakes’ creamy filling.
- Flavored Extracts: Experiment with flavored extracts like almond or peppermint instead of vanilla to give your cheesecakes a unique twist. The subtle flavor variations can elevate these treats to a whole new level!
- Mini Cheesecake Bites: Pour the filling into mini muffin tins for bite-sized cheesecake delights. They’re not only adorable but also perfect for serving at holiday parties where guests love a variety of treats.
- Different Colors: Have fun mixing up the food coloring! Use red or blue for different festive occasions, like red for Valentine's Day or blue for winter celebrations. This adds a playful touch that always delights kids and adults alike!
- Add a Little Heat: For those who enjoy a hint of spice, try adding a pinch of cinnamon or nutmeg to the cheesecake filling. This will give your Grinch Mini Cheesecakes a warm and inviting flavor that’s perfect for the season.
Let your creativity flow and make these Grinch Mini Cheesecakes your own! And if you’re looking for more sweet treats, check out my Mini Tropical Pavlovas or try some other festive desserts for delightfully delicious inspiration!
What to Serve with Grinch Mini Cheesecakes?
Delight your guests with a full holiday meal featuring treats that complement the whimsical charm of these vibrant desserts.
-
Hot Cocoa Bar: A warm, rich cocoa station with toppings like marshmallows and whipped cream keeps the festive vibe alive.
-
Chewy Gingerbread Cookies: Their spicy sweetness harmonizes beautifully with the creamy cheesecakes, enhancing the holiday spirit.
-
Peppermint Bark: The cool, minty flavor of this classic treat provides a satisfying crunch and pairs perfectly with the smoothness of the cheesecakes.
Imagine a cozy evening with the scent of ginger and chocolate wafting through the air while everyone savors the delightful cheesecakes.
-
Fruit Salad: A refreshing mix of seasonal fruits brightens the table and adds a burst of natural sweetness, balancing the rich flavors of the mini cheesecakes.
-
Vanilla Ice Cream: Serve a scoop alongside the cheesecakes for a delightful contrast in temperature and texture.
-
Mulled Wine: A spiced red wine brings warmth and sophistication, making it a perfect drink choice for holiday gatherings.
Let these pairings enhance your festive celebration as you share delicious moments and create lasting memories.
Make Ahead Options
These Grinch Mini Cheesecakes are perfect for meal prep, saving you precious time during the busy holiday season! You can prepare the crust and the cheesecake filling up to 24 hours in advance. Simply make the crust and press it into the cupcake liners, then mix your cheesecake filling and store it separately in the fridge. This helps maintain the crust's crunchiness. When you're ready to bake, just spoon the filling into the prepped crusts and pop them in the oven. They'll turn out just as delicious, ensuring your festive treat is a hit without the last-minute rush!
Storage Tips for Grinch Mini Cheesecakes
Fridge: Store in an airtight container in the refrigerator for up to 5 days. This keeps your Grinch Mini Cheesecakes fresh and creamy for any festive occasion.
Freezer: For longer storage, freeze un-topped mini cheesecakes for up to 2 months. Wrap tightly in plastic wrap to prevent freezer burn and preserve flavor.
Thawing: When ready to enjoy, thaw the frozen cheesecakes in the fridge overnight. This ensures a smooth texture upon serving.
Reheating: These mini cheesecakes are best served chilled. Avoid reheating, as it may alter the delightful creamy texture. Enjoy them straight from the fridge!

Grinch Mini Cheesecakes Recipe FAQs
How do I select ripe or fresh ingredients for this recipe?
Absolutely! For the best results, ensure your cream cheese is fresh and at room temperature. Look for cream cheese that's smooth and free of any lumps or dark spots. Also, check your eggs by cracking them open—fresh eggs should have a firm white and a bright yolk. If using food coloring, opt for gel-based colors for the most vibrant results.
What is the best way to store leftover Grinch Mini Cheesecakes?
You should store these mini cheesecakes in an airtight container in the fridge for up to 5 days. They’ll maintain their creamy texture beautifully. To ensure they stay fresh, avoid stacking them and use parchment paper between layers if necessary.
Can I freeze Grinch Mini Cheesecakes, and how do I do it?
Yes, you can absolutely freeze them! For the best results, freeze them un-topped in a single layer. Wrap each cheesecake tightly in plastic wrap and place them in a freezer-safe container. They can be stored for up to 2 months. When you’re ready to enjoy, simply remove them from the freezer and thaw in the fridge overnight before serving.
What should I do if my cheesecake batter has lumps?
Very important! If you notice lumps in your cheesecake batter, it usually means your cream cheese wasn't softened enough. To fix this, let the cream cheese sit at room temperature for about 30 minutes before mixing. If you're already mixing and notice lumps, try using a hand mixer or blender to fully incorporate the ingredients for a smooth consistency.
Are there any dietary considerations I should be aware of?
Yes, definitely! These Grinch Mini Cheesecakes are vegetarian-friendly, but if you have dietary restrictions, you can make them dairy-free by using a vegan cream cheese alternative. For those with egg allergies, substituting the eggs with flax eggs works wonderfully—combine 1 tablespoon of flaxseed meal with 2.5 tablespoons of water for each egg. Just remember to let it sit until it thickens!
Can I add different flavors or colors to this recipe?
The more, the merrier! Feel free to get creative! You can substitute the neon green food coloring with red for a fun Valentine’s theme or use blue for a winter wonderland look. Additionally, consider adding some peppermint extract or vanilla bean to the filling for a delightful flavor twist!
Joyful Grinch Mini Cheesecakes for a Festive Holiday Treat
Ingredients
Equipment
Method
- Preheat your oven to 350°F (175°C) and line a cupcake pan with festive cupcake liners.
- In a food processor, pulse about 10-11 Oreos until they form fine crumbs. Melt some butter and add it to the Oreo crumbs, mixing until they resemble wet sand.
- Evenly distribute the crumb mixture into the lined cupcake cups, pressing down firmly.
- In a medium bowl, mix the softened cream cheese and sugar using an electric mixer until smooth. Incorporate the eggs one at a time along with the vanilla extract.
- Mix in a few drops of neon green food coloring until you achieve the desired vibrant hue.
- Spoon approximately 1/4 cup of the cheesecake batter into each cupcake liner, filling them to about three-quarters full.
- Bake for 15-17 minutes until the centers are slightly jiggly.
- Allow the cheesecakes to cool completely in the pan, then refrigerate for at least 2 hours or until firm.
- Serve topped with whipped cream and festive sprinkles if desired.


Leave a Reply