
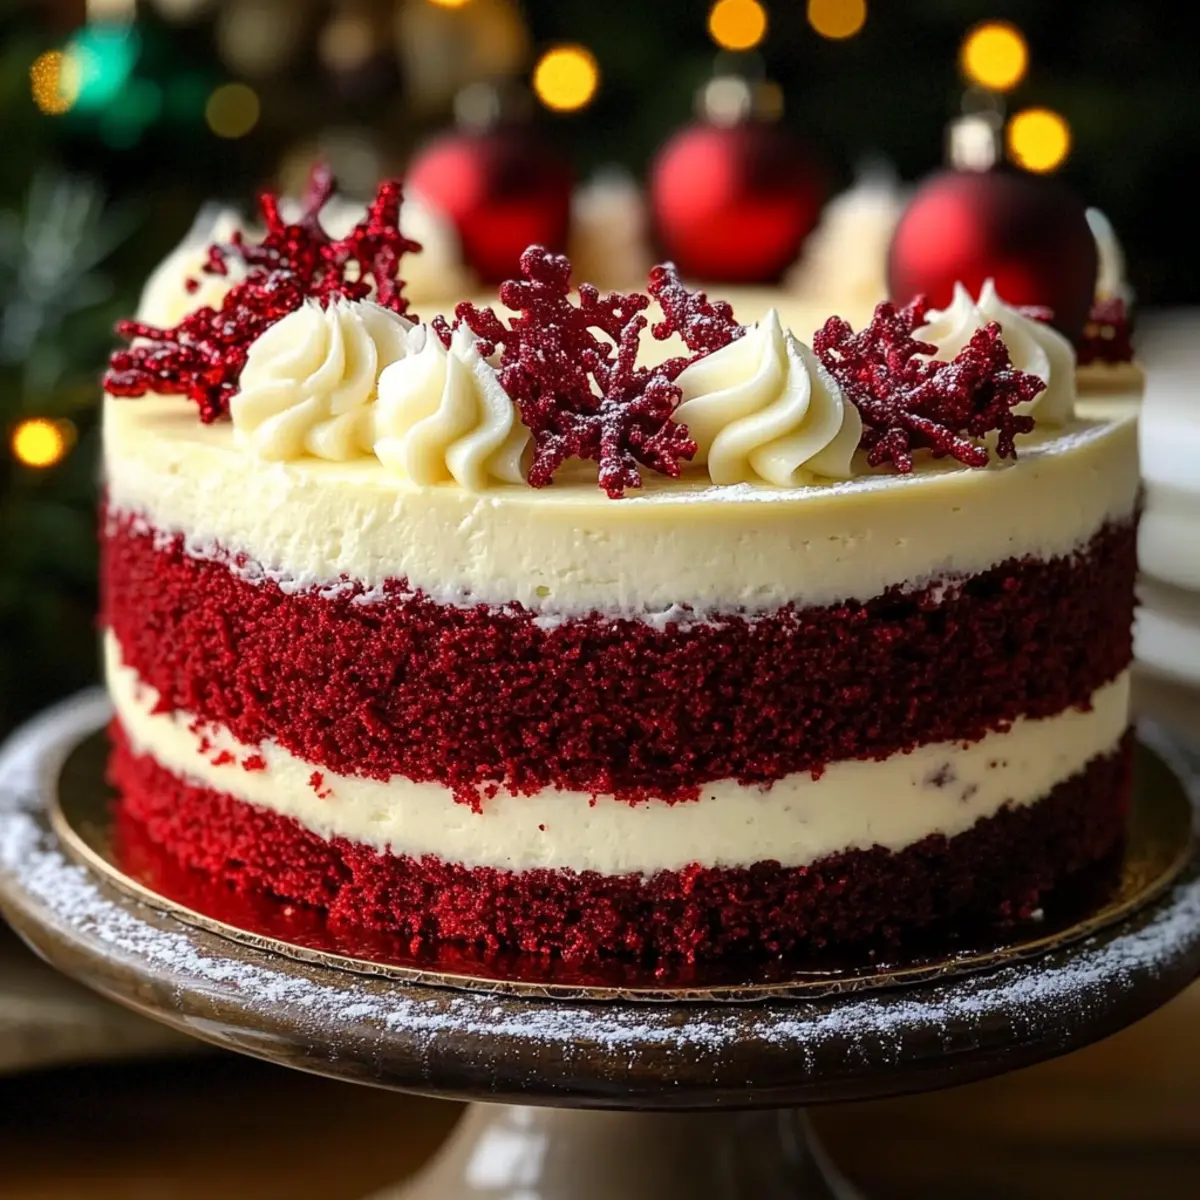
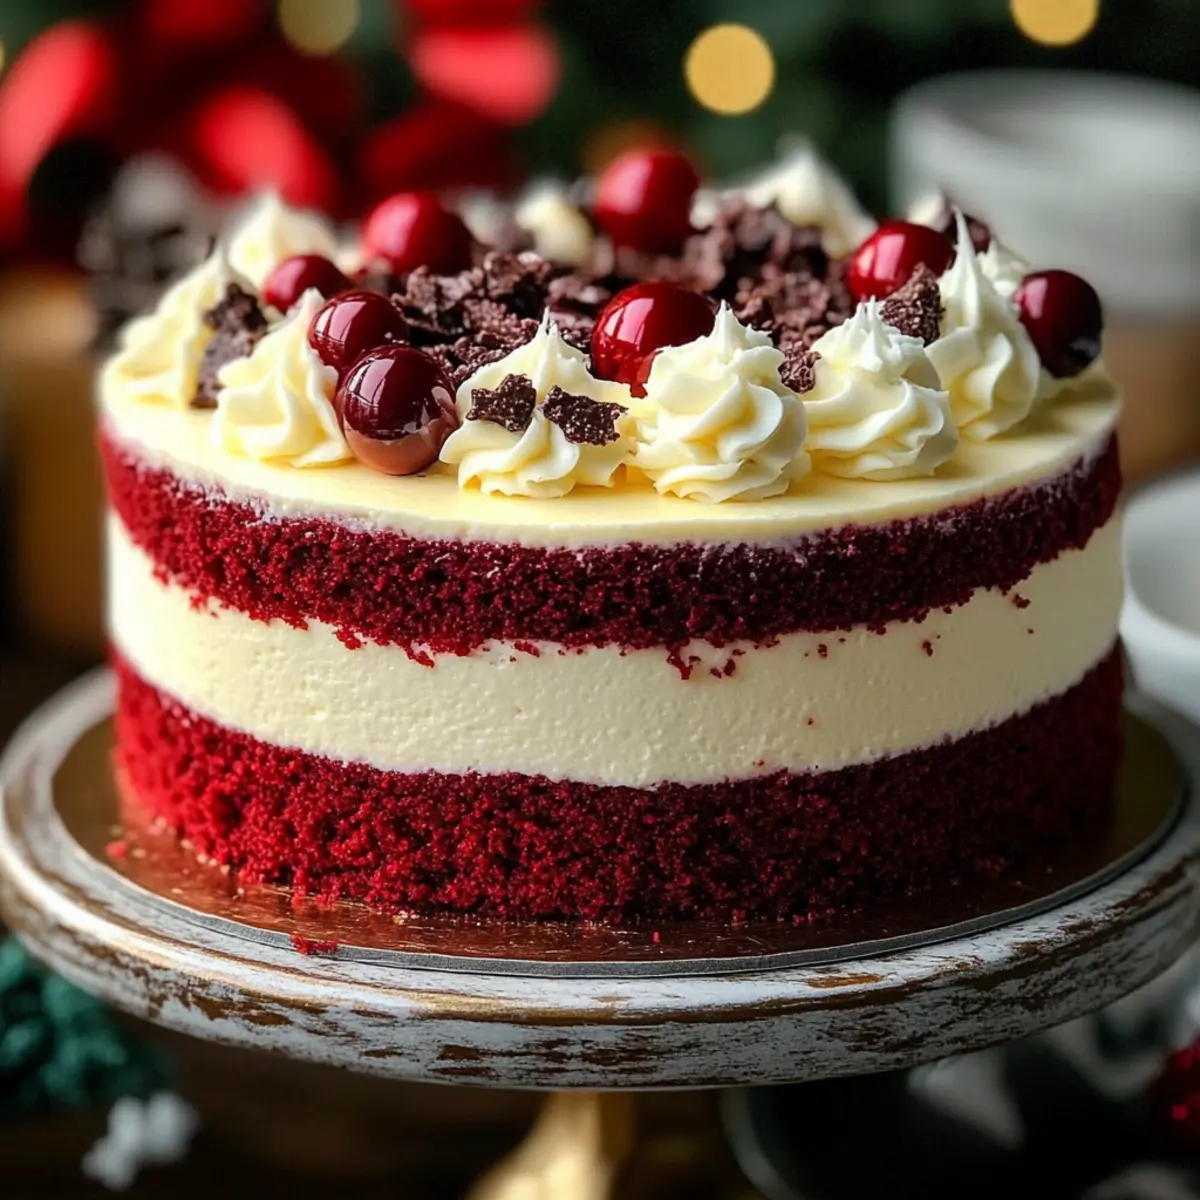
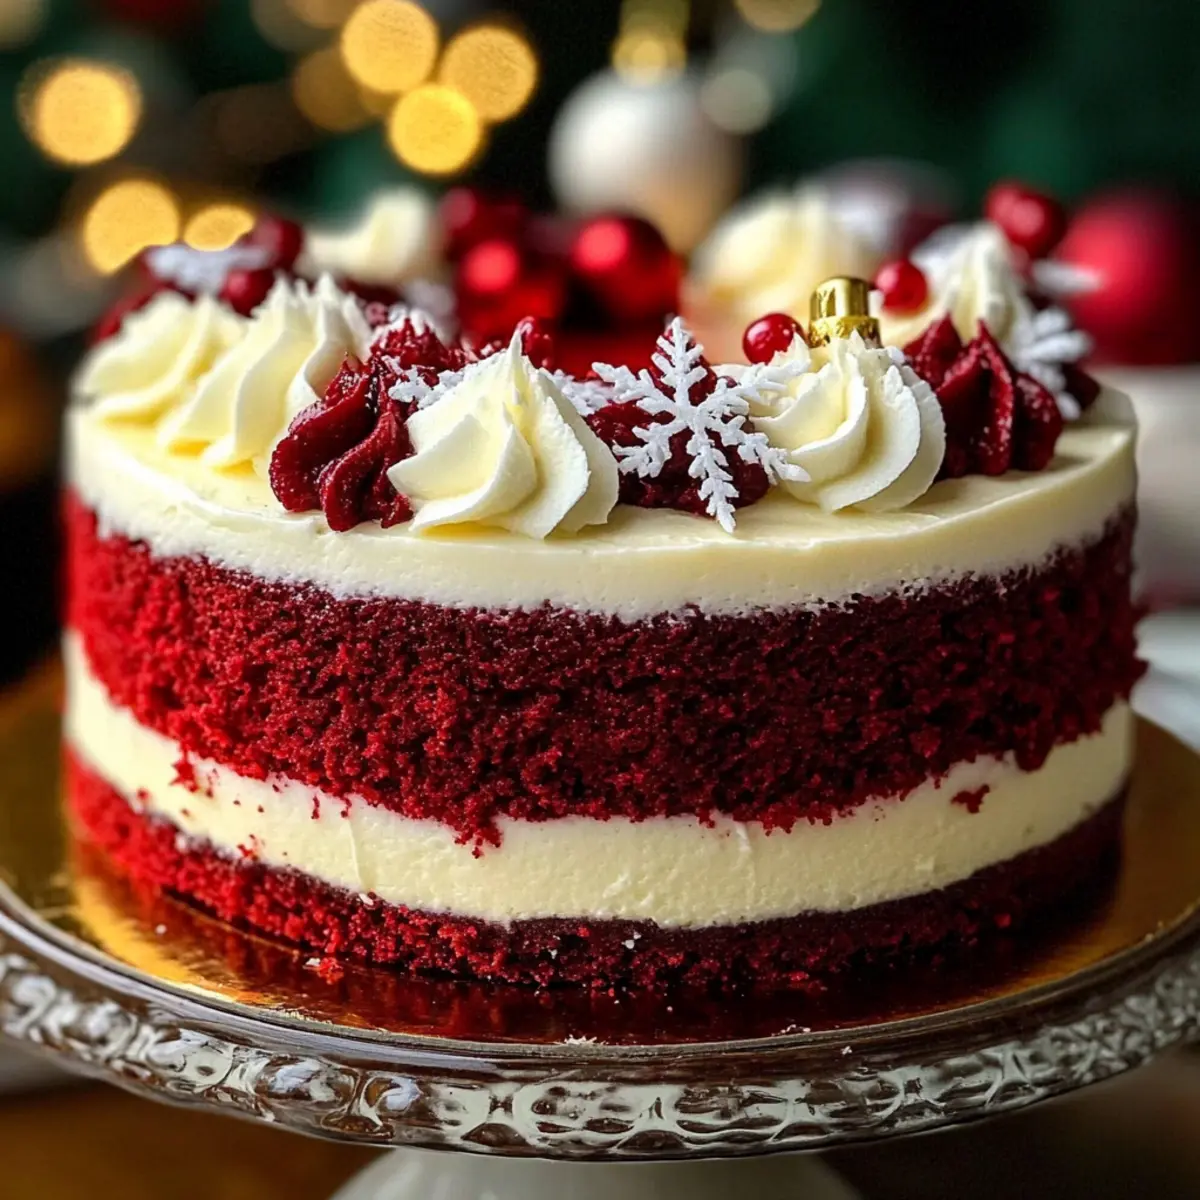
As the holiday season approaches, I find myself eagerly anticipating the joy of festive gatherings and the deliciousness they bring. This isn't just any dessert; it’s a show-stopping Christmas Red Velvet Cheesecake that perfectly marries the classic richness of red velvet cake with the silky smoothness of cheesecake. Not only does it make a striking centerpiece for your holiday table, but it also promises a delightful taste experience that will leave your guests raving. Plus, it’s surprisingly easy to whip up, making it a perfect project even for the busiest hosts. So, are you ready to add a touch of magic to your holiday dessert spread? Let’s dive into making this unforgettable treat together!
Why is this cheesecake a holiday must-have?
Decadence at Its Finest: This Christmas Red Velvet Cheesecake elevates your dessert table with its stunning appearance and luxurious flavor, making it a show-stopping delight.
Easy to Make: You don't need to be a professional baker; this recipe is designed for all skill levels, ensuring everyone can enjoy a festive masterpiece.
Festive Touch: The vibrant red and white layers add a magical flair to any holiday gathering, brightening up your celebrations.
Crowd-Pleaser: The combination of rich red velvet and creamy cheesecake is sure to impress guests of all ages, leaving them wanting seconds.
Make-Ahead Friendly: Prepare it a day in advance, allowing for extra time to enjoy your family and festivities. Don’t forget to check out our tips on how to perfectly chill your cakes for the best results!
Christmas Red Velvet Cheesecake Ingredients
For the Cake Layers
- All-purpose flour – Structure for the cake layers; use gluten-free flour for a gluten-free option.
- Unsweetened cocoa powder – Adds a touch of chocolate flavor; choose high-quality cocoa for best results.
- Baking powder & Baking soda – Essential leavening agents that ensure the cake rises beautifully.
- Salt – Enhances flavor and balances the sweetness perfectly.
- Granulated sugar – Provides sweetness and moisture for the cake.
- Vegetable oil – Keeps the cake delightfully moist; canola oil works as a substitute.
- Buttermilk – Adds a tangy flavor and moisture; substitute with milk and vinegar in equal parts.
- Large eggs – These give the cake structure; remember to use room temperature eggs for smoother mixing.
- Red food coloring – Essential for that signature red hue; opt for gel food coloring for vibrant results without altering texture.
- Vanilla extract – Enhances the flavor in both the cake and the cheesecake layers.
- White vinegar – Reacts with baking soda to keep the cake moist while enhancing its rise.
For the Cheesecake Filling
- Cream cheese – The star of the cheesecake filling, offering rich creaminess and tang.
- Sour cream – Contributes extra richness and moisture to the filling.
- Powdered sugar – Sweetens the cheesecake filling and helps thicken it; sifting before use prevents lumps.
- Unsalted butter – Adds creaminess to the frosting and enhances flavor; make sure it’s softened before use.
This Christmas Red Velvet Cheesecake will surely brighten your holiday celebrations, combining delectable flavors and stunning visuals!
Step‑by‑Step Instructions for Christmas Red Velvet Cheesecake
Step 1: Prepare Cake Layers
Begin by preheating your oven to 350°F (175°C) and greasing two 9-inch round cake pans with non-stick spray. In a medium bowl, whisk together the all-purpose flour, cocoa powder, baking powder, baking soda, and salt until well combined. In a separate larger bowl, mix the granulated sugar, vegetable oil, buttermilk, large eggs, red food coloring, vanilla extract, and white vinegar until smooth and homogeneous. Gradually combine the wet and dry ingredients, mixing until just combined, then divide the batter evenly into the prepared pans. Bake for 25-30 minutes, or until a toothpick inserted into the center comes out clean.
Step 2: Make Cheesecake Filling
While the cake layers cool, prepare your cheesecake filling. In a large mixing bowl, beat the cream cheese until creamy and smooth, then add the granulated sugar and sour cream, mixing until fully combined. Incorporate the eggs one at a time, adding the vanilla extract, and ensure the mixture is smooth again. Once your cheesecake batter is ready, pour it over the top of the cooled red velvet cake layers in the pans, spreading evenly. Bake in the oven at 325°F (163°C) for 30-35 minutes, or until the edges are set and the center is slightly jiggly.
Step 3: Prepare Frosting
After your cheesecake layers have cooled completely, it’s time to make the frosting. In a medium bowl, beat the softened unsalted butter and cream cheese together until creamy and fluffy. Gradually add in the sifted powdered sugar, mixing on low until incorporated, then increase the speed and add vanilla extract. Continue beating for 2-3 minutes, or until the frosting is light and airy. Set aside while you assemble the cake.
Step 4: Assemble the Cake
Once both the cake layers and cheesecake filling are fully cooled, it's time to assemble your festive delight. Place one cake layer on a serving plate or cake stand, carefully top it with half of the cheesecake filling, smoothing it out evenly. Repeat with the second layer, adding the remaining cheesecake filling on top. Finally, spread the cream cheese frosting over the top and sides of the assembled Christmas Red Velvet Cheesecake for a beautiful finish.
Step 5: Chill and Serve
To ensure the flavors meld beautifully and the frosting sets, chill the assembled cheesecake in the refrigerator for at least 4 hours, but overnight is best for a thicker texture. Once chilled, slice beautifully into pieces and serve to your eager guests, delighting in the rich layers and festive presentation that is sure to impress during your holiday gatherings.
Expert Tips for Christmas Red Velvet Cheesecake
-
Room Temperature Ingredients: Always use room temperature ingredients, like eggs and cream cheese, for smoother mixing and a fluffier texture in your cheesecake filling.
-
Avoid Overmixing: Beat the cheesecake filling slowly to prevent incorporating too much air, which can lead to cracks in your final product.
-
Proper Cooling: Ensure your cake layers are completely cool before adding the cheesecake filling. This prevents melting and ensures clean layers in your Christmas Red Velvet Cheesecake.
-
Chill Time is Key: Let the assembled cheesecake chill at least 4 hours, preferably overnight, to allow flavors to meld and the texture to set perfectly.
-
Sifting Powdered Sugar: Always sift your powdered sugar before adding it to the frosting. This prevents lumps and guarantees a silky, smooth frosting finish.
Make Ahead Options
Preparing this Christmas Red Velvet Cheesecake ahead of time is a fantastic way to save you stress during the busy holiday season! You can make the cake layers and cheesecake filling up to 24 hours in advance; simply bake and cool the layers, then wrap them tightly in plastic wrap and refrigerate. The cheesecake filling can be prepared the same day and stored in the fridge. When you're ready to assemble, take the layers and frosting out and let them come to room temperature before layering. This helps maintain moisture and flavor, ensuring your dessert is just as delicious as if it were made fresh! Finish by frosting the cheesecake and chilling for at least 4 hours, or overnight for the best results before serving.
What to Serve with Christmas Red Velvet Cheesecake
As you plan your holiday feast, consider delightful accompaniments to elevate your dessert experience even further.
-
Spiced Chai Tea: A warm cup of spiced chai adds a comforting, aromatic touch that perfectly contrasts the rich cheesecake.
-
Hot Cocoa: Indulge your sweet tooth with luxurious hot cocoa topped with whipped cream, enhancing that cozy holiday feeling.
-
Fresh Berries: Garnish with raspberries or strawberries for a burst of freshness that cuts through the richness of the cheesecake.
-
Peppermint Bark: A festive treat that combines crunch and minty sweetness, adding a delightful textural contrast and holiday spirit.
-
Vanilla Ice Cream: A scoop of creamy vanilla ice cream complements the velvety texture of the cheesecake beautifully, creating a decadent duo.
-
Festive Fruit Salad: A light, fruity salad featuring citrus and pomegranate provides a refreshing balance to the rich flavors of the cheesecake.
-
Sparkling Wine: A chilled glass of sparkling wine adds a celebratory touch, its effervescence marrying wonderfully with the cheesecake's richness.
-
Chocolate Ganache: Drizzle warm chocolate ganache over each slice for an extra layer of indulgence and a rich, luscious finish.
-
Gingerbread Cookies: Add childhood nostalgia with chewy gingerbread cookies; their spices will harmonize with the holiday flavors in your cheesecake.
Christmas Red Velvet Cheesecake Variations
Customize your Christmas Red Velvet Cheesecake to make it truly one-of-a-kind, embracing flavors that warm the heart and soul!
-
Chocolate Twist: Stir in some chocolate chips into the cheesecake layer for an additional burst of flavor that the chocolate lovers will adore.
-
Natural Coloring: Replace the red food coloring with natural beet juice for a healthier option and a beautiful earth-toned hue. Your dessert still retains that festive allure!
-
Peppermint Crunch: Top it with crushed peppermint candies or candy canes for a refreshing, minty finish that adds a delightful crunch and perfect holiday spirit.
-
Berry Burst: Add fresh raspberries or strawberries on top for a pop of color and a tart flavor that pairs beautifully with the sweetness of the cheesecake.
-
Nutty Surprise: Incorporate finely chopped nuts, such as pecans or walnuts, into your cheesecake filling for an added crunch and rustic flavor.
-
Spiced Infusion: Add a sprinkle of cinnamon or nutmeg to the batter for a warm, cozy flavor that screams holiday cheer and enhances the festive vibe.
-
Lemon Zest Freshness: Brighten up the cream cheese frosting by mixing in some fresh lemon zest. The citrus notes will give a tangy balance to the richness of the cheesecake.
-
Personalize the Frosting: Instead of the standard cream cheese frosting, try a chocolate ganache or a whipped cream topping for a unique twist that can satisfy different taste preferences.
Every variation offers a new way to share love through cooking. Don't forget to look at our tips on how to make the perfect chocolate ganache for additional inspiration!
How to Store and Freeze Christmas Red Velvet Cheesecake
Fridge: Store any leftover Christmas Red Velvet Cheesecake in an airtight container in the fridge for up to 5 days, ensuring it remains fresh and delicious.
Freezer: If you want to keep it longer, freeze slices wrapped in plastic wrap and aluminum foil for up to 2 months; allow to thaw in the refrigerator before serving.
Reheating: This cheesecake is best enjoyed chilled, so serve it straight from the fridge. No need for reheating; simply slice and savor all that luscious flavor!

Christmas Red Velvet Cheesecake Recipe FAQs
What’s the best way to select ripe ingredients?
Absolutely! For the best results, ensure your eggs are at room temperature before mixing, as this helps them blend more evenly into the batter. Choose fresh, high-quality buttermilk for a richer flavor, and opt for a pure, gel food coloring for that vibrant red hue—this won't alter the texture and provides a more intense color.
How should I store leftover cheesecake?
Very! Store any remaining portions of your Christmas Red Velvet Cheesecake in an airtight container in the refrigerator for up to 5 days. If you're using a cake dome or wrap, it helps keep the cheesecake moist and fresh, ready for you to enjoy at any time during the holiday week!
Can I freeze my cheesecake, and if so, how?
Of course! To freeze your cheesecake, slice it into individual portions first for easy access later. Wrap each slice tightly in plastic wrap, then place it in an airtight container or freezer bag. It will stay delicious in the freezer for up to 2 months. When you’re ready to indulge, remove it from the freezer and let it thaw in the refrigerator for a few hours or overnight.
What if my cheesecake cracks while baking?
No worries! If your cheesecake layer cracks, you can easily cover it with frosting for a smooth finish. Remember to mix your cheesecake batter on low speed to avoid incorporating too much air, which can lead to cracks during the baking process. Additionally, placing a shallow pan of water in the oven while baking can help create a steamy environment, preventing cracks.
Is this cheesecake safe for pets or those with allergies?
Great question! This Christmas Red Velvet Cheesecake contains ingredients like cream cheese and sugar that aren't suitable for pets, especially dogs and cats, as they can lead to digestive issues. For those with allergies, be mindful of the gluten in regular flour; consider using gluten-free flour instead, and be sure to check for any specific allergies in your guests before serving.
Decadent Christmas Red Velvet Cheesecake for Holiday Joy
Ingredients
Equipment
Method
- Preheat the oven to 350°F (175°C) and grease two 9-inch round cake pans.
- Whisk flour, cocoa powder, baking powder, baking soda, and salt in a bowl.
- In another bowl, mix sugar, oil, buttermilk, eggs, food coloring, vanilla, and vinegar until smooth.
- Combine wet and dry ingredients, divide batter into pans, and bake for 25-30 minutes.
- For the cheesecake, beat cream cheese, add sugar and sour cream, mix in eggs and vanilla.
- Pour cheesecake mixture over cooled cake layers and bake at 325°F (163°C) for 30-35 minutes.
- For the frosting, beat butter and cream cheese until fluffy, then add sifted powdered sugar and vanilla.
- Assemble by layering cake and cheesecake, topping with frosting.
- Chill assembled cheesecake for at least 4 hours before serving.


Leave a Reply