
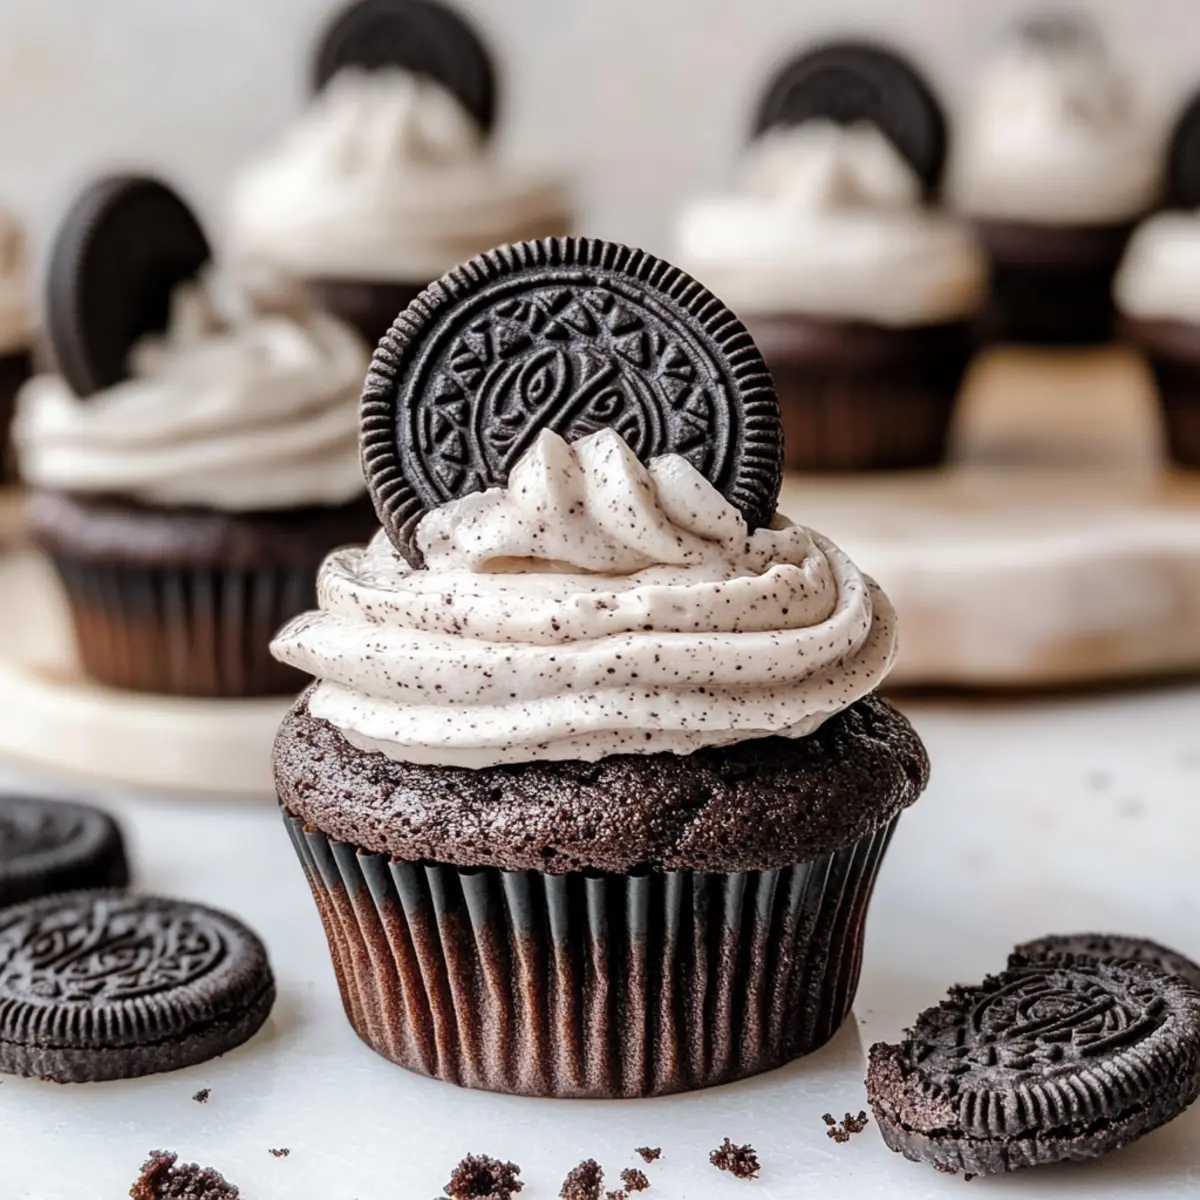
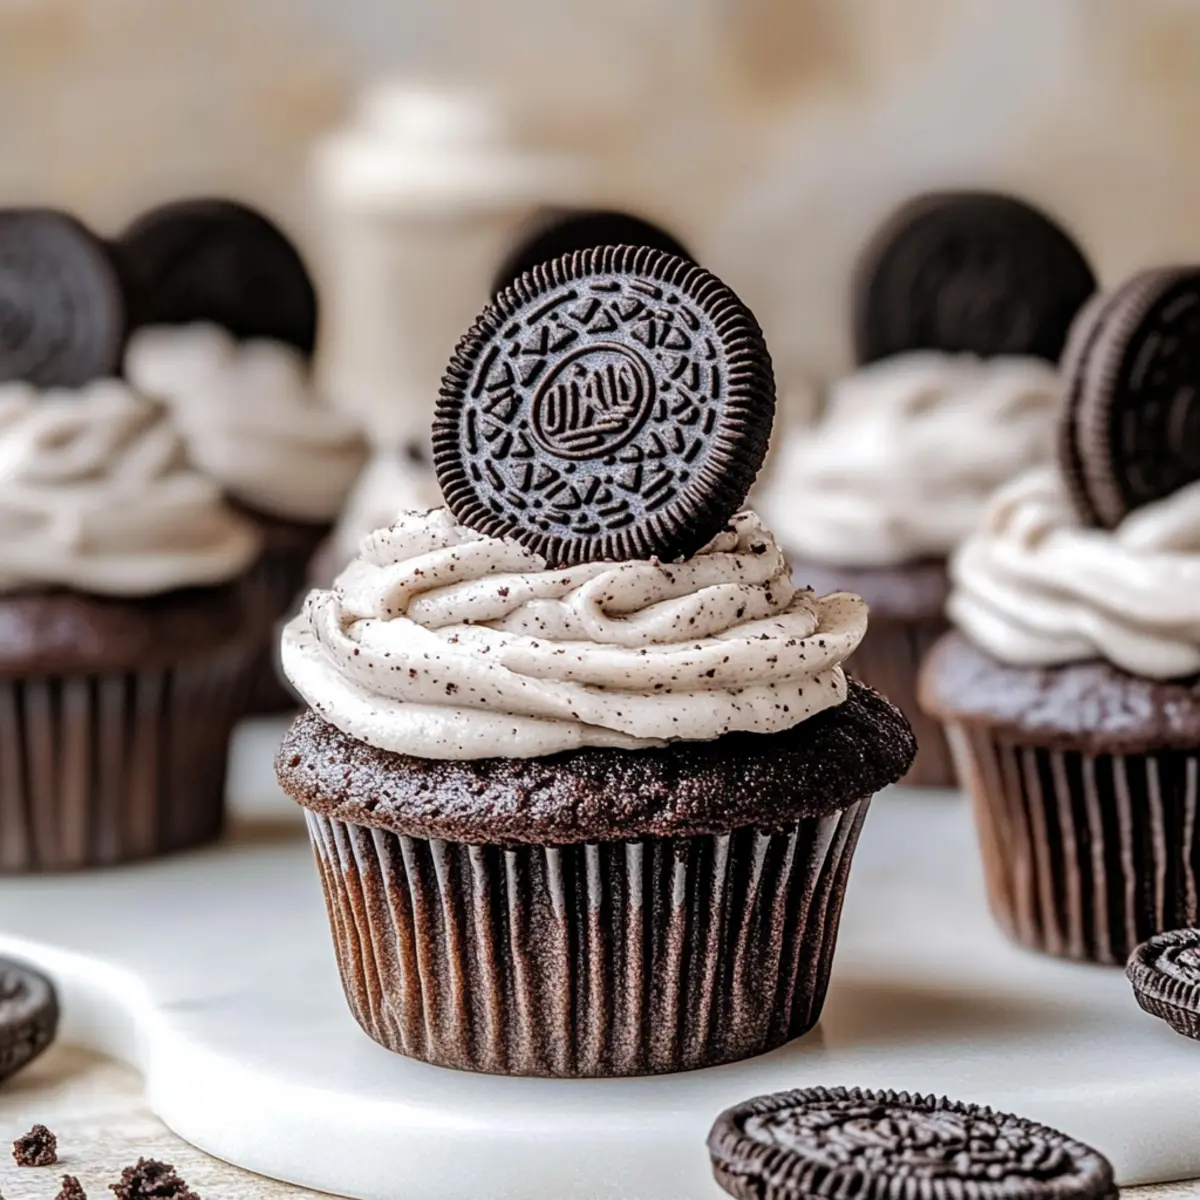
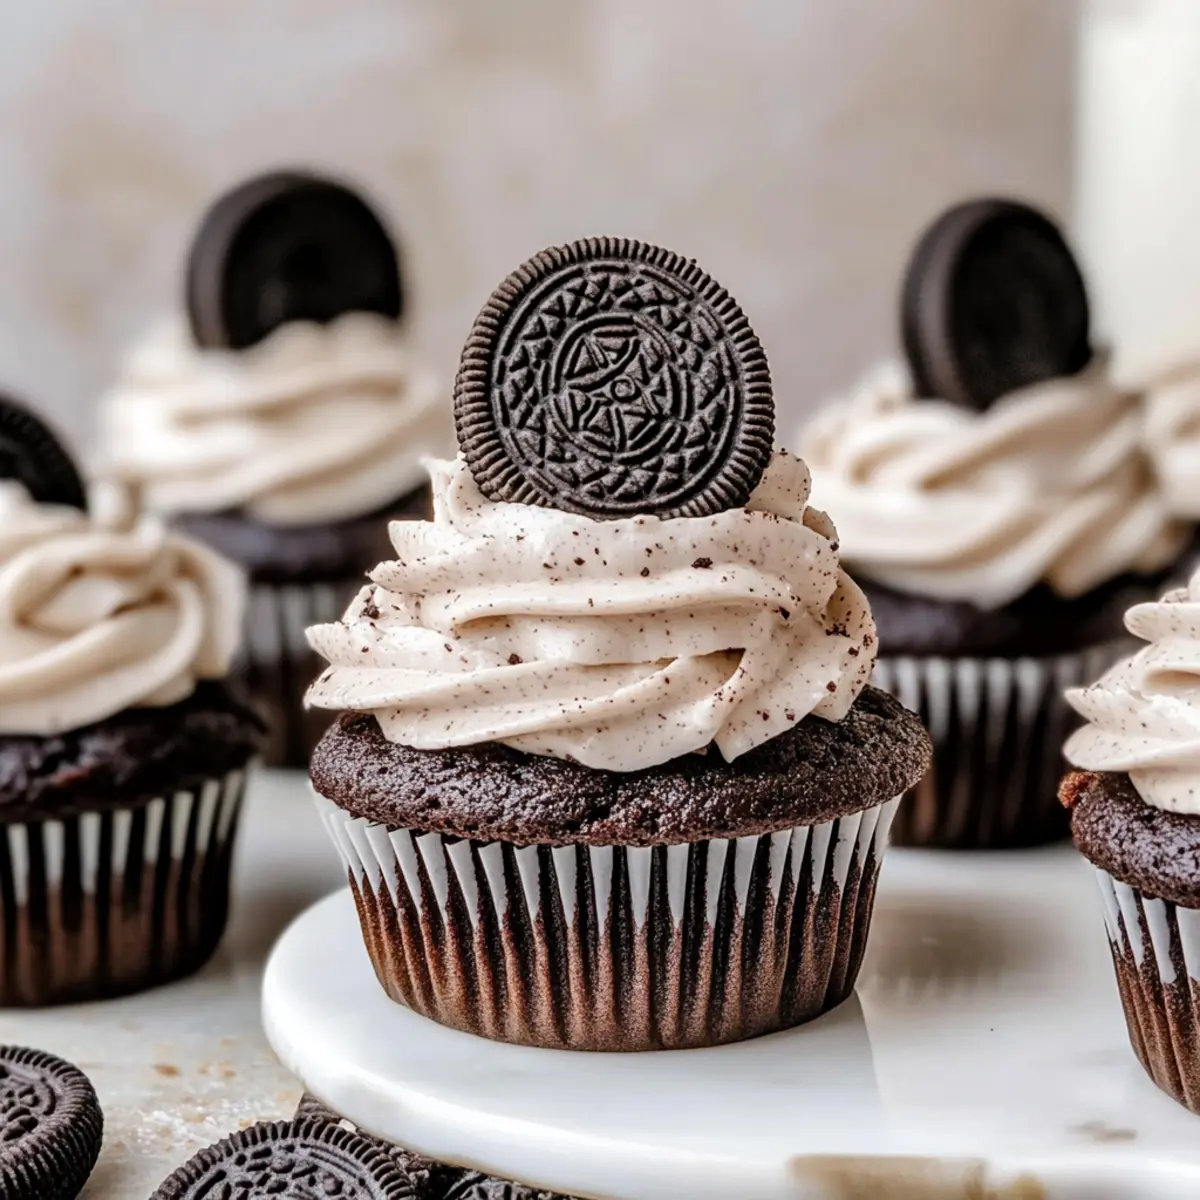
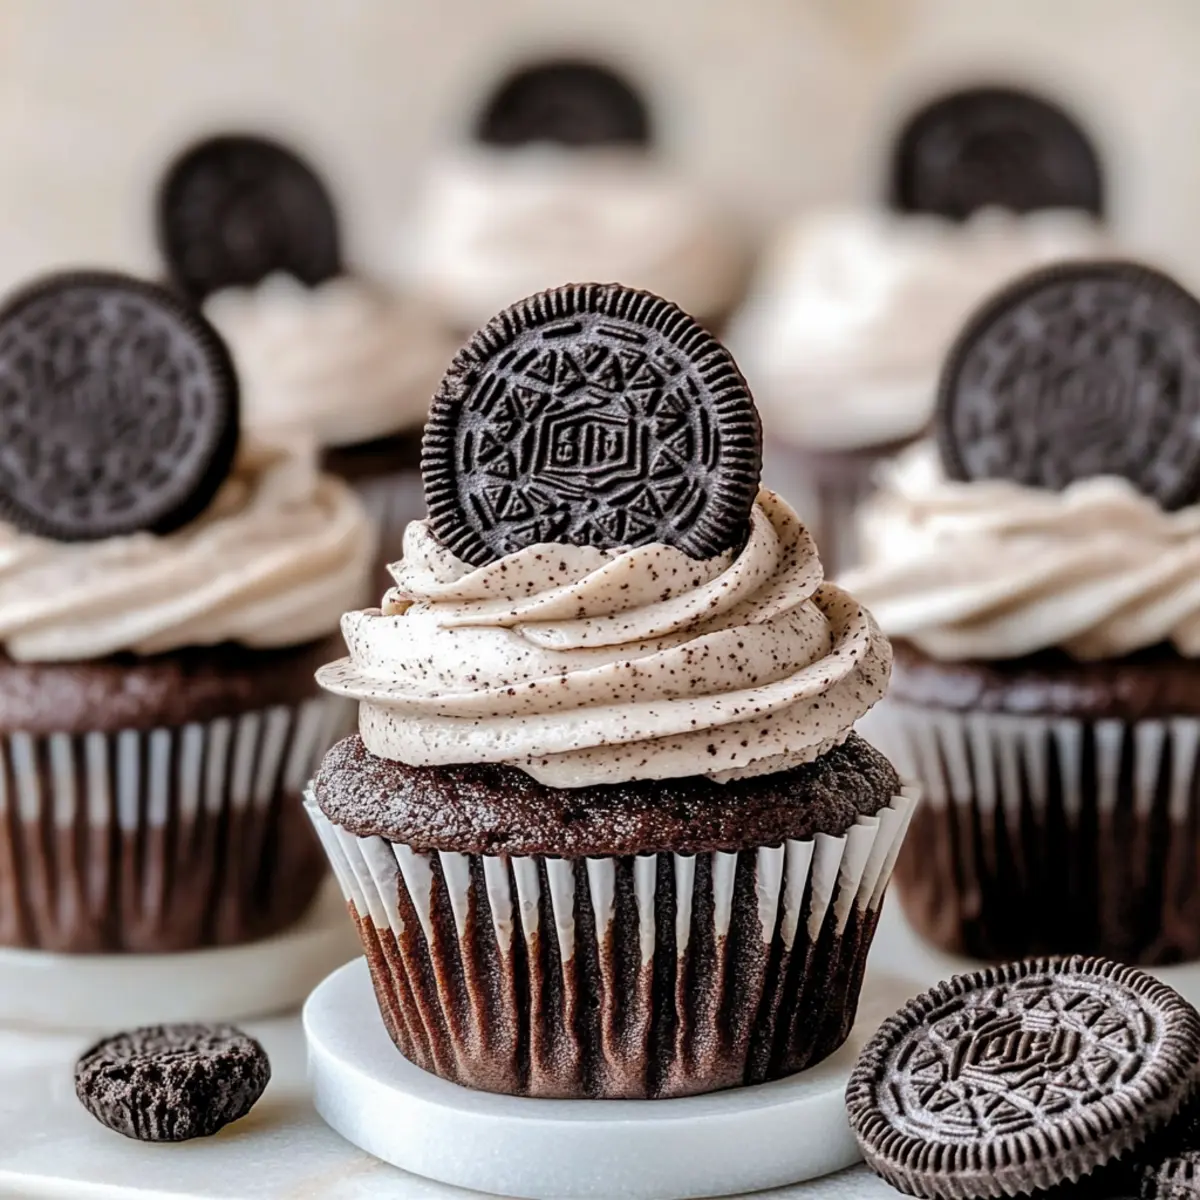
You won’t believe the joy that fills the kitchen as these Oreo Cupcakes bake to perfection. With a chocolatey aroma wafting through the air, I can already envision the delight on my friends’ faces as they take their first bite. This recipe for Oreo Cupcakes offers a whimsical twist on traditional desserts, featuring soft chocolate cake topped with a luscious Oreo buttercream frosting. Not only are they a crowd-pleaser perfect for birthdays and celebrations, but they're also incredibly easy to whip up, making your baking experience seamless and fun. Trust me, you’ll want to keep this delightful treat on hand for any occasion. Are you ready to unleash your inner pastry chef and create these irresistible cupcakes?
Why Are Oreo Cupcakes Irresistible?
Decadent Flavor: Each bite offers a heavenly mix of chocolate cake and Oreo goodness that satisfies any sweet tooth.
Simple to Make: With easy-to-follow steps, these cupcakes can be whipped up quickly, making them perfect for both beginner and experienced bakers.
Versatile Treat: These cupcakes shine at any event—be it a birthday, holiday, or casual gathering—ensuring smiles all around.
Engaging Decor: Topped with creamy buttercream and adorned with Oreos, they’re not just delicious but also a feast for the eyes.
Kid-Friendly Fun: Involve your little ones in the decorating process for a delightful family activity!
Indulge your taste buds and experience the charm of these Oreo Cupcakes; they truly deliver a unique combination of flavor and fun that's hard to resist!
Oreo Cupcake Ingredients
• Get ready to bake these delightful Oreo Cupcakes with a list of essential ingredients!
For the Cupcake Batter
- Boiling Water – Adds moisture and activates cocoa powder for a richer chocolate flavor.
- Granulated Sugar – Sweetens the cupcakes and adds to their moist texture; brown sugar can be swapped for a deeper flavor.
- Dutch Processed Cocoa Powder – Delivers a rich chocolate taste; regular cocoa can be used, but it will slightly change the flavor.
- All-Purpose Flour – Provides structure; feel free to use a gluten-free blend if needed.
- Instant Espresso Powder – Optional, but enhances the chocolate flavor beautifully.
- Baking Powder & Baking Soda – Essential leavening agents for a lovely rise.
- Salt – Elevates the overall flavor; don't skip this ingredient!
- Sour Cream – Adds moisture and richness; can substitute with buttermilk or yogurt if you wish.
- Vegetable Oil – Ensures moisture and softness; melted butter can be a delicious alternative.
- Large Eggs – Crucial for binding the cupcakes together; room temperature eggs mix better.
- Vanilla Extract – Adds a depth of flavor; pure vanilla is preferred, but imitation will work in a pinch.
For the Oreo Buttercream
- Oreo Cookies (for buttercream) – The star ingredient for the frosting’s flavor; crush them finely for better incorporation.
- Butter – Provides creaminess to the frosting; ensure it’s at cool room temperature for best mixing.
- Powdered Sugar – Sweetens and thickens the buttercream; sift this first to avoid lumps.
- Whole Milk – Adjusts the consistency of the frosting; cream can make it even richer.
For Decoration
- 12 Oreos (for decoration) – Adds visual appeal and extra Oreo goodness on top; you can also use crushed Oreos for an extra crunchy touch.
Get ready to dive into the joy of baking with these Oreo Cupcakes—the perfect mix of flavor, fun, and sweetness that everyone will adore!
Step‑by‑Step Instructions for Oreo Cupcakes
Step 1: Preheat the Oven
Start by preheating your oven to 160ºC (320ºF). While it warms up, line a 12-cup cupcake tray with colorful liners. This step ensures that your Oreo Cupcakes bake evenly and create a delightful visual appeal, so don’t skip it!
Step 2: Mix the Dry Ingredients
In a large mixing bowl, combine granulated sugar, Dutch processed cocoa powder, all-purpose flour, instant espresso powder, baking powder, baking soda, and salt. Whisk these dry ingredients together until fully blended, which should take about a minute. This creates a solid foundation of flavor for your Oreo Cupcakes.
Step 3: Combine the Wet Ingredients
In another bowl, whisk together sour cream, vegetable oil, large eggs, and vanilla extract. Then, carefully stir in the boiling water. This harmonious mixture brings moisture and richness to your cupcake batter, making it incredibly soft and delicious.
Step 4: Unite the Mixtures
Gradually add the wet mixture to the dry ingredients, stirring gently until no lumps remain. This process should take about 30 seconds, and you’ll know it’s ready when your batter is smooth and glossy. Make sure not to overmix; you want those Oreo Cupcakes to stay fluffy!
Step 5: Bake the Cupcakes
Divide the batter evenly among the lined cupcake cups, filling each about two-thirds full. Place the tray in the preheated oven and bake for 20-23 minutes. They'll be ready when a toothpick inserted into the center comes out clean, signaling that your Oreo Cupcakes are perfectly baked.
Step 6: Cool the Cupcakes
Once baked, remove the tray from the oven and allow the cupcakes to cool in the pan for about 5 minutes. Then, gently transfer them to a wire rack to cool completely. This step is essential for achieving the perfect texture for frosting later.
Step 7: Prepare the Buttercream
Crush Oreo cookies into fine crumbs using a food processor or a rolling pin. In a mixer, beat the cool room temperature butter until creamy, then gradually mix in powdered sugar and vanilla extract, alternating with the milk. Finally, fold in the crushed Oreos to create a delectable Oreo buttercream.
Step 8: Frost the Cupcakes
Once the cupcakes are completely cool, transfer the Oreo buttercream to a piping bag fitted with your favorite nozzle. Pipe a generous swirl of frosting on each cupcake. For a finishing touch, decorate them with whole Oreos on top and sprinkle additional crushed Oreos for extra flair.
Make Ahead Options
These delightful Oreo Cupcakes are perfect for busy home cooks looking to save time during hectic weekdays! You can prepare the cupcake batter up to 24 hours in advance; simply mix all the wet and dry ingredients and refrigerate it in an airtight container. Bake your cupcakes just before serving for the freshest taste. Furthermore, the Oreo buttercream can be made ahead and stored in the fridge for up to 3 days—just remember to bring it back to room temperature before piping. These small steps allow you to enjoy the joy of homemade Oreo Cupcakes with minimal effort on the day of your event!
Oreo Cupcakes Variations & Substitutions
Feel free to get creative with these Oreo Cupcakes – your taste buds will thank you!
- Dairy-Free: Use non-dairy milk and vegan butter in the frosting to enjoy a vegan version of these delights.
- Gluten-Free: Swap all-purpose flour for a gluten-free flour blend to cater to gluten sensitivities without compromising taste.
- Flavor Twist: Experiment with different Oreo flavors in the buttercream, such as mint or peanut butter, for unique flavor profiles.
- Extra Crunch: Add mini chocolate chips or chopped nuts to the cupcake batter for a delightful textural contrast.
- Lower Sugar: Substitute granulated sugar with a natural sweetener like coconut sugar or maple syrup to reduce the sweetness.
- Spiced Delight: Incorporate a dash of cinnamon or a pinch of allspice into the cupcake batter for a lovely warmth.
- Syrupy Addition: Drizzle a chocolate ganache over the frosted cupcakes for a decadent chocolate lover's dream.
- Frosting Alternatives: Replace the butter in the buttercream with cream cheese for a tangy twist that complements the Oreo flavor beautifully.
With all these tempting options, you're well on your way to customizing these Oreo Cupcakes to suit every occasion and palate!
What to Serve with Decadent Oreo Cupcakes
Imagine a delightful spread that perfectly complements the rich, chocolaty experience of your cupcakes, creating a memorable occasion for friends and family.
- Glass of Milk: The classic pairing enhances the creamy flavors of the buttercream while balancing the richness of the chocolate cake.
- Vanilla Ice Cream: A scoop of cool, creamy vanilla provides a fantastic contrast to the cupcake's warmth, taking your dessert to the next level.
- Chocolate Sauce Drizzle: A light drizzle elevates the visual appeal and adds an extra layer of indulgence—perfect for chocolate lovers!
- Fresh Berries: Strawberries or raspberries add a refreshing burst of tartness that beautifully offsets the sweetness—great for palate cleansing.
- Whipped Cream: A dollop of light, airy whipped cream can soften the richness and enhance the indulgent experience of each bite.
- Fruit Salad: A vibrant mix of seasonal fruit brings brightness and freshness to your dessert table, balancing the sumptuous allure of your cupcakes.
- Coffee: A warm cup of coffee brings out the chocolate notes, creating a cozy association, ideal for after-dinner enjoyment.
Delight in how each pairing can enhance the joyful experience as you share these decadent Oreo Cupcakes with your loved ones!
Expert Tips for Oreo Cupcakes
-
Perfect Butter Temperature: Ensure your butter is at cool room temperature for easy blending into the buttercream, achieving that smooth, creamy texture.
-
Accurate Flour Measurement: Use the spoon-and-level method to measure flour. This helps prevent dense cupcakes, ensuring your Oreo Cupcakes remain light and fluffy.
-
Chilling the Frosting: Allow the frosting to sit at room temperature before piping. This makes it easier to handle and creates a smoother finish on your cupcakes.
-
Don't Overbake: Keep an eye on the baking time; overbaking can dry out your cupcakes, taking away that cherished moistness. A toothpick test is key!
-
Experiment with Flavors: Consider varying your Oreo flavors for unique buttercreams—peanut butter or mint Oreos can create exciting new tastes in your treats.
Storage Tips for Oreo Cupcakes
Room Temperature: Store unfrosted cupcakes in an airtight container for up to 2 days at room temperature to maintain their softness and flavor.
Fridge: If you’ve frosted your Oreo Cupcakes, refrigerate them in an airtight container for 1-2 days. This extends their freshness while keeping the buttercream stable.
Freezer: For longer storage, freeze unfrosted cupcakes for up to 3 months. Wrap them individually in plastic wrap and place in a sealed freezer bag.
Reheating: To enjoy frozen cupcakes, thaw them in the fridge overnight. For a warm treat, microwave for 10-15 seconds before serving, ensuring the chocolatey flavor shines through.
Oreo Cupcakes Recipe FAQs
What type of cocoa powder should I use for Oreo Cupcakes?
Using Dutch processed cocoa powder is recommended for a richer chocolate flavor, but if you only have regular cocoa powder, you can substitute it. Just keep in mind that it may slightly alter the flavor.
How can I store my Oreo Cupcakes?
If you have unfrosted cupcakes, keep them in an airtight container at room temperature for up to 2 days. For frosted versions, pop them in the fridge in an airtight container, where they can stay fresh for about 1-2 days. This way, your cupcakes maintain their delightful texture and flavor!
Can I freeze Oreo Cupcakes?
Absolutely! For longer storage, freeze the unfrosted cupcakes for up to 3 months. Wrap each cupcake individually in plastic wrap and place them in a sealed freezer bag. When you're ready to enjoy one, simply thaw it in the fridge overnight, and for a delightful warm treat, give it a quick 10-15 seconds in the microwave.
How do I prevent my cupcakes from being dense?
To avoid dense Oreo Cupcakes, make sure to measure your flour correctly. I recommend using the spoon-and-level method: gently spoon the flour into your measuring cup and level it off with a knife. Overmixing can also lead to density, so stir the batter just until smooth—no lumps!
Are there any dietary concerns with Oreo Cupcakes?
If you have allergies, be cautious as these cupcakes contain gluten from the flour and dairy from the butter and sour cream. For a gluten-free version, simply swap in a gluten-free flour blend. And remember to check the Oreo ingredients if you're accommodating allergies, especially for nut allergies!
What should I do if my frosting is too thick?
If your Oreo buttercream is too thick for piping, simply add a splash of whole milk and mix until the desired consistency is reached. If it’s too thin, add a bit more sifted powdered sugar until you achieve that perfect, swirly frosting texture that will make your cupcakes truly eye-catching!
Delightful Oreo Cupcakes with Creamy Buttercream Bliss
Ingredients
Equipment
Method
- Preheat the oven to 160ºC (320ºF) and line a 12-cup cupcake tray with liners.
- In a large mixing bowl, combine granulated sugar, cocoa powder, flour, espresso powder, baking powder, baking soda, and salt.
- In another bowl, whisk together sour cream, vegetable oil, eggs, and vanilla. Stir in boiling water.
- Gradually add the wet mixture to the dry ingredients, stirring until smooth.
- Divide the batter among the cupcake cups, filling two-thirds full. Bake for 20-23 minutes.
- Cool in the pan for 5 minutes, then transfer to a wire rack to cool completely.
- Crush Oreo cookies. Beat butter until creamy, then mix in powdered sugar, vanilla, and milk alternately.
- Fold in crushed Oreos to create the buttercream. Pipe onto cooled cupcakes and top with whole Oreos.


Leave a Reply